8 Ways to Stop Someone Stealing Your Wi-Fi Password
By Dominic Chooper on July 29, 2023Stealing someone else’s Wi-Fi is a growing concern today, despite the advancement in security measures and other technology to protect against cybercrime.
Someone else can steal your Wi-Fi especially when security settings in your router are not configured properly.
More significantly, your Wi-Fi will be a soft target for others and steal it if you are using the default router password.
It will be very easy for the squatters to guess it and gain access to your Wi-Fi router.
Here are some useful ways to stop someone else from stealing your Wi-Fi.
KEY TAKEAWAYS
- One easy way to stop someone else from stealing your Wi-Fi is to review the router configuration, use a strong password, and change it regularly.
- Limiting the number of devices that regularly connect to your network can also help in preventing unauthorized access to your Wi-Fi.
- Using the admin interface of the router to identify the user and blocking them is a good way to stop someone else using your Wi-Fi.
- It is also a good way to block the Wi-Fi Protected Setup or WPS feature on your router to block others and prevent them from using your Wi-Fi.
- Changing the admin panel router URL or IP address along with other security settings will also prevent others from stealing your Wi-Fi.
How to Tell If Someone is Stealing Your Wi-Fi?
You can very easily know if someone else is stealing your Wi-Fi from your router interface. You can check the activities and users on the router network and identify the culprit.
Also, you can use one of the many third-party apps and software programs to detect such unauthorized users and suspicious activities and even block unauthorized access to your Wi-Fi.
Just make sure it is a reliable software and does not cause any other issues itself when you run it on your PC.
You may also check the different devices connected to your network that are using your Wi-Fi by using the web-based administrator control panel of your router.
How to Stop Someone Stealing Your Wi-Fi?
The best way to prevent someone else from stealing your Wi-Fi is to check your router settings from time to time and to keep a check on its use and the users connected to it.
This will help you identify vulnerabilities and assess how easy it is for unknown entities to gain access.
Some other useful ways to block others from hacking your Wi-Fi are:
- Changing your Wi-Fi password regularly and making sure it is strong and hard to guess
- Enabling a more reliable encryption such as WPA2 for wireless networking instead of Wi-Fi Protected Access (WPA) or Wired Equivalent Privacy (WEP) making it difficult for others to crack the password.
- Disabling Service Set Identifier or SSID broadcast to hide your network or choosing a new network name and hiding it from others
- Using a reliable third-party network management software program to enable new device joining notification and send alerts when someone joins your network
- Using Media Access Control or MAC address filtering to restrict access to your Wi-Fi so that anyone and everyone cannot access your Wi-Fi
- Limiting the number of devices to use your Wi-Fi and counting and adjusting them regularly
Read Also: 12 Ways to Fix PC Stuck on Let’s Connect You to a Network
Here are the steps to follow for some proven ways to stop a stranger using your Wi-Fi.
All these are general steps, though the specific page of the interface may look a bit different depending on the type of router you are using.
Method 1: Set a Strong Password for Your Wi-Fi
The first thing to do in order to prevent someone else using your Wi-fi is to set a strong password for your router.
STEPS TO FOLLOW:
First of all, you will need to get access to the admin interface of your router to make any changes in the Wi-Fi settings.
- Look for the IP or Internet Protocol address and other login details of your router (usually found on the label at the back of the router).
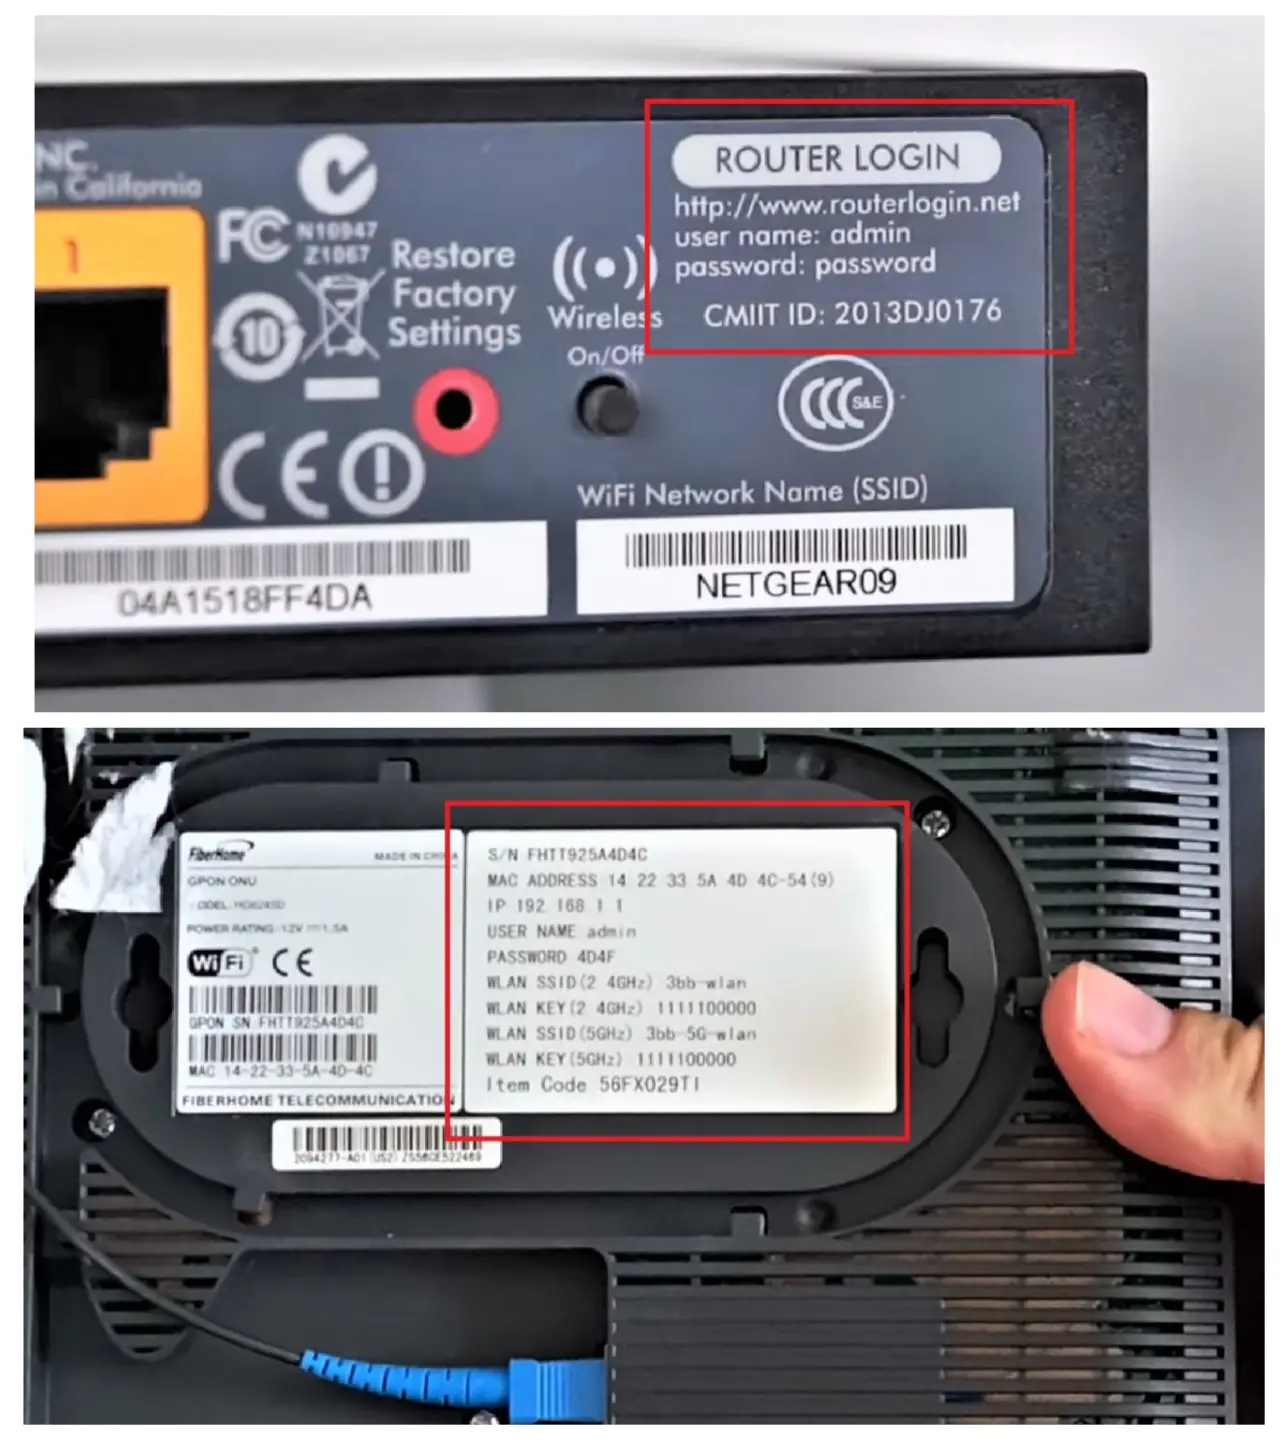
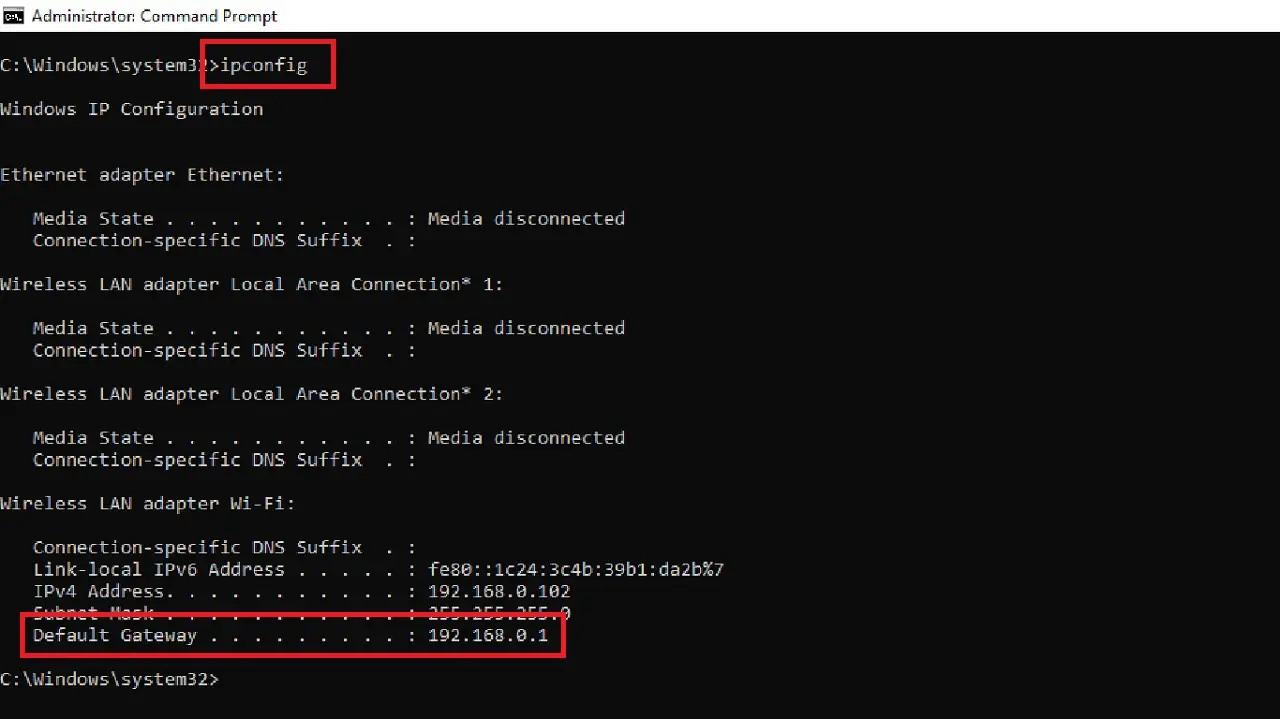
If you have removed the label or if the print is not clearly visible, you can also find the IP address of your router by using the Command Prompt.
Go to the Start search box > Type in the command ipconfig > Press Enter. Look for your IP address next to the ‘Default Gateway.’
- Now, open your browser.
- Type it the IP address in the Uniform Resource Locator or URL bar of the browser to log in.
- Provide the necessary login credentials such as your username and admin password. (If you have not changed them, these should be the same on the router label).
Once you are in the admin interface, follow, these steps:
- Open Settings of your router.
- Go to the Wi-Fi section.
- Change the Wi-Fi password.
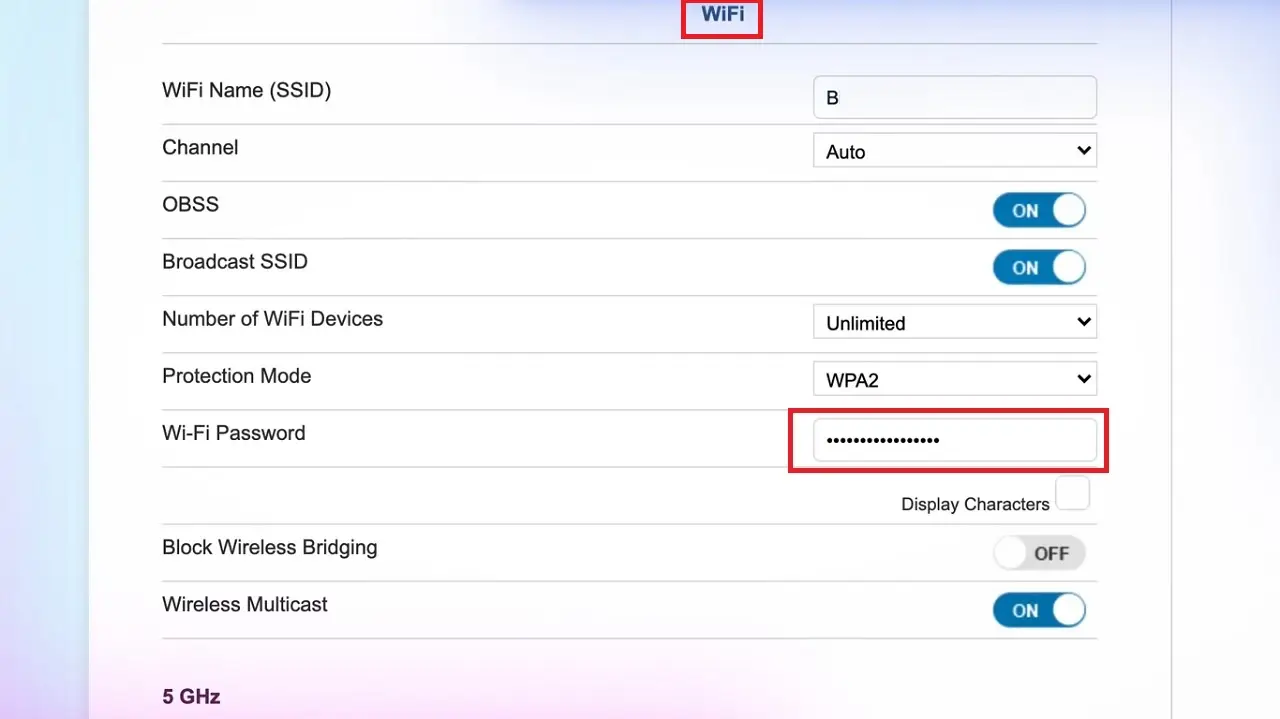
Ensure that the password is not less than 8 or 10 characters and is a mix of upper- and lower-case letters, numbers, and special characters.
Method 2: Change the Factory Username and Password of the Router
As shown above, you will need to furnish some credentials to login to the admin interface of the router.
Make sure you have also changed the username and password for the router, which should be different from your network’s username and password.
STEPS TO FOLLOW:
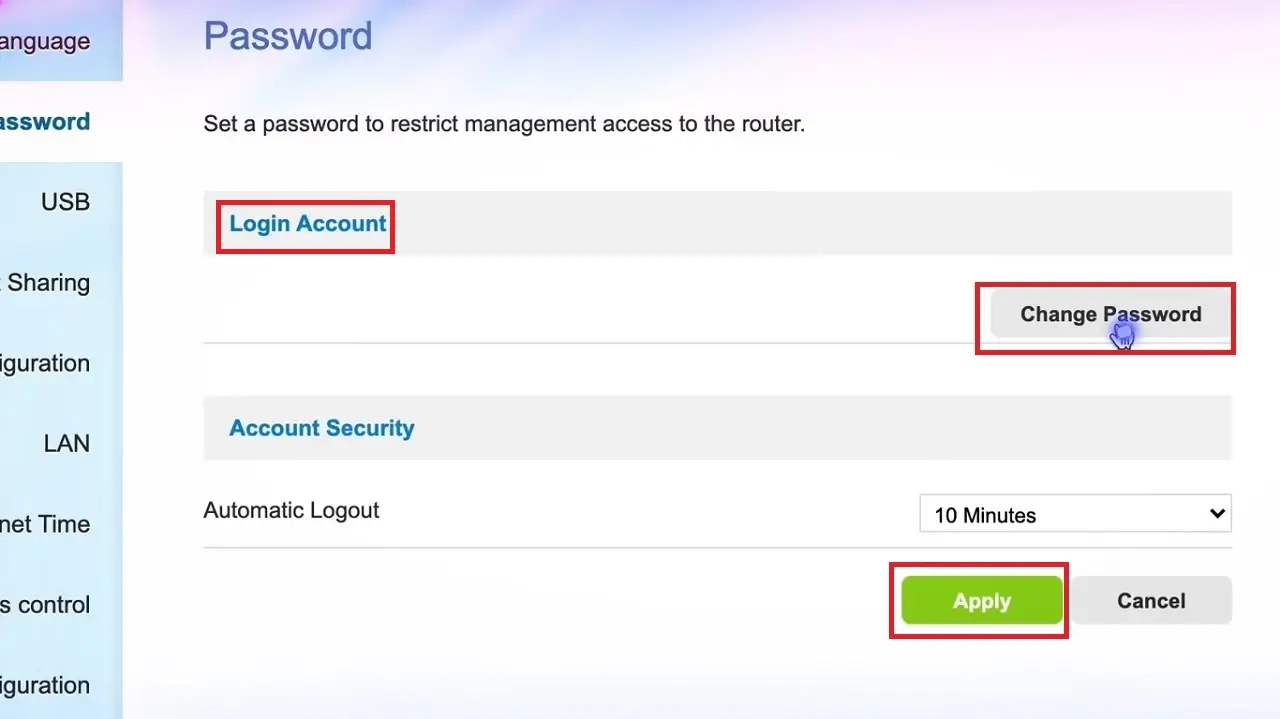
- Go to Wi-Fi settings again.
- Choose factory settings of the router.
- Change the password in the box under Login Account.
- Click on the Apply button.
Also, change the password to log into the admin software of the router. By default, it is usually ‘admin’ for both. Keeping them the same will give others an easy way to hack into your router. So, change them in the following way:
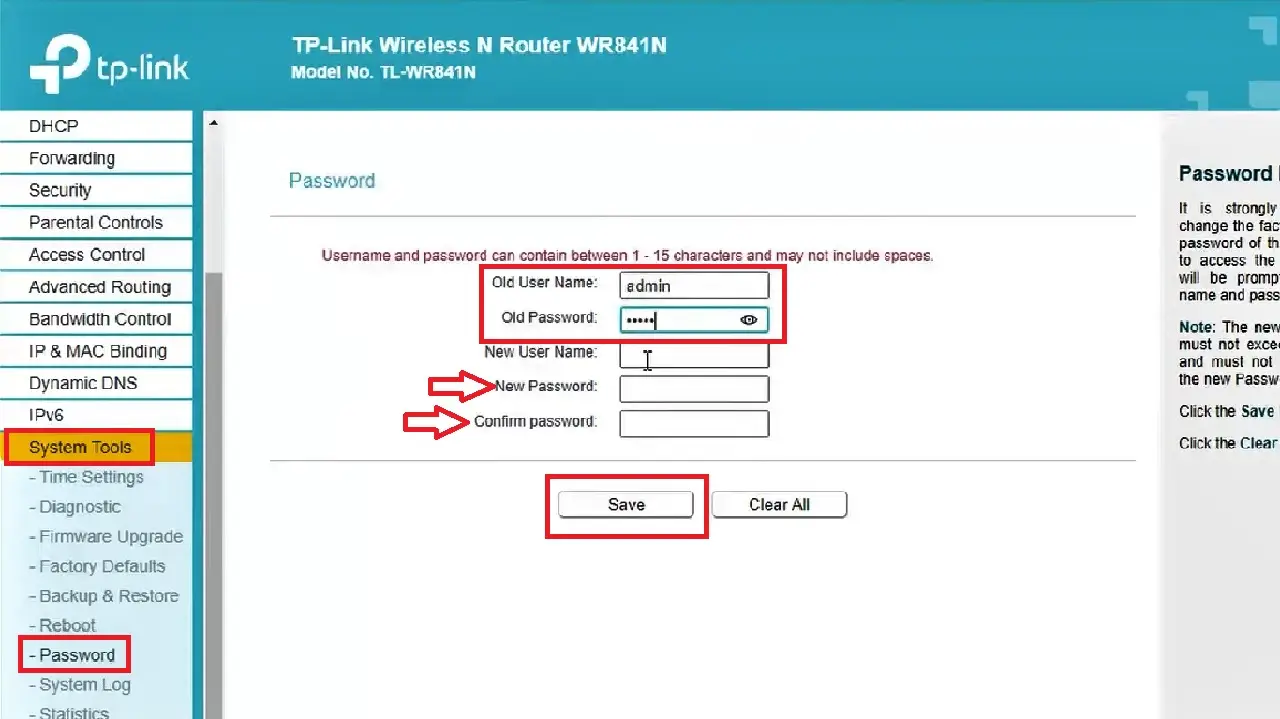
- Go to the admin panel.
- Once you are on the page, select System Tools from the left panel.
- Then, click on Network.
- On the right side of the new window, enter your current username and password (admin) in the relevant boxes.
- Then, Enter Your New Password that you want to set in the box marked by a red arrow.
- Re-enter it for confirmation.
- Click on the Save button.
Read Also: How to Fix PC Not Connecting to Ethernet? (12 Methods)
Once again, make sure that the password is strong.
Method 3: Block or Disable the WPS Feature
The WPS feature is quite useful to get connected to your router quickly. It just needs an 8-digit Personal Identification Number or PIN or pressing a convenient button.
If this feature is on, anyone within the range of the router can gain access and steal your Wi-Fi. So, turn this feature off.
STEPS TO FOLLOW:
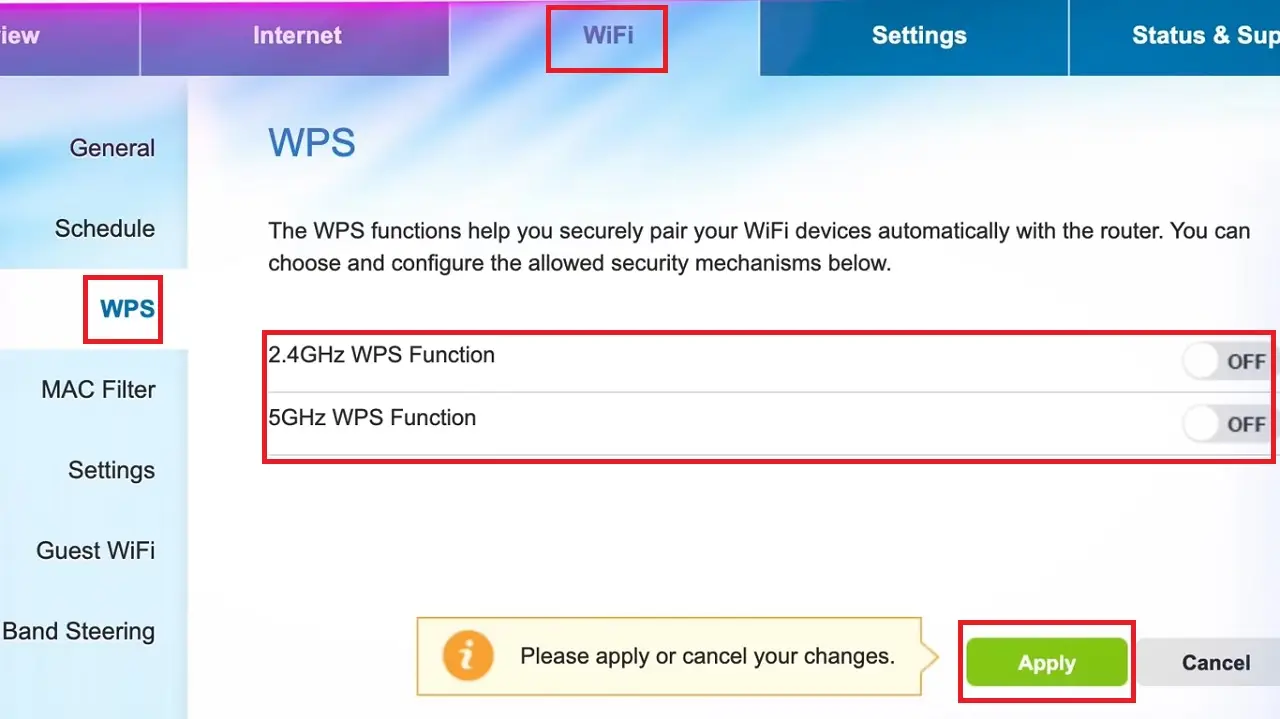
- Go to Wi-Fi in the router settings.
- Select WPS from the left panel.
- Drag the sliding switch next to both 2.4GHz WPS Function and 5GHz WPS Function to turn them OFF.
- Click on the Apply button.
Method 4: Enable WPA2 Encryption Protocol
Enable WPA2 encryption protocol in order to prevent someone else from stealing your Wi-Fi even if your data is intercepted.
STEPS TO FOLLOW:
- Go to the Wi-Fi settings page as you did before.
- Scroll down to Protection Mode.
- Click on the small arrow at the right of the box next to it.
- Select WPA2 option from the drop-down option.
- Click on the apply button.
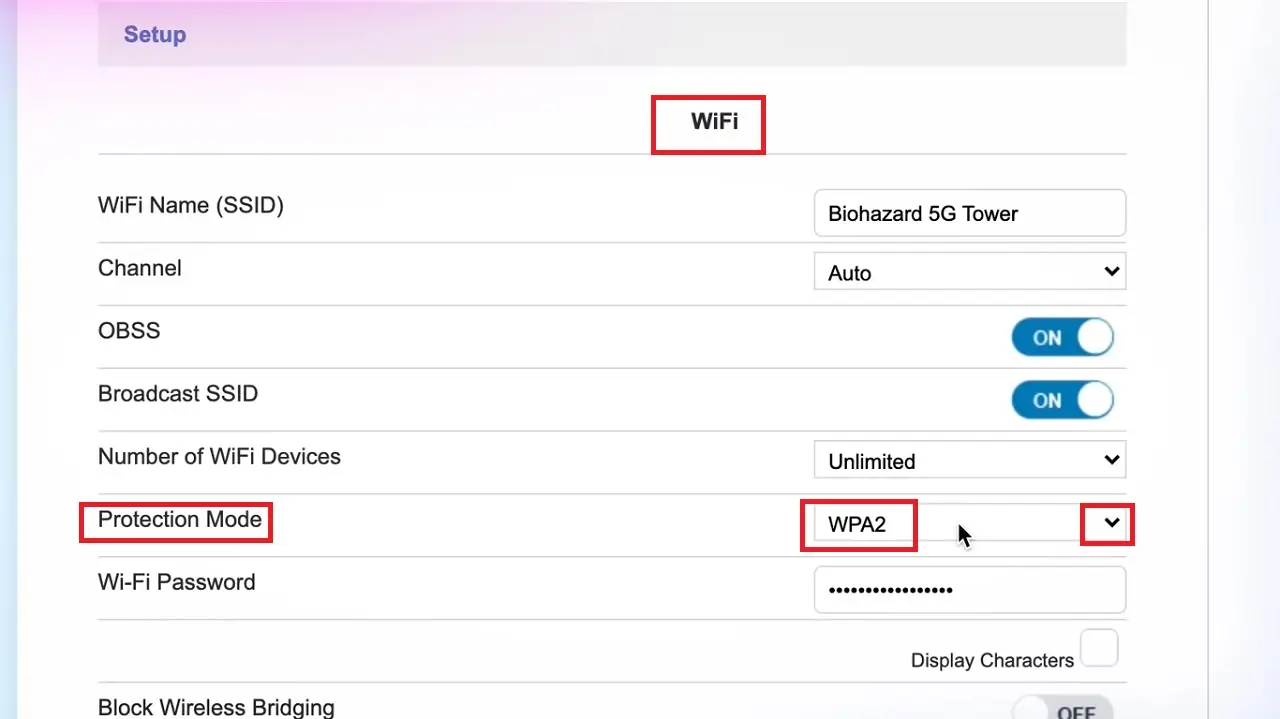
You may use a higher version than WPA2 if available.
Method 5: Update the Router Firmware
An updated router firmware will fix the vulnerabilities and prevent others from accessing it and stealing your Wi-Fi.
STEPS TO FOLLOW:
- Login to your router interface.
- Look for Firmware.
- Click on the Check for Updates button.
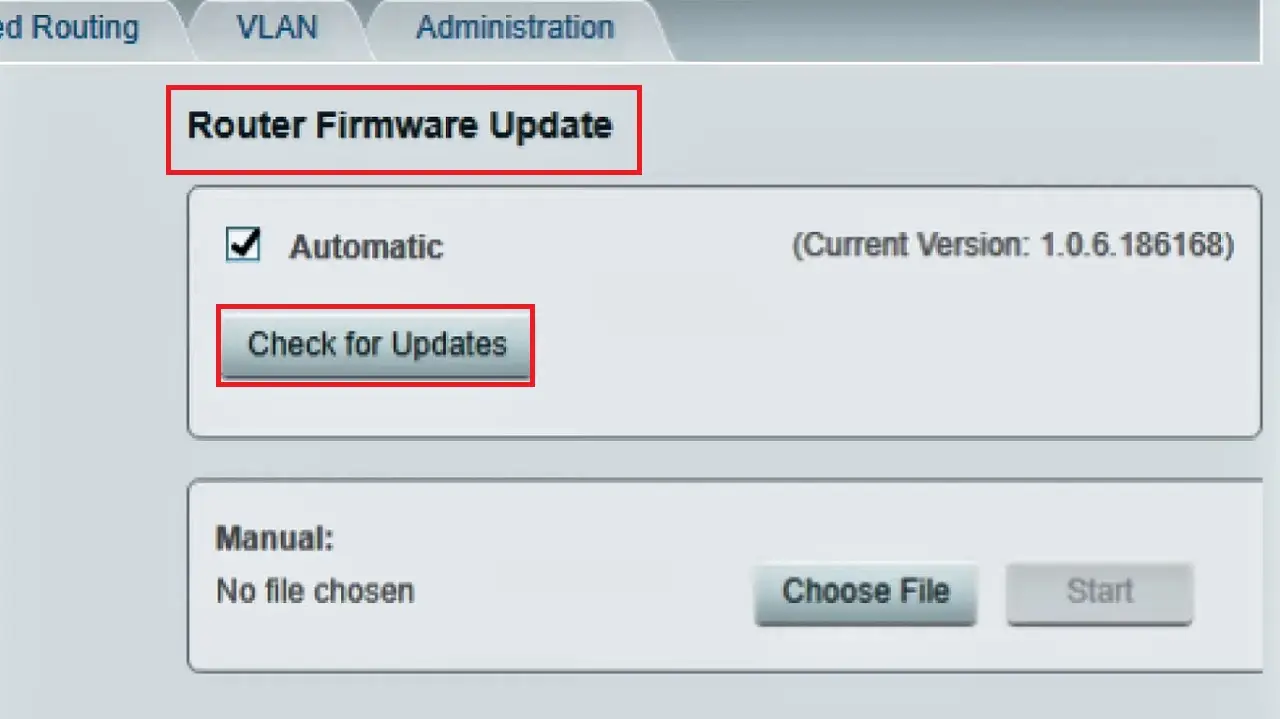
However, depending on the type, brand, and model of the router, it may not allow updating it that easily. For them, you will need to:
- Open your browser
- Go to the website of the manufacturer of your router
- Look for the latest version of updates
- Follow the on-screen instructions
- Download the file
- Specify the location and
- Run it by hitting the update button.
Method 6: Change the Admin Panel Access URL
By default, every router has either of these two admin panel router URLs – 192.168.0.1 or 192.168.1.1. This is also referred to as the IP address of the router.
This makes things easier for others, especially the hackers, to get into your router and steal your Wi-Fi and more.
So, changing the IP address is an effective way to prevent unauthorized access to your Wi-Fi network.
STEPS TO FOLLOW:
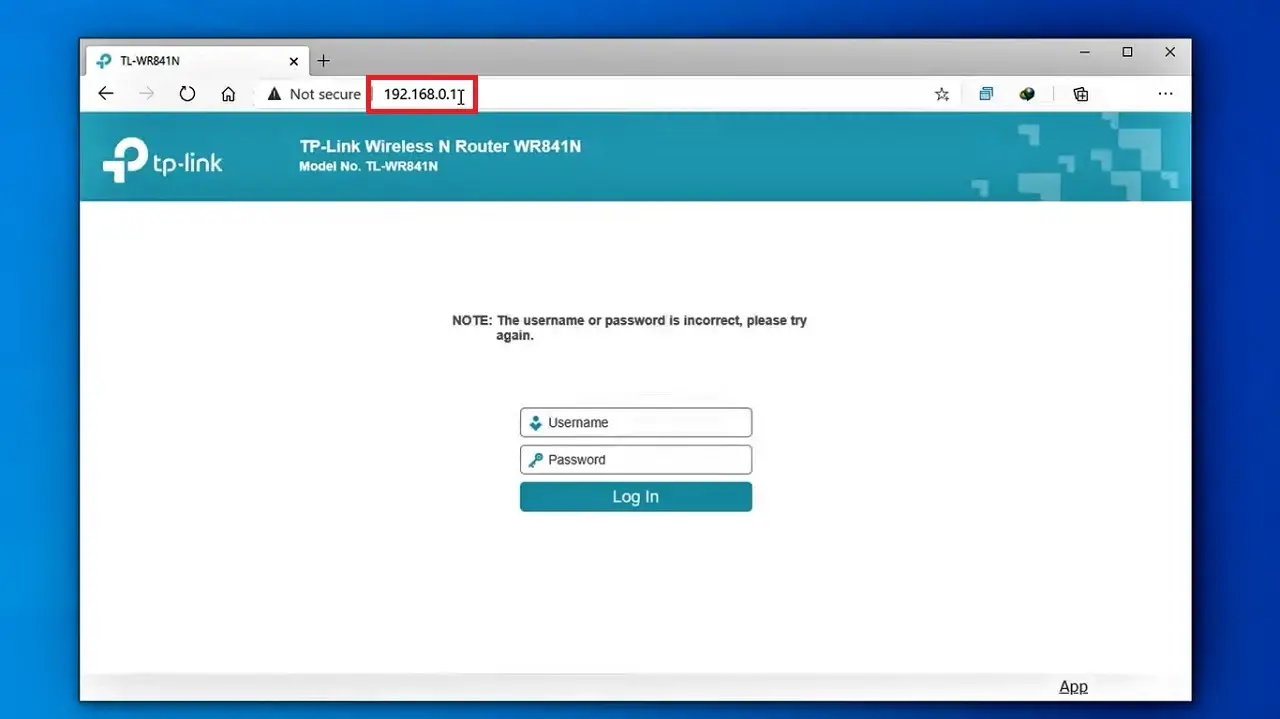
- Type any of the two default IP addresses on the URL of your browser and hit Enter. Assuming that you are using a TP-Link router, it would look like this: (Note the IP address used).
- Go to the admin panel.
- Select Network from the left panel.
- Click on LAN.
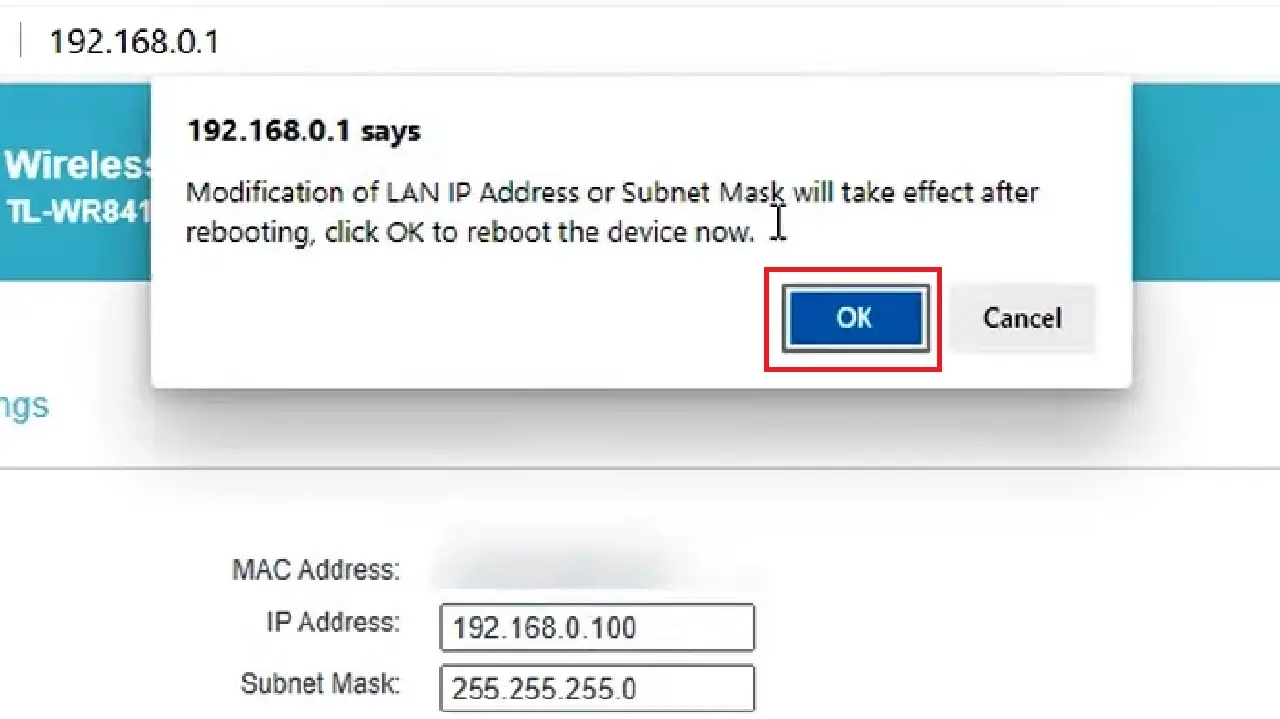
- Change the default IP address on the right side of the window.
- Click on the Save button.

This will reboot the router to save the changes. Click on the OK button on the window that appears.
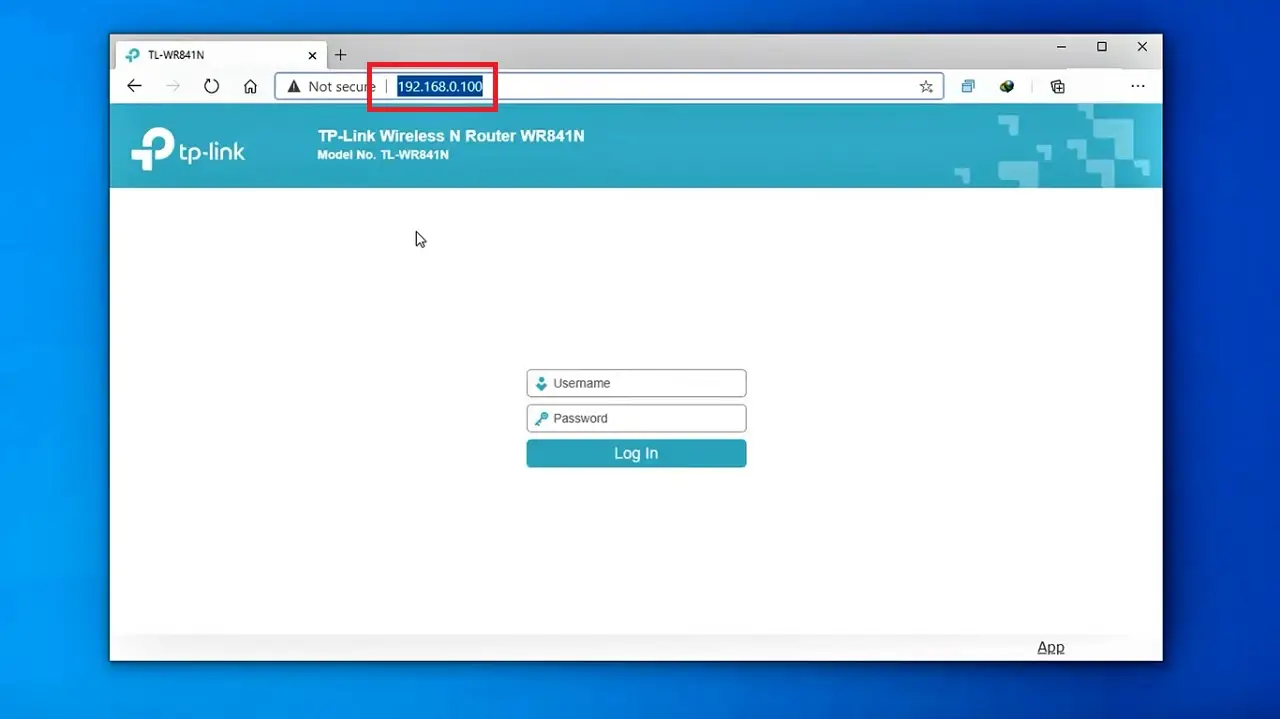
You will see that the IP address has changed, as shown in the image below:
If you or anyone tries to access your router by typing the default IP address, they will not be able to. Instead, they will get to see a page as below:
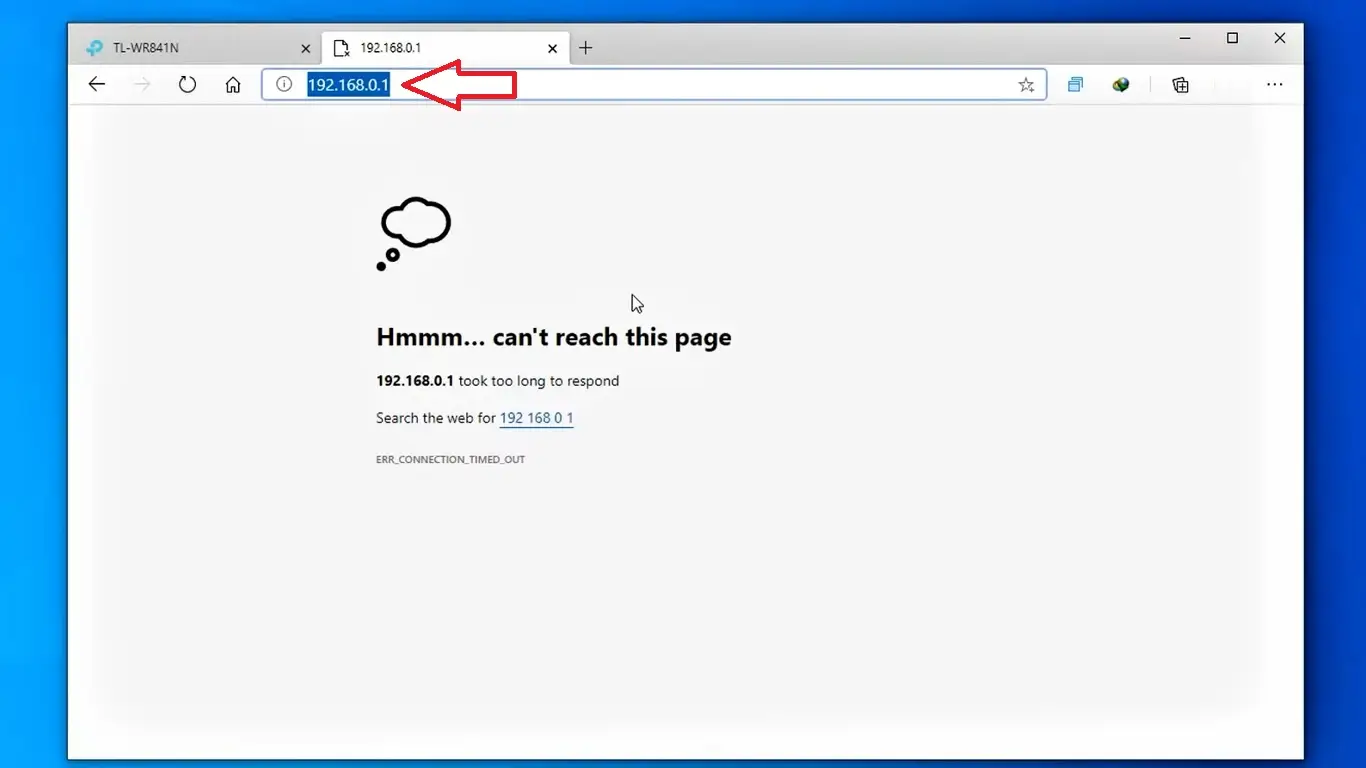
So, your router will be protected from unauthorized access.
Read Also: 7 Ways to Fix DHCP is Not Enabled for Wi-Fi
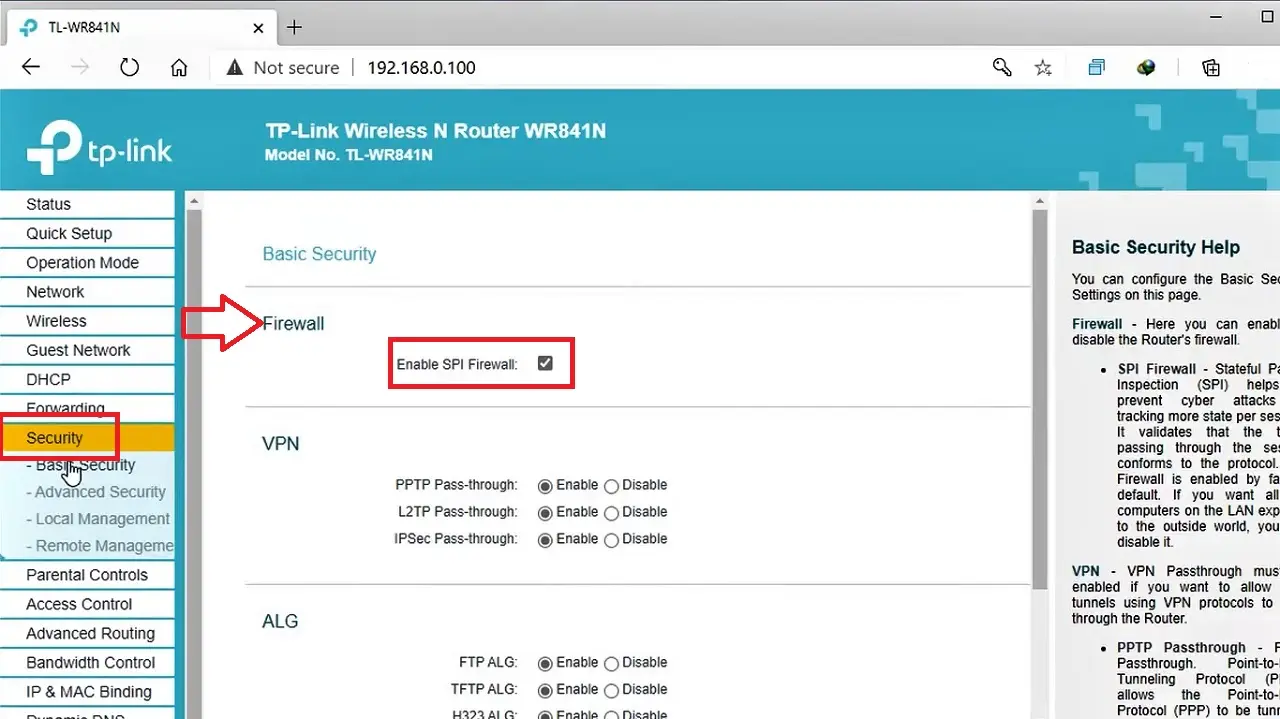
Method 7: Enable Firewall and Change other Settings
Another good way to stop others from accessing your Wi-Fi is to enable Firewall protection on your router.
STEPS TO FOLLOW:
- Access the admin control panel interface.
- Select Security from the left panel.
- Click on the small square box next to Enable SPI Firewall under Firewall to enable it.
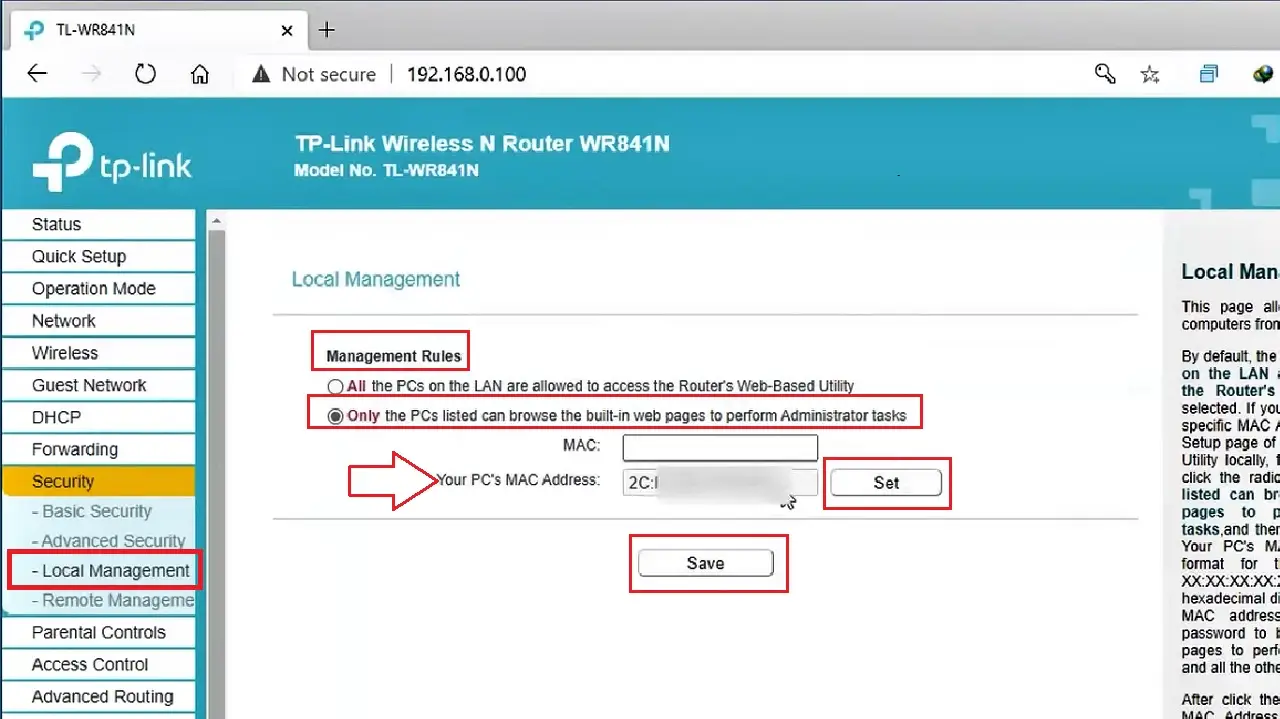
- Then click on Local Management in the left panel of the admin control panel.
- Click on the small circular button to select the option ‘Only the PCs listed can browse the built-in web pages to perform Administrator tasks’ under Management Rules.
- Next, click on the Set button.
- Type in your MAC address in the relevant box.
- Click on the Save button.
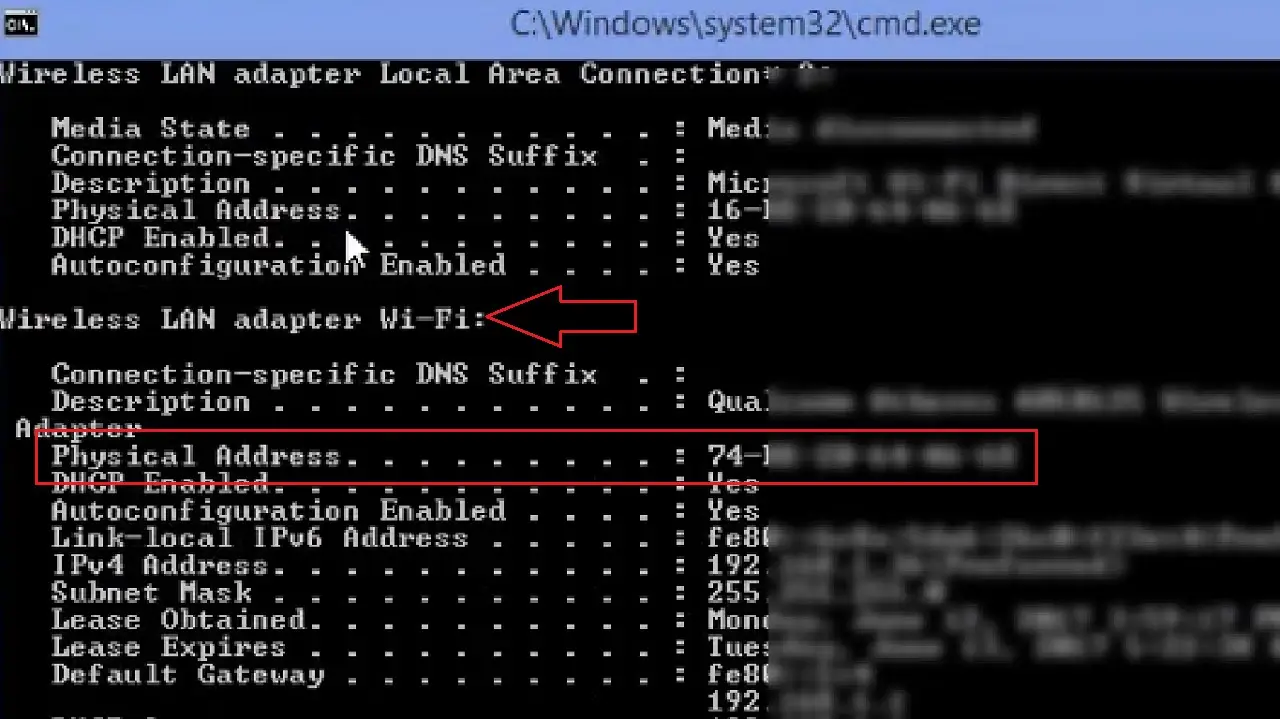
Note:
If you do not know your MAC address, open the Command Prompt, type in the command ipconfig/all, and hit Enter. Look for the Physical Address under Wireless LAN adapter Wi-Fi. This is the MAC address.
Also, if you want to enable router remote management, then make sure that it is accessible only from your internal network.
Method 8: Block the MAC Address
STEPS TO FOLLOW:
- Open the admin interface of your router.
- Search for the “Connected devices” section, usually located under the DHCP Client list. (It, however, may vary depending on the type of router you are using).
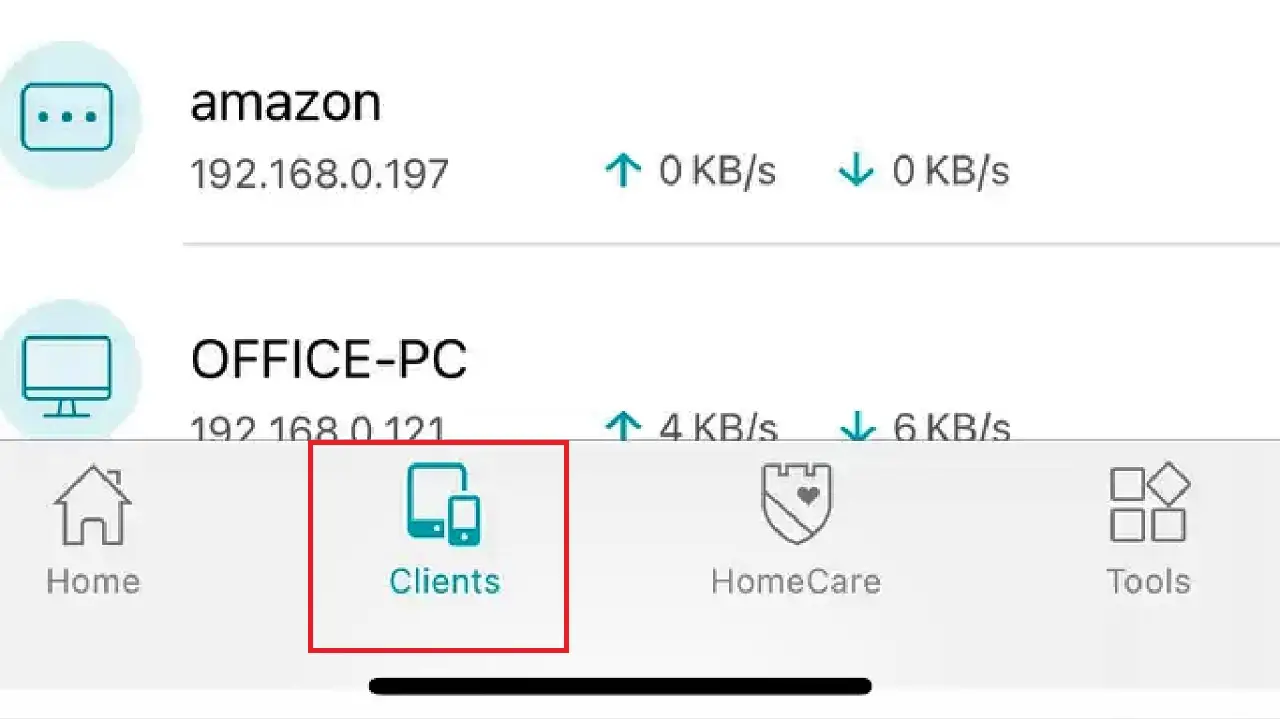
- Look for the MAC addresses in the list and identify the ones that do not belong to your device or are unknown to you, like the one marked in the following image as for example.
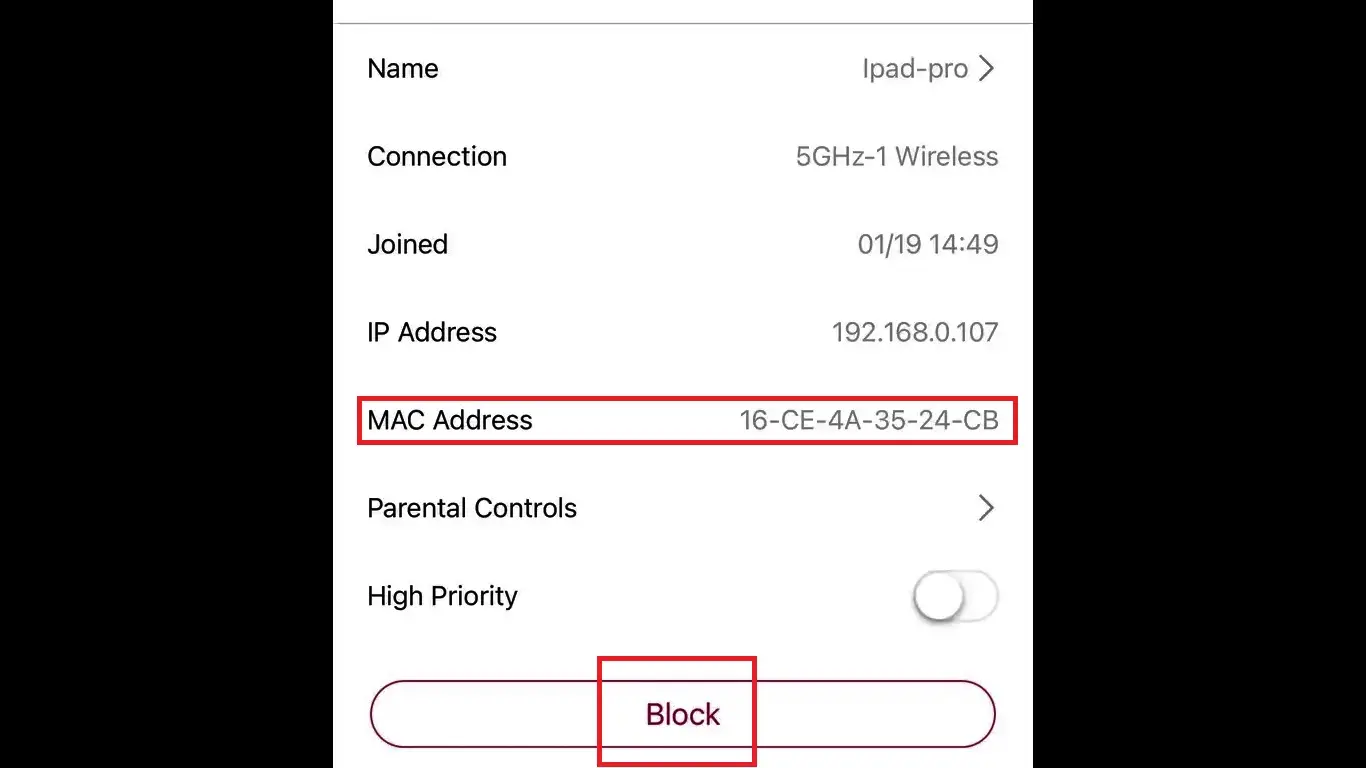
Now, all you have to do is, look for the option to ban, block, or eject the device.
Appendage:
Now, all these steps will prevent others from accessing your Wi-Fi network, especially the unwanted users. But what about the guests or neighbors visiting in the evening and wanting to use your Wi-Fi?
Avoid being impolite by denying them access. Instead, create a guest network with a different password, and of course with WPA2 encryption protection.
- Go to the admin interface of your router.
- Go to Guest Wi-Fi.
- Select Settings from the left panel.
- Click on the small square box next to it to enable it.
- Click on the gear icon on the right for further settings.
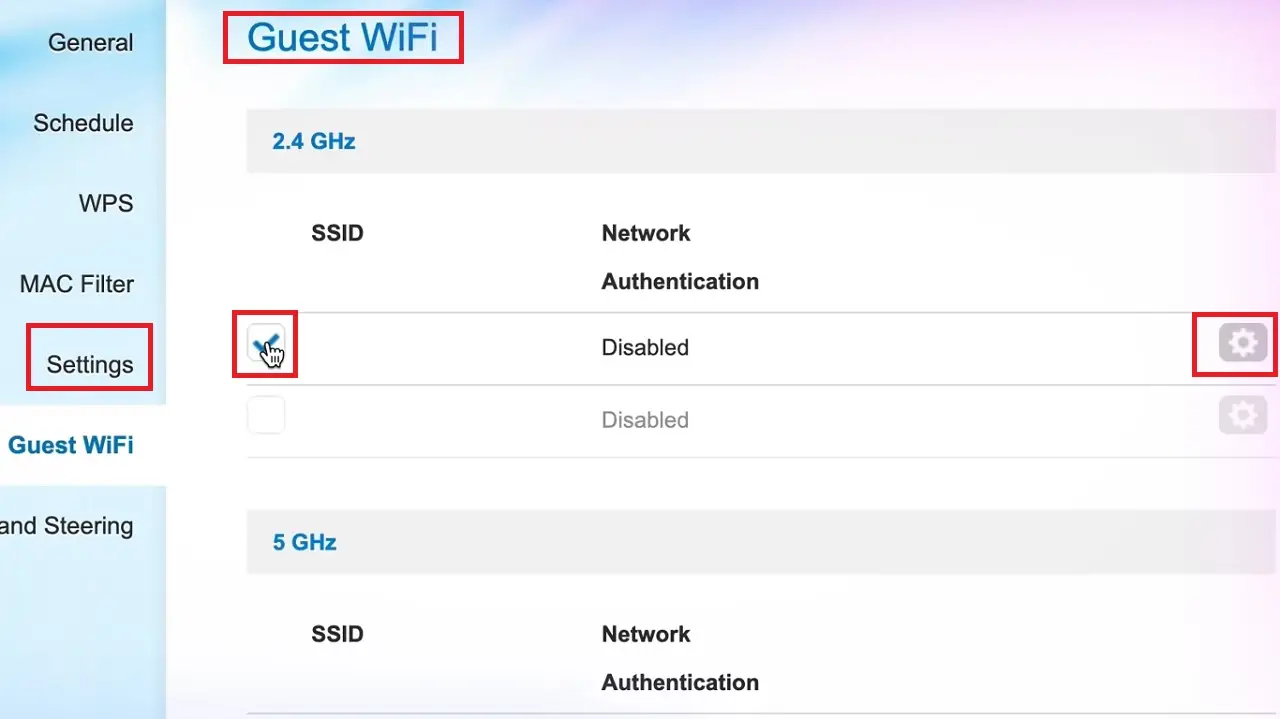
- In the following Guest Wi-Fi window, change the Network Authentication to WPA2. (WPA2-PSK here).
- Set the unique and strong passwords as well.

Finally, click on the Apply button (not shown in picture) to save the changes.
One last thing: make sure that you disable the guest Wi-Fi after use, because keeping it on may once again open the backdoors for others to get access and steal your Wi-Fi.
Conclusion
So, as you can see, there are quite a few ways to tell whether or not your Wi-Fi is being used by others, for free.
Now that you are aware of these methods, it should not be difficult for you to secure your Wi-Fi bandwidth and prevent unauthorized use.