
The camera on your computer may sometimes fail and not show up in the Device Manager. You may have tried troubleshooting the issue but things may not have changed.
Well, in that case, either you did not follow the right steps or there are some other issues that need to be dealt with.
If you experience such a problem on your Windows PC, there is not much reason to worry, because in this article you will find all the ways in which you can resolve the problem easily and quickly.
In This Article
KEY TAKEAWAYS
- The easiest and most common way to make the camera visible in the Device Manager is to reboot the system.
- Simple troubleshooting or performing a scan for hardware changes may also resolve the issue in most cases.
- In some cases, reinstalling the operating system after taking a proper backup may also bring back a missing webcam in the Device Manager.
- If the driver is the main reason for a camera not to show up in the Device Manager, it can be resolved easily by updating the software.
- Scanning for hardware changes and even enabling the camera from the BIOS settings may also help in fixing the issue.
Why is the Camera Not Showing Up in Device Manager?
The camera of a PC or a laptop may not show up in the Device Manager mainly due to missing, faulty, or corrupt drivers. Windows may also fail to recognize the driver for the camera and therefore not show it in the Device Manager, especially if it is not up to date.
Apart from that, there may be a few specific problems in the system that may cause such an issue, or there may be a specific type of antivirus software that is preventing the camera from being displayed in the Device Manager.
Sometimes, the camera may be present in the Device Manager, but it may be in some other category listed elsewhere and not under Cameras. These categories could be:
- Imaging devices
- USB device hub
In addition, device access may be denied to ensure camera privacy, which is also a reason for the camera not to show up in your Device Manager.
Irrespective of the reason for this issue, you can fix it with some easy solutions mentioned below.
Ways to Fix Camera Missing from Device Manager
Restarting the computer or installing the latest software on your computer are a few of the most common, proven, and quickest ways to resolve the issue of a missing camera in the Device Manager.
However, if these do not work and the camera is not listed under any other category, you may try a few other solutions to bring things back to normal, such as:
- Update your operating system
- Run simple troubleshooting
- Turn on and reset the camera
- Scan for hardware changes
- Install the driver manually in the Device Manager
- Enable the camera in BIOS
Here are the specific solutions described that you may try to fix the issue.
Method 1: Restart Your System
Start with the basics and the quickest and easiest way of making the camera visible on the Device Manager, which is by restarting or rebooting your PC.
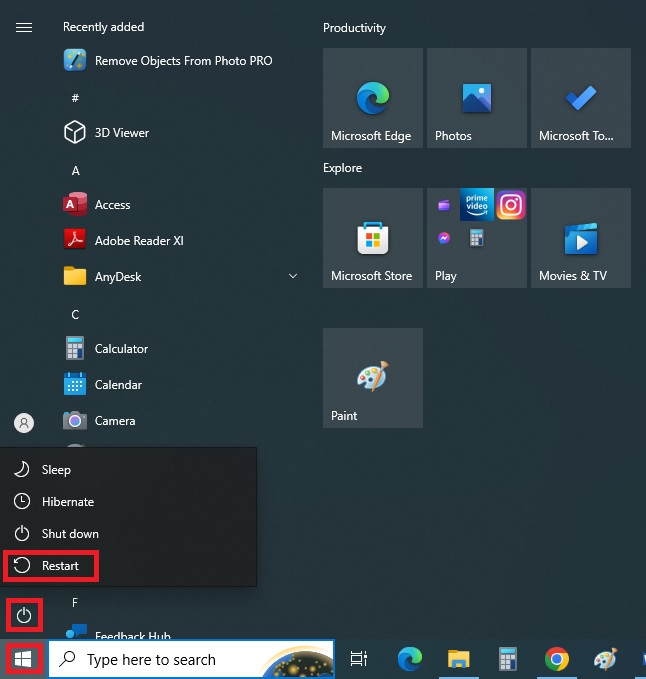
- Go to the Start button and click on it.
- Go to and click on the Power button.
- Select Restart from the submenu.
Check whether you can see the camera in the Device Manager. If you cannot, try the next method.
Method 2: Allow Device Access
If access to the device is not allowed in the first place, the camera will not show up in the Device Manager. Therefore, you will have to enable it by following these simple steps:
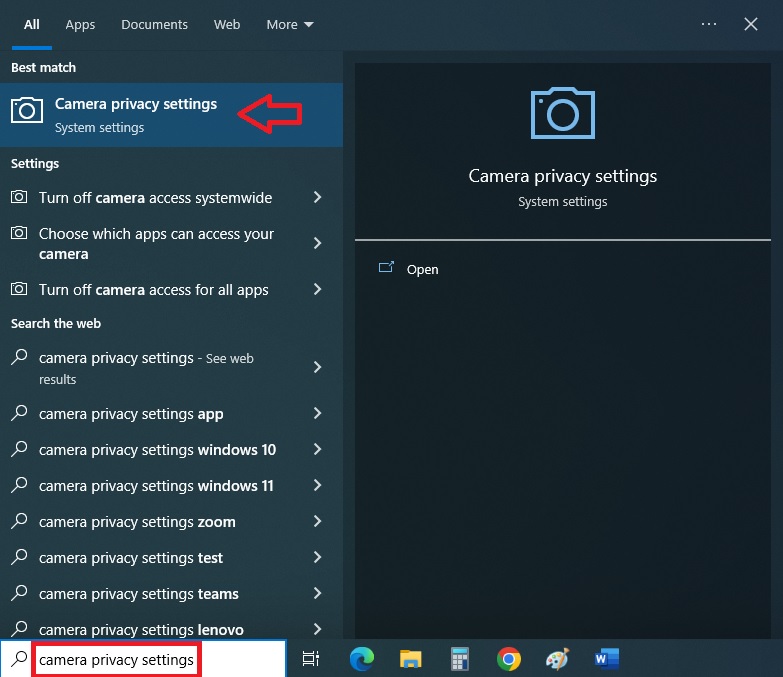
- Go to the Search box.
- Type camera privacy settings in the box.
- Press Enter.
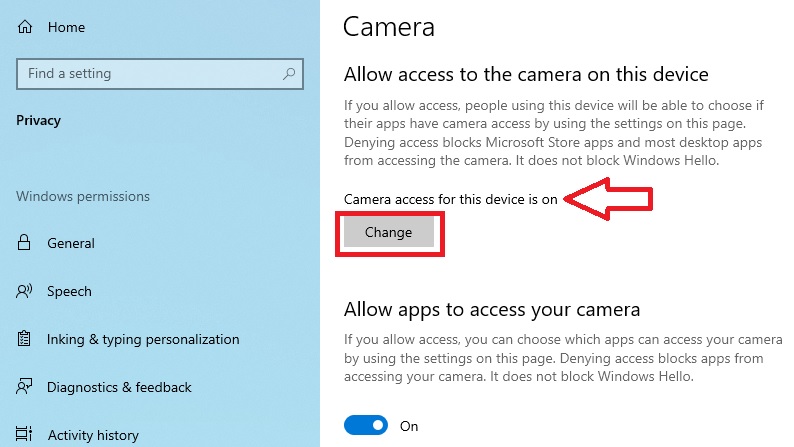
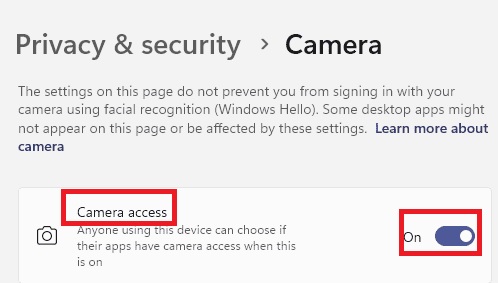
Check whether or not it says the Camera access for this device is on. If it is not enabled, then click on the Change button as shown in the image below.
Now check whether or not the issue has been resolved. If you still cannot see the camera in your Device Manager, proceed with the next solution.
Method 3: Perform Troubleshooting
Simple troubleshooting may also bring back the missing camera in the Device Manager. However, this process consists of two separate parts.
For the first part:
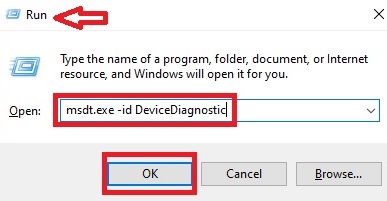
- Press the Windows and R keys together on your keyboard to open the Run box.
- Type msdt.exe -id DeviceDiagnostic in the box.
- Press Enter or click on the OK button.
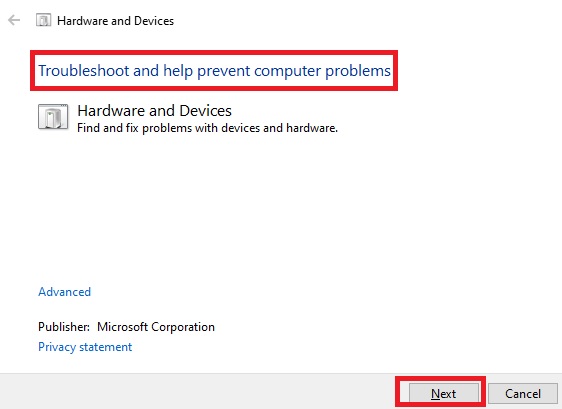
- In the new window, simply click on the Next button to run Troubleshoot and help prevent computer problems.
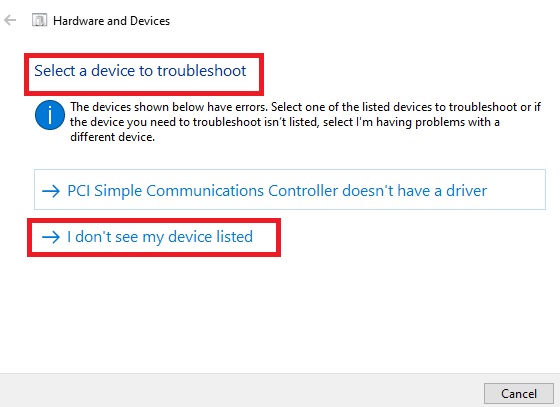
In the following window, you will be presented with some options to Select a device to troubleshoot. Since you cannot find a device, your camera in this case, click on ‘I don’t see my device listed.’
The system will detect and fix the issue. Now click on Apply this fix when you are asked to in the next window.
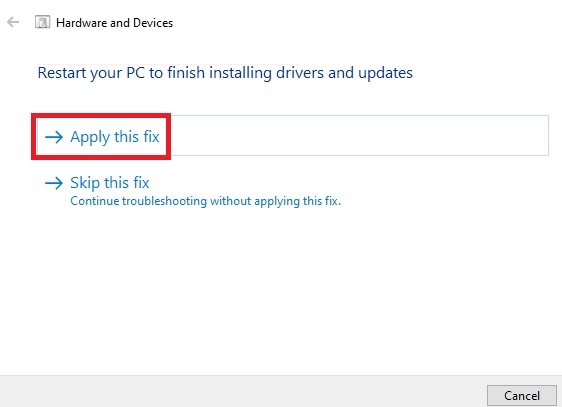
Finally, close all windows and restart your PC to finish installing drivers and updates.
Now, after you are done with this first part of troubleshooting, for the second part of this process, follow these steps:
- Press the Windows and R keys on your keyboard together, type control panel, and hit Enter to open it.
(Alternatively, you can try other methods to Open Control Panel as well.)
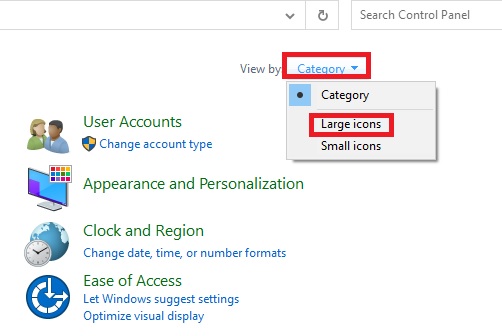
- Click on the small arrow next to Category.
- Click on Large icons.
- Look for and open Troubleshooting in the new window.
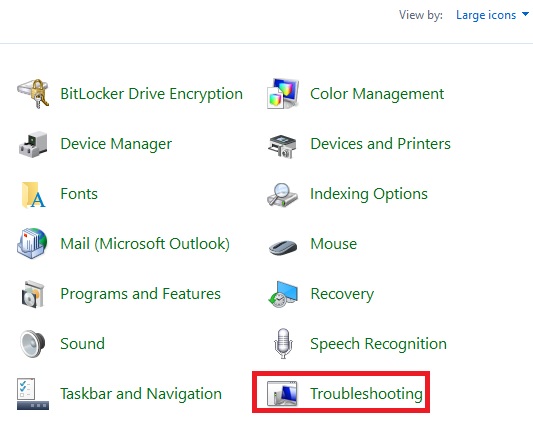
(Alternatively, in the box in the search bar located at the top-right corner of the Control Panel window, type troubleshooting, and then click on it.)
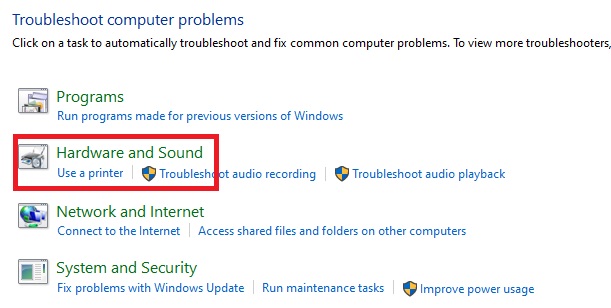
- Go to Hardware and Sound.
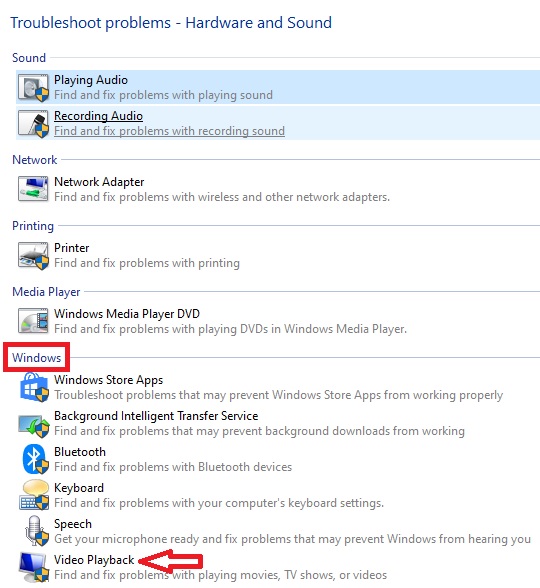
- Scroll down in the Troubleshoot problems – Hardware and Sound section in the next window to find Windows, and click on the arrow on the far right to expand it.
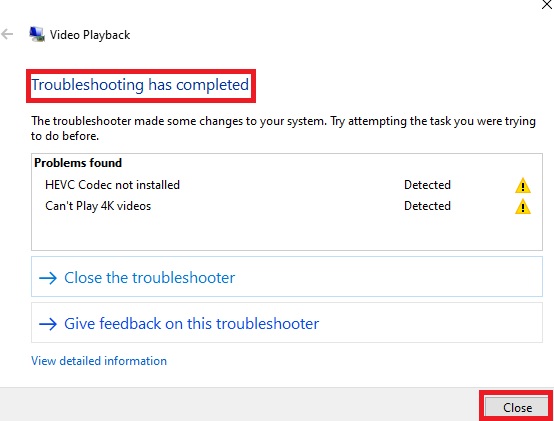
- Look for Video Playback and click on it.
- Click on the Next button on the Video Playback window that pops up.
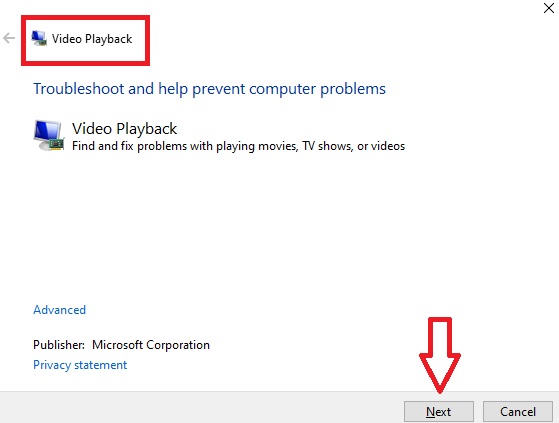
- Click on I want to continue with this troubleshooter.

When the Troubleshooting has completed detecting and fixing the issues, finally hit the Close button.
Additionally, you may also need to do the same for the Bluetooth and Windows Store apps by following the onscreen instructions.
These specific troubleshooters will help in finding any issues in the operating system, especially if they are related in any way to the functionality of the camera, and fix them automatically.
You will find these options one or two above Video Playback in the same place in the Troubleshoot problems – Hardware and Sound window.
Now, restart your computer, and your camera may show up in the Device Manager.
Method 4: Run a Scan for Hardware Changes
Sometimes, Windows may fail to recognize your camera driver installed on your PC. Running a scan for hardware changes can often help the Device Manager display it.
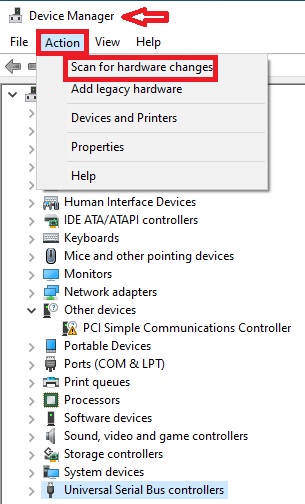
- Press the Windows and X keys together and then the M key on your keyboard to Open Device Manager.
- Go to Cameras, Imaging, or USB devices.
- Click on Action.
- Choose Scan for hardware changes.
Check your Device Manager whether or not it is visible now. If it is, restart your computer so that the changes take effect fully. If it is not visible, follow the next step and try to resolve the issue by adding legacy hardware.
For this particular method, you will have to click on the Add legacy hardware option you get while clicking on the Action tab, as shown in the above image. Then, follow these specific steps:
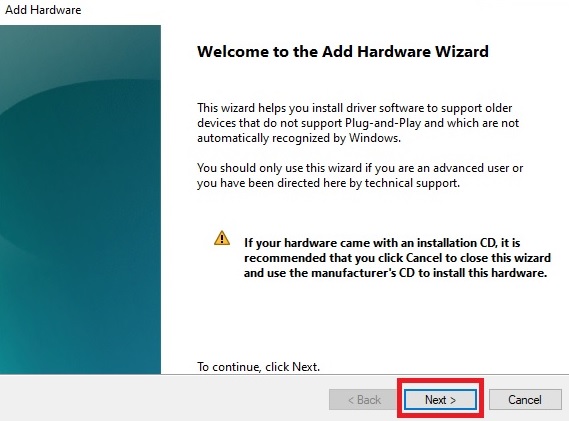
- Click on the Next button when the Welcome to the Add Hardware Wizard window opens.
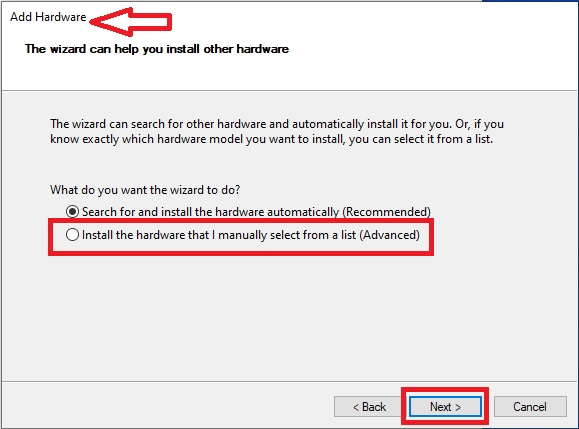
- In the next Add Hardware window, select the Install the hardware that I manually select from a list (Advanced) option.
- Click on the Next button.
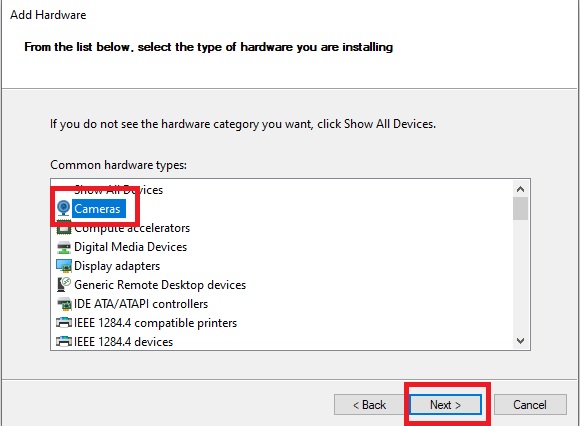
- Select Cameras, which is listed under the Common hardware types.
- Click on Next.
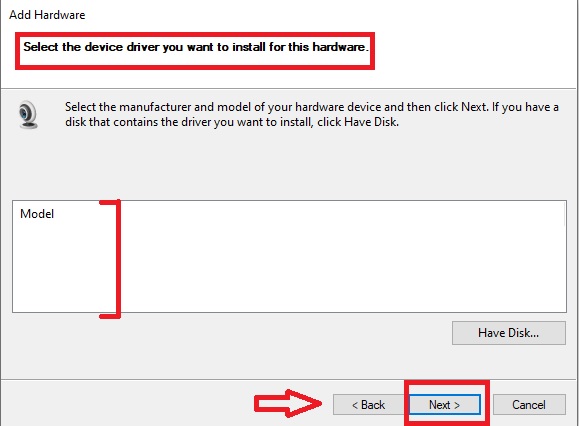
- From the next window, choose the camera driver when you are asked to Select the device driver you want to install for this hardware.
- Click on Next.
However, in most cases, there will be nothing to choose from since the list will be empty, as shown in the image below, because the system cannot recognize your camera.
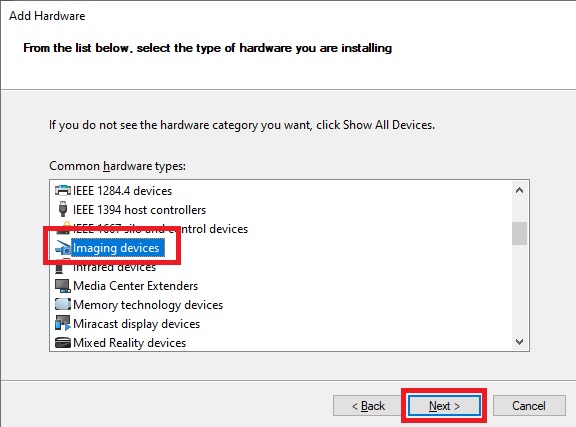
In that case, you will need to go Back to the previous window, scroll down the list under Common hardware types, and select Imaging devices from the list.
- Click on the Next button.
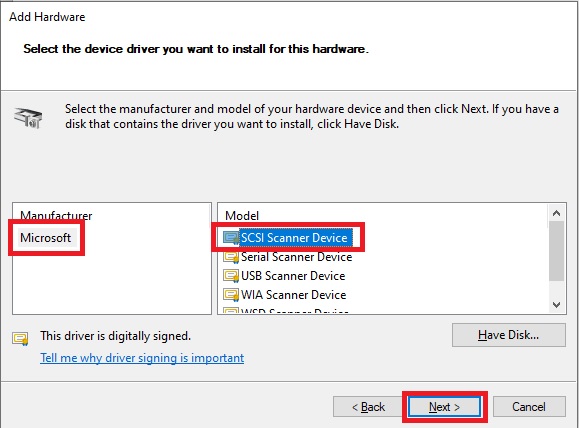
In the following window, Microsoft will be mentioned by default as the manufacturer.
- Here, you should choose the first option under Model.
- Click on Next.
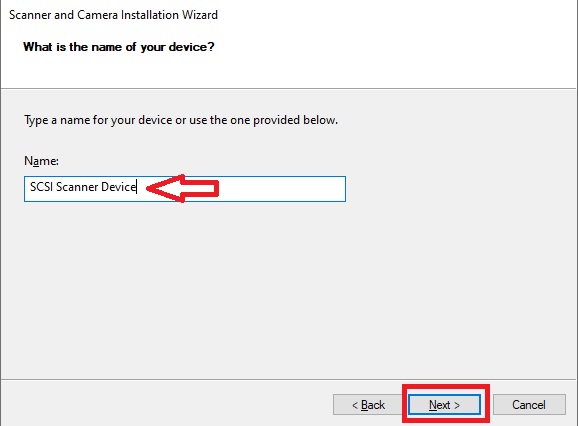
- Give a name to the device of your choice in the Name field or leave it as it is and simply click on the Next button to proceed.
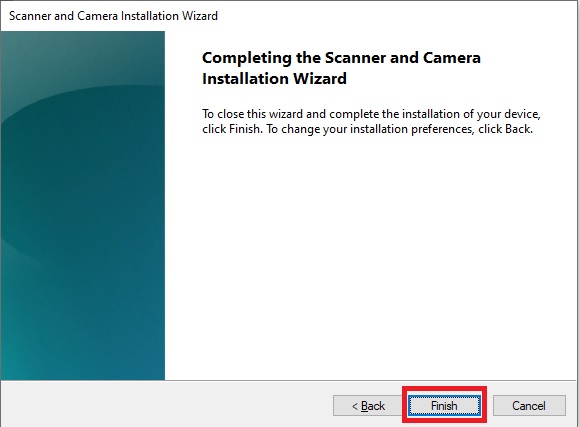
- Click on the Finish button when the Completing the Scanner and Camera Installation Wizard window appears.
Finally, restart your computer for the changes to take effect and see whether or not you can see the camera in the Device Manager window, either separately or under Imaging devices.
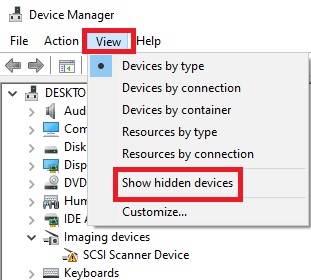
If you still cannot see it, you will have to go to the View tab in the Device Manager window, click on it, and then click on the Show hidden devices option.
Method 5: Resetting the Camera App
If the issue is still not resolved, there may be some issues with the settings of the camera app in the first place. Therefore, you will need to reset it.
- Go to the Start menu.
- Click on it.
- Choose Settings or the gear menu from the window.

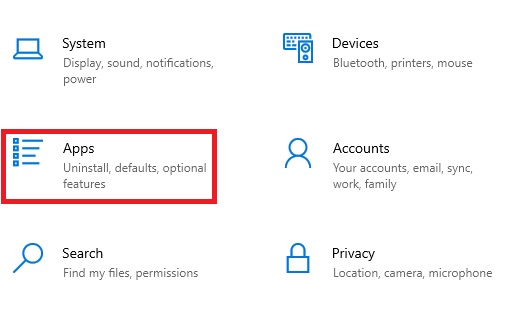
- Click on Apps on the Settings page.
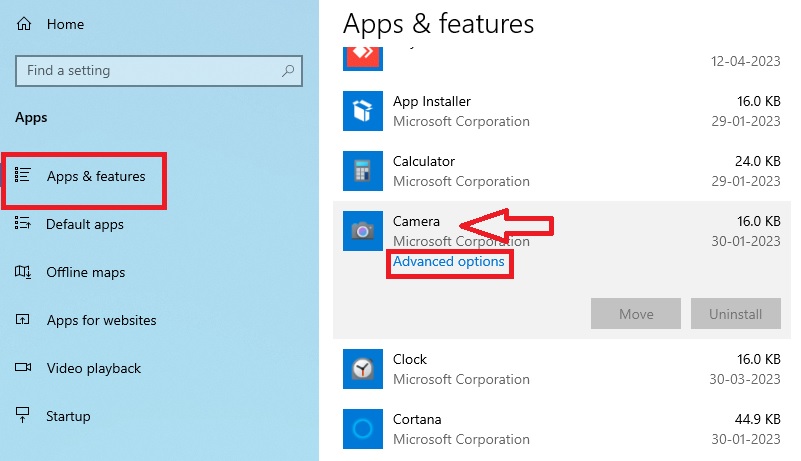
- Select the Apps & features tab from the left panel of the new window.
- Scroll down to find the Camera app on the right side of the window.
- Click on the Advanced options.
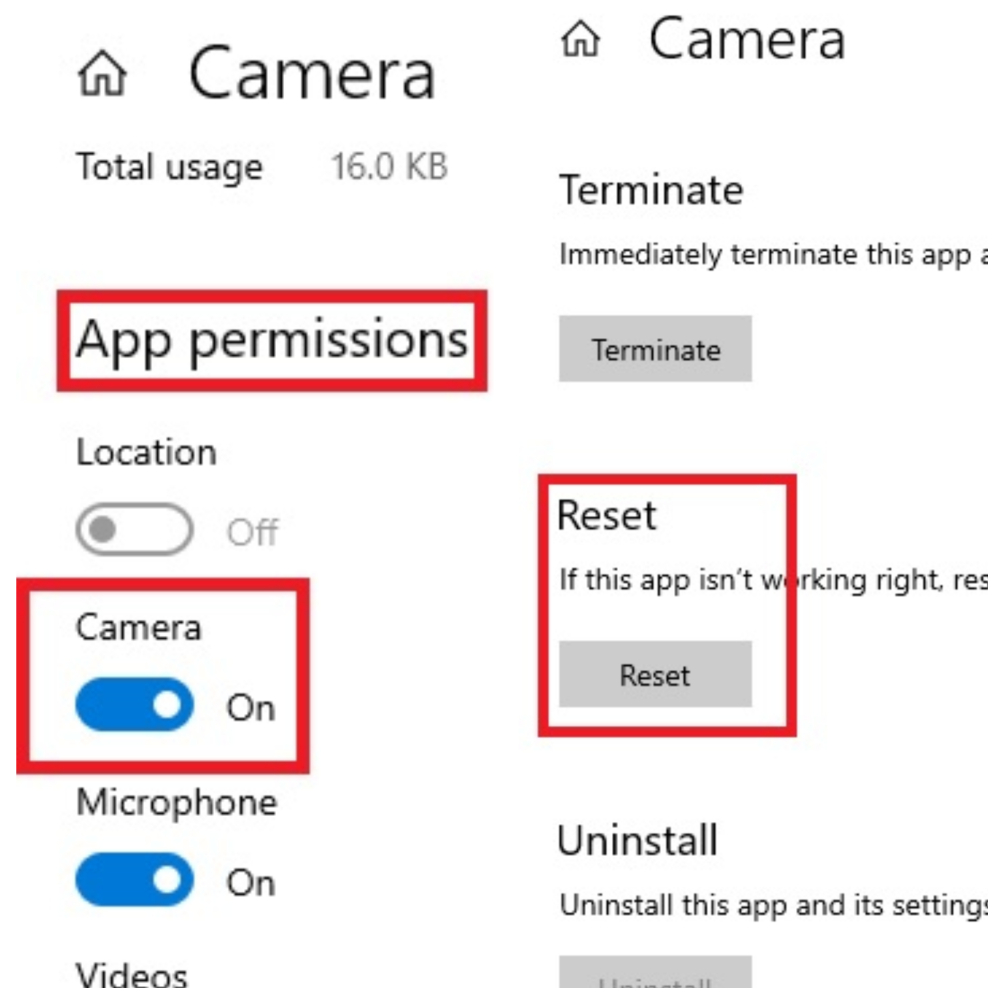
- In the new Camera window, check that the App permissions for your camera are set to On.
- Now, scroll down to go to the Reset section.
- Click on the Reset button.
This should fix the issue and make the camera visible in the Device Manager.
In Windows 11, however, you will have to follow these steps:
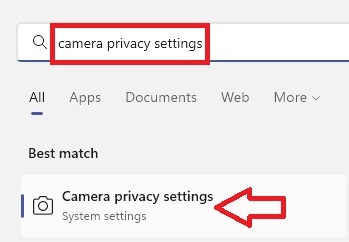
- Go to the Search.
- Type camera privacy settings.
- Hit Enter to open it.
- Now toggle the slide switch beside Camera access to On.
Method 6: Update the Operating System
An outdated operating system may fail to recognize the camera or the driver installed on your PC and hence it may not show up in the Device Manager. Updating it to the latest available version may resolve the issue.
- Go to the Settings page as described above.
- Choose Update & Security this time.
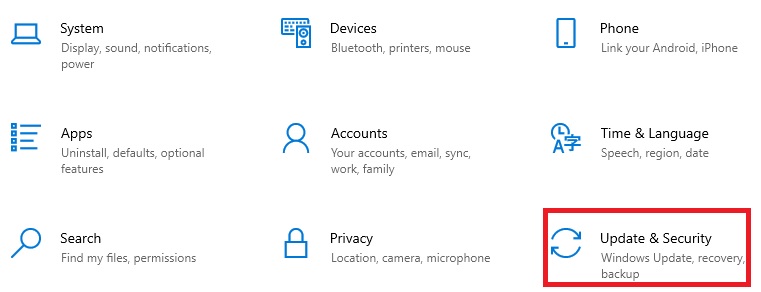
- Go to Windows Update.
- Click on the Check for updates button.

The Windows will check for updates automatically, download them, and show you the Status as well.
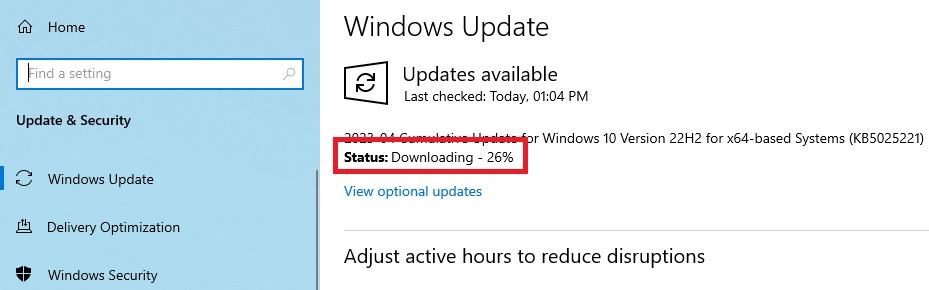
Now, the camera installed on your PC will be recognized and displayed in the Device Manager.
Method 7: Enable Any Disabled USB Device
There may be a specific USB device that is disabled in the Device Manager, which may also prevent the camera from showing up in the window. Enable it by following these particular steps:
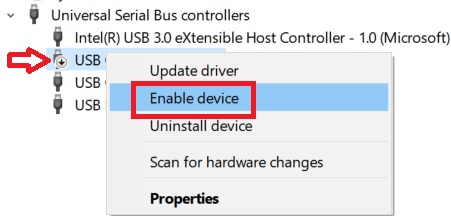
- Open the Device Manager as mentioned before.
- Go to Universal Serial Bus Controllers.
- If you find any device marked as disabled, right-click on it.
- Click on the Enable device option in the drop-down menu.
Method 8: Perform a System Restore
One way to make your camera visible in the Device Manager again is to change the settings of your PC to an earlier point when it was visible. This means that you will have to perform a system restore, which might fix the issue.
The steps to follow for it are:
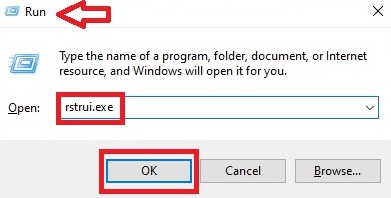
- Pressing the Windows and R keys on your keyboard at the same time to open the Run box.
- Typing rstrui.exe in the box.
- Clicking on the OK button.
- Now, click on the Next button in the Restore system files and settings window.
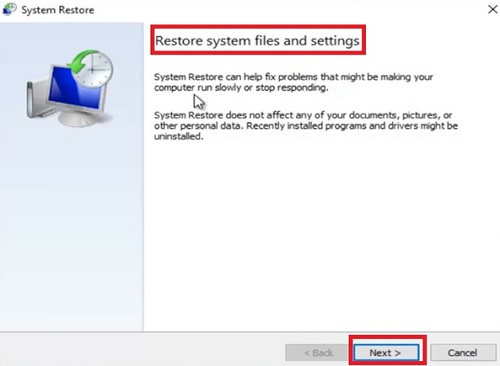
- There will be some restore points suggested in the new System Restore window that appears.
- Choose an option from the list.
- Click on the Next button.
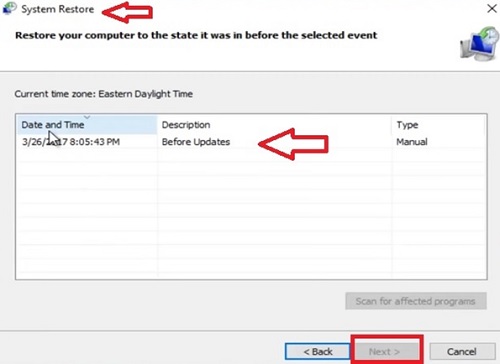
You may sometimes have to choose the date and time of the restore point you prefer separately and then click on the Next button.
- Finally, click on Finish.
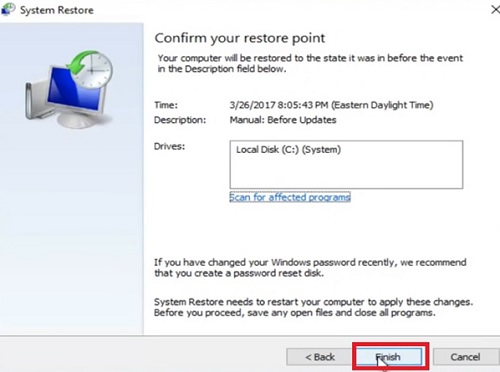
Your system will restart at this point so that the changes are initiated and may take a few minutes to complete, depending on the type of changes you have made and the speed of your computer system. Therefore, do not interrupt the process.
Method 9: Run a Few Commands
Sometimes, running a few specific commands such as System File Checker or SFC in the Command Prompt may also resolve the issue.
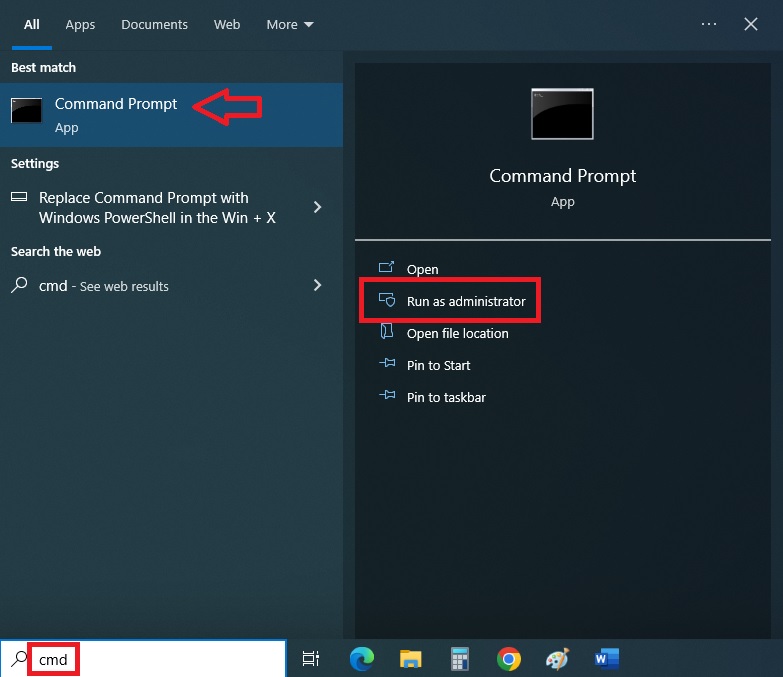
- Go to the Search box beside the Start menu.
- Type cmd in the box.
- Click on Run as administrator.
- Press Enter.
Alternatively, you can press the Windows and R keys together to bring up the Run box and type cmd in it. Then press the CTRL + SHIFT + ENTER keys on your keyboard together instead of hitting Enter or clicking on the OK button to open the Command Prompt and run it as administrator.
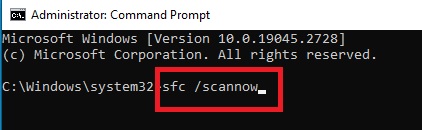
When the prompt opens, type the command sfc /scannow and press Enter.
Let it take its time to execute the command.
After it is done checking, you may see any of these following messages:
- No errors
- Could not fix all errors
- Fixed some errors
- Could not fix errors at all
Sometimes, running only this single command will restore things, and sometimes it may not.
In case it does not, irrespective of the message you see, you will need to run the Deployment Image Servicing and Management or DISM commands additionally.
Type in these commands and press Enter every time:
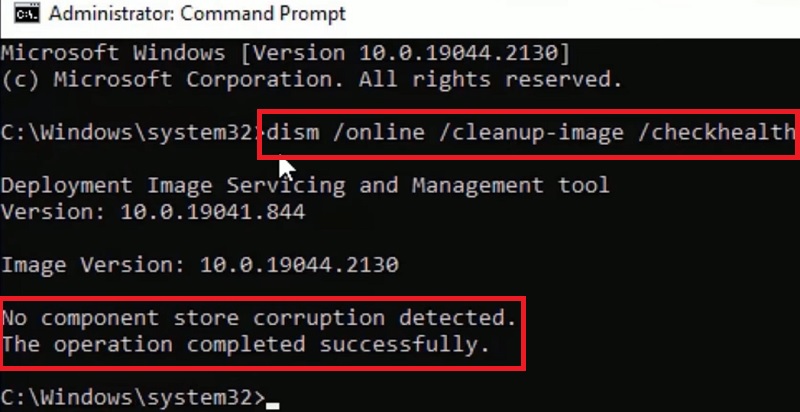
- dism /online /cleanup-image /checkhealth, to check for corrupt files
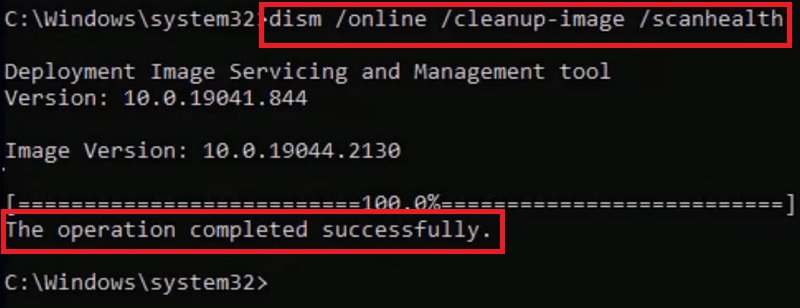
- dism /online /cleanup-image /scanhealth, to find errors not found by the above command and check the health of your computer
- dism /online /cleanup-image /restorehealth, to restore the corrupt files
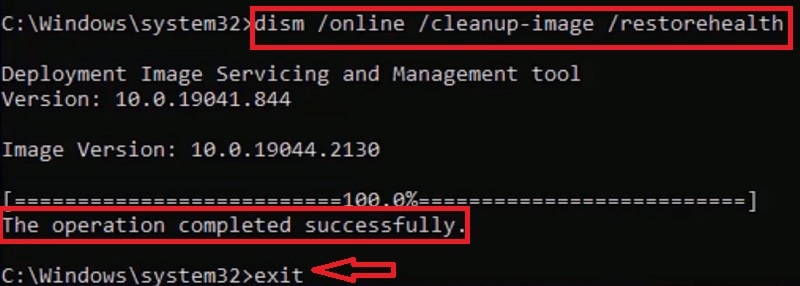
When these commands are executed completely, and you do not get any error message as displayed by the images above, type exit to exit from the Command Prompt.
All these commands will not only scan the system for errors and fix them, but will also help in fixing the drivers of the camera to bring it back into the Device Manager.
Now, restart your PC for the changes to take full effect and check whether or not the issue has been resolved.
On the other hand, if you get some error messages after running the above DISM commands, you will need to enter a few other commands.
For any general error message, you will need to run this specific command line:
- dism /online /cleanup-image /startcomponentcleanup
This will take a pretty long time to complete.
However, if you get an error message such as Error: 0x800F081F after running the restore health scan, you will have to restart your computer and then run the following command line:
- dism /online /cleanup-image /analyzecomponentstore
When the process is complete, exit from the Command Prompt, shut down your PC, restart it, and check whether or not you can now see the camera in the Device Manager.
Conclusion
It is evident from the article that your camera may not show up in the Device Manager, which is a rare occurrence but repairable.
In most cases, any one of the solutions cited above will resolve the issue and make the camera visible in the Device Manager once again.
However, you may try a couple of them as well.