
The network of a system or the adapter installed in it is usually detected automatically by Windows to establish a connection by configuring it according to the fundamental networking protocols.
However, you may need to change the network settings manually at times, and if you are not aware of the methods to do so, you are at the right place. This article will guide you through the process of changing network settings in Windows.
In This Article
KEY TAKEAWAYS
- A simple reset by using the network reset feature in Windows is one way to alter network settings.
- The IP and DNS addresses may also be changed manually to eventually change the network settings.
- Making some tweaks on the advanced metric is an advanced method to change the network settings as well.
- Managing or removing known networks is also a way which will allow you to make changes to the network settings.
- You may also make some changes in the LAN settings to alter your network settings.
Why Do You Need to Change Network Settings?
One common reason to change the network settings on your PC is to do away with the problems that you may be facing with the internet connection after all other basic troubleshooting methods have failed to rectify the issue.
Changing the network settings may also allow easy management of your network and internet connection or to gain higher speed, as the case may be.
Ways to Change Network Settings in Windows
You can simply reset the network setting on your PC when you want to change it. Additionally, you can change the automatic metric that Windows uses to choose a network connection.
Changing the IP, DNS and gateway addresses will also change the network settings.
Expert tip:
Changing your network settings will usually set the default configuration. Therefore, before you start, make sure that you have gone through all the vital settings of your network.
You may even keep a note of them. This will help you set the network back to its current settings after you are done with the initial steps.
Method 1: Use the Built-in Windows Network Reset Function
Perhaps the simplest of all ways to change network settings in Windows is to use the built-in reset function.
STEPS TO FOLLOW:
- Go to Start > Settings > Network & Internet.
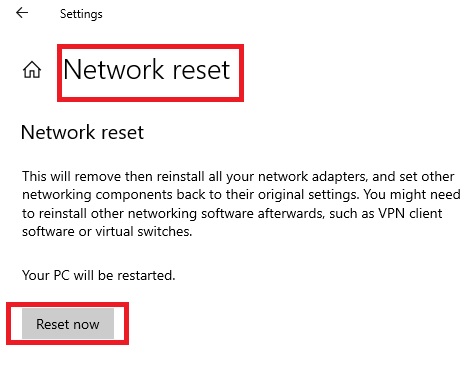
- On the right side of the Status page, scroll down to find Network reset and click on it.

- Click on the Reset now button in the next window.
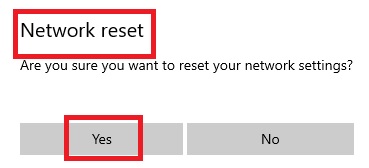
- Click on the Yes button on the Network reset confirmation window.
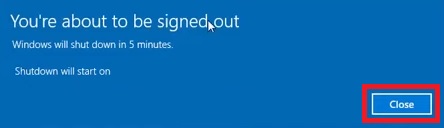
This will initiate the process, and you will be signed out and your system will shut down after some time. You will be informed about it immediately, as follows:
However, you can also reboot your system manually, if you do not want to wait that long.
When your PC restarts, you will need to reinstall other software related to networking that you had previously on your PC if you wish, such as virtual switches, VPN client, and others.
Method 2: Change the Settings of the Network Adapter in Device Manager
Another common way to change the network settings in Windows is to change the settings of the network adapters in the first place. This will also reset the adapter at the same time.
STEPS TO FOLLOW:
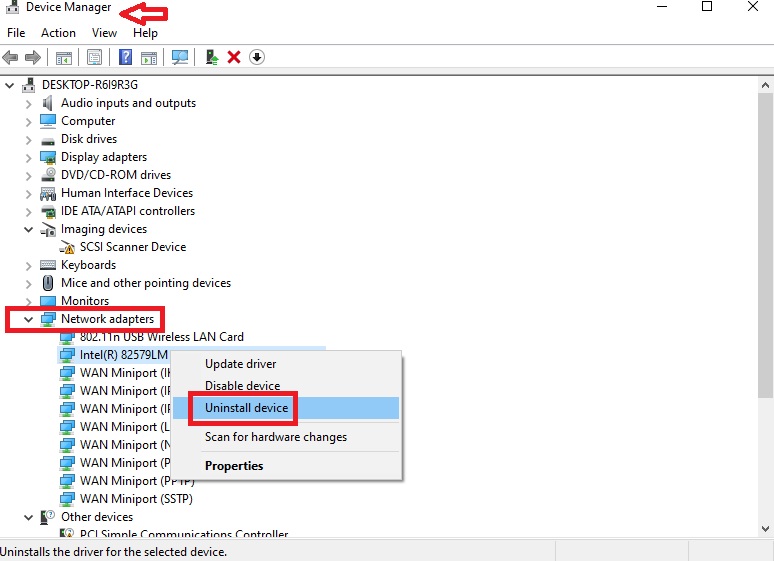
- Press the Windows and X keys on your keyboard together and select Device Manager from the pop-up window.
- Find Network adapters in the window.
- Click on the small arrow next to it to expand it.
- Select the one that you use.
- Right-click on it.
- Click on Uninstall.
- Click on the Uninstall button in the confirmation box when it appears.

Now, restart your computer, and the network adapter will be reset, thereby making the necessary changes.
Method 3: Change IP and DNS Server Addresses Manually
You may also need to change the adapter options for the Ethernet if you are using it. In that case, you may sometimes have to change the Internet Protocol (IP) address and the Domain Name System (DNS) server address manually.
STEPS TO FOLLOW:
- Go to Network & Internet as above.
- Select Ethernet.
- Click on Change adapter options, usually located at the top-right corner of the window.
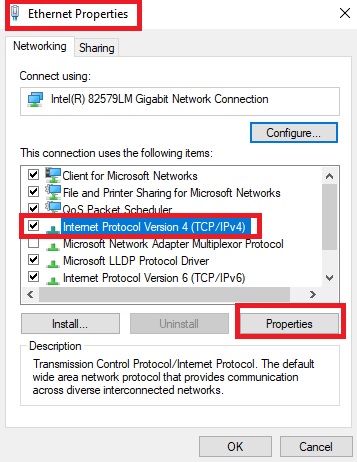
- In the Network Connections window, right-click on Ethernet.
- Select Properties from the drop-down menu.

- From the Ethernet Properties window, check the small box next to Internet Protocol Version 4 (TCP/IPv4).
- Click on the Properties button below.
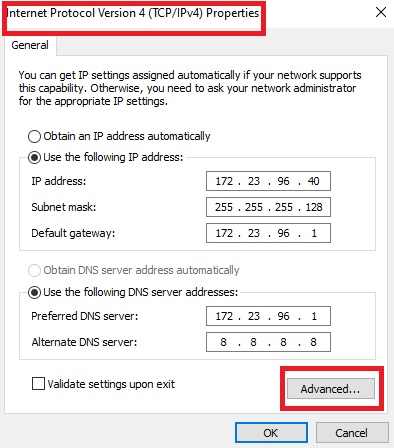
In the Internet Protocol Version 4 (TCP/IPv4) Properties window that appears, you will usually find the small circles next to ‘Obtain an IP address automatically’ and ‘Obtain DNS server address automatically’ are already checked.
However, in this case, you will need to set the IP and DNS server addresses manually in the following way:
- Click on the circle next to Use the following IP address:
- Enter the IP address of your computer, such as 172.23.96.40.
You may check whether or not this IP address is correct by using the Command Prompt and running the ping command along with the IP address. If there is no answer, you can assume that the address is OK.
(You can see it demonstrated in the last image of this method.)
- Then, enter the Subnet mask 255.255.255.128, for example.
- Now enter the address of the Default gateway, such as 172.23.96.1, which can be the address of your home modem.
- Now, click on the circle next to Use the following DNS server addresses:
- Enter the address of the Preferred DNS server, which can be the same as the address of the default gateway or the home modem.
- Then enter the address of the DNS server of Google, which is 8.8.8.8, as your Alternate DNS server address.
When everything is entered correctly, it will look like this:
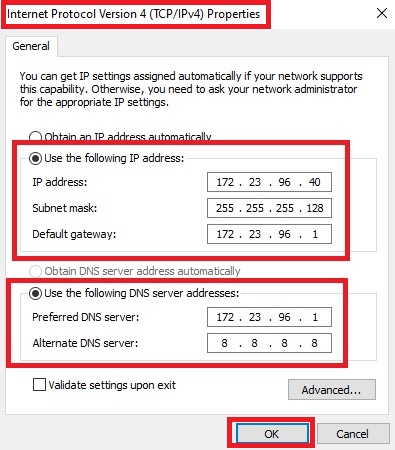
Save the changes by clicking on the OK button, and close all windows to exit.
Now, find out whether or not it works from the Command Prompt.
- Go to the search box > type cmd > choose Run as administrator > hit Enter.
- Enter the commands marked by the red arrows in the prompt.
Ideally, it should work, and the return of your commands would look something like this:
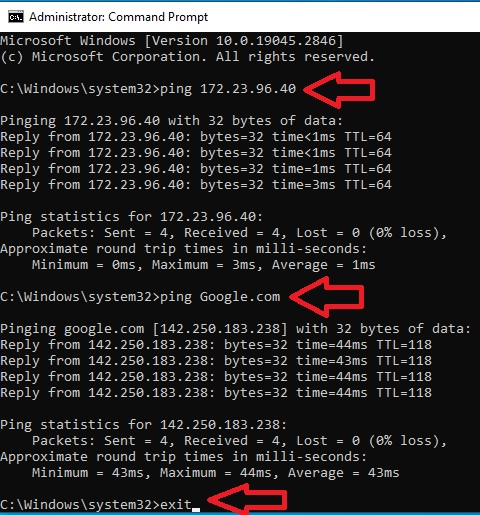
Finally, type exit and close the Command Prompt.
Method 4: Change Advanced TCP Settings
You can also change your network settings by making some simple tweaks in the Transmission Control Protocol/Internet Protocol (TCP/IP) settings.
STEPS TO FOLLOW:
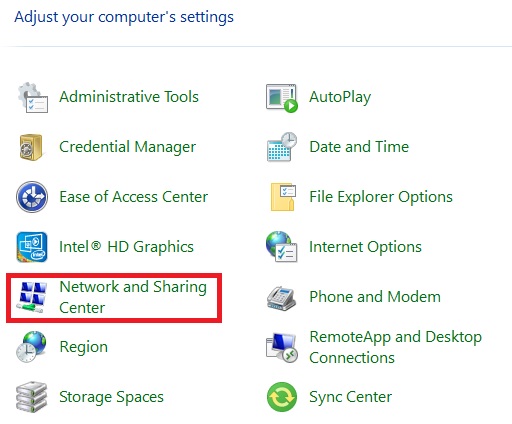
- Go to the search box > type control panel > hit Enter.
- Select Large icons from the options menu that appears when you click on the small downward arrow in the View by box.
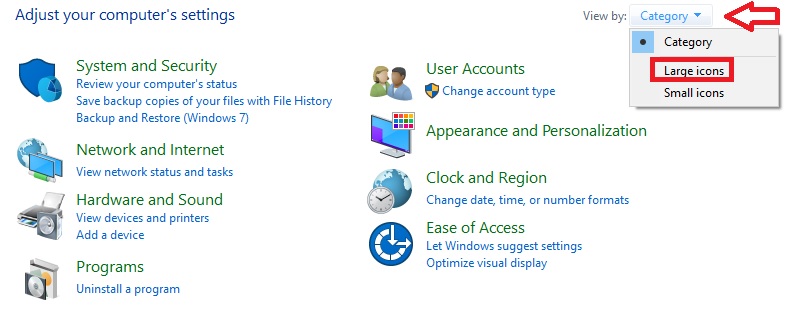
- Select Network and Sharing Center from the new window.
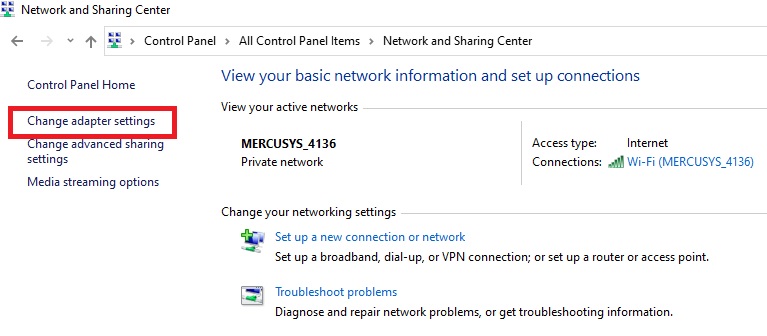
- Select Change adapter settings from the left panel of the window.
- Then, follow all the steps mentioned in the above method till you reach the Internet Protocol Version 4 (TCP/IPv4) Properties window.
- Click on the Advanced button at the bottom.
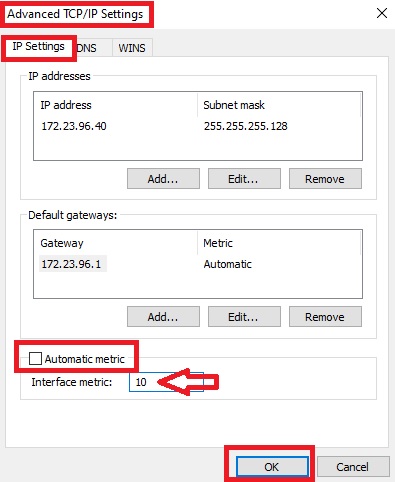
This will take you to the Advanced TCP/IP Settings window.
- Uncheck the small box next to Automatic metric.
- Set it to 10 or anything lower than the primary network connection, which the system automatically selects.
- Click on the OK button.
Click OK on all windows to close them. You may restart the computer now so that the changes take effect, and that should change your network settings.
Method 5: Make Changes in the Local Area Network
If you are using Local Area Network or LAN, you may also need to make changes to its settings.
STEPS TO FOLLOW:
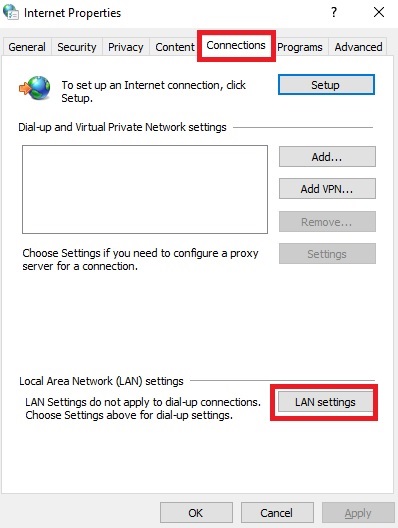
Go to the Control Panel as above and choose Internet Options this time. This will open the Internet Properties window.
- Now, go to the Connections tab and choose LAN settings.
In the Local Area Network (LAN) Settings window that appears, the Automatic configuration will be enabled by default.
- Click on the small box next to Automatically detect settings to disable it.
- Click on the square box next to Use automatic configuration script.
- Enter the address of your LAN.
- If you want to add the Proxy server, click on the box beside Use a proxy server for your LAN and enter the relevant address.
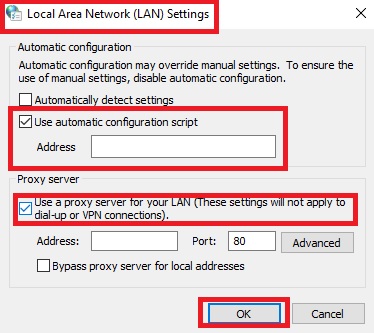
Now, finally, click on the OK button and check the LAN settings to see the changes made.
Method 6: Manage or Remove Networks
You may also manage or even remove some known networks that you may have used before.
STEPS TO FOLLOW:
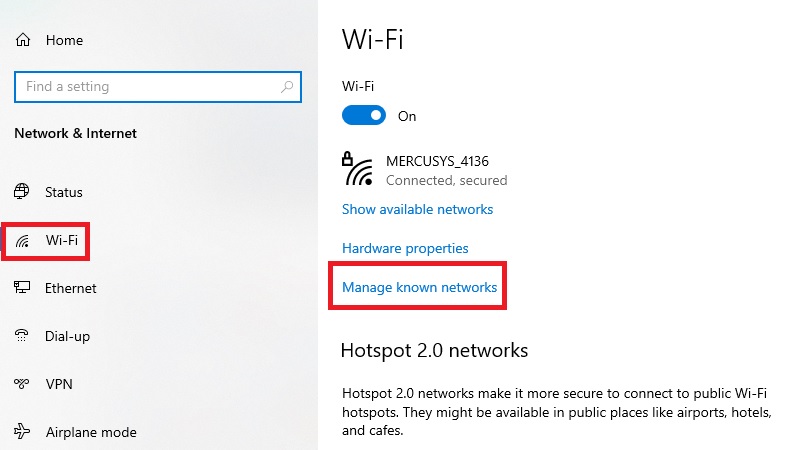
- Press the Windows and I keys on your keyboard together to open the Settings app, and choose the Network & Internet option.
- Select Wi-Fi from the left panel of the window.
- Click on Manage known networks on the right side of the window.
- Click on the known network you want to remove.
- Click on the Properties button if you want to manage this connection, or click on the Forget button if you want to remove it.
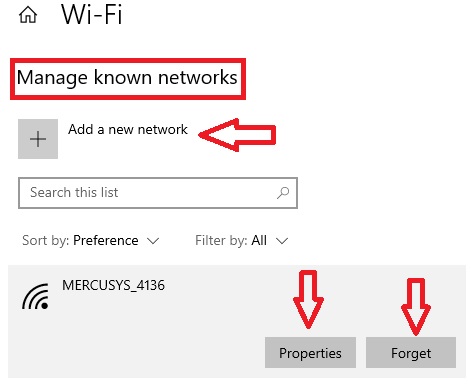
You can even add a new network from the same place.
Conclusion
There are quite a few ways in which you can change the network settings of your PC manually, as described in this article.
If you ever need to do so, you can start with the easiest method and then move on to the more complex ones, if the former does not work in your particular case.