
Putting your PC into sleep mode is a process that sends the system into a low-power mode to save electrical power. However, there may be times when your computer may not enter into this mode as normally as it should.
When you read on, here in this article, you will come to know about the causes of this issue and find some easy and quick fixes to put things back on track.
KEY TAKEAWAYS
- Since it is basically related to power, this issue can be easily resolved by making changes to the power options.
- You may also use a few specific types of commands using the built-in Command Prompt in order to find the roots of the issue and rectify them.
- If you are not sure about the issue, a smart way to resolve it is to run a power troubleshooter.
- Like most common issues with a PC, more often than not, updating the device driver may also resolve the issue of your system not going to sleep.
- Some other simple fixes such as performing a clean boot, disabling the screen saver, and more, can solve the problem as well.
In This Article
Why Does a PC Not Sleep?
Typically, a PC may not go into sleep mode if there is a problem with the power options and settings.
Apart from that, there may be other reasons for it, such as:
- Improper wake timer
- Outdated or malfunctioning drivers
- Improperly set Wake-on-Lan
- Other scheduled tasks
- Virus, malware or spyware infection
- The connected networking devices
- Interference by a third-party app or software program
Whatever the reason is, you should not worry when you experience such an issue because it is not fatal and can be fixed easily.
Even a few specific types of peripherals connected to your PC may prevent it from going into sleep mode. Removing them can sometimes also resolve the issue.
These additional devices could be any or a combination of the following:
There may also be some software programs that may be causing such an issue. This may be hard to find out unless you use the built-in Command Prompt and run it as administrator. You will need to type in the following commands:
- powercfg -requests – This process will let you know the causes of the issue.
- powercfg -requestsoverride (followed by the caller type, name and request) – This will allow you to disable a process directly.
- powercfg -lastwake – It will let you know which particular process is preventing the PC from going to sleep.
- powercfg -devicequery wake_armed – This will let you know the specific devices that are waking up the system.
How to Fix a PC Not Going to Sleep?
There are lots of simple as well as complex fixes to the issue when a PC does not go to sleep. You can disable the screensaver or the wake timer, check the sleep and power settings, and allow a clean boot or disable Fast Startup.
You can even try updating Windows, performing troubleshooting, scanning the computer system for viruses or malware, even disconnecting peripheral devices, and more.
Most of these solutions are applicable to Windows 10 and Windows 11 PCs, with a few specific to the latter.
However, none of these fixes require additional or professional technical expertise and can be performed by any average user, as you will find out as you continue reading.
Steps to Fix a PC Not Going to Sleep in Windows 10
Method 1: Change the Power Plan
The PC may not go to sleep if the power settings do not allow it in the first place. Therefore, it is good to start with making changes to the power settings.
STEPS TO FIX:
- Go to the Search box beside the Start menu icon.
- Type in power plan.
- Click on Edit power plan.

- In the Edit Plan Settings window, choose Change advanced power settings.
- Click on Restore plan defaults in the new window.
- Click on the Yes button in the following Power Options window.
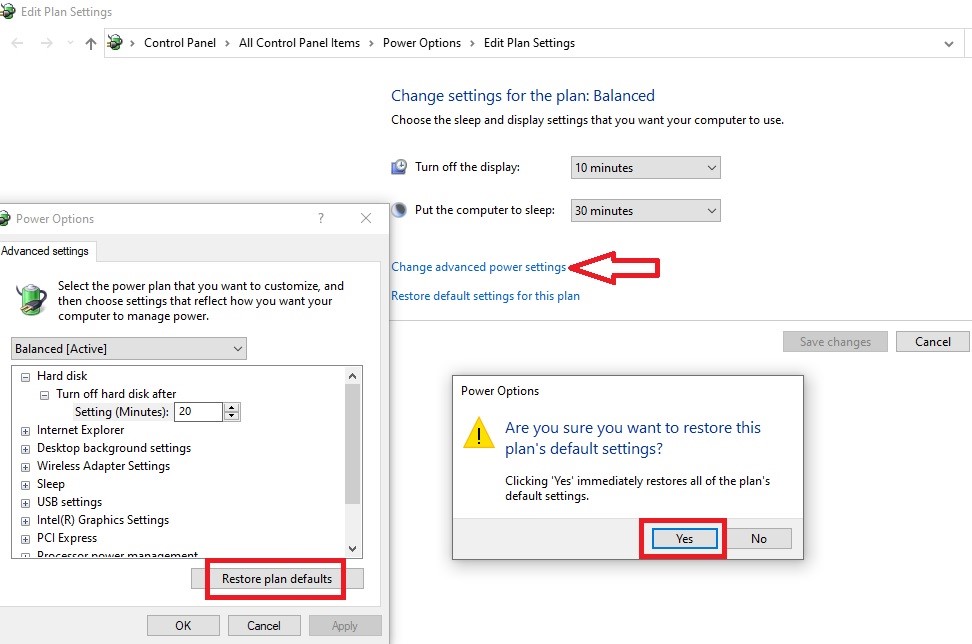
- Click on the Apply button and then on the OK button.
This will change all power settings.
Once done, follow these steps:
- Scroll down the options displayed on the advanced settings window (the one on the right above).
- Look for Multimedia settings.
- Click on it to expand it.
- Click on ‘When sharing media’.
- Check that ‘Allow the computer to sleep’ option is enabled for both the ‘On battery’ and ‘Plugged in’ options.
This will rectify that issue that has been creating a problem with going to sleep mode.
Method 2: Disable Fast Startup
As useful as it may be, sometimes the Fast Startup feature may cause some issues with the PC entering into sleep mode.
Therefore, disabling it will be a more appropriate move.
STEPS TO FIX:
- Go to the Start menu.
- Right-click on it.
- Choose Setting
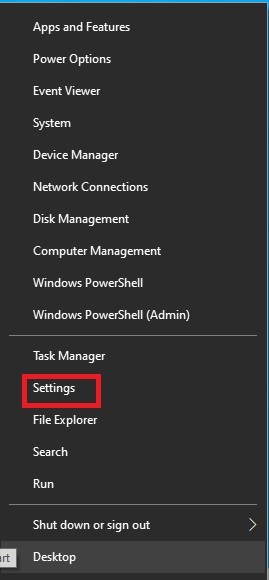
- Click on System

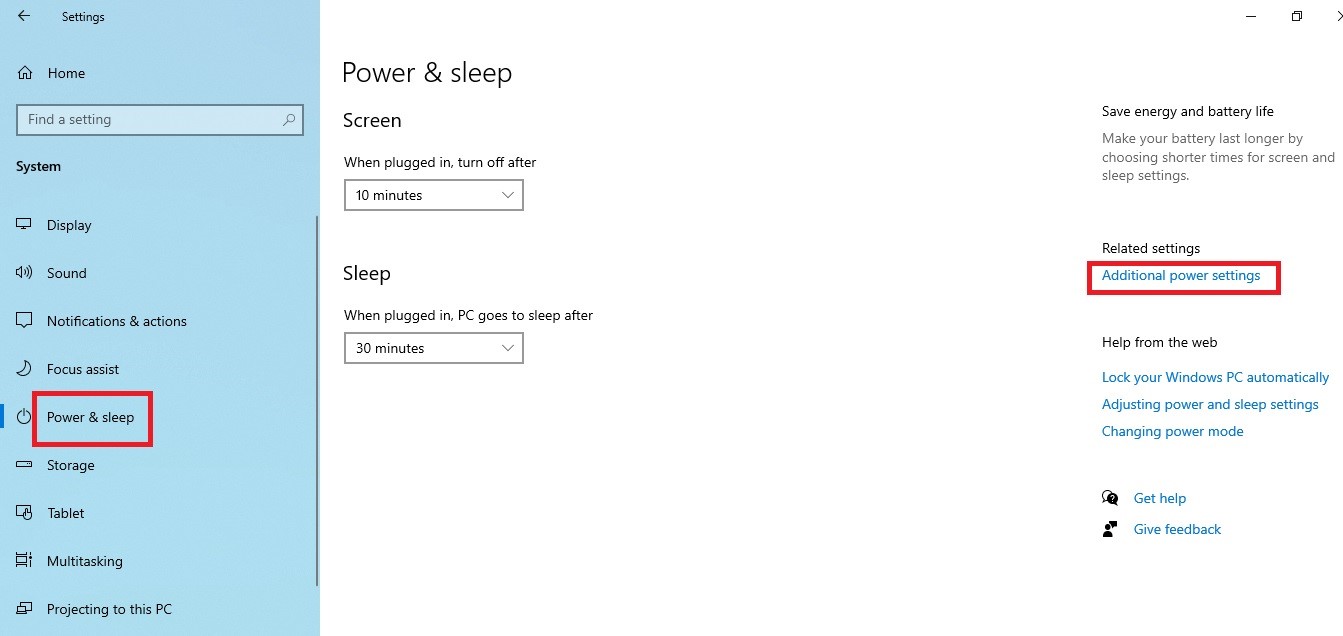
- Click on Power & sleep on the left pane.
- Click on Additional power settings under Related settings on the right side.
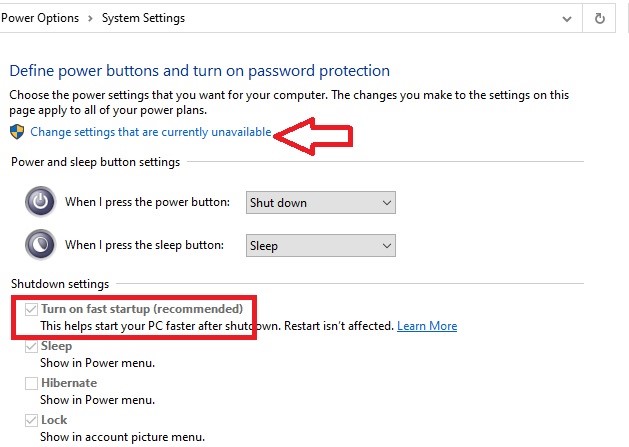
- Click on ‘Choose what the power buttons do’ option on the left side of the new window.
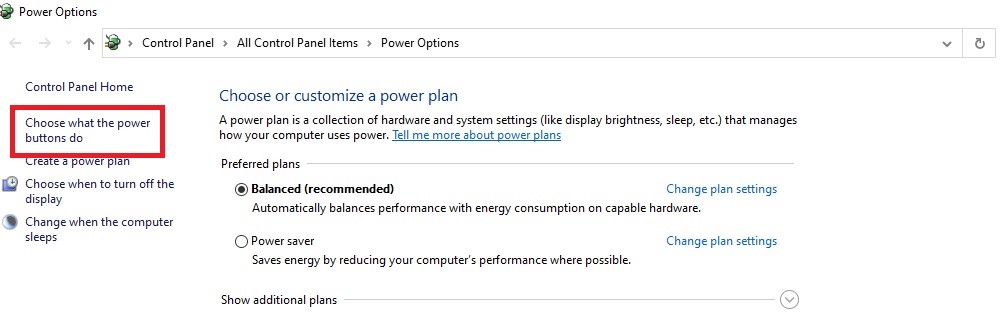
- Click on ‘Change settings that are currently unavailable’.
- Uncheck the box beside ‘Turn on fast startup (recommended)’ at the bottom under Shutdown settings.
This will resolve the issue most of the time.
Method 3: Check for Updates
Your PC may not go into sleep mode if there are issues with the Windows operating system. In that case, you will need to update it.
STEPS TO FIX:
- Go to the Settings again.
- Click on Update & Security.

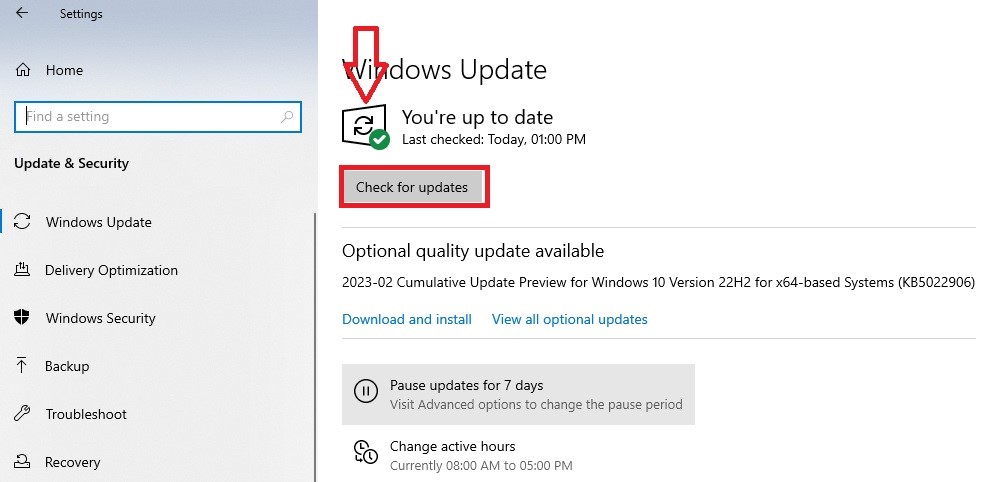
- Select Windows Update.
- Look for any notification saying your Windows is updated.
- If not, click on Check for updates.
If it is not, then you should update it. Once done, it should resolve the issue.
Method 4: Troubleshoot Power
STEPS TO FIX:
- On the Update & Security page, select Troubleshoot from the left pane.
- Click on Additional troubleshooters.

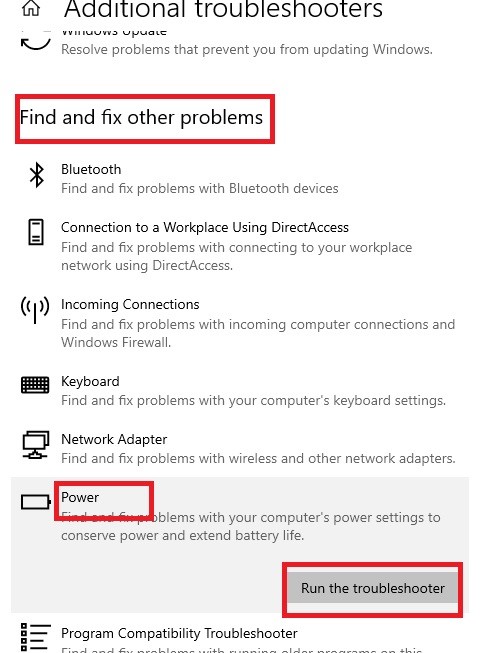
- On the new window, scroll down to ‘Find and fix other problems’.
- Look for the Power option under it.
- Click on it.
- Click on Run the troubleshooter.
Wait for some time until it completes detecting issues and close the window if you do not get a complete message of the issue or issues found. If there are any issues then choose other solutions mentioned here to work accordingly.
Method 5: Power Management
After troubleshooting, for example, if the issue is found with the network adapter, you will need to make changes to its power management.
STEPS TO FIX:
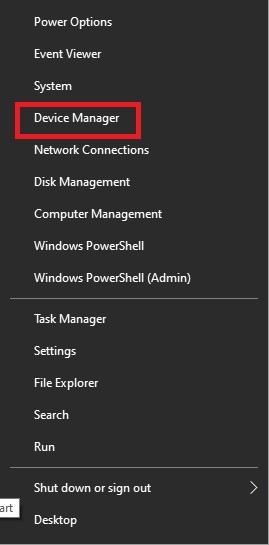
- Go to the Start menu.
- Right-click on it.
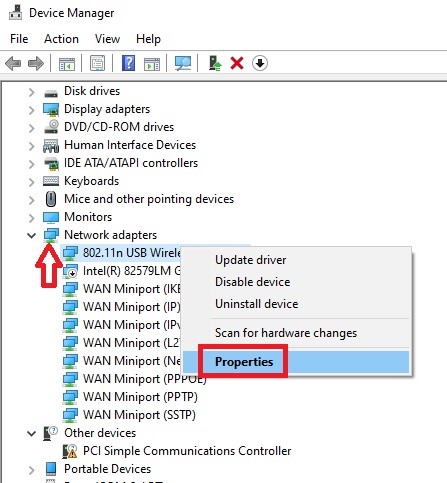
- Select Device Manager.
- Look for Network adapters.
- Click on it to expand it.
- Right click on your adapter.
- Click on Properties.
- On the new window, click on Power Management.
- If the box beside ‘Allow this device to wake the computer’ is checked, uncheck it.
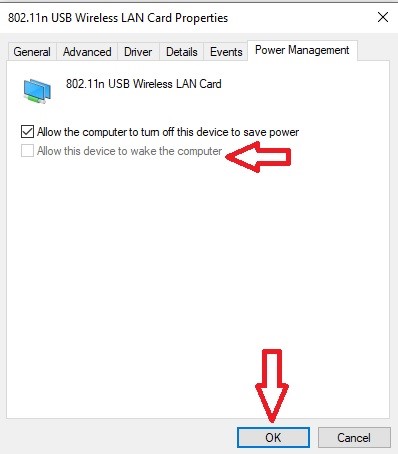
This should resolve the issue. Do the same with USB connectors, mice and keyboard as well.
Method 6: Changing PCIe Settings
Sometimes, the settings of the Peripheral Component Interconnect Express (PCIe) may cause this issue, and therefore, it needs to be changed.
STEPS TO FIX:
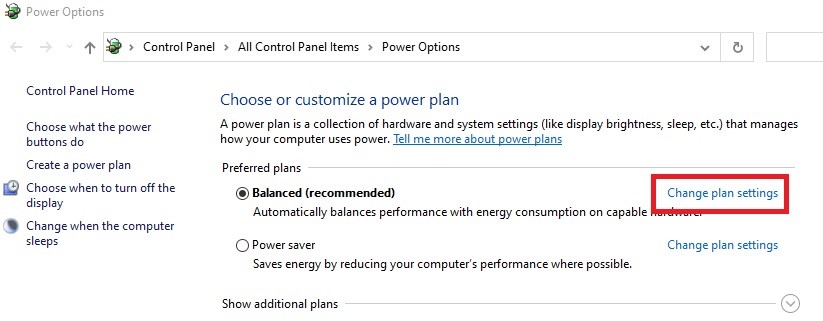
- Go to the Power & Sleep option and click on Additional power settings as you did in Method 2.
- Click on ‘Change plan settings’ written in blue beside Balanced (recommended).
- Click on ‘Change advanced power settings’ in the new window.
- Scroll down and look for PCI Express in the list displayed under the Balanced (Active) window.
- Click on the small + sign on its left to expand it.
- Click on the + sign beside the option Link State Power Management.
- On Settings, click on the little drop-down arrow at the right side of the box.
- Whatever it is set to, select Off.
- If you are using a laptop computer, you will have another option below it saying Plugged in or Battery. Make sure that is also changed to Off.

In the same Advanced settings window on the right, check for the following and make the necessary changes:
- Click on the + sign beside the display and check that it is set to turn off after a specific period of time.
- Click on the + sign beside the USB settings to open the USB selective suspend setting and make sure that is enabled.
- Check that the settings for ‘Hibernate after’ is set to Never.
- Then check on the ‘Allow hybrid sleep’ option and make sure it is set to Off.
Finally, click on Apply and then on the OK button. Once all these are done, the issue with the sleep mode on your PC will be resolved.
Method 7: Force Sleep
If the above steps do not resolve your issue, you can force your PC to go into sleep mode.
STEPS TO FIX:
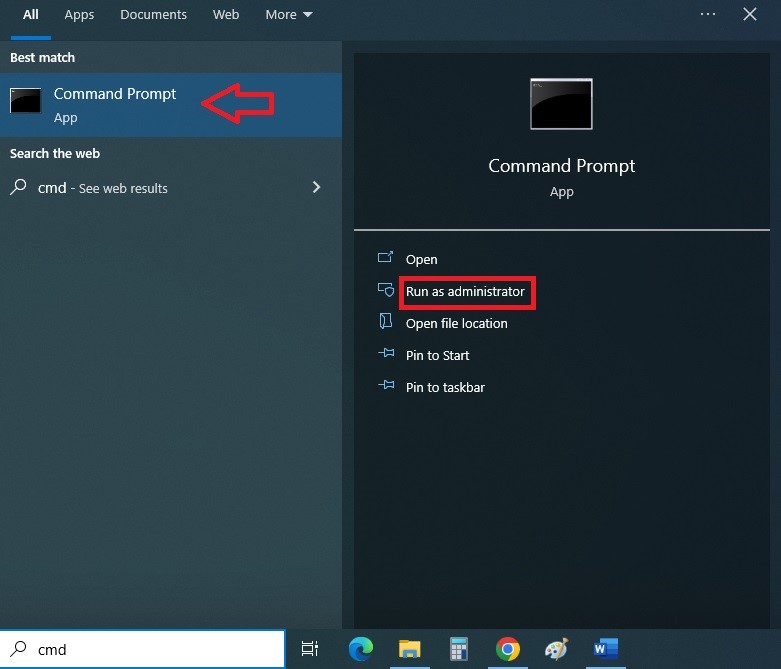
- Go to the Search bar.
- Type in CMD
- Click on it to open the Command Prompt.
- Select Run as Administrator.
- Type in the command powercfg -h off.
- Press Enter.
- Type in exit
- Press Enter.
- Restart your PC.
This should fix the issue.
Method 8: Adjust Screensaver Timing
The screensaver settings may also cause issues with the PC going into sleep mode. Therefore, changing its timing may resolve the issue.
STEPS TO FIX:
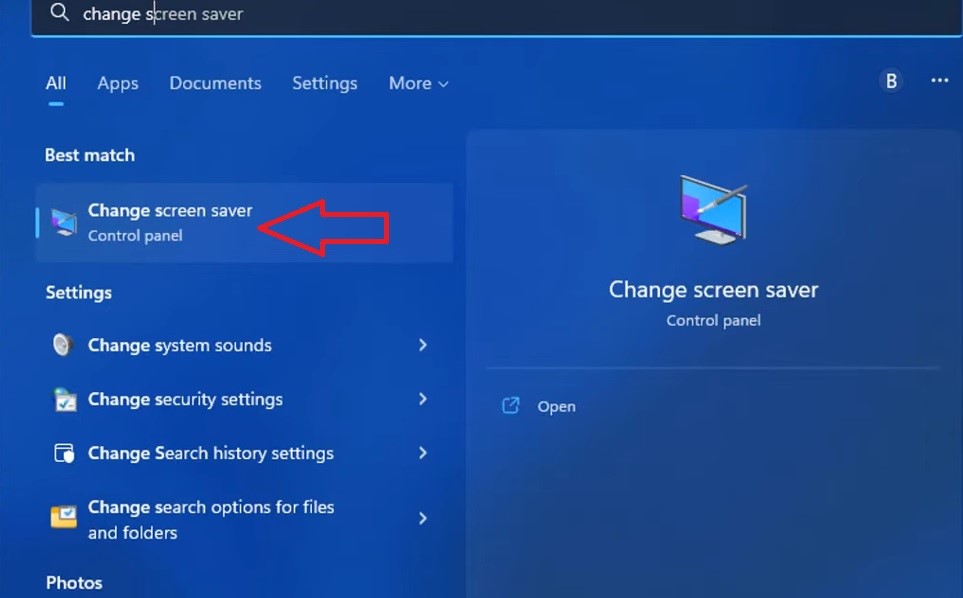
- Go to the Search bar.
- Type in change screensaver.
- Click on it to open the screensaver.
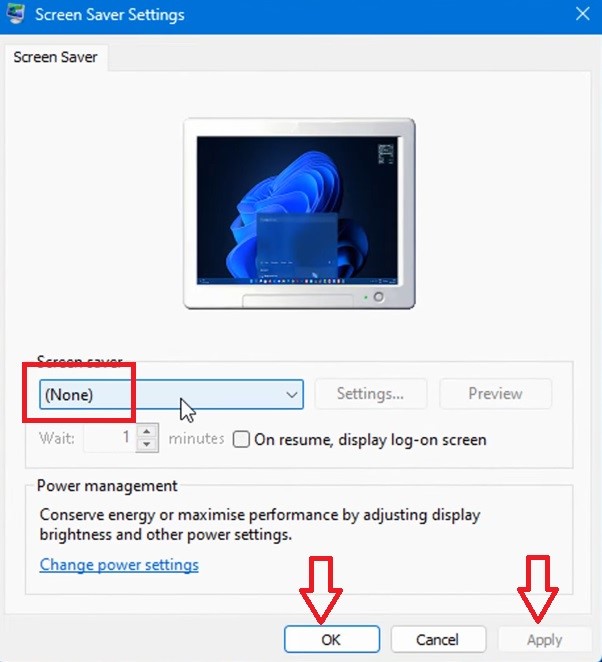
- Make sure that it is set to None.
- Click on the Apply button.
- Click on the OK button.
Method 9: Perform a Clean Boot
There may be some performance issues due to third-party software installed on your PC, which may prevent the system from going into sleep mode. In such cases, it is better to perform a clean boot.
STEPS TO FIX:
- Go to the Search bar.
- Type in msconfig.
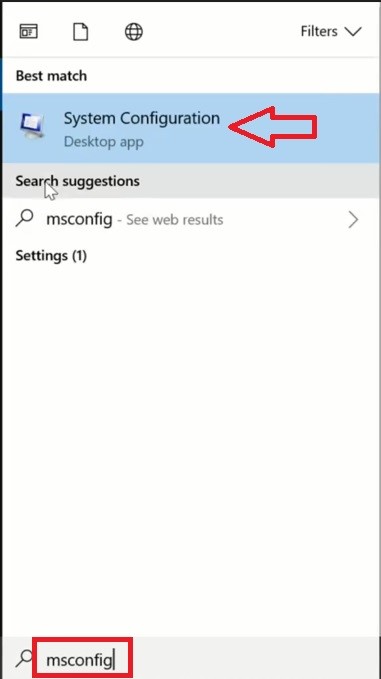
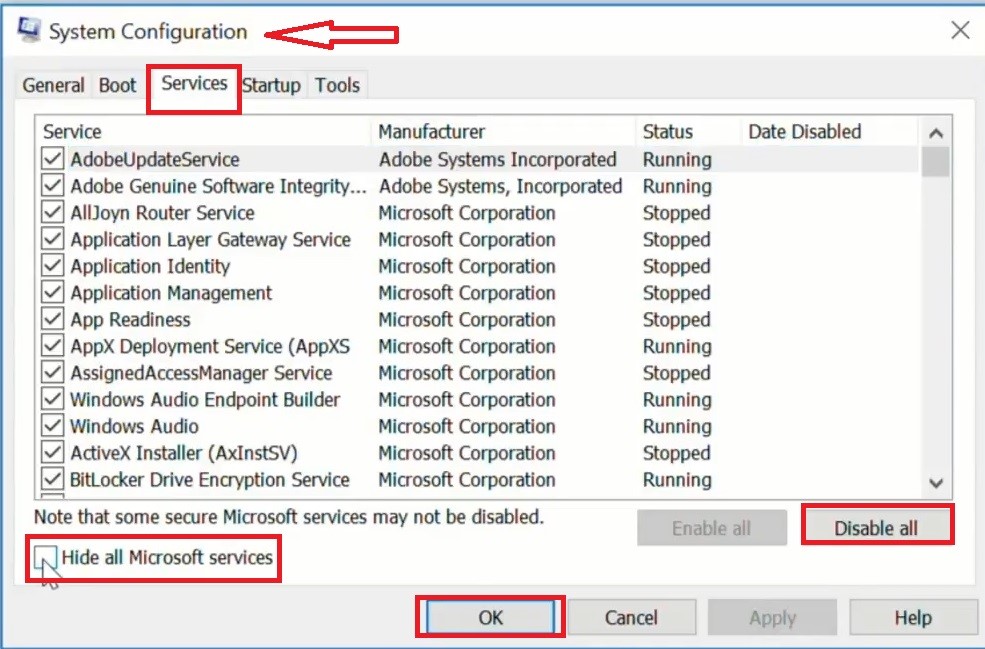
- In the new System Configuration window, go to the Services tab.
- Check the box beside ‘Hide all Microsoft services’.
- Click on the Disable all button.
- Click on the OK button.
You must also disable all startup applications. For this, you will need to do the following:
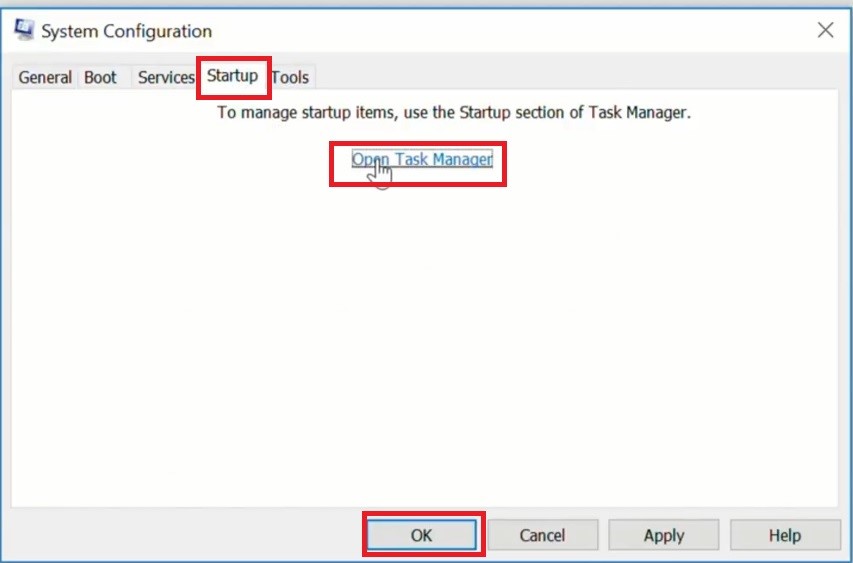
- Go to the Startup tab on the same System Configuration window.
- Click on Open Task Manager.
- Click on the OK button.
- In the new window, disable each application one by one.
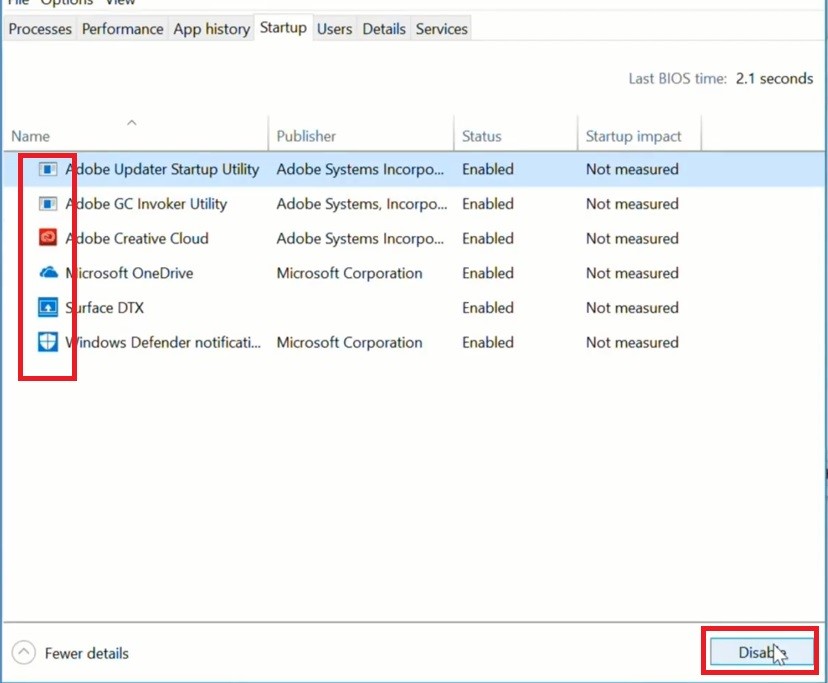
- Close all windows.
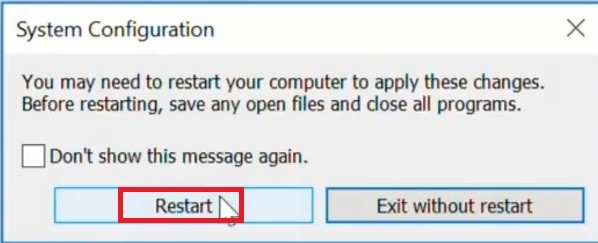
- Press the restart button on the confirmation window.
Steps to Fix a PC Not Going to Sleep in Windows 11
Method 10: Windows Repair
Sometimes, in Windows 11 especially, the operating system may be the issue. In such a situation, you may need to repair Windows if the PC does not go into sleep mode.
STEPS TO FIX:
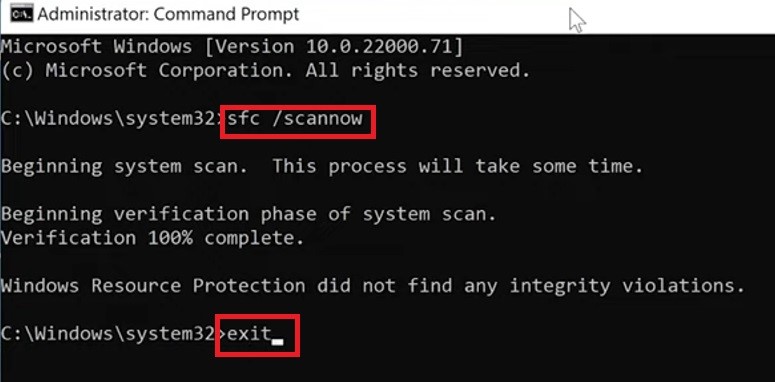
- Go to the Command Prompt as before and Run as Administrator.
- Type in sfc /scannow.
- Press Enter.
- Wait for the process to complete.
- Type exit
- Press Enter.
If you find any issues unknown to you, take the necessary actions based on the cause and choose the solution or solutions mentioned in this article. This will resolve the sleep issue with your PC.
Method 11: Setting Sleep Mode Time manually
The time set for sleep mode may sometimes cause issues as well. Therefore, setting it manually can resolve the problem.
STEPS TO FIX:
- Go to Settings and System as before.
- Go to the Power & battery
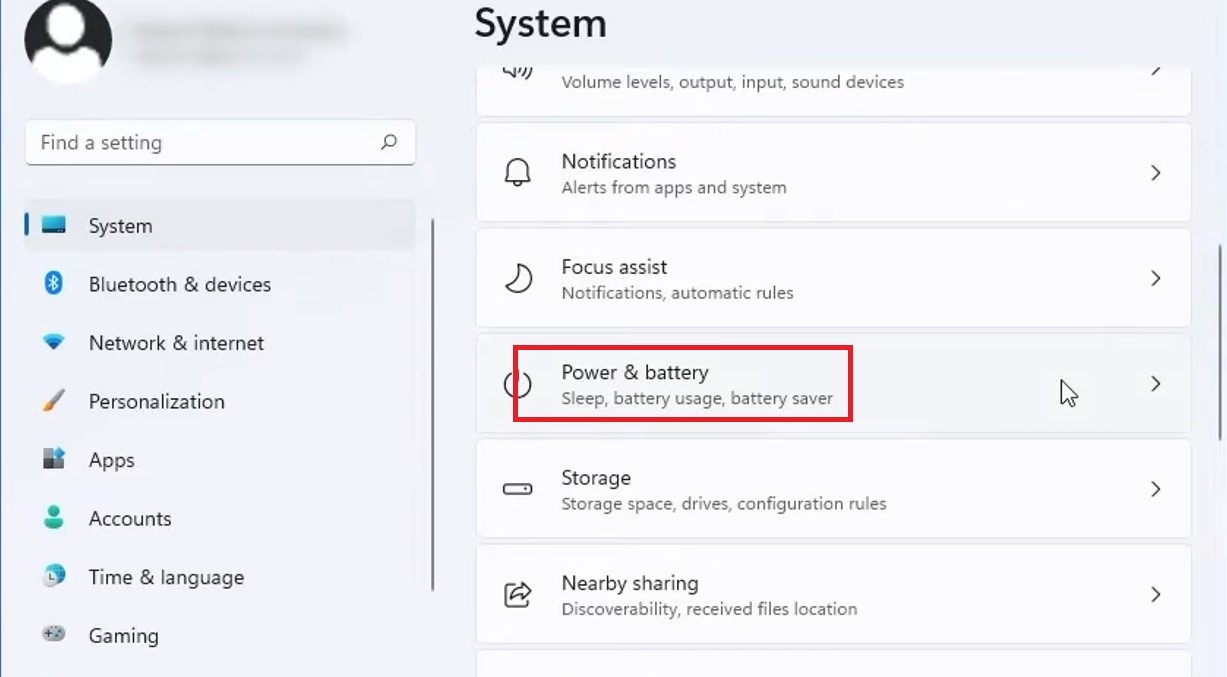
- On the next window, scroll down to the Screen and sleep
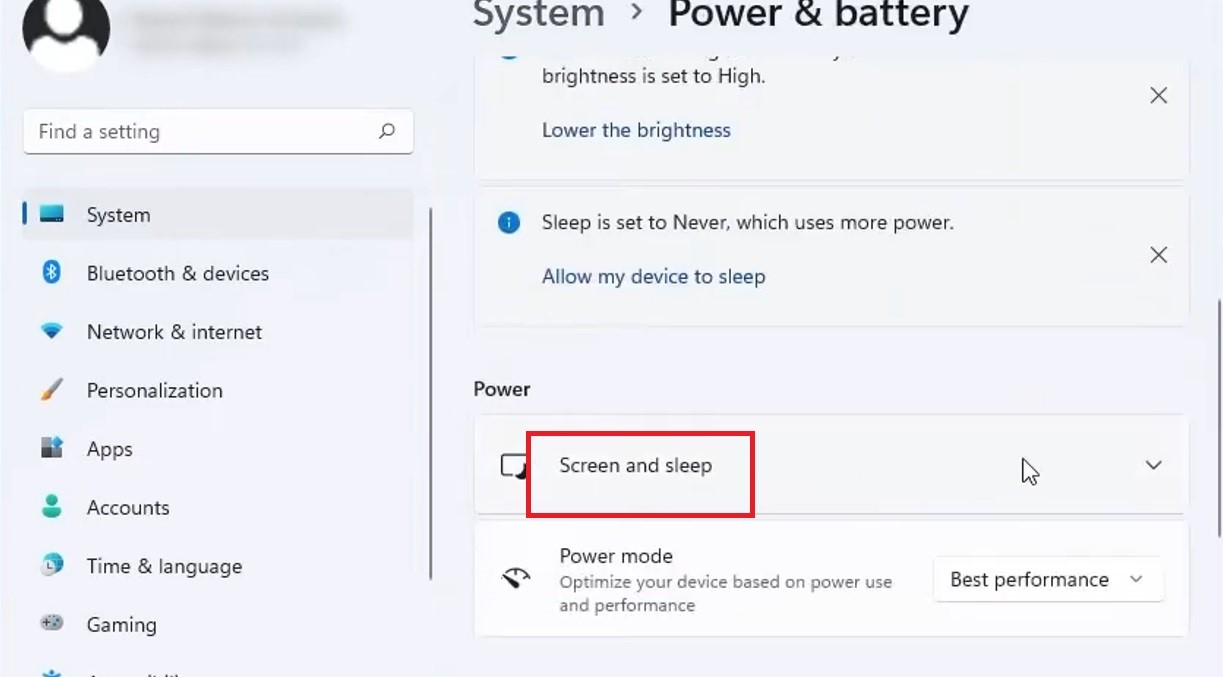
- Change all the settings in this section.
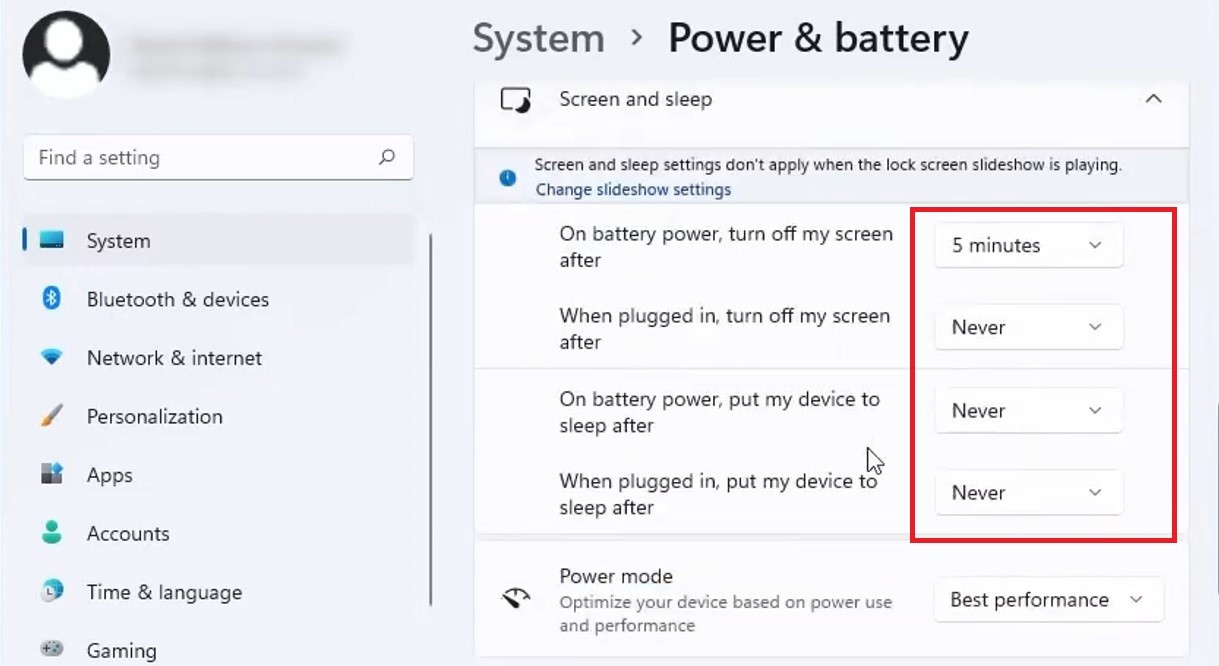
- Restart your PC.
Check if the problem is resolved.
Method 12: Disable the Wake Timer
If the wake timer is set incorrectly, the PC may not go into sleep mode as well. Therefore, the best solution to this issue is to disable the wake timers.
STEPS TO FIX:
- Go to Edit power plan and open it as you did in Method 1.
- Click on ‘Change advanced power settings’ option.
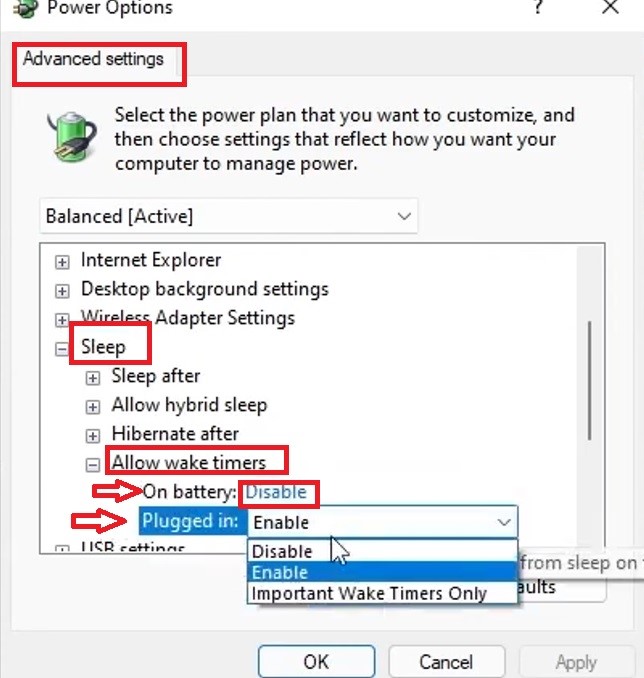
- In the Power Options window, double-click on Sleep.
- Click on ‘Allow wake timers’.
- Make sure that both ‘On battery’ and ‘Plugged in’ are disabled. If it is not, change it.
- Click on the Apply and then click on the OK button.
This will also resolve the problem of the computer not going into sleep mode.
Questions & Answers:
Does Sleep Mode Affect RAM?
Ideally, sleep mode affects the CPU, hard disk, and other power-hungry components of a PC by reducing their power consumption. As for the RAM (Random Access Memory), it receives just enough power to maintain data.
Does Sleep Damage PCs?
No, sleep mode does not harm the PC. It simply puts the system to sleep so that power consumption is reduced. In fact, most computer systems are designed to enter sleep mode automatically after some time of inactivity.
Does Sleep Mode Reduce Battery?
Yes, if you are using a laptop computer, it is better to use sleep mode because it will prevent unnecessary consumption of power since the CPU, hard disk and the other parts on the system will be powered down and reduce battery usage.
Conclusion
Issues with sleep mode in a PC can be categorized into two major groups, such as when it won’t go to sleep and when the sleep option is missing.
As you can see, the issue can be fixed quickly and easily. Simply choose one or a number of the fixes mentioned above that suits best based on the situation and the cause.