
Sometimes, it is important to change a few BIOS configurations, especially when you are denied access to any configuration-related information if a password is set and you do not know it.
Even an amateur computer technician has good knowledge about how to unlock BIOS passwords on both desktops and laptops.
If you do not, then read this article and learn a few methods to do it on a desktop PC.
In This Article
KEY TAKEAWAYS
- The simplest way to unlock the BIOS is to detach the cables, remove the CMOS battery from the motherboard, and replace it after a few minutes.
- Clearing the CMOS jumper located on the motherboard is also another useful way to unlock the BIOS.
- Booting into Windows from a CD or USB as well as using other tools will also help in the process.
- Sometimes, using specific commands may also unlock a locked BIOS on a desktop PC, just as using specific software programs would.
- BIOS manufacturers often set backdoor passwords that may also unlock the BIOS irrespective of the password previously set.
Why Do You Need to Unlock the BIOS Lock on a Desktop PC?
The most common reason to unlock a BIOS is that users often forget the password set by them if they do not use it for a long period of time.
Apart from that, these days, unlocking a BIOS lock has become a very common practice, especially when more and more people are using second-hand systems.
The main reason behind it is that the previous owners usually do not give the password or BIOS-related information to the new buyers, and therefore, they cannot use it.
How to Unlock a BIOS Lock on a Desktop PC?
Some proven ways to unlock a locked BIOS on a desktop PC include removing the Complementary Metal Oxide Semiconductor (CMOS) battery or by using the jumper.
A few specific types of software and commands may also resolve the issue.
Here are some of the easy and effective ways to unlock a locked BIOS on a desktop PC.
Step 1: Removing the CMOS Battery
Assuming that you have tried starting your computer more than a couple of times by typing in the wrong password, the system will no longer allow you to type it again. In that case, follow these steps:
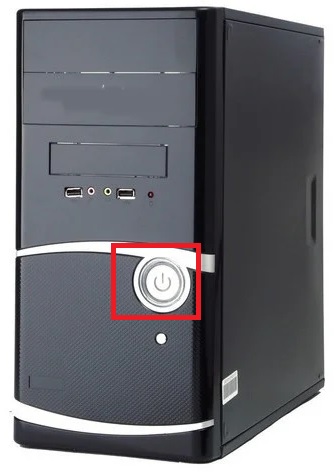
- Press and hold down the power button on your computer case for about ten seconds. This will turn the computer off.
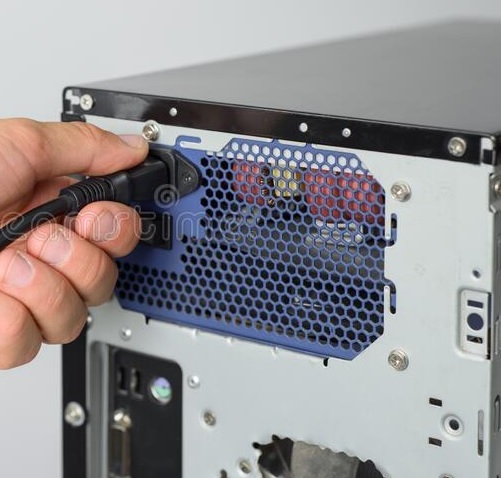
- Unplug the power cord from the back of the CPU case.
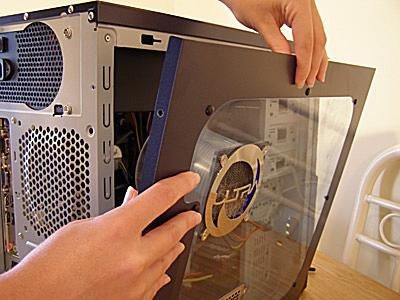
- Remove the cover from the computer case.
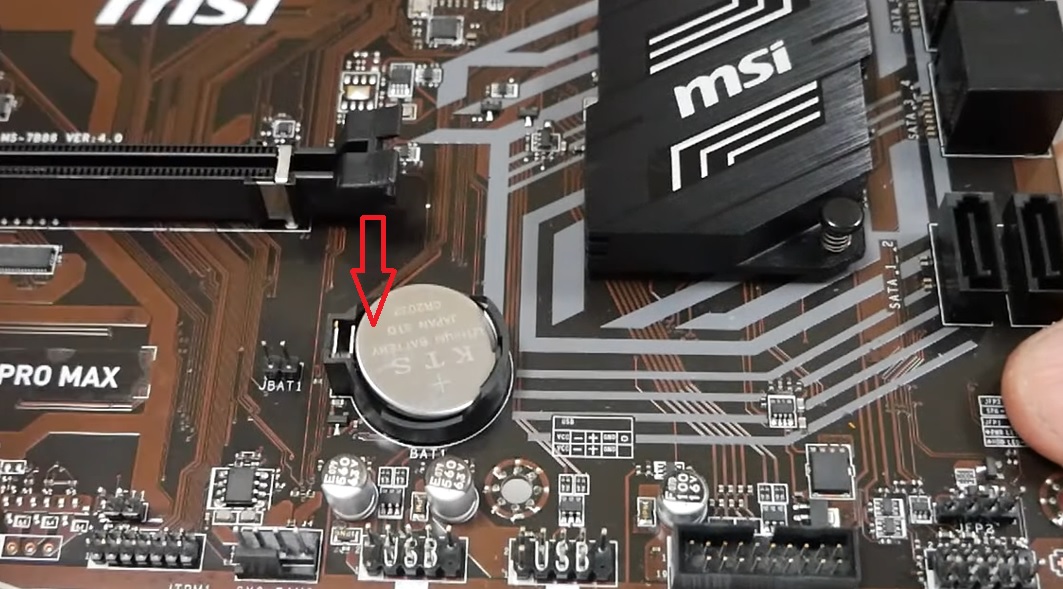
- Locate the round CMOS battery on the motherboard.
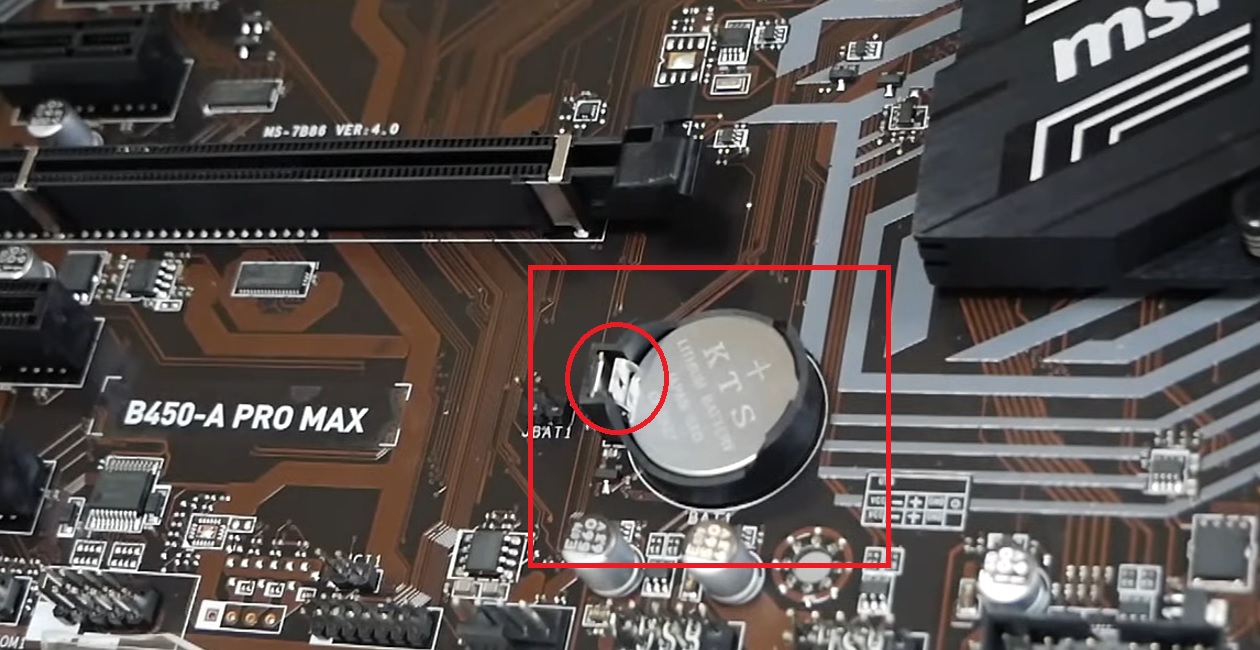
- Press the clip on the side of the battery socket, marked by a red circle in the above image, and the battery will flip out automatically. (You may use a screwdriver to press the clip.)
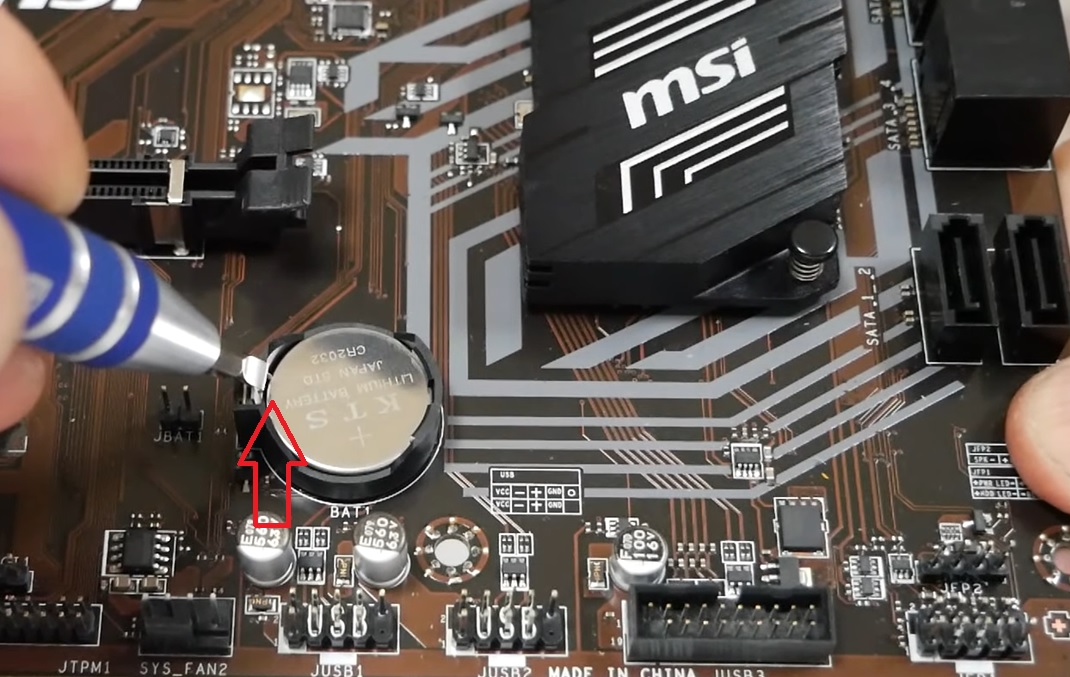
- Remove the battery and keep it aside for a couple of minutes. (You may use a tweezer to remove the battery.)
- Replace the CMOS battery in the right place by pushing it at one end of the socket first and then pressing the other side to ‘clip’ it.
- Reconnect the power cable to your PC.
Now switch on your computer, and it will not ask for any BIOS password anymore because it has been removed. This can be confirmed by the fact that you will get a warning message that the BIOS date has not been set.
Step 2: Using the Jumper
You may also use the jumper on the motherboard to remove the BIOS password and reset it.
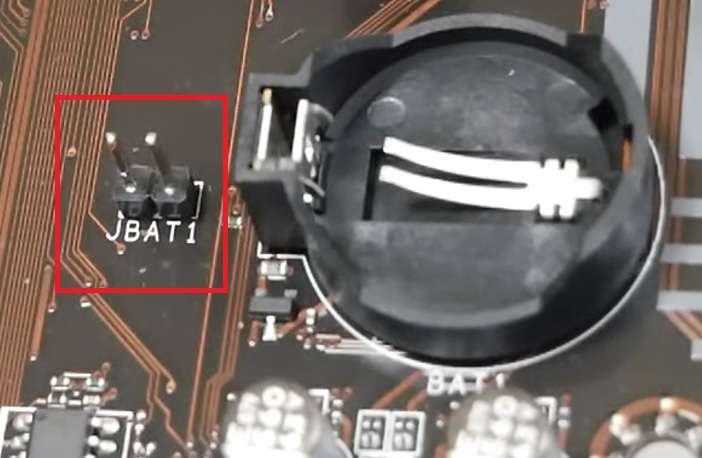
- Look at the two jumper pins marked JBAT 1. (These are usually located next to the CMOS battery or at the side of the board.)
- Use a screwdriver to touch the two pins at the same time for some time.
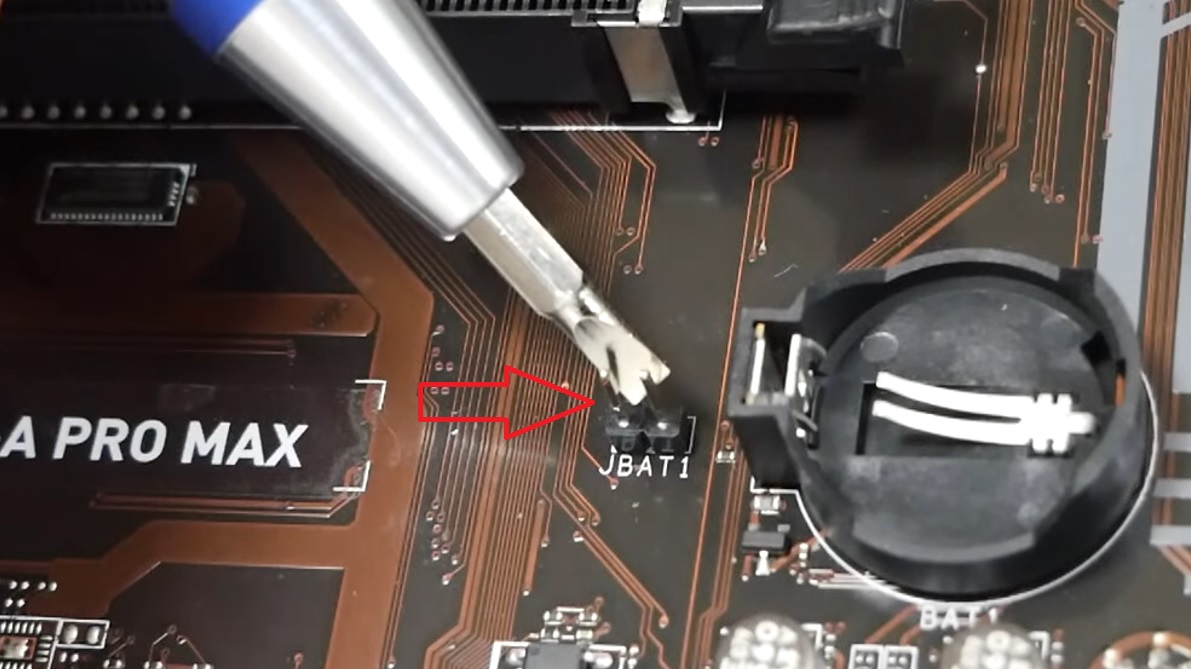
This will remove the earlier setting of the CMOS.
Step 3: Using Command Prompt
This method will actually work if you can access your operating system. Assuming that you can, follow these steps:
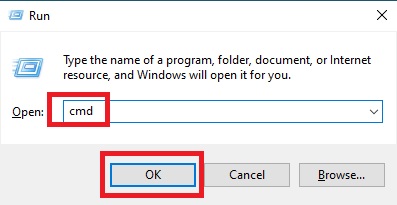
- Press the Windows and R keys on your motherboard together.
- Type cmd in the Run box.
- Press Enter or click on the OK button.
This will take you to the Command Prompt, where you will need to type in the following command:
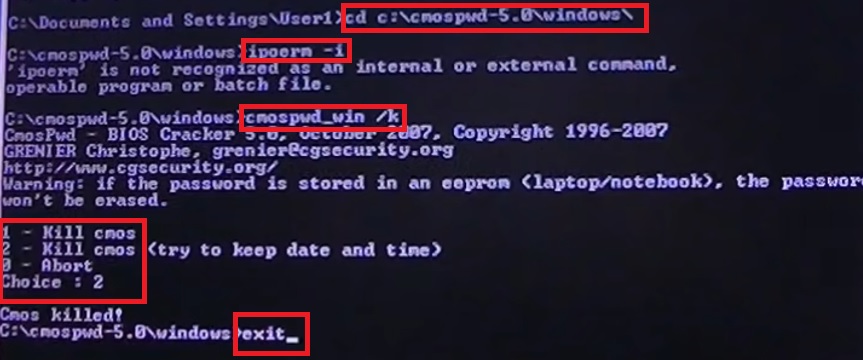
- cd c:\cmospwd-5.0\windows\
Here, ‘c’ signifies the drive letter, 5.0 denotes the version, and ‘windows’ refers to the operating system that you are using. So, replace them accordingly, if needed.
- Hit the Enter button once you are done so that the command is executed.
Next up, you will need to type some other commands, pressing the Enter key every time. These are:
- ioperm -i
- cmospwd_win /k
Here you will get a few options to choose from. Choose and type in the option number you want, and the CMOS password will be removed.
Finally, type exit to close the Command Prompt.
Now, shutdown your computer and restart it while pressing the specific hotkey repeatedly to get into the BIOS setup. You will see that you can now get into the BIOS as easily as you desire.
Step 4: Using Debug.exe and FreeDOS
If you have a bootable USB with the debug.exe file, it will also help you to unlock the locked BIOS by following these steps:
- Insert the USB.
- Go to the boot menu.
- Find the Debug file.
- Use the command DEBUG.EXE to run the program.
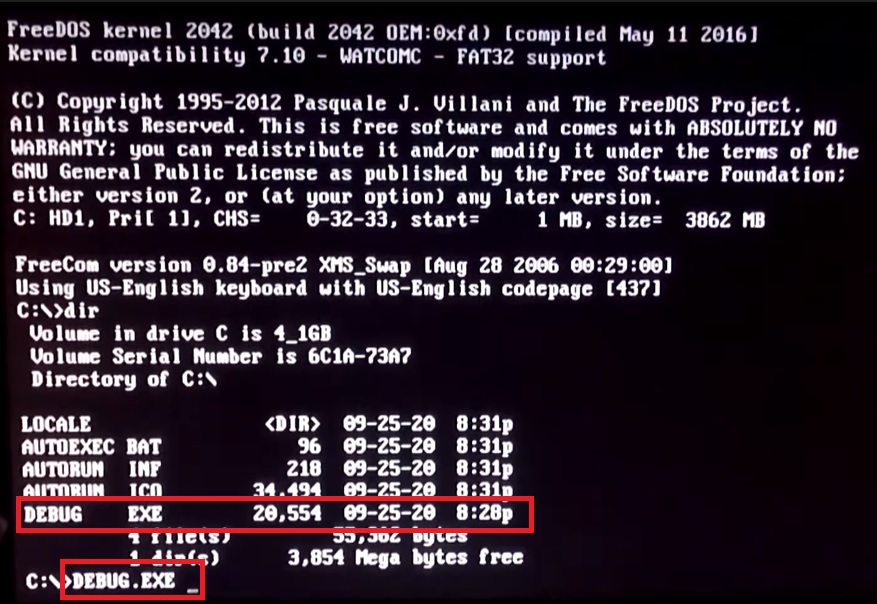
Now, type in the following commands and press the Enter key after each entry:
- o 70 2E
- o 71 FF
Finally, type quit and exit.
Here, the ‘o’ character in the commands will yield the values to IO ports.
The numbers 70 and 71 indicate the port numbers that are used to access the CMOS memory.
And the FF value will tell the CMOS to reset the settings because the checksum is invalid. However, along with that, it will also reset the BIOS password.
Now, press the CTRL, ALT, and DEL keys on your motherboard together to reboot your PC and see whether or not the method was successful in unlocking the BIOS lock. Ideally, it should be.
Step 5: Use the Backdoor BIOS Password
Finally, you can also visit the websites of some of the BIOS manufacturers to use one of the backdoor passwords that most of them typically maintain.
These passwords are actually the master passwords and are normally used while troubleshooting or testing something.
More often than not, one of these passwords will be able to unlock the BIOS, irrespective of the password already set for it. However, this is a time-consuming process.
Conclusion
A password set to the BIOS is quite common. The users put it to add another layer of protection to their PCs.
If you do not know the password or have forgotten it, the BIOS will be locked and disallow more than three attempts to unlock it.
However, with the above methods, you can put things back to normal.