
The disk management feature will allow you to partition your hard drive, delete any partition and do a lot of other things with relation to disk management.
This article deals with creating a new partition in the existing hard drive in the computer.
The method is pretty simple, albeit a bit long, but can be accomplished by anyone without any technical knowledge.
In This Article
KEY TAKEAWAYS
- When a hard drive in the computer is partitioned properly and adequately, it helps in better management of data and also offers better data protection.
- Partitioning of the hard drive in a computer is quite easy with the disk management feature.
- There are also a lot of different third-party software programs that allow safe and quick partitioning of a hard drive in a computer system.
Ways to Partition a Hard Drive
The most important reason behind partitioning a hard drive in a computer system is to allow managing data in a much cleaner and more logical manner.
It allows isolating system files from personal data to allow better, easier, and faster access.
In addition to that, partitioning the hard drive guarantees safety of data stored in it by protecting them from chances of loss due to errors that may cause a system failure or due to crashing of the operating system.
Creating partitions on a hard drive also allows the following:
- Installing different operating systems and storing them safely on the computer
- Create more virtual space by using a virtual machine
Apart from the above partitioning your hard drive will improve system performance by storing frequently accessed data and used programs nearby.
How to Partition a Hard Drive?
A hard drive in a computer can be partitioned from Disk Management, which is a section found under Computer Management in This PC.
You can also partition the space on the hard drive of your computer by using a reliable third-party software program.
In this article we focus on using the built-in feature, which is explained clearly below.
Method: Using Disk Management
It is easy to partition a hard drive from the Disk Management. It is also one of the most common processes followed by users which involves making all sorts of changes in the hard drive installed in a computer.
STEPS TO FOLLOW:
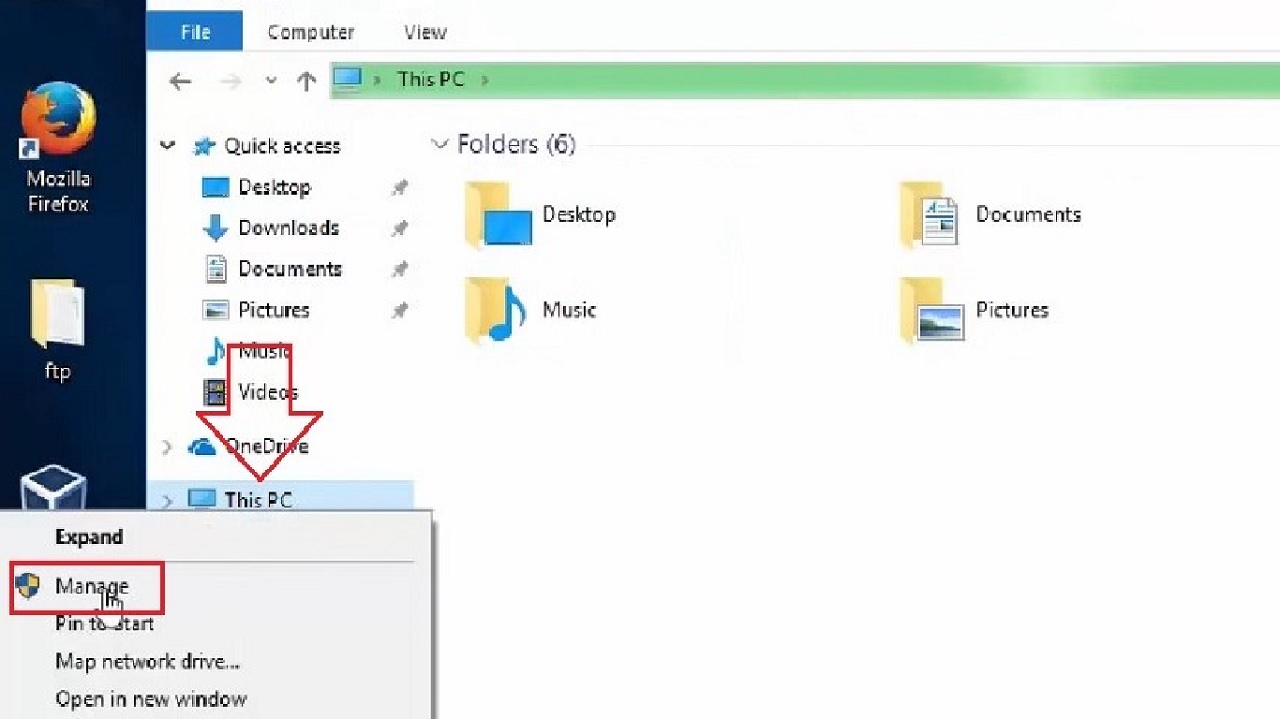
- Go to the Start menu and open the File Explorer.
- Right-click on the This PC icon on the left panel of the window.
- Select Manage from the drop-down options.
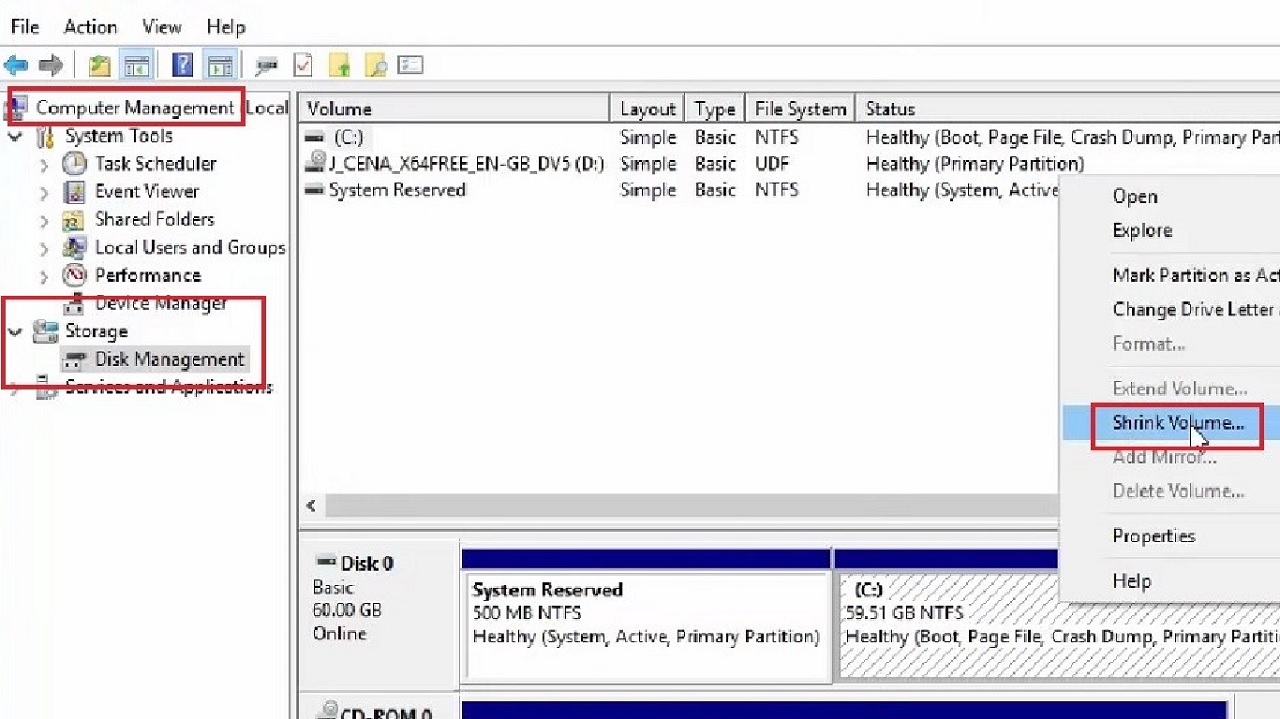
- Under Computer Management, expand Storage on the left side of the window.
- Select and click on Disk Management.
- Choose the particular drive you want to partition, Drive: C in this case.
- Right-click on it.
- Click on Shrink Volume from the available options.
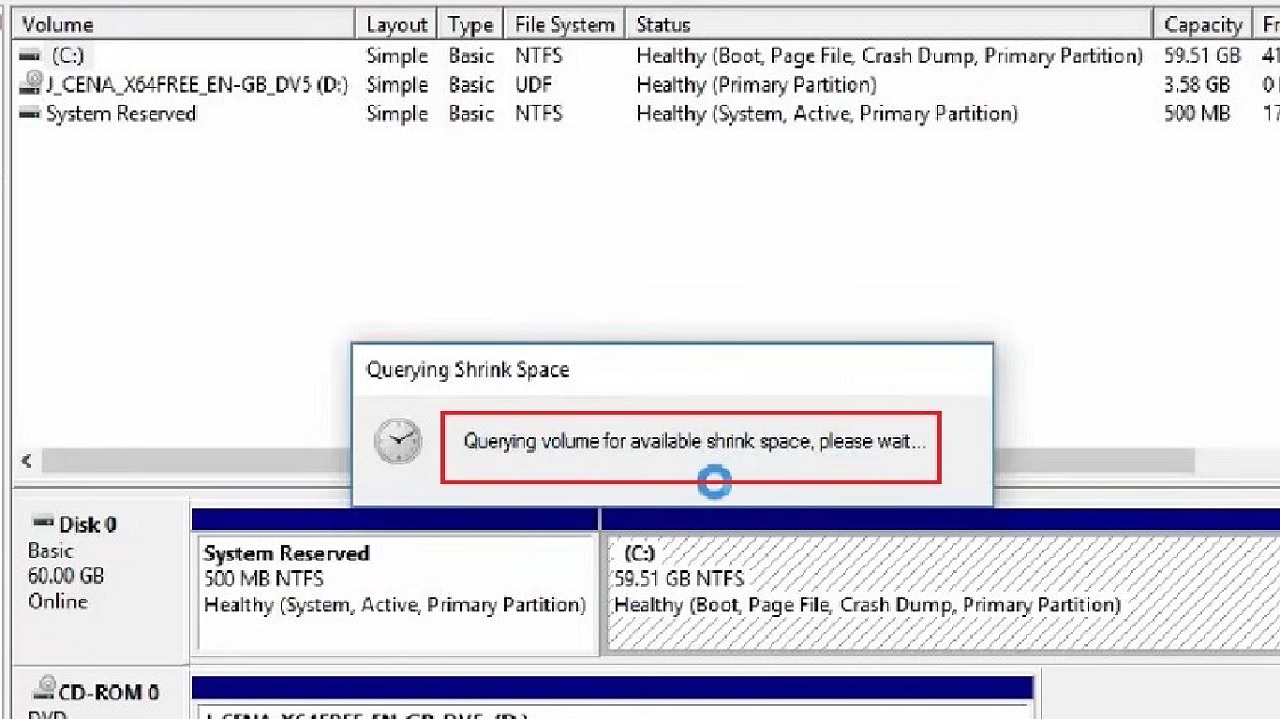
This will take some time and you will see a window pop up asking to wait until the Querying Shrink Space process is complete.
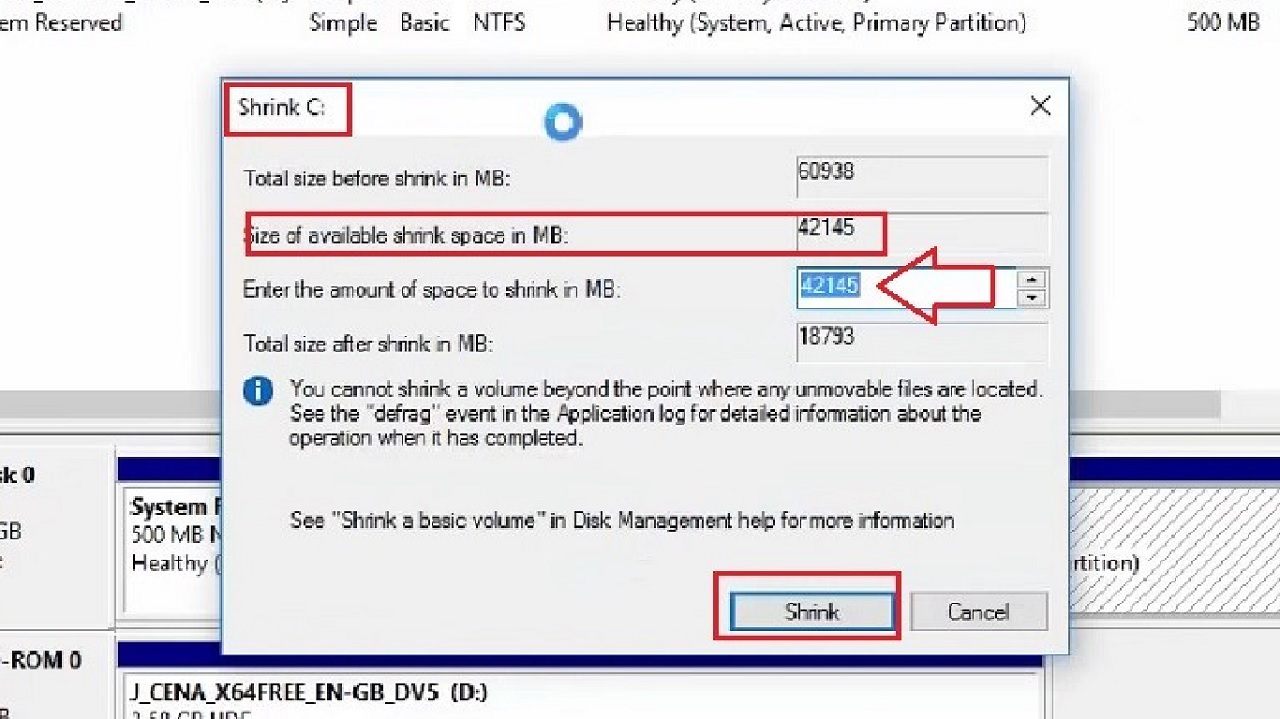
- When the process is complete, it will open the Shrink C: window.
- You will see the Size of the available shrink space in MB.
- Enter the amount of space in your hard drive that you want to shrink in the relevant box, marked with a red arrow in the image below.
- Finally, click on the Shrink button.
This will create and show the amount of space you shrunk for partition as Unallocated in the Computer management window.
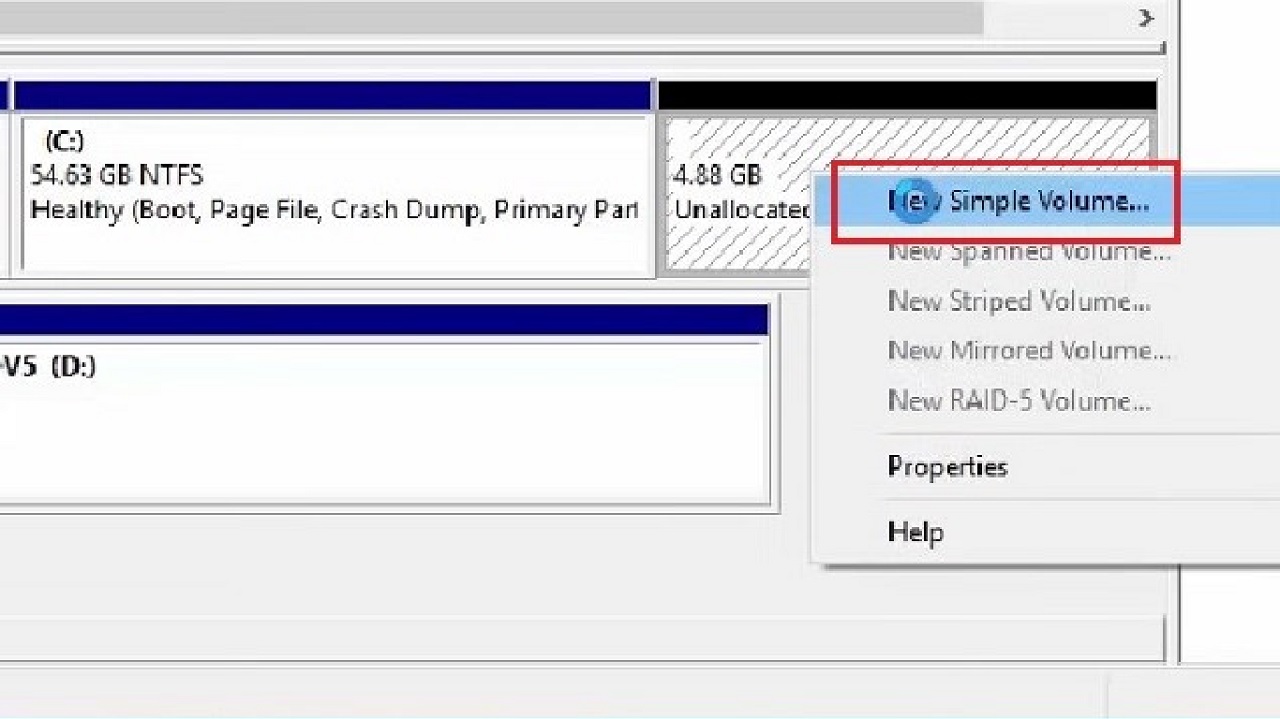
- Right-click on this partition.
- Select New Simple Volume from the options.
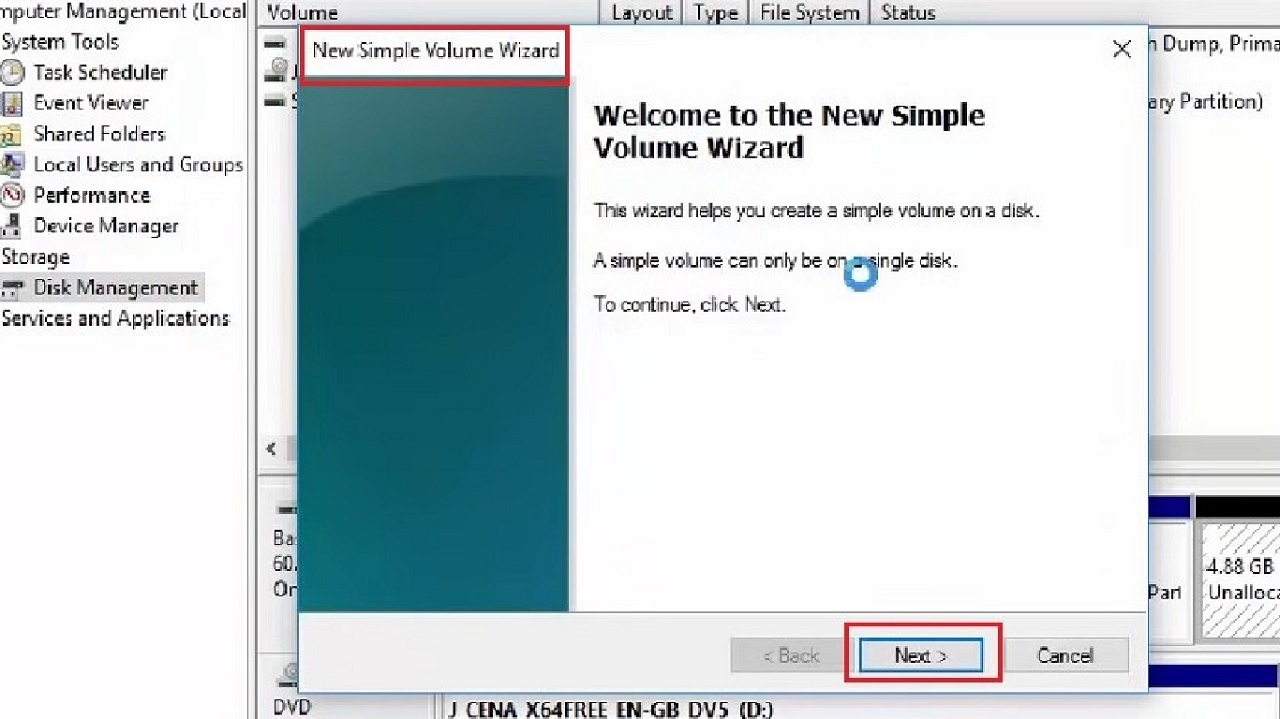
- This will open the New Simple Volume Wizard window.
- Click on the Next button.
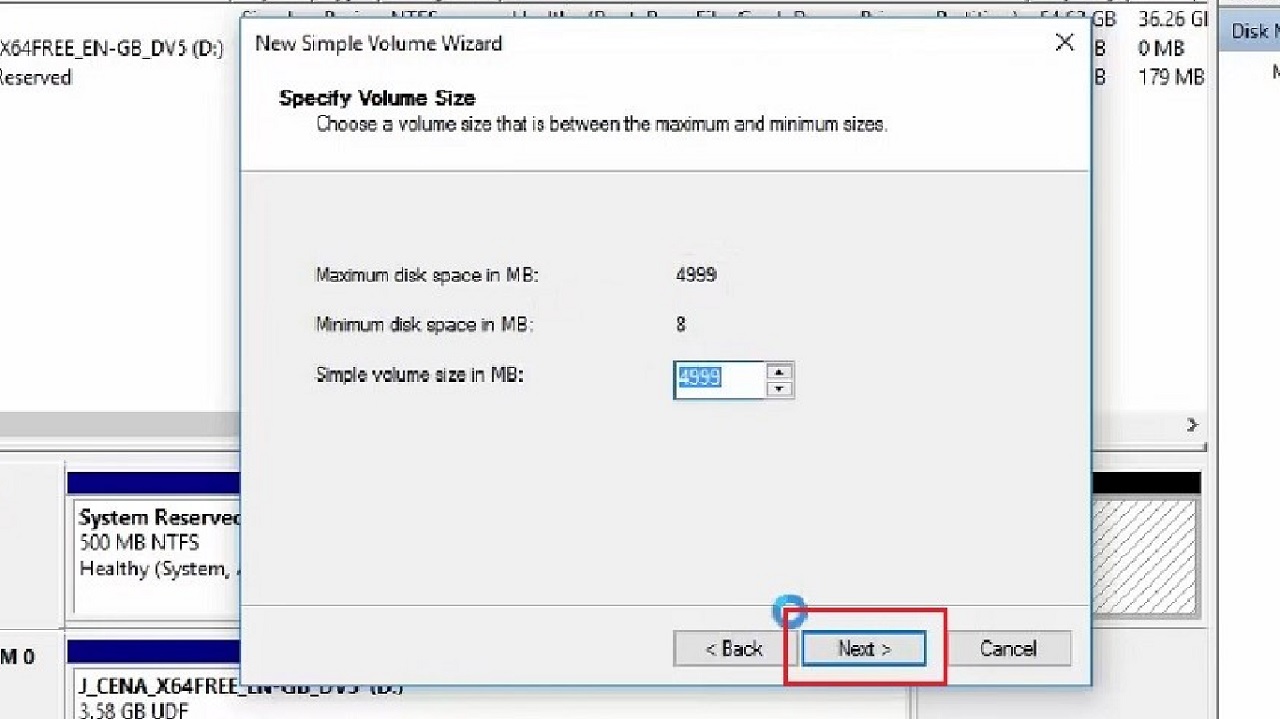
- Leave everything as it is in the following window and click on the Next button here as well.
- In the new window, you will need to Assign Drive Letter or Path to the drive you want to partition.
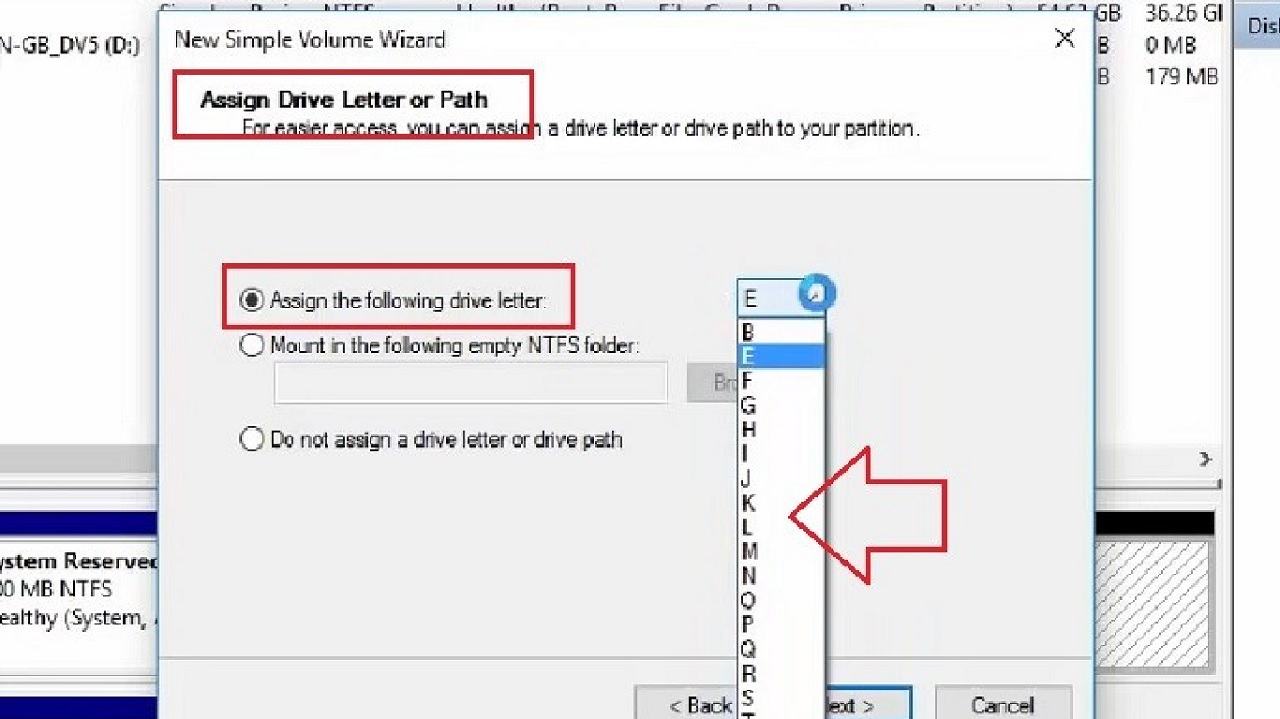
You can leave the default letter or choose anyone you like from the drop-down options you get after clicking on the small downward arrow key at the right side of the box.
- Click on the Next button at the bottom. (Covered partially by the list of options of drive letters in the picture.)
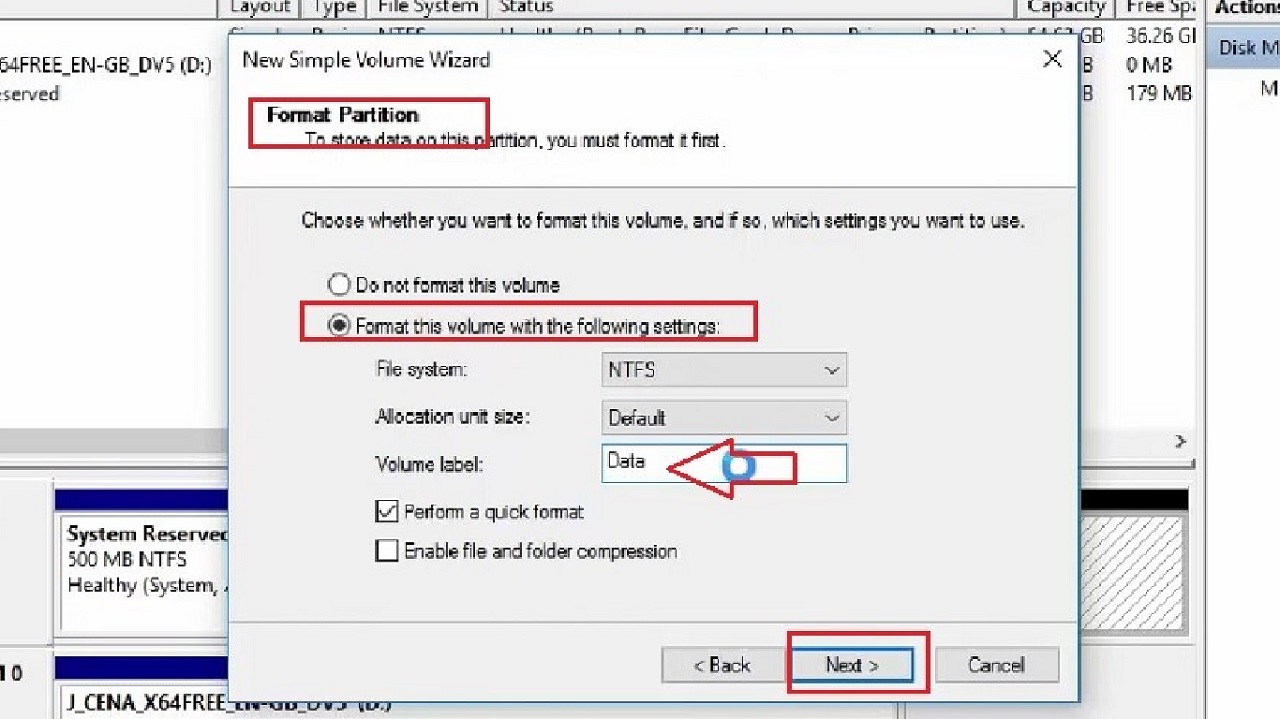
- This will take you to the new window where you will have to Format Partition.
- Simply click on the radio button next to Format this volume with the following settings:
- Give a label to your partition (Data in this example) in the relevant window as shown by the red arrow in the image below.
- Click on the Next button below.
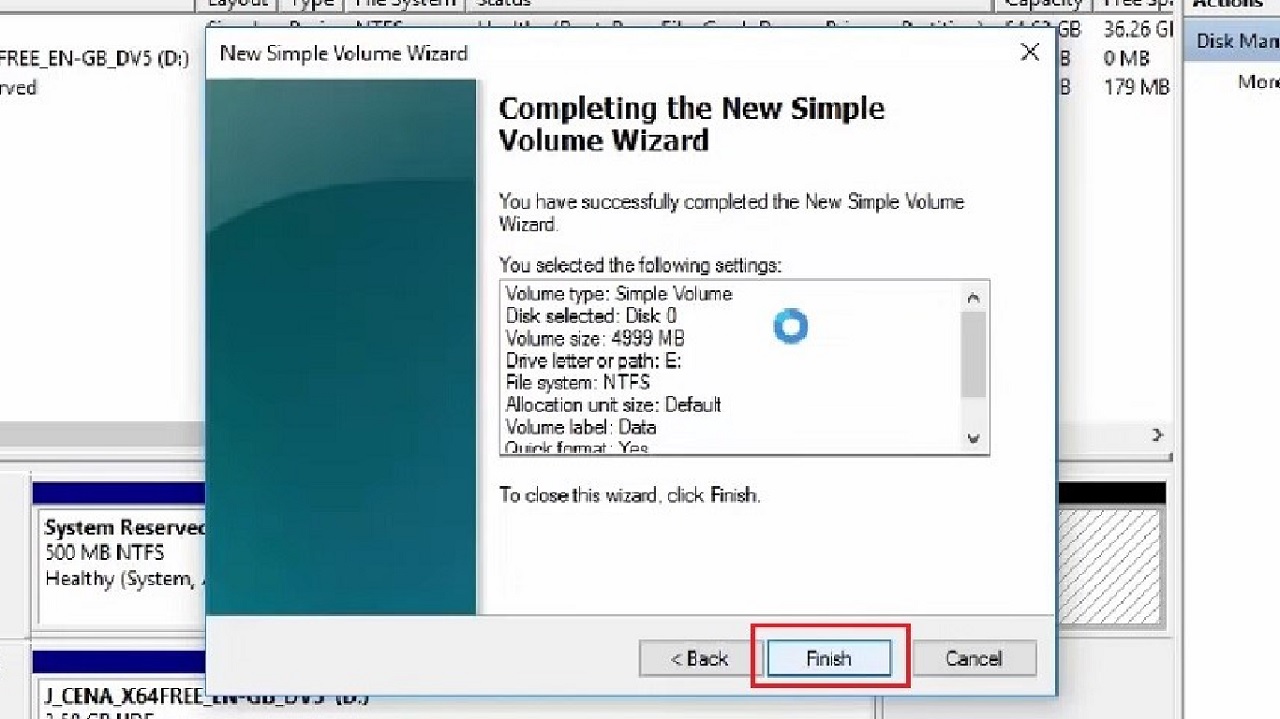
This will once again take you to the New Simple Volume Wizard window.
- Click on the Finish button.
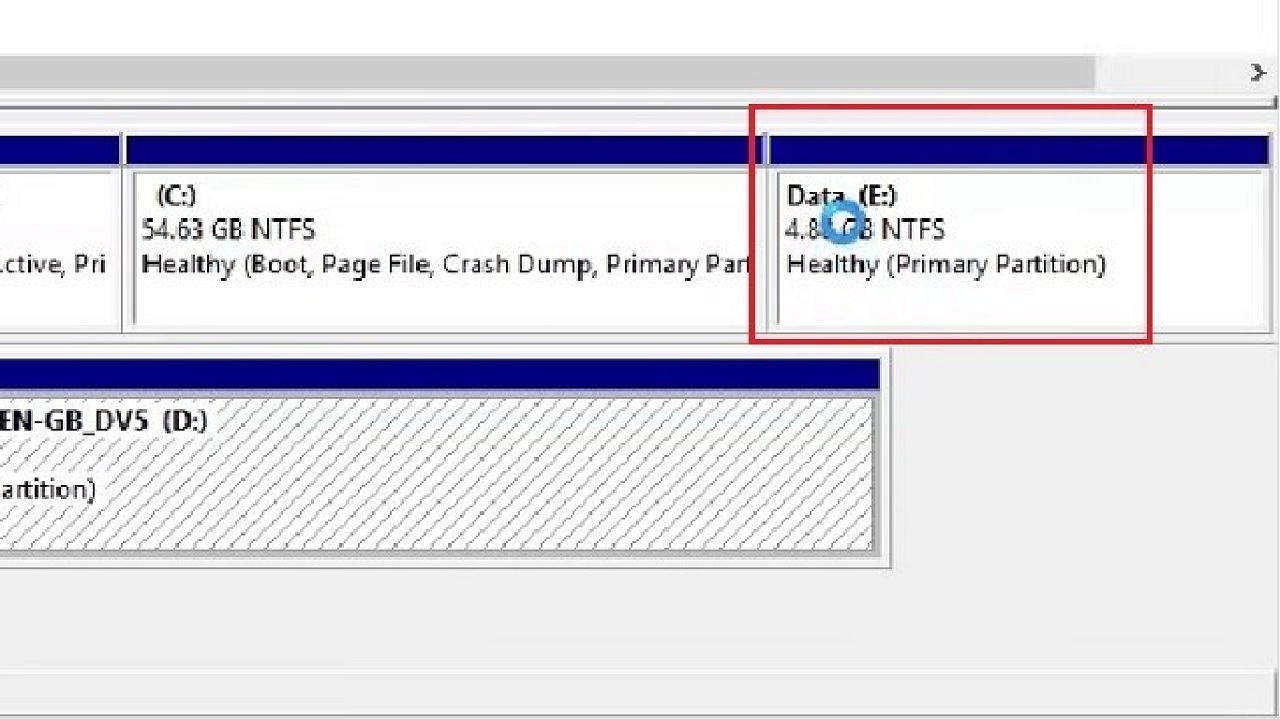
The process will once again take some time to complete before you can see the new partition is given the name you choose as its label before, as shown in the image below:
You will also be able to see this new partition of your hard drive in the File Explorer as shown in the picture below:
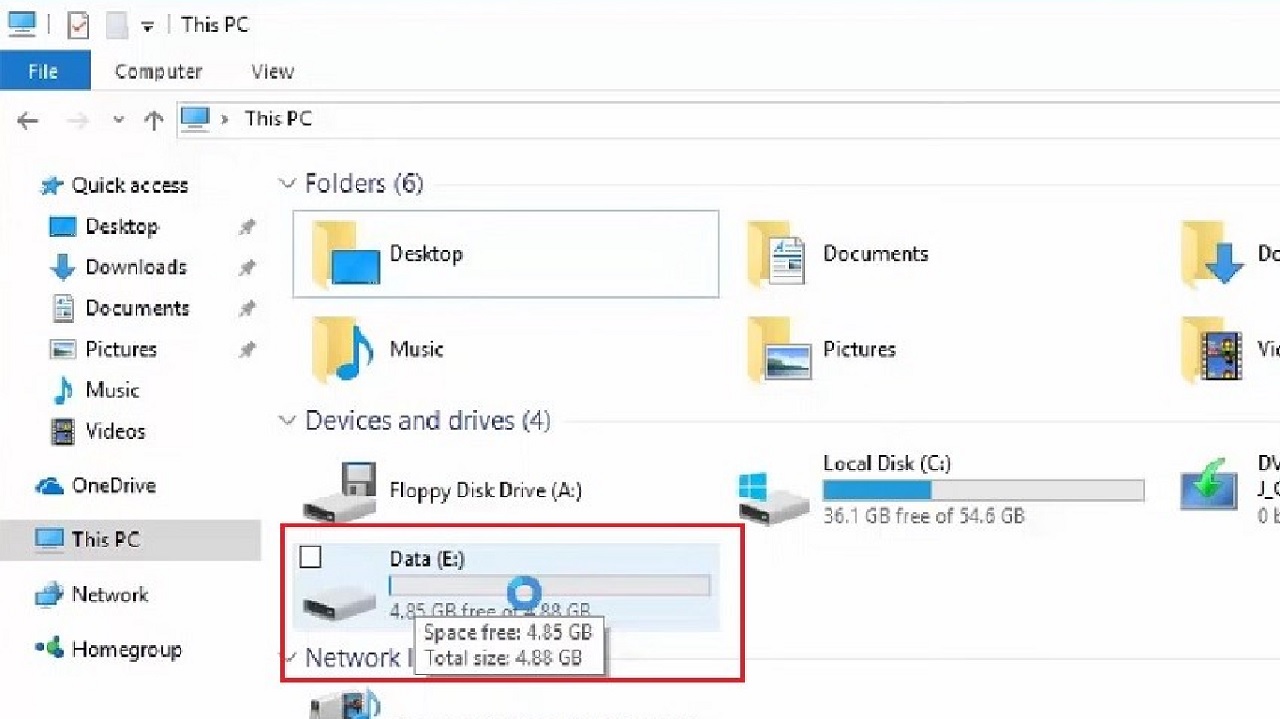
This shows that you have successfully created a new partition in your hard drive.
Conclusion
That is all you have to do in order to create a new partition on the hard drive installed on your computer.
If you do not have enough partitions, you are missing on system performance and compromising data safety. Go ahead and create one now.