
Like most users, you may also face the inconvenience of a mapped network drive not showing on your PC. You will not be able to share data, which is quite annoying and frustrating.
However, there is nothing to worry because there are a couple of easy fixes to this issue. If you do not know them, this article will have everything covered. Continue reading.
In This Article
KEY TAKEAWAYS
- Like most of the issues related to the network, updating all the drivers and Windows itself may resolve the issue of mapped network drive not showing in Windows.
- The value data of the System key in the Registry Editor may be changed to 1 instead of 0, which is usually set by default, to make the mapped drive visible on Windows again.
- Installing and enabling the Server Message Block 2 protocol may also fix the issue and make the mapped network drive show up in Windows. Along with it enabling all other SMB protocols is also necessary.
Why Are Network Drives Not Showing in Windows?
More often than not, a mapped network drive may not be visible on Windows PC due to some faulty settings in the System key in the Registry Editor.
Also, the SMB or Server Message Block, especially SMB2 protocol may not be installed or may be disabled to cause this issue.
In addition, there are some other reasons for a mapped network drive to be invisible in a Windows computer system. These are:
- Using UAC or User Account Control incorrectly while mapping the drive
- Mapping the drive without admin rights
- Using File Explorer to map the drive with or without admin rights
The reasons may be many but the fixes are a few, as you will see when you continue reading.
Ways to Fix Mapped Network Drive Not Showing in Windows
The easiest and most common way to fix the issue of a mapped network drive not showing in Windows is by updating Windows and all drivers.
And, just like all other issues with network, troubleshooting networks may also help in such specific situations.
There are also a few other easy and not-so-easy fixes to this solution. These are:
- Reconfiguring the proxy settings of the network
- Changing the adapter options
- Setting the Internet Protocol Version 4 (TCP/IPv4) correctly so that both IP address and DNS server address are obtained automatically
If these solutions do not work, here are some more effective fixes that will make the mapped network drive visible on your computer again.
Method 1: Make Changes in the Registry Editor
The value of the System key in the Registry Editor may not be set properly. You will need to change it to resolve the issue.
STEPS TO FOLLOW:
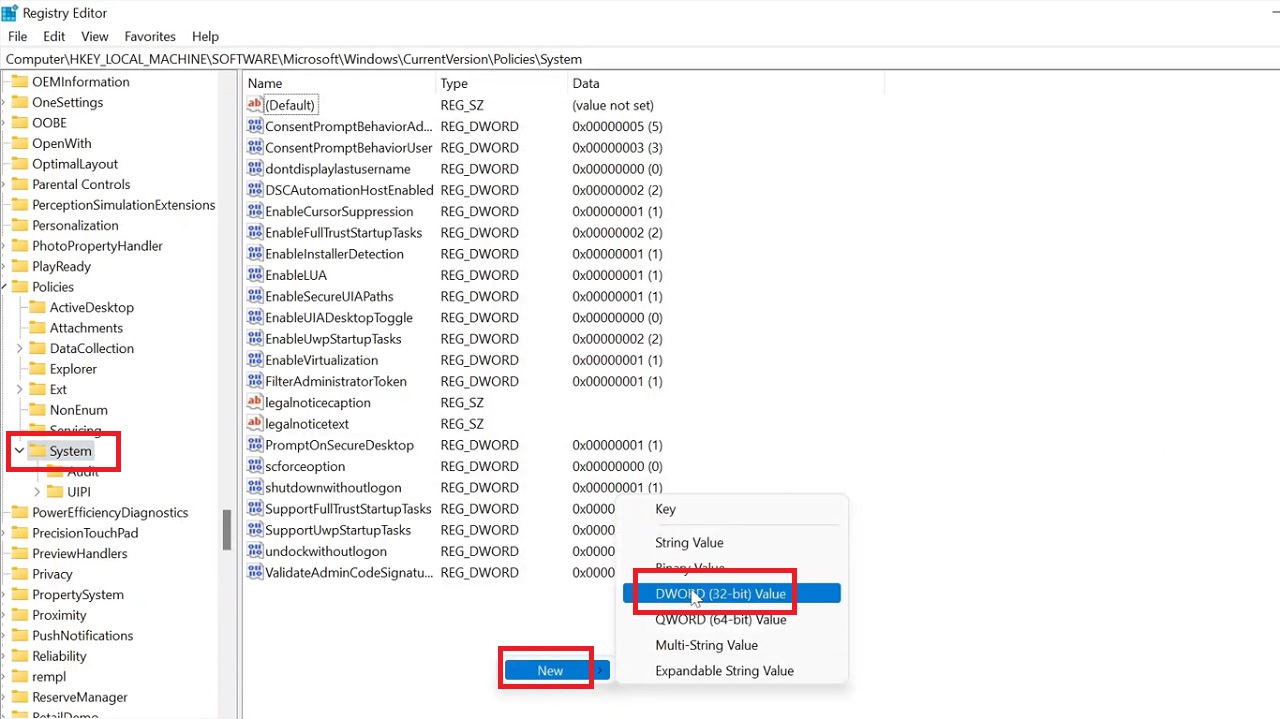
- Press Windows and R keys together to open Run, type regedit in the box, and hit Enter.
In the registry Editor window, click on the small arrow beside each of these following folders in the exact order to expand:
- HKEY_LOCAL_MACHINE
- SOFTWARE
- Microsoft
- Windows
- CurrentVersion
- Policies
- System
- In the System window, right-click on a blank space on the right side of the window.
- Click on New.
- Select DWORD (32-bit) Value from the drop-down options.
- Double-click on it.
- Rename the key exactly as EnableLinkedConnection, without any space in between the words.
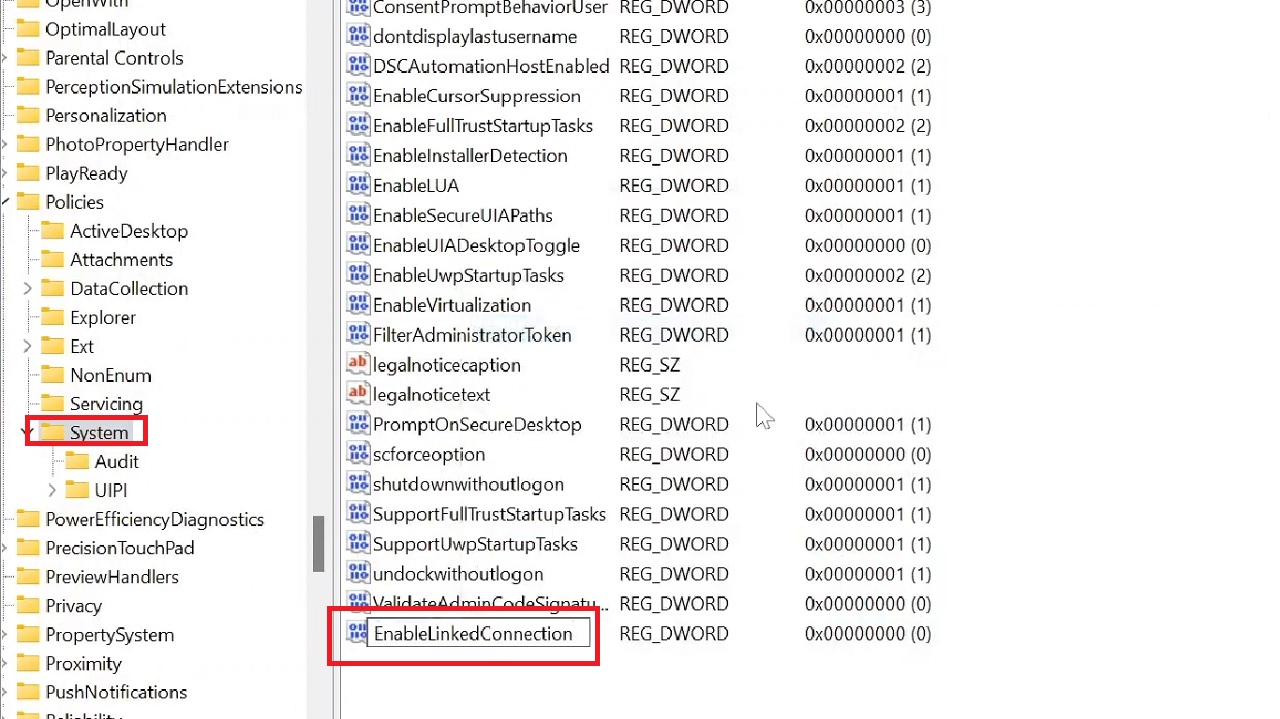
(Alternatively, you can right-click on the New Value # 1, select Rename and then do the same.)
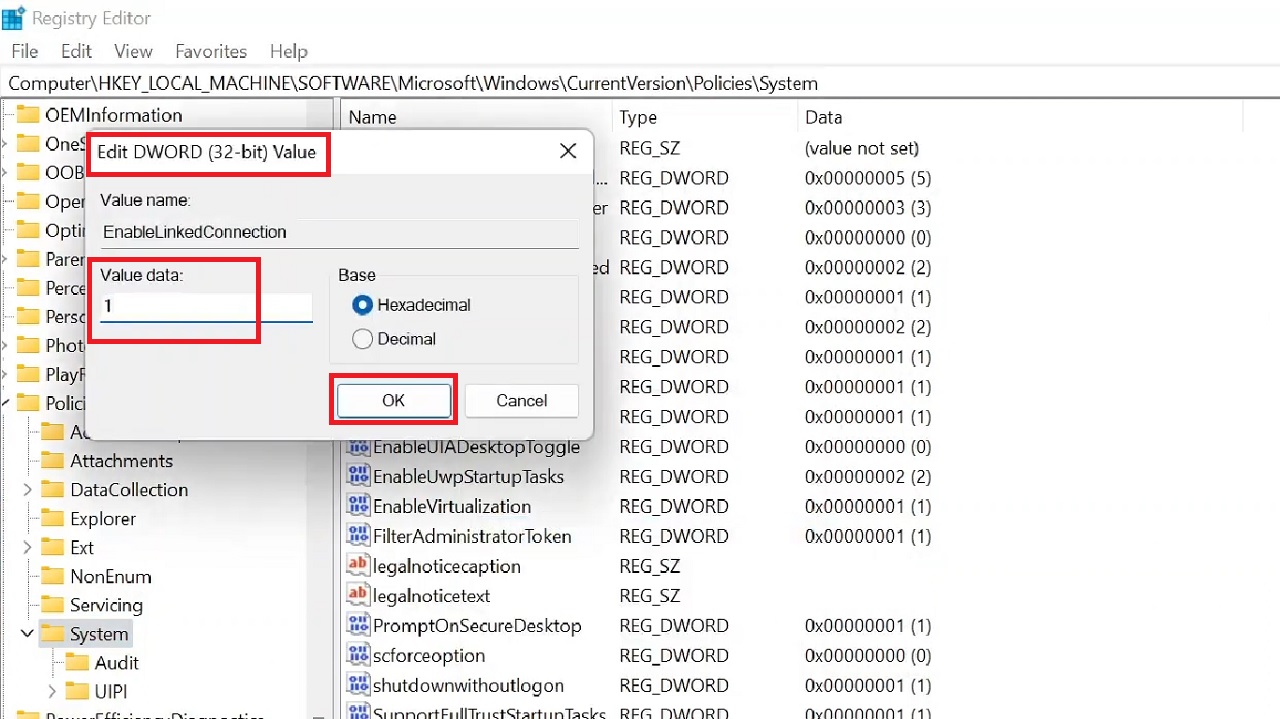
- Now double-click on this newly created key.
- Change the Value data to 1 in the Edit DWORD (32-bit) Value window.
- Click on the OK button.
Restart your computer and check whether the mapped network drive is showing on your PC now. If it is not, follow the next solution.
Method 2: Enable the SMB Protocol
The Server Message Block or SMB protocol must be enabled to show the mapped network drive in Windows.
STEPS TO FOLLOW:
To enable the SMB2 protocol, open Windows PowerShell (Admin) from the options you get after right-clicking on the Start menu.
When the window opens, you will need to run two specific commands one after the other.
First, run the command Get-SmbServerConfiguration | Select EnableSMB2Protocol and hit Enter.
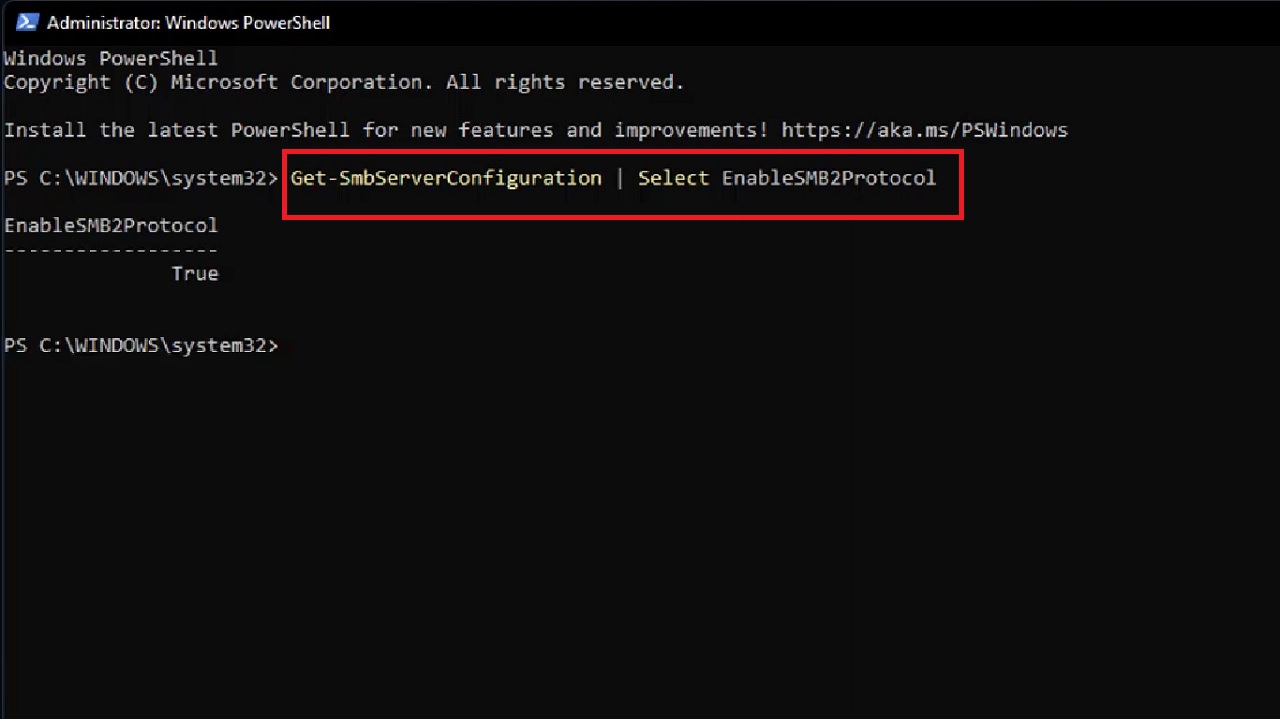
This will check whether or not the SMB2 protocol can be installed on your PC.
If it can be installed, you will need to run the second command Set-SmbServerConfiguration -EnableSMB2Protocol $true and Type Y for confirming that you want to perform this action and then hit Enter.
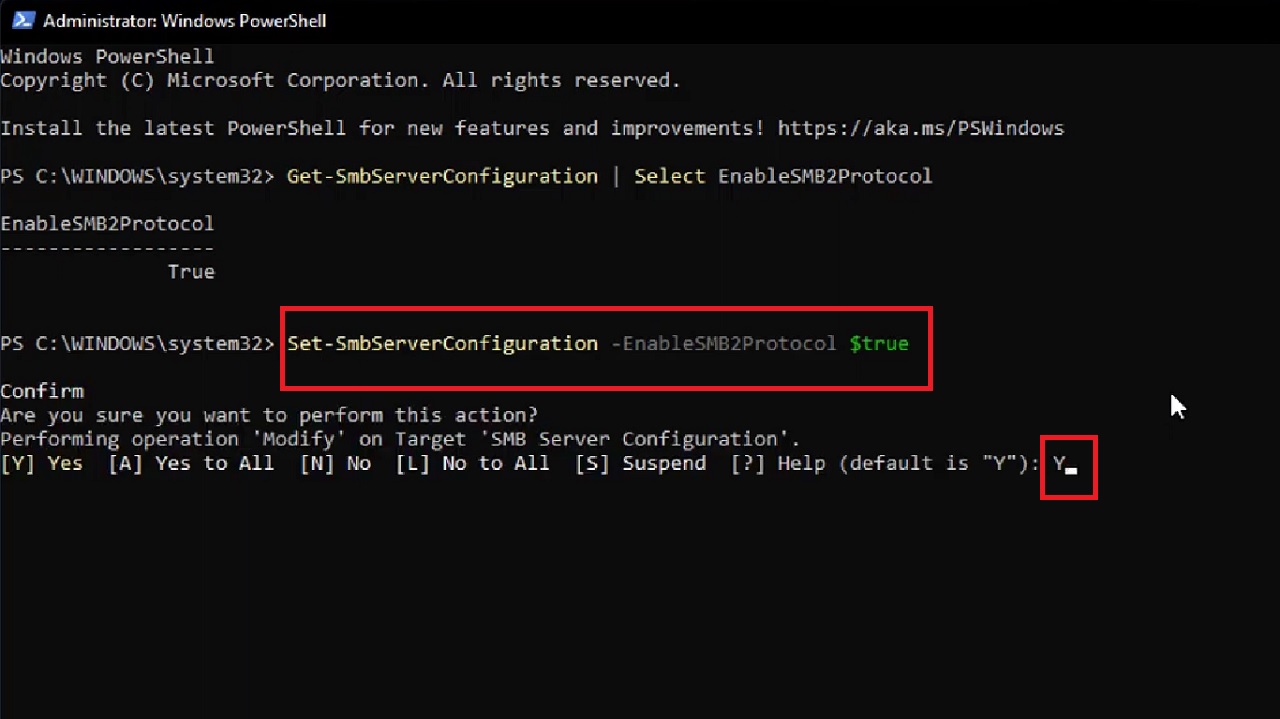
This will install and enable the SMB2 protocol on your PC.
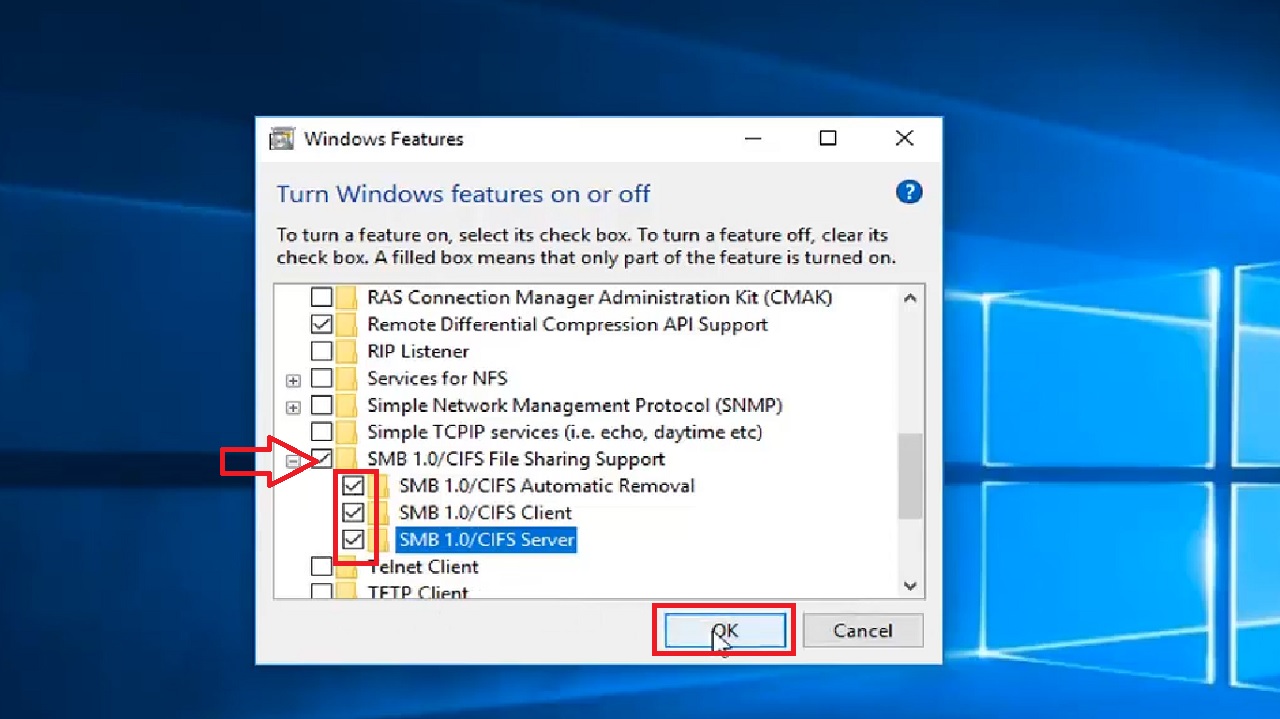
As for the other SMB protocol, go to the search box next to the Start menu and type in programs and features.
- Left-click on the option Turn Windows features on or off.

- Scroll down the following window.
- Click on the small square next to SMB 1.0/CIFS File Sharing Support to expand the feature.
- Make sure that all the boxes are checked.
- Click on the OK button to apply the changes.
When the process is complete, restart your computer and check whether or not the issue has been resolved.
Now, restart your system and check whether the issue still persists.
Method 3: Change Proxy Settings
Changes in the proxy settings in Network and Internet will also resolve the issue.
STEPS TO FOLLOW:
- Go to Settings > Network & Internet > Status > Change adapter options > Ethernet > Properties.
- Select Internet Protocol Version 4 (TCP/Pv4).
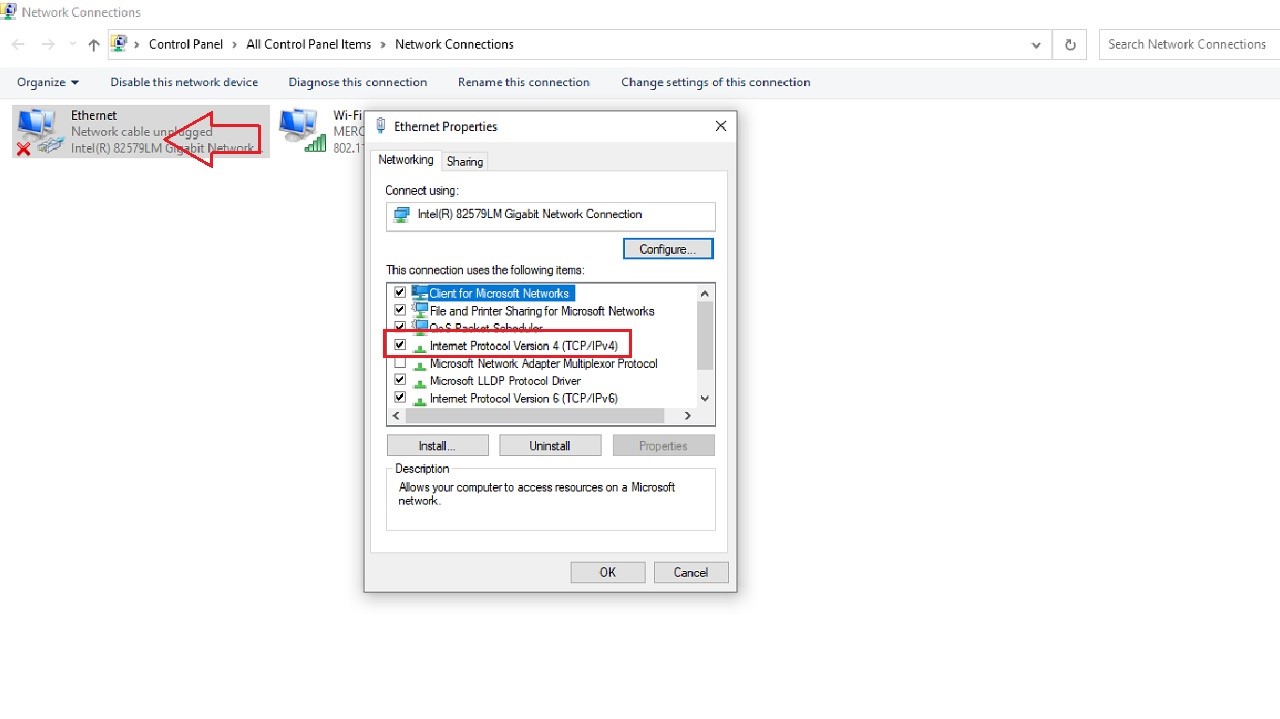
- Select Properties.
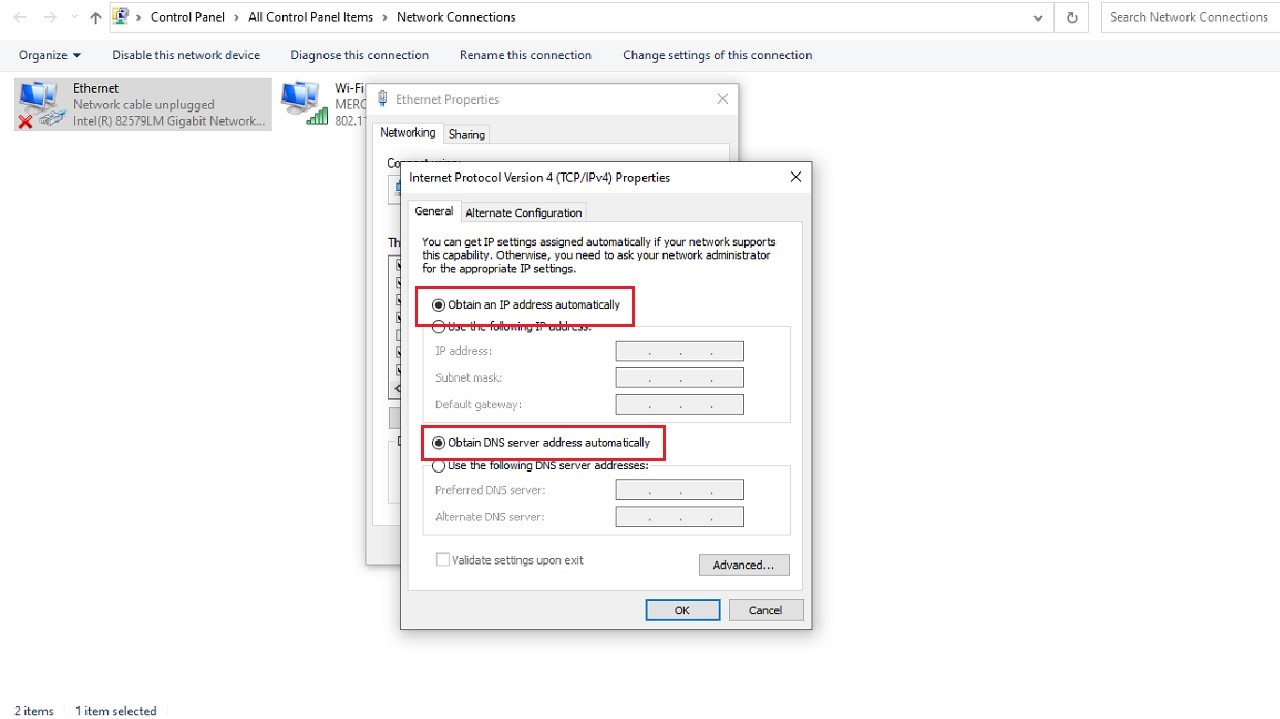
- Click on ‘Obtain an IP address automatically’ and ‘Obtain DNS server address automatically.’
Restart your PC and find your issue resolved.
Conclusion
So, with these easy steps you can resolve the issue of a mapped network drive not showing in your PC successfully.