
Discover the solutions to the core isolation issue on your Windows system by going through this simple guide.
Whether you are familiar with PowerShell, navigating Autoruns, or exploring Group Policy, these step-by-step directions offer a straightforward process to restore security and stability, ensuring your PC performs at its best.
In This Article
KEY TAKEAWAYS
- Core isolation may turn off due to incompatible drivers, system updates, driver signature issues, security software interference, or hardware limitations.
- Updating drivers is a common and effective solution, ensuring modified security settings and system compatibility.
- Alternative methods include removing faulty drivers using specific commands and making changes in the Windows Group Policy Editor.
- Using PowerShell commands helps identify and uninstall problematic drivers, while Autoruns can update drivers causing core isolation issues.
- Exercise caution when disabling drivers with Autoruns, confirming the driver’s identity before making changes.
Why is Core Isolation Turned Off?
An incompatible driver in a system is the most common cause for the core isolation to be turned off. It is mainly the effect of the conflicts caused.
However, there are also other significant reasons, such as:
System Updates: Windows updates or changes made to the system configurations can often impact core isolation settings and cause this issue.
Driver Signature Issues: Drivers without proper signatures may also cause this issue.
Security Software Interference: There may be a few third-party security software or antivirus programs that may inhibit core isolation, instigating its deactivation.
Hardware Limitations: If your computer system has older hardware or components, it may lack the required virtualization support. This may affect the functioning of core isolation.
However, the good news is that this issue can be resolved easily by careful troubleshooting.
Ways to Fix Core Isolation Turned Off Issue
Updating the drivers is one common and most effective way to resolve the issue of the core isolation being turned off in a computer system. This will not only modify the security settings but will also ensure system compatibility.
A few other ways to resolve this issue are:
- Removing the faulty driver using specific commands
- Making changes in the Windows Group Policy Editor
Here are the specific steps for each that you should follow.
Method 1: Using Specific Commands in Windows PowerShell
You can fix the issue of core isolation turned off in your computer by running a few specific pnputil commands in Windows PowerShell as the administrator to delete the drivers causing the issue, if you know that in the first place.
STEPS TO FOLLOW:
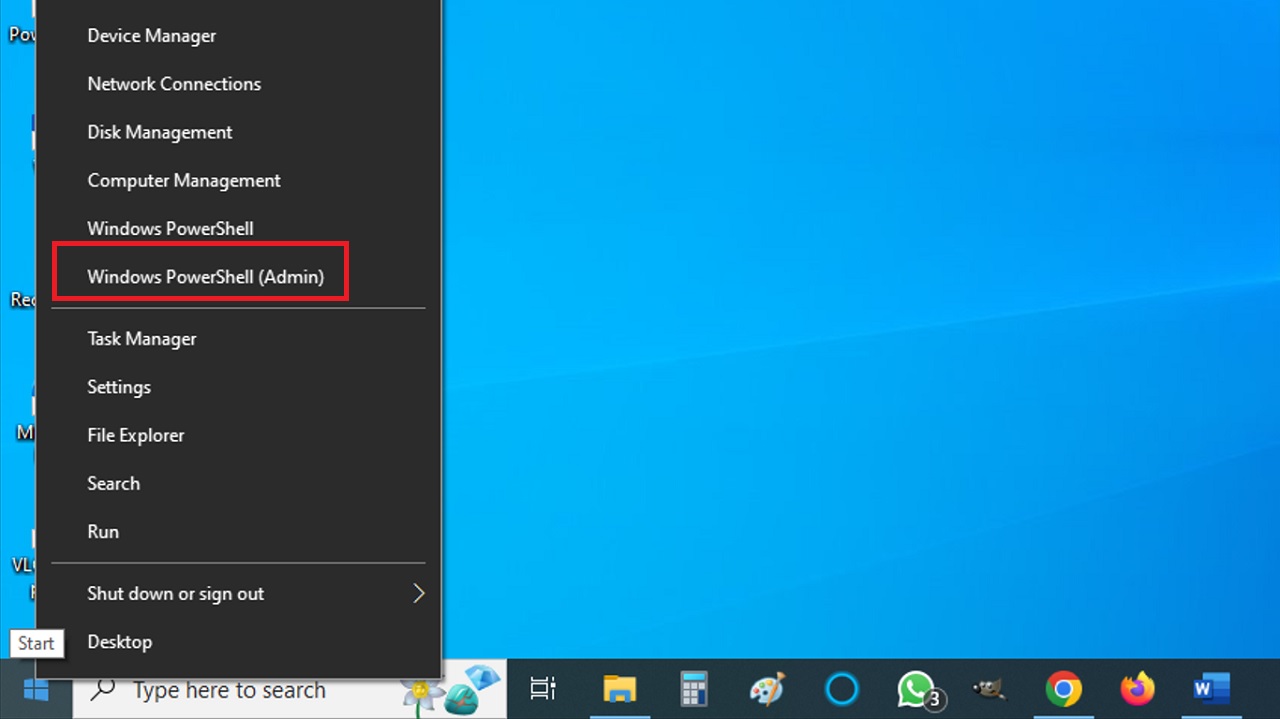
- Right-click on the Start button.
- Select “Windows PowerShell (Admin)” from the options that pop up.
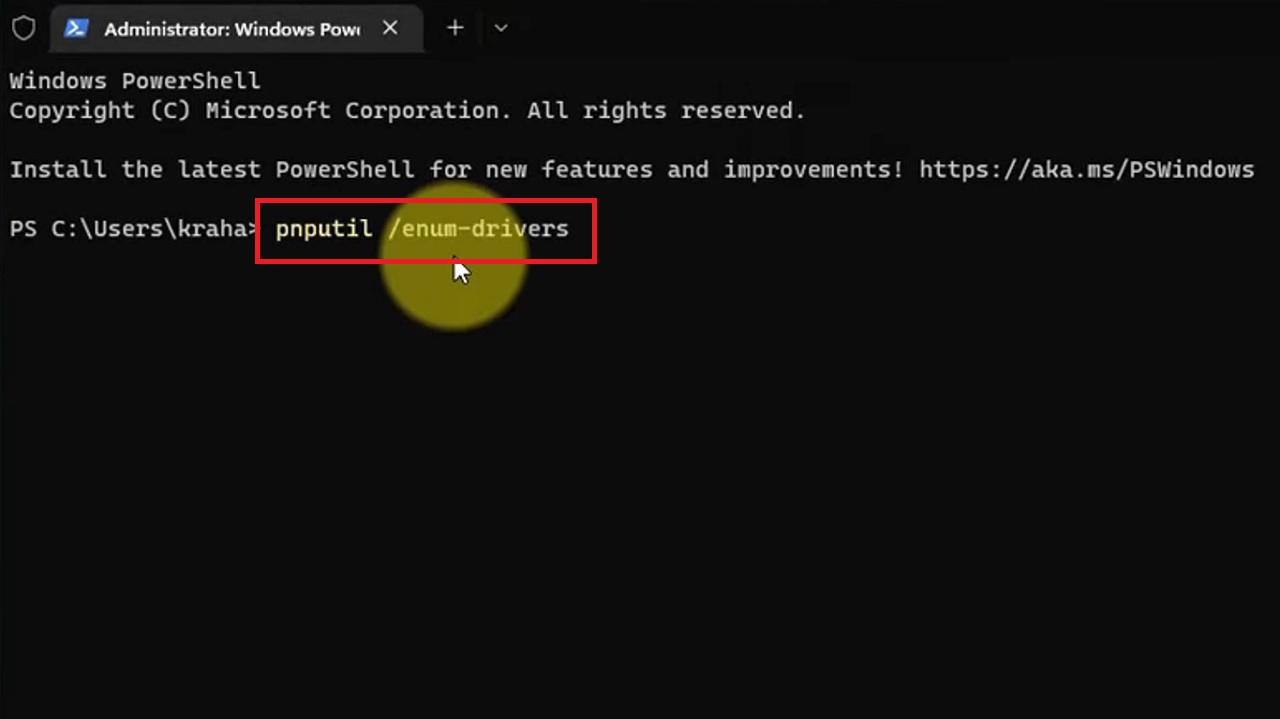
- Run the command: pnputil /enum-drivers to list all drivers on your computer.
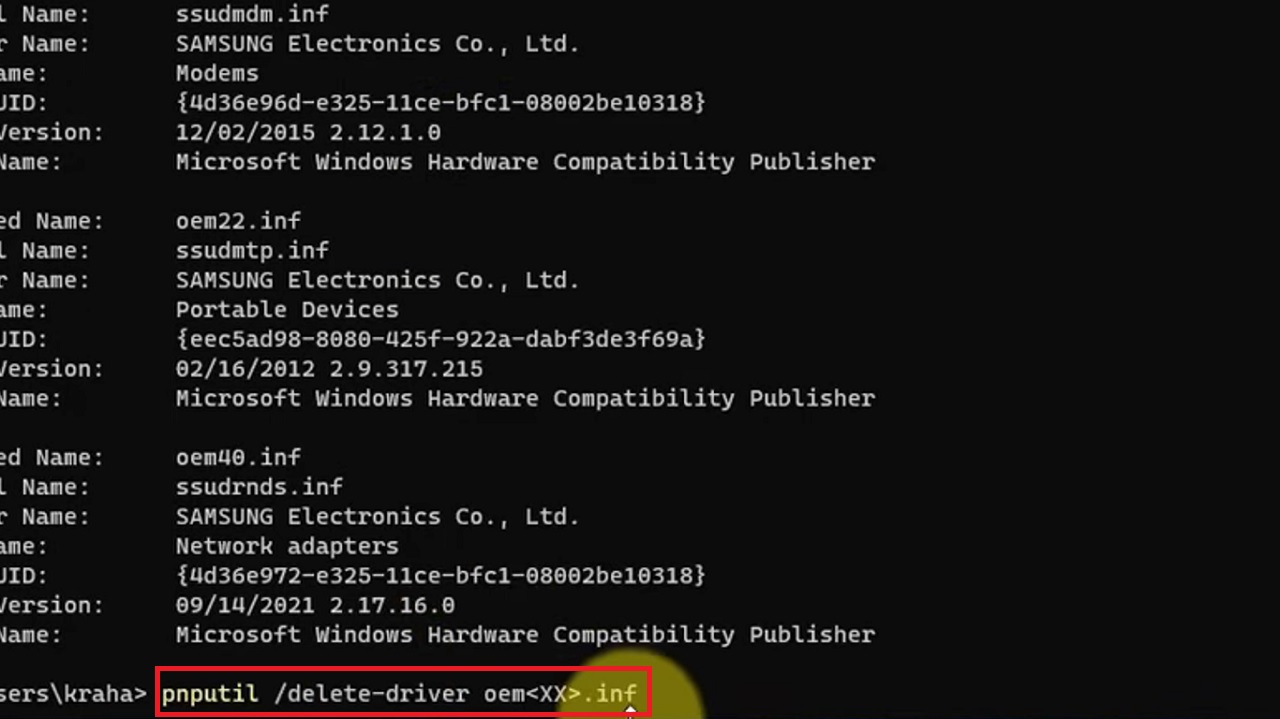
- Identify the driver associated with the error message.
- Uninstall the problematic driver using the command: pnputil /delete-driver oem<XX>.inf (Replace XXX with the specific driver’s name causing the issue).
You do not have to reboot your system. Therefore, you can immediately retry to enable core isolation of your computer. It is now when you will see a prompt to reboot once core isolation or memory integrity is turned ON.
Expert tip: It is good to reboot your system for a clean state. Also, consider creating a system restore point or backup before proceeding.
Method 2: Update the Driver
If you are not sure about the driver causing the core isolation issue, you can try updating the driver using Autoruns and enabling core isolation through Windows Security.
STEPS TO FOLLOW:
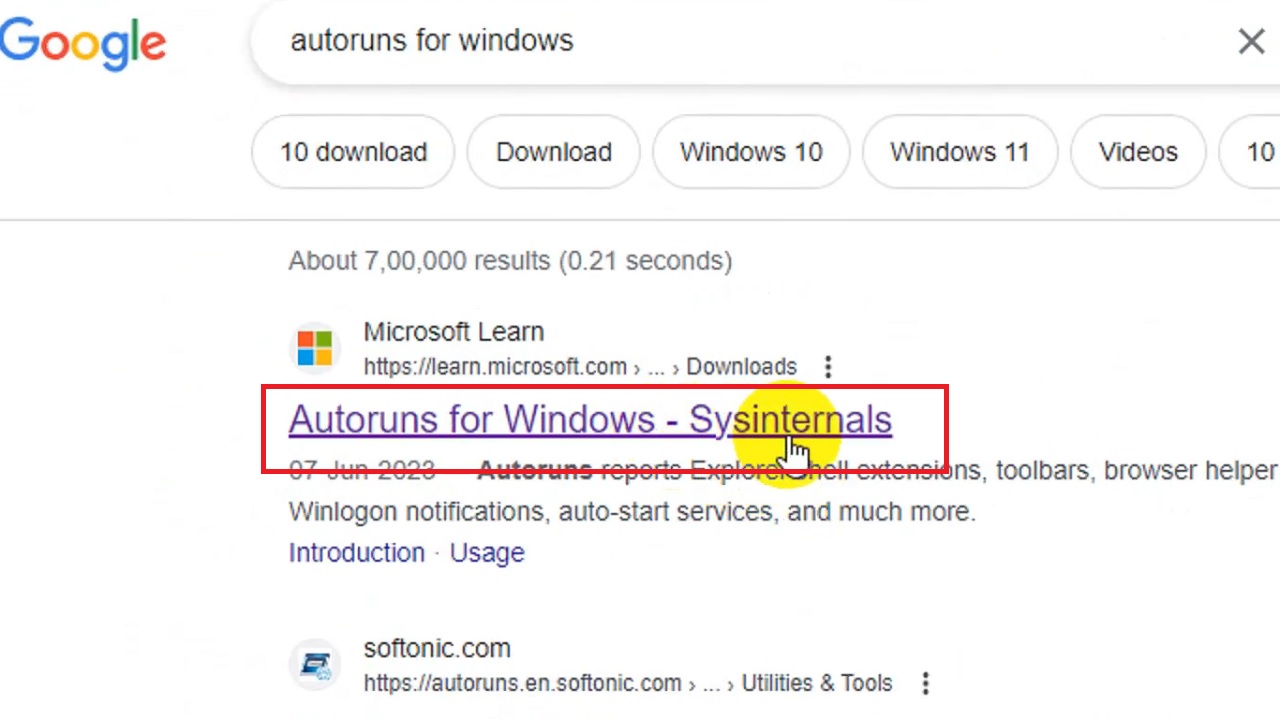
- Go to your Browser. Google in this case.
- Type autoruns in the address bar.
- Select autoruns for windows from the dropdown options and hit the Enter button on your keyboard.

- Open Autoruns for Windows – Sysinternals.
- Click on Download Autoruns and Autorunsc.
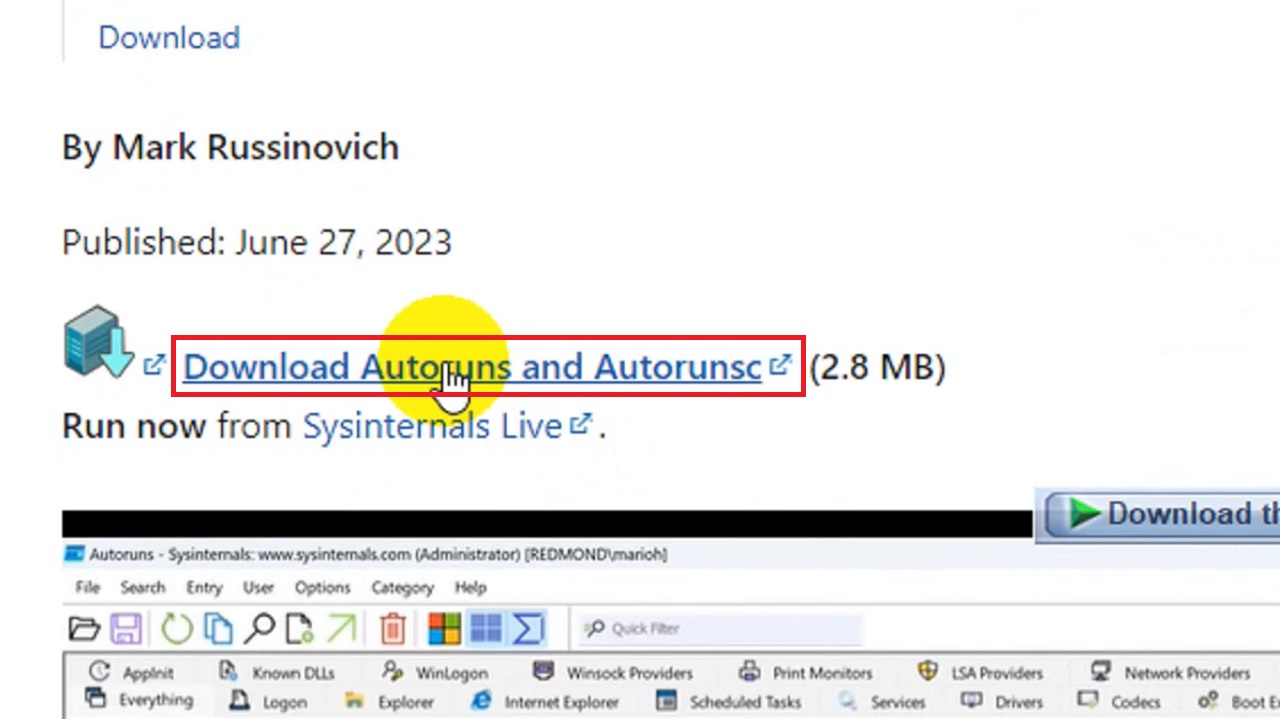
- Click on the Start Download button in the Download File Info window when it appears.

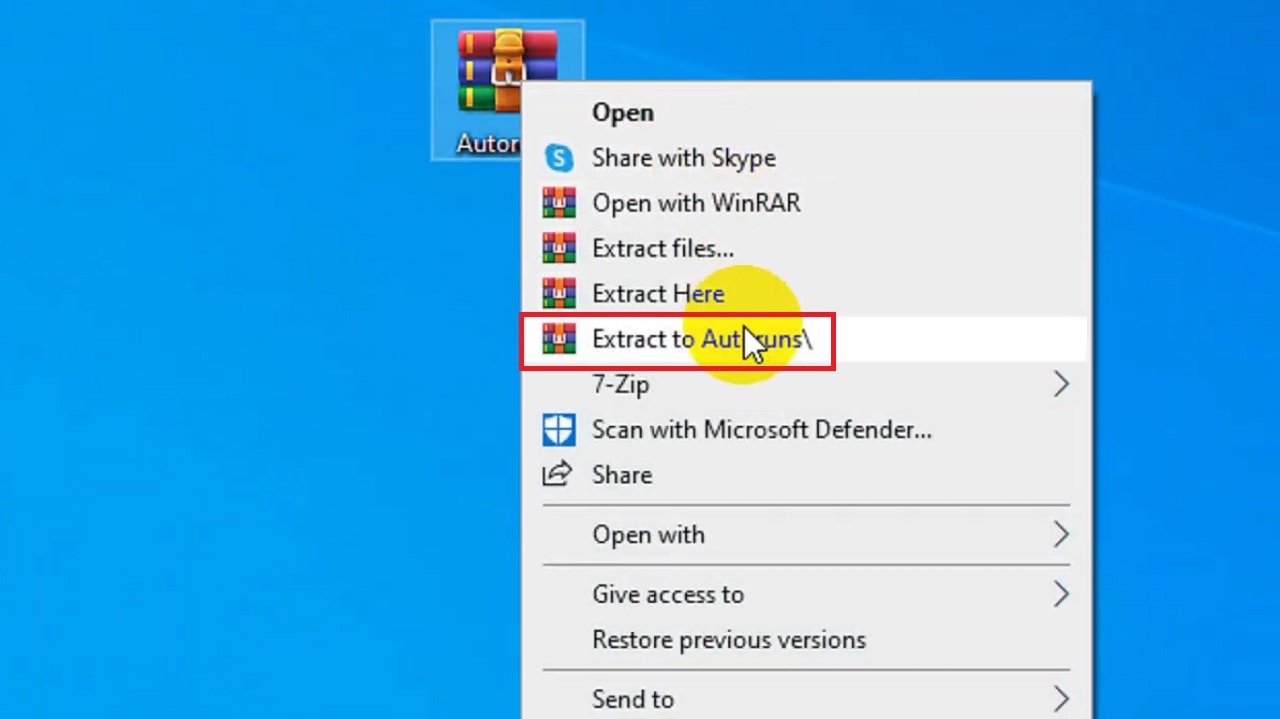
- Right-click on the Autoruns icon on the desktop. Click on the Extract to Autoruns\ option from the drop-down context menu.
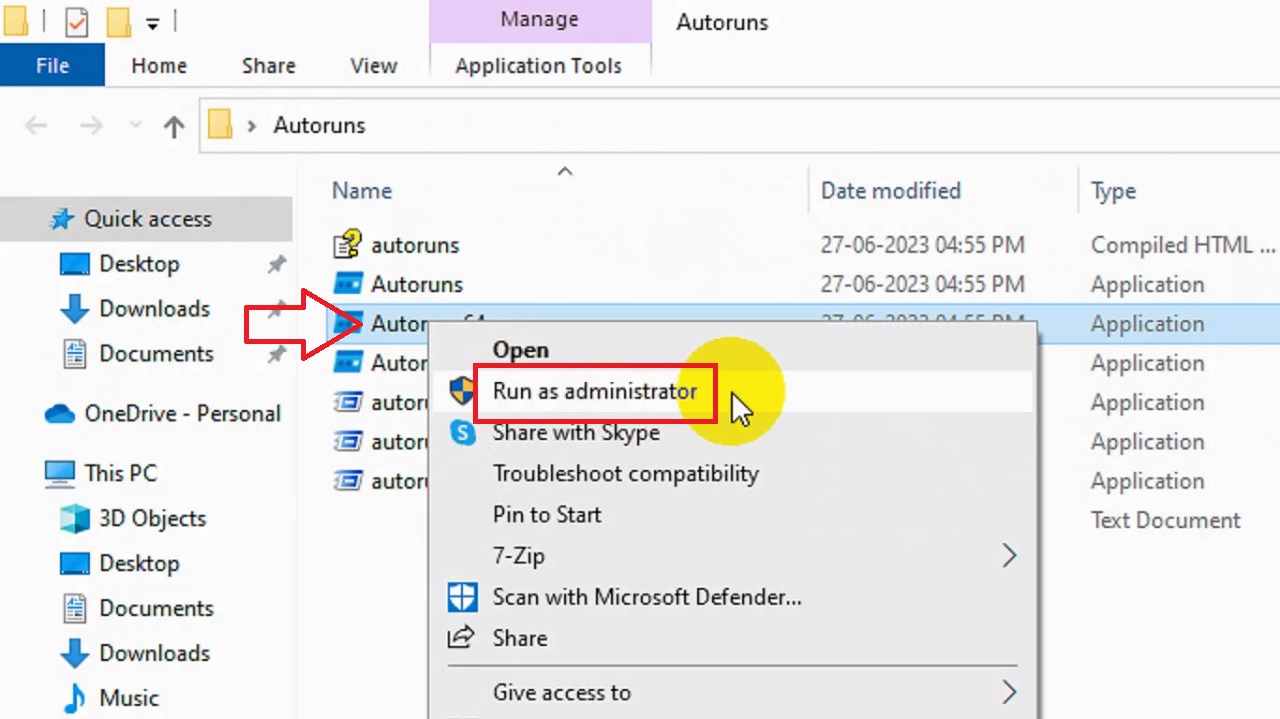
- Open the file > Select Autoruns64 > Right-click on it > Click on Run as administrator.
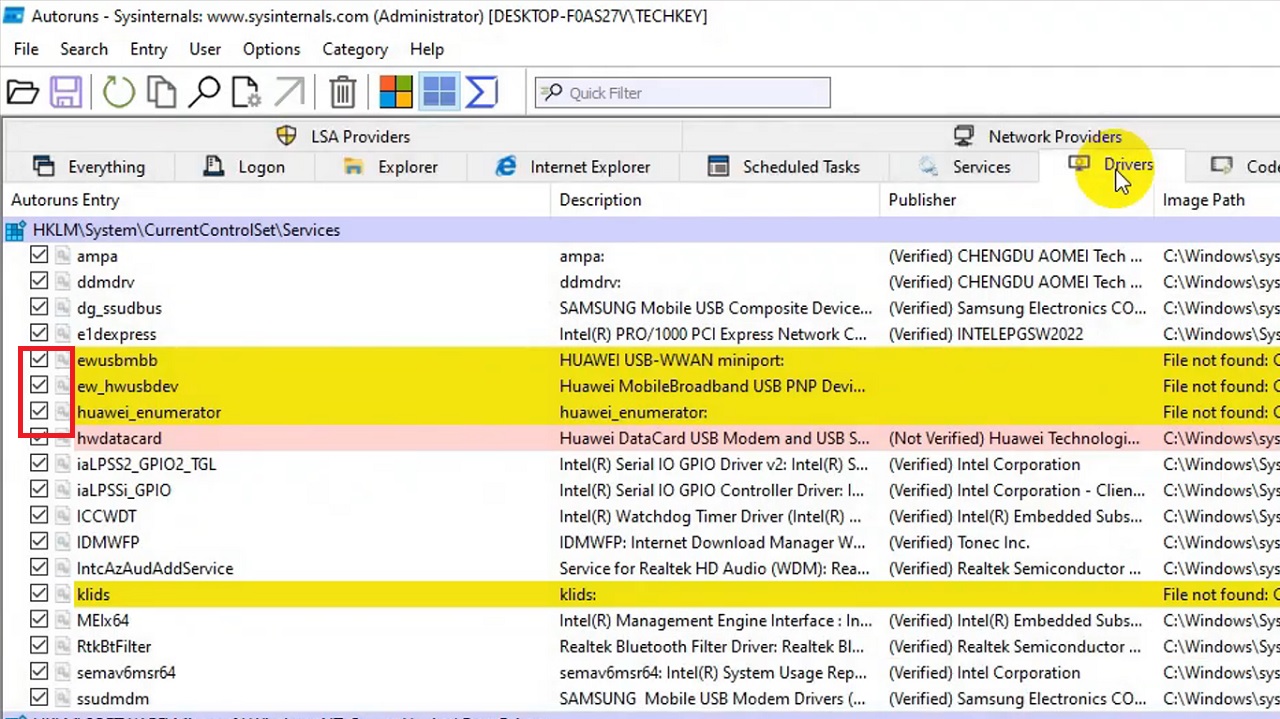
- Let the files download. When it is done, go to the Drivers tab from there.
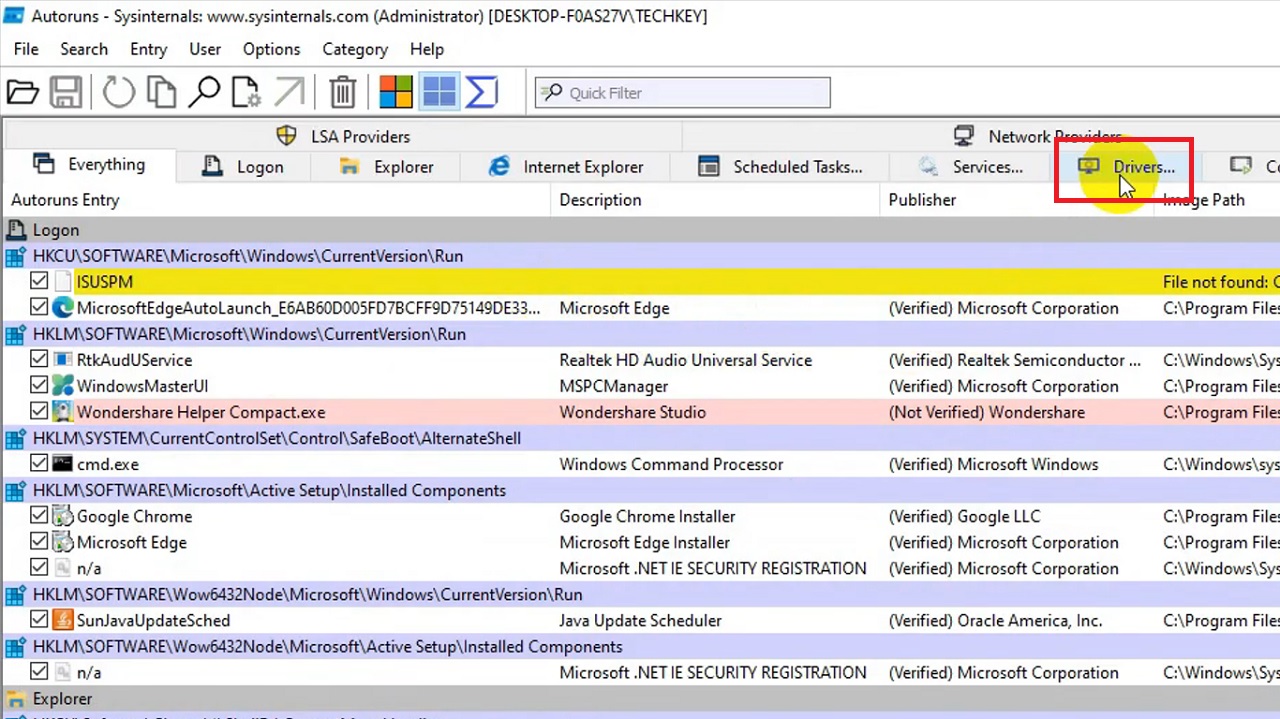
Wait till the page completes listing all available drivers. The ones marked in yellow or red color are the ones that are causing the issue with core isolation. You can uncheck them simply from here.
Alternatively:
- You can right-click on each of them and select Delete from the drop-down options.
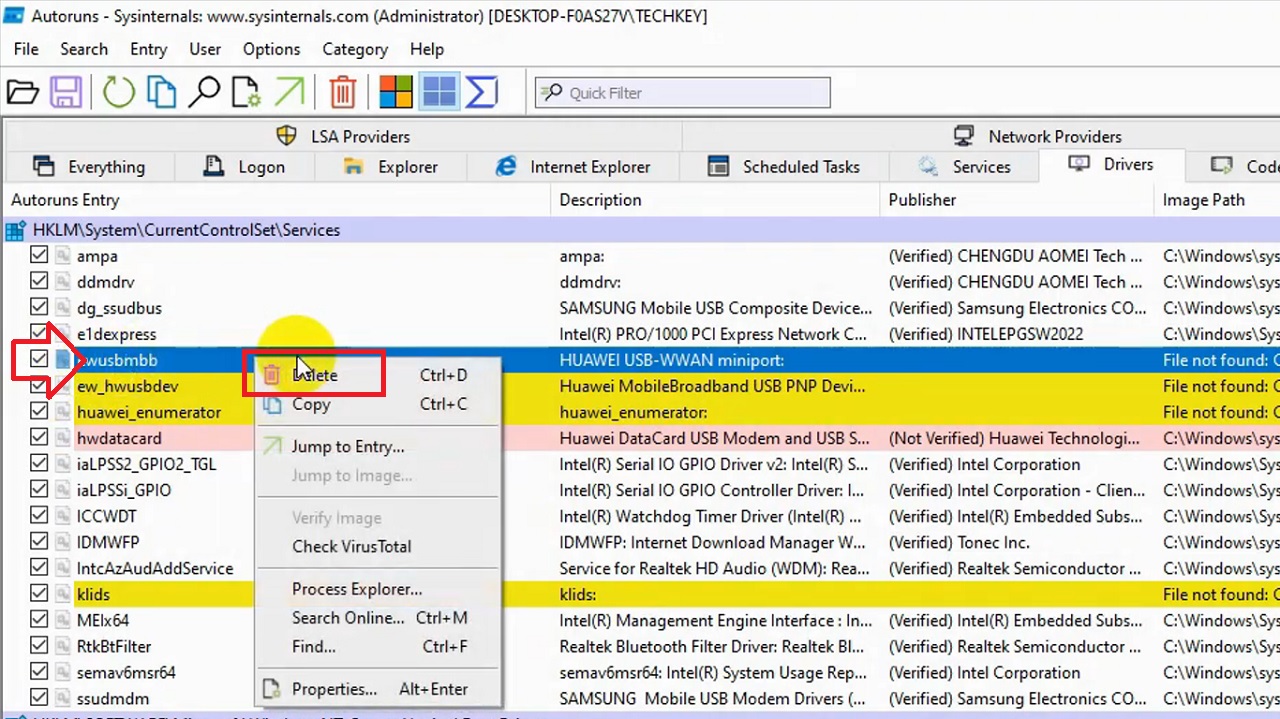
- Click on the OK button in the confirmation box that pops up after every time you select a driver to delete.
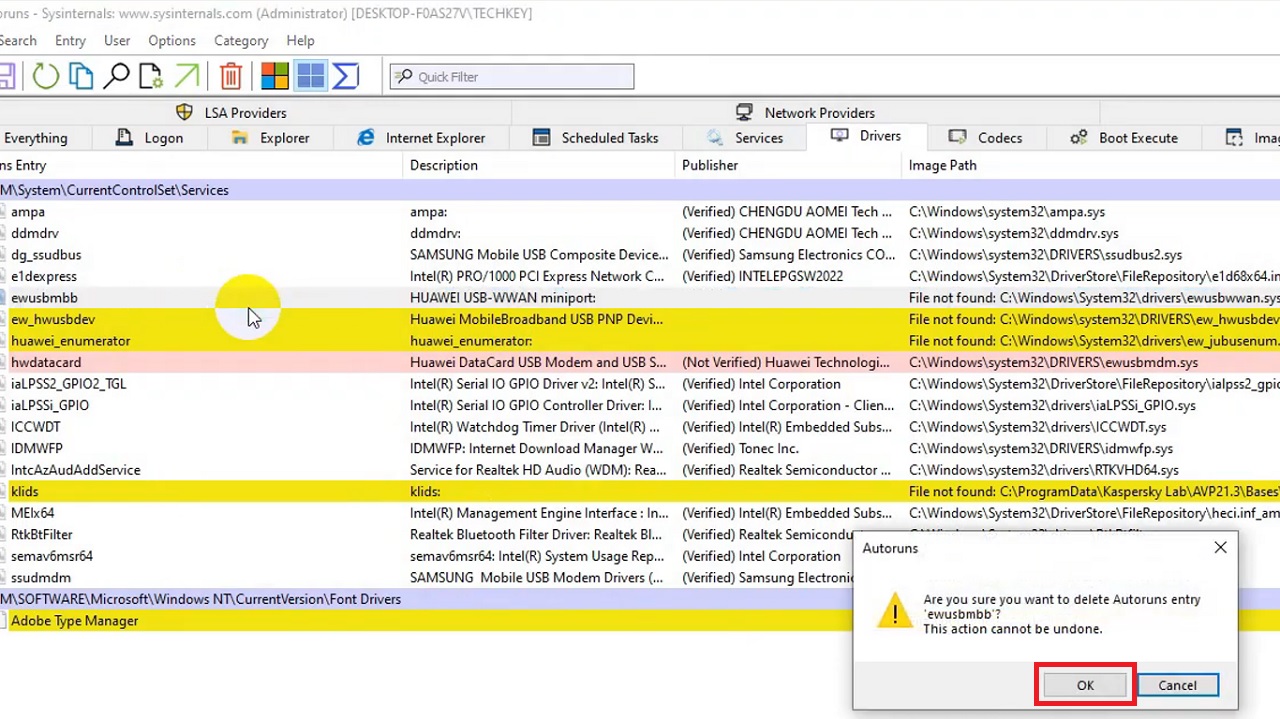
Close the window when you are done deleting all of the problematic drivers.
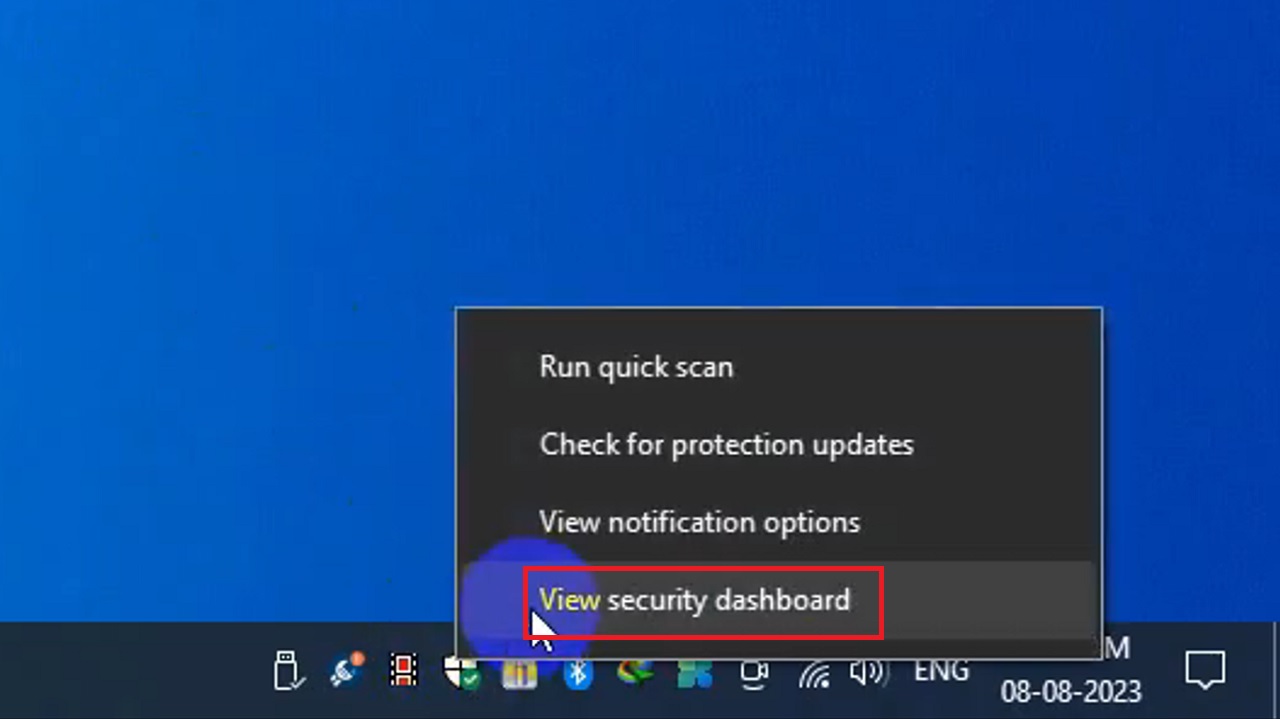
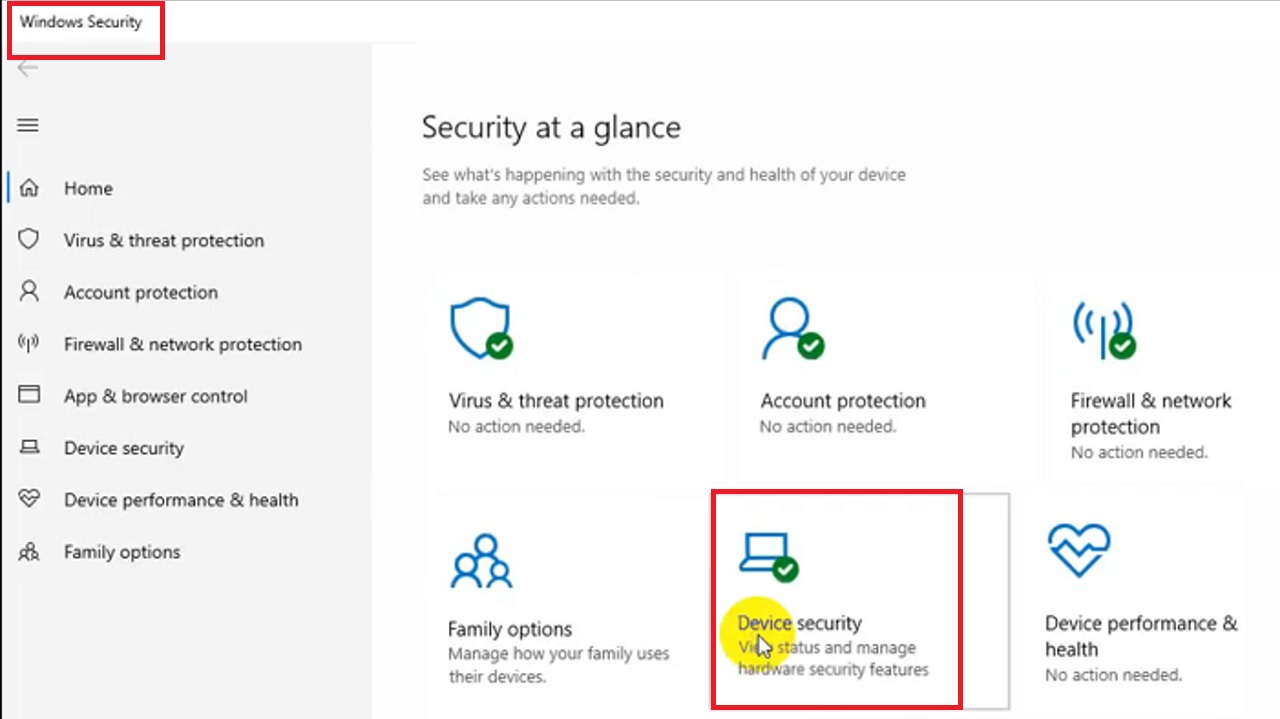
- Now, click on the Windows Security shield on the right-hand corner of the taskbar to View security dashboard. Sometimes, it may be hidden. In that case, click on the arrow to show the hidden icons and then click on Windows Security from there.
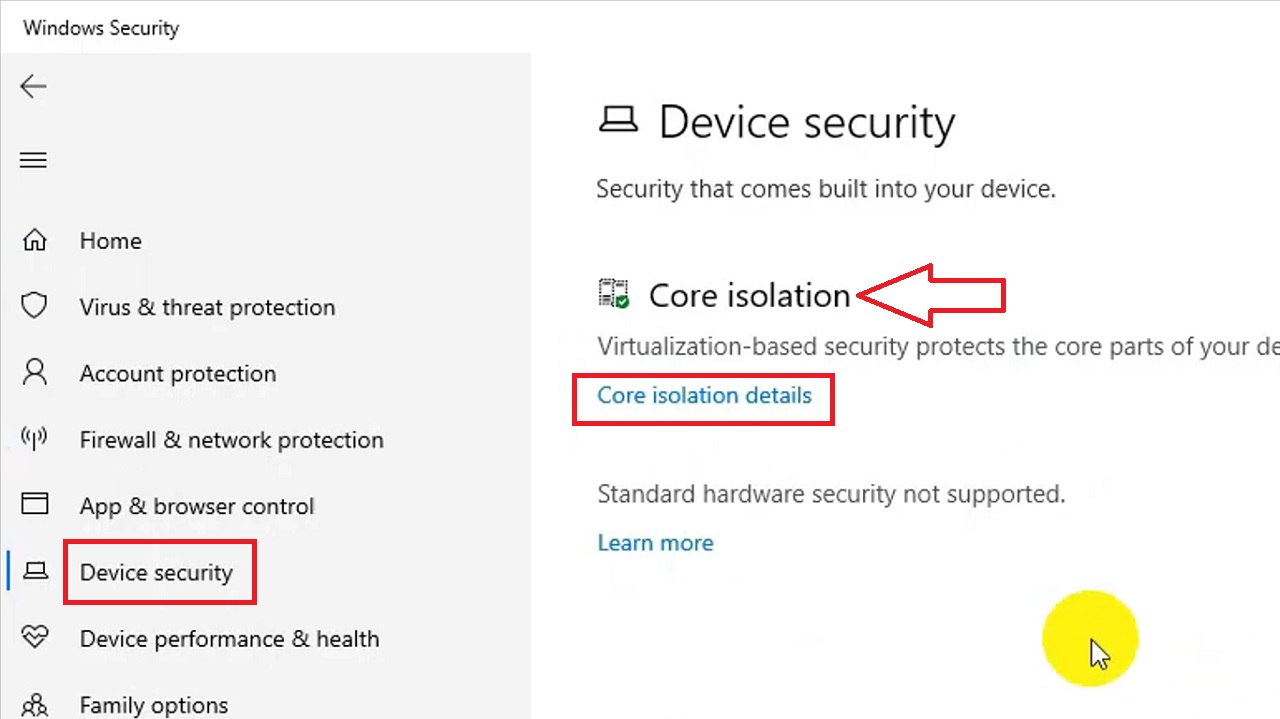
- Select Device security on the Windows Security page when it opens.
- Click on Core isolation details under Core isolation on the right side of the Device security page.
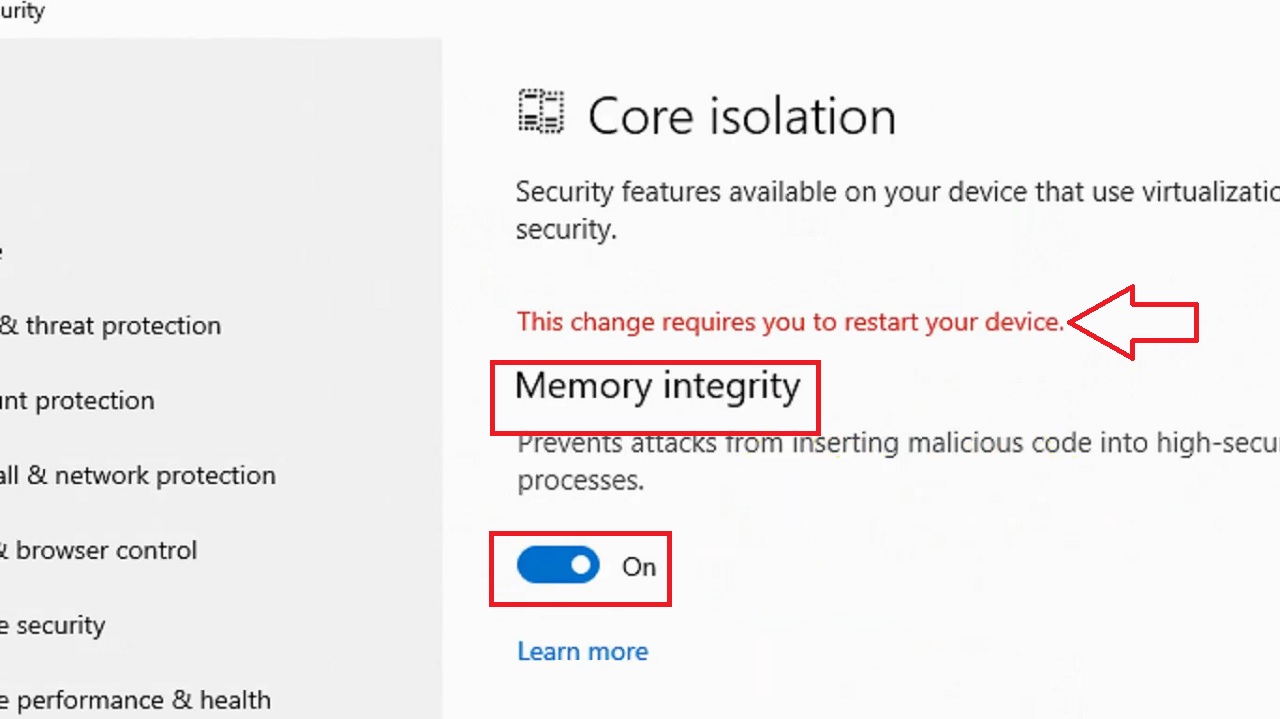
- Drag the sliding switch under Memory integrity to ON. You will not get the error message now. At this point, you will be informed that the system needs to be restarted.
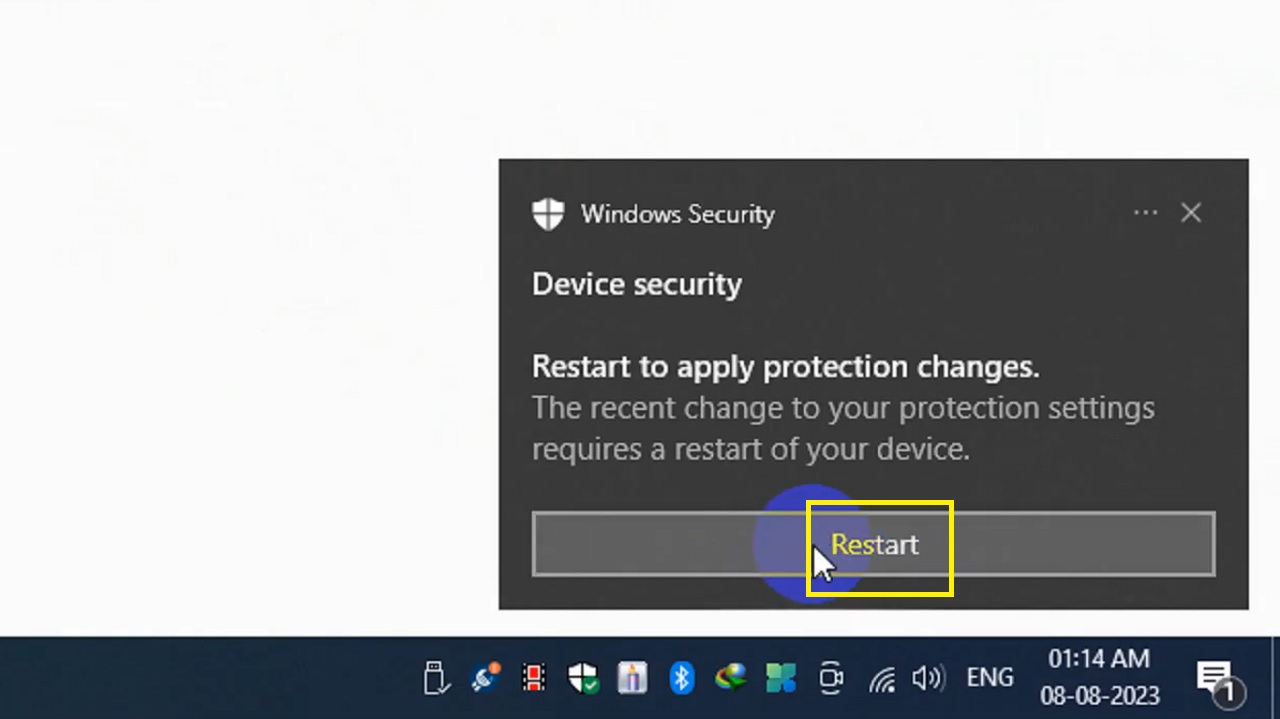
- Click on the Restart button to apply protection changes made in your system.
Expert tip: Exercise caution while using Autoruns to disable drivers. Also, make sure that you have identified the correct drivers causing the core isolation issue before you make any changes. Creating a backup or restore point is recommended.
Method 3: Using Group Policy Editor
Making changes in the Group Policy Editor can potentially help address issues related to core isolation being turned off.
STEPS TO FOLLOW:
- Go to the Start Menu.
- Type Group Policy in the menu to search for it.
- Click on the Edit Group Policy option to open the Group Policy Editor on your screen.

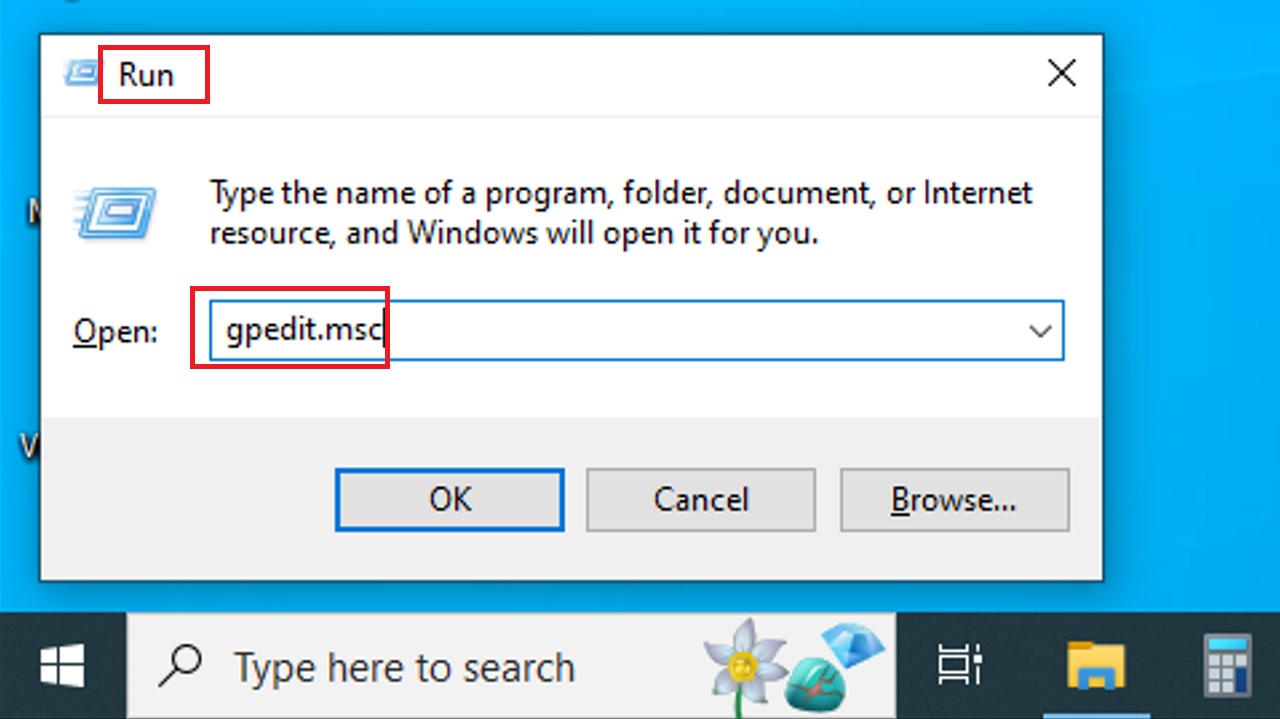
Alternatively, you can press the Windows and R keys together to open the Run dialog box > Type gpedit.msc > press Enter.
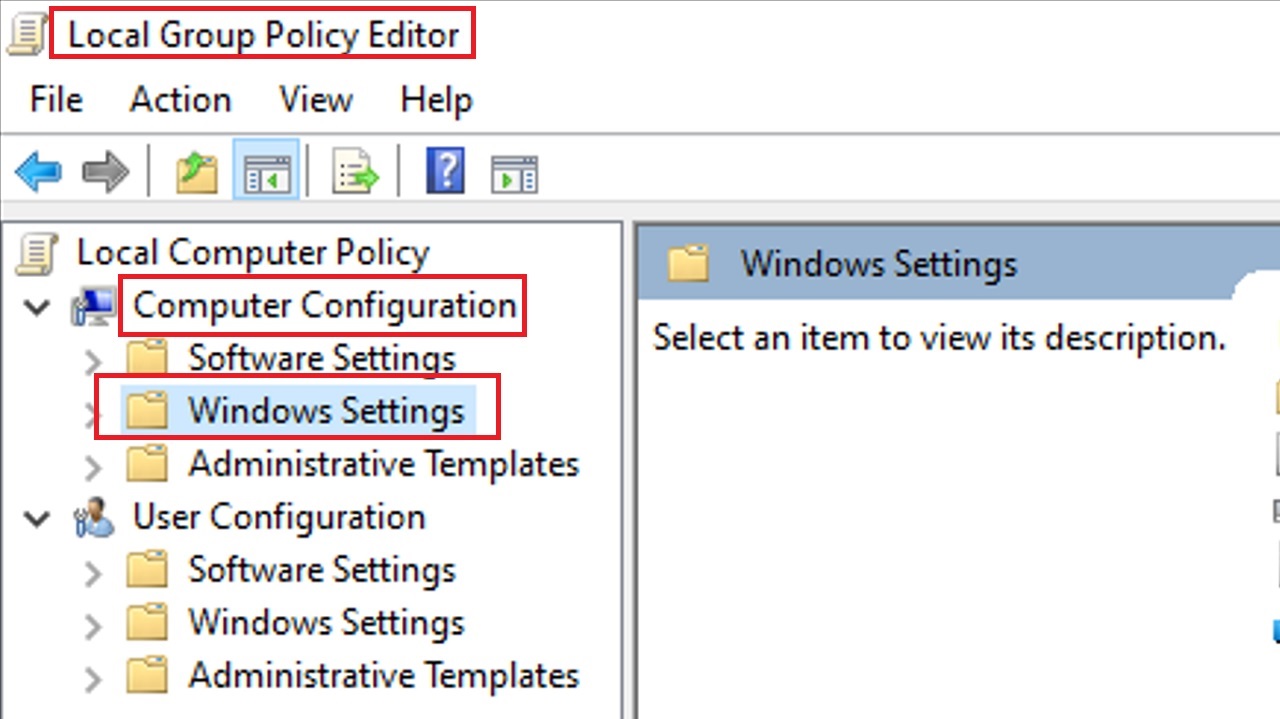
- Double-click on the Computer Configuration option located on the right side of the window.
- Double-click on the Windows Settings folder from the list of folders to continue.
- Find and double-click on the Device Guard folder to proceed.
- Double-click on the Turn on Virtualization Based Security setting file.
- From the following window that opens, click on the small radio button beside the Enabled option located on the top-left side of the window.
- Click on the Apply button to apply the changes.
- Then click on the OK button to close the window.
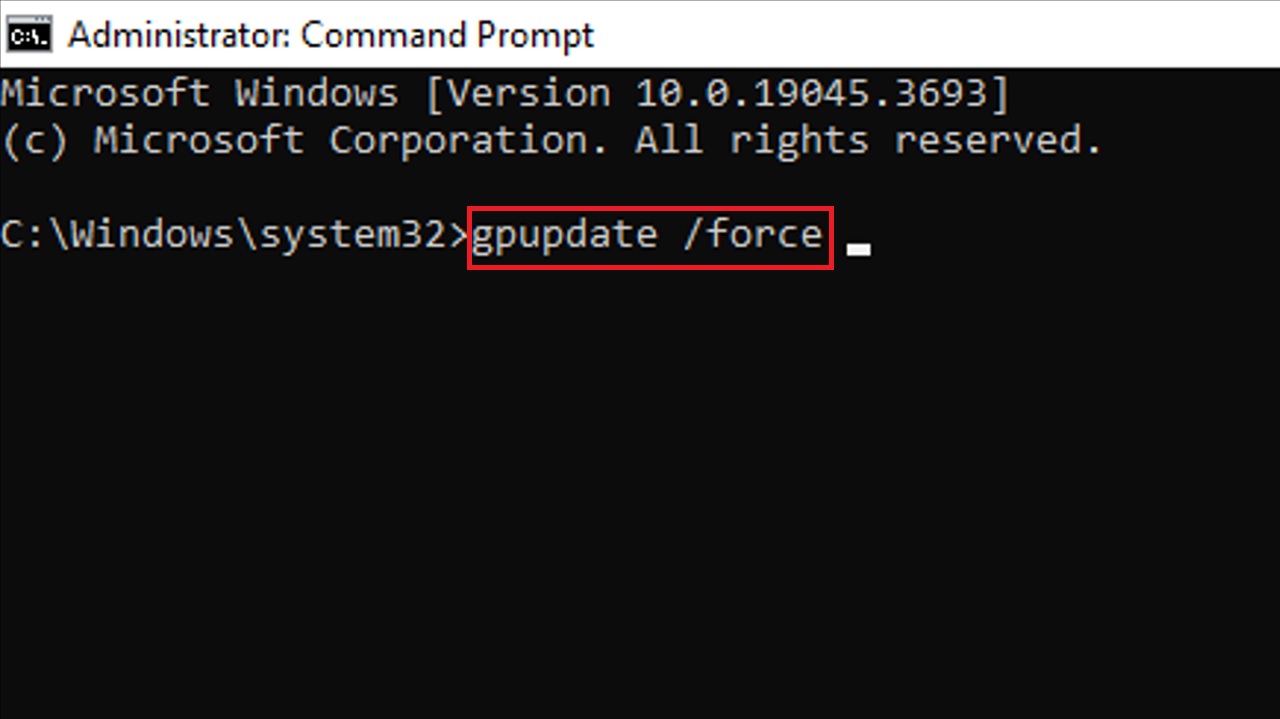
When you are done, go to the Start Menu again and type cmd.exe in it to open the Command Prompt. Click on the Yes button in the following prompt to get administrative privilege.
- Run the command gpupdate /force in a Command Prompt and hit Enter.
This will update the Group Policy. Now, once the process is complete, restart your computer system to apply the Group Policy modifications.
Conclusion
In conclusion, the solutions to core isolation being turned off are pretty simple.
All you have to do is target the root causes.
Follow this guide not to troubleshoot and enhance the security and performance of your PC easily and efficiently.