
You may map a network drive from the File Explorer in Windows or allow connecting to a shared network folder.
Mapping network drives is a very useful process to use drives of other computers as if it is in a local folder.
Fortunately, Windows allows mapping a drive in a few simple and quick steps. If you are not aware of it, this article is the right one to continue reading.
In This Article
KEY TAKEAWAYS
- Mapping a network drive is necessary for quicker file and data sharing and communication.
- A network drive can be mapped by running a command in the Command Prompt first to show the drive and then enabling the SMB protocol to map it.
- It can also be mapped by sharing a folder in the host PC window.
Why Do You Need to Map a Network Drive in Windows?
The most important reason to map a network drive is to allow all members of the network to access it and share files and data as and when required.
Another important reason to map a network drive in Windows is to make it easier to transfer files and expedite communication.
You will not need to go through all the hassles of getting to the network first and then browse through the server to get to it. It will save you a lot of time and increase your productivity.
Moreover, mapping a network drive is extremely useful for the administrators, end users and different other groups and operators. It helps them to locate different things, such as:
- Objects
- Files
- Programs
To make the best use of this possibility in Windows, you do not need to be a technical expert. Just follow these simple steps explained below.
Ways to Map a Network Drive in Windows
In order to map a network drive, you must enable network discovery first. Then, assuming that you know the IP address of the host PC, you will need to share the folder of the host PC with others for mapping.
Another way of doing it is through Command Prompt. You will need to run specific commands that will show the drive in the window and then enable SMB to map the drive.
Here are the simple steps to follow for these methods.
Method 1: Using the Command Prompt
This is another useful and quick way to map a network drive.
STEPS TO FOLLOW:
- Open The Command Prompt as an administrator by typing it in the search box, choosing Run as administrator and hitting Enter.
- When the Command Prompt opens, type in this command: net use DLetter: \\PATH /PERSISTENT: YES
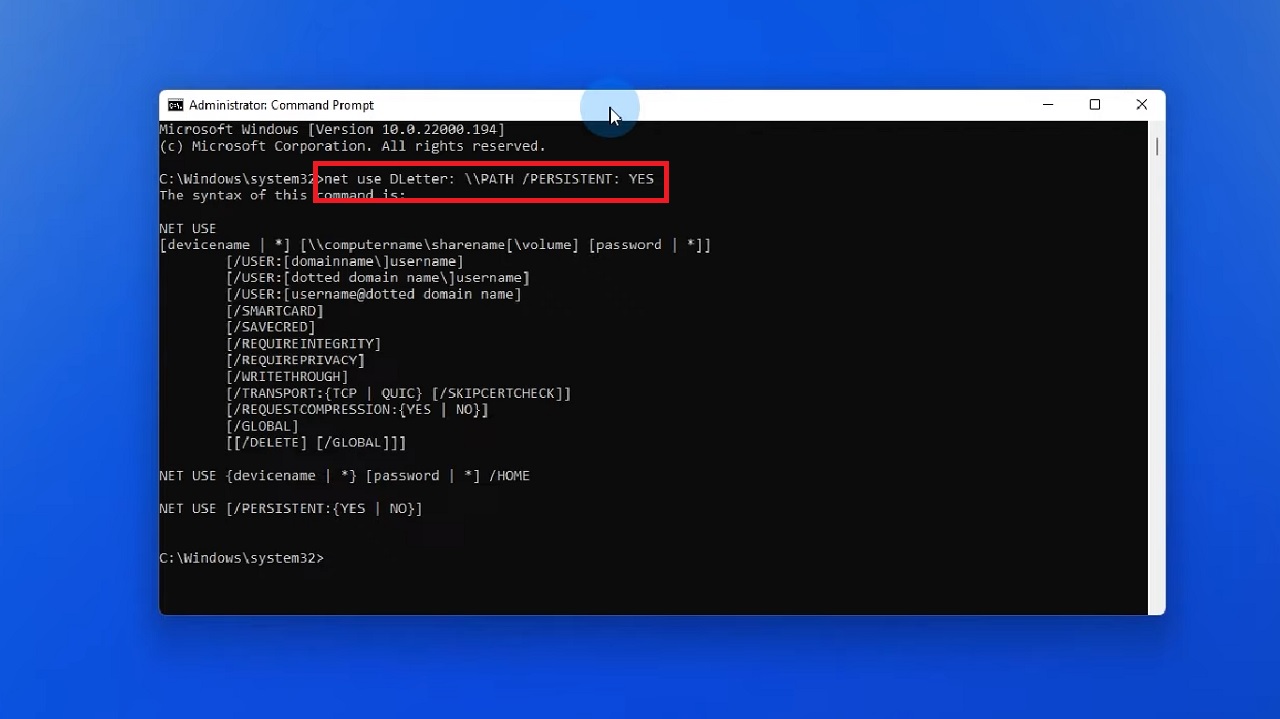
Note: You will have to replace the DLetter with the actual drive letter and path for the real network folder location. For example, if the drive letter and path is E:\DESKTOP-8PHHAN9\Program Files, type it in between net use and /PERSISTENT: YES.
- Hit Enter and exit Command Prompt.
The network drive will now show in the window.
However, you may not be able to access the drive for mapping. In that case, you will need to enable SMB, the particular protocol that allows mapping drives. The additional steps to follow for this are:
- Go to the search box next to the Start Menu.
- Type appwiz.cpl and hit Enter.
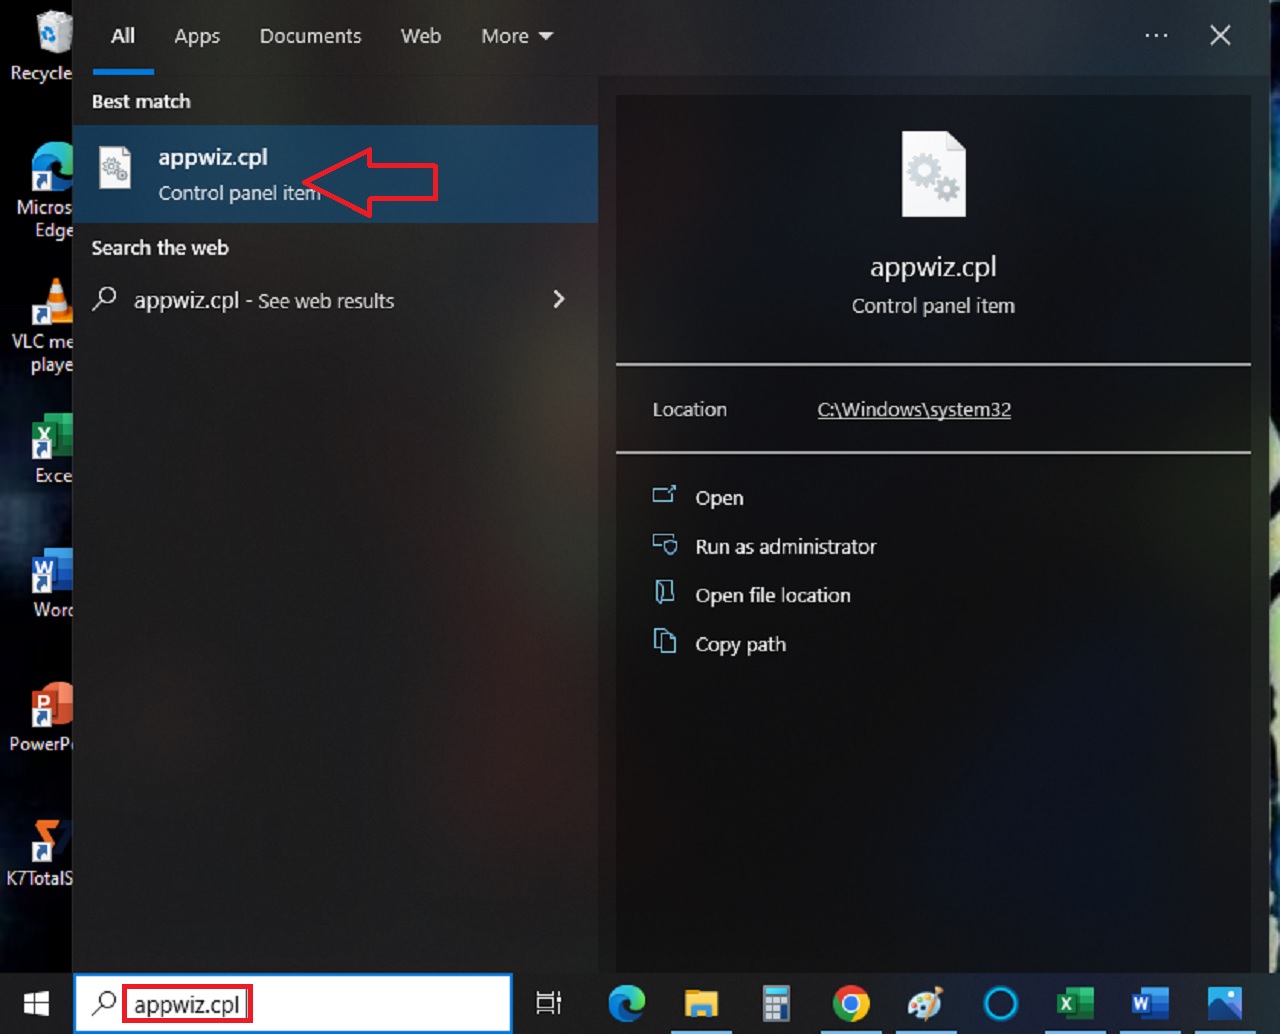
(Alternatively, you can also type in programs and features.)
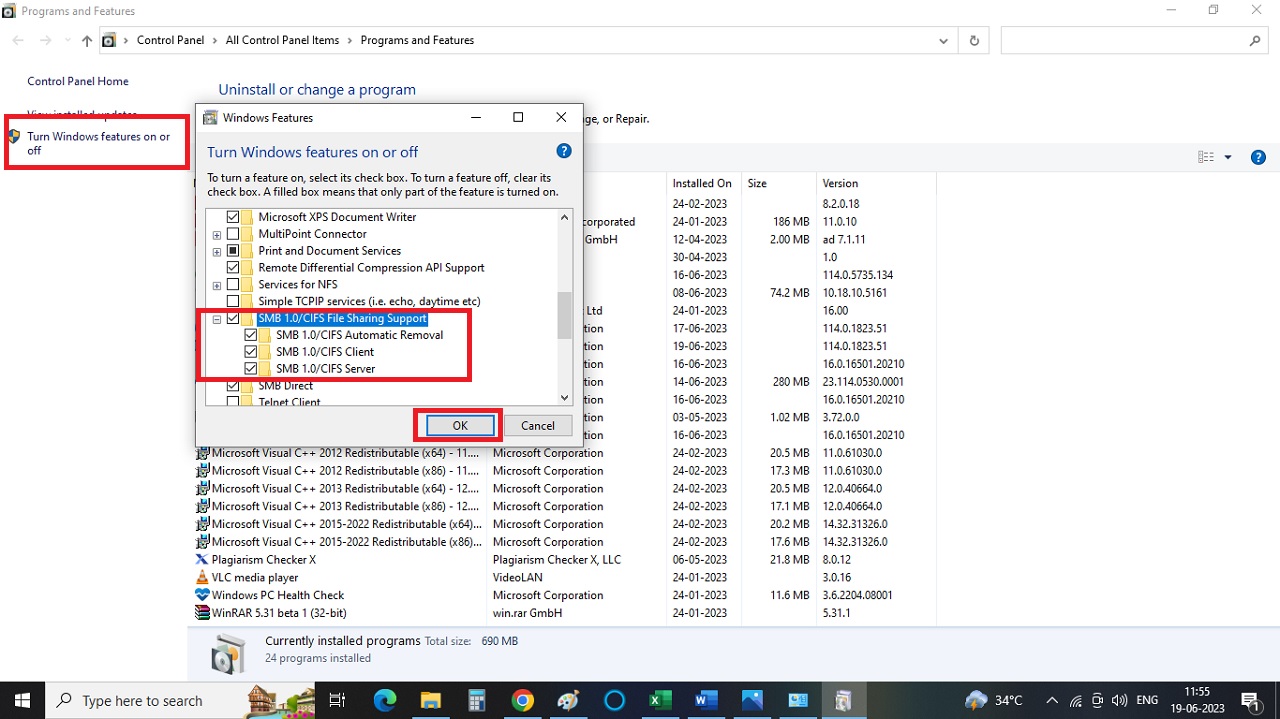
- Click on the option Turn Windows features on or off on the left panel.
- Scroll down to find the SMB 1.0/CIFS File Sharing Support in the following window.
- Click on the small square next to it to expand the feature.
- Make sure that all the boxes under it are checked.
- Click on the OK button to apply the changes.
You can also map a network drive for all users automatically by using the net use command in the Command Prompt.
You will need to create a script first so that a driver letter is assigned automatically and the users are allowed to connect to the mapped network drive automatically.
The command to run is net use * “\\server\files” /p:yes and hit Enter.
Replace the ‘server\files’ part with your server and file name.
This will create the script which you will need to save as a BAT file. This will allow Windows to use it for execution whenever a user logs in.
- Now, go to the ‘All Users Startup’ folder.
For this, open the Run dialog box by pressing the Windows and R keys together on your keyboard and typing the command shell:common startup and hitting Enter or clicking on the OK button below.
- Copy the BAT file you have created earlier to the folder window that pops up.
Now, when any user logs into the computer, they can automatically connect to the network drive that you have mapped using the script.
Method 2: Using Windows PowerShell
If you are not comfortable using the Command Prompt, you may also use Windows PowerShell to map a network drive.
STEPS TO FOLLOW:
- Right-click on the Start menu and click on PowerShell.
- In the PowerShell window, type the command New-PSDrive -Name DRIVE -PSProvider FileSystem -Root \\ServerName\SharedFolder
Since the above command is an example, you must replace DRIVE with the letter of the drive you want to map. Also, replace the \\ServerName\SharedFolder part with the path of the shared folder.
You may prefer to use a username and password for accessing the shared folder. In that case you add an additional ‘-Credential parameter’ to the command along with the username and password.
For example, if you want to map Drive X, the command would look like the following:
New-PSDrive -Name X -PSProvider FileSystem -Root \\ServerName\SharedFolder -Credential username password
- Now, hit Enter.
This will allow PowerShell to map the network drive and you can access it from the File Explorer.
Method 3: From the Shared Folder Window of the Host PC
The shared folder on your host PC will allow you to map your network drive very easily.
In this case, consider the IP address of the host PC to be 192.168.0.138
STEPS TO FOLLOW:
- Press the Windows and R keys together on your keyboard to open the Run dialog box.
- Type in the IP address as shown in the image below:
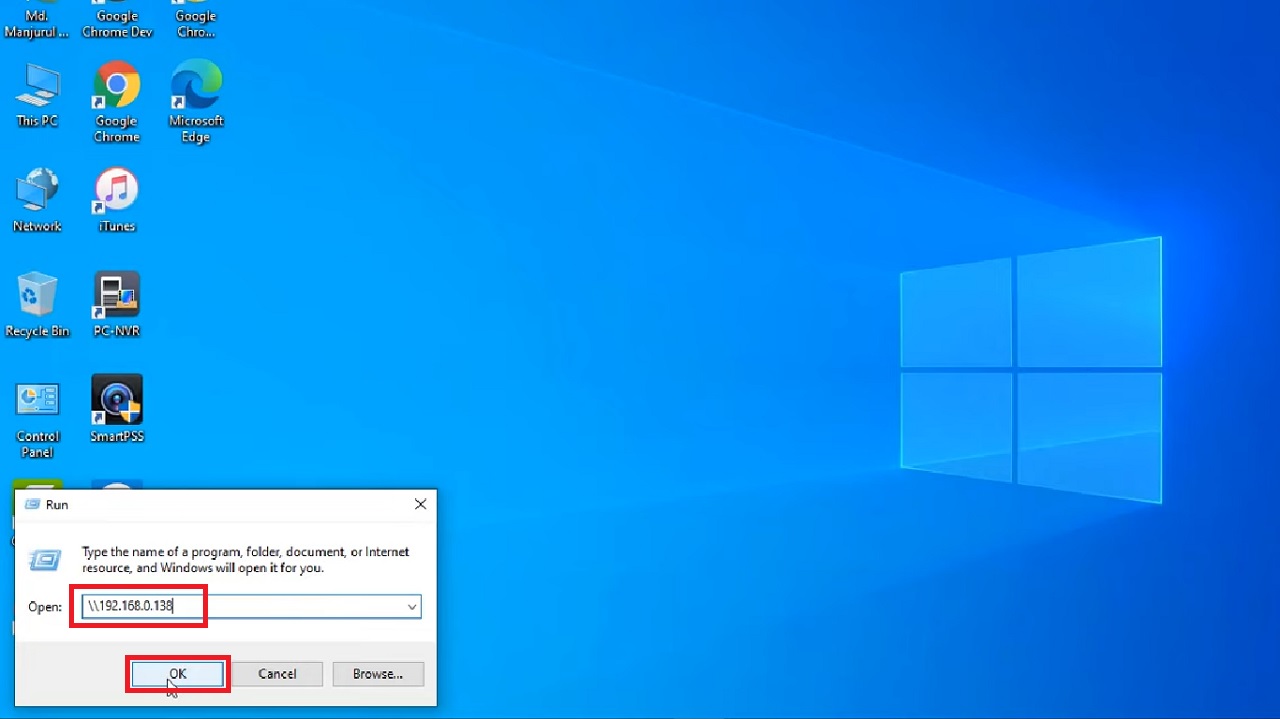
- Click on the OK button.
- From the window of the shared folder of the host PC, select and open the one in the Network 192.168.0.138 that you want to map.
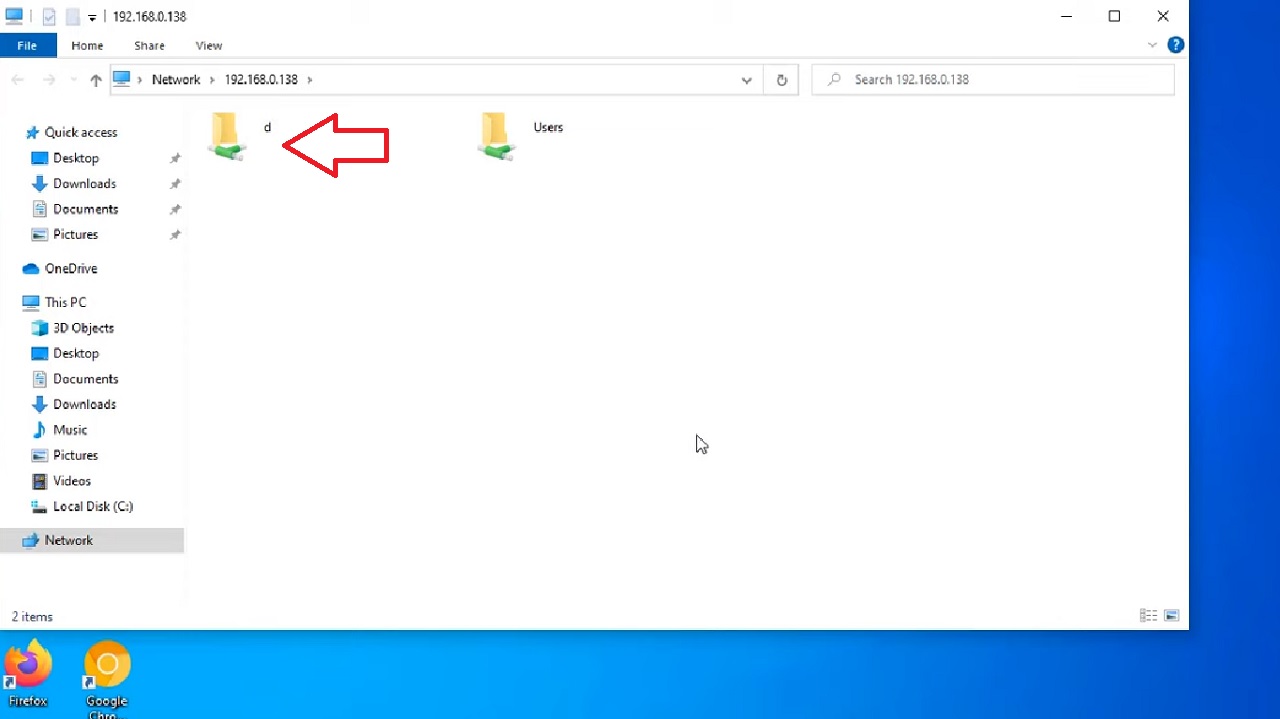
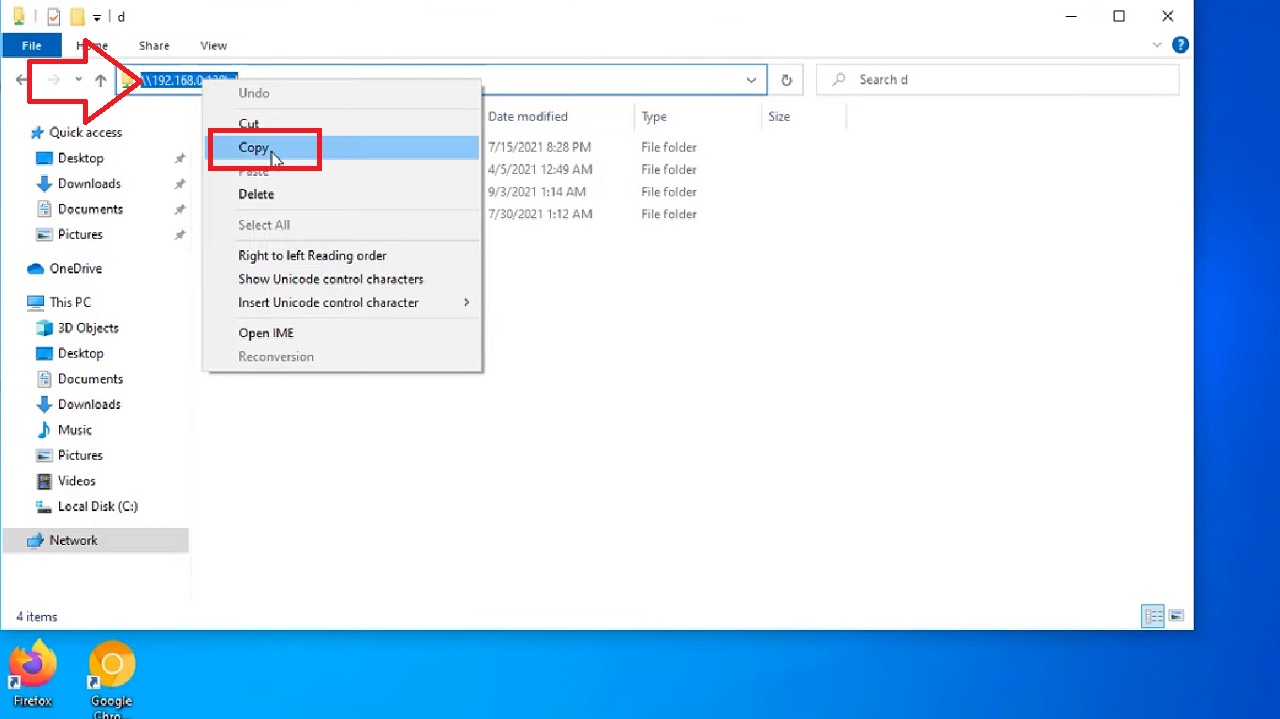
- Click on the address bar, right-click, and Copy the address.
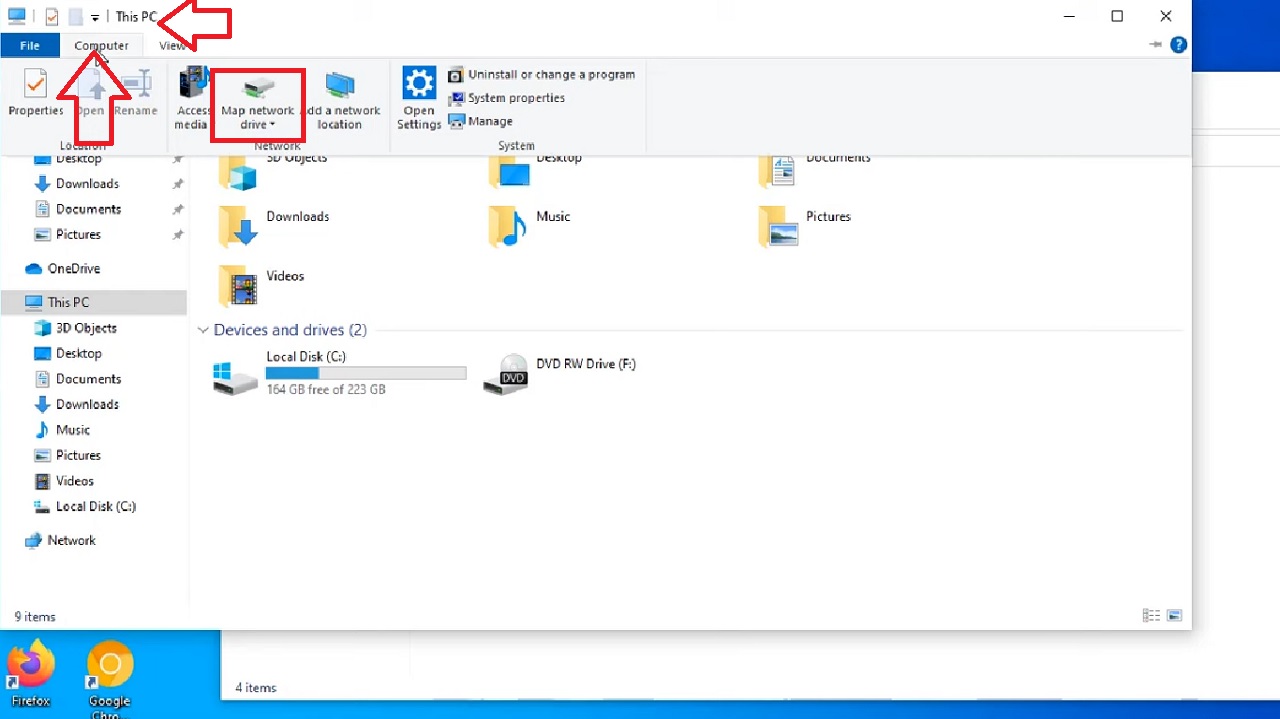
- Double-click on the This PC logo on your desktop to open it.
- In the following window, click on the ‘Computer’ on the top-left.
- Select Map network drive from the options.
- In the following window, paste the host address in the box next to Folder.
- Click on the Finish button below.
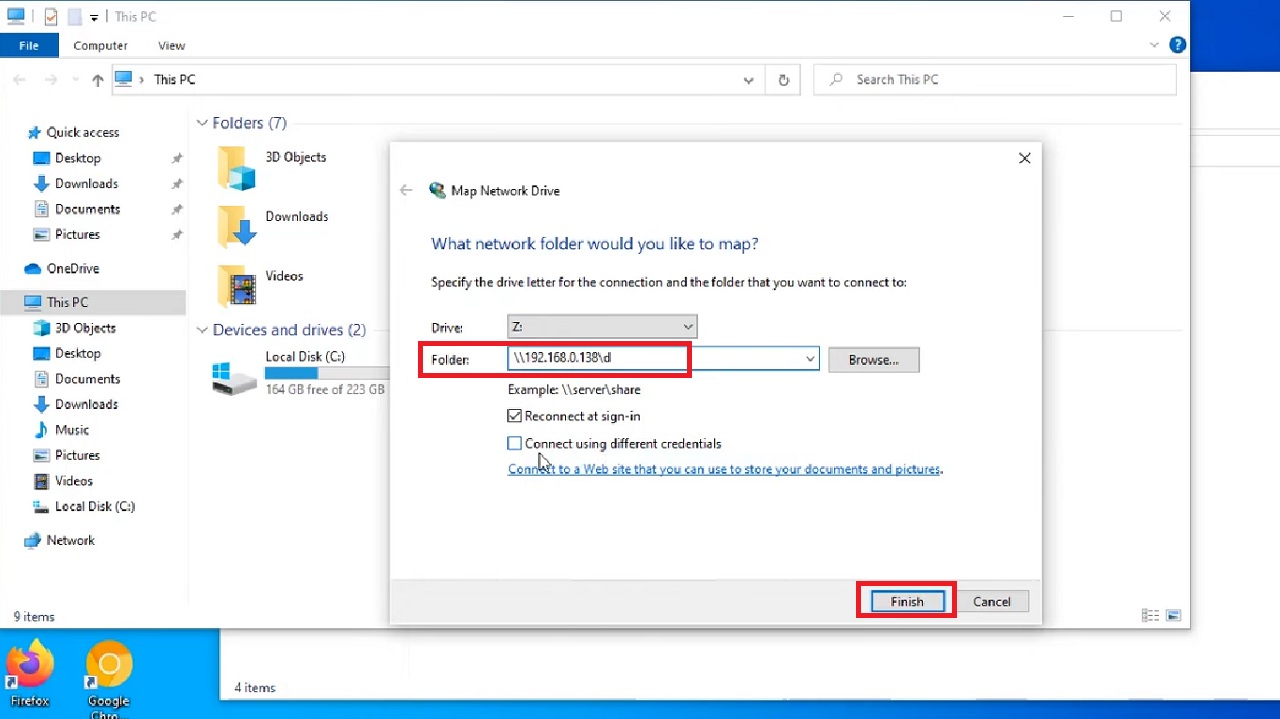
The network drive will be now added to the window, fully mapped.
Conclusion
So, that is all you have to do to map a network drive in Windows. Follow any one of them and share files and folders quickly and easily.