
An important step of a network setup is to configure your router to use DHCP or Dynamic Host Configuration Protocol.
It assigns an IP address to each device connected to the router and the network to prevent connection errors since no two devices share an IP address.
This is a pretty straightforward process. If you are unaware of the process, here is an article that will guide you through it.
In This Article
KEY TAKEAWAYS
- Configuring your router to use DHCP will simplify network arrangement.
- Access the web interface of your router and navigate to the DHCP settings.
- Enable DHCP and set the range and lease time along with other functionalities.
- Save settings to apply the changes.
- Reboot the device for DHCP to take effect.
Why Configure a Router to Use DHCP?
Configuring a router to use DHCP allows more efficient network configuration. It streamlines the whole process of network setup by reducing the manual configuration efforts to a minimum.
Some other significant benefits of it include:
- Assigning automatic IP addresses
- Making the manual IP allocation process more dynamic
- Reducing the chances of human errors during IP address assigning
- Simplifying the management process of multiple devices connected to the network
- Offering more scalability to the network when it expands and needs seamless assignment of IP addresses to the connected devices
Here are the steps to follow to configure your router to use DHCP.
Ways to Configure a Router to Use DHCP
The process to configure your router to use DHCP is pretty straightforward and can be done easily by accessing the web interface of your router.
The other steps to follow include:
- Navigating to DHCP settings
- Enabling DHCP
- Setting the DHCP range
- Setting the DHCP lease duration
Finally, you have to save the changes before rebooting your router for the changes to take effect.
Method: From the Web Interface of the Router
The most common way to configure a router to use DHCP is by accessing the web interface and making the necessary changes.
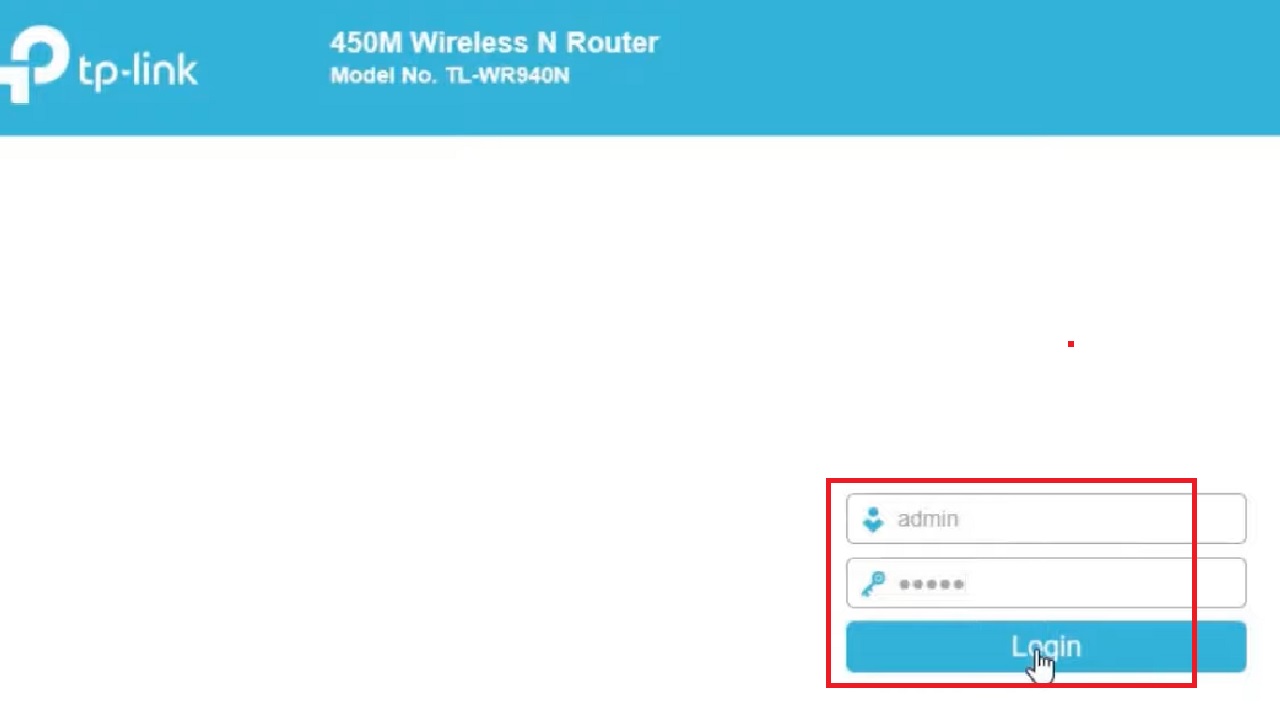
Notes: Typically, the username and password are written on the label at the back of the router and are ‘admin’ for both, if you have not changed these credentials before.
The IP address may also be written on the label and is usually 192.168.1.1 or 192.168.0.1. Alternatively, go to Windows search > type cmd > hit Enter > type ipconfig > hit enter > note the Default Gateway address.
However, always refer to your router’s documentation or manual for the exact login details.
Here, a TP-Link router is used for demonstration purposes. The interface and layout of your router may vary. Refer to your router’s documentation for the exact approach while performing these steps.
STEPS TO FOLLOW:
- Connect the router to your computer either through a wireless connection or through an Ethernet cable.
- Open a web browser.
- Enter the IP address of the router in the address bar.
- Now, Login to the admin panel of your router, D-Link in this case, using the username and password provided on the label or in the router’s documentation.
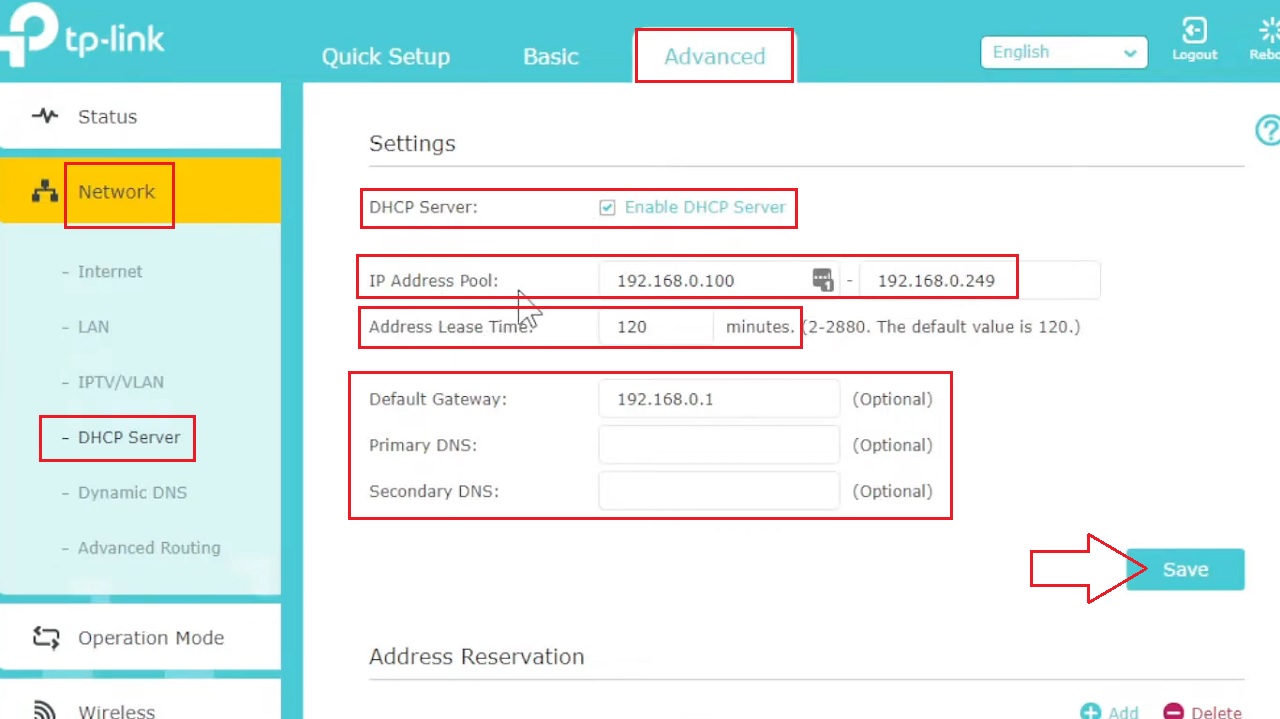
- Go to the Advanced tab in the following window.
- Select Network from the left pane.
- Click on DHCP Server on the expanded list.
- Click on the small square button next to DHCP Server and before Enable DHCP Server to turn it on.
- Once the DHCP is enabled, set a starting IP address as well as an ending IP address in the two boxes next to the IP Address Pool.
- Specify the DHCP lease duration or amount of time in the box next to the Address Lease Time for the assigned IP addresses to each device to hold them before they need to be renewed.
- You may change the other details or leave them as they are.
Now, if you want to reserve an address, scroll down the window to go to the Address Reservation section.
- Note the MAC Address of the device. For example, let’s choose the first one.
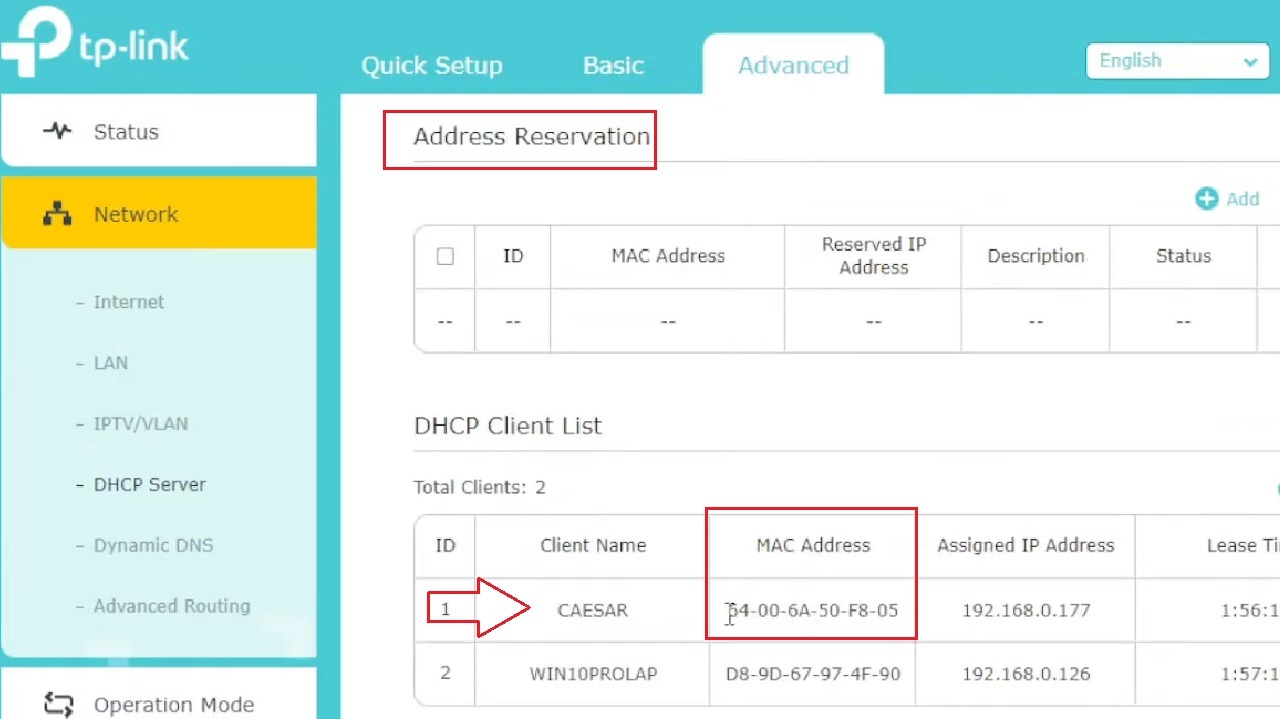
- Now, click on the + Add button above.
- Give it a different IP Address that is below 100. For example, 192.168.0.25.
- Type the name of the device in the box next to Description.
- Click on the small square box next to Enable This Entry.
- Click on the Save button.

Also click on the Save button, marked by a red arrow in the second image in this demonstration to save the changes you have made to configure the DHCP settings.
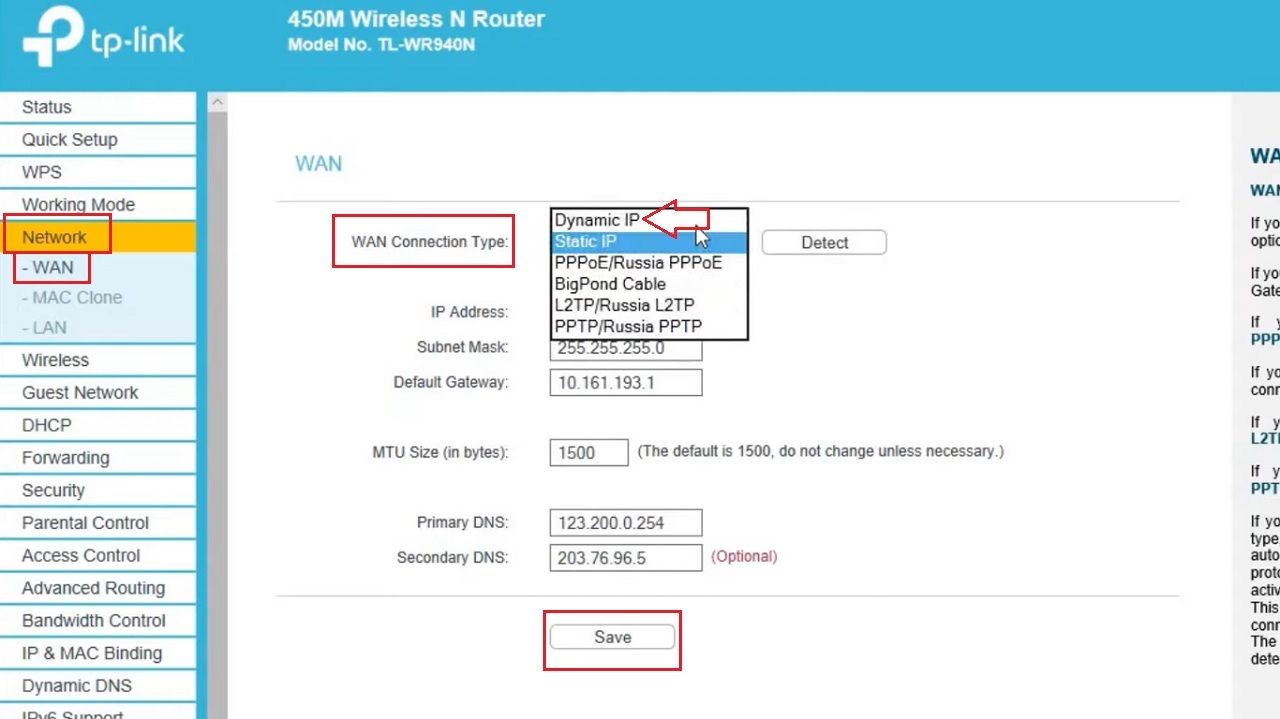
Additionally, you can make a few other settings if you want.
- Go to Network.
- Select WAN under it.
- If the WAN Connection Type is set to Static IP, set it to Dynamic IP by choosing the option from the dropdown list you get after clicking on the small arrow on the right side of the box.
- Click on the Save button.
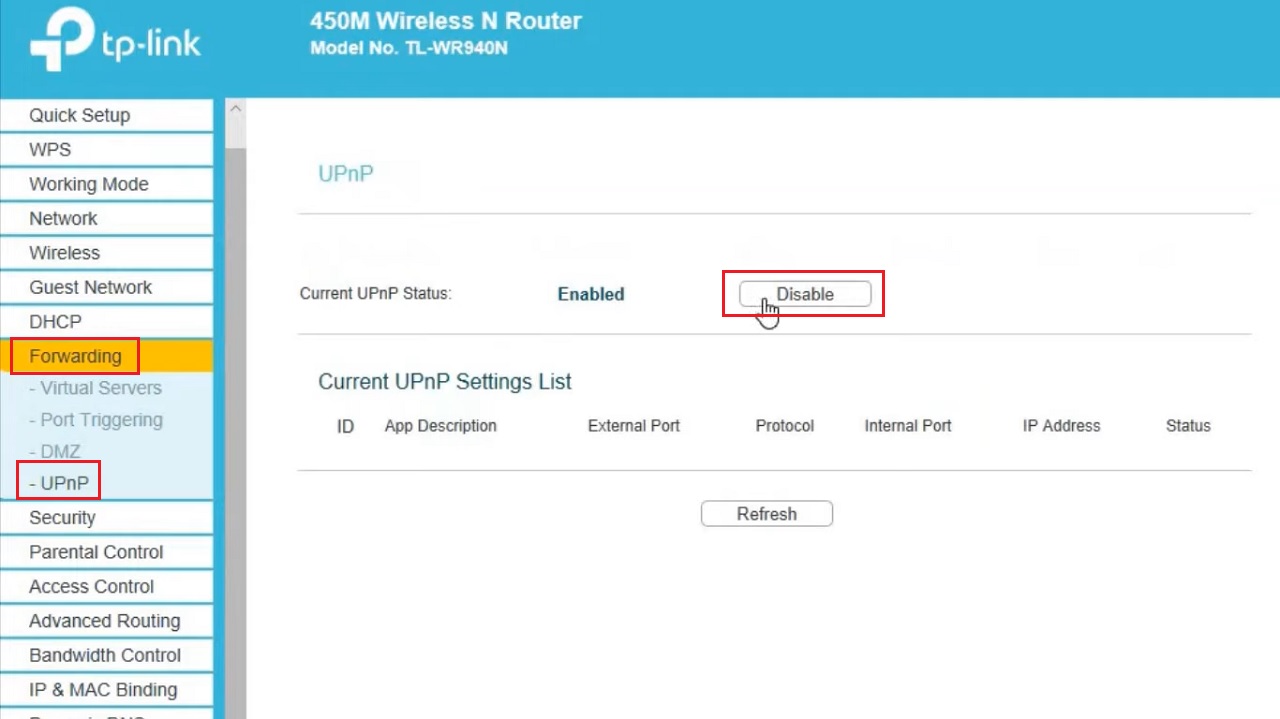
- Next, click on the Forwarding option in the left pane.
- Select the Universal Plug and Play (UPnP) option under it.
- If it is Enabled, click on the Disable button alongside Current UPnP Status.
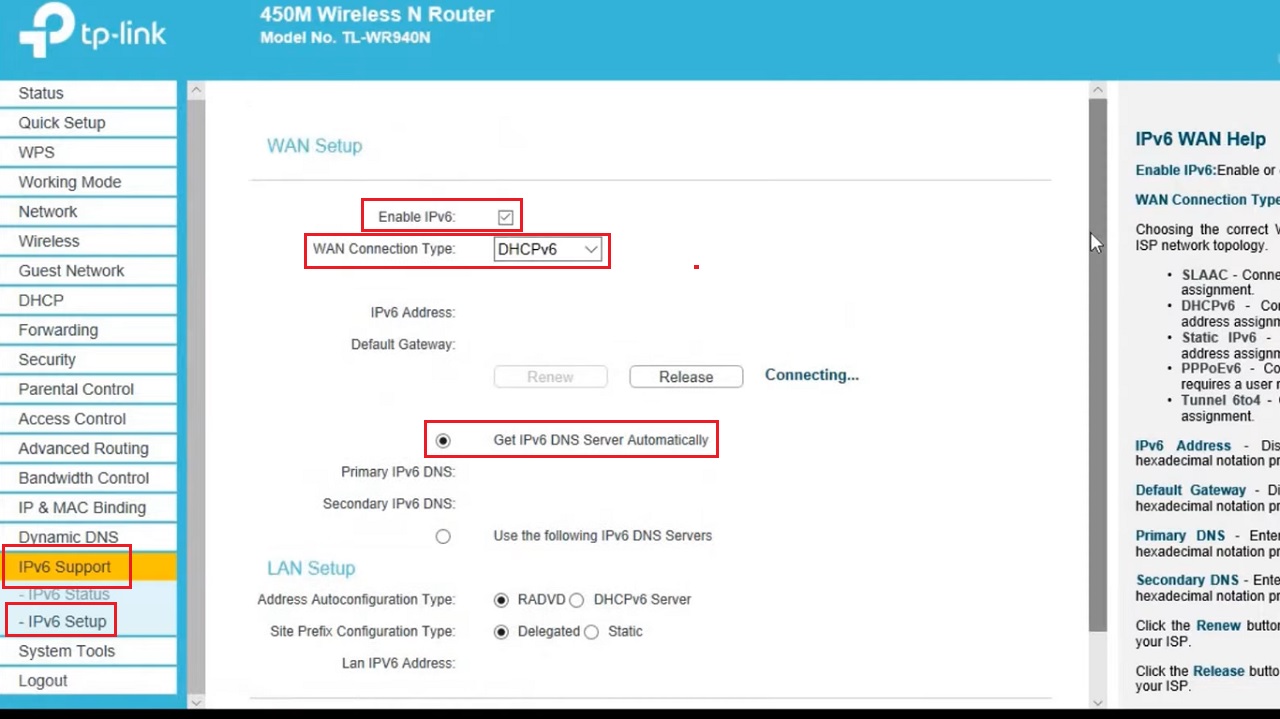
If your router supports Internet Protocol Version 6 or IPv6 along with IPv4, you may check and make the necessary changes there as well.
- Go to the IPv6 Support option in the left pane of the window.
- Select the IPv6 Setup option under it.
- Check if the small square box next to Enable IPv6 is checked or not. If it is not checked, click on it to enable it.
- Also ensure the WAN Connection Type is set to DHCPv6. If it is not set likewise, click on the small arrow, select, and set the option.
- Finally, ensure the small circular button next to Get IPv6 DNS Server Automatically. If it is not, click on it.
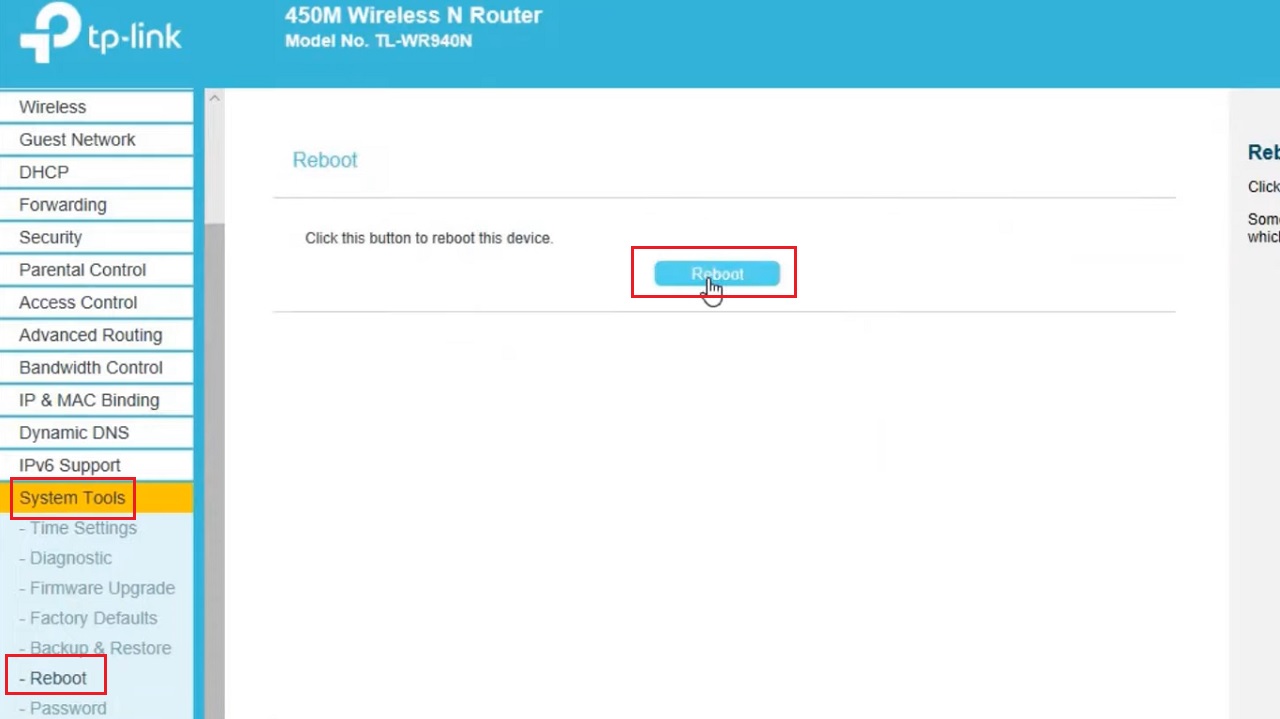
This completes the setup process. It is a good practice to reboot the system now.
- On the same page, scroll down to find System Tools.
- Click on Reboot under it from the expanded list.
- Again, click on the Reboot button on the right side of the window.
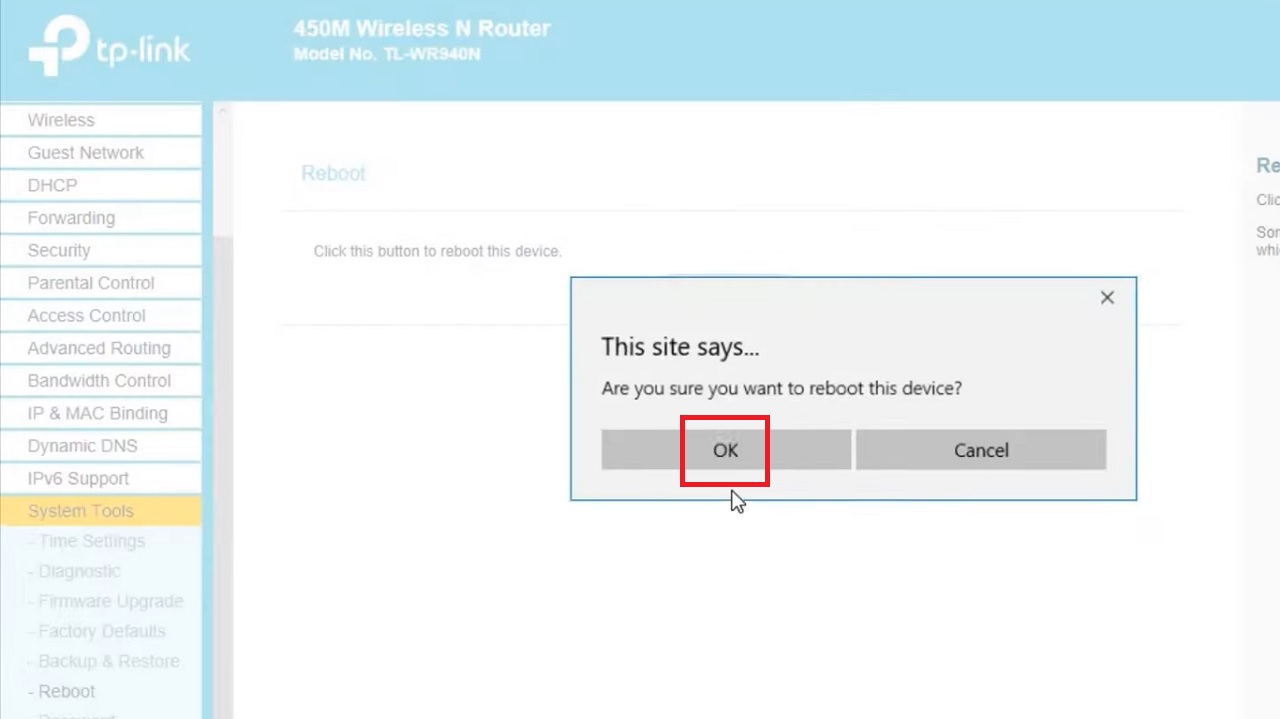
- Click on the OK button in the following confirmation window to initiate the rebooting process.
Alternatively, you can also do it physically by power cycling your router if you do not want to through the hassles of rebooting from the admin panel of the router.
To do this, turn off the router > unplug it > wait for a couple of minutes > plug it back again > turn on the router.
This will ensure that the changes you made take effect.
Conclusion
In conclusion, configuring your router to use DHCP is a simple process that can be completed in just a few steps.
It will simplify network management and minimize the chances of human errors.
Follow the steps outlined in the guide to ensure an efficient and smooth network setup for seamless connectivity.