
It is crucial to set up a MU-MIMO (Multi-User, Multiple-Input, Multiple-Output) router to improve the performance of your network with more effective data transmission across multiple devices at the same time.
If you are unaware of the steps to follow, this guide will provide them to you for a straightforward setup process.
In This Article
KEY TAKEAWAYS
- Start by gathering the required items, such as the MU-MIMO router, a PC, an Ethernet cable, and your internet service provider credentials.
- Place the router in a central location, connect it to the power source, and link it securely using the Ethernet cable.
- Login to the router interface typing the IP address in the address bar of your web browser.
- Access and configure the network settings by enabling MU-MIMO and setting the wireless network name, security, and password.
- Save the settings and connect your devices using the SSID set and password of the new router.
Why Do You Need to Setup a MU-MIMO Router?
You will need to set up a MU-MIMO router to enjoy effective and reliable connectivity and communication simultaneously across multiple devices.
Ideally, it is vital for the following reasons:
- Reduce congestion
- Improve overall network performance
- Enhance gaming and streaming experiences
- Smooth and lag-free data transmission
- Connect multiple devices to enjoy optimal connectivity
- Faster upload and download speeds even during peak usage times
- Better range and coverage through beamforming
- Meet the growing demand for bandwidth
- Improve productivity in business and office environments
- Efficient management of neighboring devices due to reduced interference
- Prioritize applications or devices according to need
- Enhance the reliability of your wireless network
- Reduce dropouts and ensure consistency
In short, it will offer a much better online experience for all users with improved performance and accommodate a number of devices without compromising the network speed or reliability.
Ways to Setup a MU-MIMO Router
Setting up a MU-MIMO router is pretty straightforward and is slightly different from setting up a regular router. You can do it all by accessing the router’s interface.
The steps to follow are:
- Collect the essentials
- Place, power on, and link the router using an Ethernet cable securely
- Login to the admin page of the router
- Make the necessary settings
- Connect the devices.
Here is the detailed step-by-step guide for making the changes in the MU-MIMO router interface to set it up.
Note: For demonstration purposes, a TP-Link MU-MIMO router is used. If you use a different model check the documentation for the setup process, which is usually the same, and follow the steps carefully. The layout and interface may be a bit different from what is shown in the demonstration.
Method: From the Web Management Page of the Router
You will need to access the web management page of the MU-MIMO router to set it up.
STEPS TO FOLLOW:
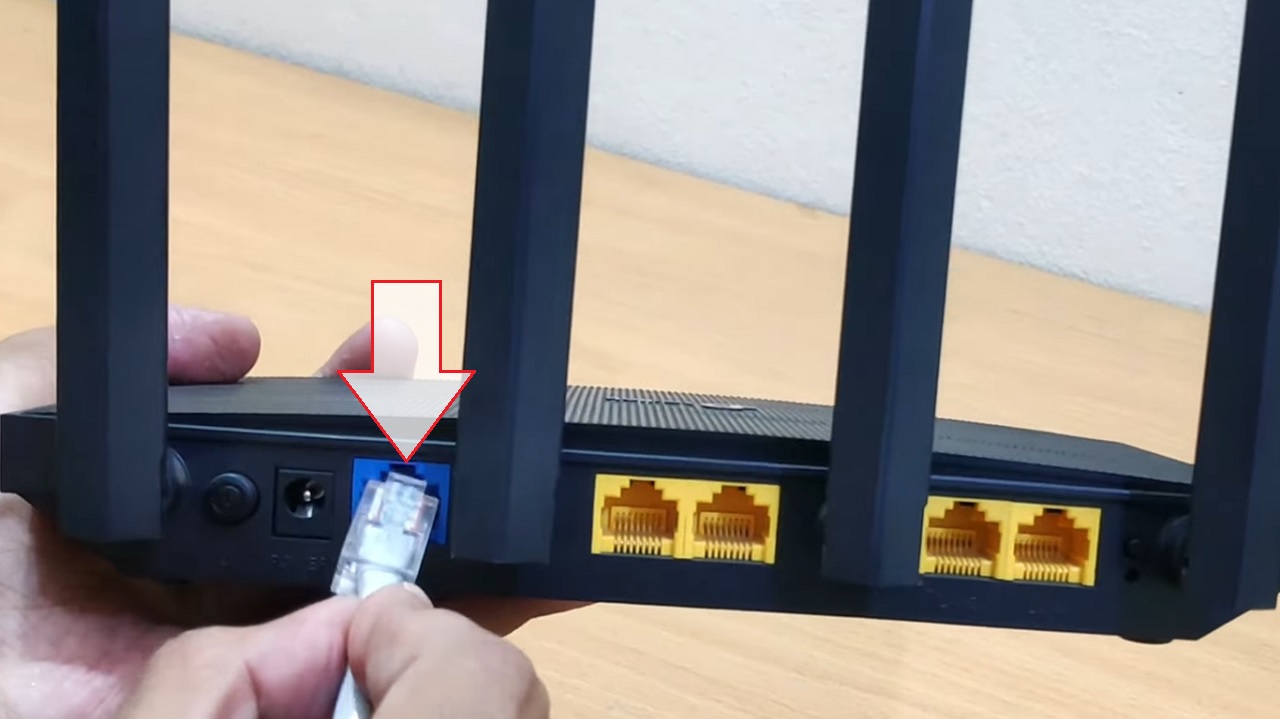
- Look at the WAN or Internet port at the back of your TP-Link router.
- Connect the Ethernet cable from your Internet Service Provider to it. Connect the other end of the cable to your computer.
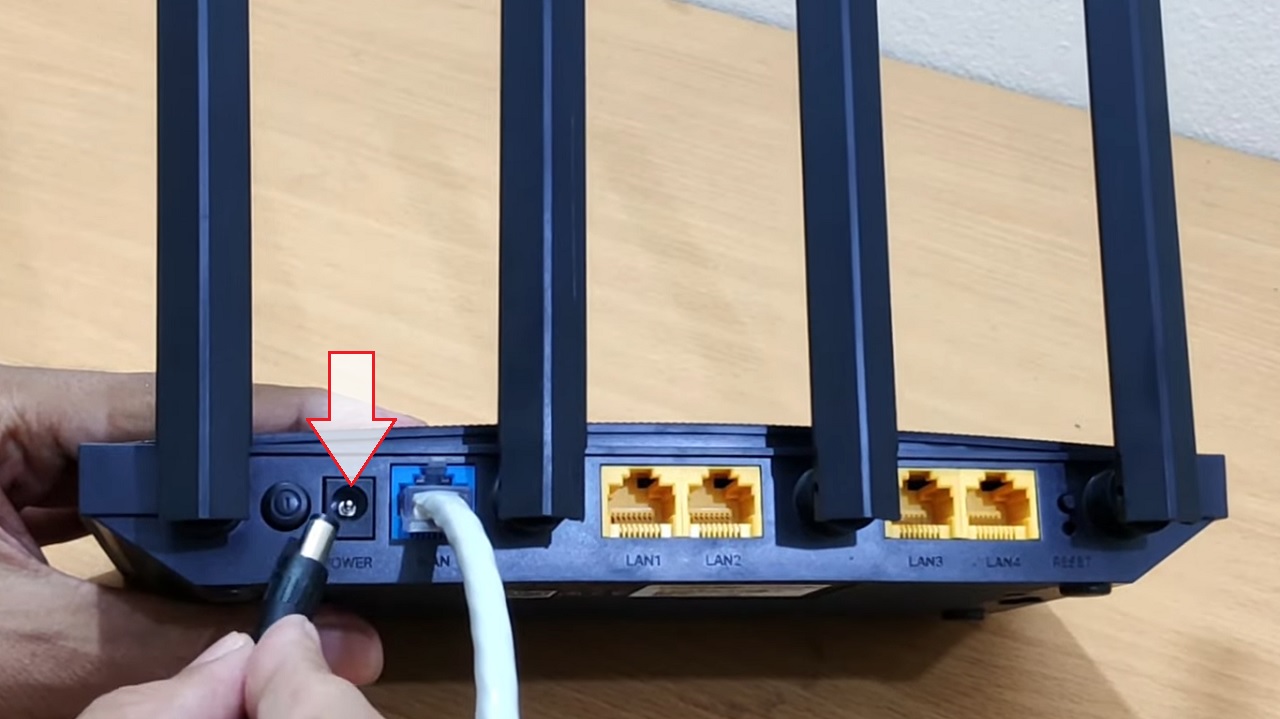
- Connect one end of the power adapter to the device and plug the other end into a power outlet nearby.
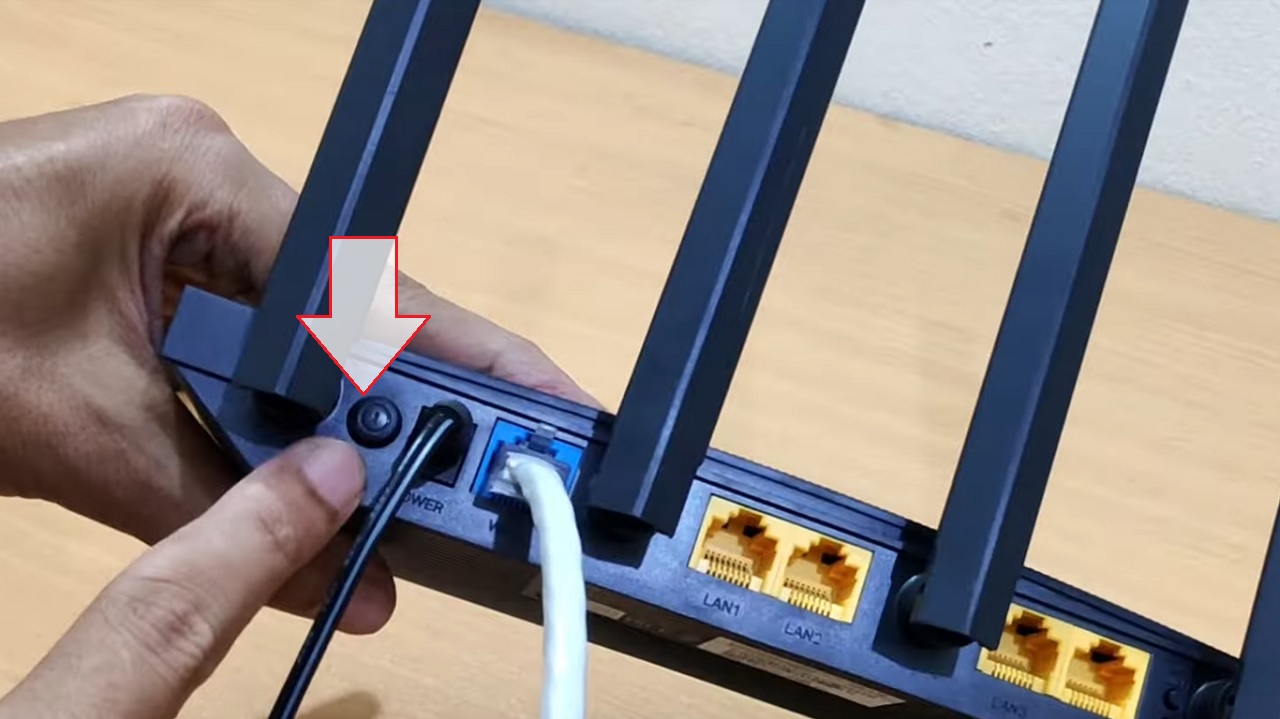
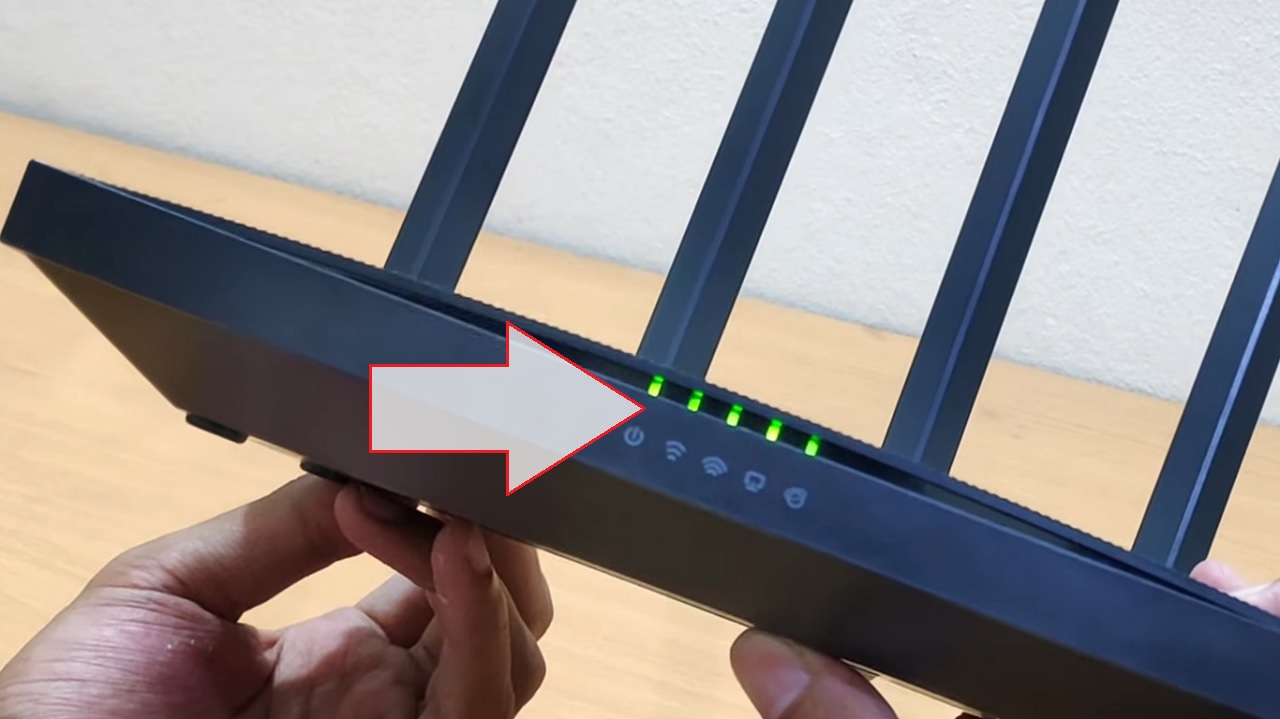
- Press the Power button on your TP-Link router to switch it on.
Though not mandatory, it is good to start by resetting the router to its factory settings in the following way:
- When the router is powered on, press and hold the Reset or WPS button with a sharp object for more than 10 seconds.
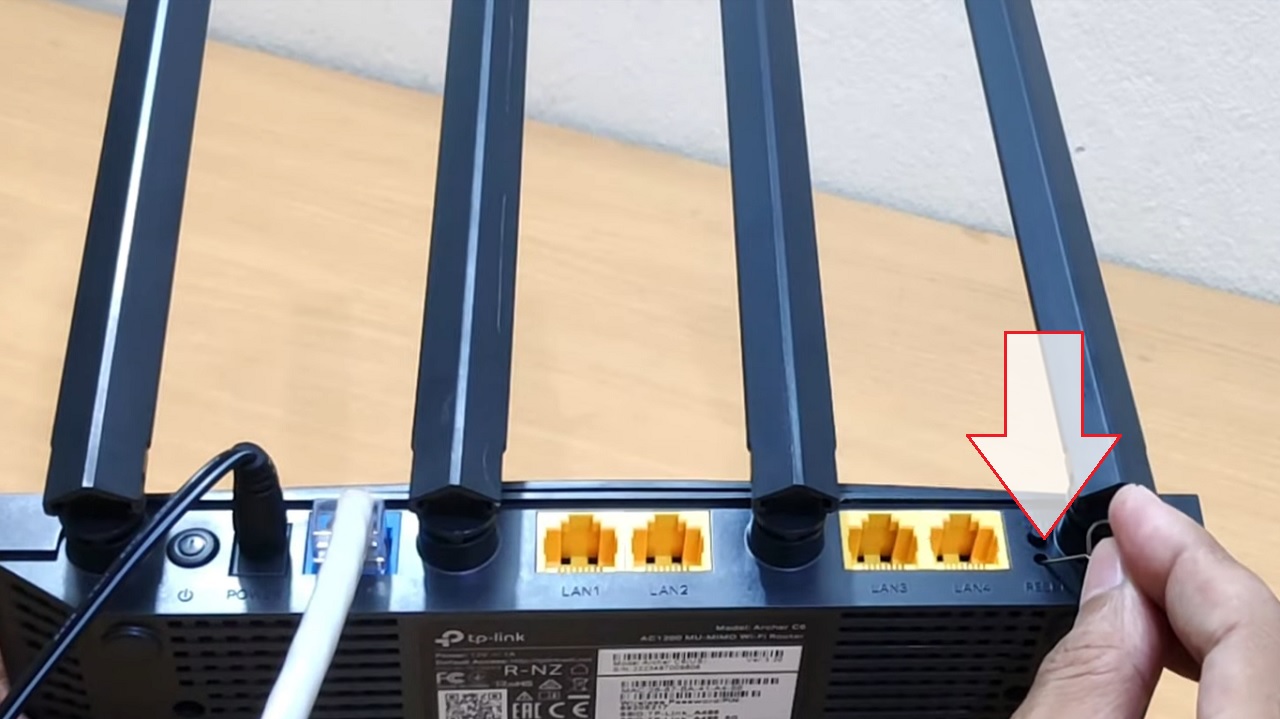
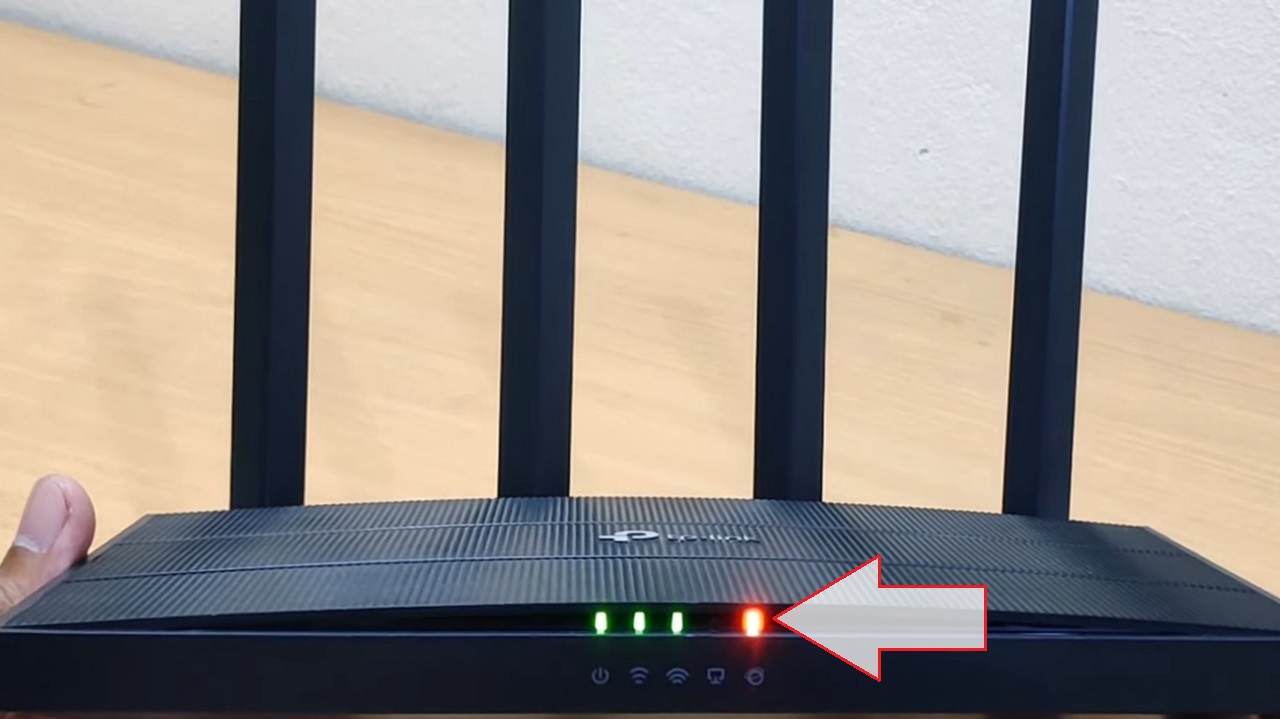
- Then release the Reset button until all the LED lights flash together.
- Wait for the system to reboot to its factory default settings, a process indicated by the red light.
By that time, check the label of the router at the back to note down the login details.
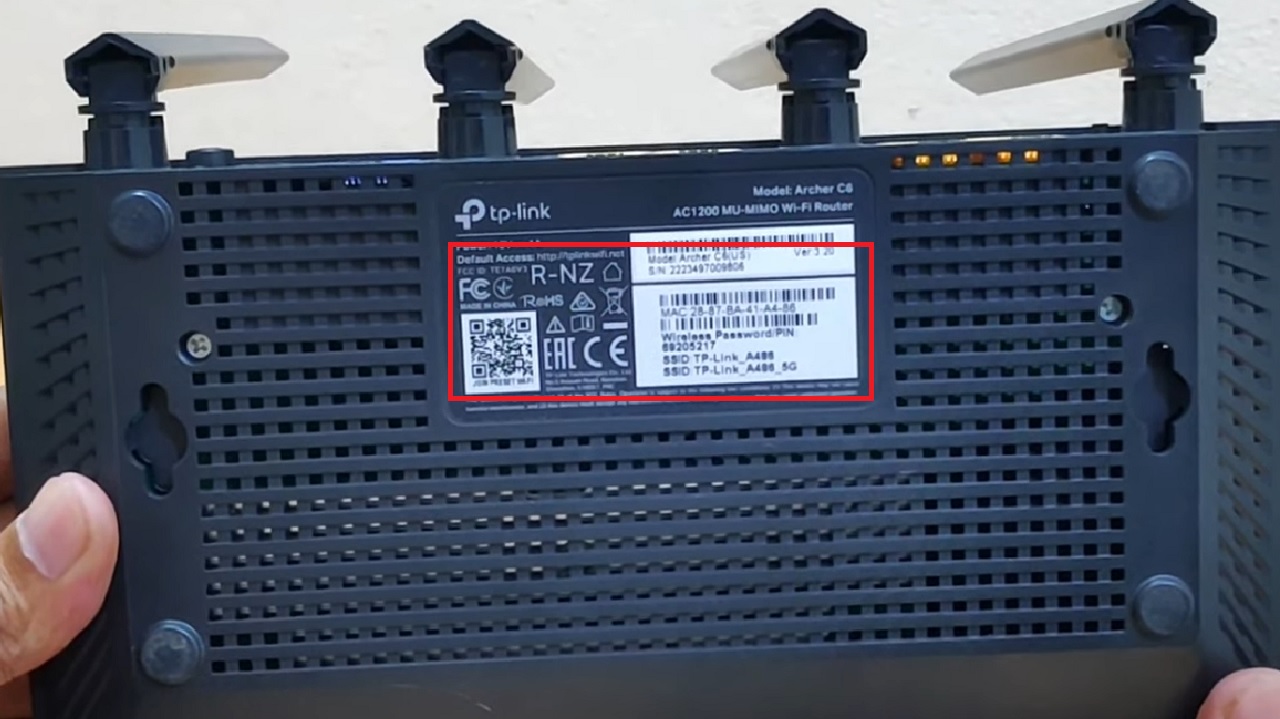
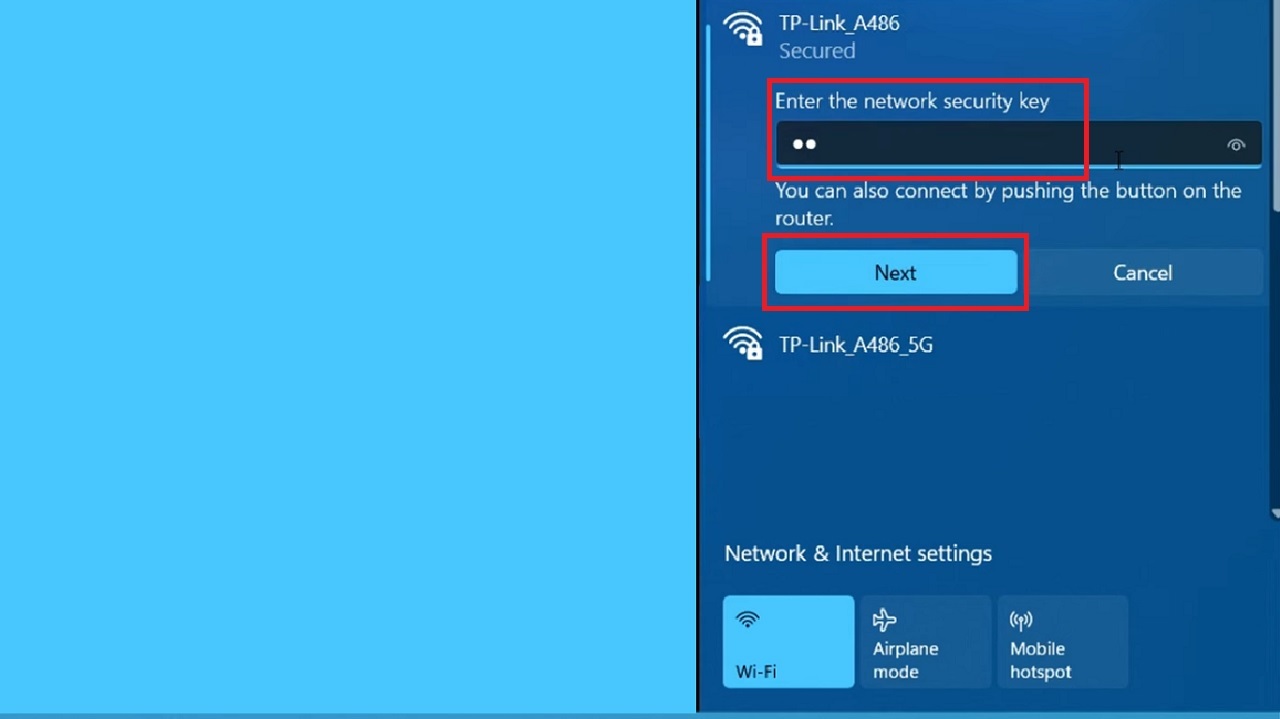
- Now, connect your computer to the router using the password on the label, if you have not changed it.
- Click on the Next button.
- Open a web browser. (Google, for example).
- Type in tplinkwifi.net in the address field.
- Then press the Enter key on your keyboard.
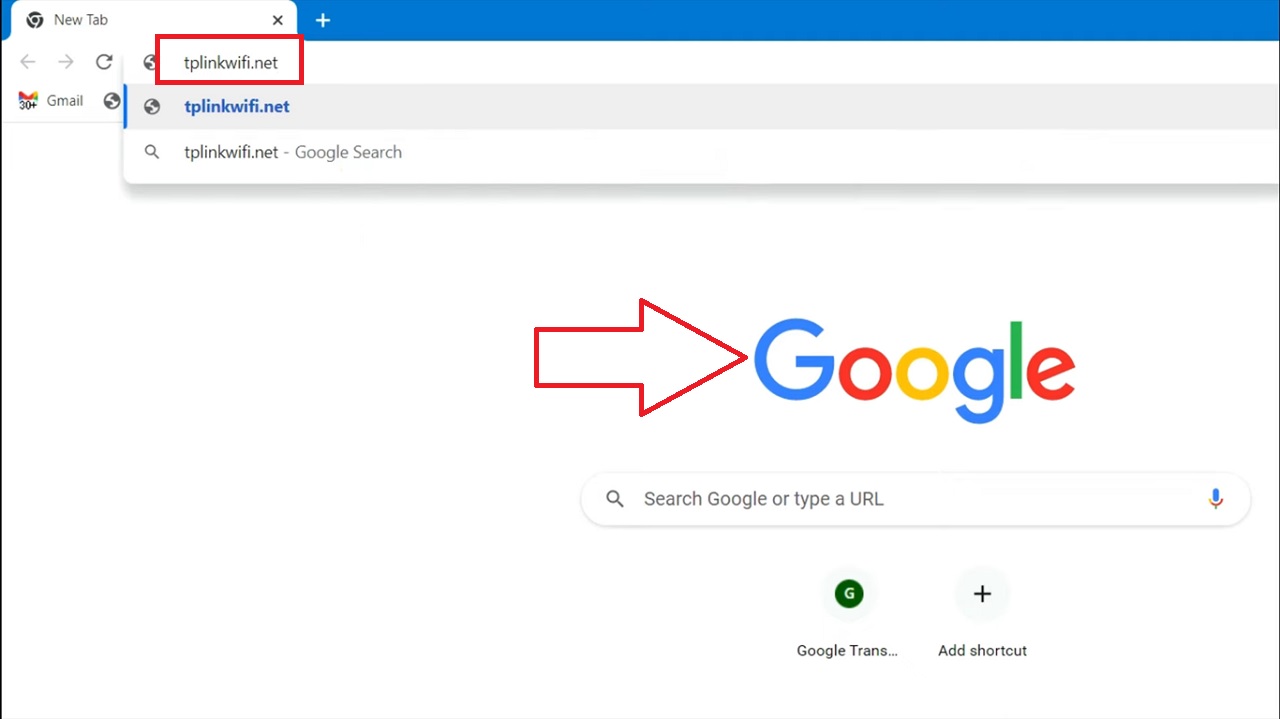
This will open the web management page of the router.
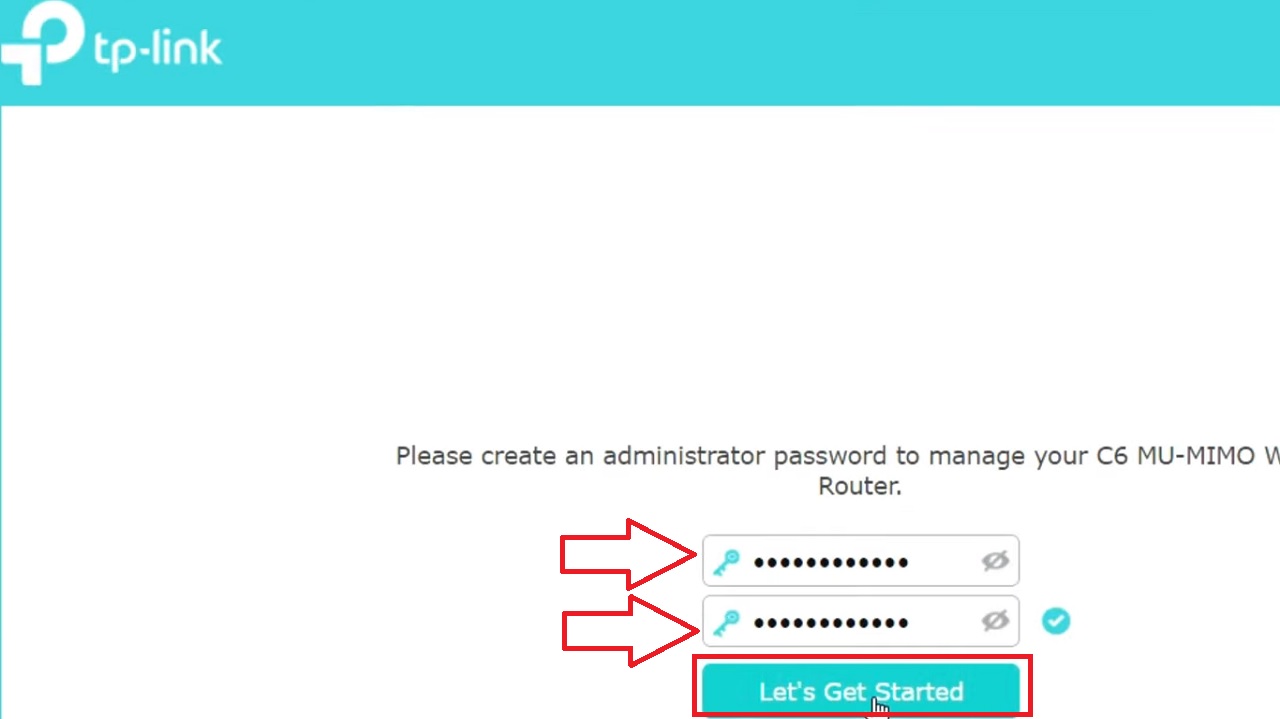
Create an administrator password for your MU-MIMO Wi-Fi router in the following way:
- Type in your new login password in the relevant box.
- Then confirm your login password.
- Now click on Let’s Get Started to continue your setup.
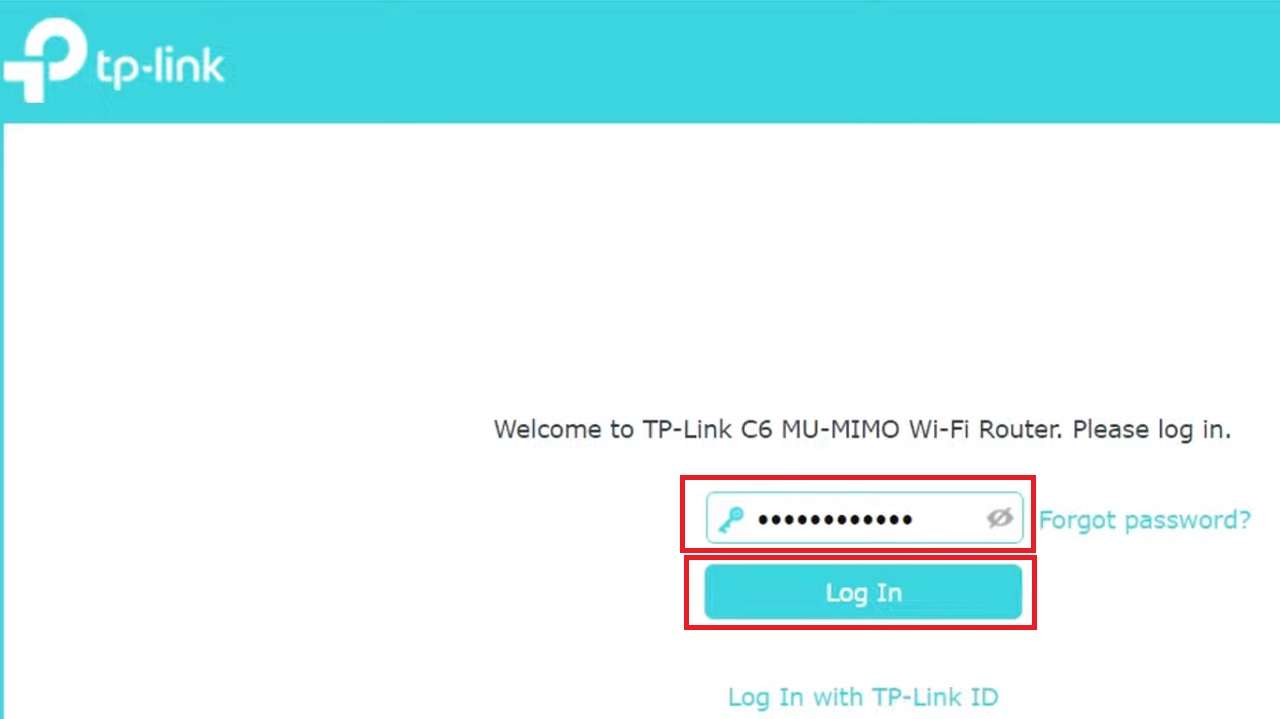
- Now, log in to your router administration panel by typing the administrator password you have set previously.
- Then click on Log In to continue the setup process.
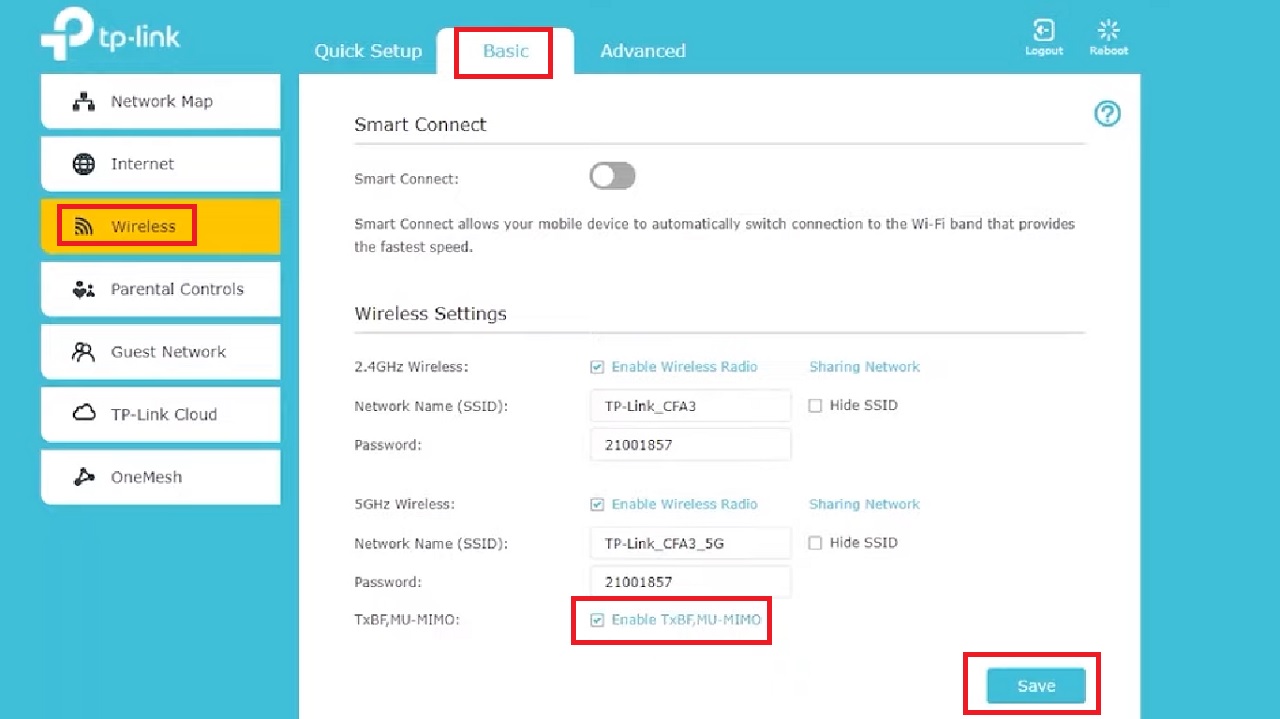
- In the new window, go to the Basic tab.
- Select Wireless from the left pane.
- Click on the small box next to Enable TxBF, MU-MIMO on the right side to enable it. (The name may differ from one router model to another).
- Click on the Save button below.
Alternatively, you can also enable it from the Advanced tab in the following way:
- Click on Wireless on the left pane.
- Select TxBF, MU-MIMO under it.
- Click on the small box next to Enable TxBF, MU-MIMO on the right side to enable it.
- Click on the Save button below.

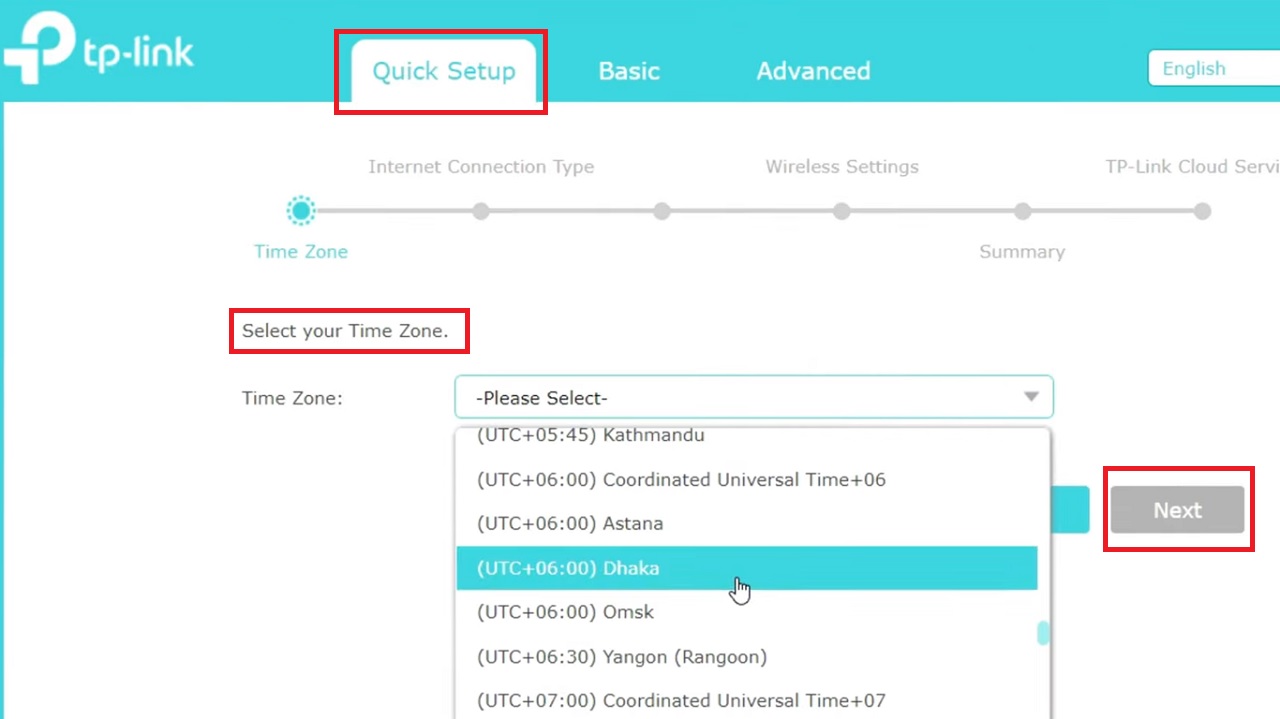
- Now, for further settings, go to the Quick Setup page.
- Select your Time Zone from the drop-down list.
- Then click the Next Button to continue.
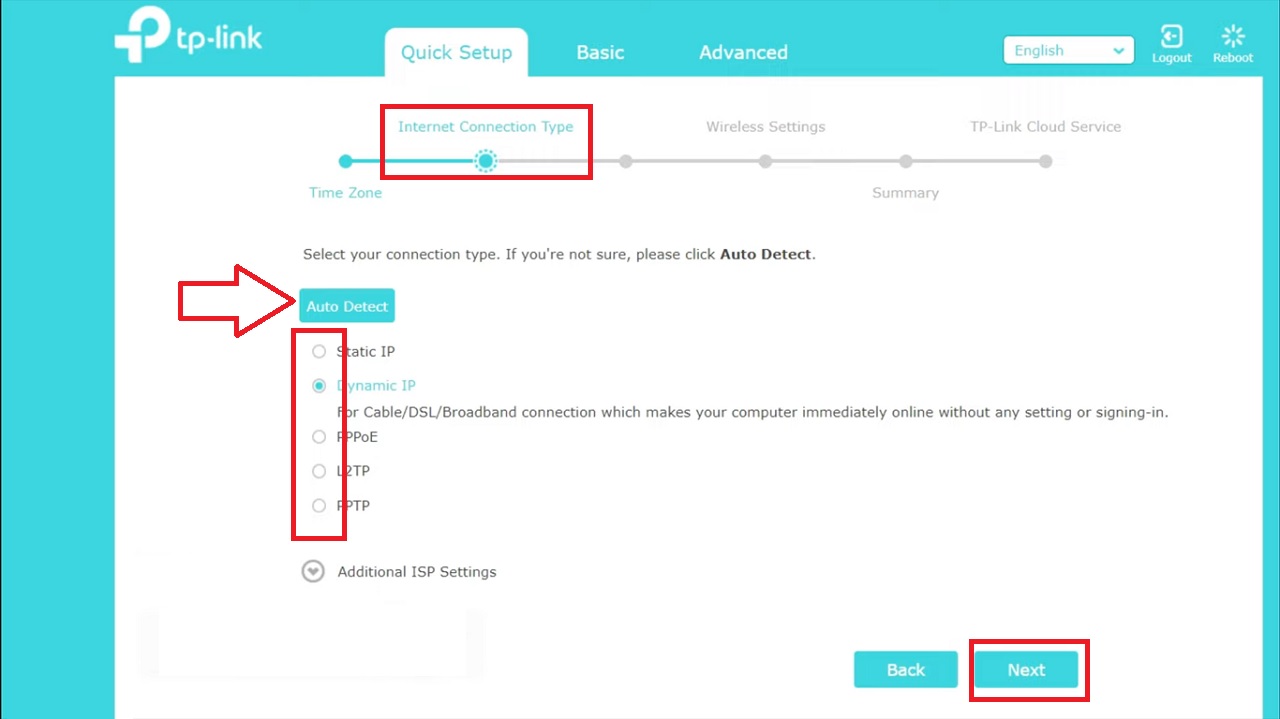
- Select the Internet Connection Type from Dynamic IP, Static IP, PPPoE, L2TP, or PPTP.
(For demonstration purposes, the PPPoE connection type is chosen here. Ask for the right connection type along with the necessary details from your Internet Service Provider. If you are unsure click on Auto Detect).
- Then click the Next Button to continue your setup.
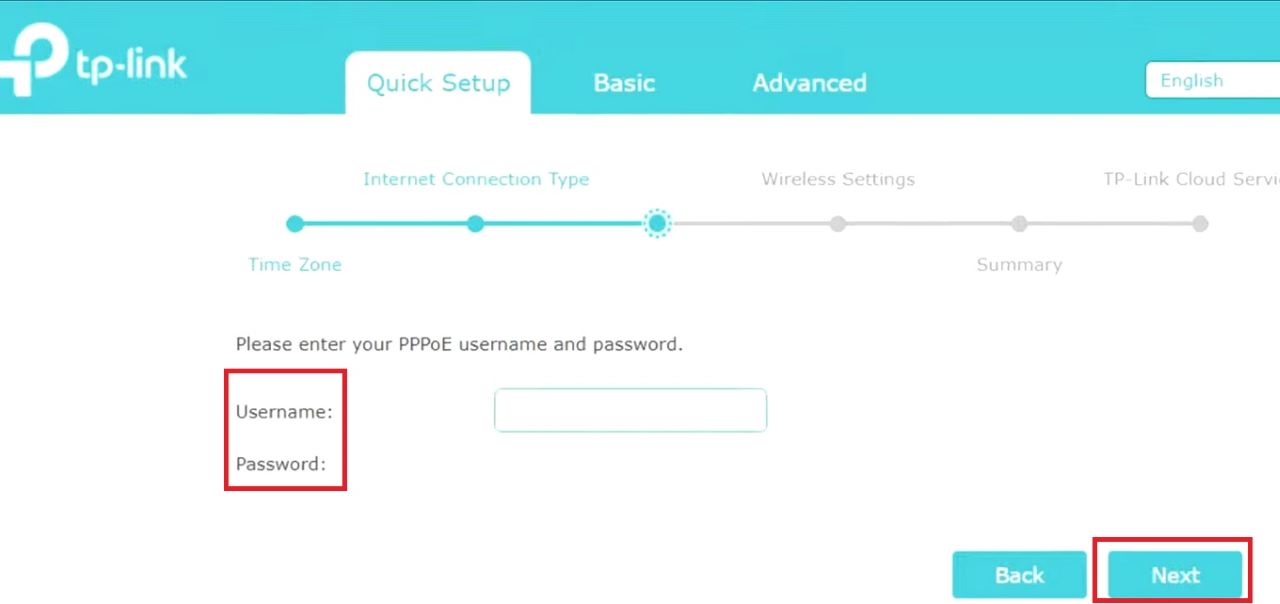
- Now, enter the PPPoE Username given by your Internet Service Provider.
- Then, type your PPPoE Password.
- Finally, click the Next button to continue.
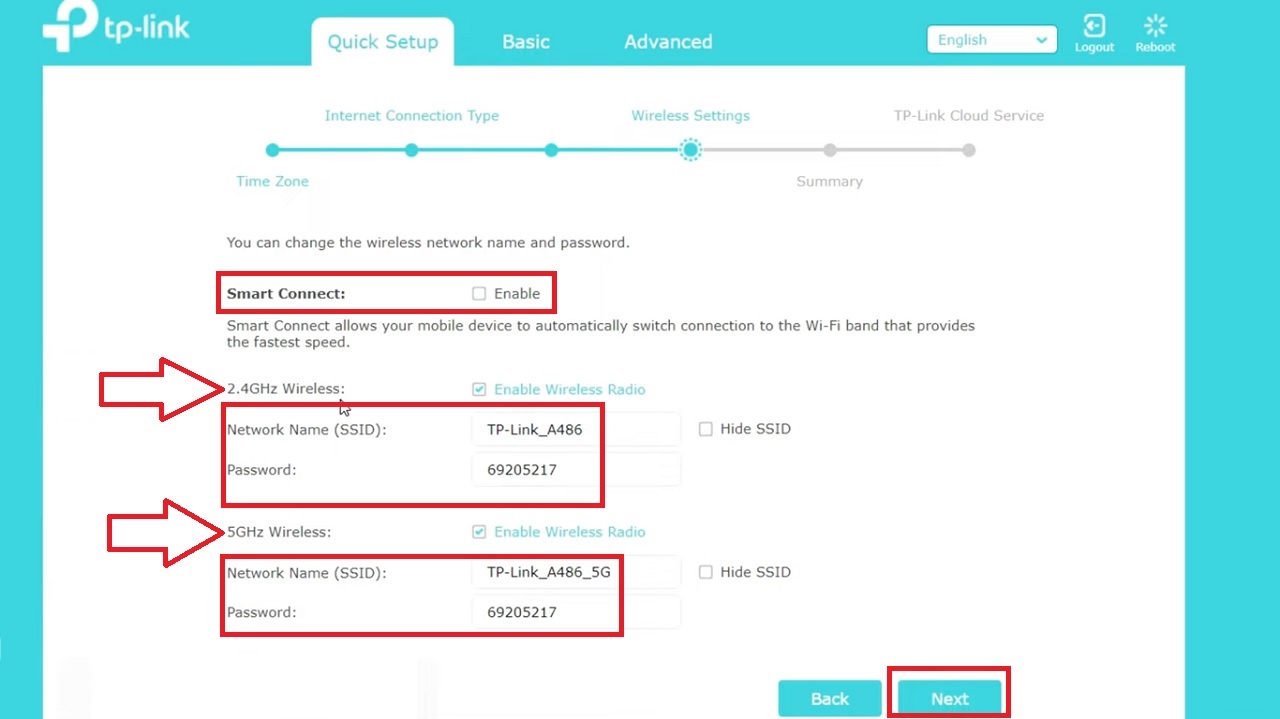
Now, moving on to Wireless Settings.
Usually, the Smart Connect feature will be enabled in the following Wireless Settings section. This means that both the 2.4 GHz and 5 GHz frequencies of the router will share the same network name and password.
- Disable Smart Connect.
- Confirm or change the wireless Network Name (SSID) for the 2.4 GHz band wireless network.
- Type the Password you have chosen in the box next to the password. Make sure it is not less than 8 characters.
- Follow the same process for your 5 GHz band wireless network.
- Then click on the Next button to proceed with the setup.
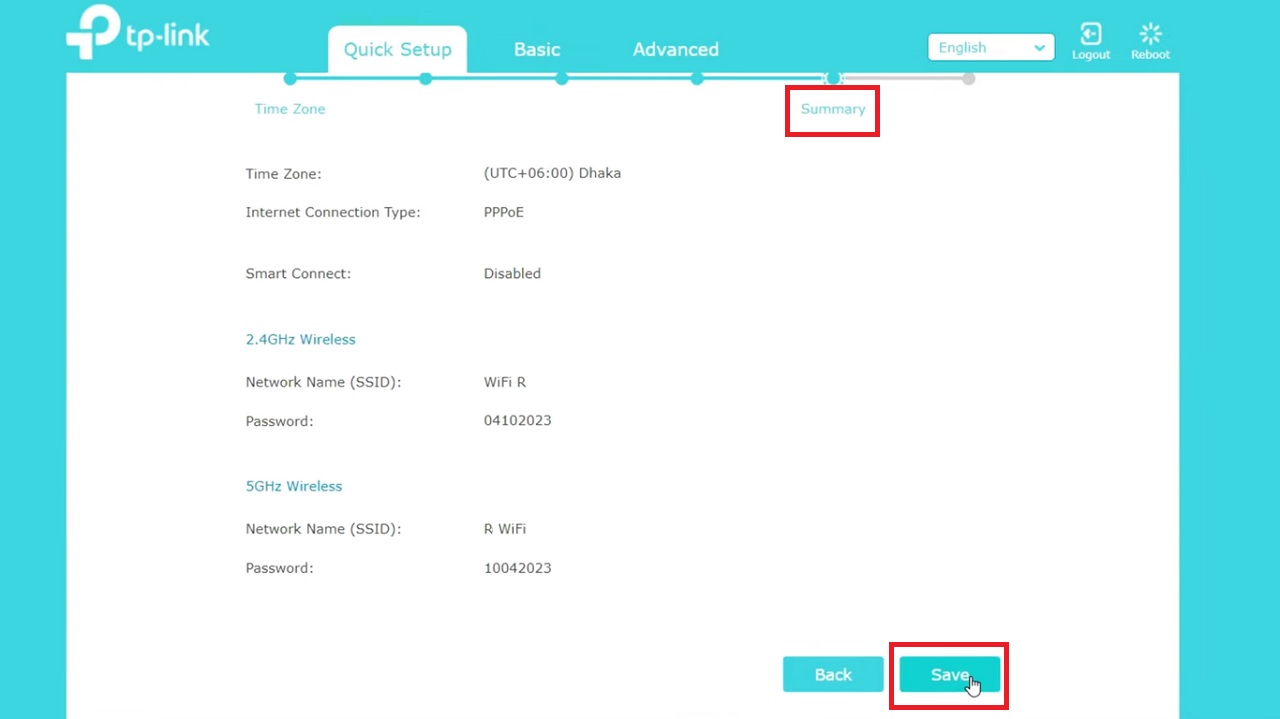
- In the following window, check the Summary, scroll down, and click on the Save button.
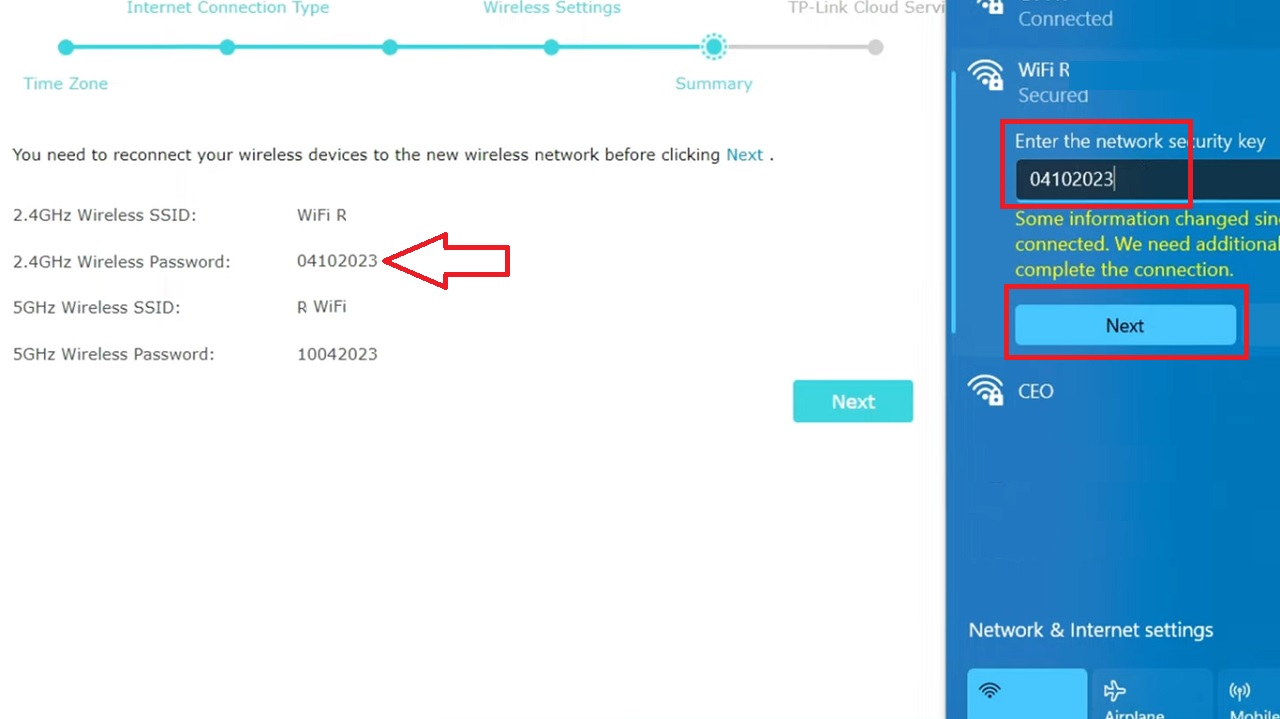
- Now, reconnect your wireless device to the new wireless network using the password shown beside with a red arrow.
- Then click on the Next button.
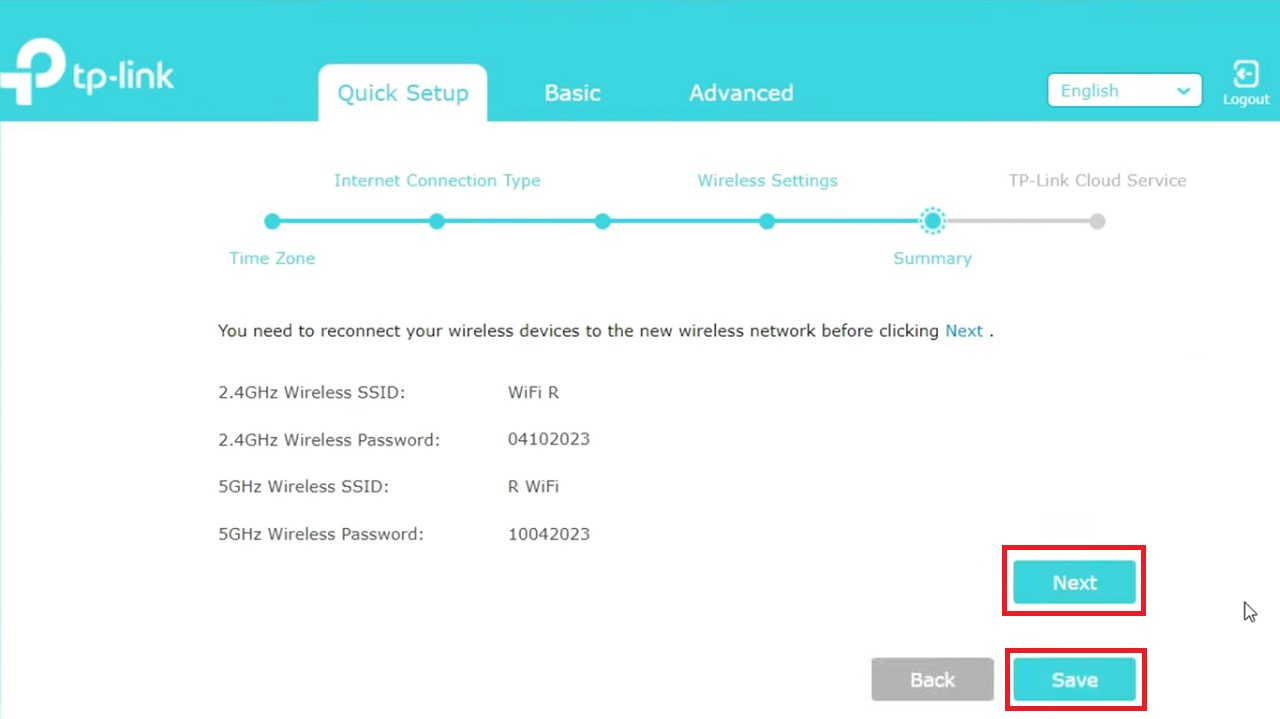
- Once it is connected click on the Next button in the following window to end the router setup and configuration process and then click on the Save button.
Your Network setup successfully completed, as the following window will confirm:

You can also configure your MU-MIMO router from the Basic tab. For example,
- When you click on the Internet option on the left, you can change the Internet Connection Type as in Quick Setup.
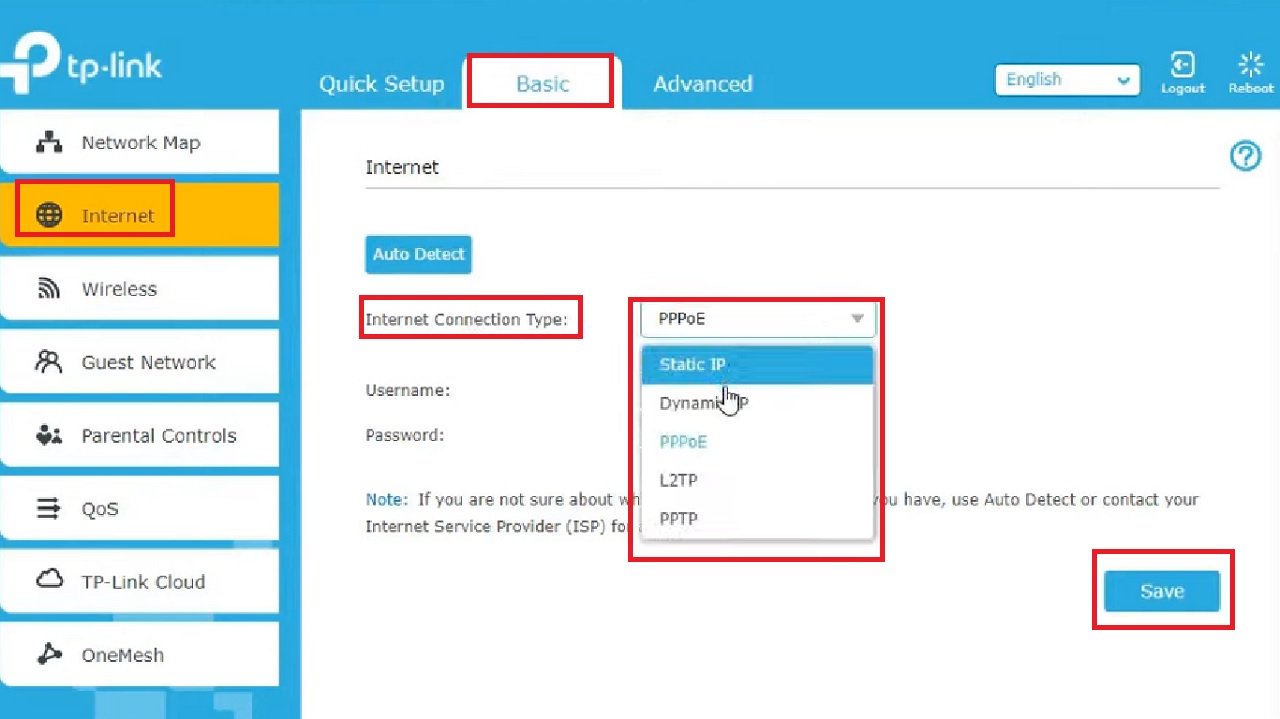
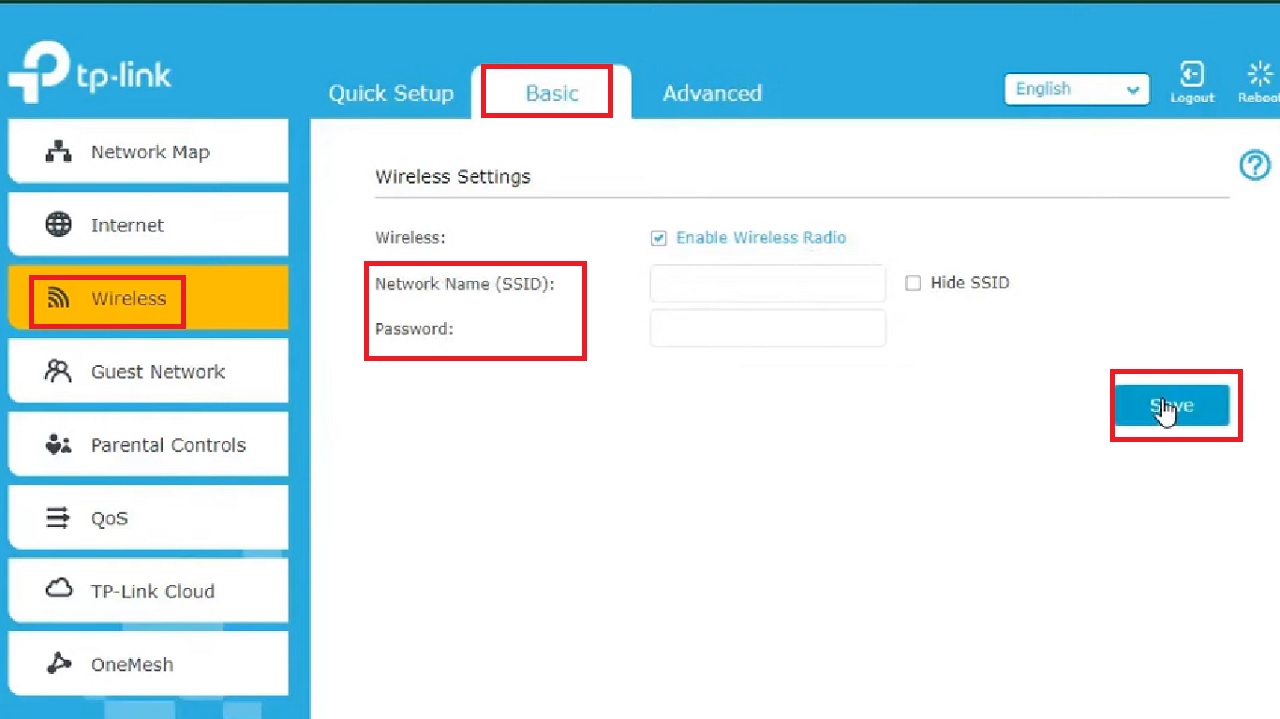
- Clicking on the Wireless option will allow you to change the Network Name (SSID) and Password if you want.
However, the Basic tab will allow you to change a few additional things that a Quick Setup would not.
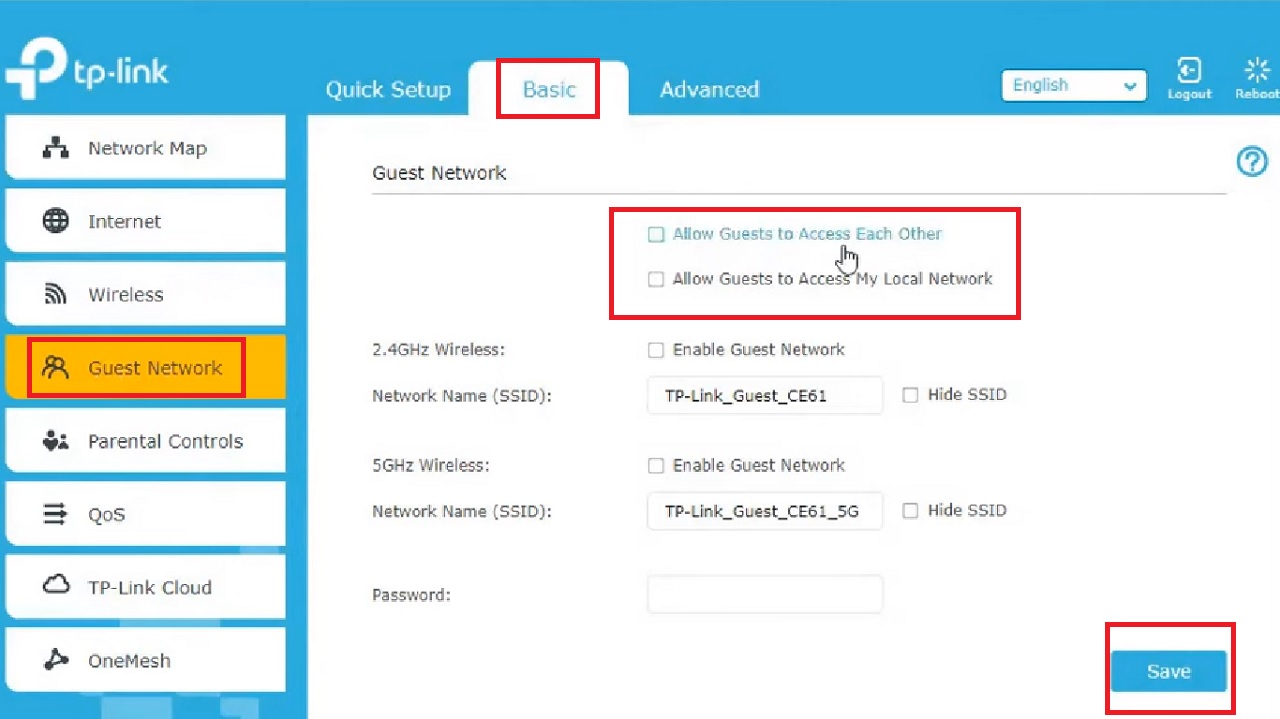
- The Guest Network option will allow you to change settings to allow guests to access each other or the local network and make other changes to the SSID and Password as well.
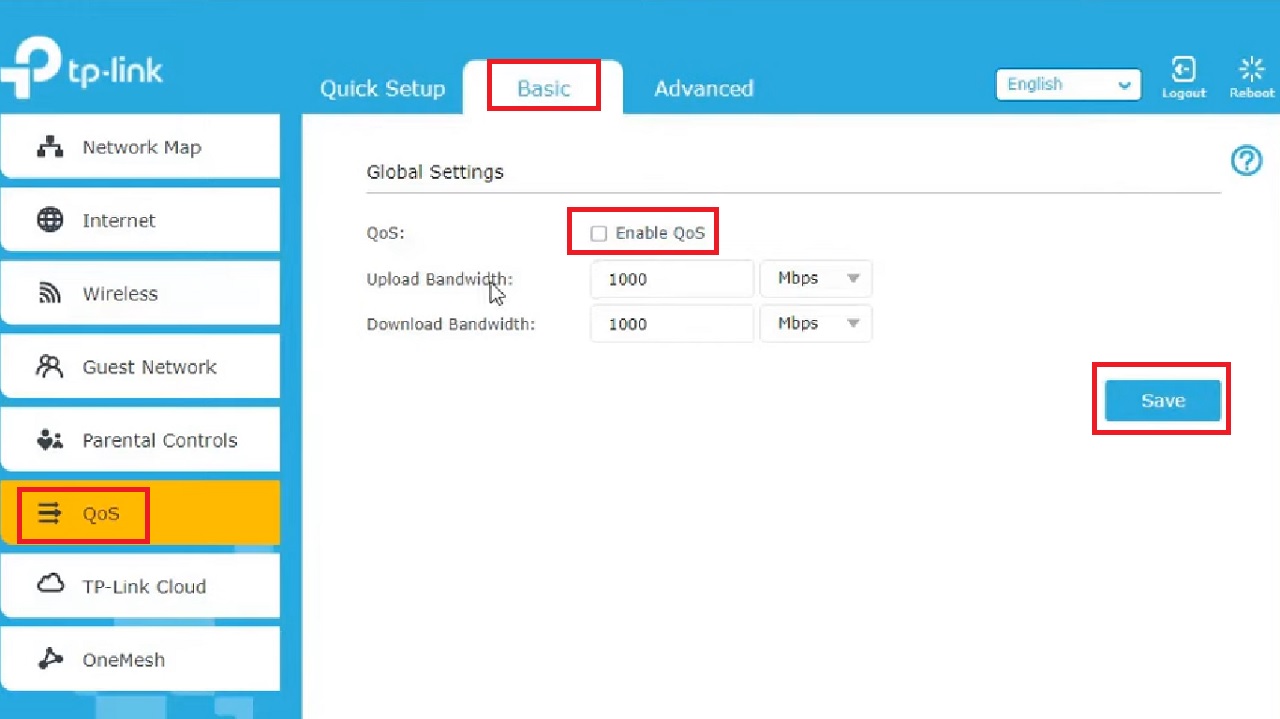
- You can also enable Quality of Service from the QoS tab.
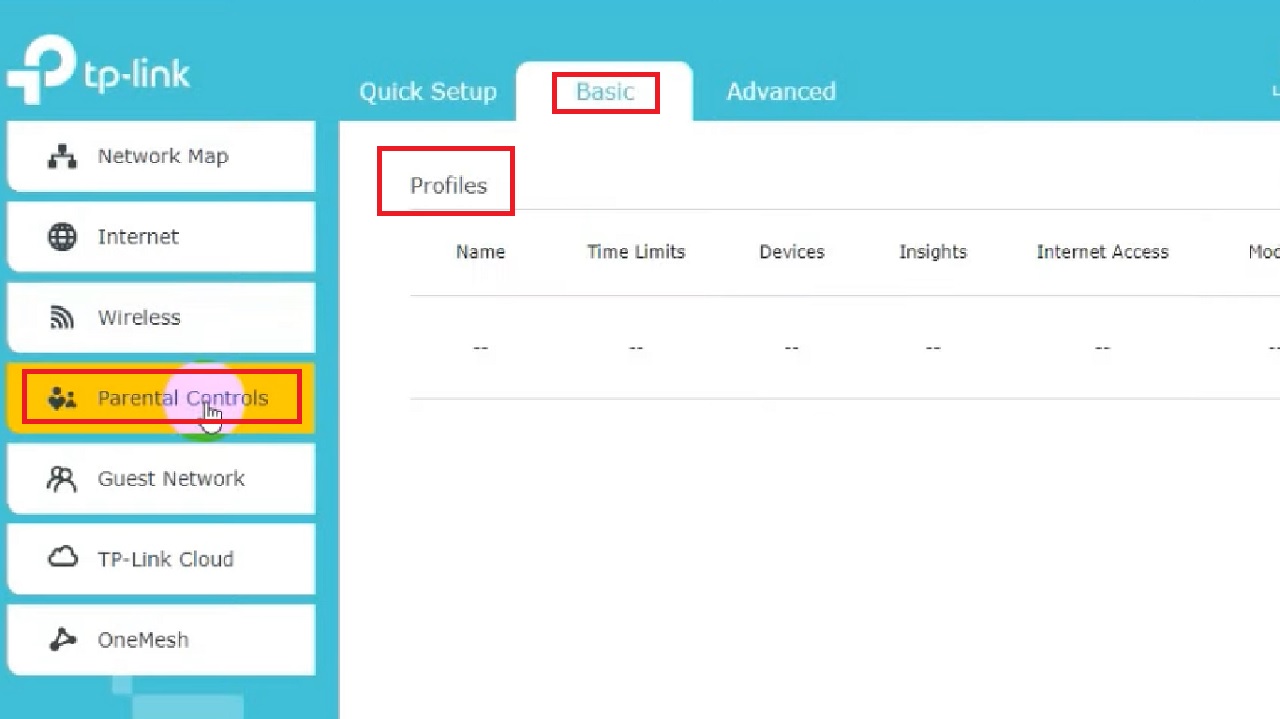
- If you wish, you may set new Profiles from the Parental Controls tab under the Basic tab as well.
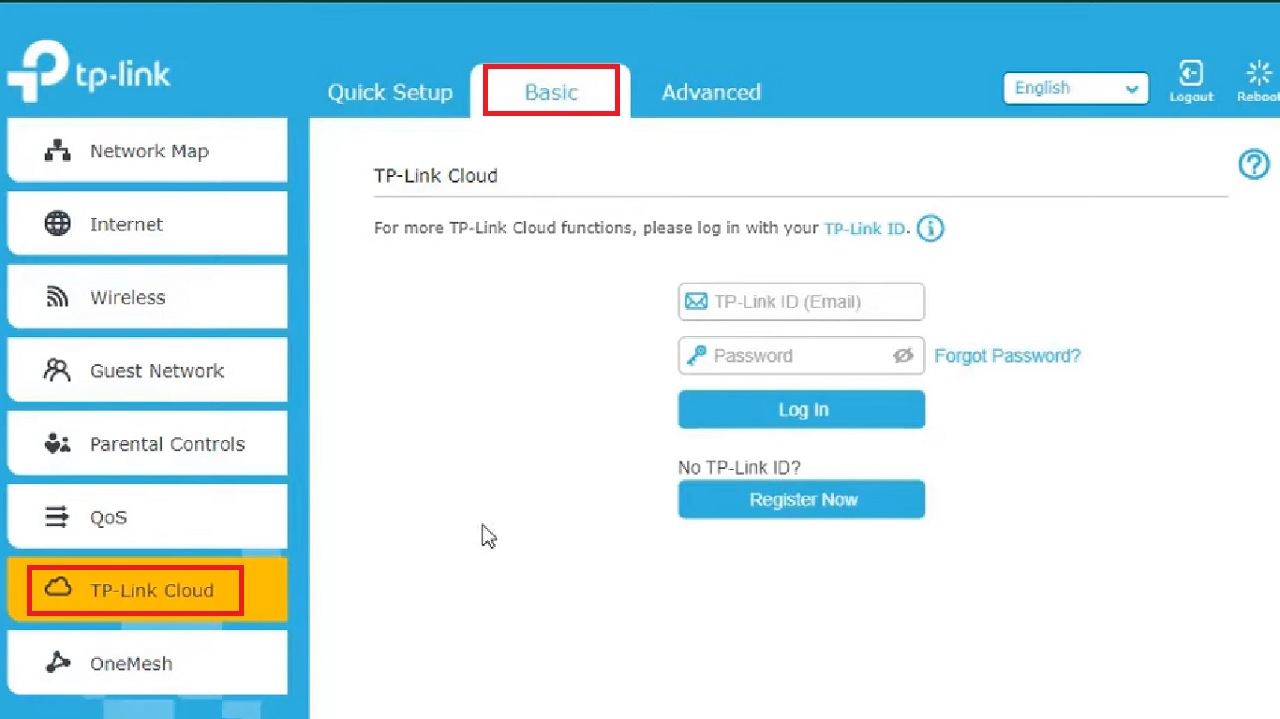
- Click on the TP-Link Cloud option to set and enjoy Cloud functions.
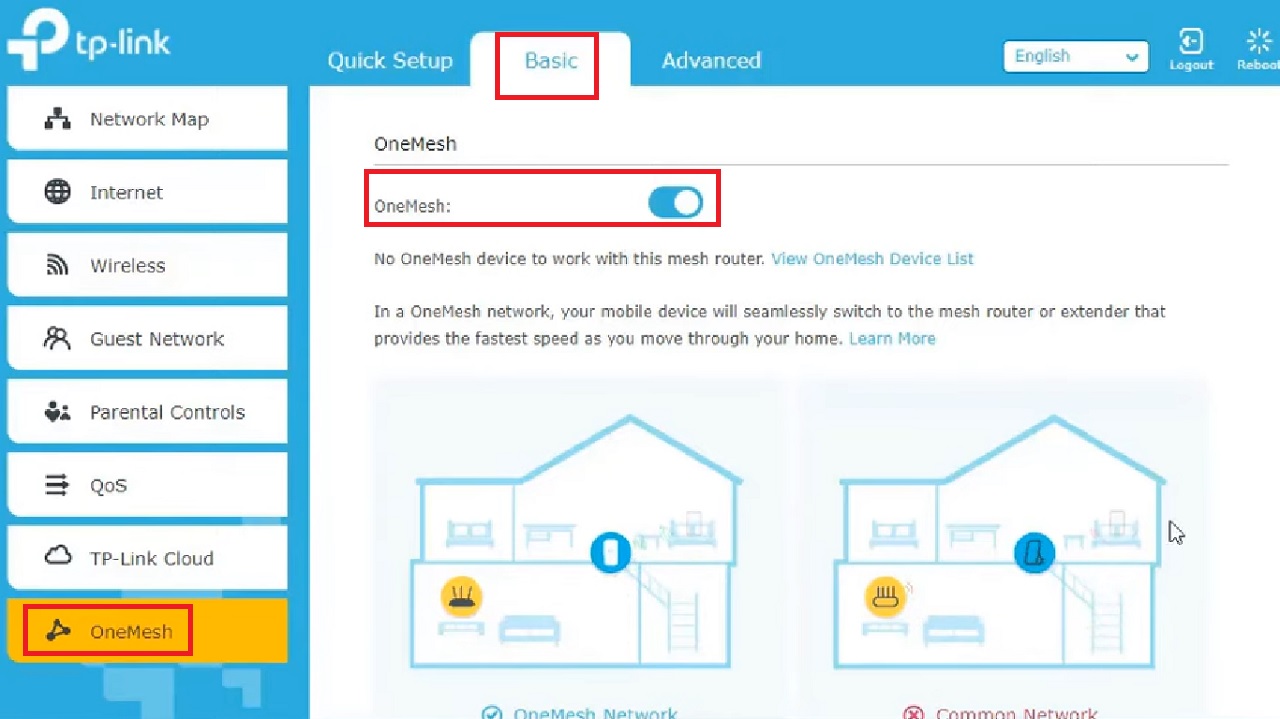
- And finally, you can set OneMesh by toggling the switch if you want seamless connectivity while using mobile devices.
Conclusion
In conclusion, it is quite easy to set up a MU-MIMO router for improved network performance.
Simply follow the steps outlined in this guide to enjoy the benefits of faster, more efficient, reliable, and responsive Wi-Fi connectivity in your home or office.