
Setting up Quality of Service (QoS) on your router is essential for optimizing network performance.
This guide offers clear, concise steps to configure QoS, ensuring a seamless online experience.
Prioritize specific network traffic, reduce latency, and make the most of your internet resources.
In This Article
KEY TAKEAWAYS
- Prioritize network traffic for a smoother online experience changing settings in the Advanced tab.
- Ensure a consistent connection, and reduce latency for crucial applications.
- Prevent congestion, and improve overall network performance through effective bandwidth allocation.
Why Implement Quality of Service?
QoS prevents issues like dropped calls during video conferences when someone on the same network is downloading large files. With a QoS set, the router can prioritize specific applications and services over others that are less important.
Quality of Service is also important for the following:
- High performance of crucial applications that need high bandwidth
- Prevent delays in delivering data packets or loss
- Better management of Internet resources
- Deliver a higher user experience
- Better point-to-point, end-to-end, node-to-node traffic management
- Reduce latency
Ways to Setup Router Quality of Service
To set up Quality of Service on your router, first identify the specific type of traffic you want to prioritize and then access your router’s settings to configure.
In addition, you may also need to do the following for a perfect setup:
- Access your router’s settings to configure QoS.
- Adjust bandwidth allocation as needed.
- Fine-tune and test your QoS configuration.
- Save, apply changes, and regularly monitor and maintain your QoS setup.
Note: Before setting up QoS, have two things ready: specify the device or services and know your upload and download speeds.
Do not depend on the advertised speeds by your Internet Service Provider (ISP). Instead, test it manually by using specific tools.
Method 1: Change the Settings in the Advanced Tab in the Router
Different router models will need different steps to follow to set up Quality of Service. Here are steps to follow to set up QoS on some of the major router models.
STEPS TO FOLLOW:
D-Link Router:
If you are using a D-Link router, you can set up Quality of Service by making some minor changes in the settings in the Advanced tab.
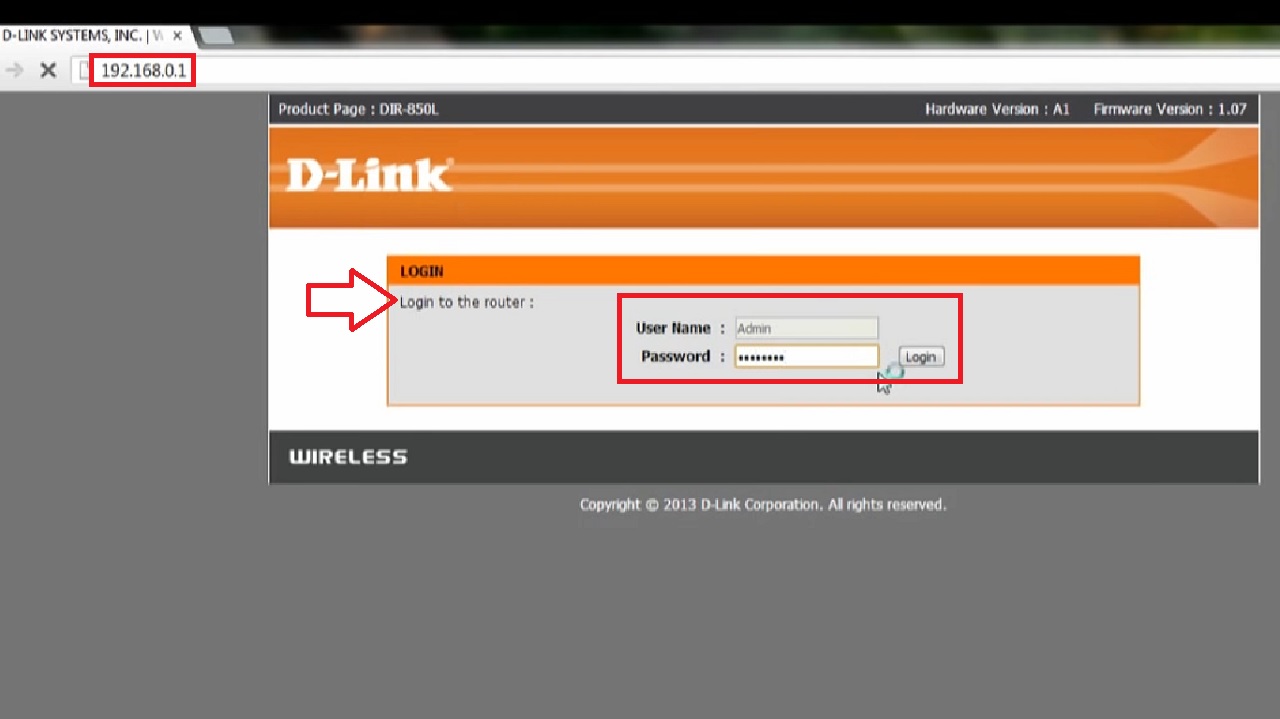
- Open your web browser.
- Type in the IP address, usually found on the label at the back of the router, in the address bar and hit Enter.
- Type in the Username and Password, also found at the back of the router, to Login to the router.
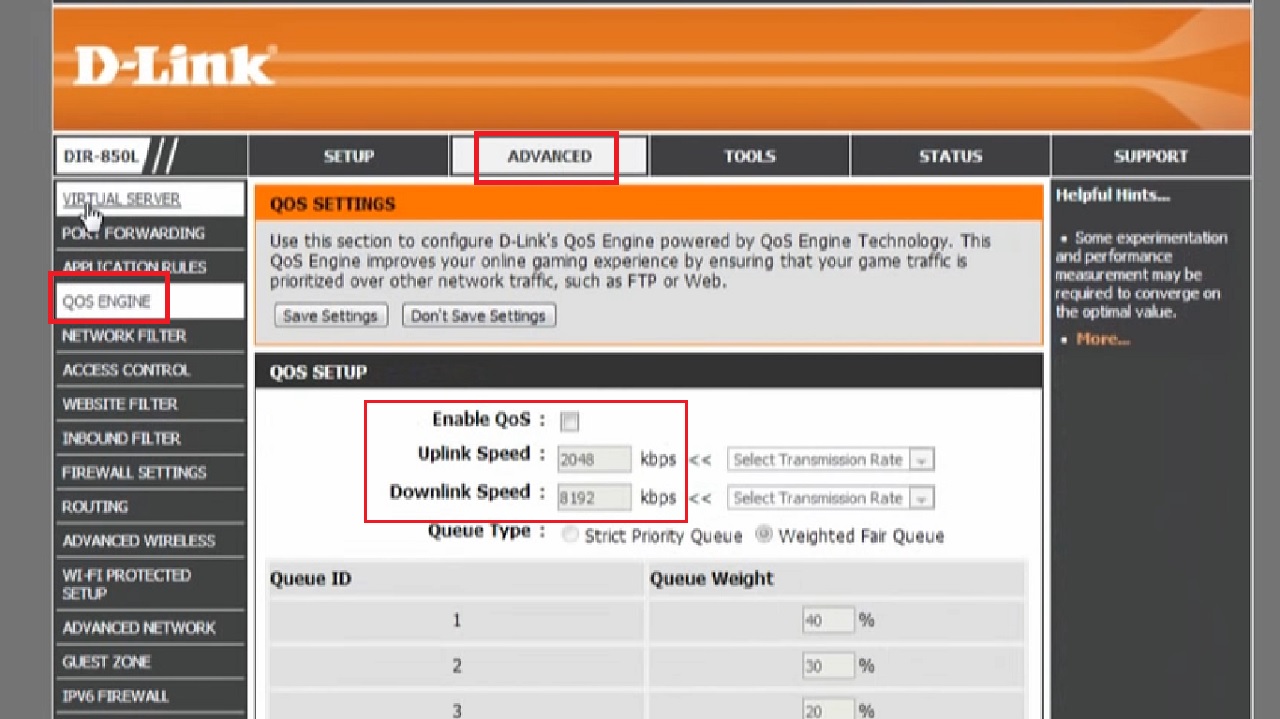
- Go to the ADVANCED tab in the following window.
- Click on QOS ENGINE on the left pane.
- Check the small box next to Enable QoS.
- Set the Uplink Speed and Downlink Speed.
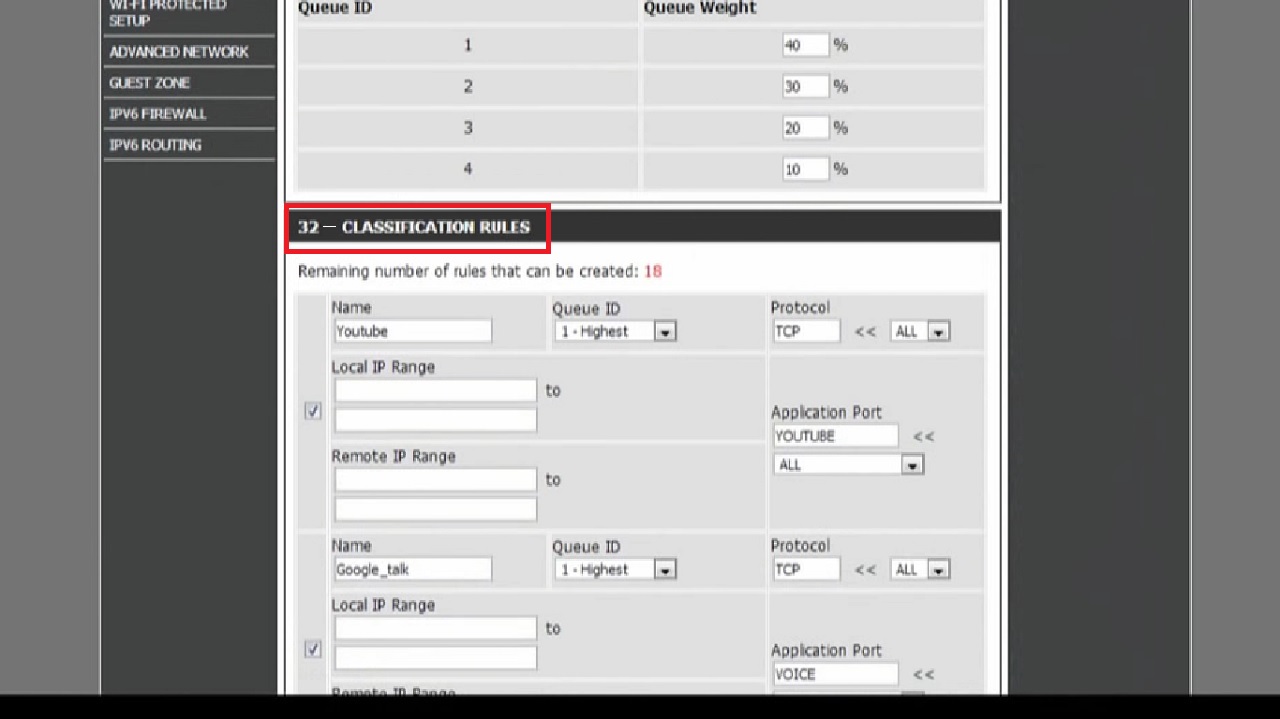
- Scroll down to the 32 – CLASSIFICATION RULES section.
- Create all the rules that you want.
- Scroll further down and finally click on the Save Settings button.
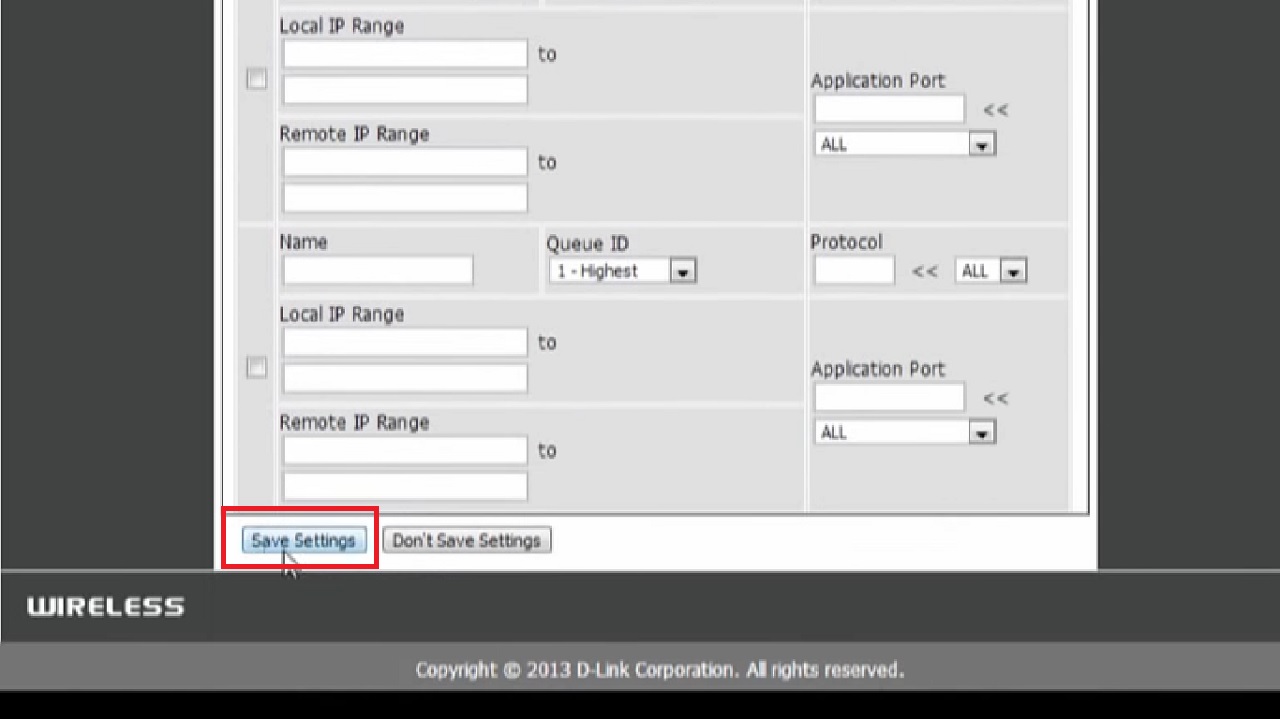
You are done with the QoS setup in your D-Link router.
TP-Link Router:
If you are using a TP-Link router, you can also set up QoS by accessing the Advanced Setup tab.
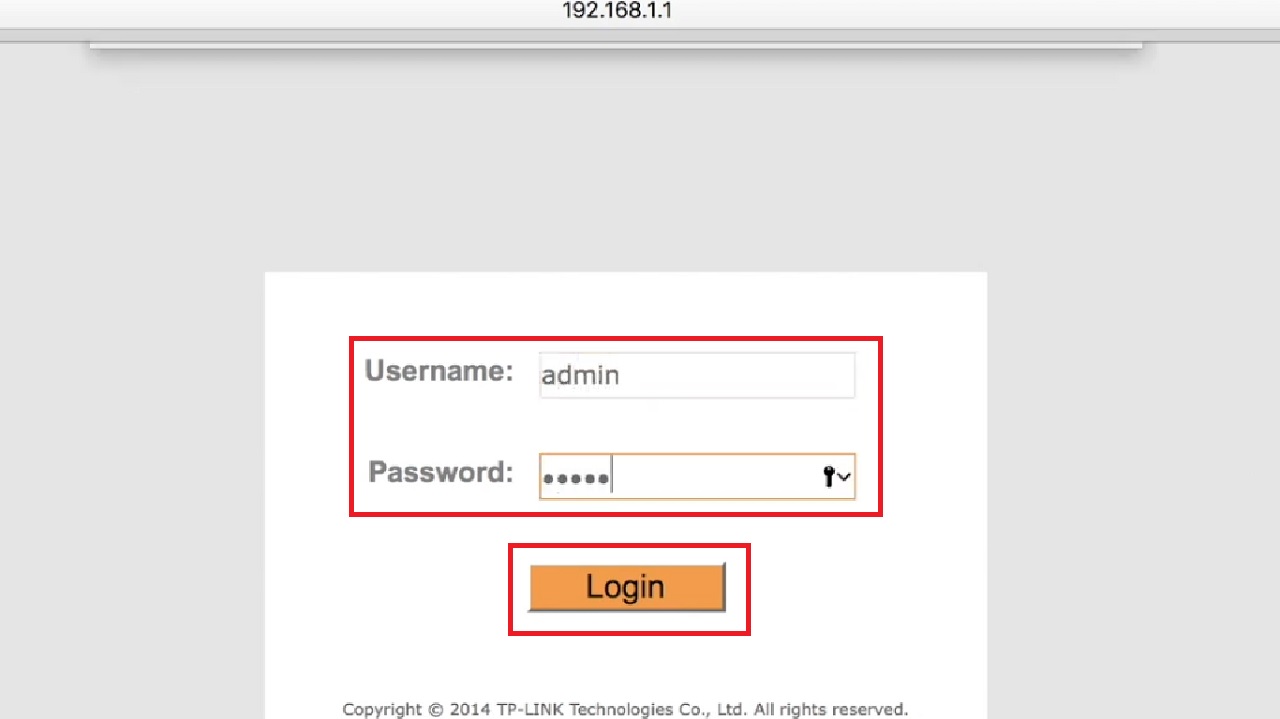
- Open the web browser > Type in the IP address.
- Login with the Username and Password, which are usually ‘admin’ for both by default.
- Go to the Advanced Setup tab.
- Select the QoS tab under it.
- Click on the small radio button next to Activated and beside QoS.
- Also check the radio button next to Activated beside Active under Rule.
- Set the Application to DHCP by choosing it from the dropdown options you get after clicking on the arrow in the box.
- Check all the boxes beside Physical Ports, such as WLAN, Enet1, Enet2, Enet3, and Enet4.
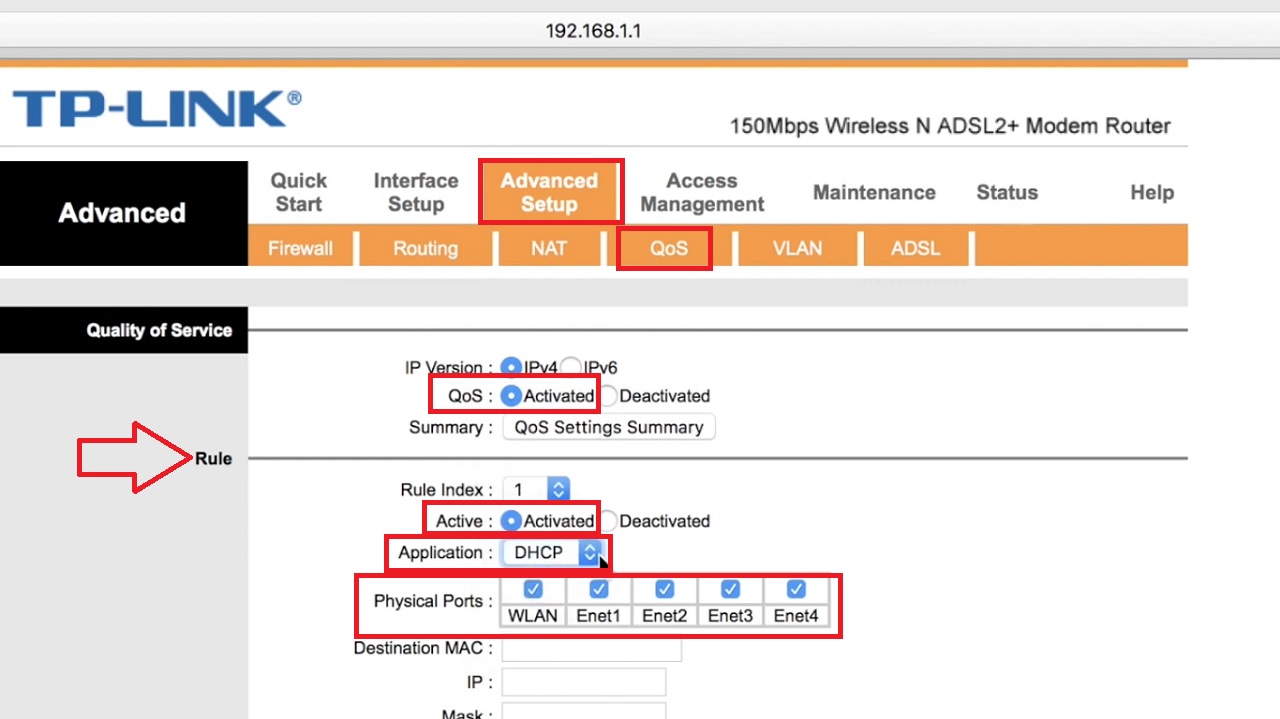
Click on save and exit. (Not shown in the image).
Netgear Router:
Follow these steps if you are using a Netgear router.
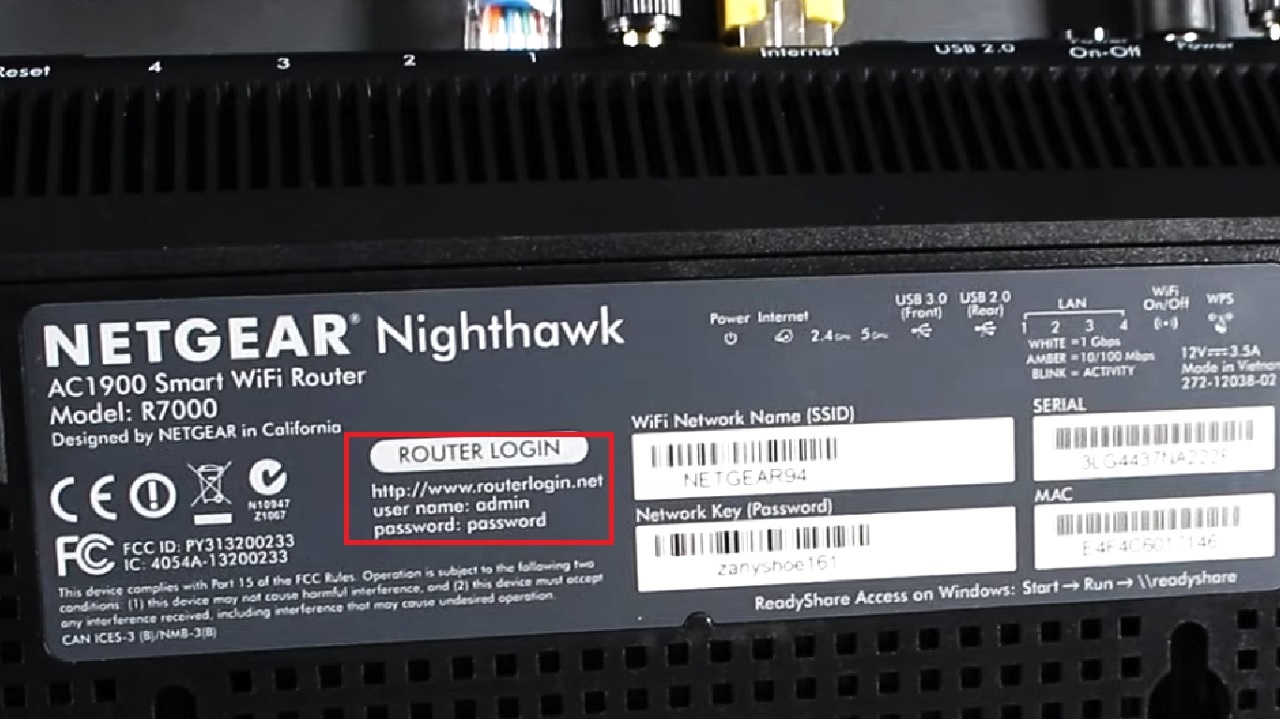
- Log in to the router by typing the username and password, which are usually ‘admin’ and ‘password’ respectively.
(However, check it out on the label at the back of your router).
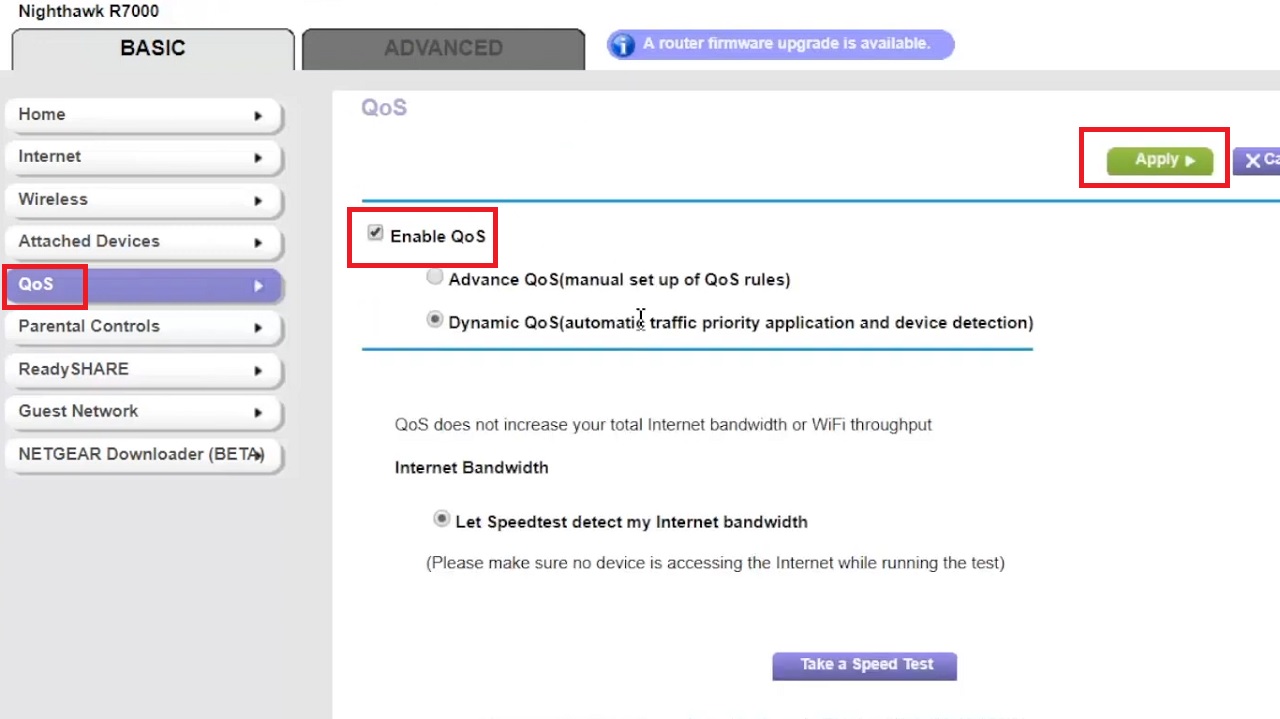
- Under the BASIC tab, select QoS from the left pane.
- Click on the box next to Enable QoS on the right side of the window.
- Click on the Apply button.
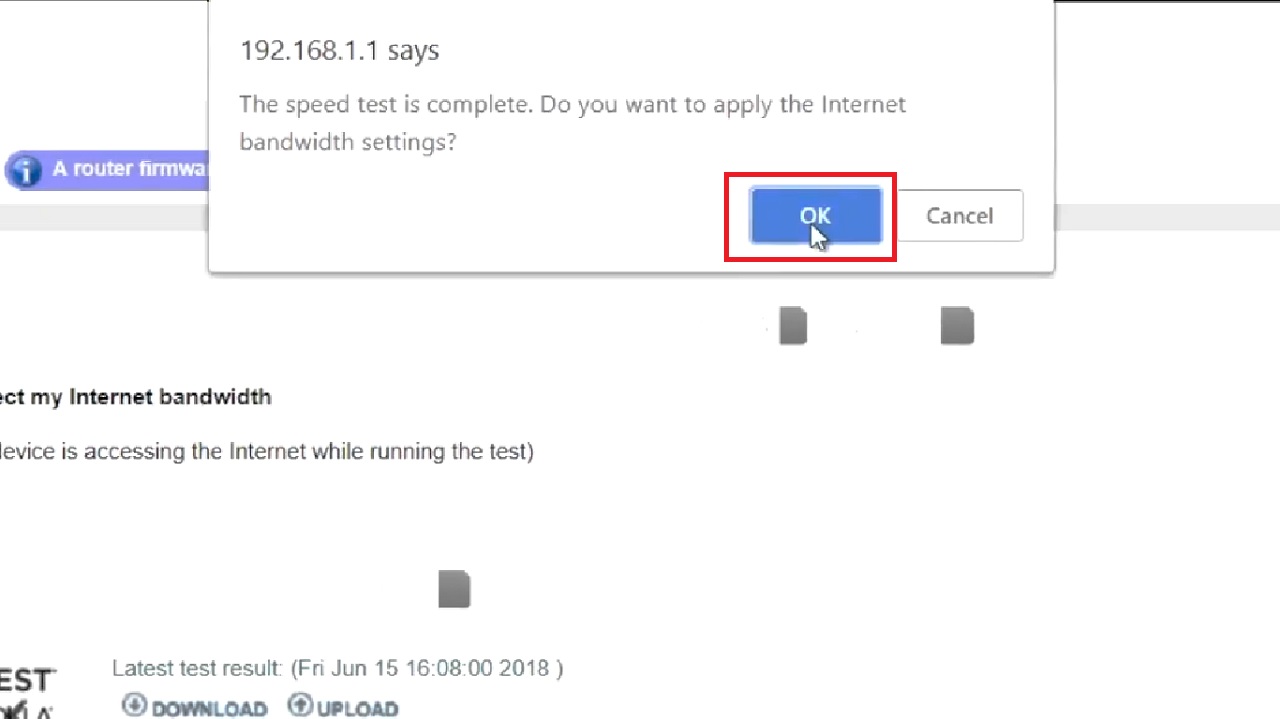
- Click the OK button to run the speed test.
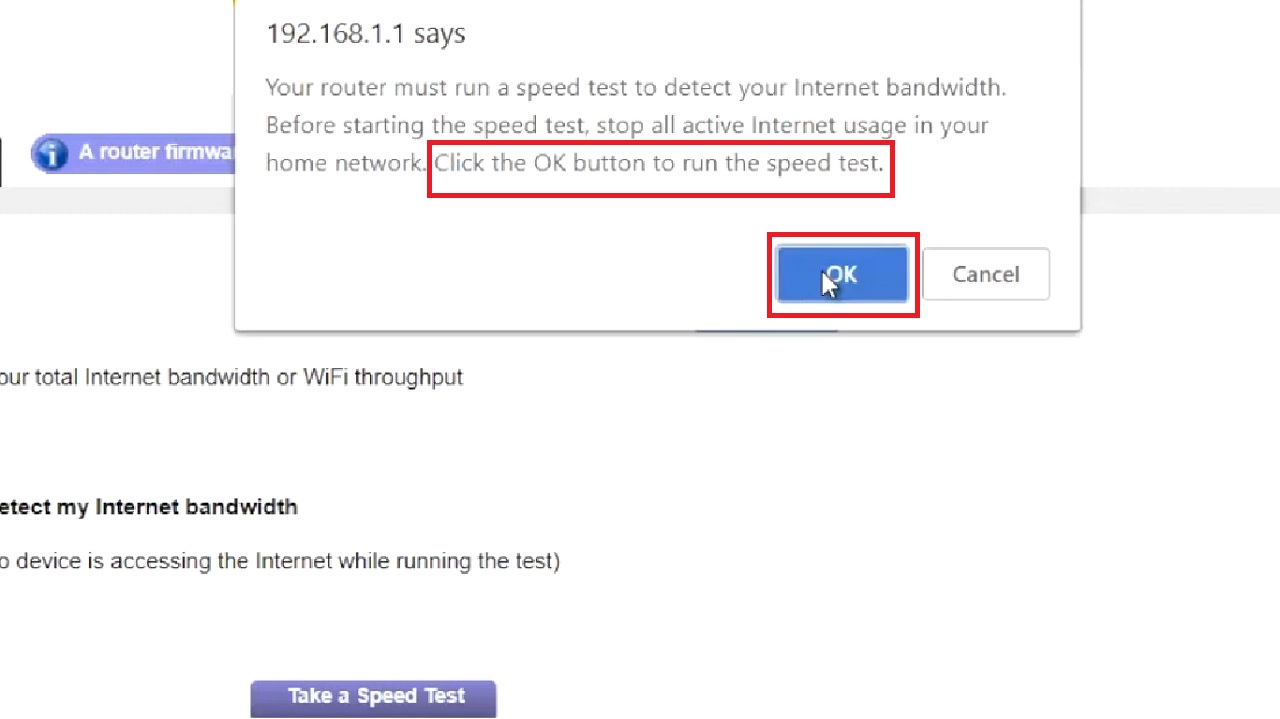
- Click on the OK button again in the following window to apply the Internet bandwidth settings.
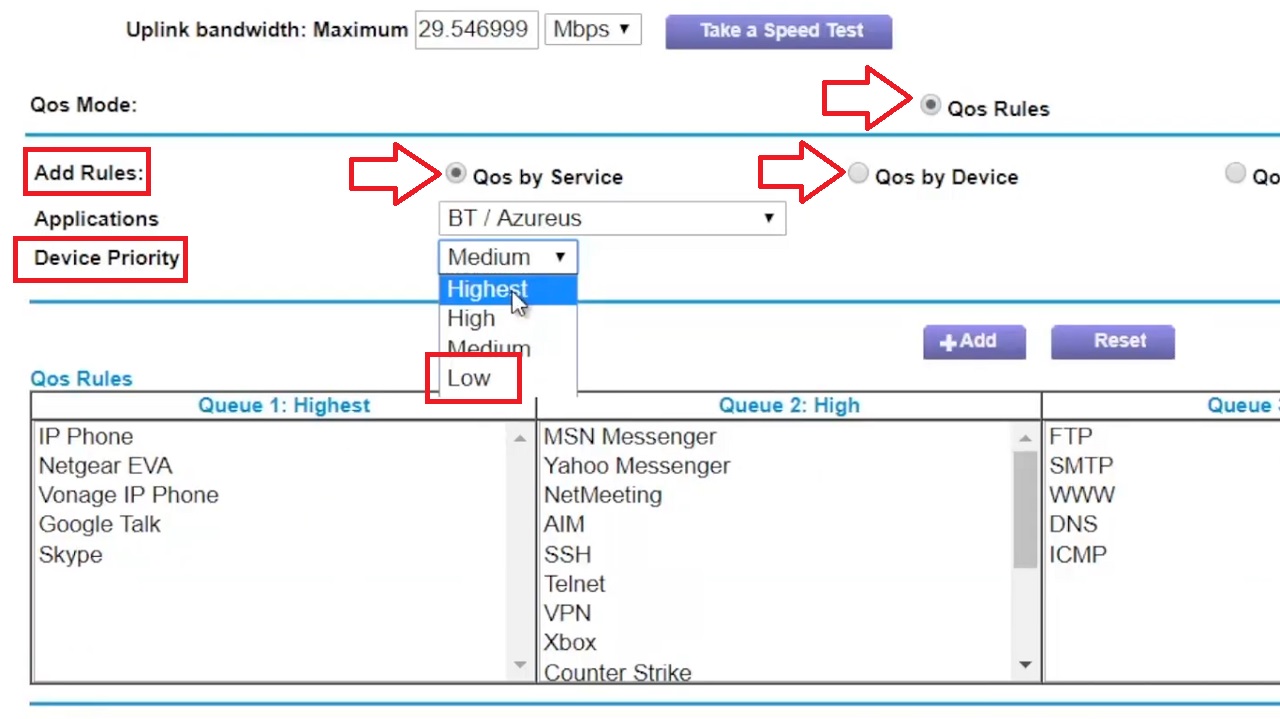
- Next you will need to Add Rules for the QoS Mode.
- Click on the circular button next to QoS Rules and select QoS by Service or QoS by Device.
- Set the Device Priority to Low from the dropdown options obtained after clicking on the arrow in the relevant box.
That ends the pretty straightforward QoS setup process for a Netgear router.
Method 2: Setting Up Router Quality of Service Using DD-WRT Firmware
The above are just basic QoS setups and have a few limitations, such as it won’t allow setting up specific internet speeds for the devices to pick up specific services.
You will need advanced Quality of Service settings for that by using custom firmware, such as the Linux-based DD-WRT or Tomato if your router is compatible and allows using it.
Note: First, you will have to replace the stock firmware on your router and then configure your router’s settings via a web-based interface on a compatible web browser using Windows, Linux, macOS, or any other operating system.
STEPS TO FOLLOW:
First, create a backup of your current router settings in the following way:
- Access your router’s web interface.
- Log in to your router’s admin page by typing the username and password.
- Backup the current settings of your router.
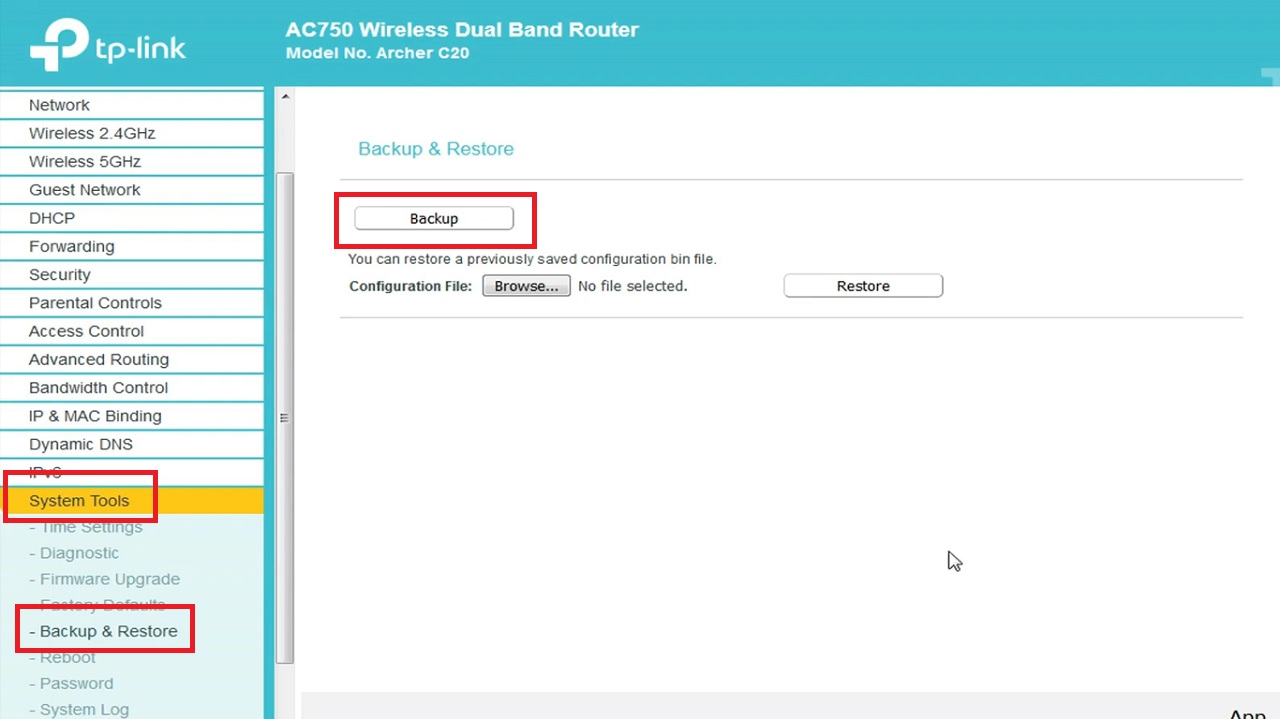
For a TP-Link router, the Backup button is on the Backup & Restore page under System Tools located in the left panel, as shown in the image below:
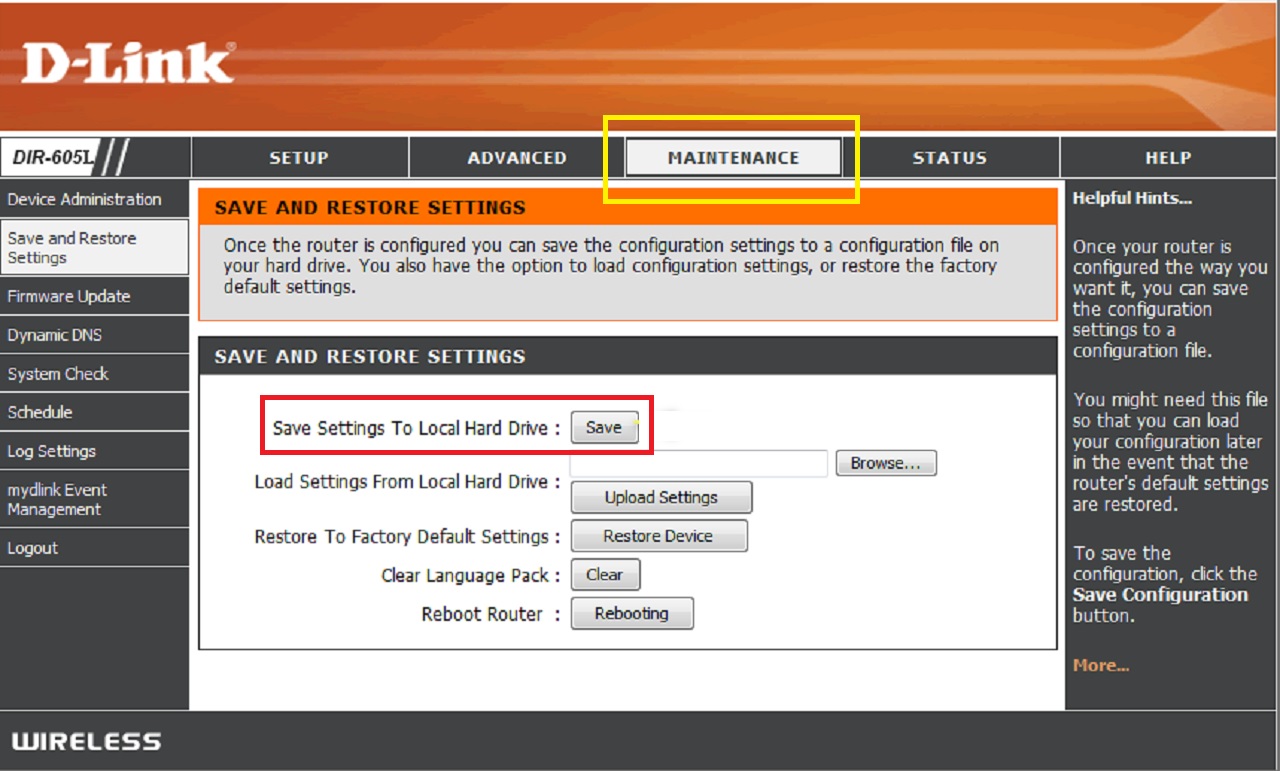
For a D-Link router, the Save button is under the MAINTENANCE tab as shown in the image below:
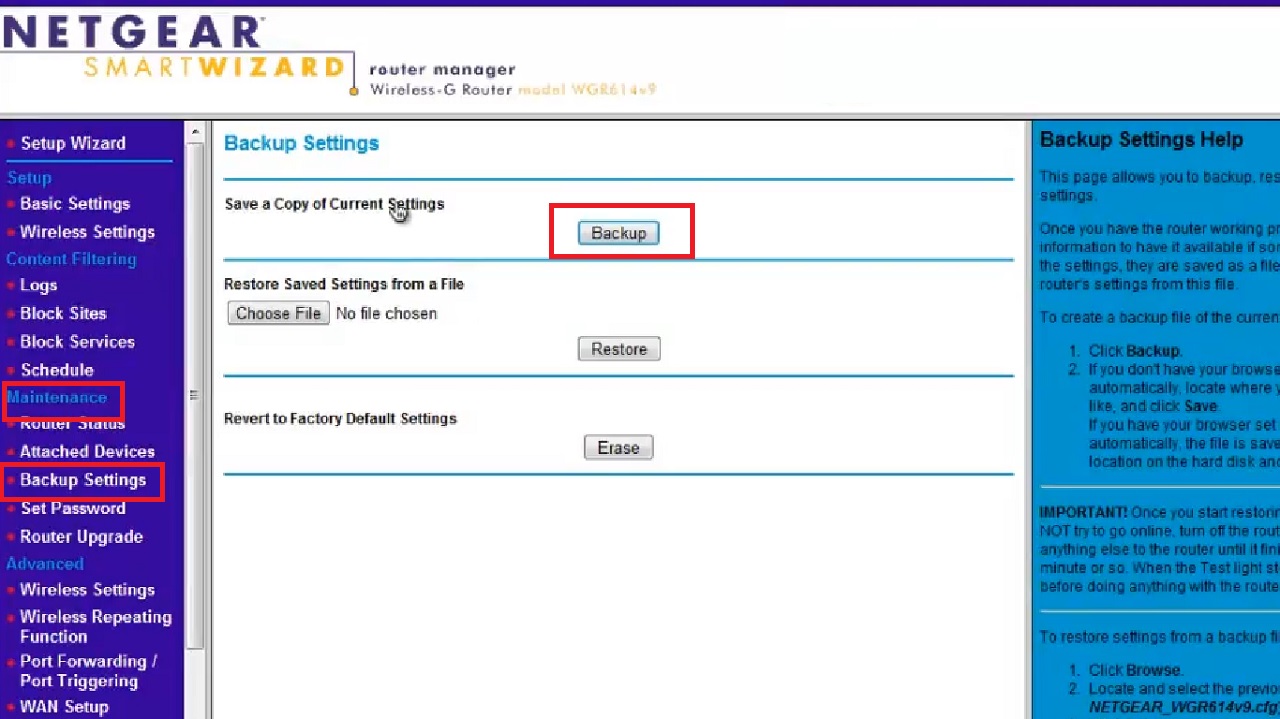
For a Netgear router, the Backup button is on the right side of the Backup Settings page under Maintenance on the left side of the window, as shown in the image below:
Now, to flash the DD-WRT firmware, follow these steps:
(For demonstration, here the popular Netgear r7000 router is used. Yours may be different and therefore the interfaces and layouts may be different but the basic process is almost the same. Exercise caution while performing these actions).
- Open a web browser.
- Visit https://wiki.dd-wrt.com/wiki/index.php/Supported_Devices to check router compatibility.
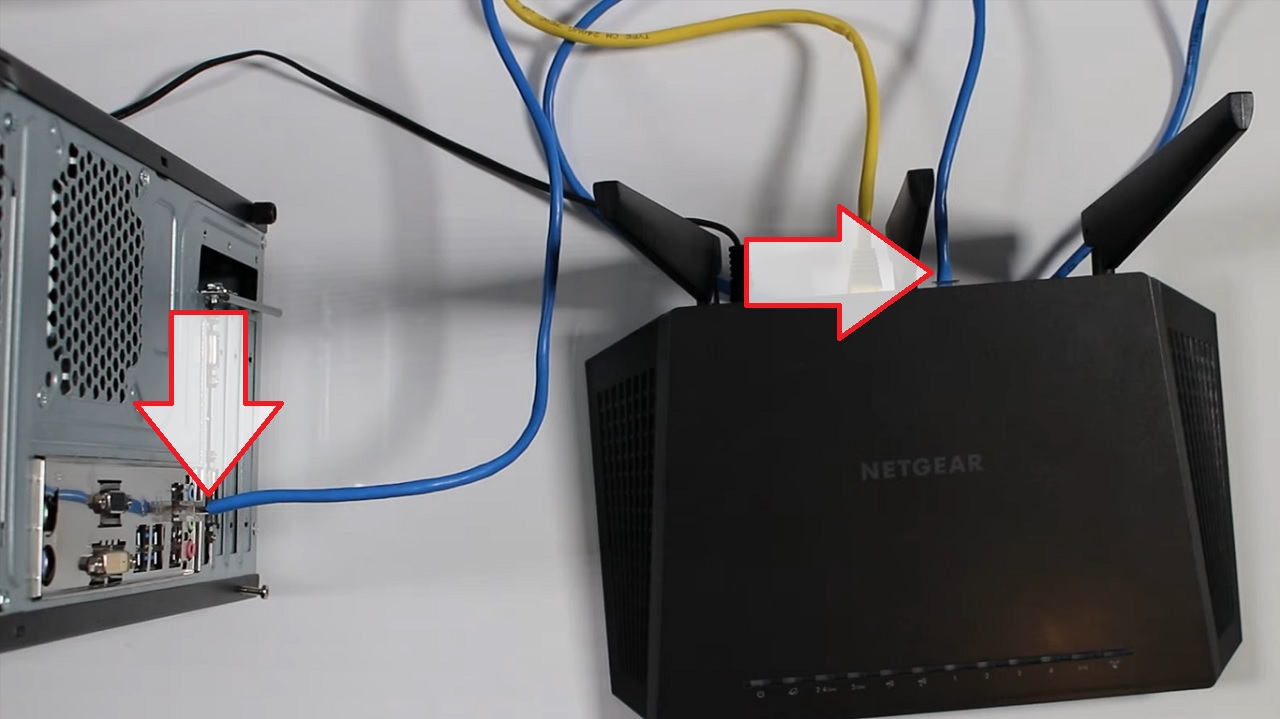
- Make sure that the connection is hardwired, that is, use an Ethernet cable to connect the router to your PC. It is easier that way.
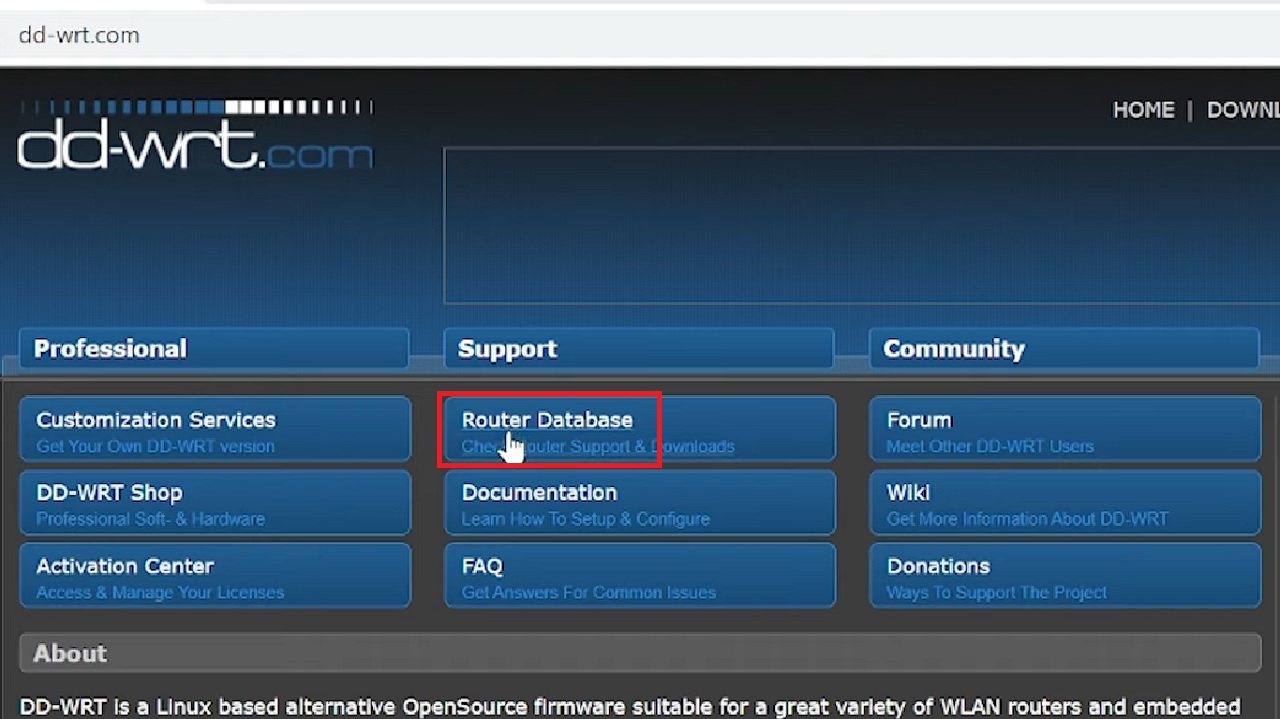
- Visit the DD-WRT website.
- Click on Router Database.
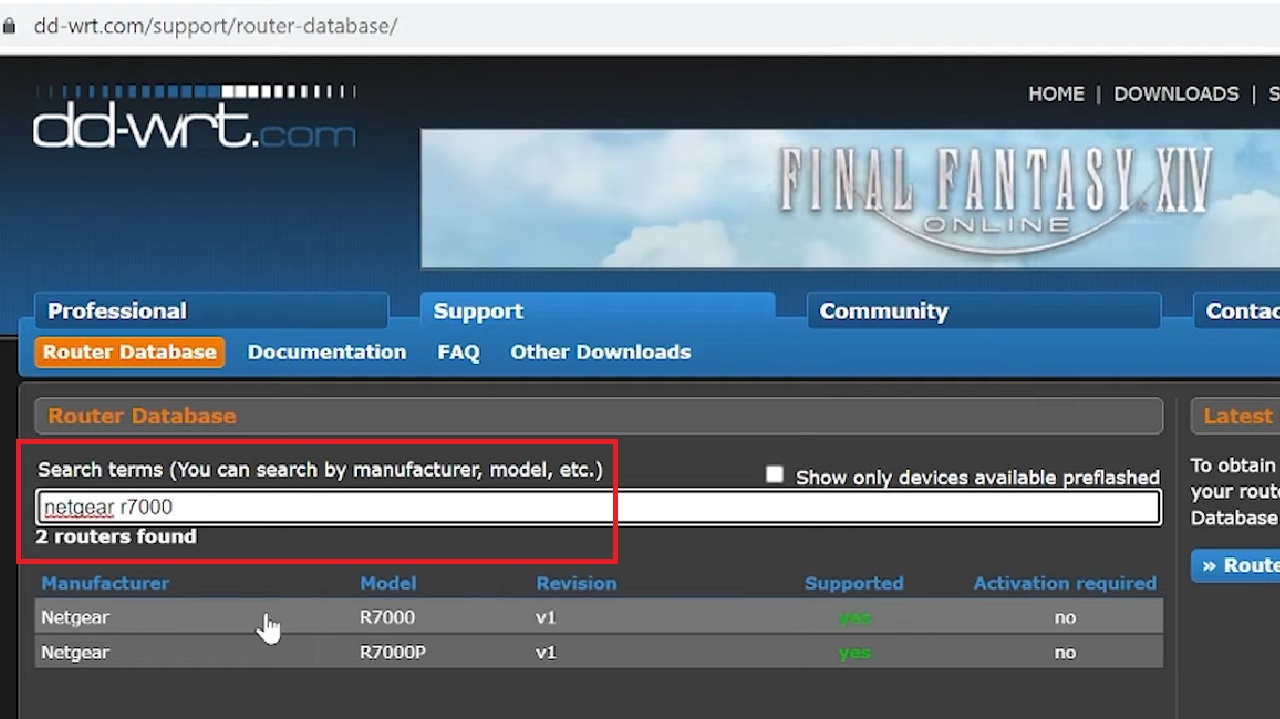
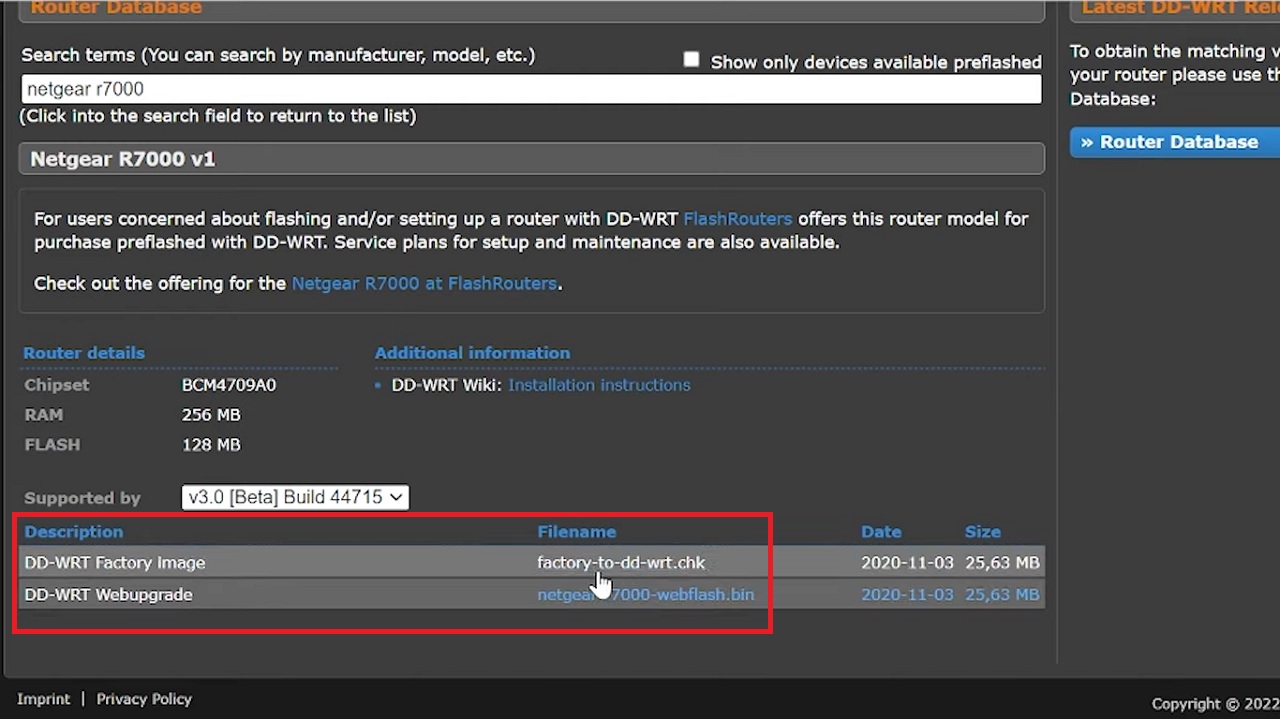
- Type in your router model in the search box.
- Select your correct router model from the results shown below.
- Download the two different files shown below by clicking on them one by one.
- These will be saved in your Download folder.
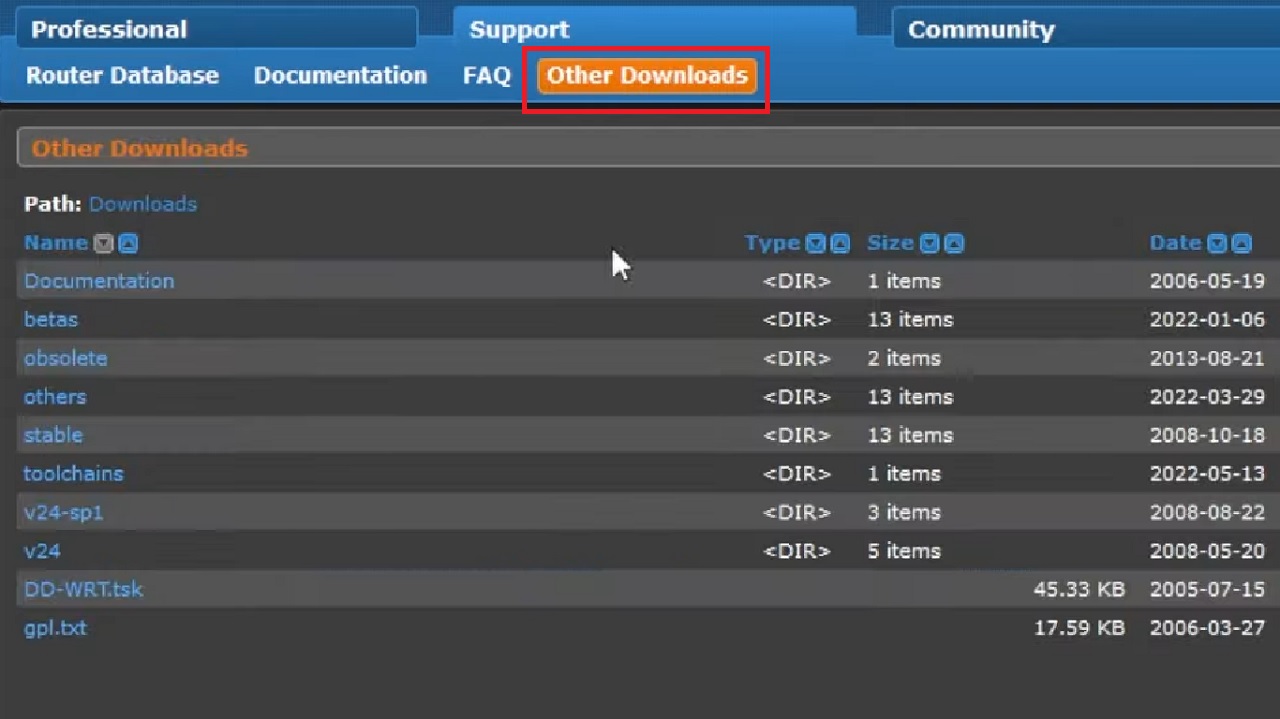
- If you want newer versions, go to Other Downloads.
- Scroll down and look for the latest option, preferably compatible betas, in the list and click on it.
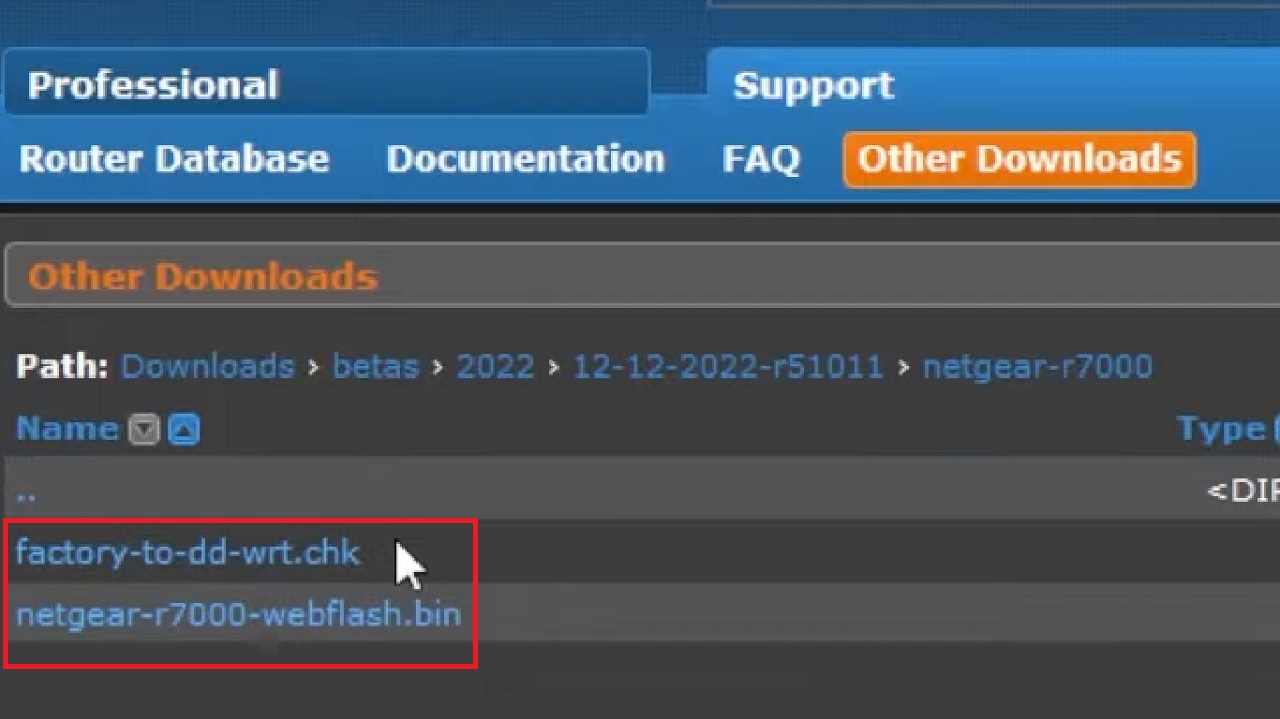
- Now scroll up and down the following window to find your router model from the names under Other Downloads.
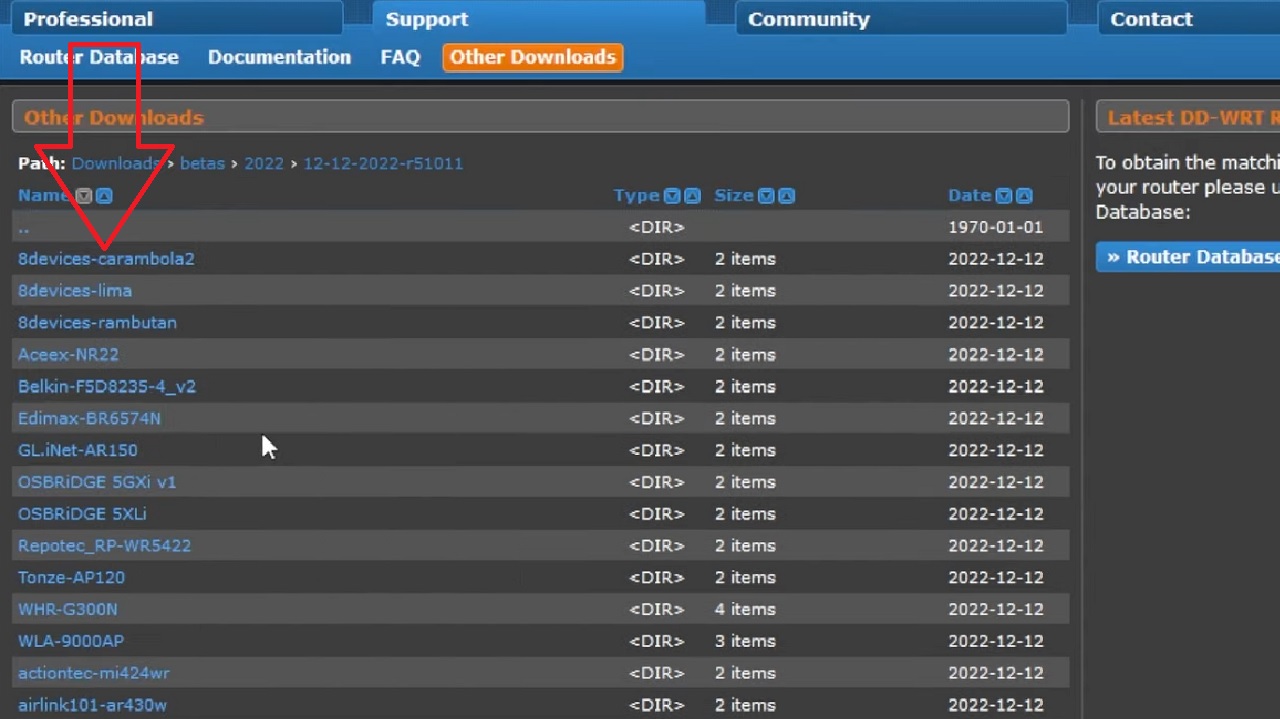
- You will get a list of files to download for your specific router model as shown in the image below:
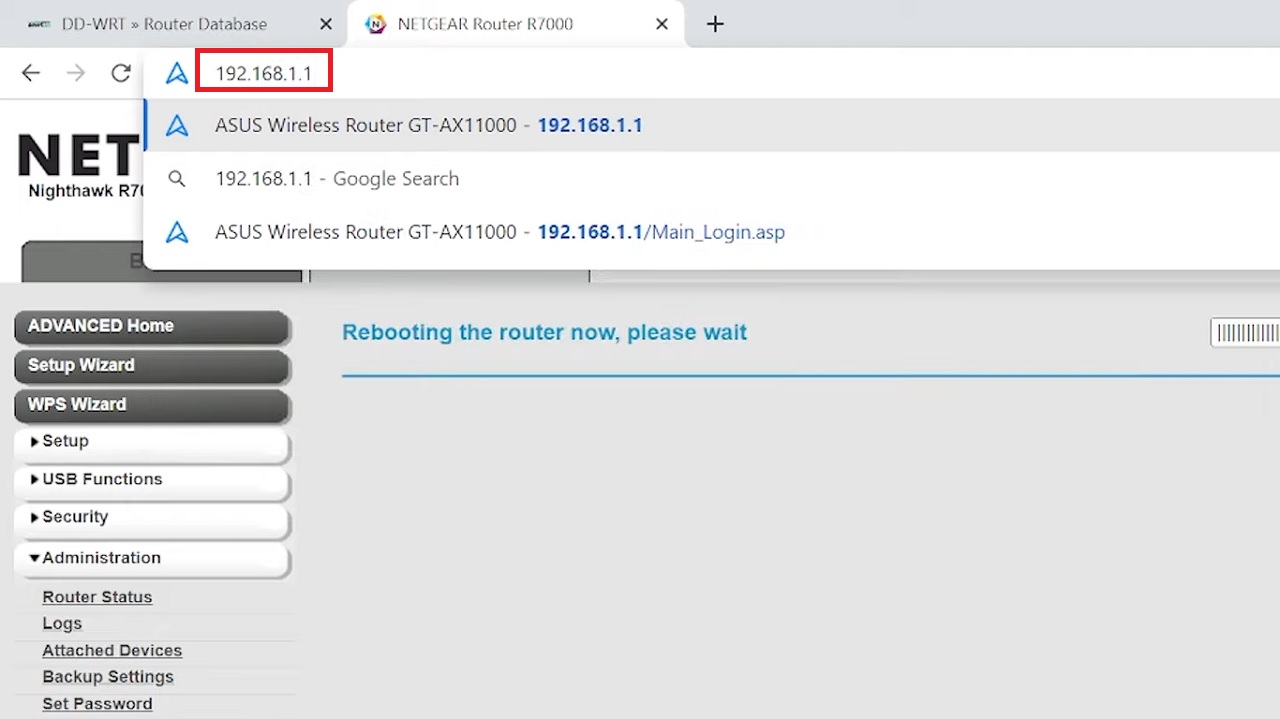
Now, you have to open the admin page of your router in the following way:
- Open a new tab on your browser.
- Type in the router login address in the address bar.
- Type in the Username and Password to Sign in.
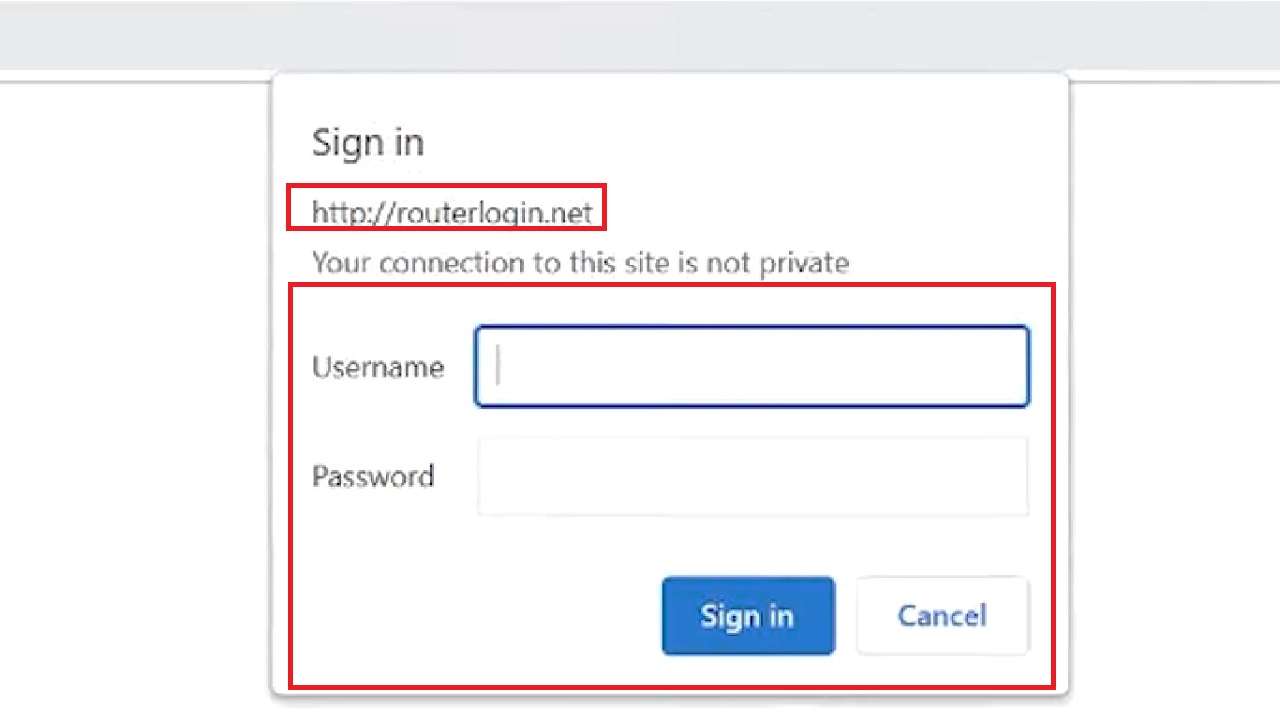
The login details are usually found on the label at the back of your router.
If you do not find the IP address, follow these steps:
- Go to the search box > Type cmd > Choose Run as administrator.
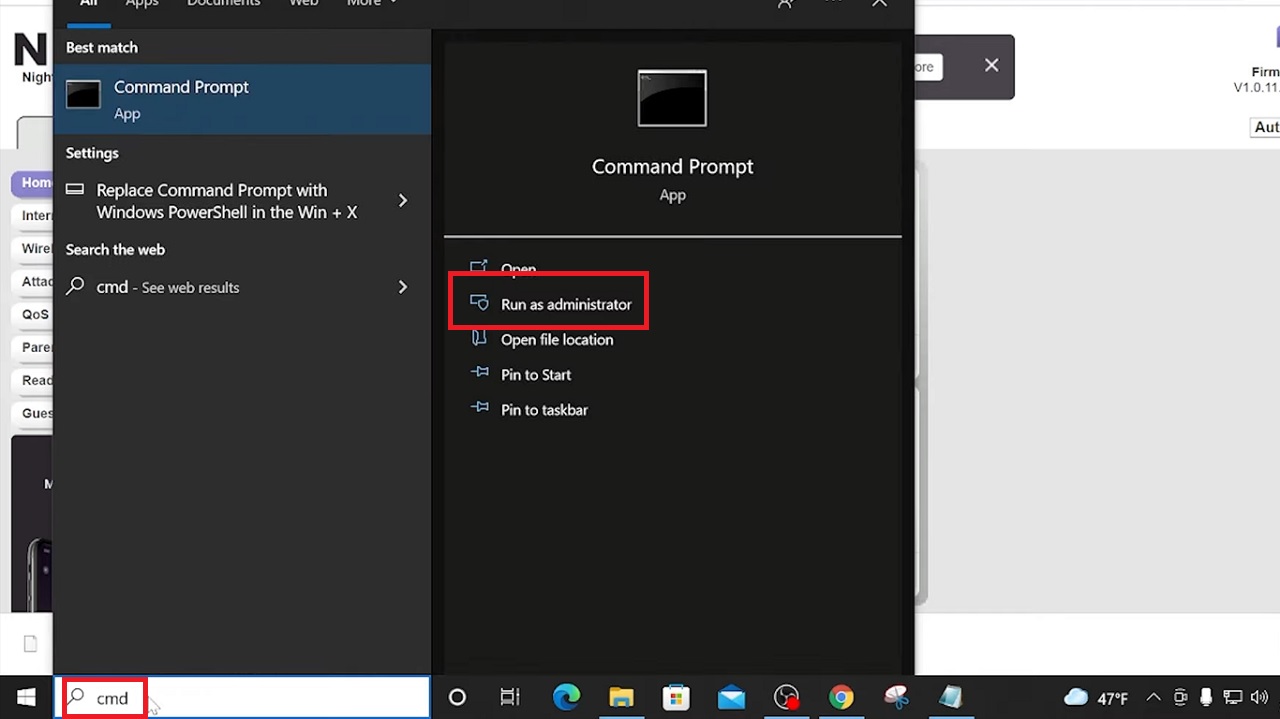
- Type ipconfig in the Command Prompt window.
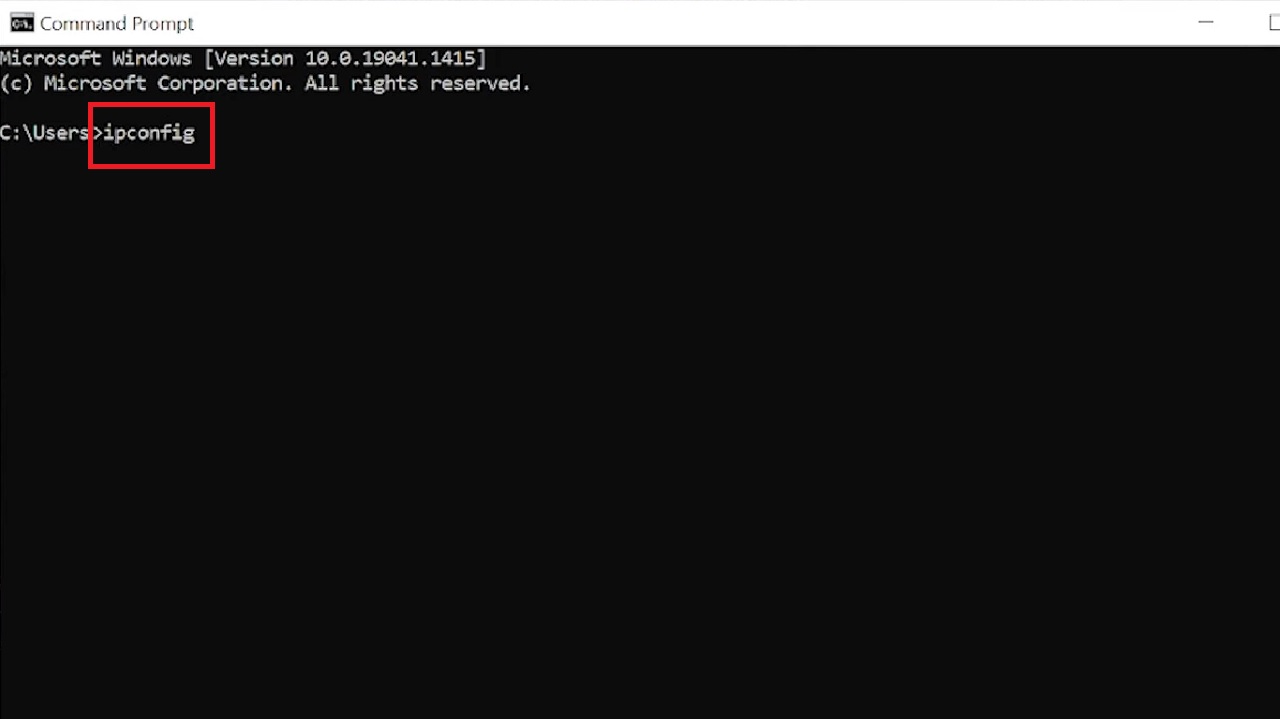
- Note the Default Gateway address.
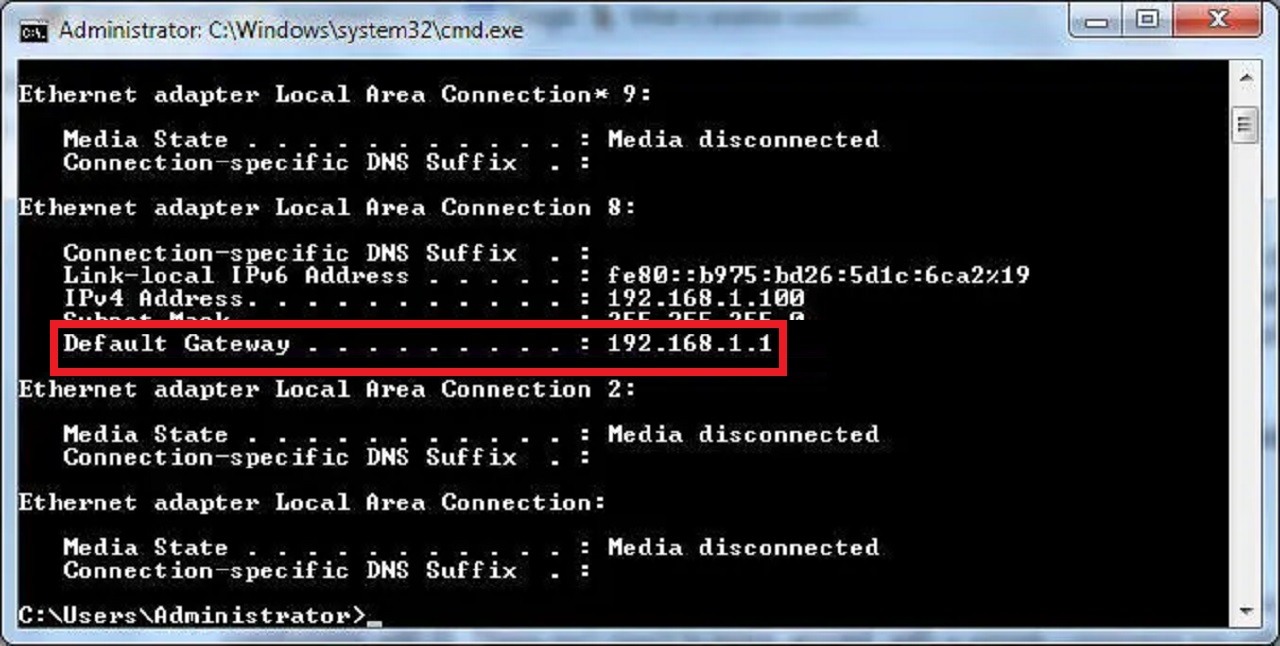
- Type it, 192.168.1.1 in this case, into the address bar and hit Enter.
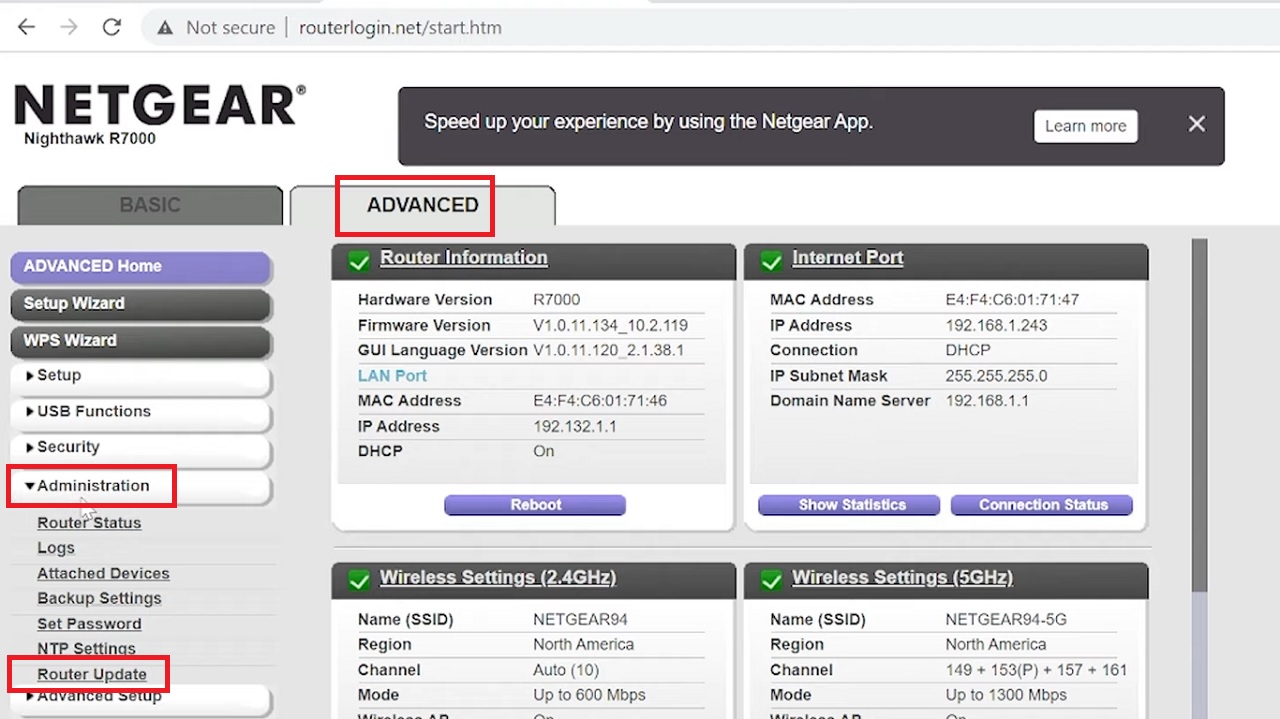
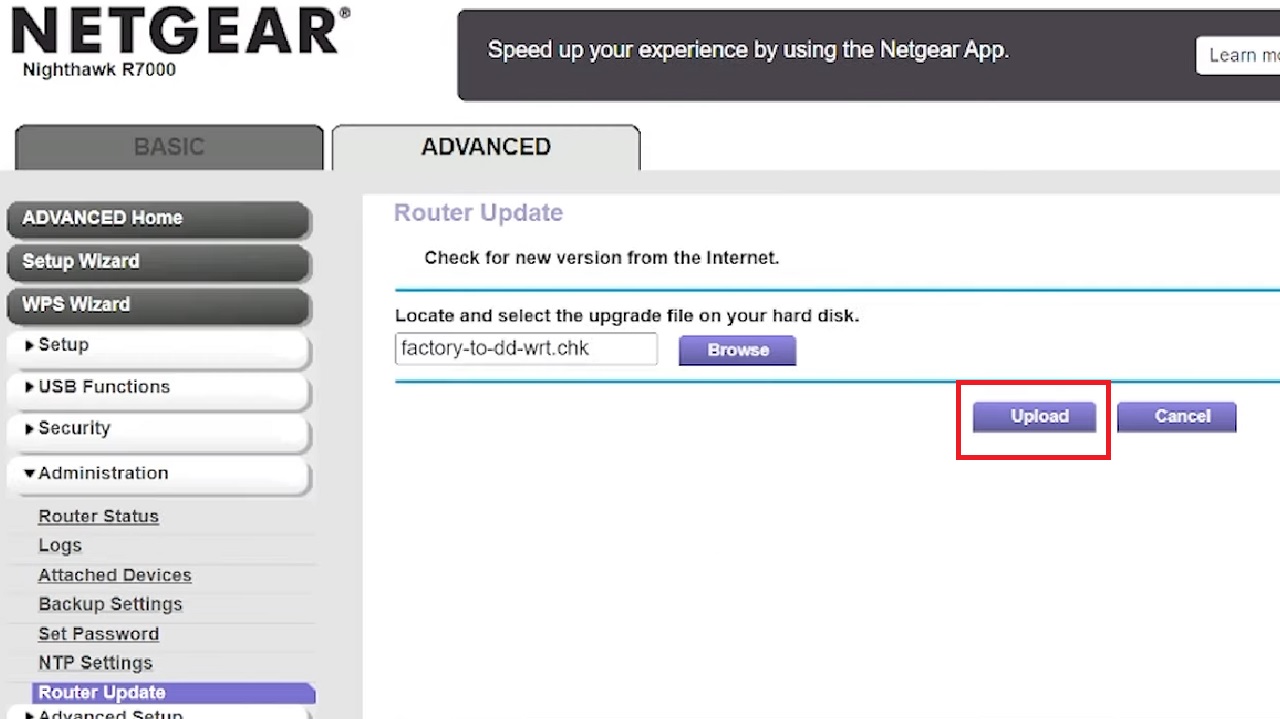
- In the router admin page, click on the ADVANCED tab.
- Click on Administration on the left pane.
- Then click on Router Update under it.
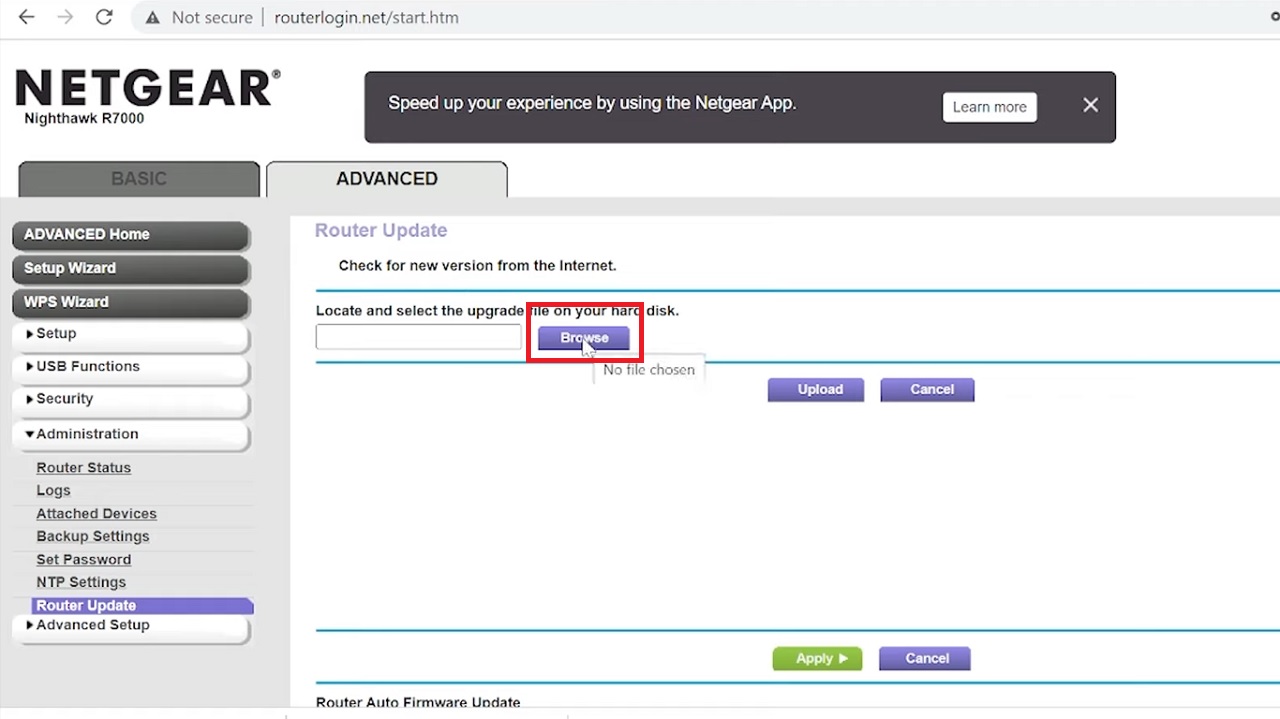
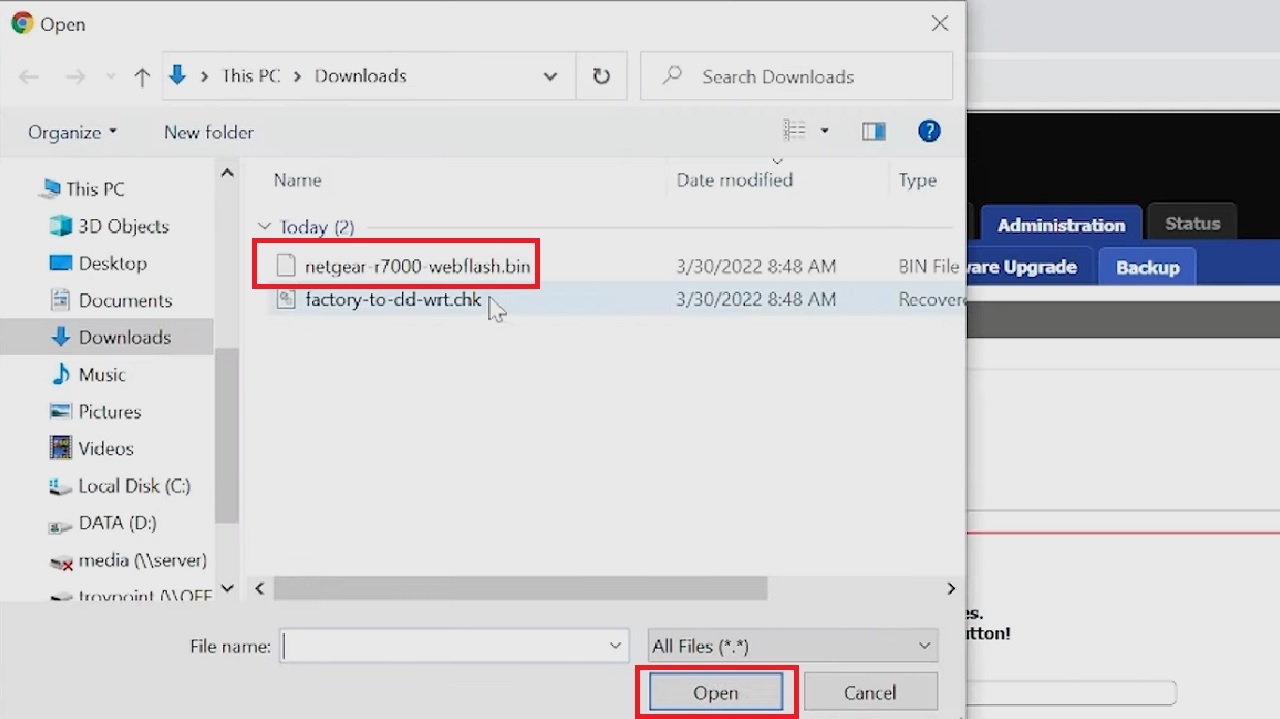
- Click on the Browse button in the following window.
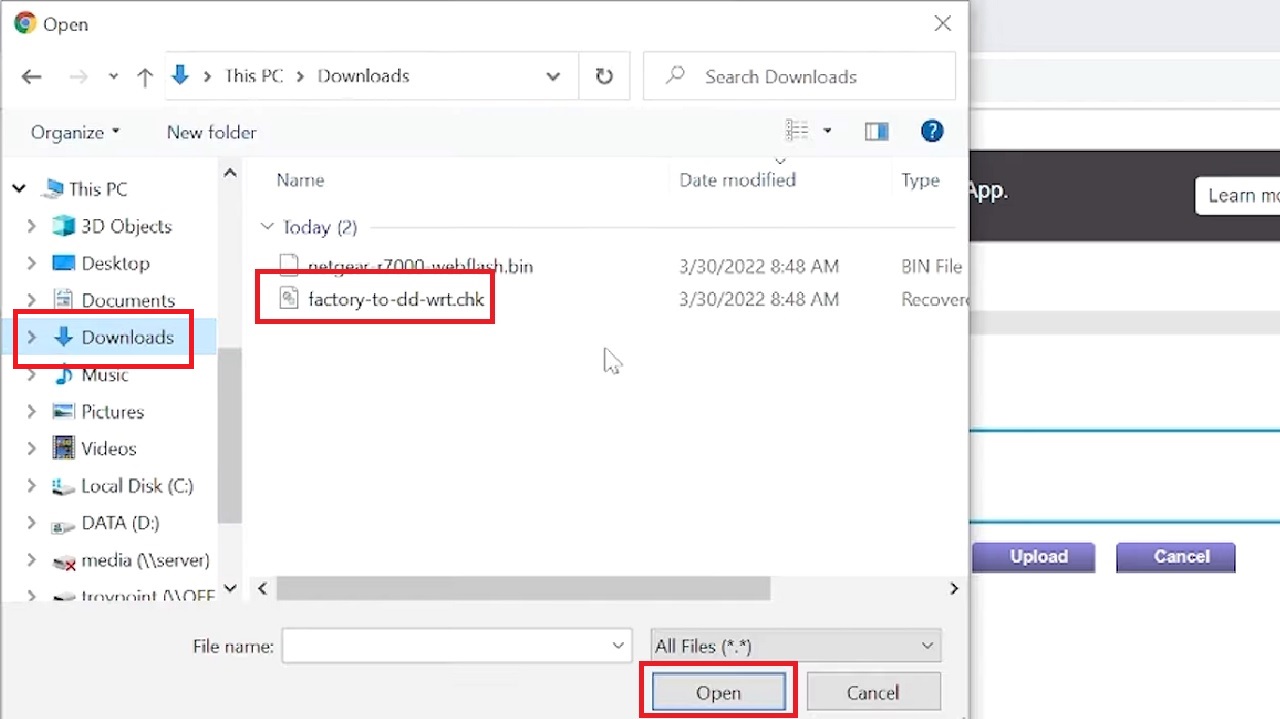
- Select the factory-to-dd-wrt.chk file first that is saved in the Downloads folder.
- Click on Open.
- Now click on the Upload button.
- Click on the OK button in the confirmation window which asks ‘Continue?’
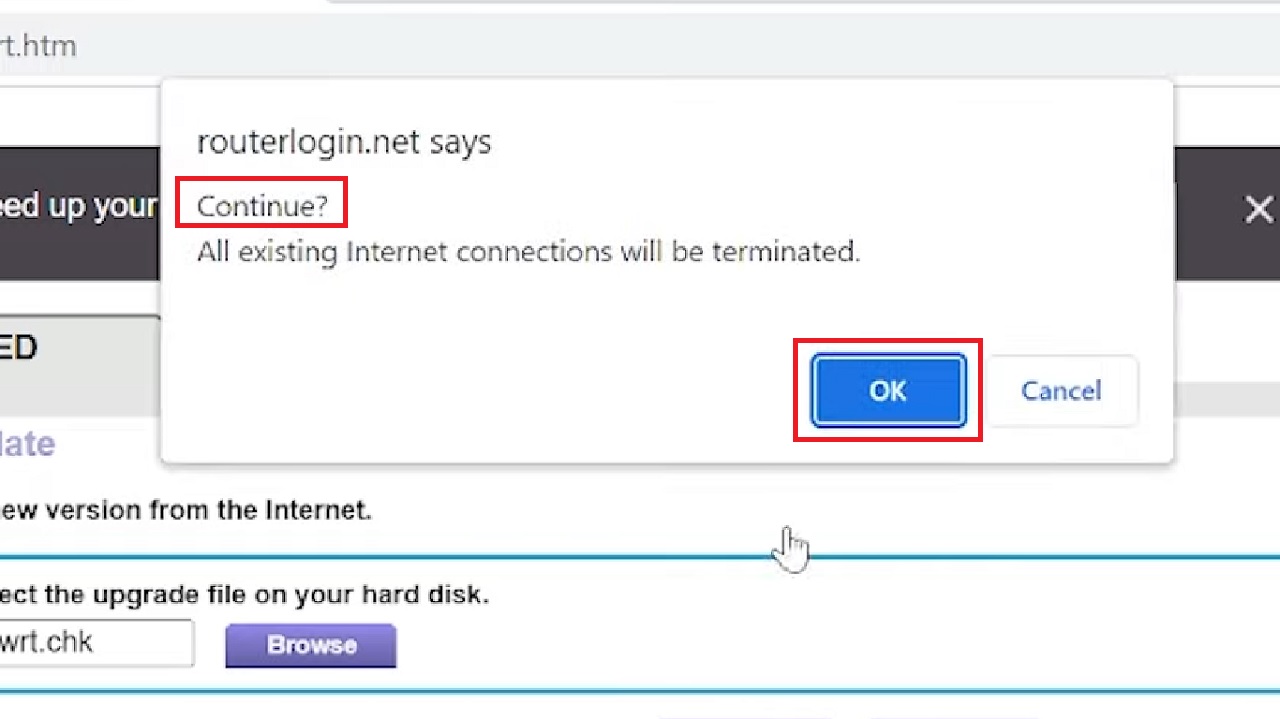
Assuming that you are okay with uploading an older version, click on the Yes button in the following window.

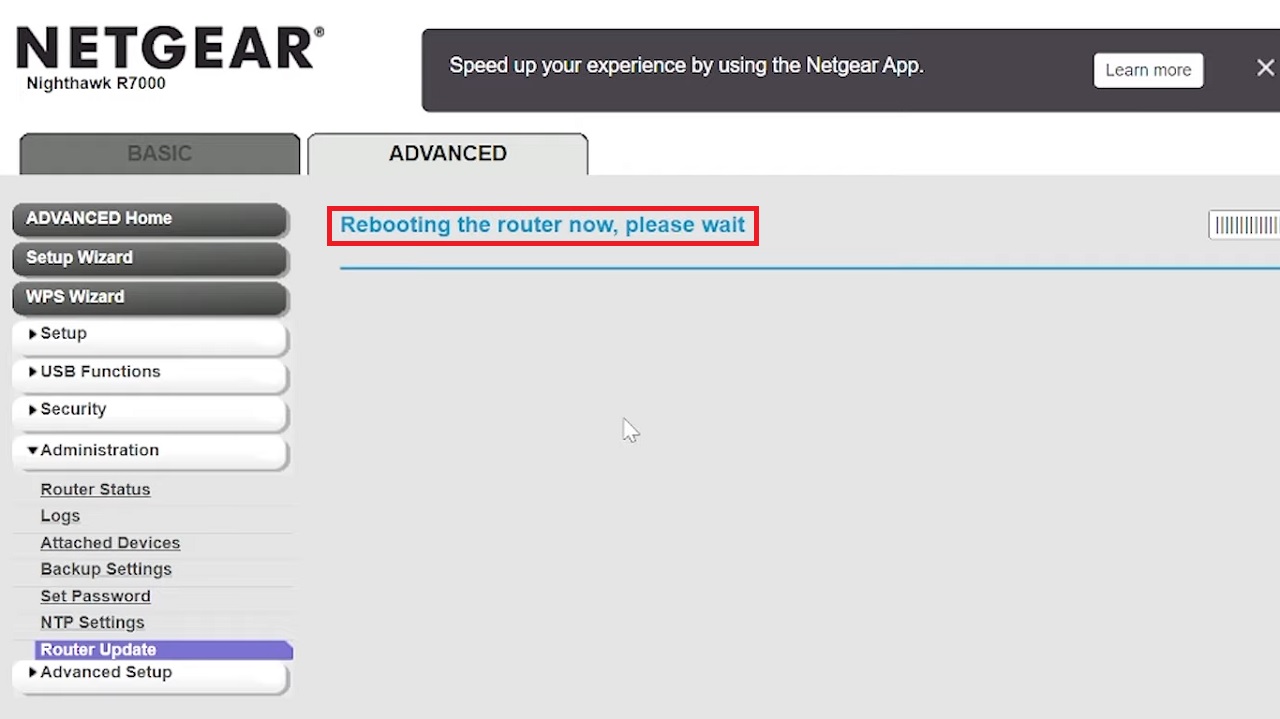
Note: This will take some time and make sure you do not power off or press the Reset button during the update process, as suggested in the following image:

Once the process starts you will see the message ‘Rebooting the router now, please wait.’ So, wait until the process is complete.
- Now, if you are not hardwired, make sure you are connected to the dd-wrt using the wireless password, which is available on the label of the router.
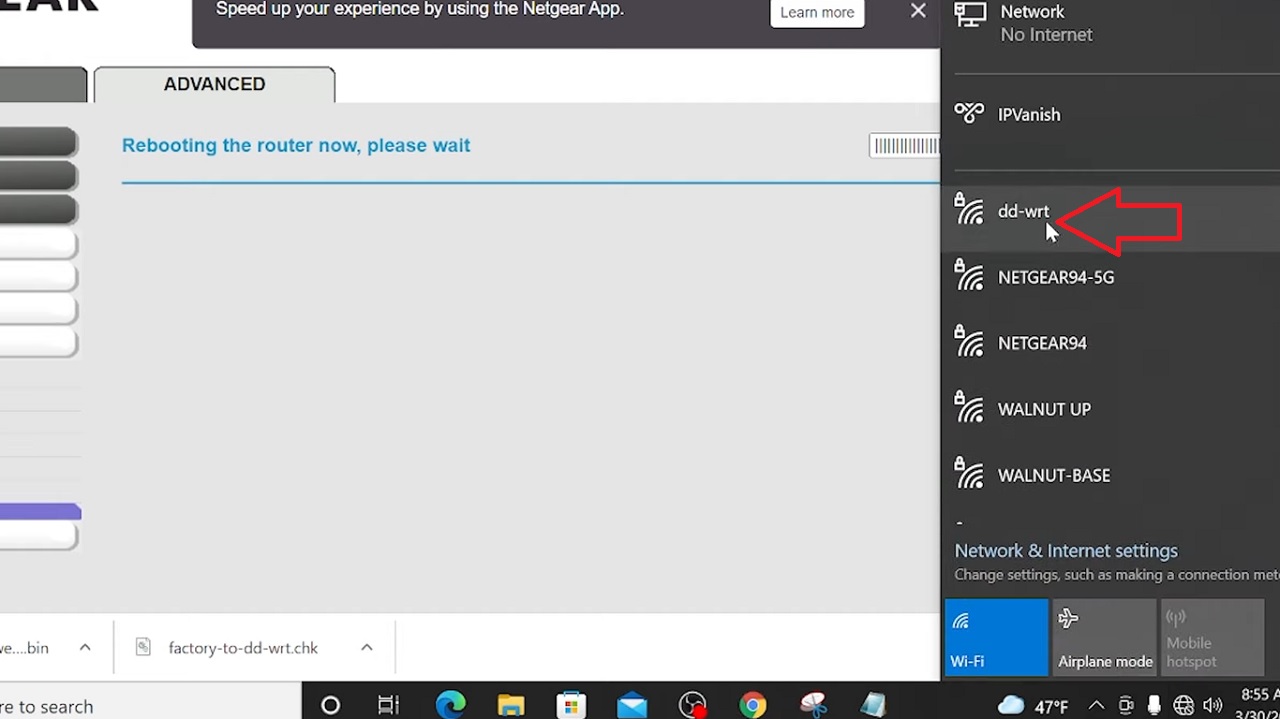
- When you are connected to the router, go to the address bar, type in 192.168.1.1 again, and hit Enter.
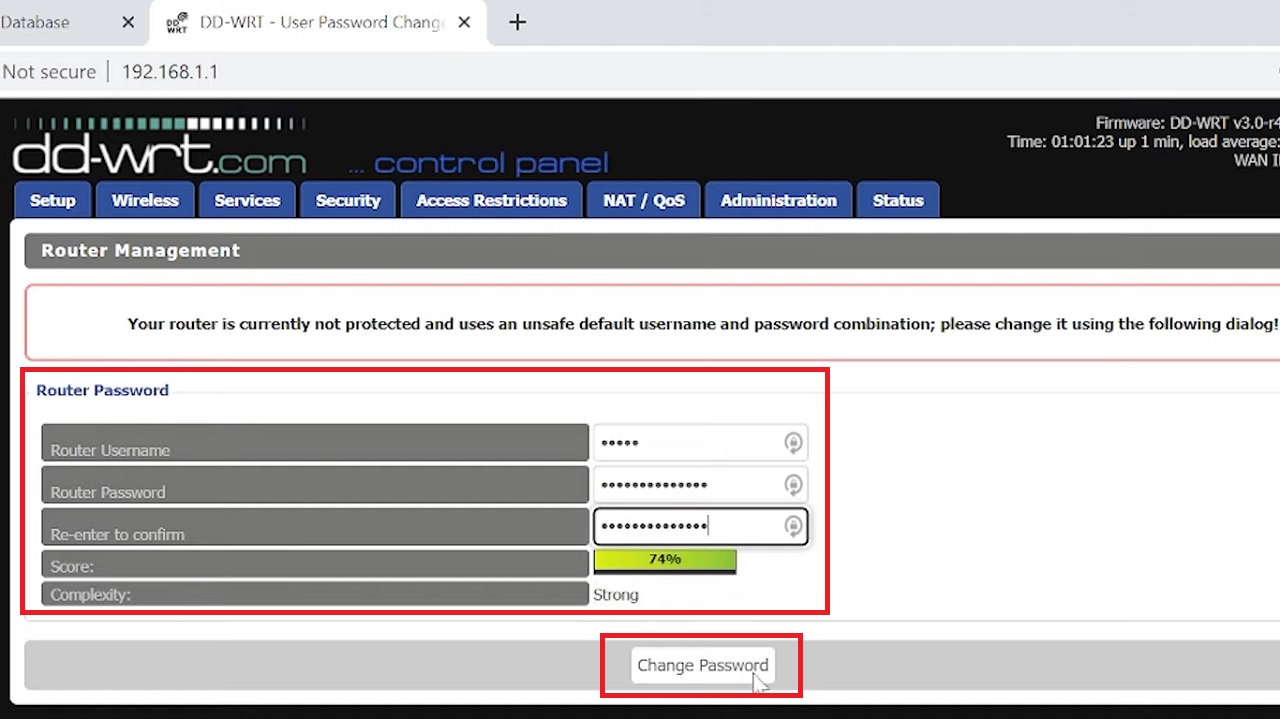
- This will open the DD-WRT admin page, where first you have to change the Router Password.
(Look at the score to ensure it is pretty strong).
- Note your password, and click on the Change Password button.
- This will take you to the DD-WRT control panel.
- Click on the Administration tab.
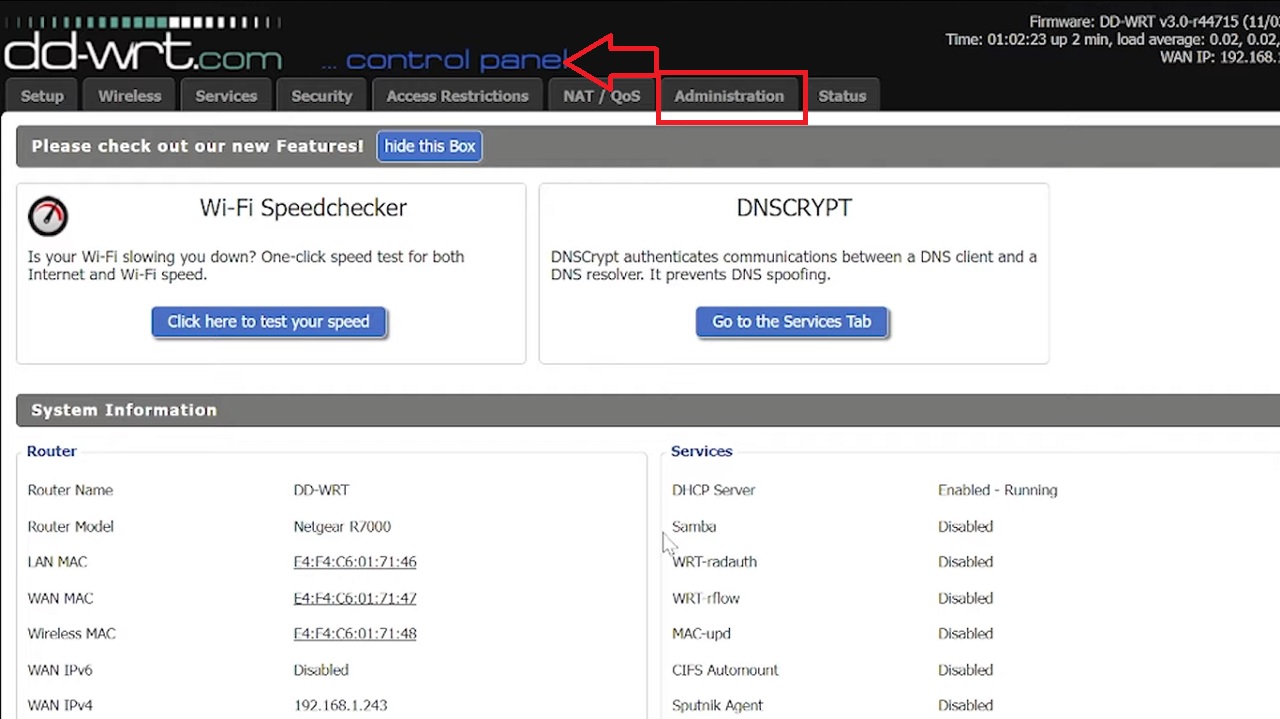
- It will ask for the username and password again because you have just changed it. Type them in the relevant boxes.
- On the Administration tab, click on the Firmware Upgrade subtab.
- Click on the Choose File button.
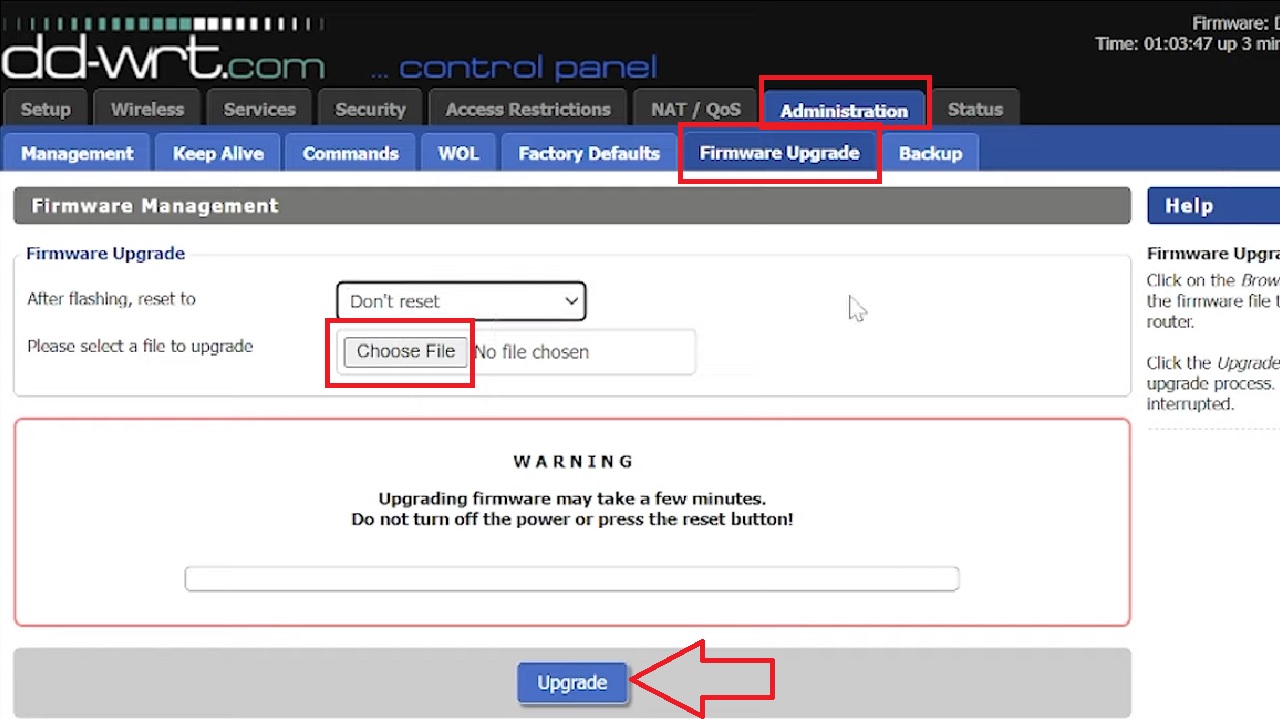
- Select the netgear-r7000-webflash.bin file from the Downloads folder.
- Click on Open.
- Now, click on Upgrade in the previous window, marked by a red arrow.
The system will reboot after a successful upgrade and this will take a couple of minutes, as the following message suggests:
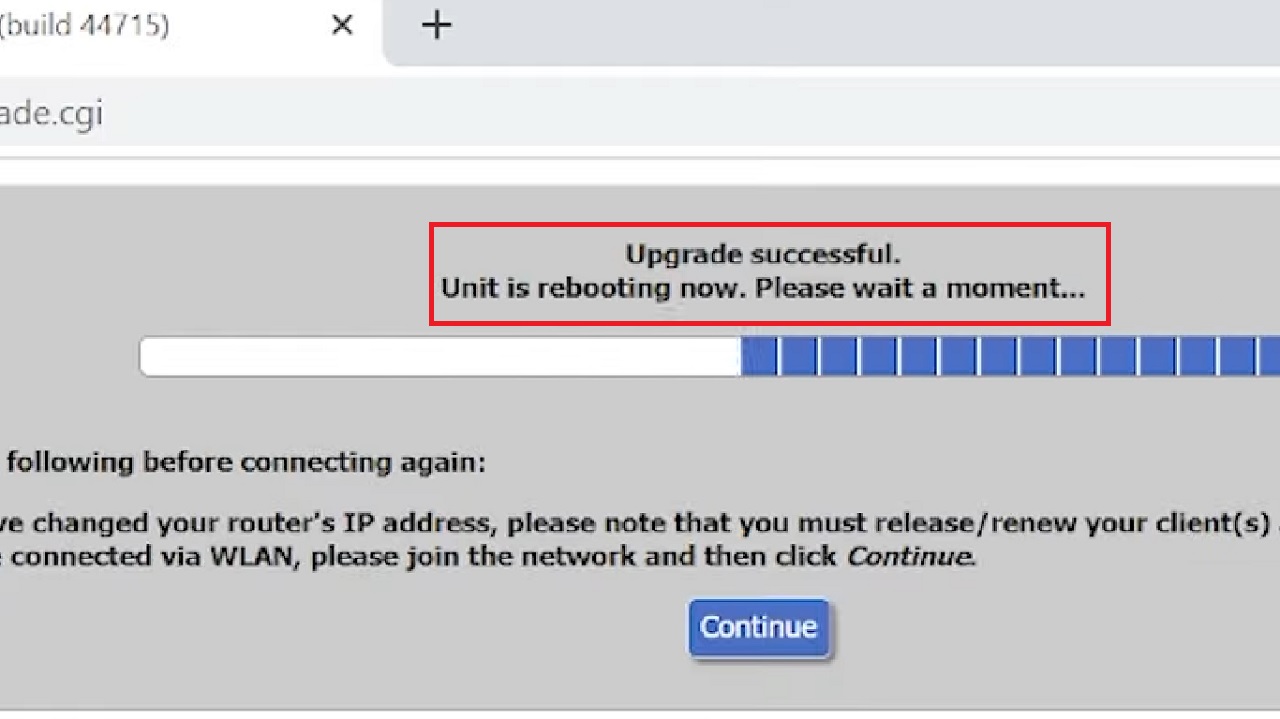
Now you will be back to the DD-WRT admin page.
(If you are connected wirelessly, you may not see it because you may not be connected properly. Click on the internet icon, the globe sign, in the bottom-right corner to connect to dd-wrt again, and then type in 192.168.1.1 and hit Enter).
- Now, to configure, navigate to Wireless.
- Click on the Wireless Security subtab.
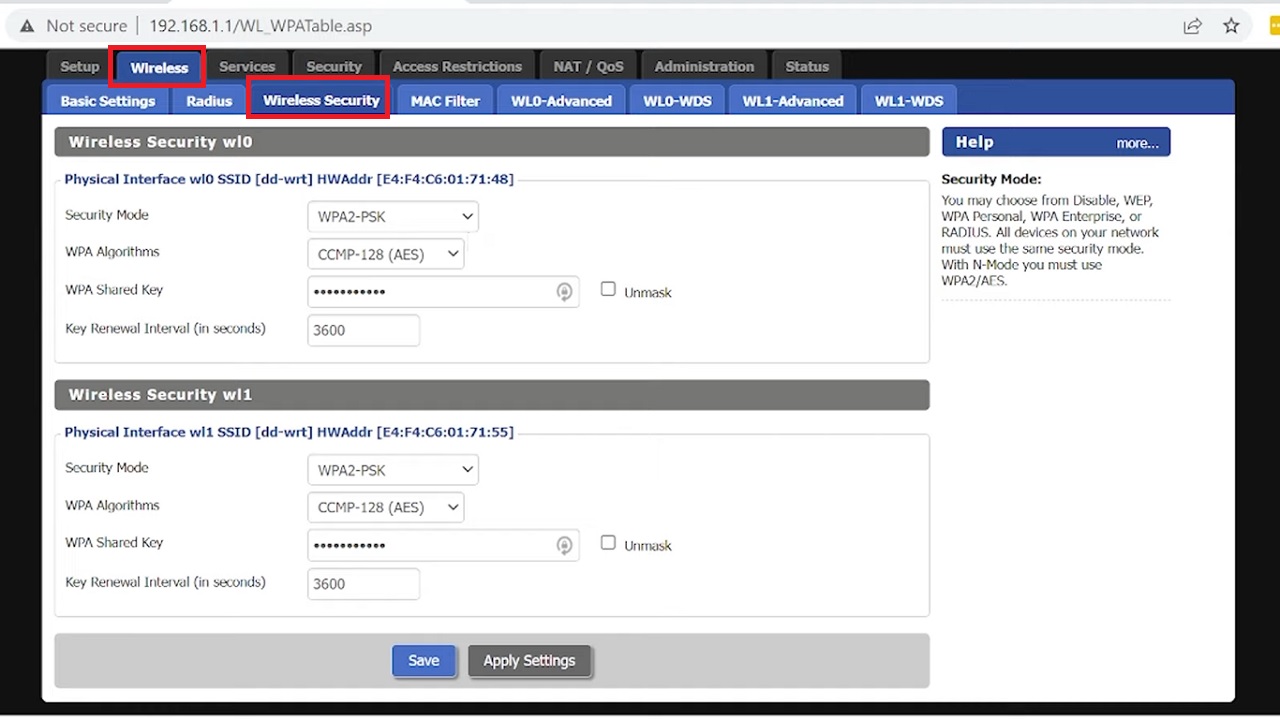
Make the changes you want to the passwords for the Wi-Fi on your router again just like any other typical router setup. Click on Apply Settings and/or Save to exit.
This will complete flashing the DD-WRT firmware onto your router. Let the router reboot.
When the router reboots, perform a factory reset to set it to factory defaults. This will ensure that the DD-WRT firmware functions properly. To do this, follow these steps:
- Log into your router web interface as before.
- Go to System Tools on the left side.
- Click on Factory Defaults under it.
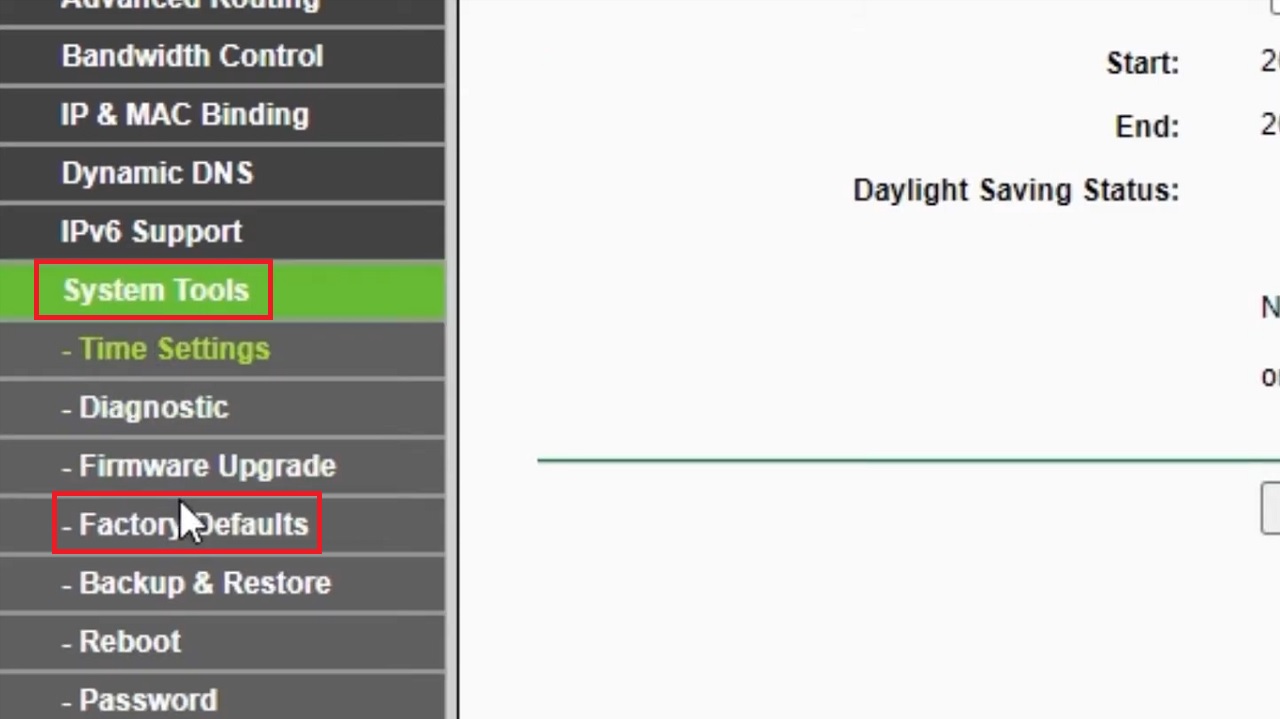
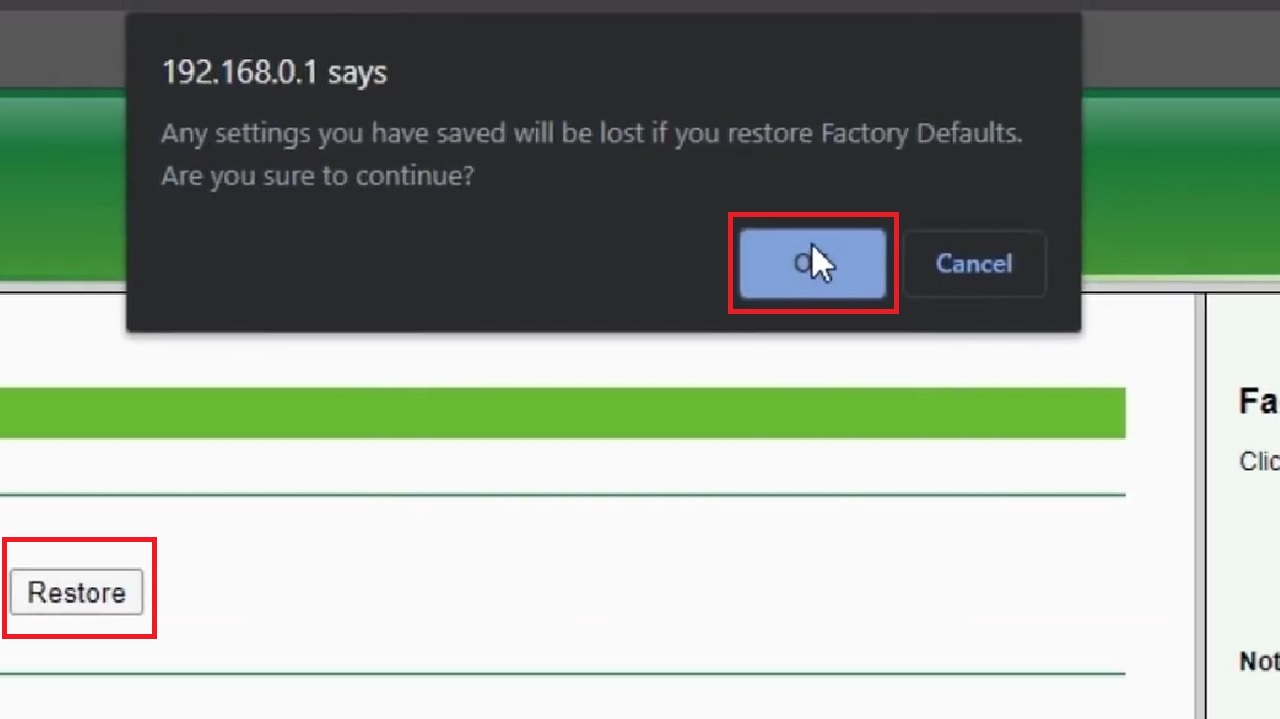
- Click on the Restore button on the right.
- Click on the OK button in the following confirmation window.
Once you are done with the factory reset, access the DD-WRT web interface once again by typing the IP address, 192.168.1.1 in your web browser to configure using DD-WRT firmware according to your preferences for security and wireless network settings and any other configurations.
You may also explore the advanced features offered by DD-WRT for additional configuration.
- Go to your router’s admin page.
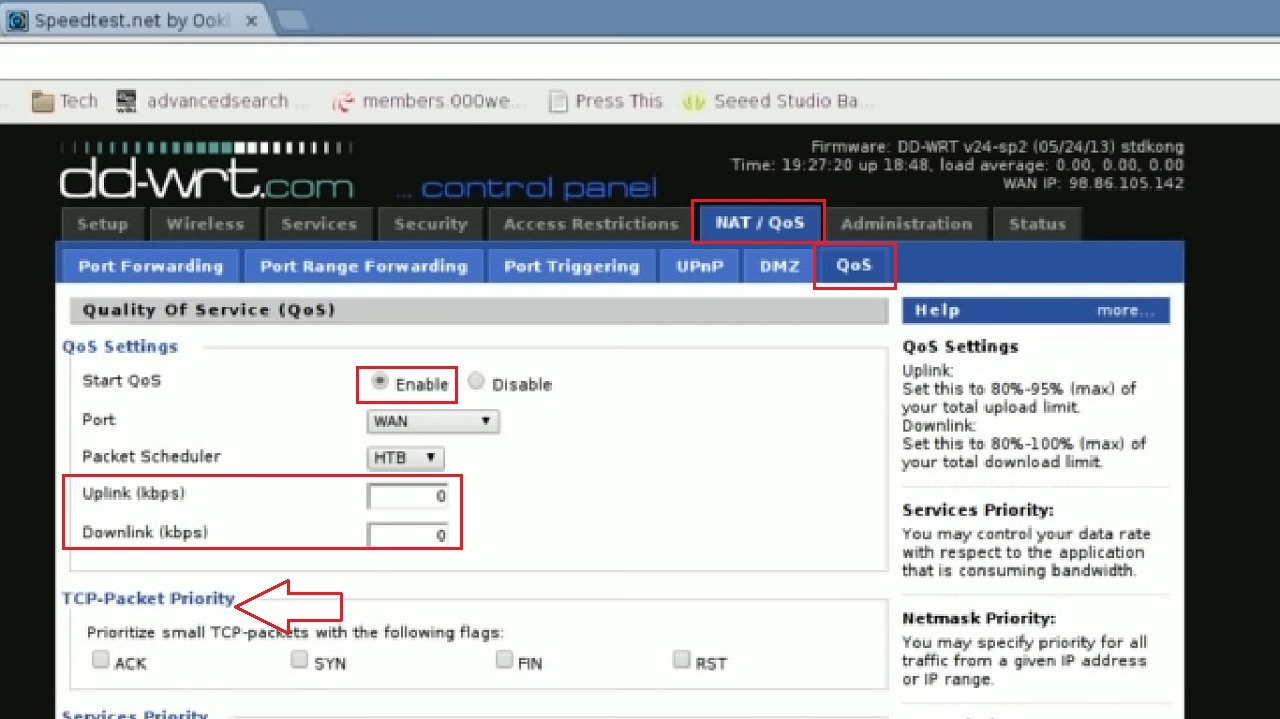
- Click on the NAT / QoS tab at the top.
- Navigate to the QoS subtab.
- Click on the small circular button next to Enable.
- Type in about 80 to 95% of your Uplink and Downlink numbers in kbps. (Run a speed test to know them first).
- Next, prioritize the packets by setting TCP-Packet Priority.
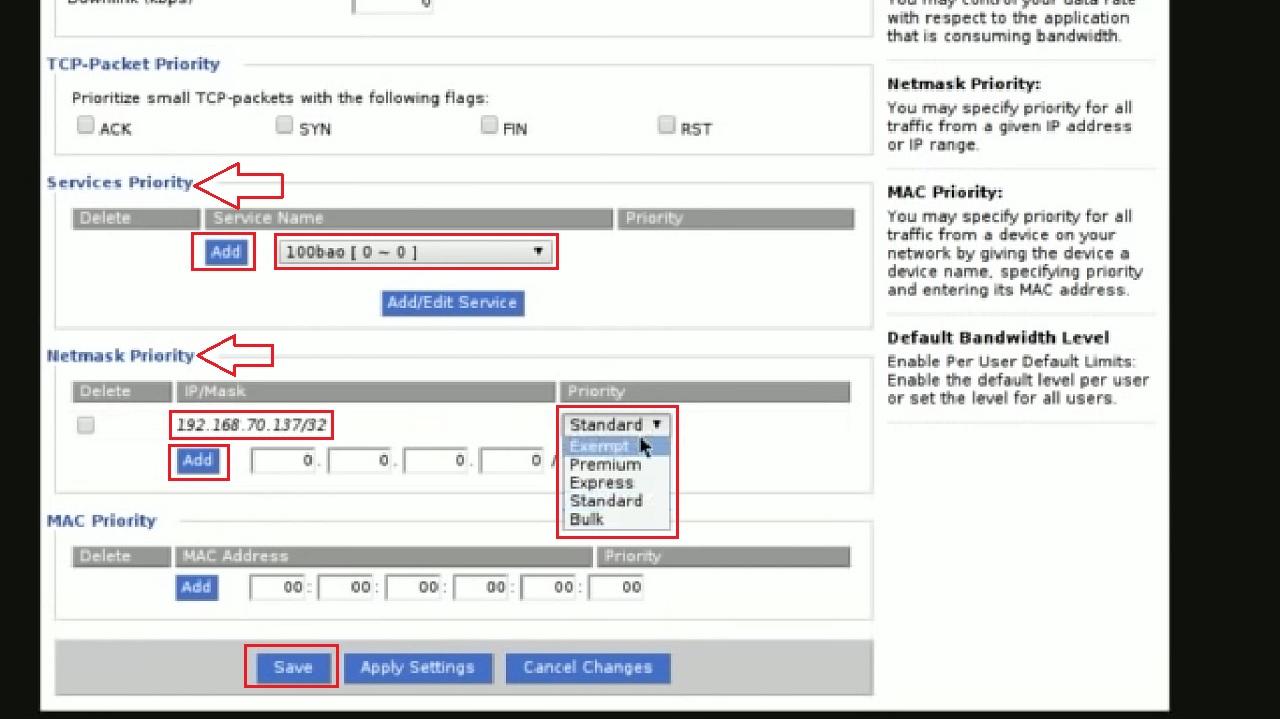
- Now, scroll down to choose the service from the dropdown box for setting Services Priority.
- Click on Add to add more services.
- Type in the IP address in the relevant box for Netmask Priority under it along with the netmask after the slash.
- Then set the Priority by choosing one from the dropdown menu, assuming that you know what Standard, Bulk, Exempt, Premium, and Express mean. (These may however vary from one DD-WRT firmware version to another and on the router model).
- Click on the Add button to prioritize more networks.
- Click on Save and exit.
Warning: There are some risks of flashing third-party firmware onto your router. Follow the steps correctly to prevent it from rendering your router inoperable.
Conclusion
By following the steps outlined in this guide, you can effectively set up Quality of Service on your router.
The article covers major router brands, ensuring you’ll find the steps for your specific router.
Consult a professional for assistance if you face difficulties during the setup process or have specific technical issues.