
You can safeguard your primary network and still allow your guests to access the internet conveniently if you set up a guest Wi-Fi network.
In this guide, you will learn about the straightforward approach to establishing a safe and functional guest Wi-Fi network.
In This Article
KEY TAKEAWAYS
- Isolate your primary and guest network to enhance security.
- Use a unique and strong password for your guest Wi-Fi network.
- Enable the built-in guest network features in the router for an easy setup.
- Limit access time and bandwidth for guests to preserve the performance of the network.
- Regularly update the guest Wi-Fi network password for enhanced security.
Why Do You Need to Set Up a Guest Wi-Fi Network?
One of the most significant reasons to set up a guest Wi-Fi network is to enhance the security of your primary network. It will isolate the two networks and therefore facilitate in protecting the devices and sensitive data.
A few additional reasons to set up a guest Wi-Fi network include the following:
- Allowing privacy to the guests while they browse the internet
- Preventing them from accessing your personal files, documents, data, and even devices due to separate access
- Ensuring better bandwidth management
- Maintaining consistency in the performance of the network with no disruptions caused by the activities of the guests
- Having better password control since you do not have to reveal the credentials of your primary network
- Offering convenience and ease to visitors
- Limiting access and bandwidth
- Tracking, monitoring, and managing usage of guest network usage easily and separately
- Preventing malware from infecting your primary devices through the devices of your guests
- Adhering to the legal liability and protecting you from potential legal issues that may arise due to internet usage of your guests
- Allowing the guests to share files or stream content without affecting the resources of your network
To get all these benefits, you must follow a few simple steps as described hereunder.
Ways to Set Up a Guest Wi-Fi Network
You can set up a guest Wi-Fi network by accessing the web interface of your router.
Once you are there, you must follow these additional steps:
- Configure guest network settings
- Set a unique SSID and strong password
- Isolate the guest network
- Adjust access time and bandwidth for restrictions
- Save and apply changes to settings
Continue reading to learn the way to go ahead.
Method: From the Web Interface of Your Router
To set up a guest Wi-Fi network, you’ll need to access your router’s web interface.
Please note that the following instructions use a TP-Link router for demonstration purposes; the interface layout may vary depending on your router model. Refer to your router’s manual for precise instructions related to your specific device.
STEPS TO FOLLOW:
- Open your preferred web browser, such as Chrome, Firefox, or Edge.
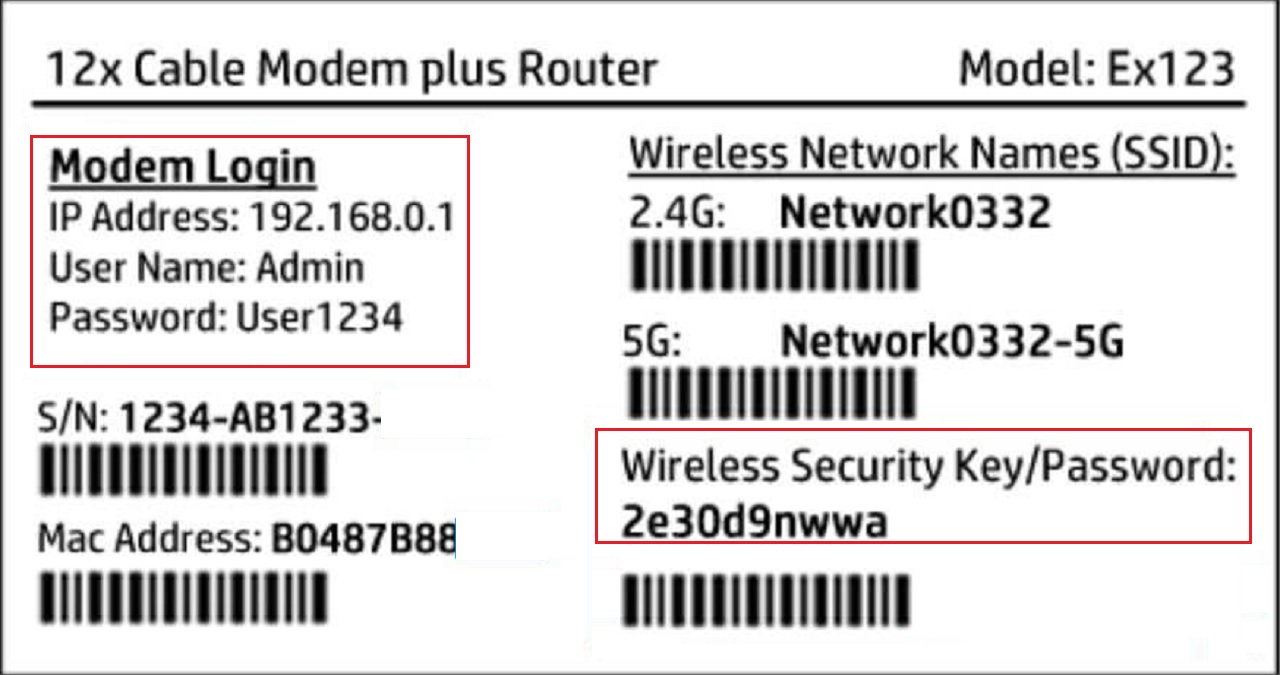
- Locate the router’s IP address, typically found on a label at the back of the router.
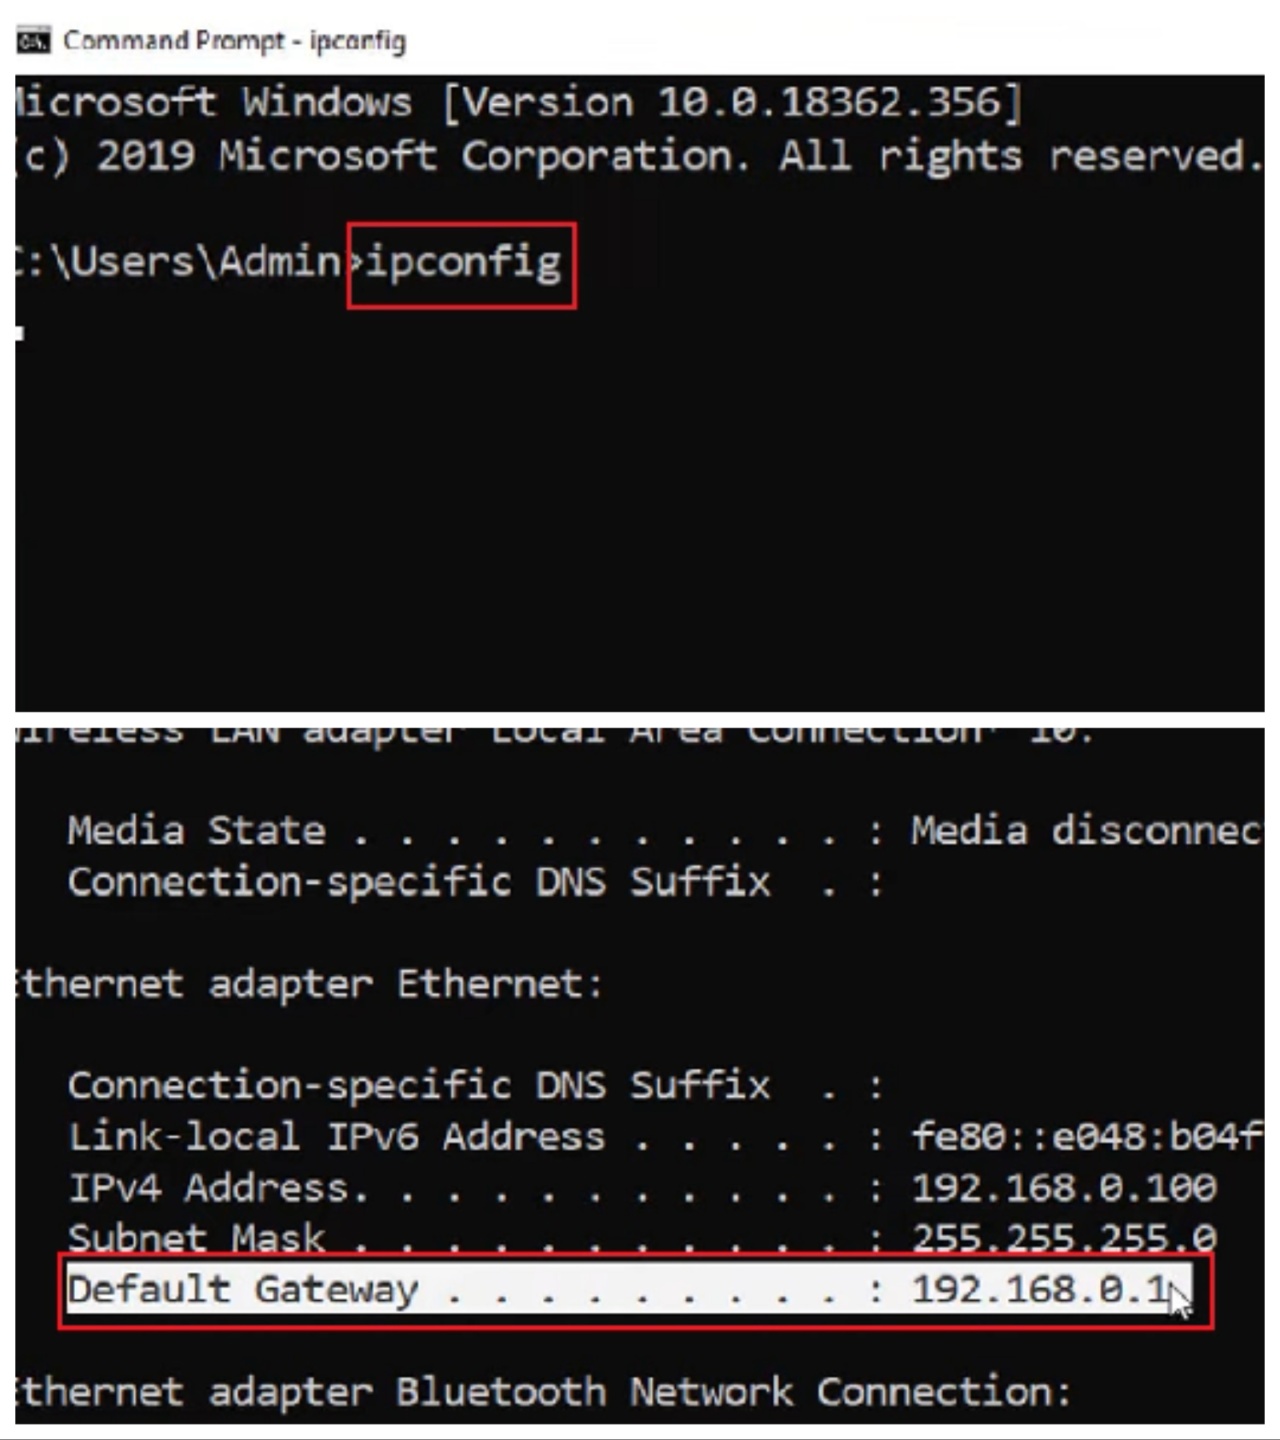
Alternatively, you can find the IP address by opening a Command Prompt window. Type “cmd” in the search box, hit Enter, then type “ipconfig.” Look for the “Default Gateway” address.
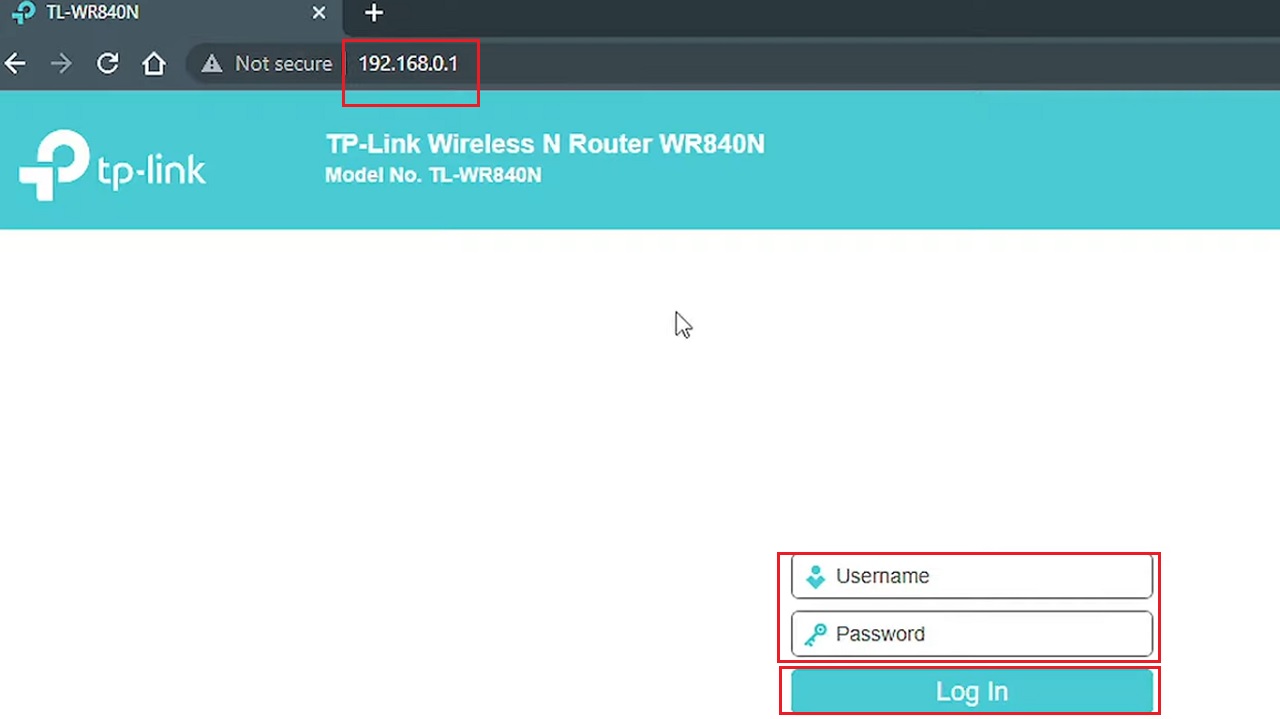
- Type in your login credentials. Most routers use default login credentials like ‘admin,’ which can often be found on the router label or in the router manual.
If you’ve changed your username and password previously, use those to Log In.
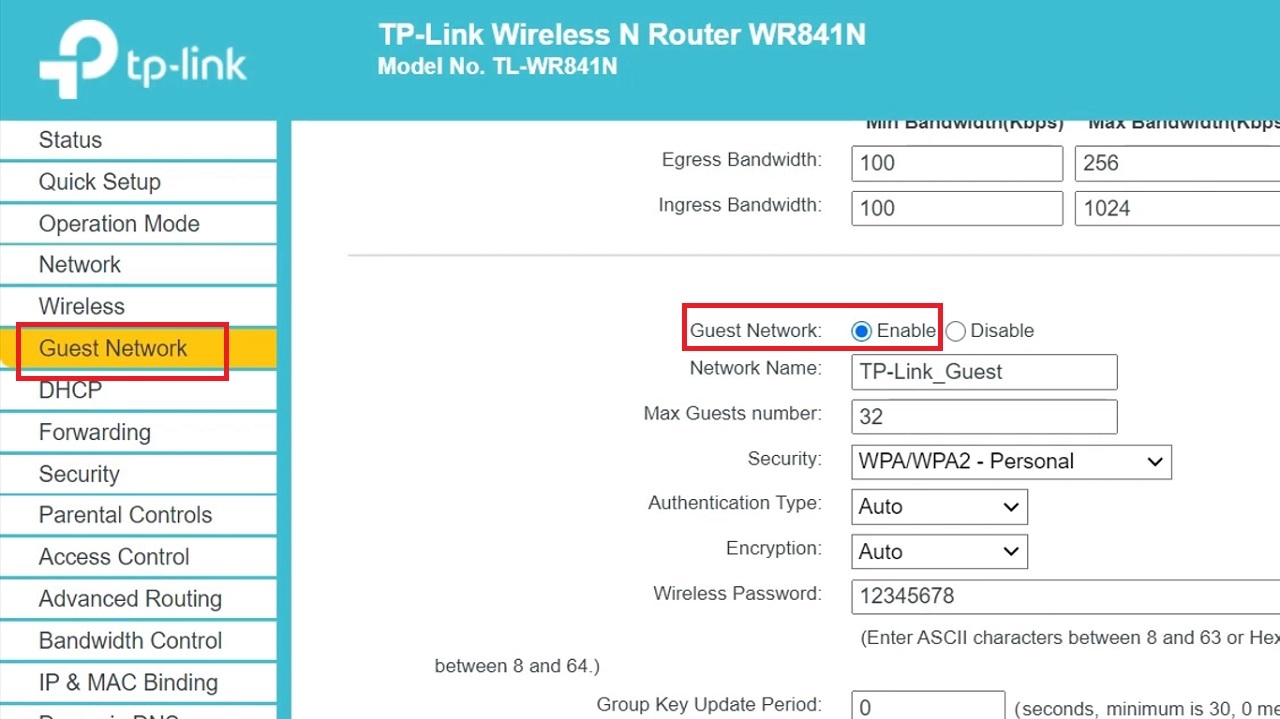
- Once logged in, navigate to the router’s Status page. Within the Status page, find and click on the Guest Network section.
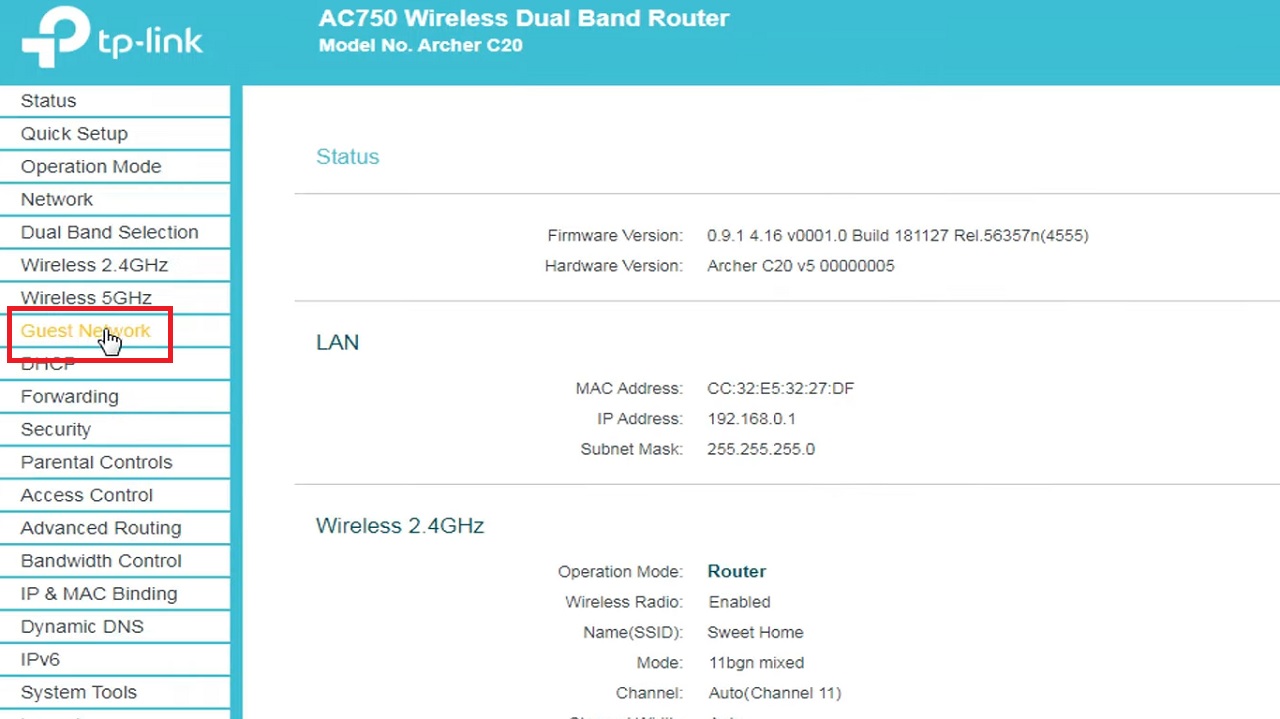
Now, make the necessary changes step by step on the right side of the page.
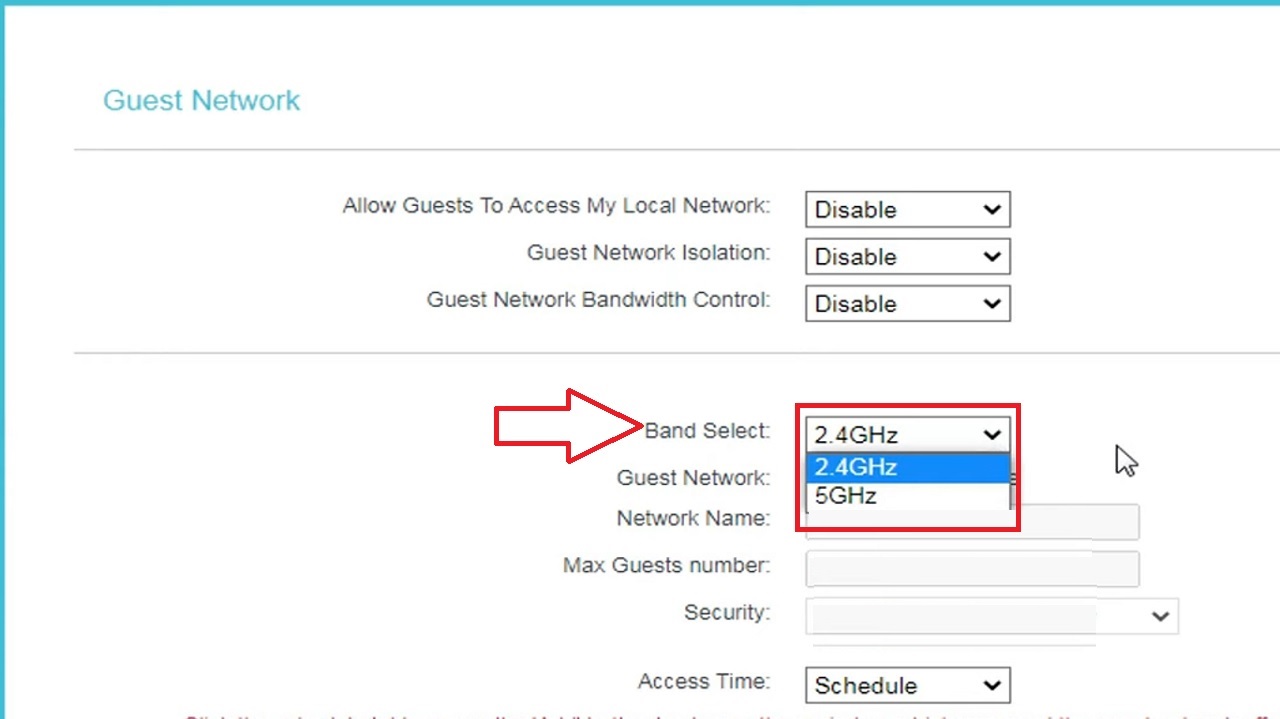
First, set the frequency band for your guest network.
If you have a dual-band router, choose the frequency band (2.4GHz or 5GHz) you want your guests to use by selecting the appropriate option from the Band Select dropdown menu.
Note: You can select both bands if needed, and repeat the following steps for each band.
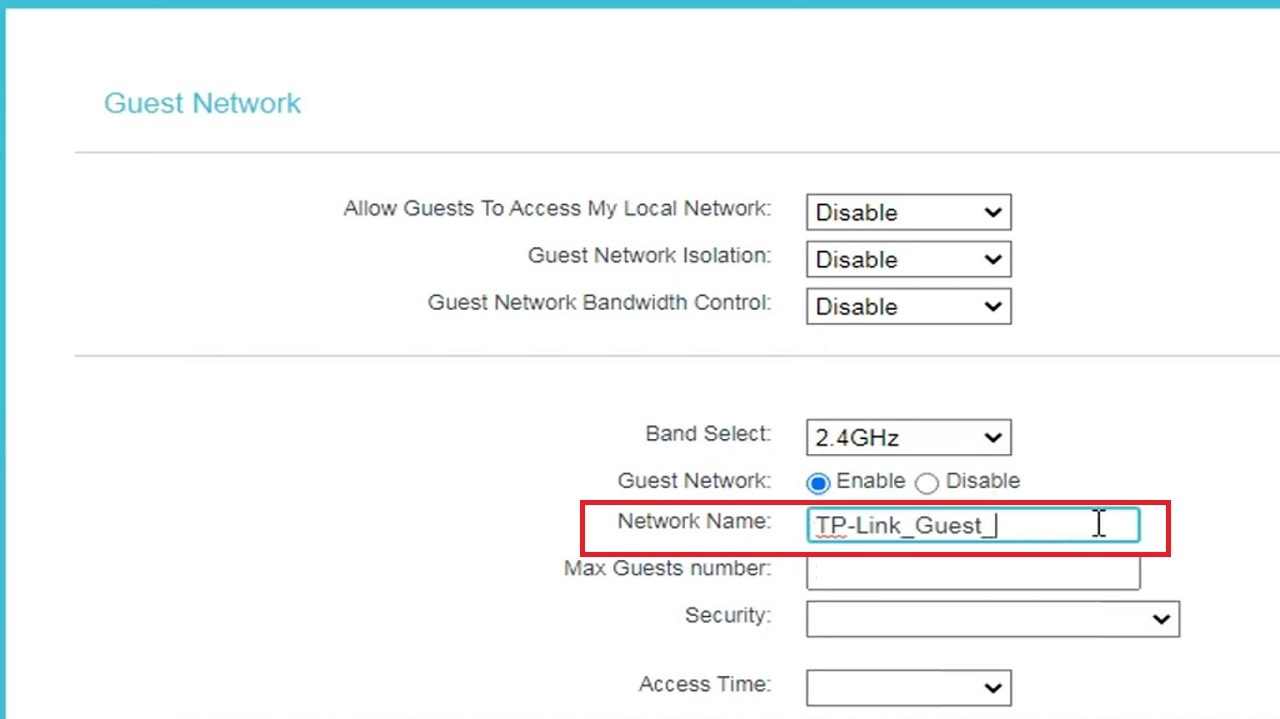
- Now, enable the Guest Network. Click on the small circular button next to “Enable” to activate the network.

- Type in the Network Name or SSID. This is the name guests will see when they attempt to connect to your guest network. For example, you can name it “TP-Link_Guest.”
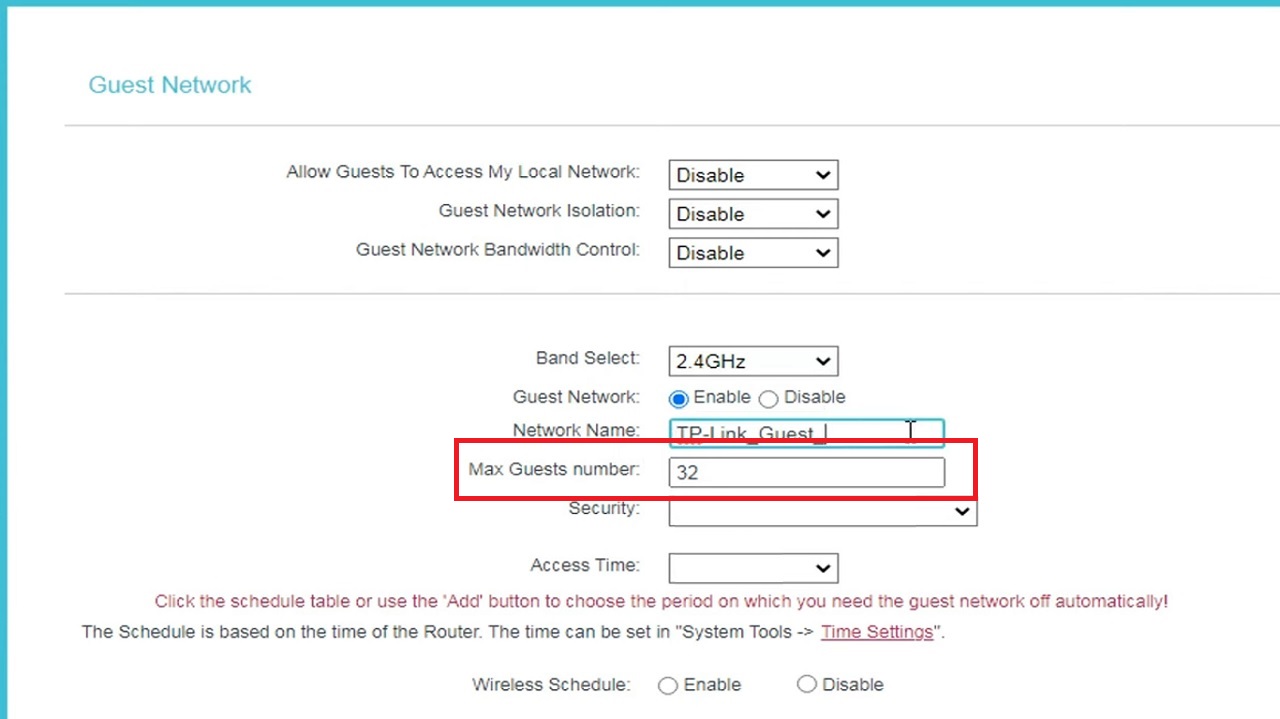
- Now, to specify the Max Guests number, set the maximum number of devices that can be connected to the guest network (e.g., 32).
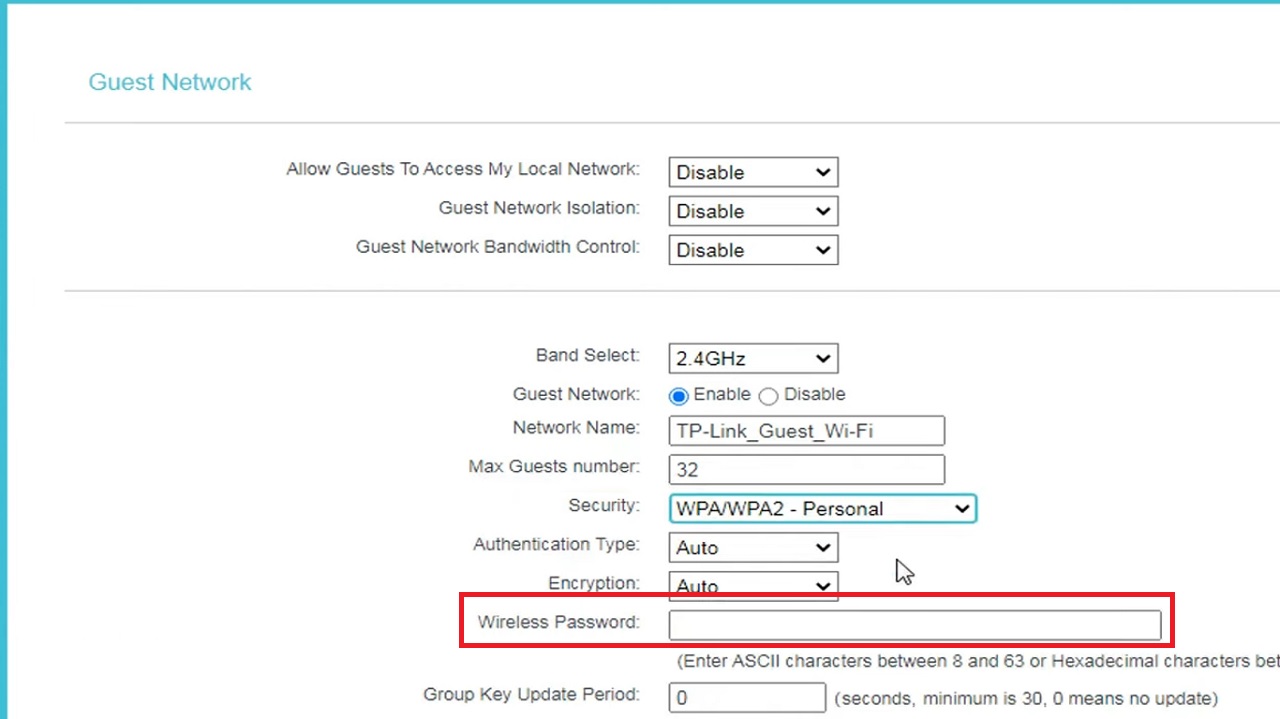
- Then, set the Security for your guest network. Click the small arrow in the box next to “Security” and select “WPA/WPA2 – Personal” from the dropdown menu.
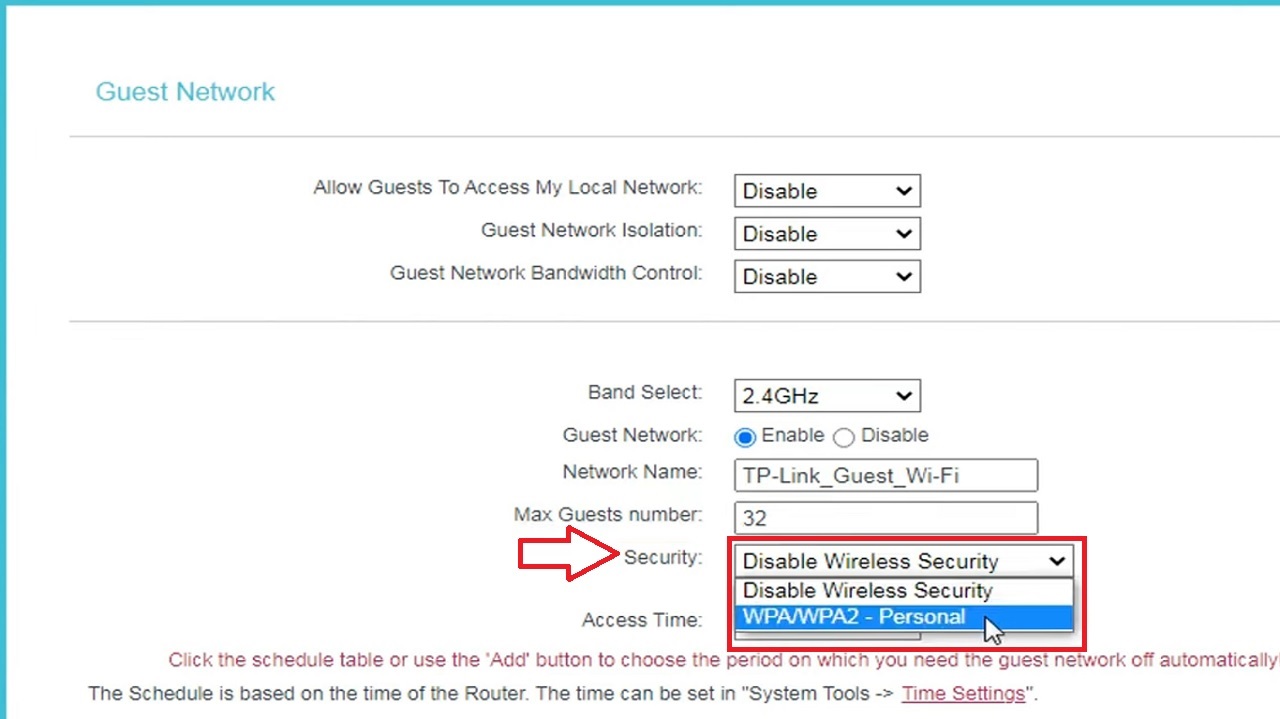
- Now, configure the Wireless Password for your guest network. Make sure to create a strong password for it as suggested. Note that if you disable wireless security, you may not need to set a password.
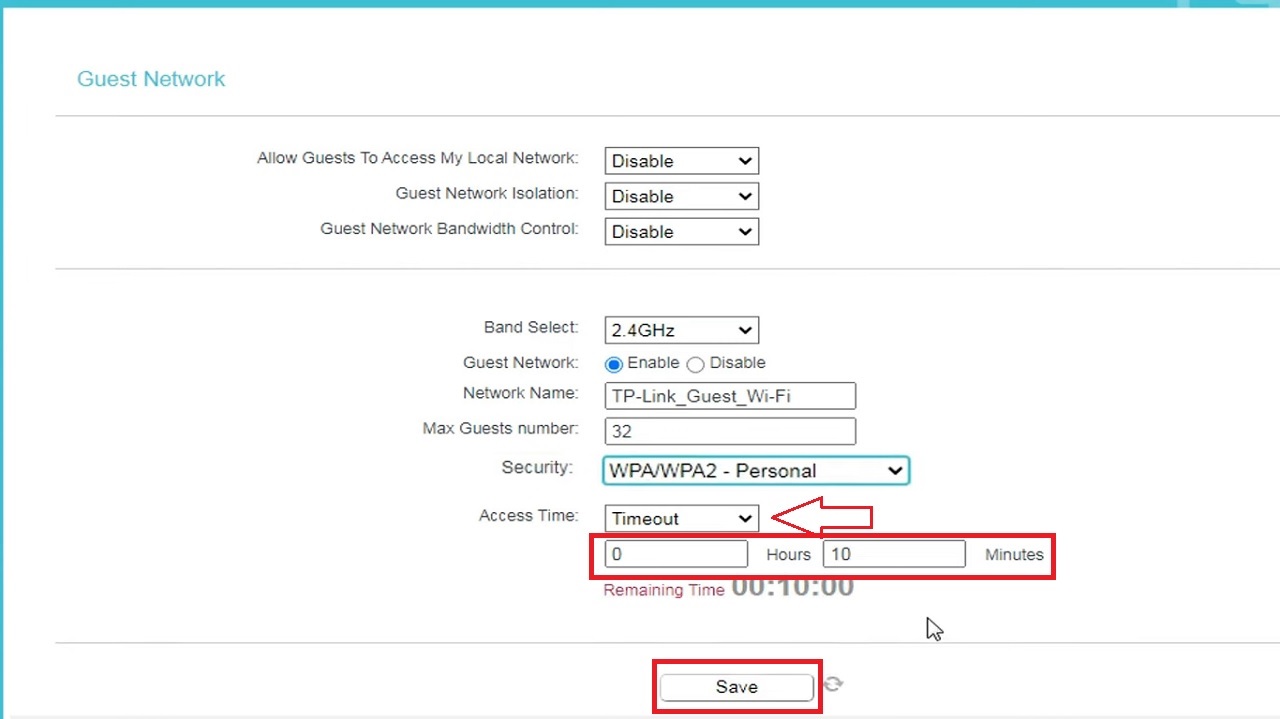
- Next, you need to set the Access Time for your guest network. There are two options: Timeout and Schedule, each with different settings.

- In the Timeout settings, specify the hours and minutes for guest network access. For example, setting it to 10 minutes will automatically disconnect guests after 10 minutes of use.
- Click on the Save button, as shown in the image below:
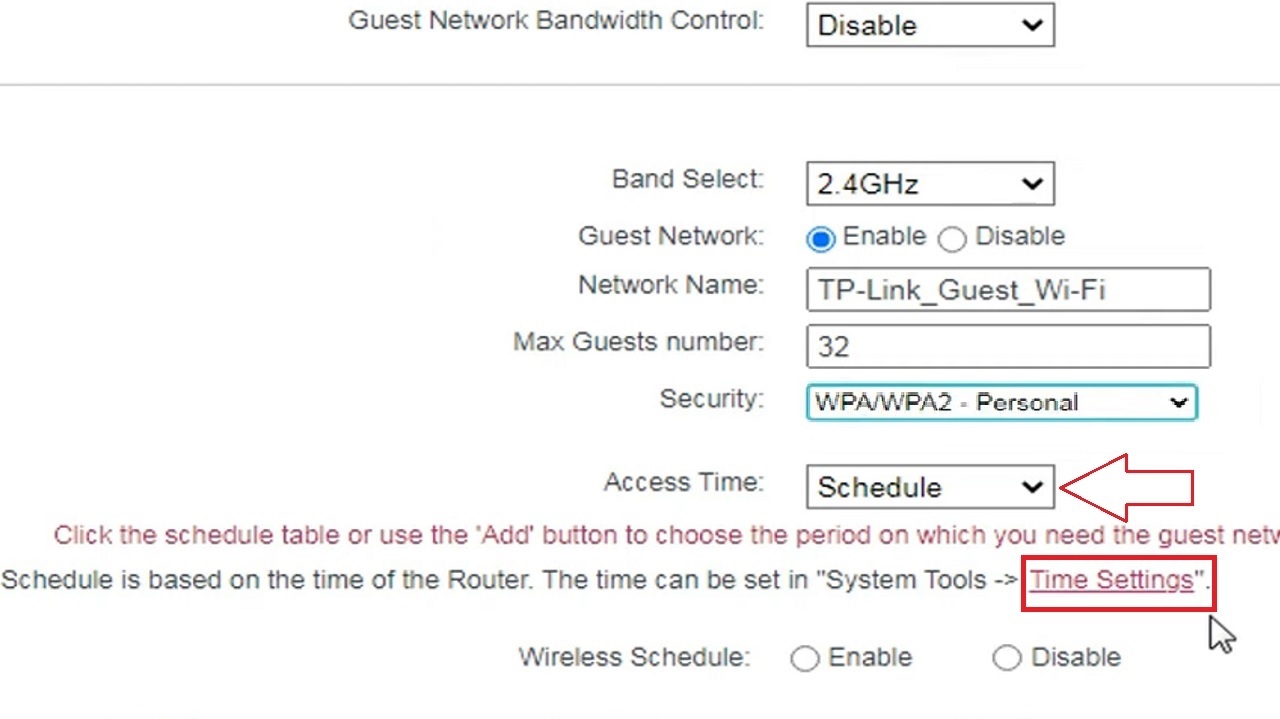
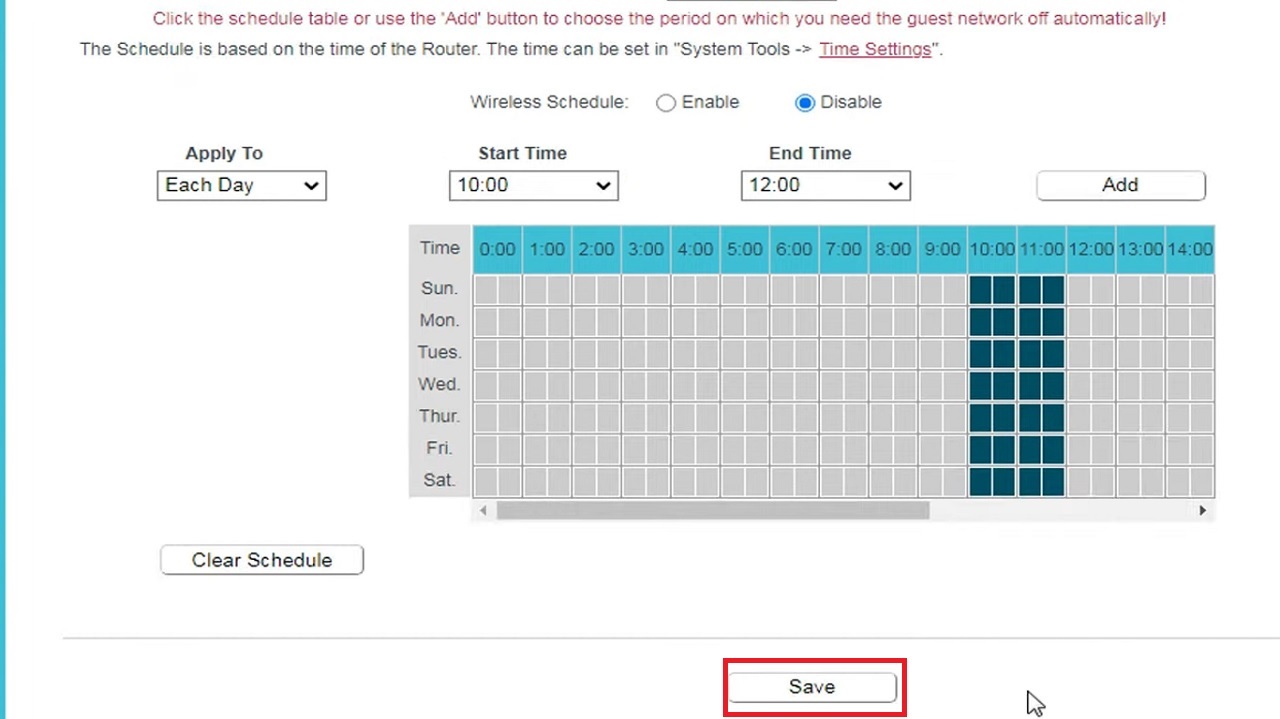
- For Schedule settings, ensure your router’s time zone is correctly configured. You can verify or adjust it by clicking on the “Time Settings” option.
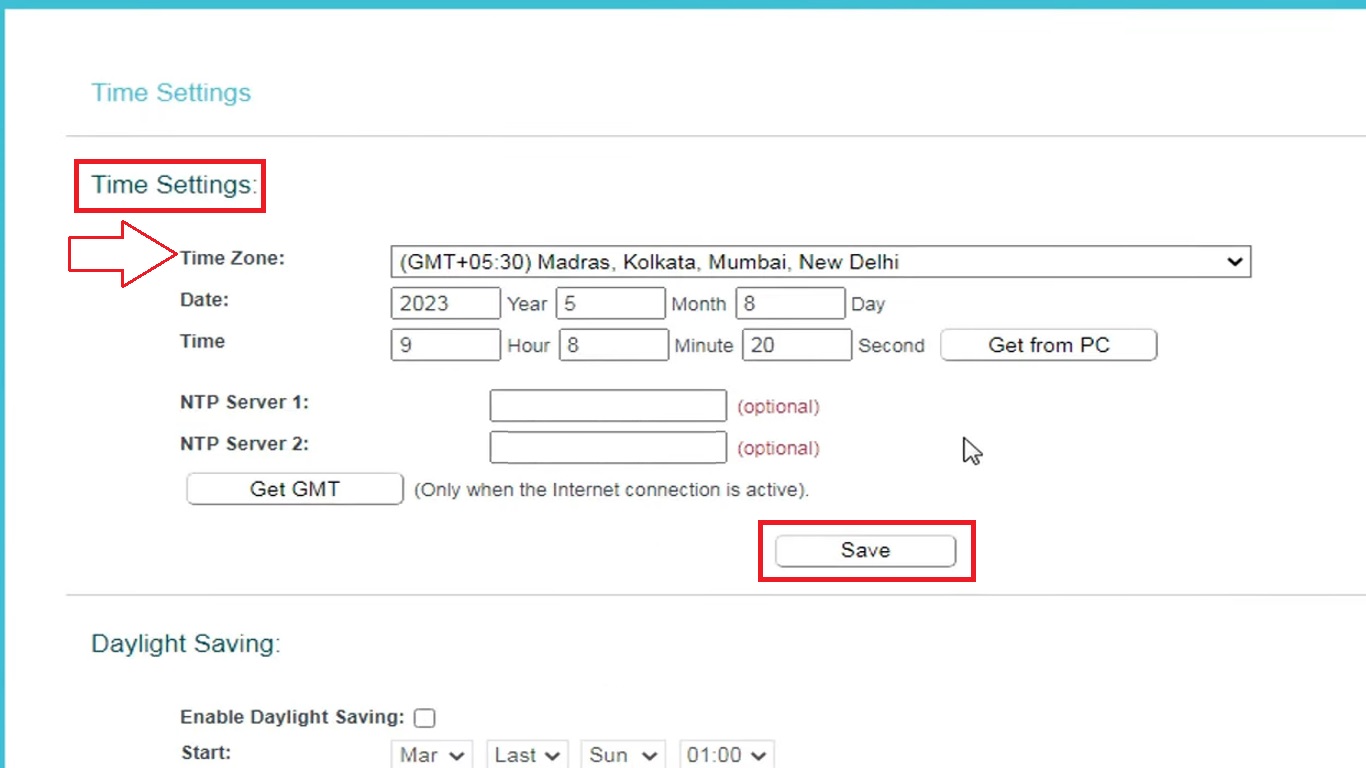
- Make the necessary settings within the Time Settings window, and then click “Save” to proceed.
- Now, click on the small radio button next to “Wireless Schedule” to activate it.
- Select the applicable schedule from the Each Day or Each Week options depending on whether you want the schedule to apply daily or weekly.
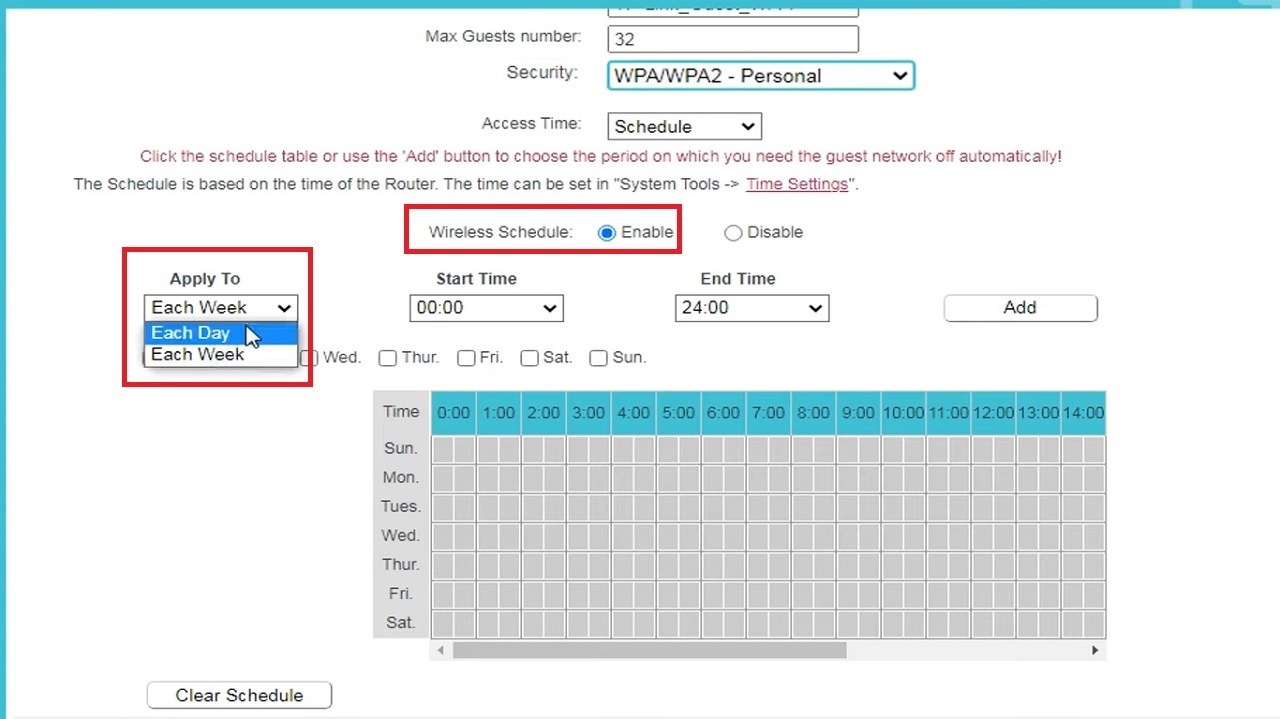
- Then set the Start Time and End Time for the schedule by clicking on the small arrow in the respective boxes to select the desired times from the dropdown menu.
- Click “Add” to save the schedule.
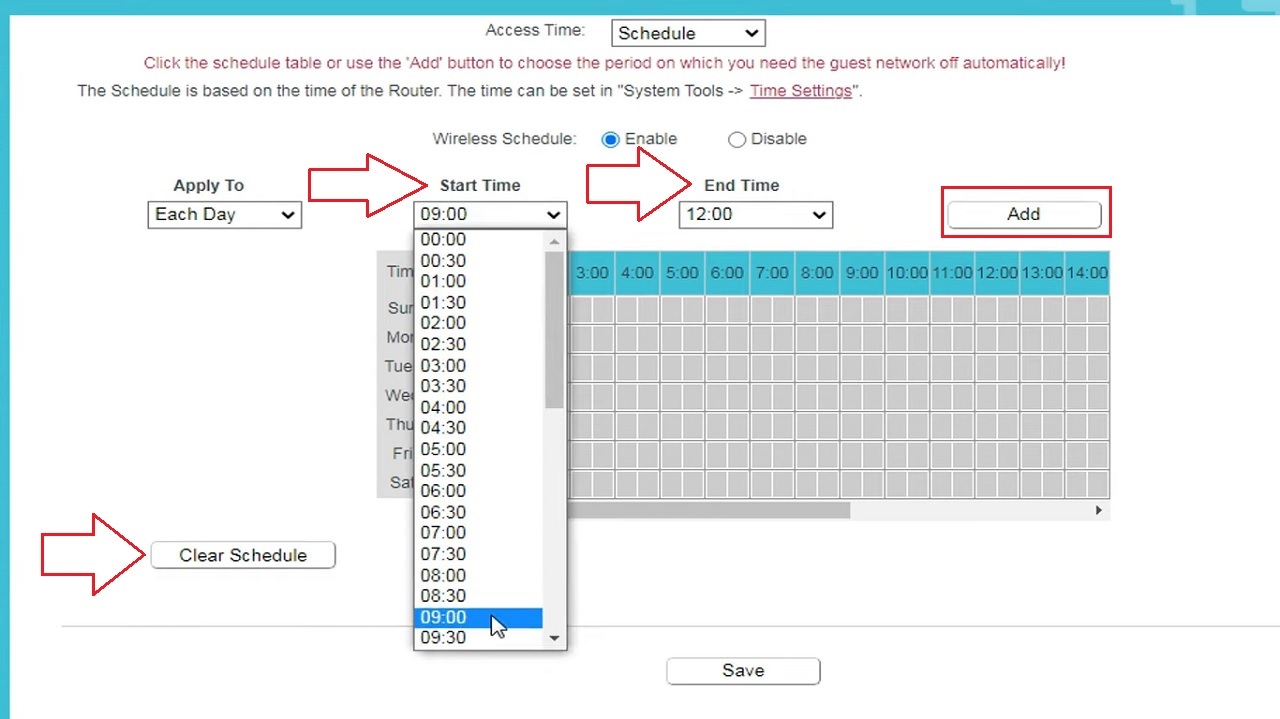
If you wish to modify the schedule later, you can access this window and click “Clear Schedule” to reset it, marked by a red arrow in the image above.
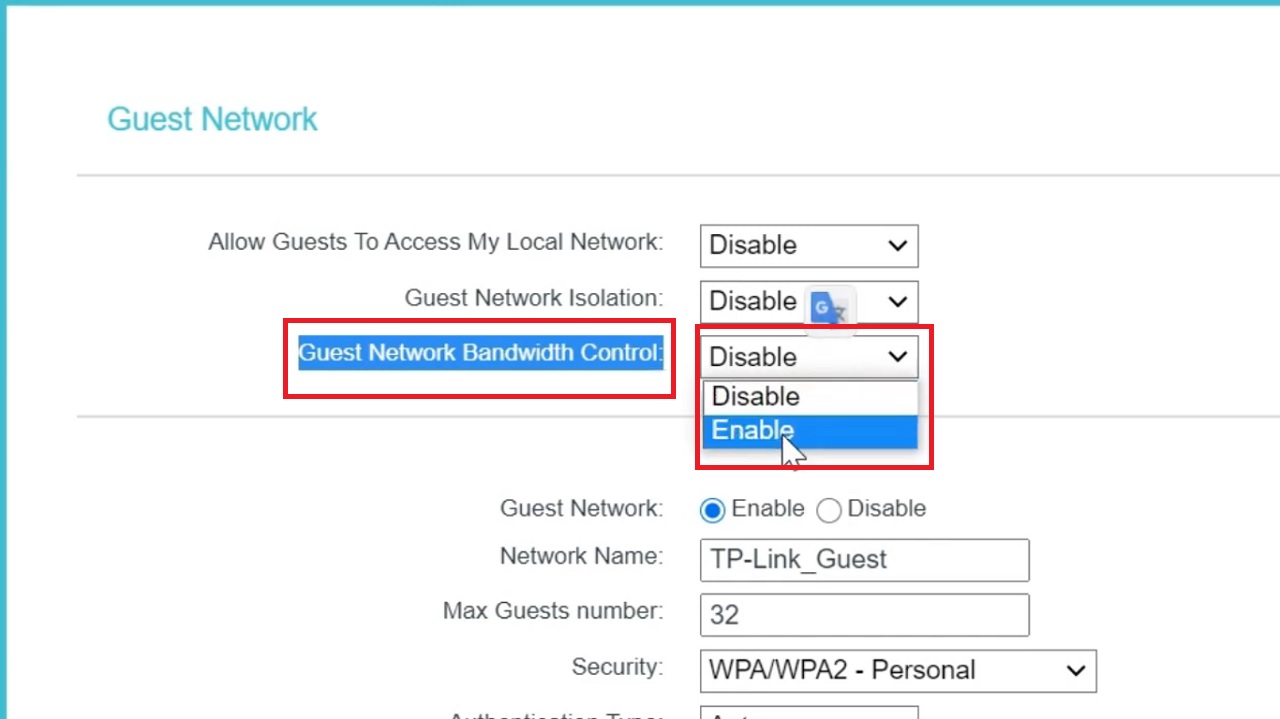
Now, manage additional features (usually disabled by default). Leave the first two features, “Allow Guests To Access My Local Network” and “Guest Network Isolation,” disabled for security reasons.
- For the third feature, “Guest Network Bandwidth Control,” click the small arrow in the box and select “Enable” from the dropdown menu.
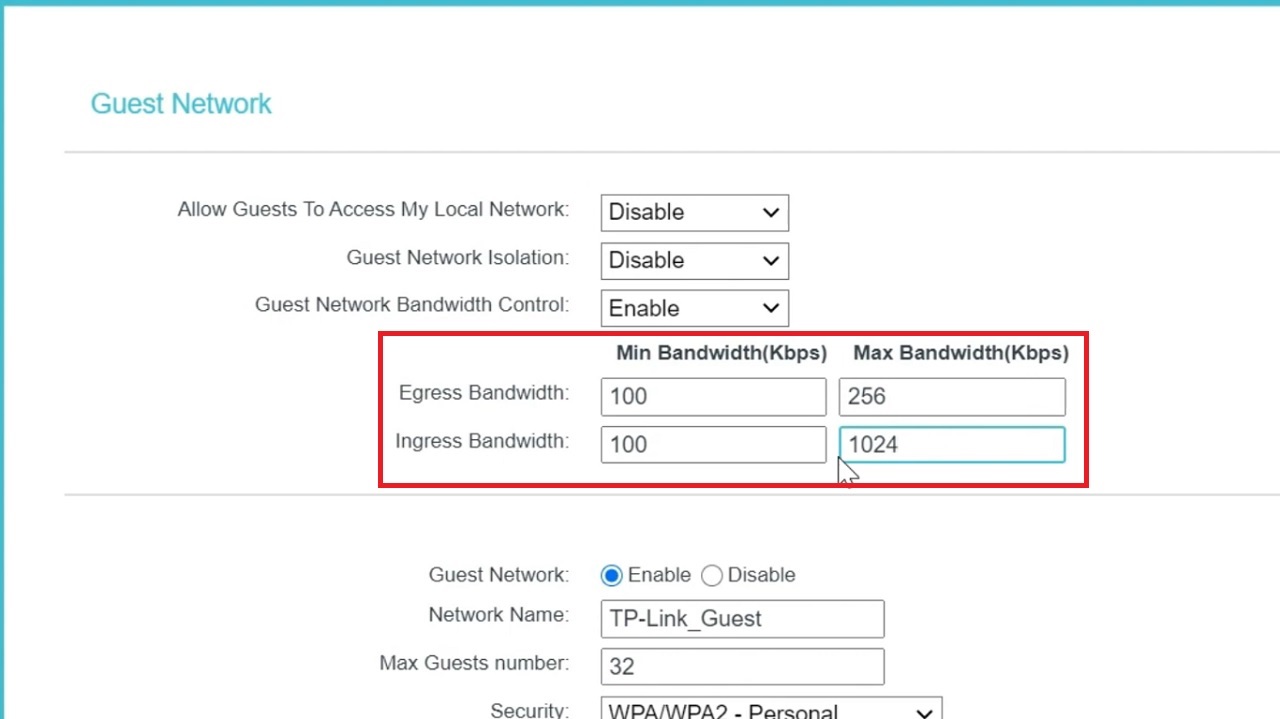
Then, configure Egress Bandwidth and Ingress Bandwidth (upload and download speeds). Set the values in kilobits per second (Kbps) to specify the minimum and maximum speeds you want to allocate to your guests.
For example, you can set the minimum egress bandwidth as 100 Kbps and the maximum egress bandwidth as 256 Kbps. Similarly, set the minimum ingress bandwidth as 100 Kbps and the maximum ingress bandwidth as 1024 Kbps, as shown in the image below:
- When all is set, finally, click “Save” to apply the changes made to the settings.
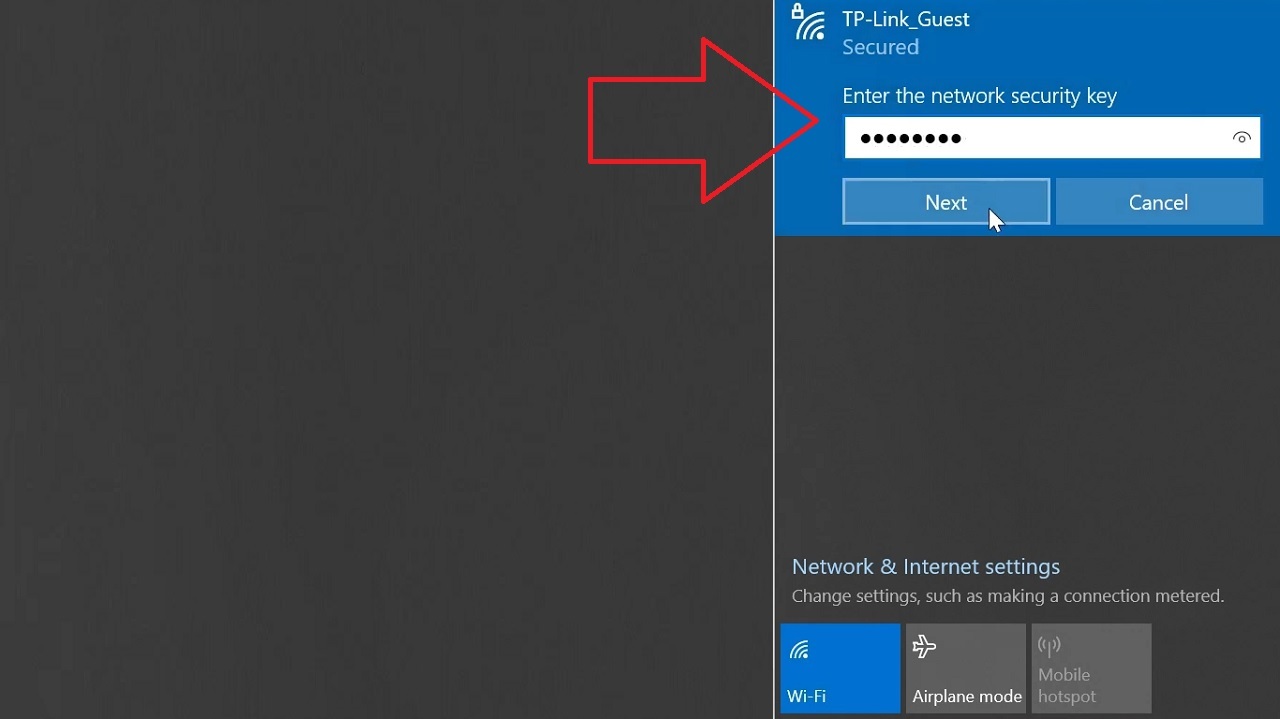
With these settings configured, your guest network is now properly set up. When you have guests, simply enable the guest network by accessing the Guest Network page and clicking on the “Enable” button.
Guests can now Enter the network security key or the password you have set and follow the on-screen instructions to connect to it for a seamless connection.
And, if you do not want to schedule access time, simply click on the Disable button next to Wireless Schedule.
Conclusion
In summary, setting up a guest Wi-Fi network enhances security, privacy, and network resource management.
Follow these concise steps for a straightforward setup.