 on a Router")
A Wireless Distribution System (WDS) allows for the expansion of a wireless network using several access points without needing a wire to link them together.
You can do this in your home or office. This article will guide you through the process.
In This Article
KEY TAKEAWAYS
- Identify your main router, the one connected to the internet, and the secondary router that will extend the network.
- Enable WDS mode on the main router from the web interface under wireless or LAN settings.
- Configure the WDS settings of the extended or secondary router according to that of the primary router.
Why Configure a Wireless Distribution System on a Router?
There are several reasons to configure a Wireless Distribution System on a router. One of the most significant reasons is to extend the coverage area of the wireless network.
It is also done for:
- Overcoming obstacles and reducing dead zones in multi-storied buildings
- Improving performance and signal strength
- Allowing seamless roaming without manual switching between networks
- Load balancing and preventing overcrowding across access points
- Offering faster and stable connection to high-bandwidth applications
- Reducing network congestion
- Isolating guest networks
- Large business environments
- A cost-effective alternative to Ethernet cables
- Adding more scalability and flexibility without much reconfiguration
- A better management of networks with centralized control and interfaces
- Creating a backup internet connection and providing redundancy
In short, it is a valuable and cost-effective solution for extending wireless coverage but limited to the specific needs and available options in the network setup.
Ways to Configure Wireless Distribution System (WDS) on a Router
While configuring a wireless router for the first time, you have to connect it to the computer on a LAN port using a wire.
After the set up you can remove the wire and place it in another location within the range of the first router.
After connecting the secondary device, proceed with the following steps:
- Log into the router’s management page
- Enter the SSID and BSSID values
- Input the authentication type and pre-shared key of your current network
- Disable the DHCP feature
- Set a different LAN IP for the router
Note: Here, for demonstration purposes, the first or the main router will be termed as the root router, and the other router as an extended router.
Also, for demonstration, a TP-Link router is used. So, if your router is different, the interfaces and layout may be a bit different but the fundamental process will be almost the same. So, refer to your router’s documentation for tailored instructions and perform the steps with caution.
Method: Enable the Wireless Distribution System and Configure
Assuming that everything is already configured properly in the root router to allow WDS configuration, you can configure the Wireless Distribution System by enabling it first on the management page of the extended router.
STEPS TO FOLLOW:
- Look at the login details on the label at the back of the router.
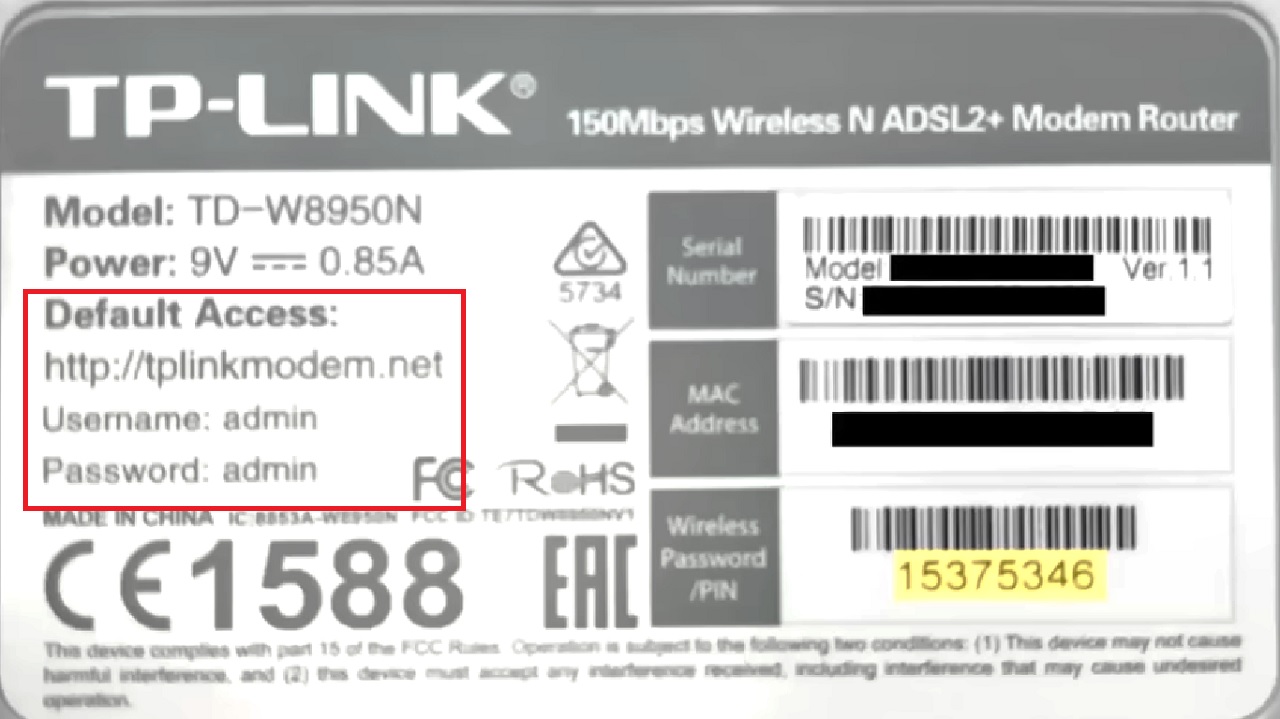
(You may also refer to the documentation of the router).
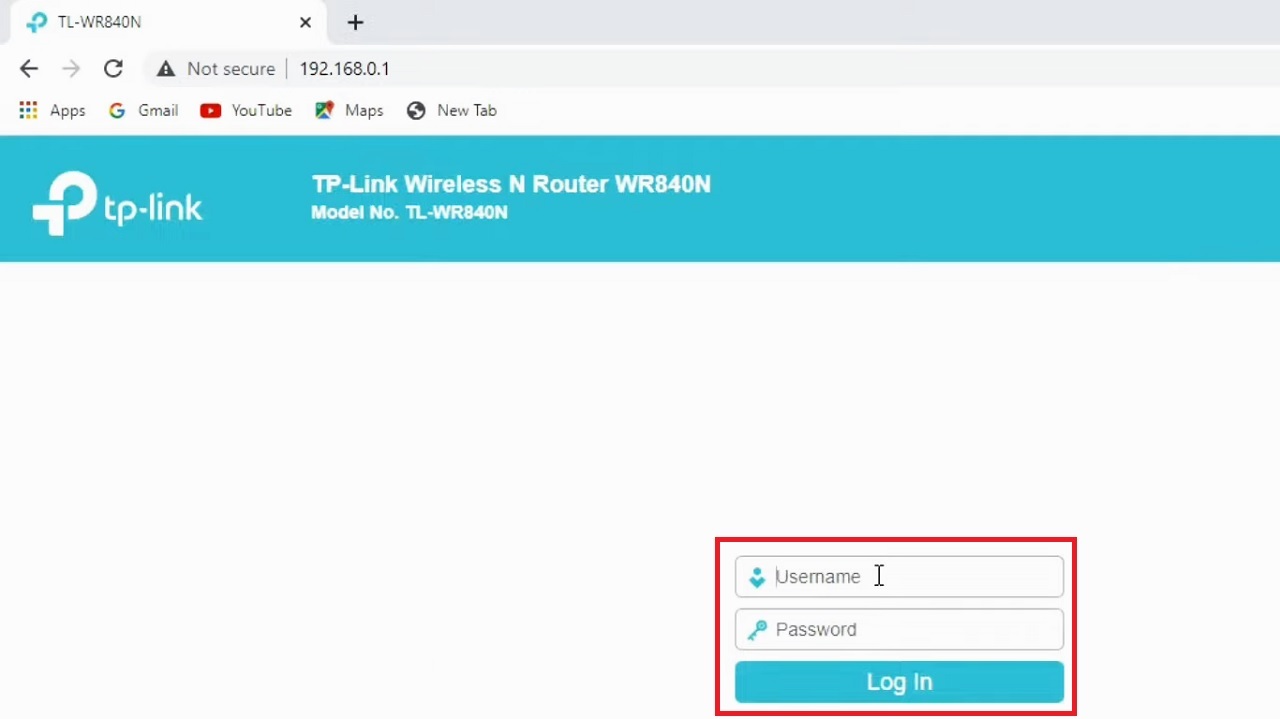
- Log In to the management page of the wireless router.
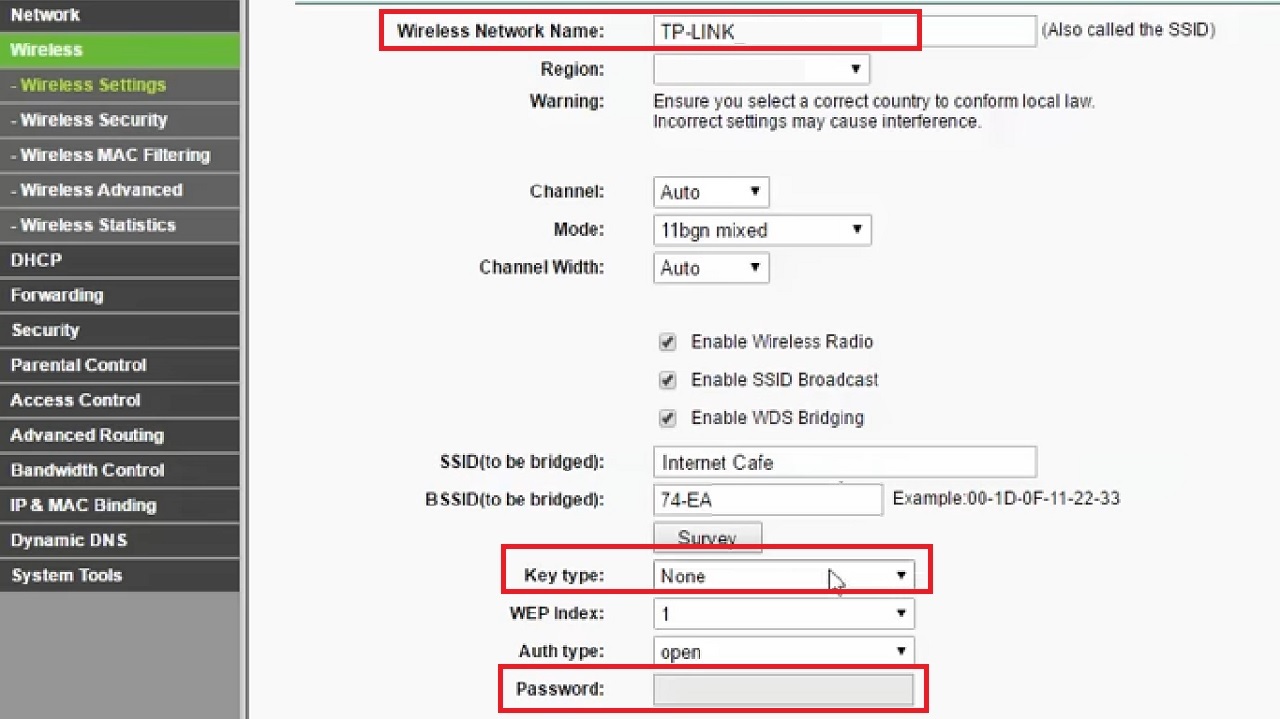
- Now go to the Wireless tab on the left pane in the following window.
- Open Wireless Settings.
- Click on the box next to Enable WDS Bridging to enable it.
- Enter the SSID and BSSID values of your current, properly configured, and up-and-running wireless network below.
(You can enter these values manually if you know them precisely. Or else, click on the Survey button, marked by a red arrow, to get the list of all the wireless networks that are available in the range).

- Click the Connect button of your current wireless network. For example, consider the second option in the list below.

Once it is connected to your current wireless network, the SSID and BSSID fields will be automatically populated.
- You may change the Wireless Network Name of the second router.
- Now configure the Key Type and Password of your current running wireless network below.
- Select the right country or Region by clicking on the small arrow in the box and choosing the right options.
- Click on the OK button in the following warning window when and if it appears.

- Also, click on the OK button when and if you are warned that the AP channel is not the same as the Bridged AP’s channel.
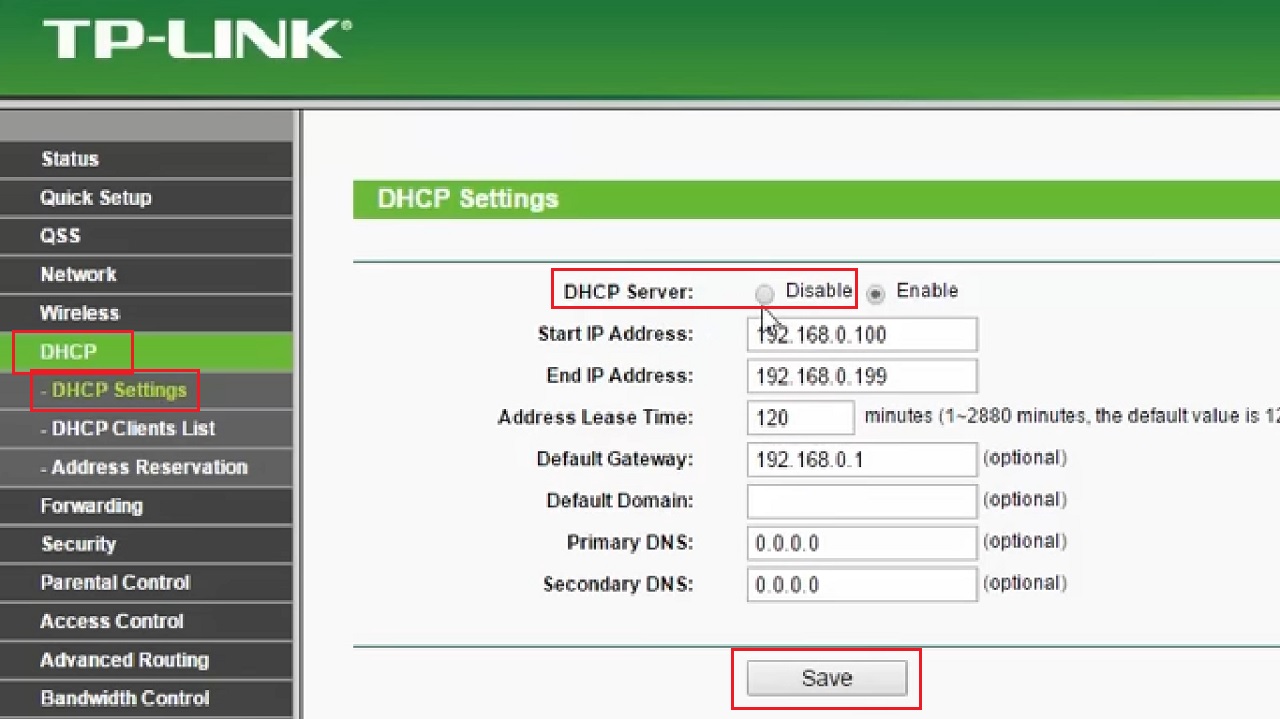
- Now, click on DHCP from the left side pane.
- Select DHCP Settings under it.
- Click on the small circular button next to Disable alongside DHCP Server.
- Click on the Save button.
- Now, click the Network tab.
- Click LAN.
- Modify the LAN IP address of the router. It must be the same network as the first router network so that both remain on the same subnet.
- Click on the Save button.
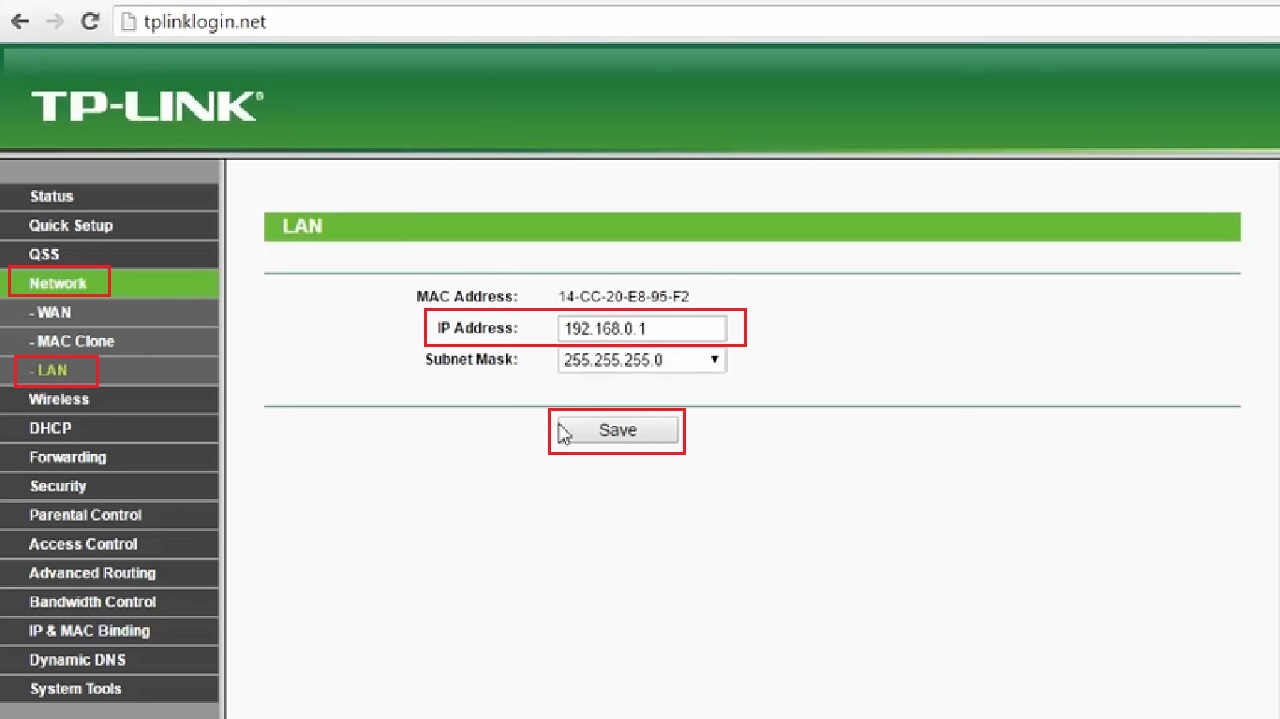
- Click on the OK button in the following window to allow rebooting of the newly configured router.
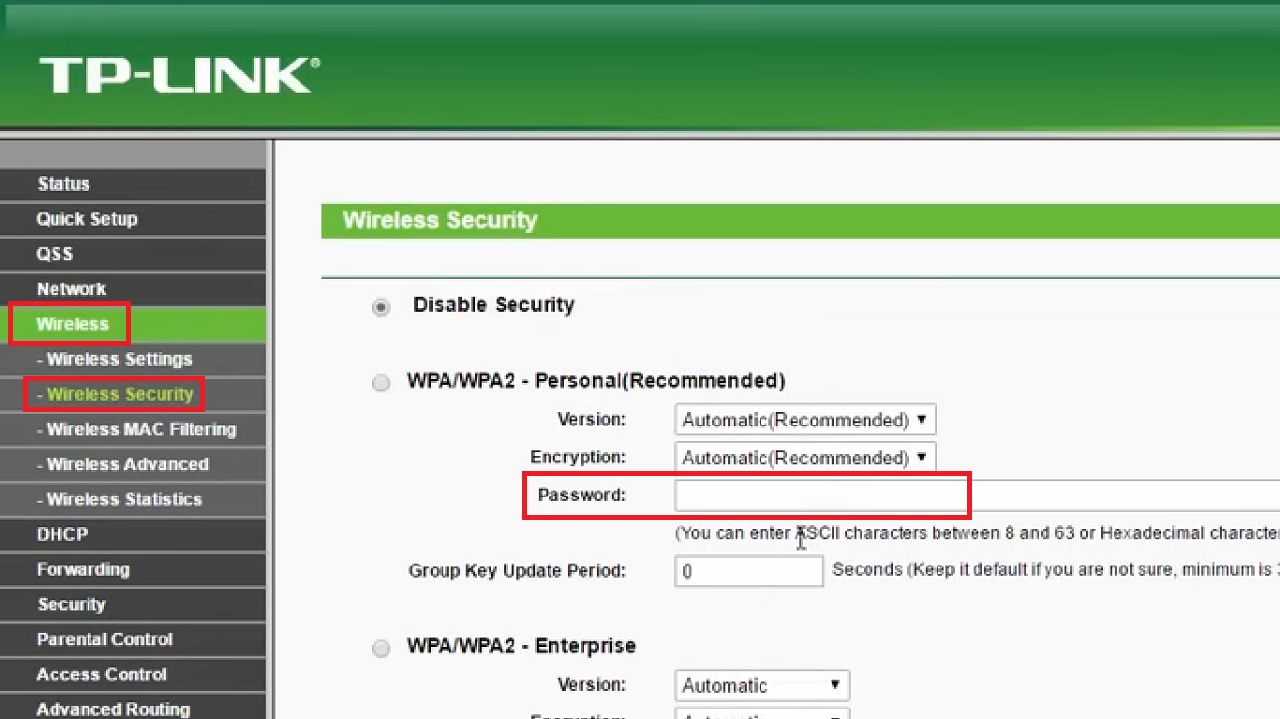
Additionally, you can assign a different wireless password for the newly configured router from the Wireless Security page.
Open your web browser > Login to the admin page > Go to Wireless > Select Wireless Security under it and change the password on the right side of the window.
This will save the hassle of connecting the two routers with a wire.
Now connect your PC to the extended router, which is on a bridged network.
Conclusion
Configuring a WDS on your router will enhance the coverage and functionality of your network greatly.
It is a cost-effective and versatile solution to improve network performance.
However, ensure compatibility, follow the manufacturer’s instructions, and be ready to invest time in setup and maintenance.