
It is important to keep your kids safe online with a controlled online environment. You can do this by setting up parental control on your router.
This post will guide you through the process of easily, effectively, and responsibly setting up parental control on your router.
In This Article
KEY TAKEAWAYS
- You may configure parental control on your router easily from the web interface.
- Access the settings to block or filter harmful or inappropriate websites.
- Set the internet access times to limit screen time for your kids.
- Select the devices to be under parental control from the devices list by entering the MAC address.
- You may set usage reports to monitor the online activities of your kid.
Why Do You Need to Set Up Parental Control on a Router?
One of the most significant reasons to set up parental control on your router is to create a safer and more responsible digital environment for your children.
Some other useful reasons for setting up parental control are:
- Protection from inappropriate content
- Enhancing online safety
- Reducing cyberbullying and scams
- Time management of online and offline activities by scheduling internet access
- Prevent potential addiction issues
- Protecting privacy
- Preventing sensitive information from being accessed by unauthorized users
- Channeling online activities towards age-appropriate and educational content
- Customizing specific needs and ages of every child
- Monitoring the online behavior of kids and addressing any concerns if any
- Parental engagement with kids in chats about responsible online behavior
- Promoting cybersecurity
- Reducing the risk of downloading malware accidentally or unknowingly
- Setting consistent rules and guidelines for devices connected to the network
- Encouraging family bonding by limiting screen time
- Allowing gradual independence by adjusting parental control
- Instilling values of responsible digital citizenship in kids from a young age
- Ensuring a safer and more positive online experience
- Ensuring compliance with age ratings and guidelines
- Supporting and controlling multiple devices
In short, setting up parental control on your router will give you complete peace of mind as a parent knowing your kid is navigating the internet safely.
Ways to Set Up Parental Control on a Router
You may set up parental control in your router by accessing the admin panel of the device. In there, you will need to restrict specific websites, limit internet access time, and even pause Wi-Fi. You may also add a router accessory for the same.
Apart from the router settings, you can also set parental control on your router in the following ways:
- Through an app
- Through your online provider account
Once you have accessed the setup page in the admin panel, you will need to follow these specific steps:
- Locate the parental control section
- Set up user profiles
- Configure website filtering
- Create content restrictions
- Schedule internet access times
- Save and apply the changes
Here is an overview of what features to look for and how to use them to set up parental control on your router.
Method: From the Web Interface
Parental control on a router is usually set up from the web interface of the router.
Note: Every router is created differently. So, you will need to refer to the router manual for the specific steps based on the specific router’s interface. For demonstration, a TP-Link router is used here.
STEPS TO FOLLOW:
- To start, open your preferred web browser on your computer.
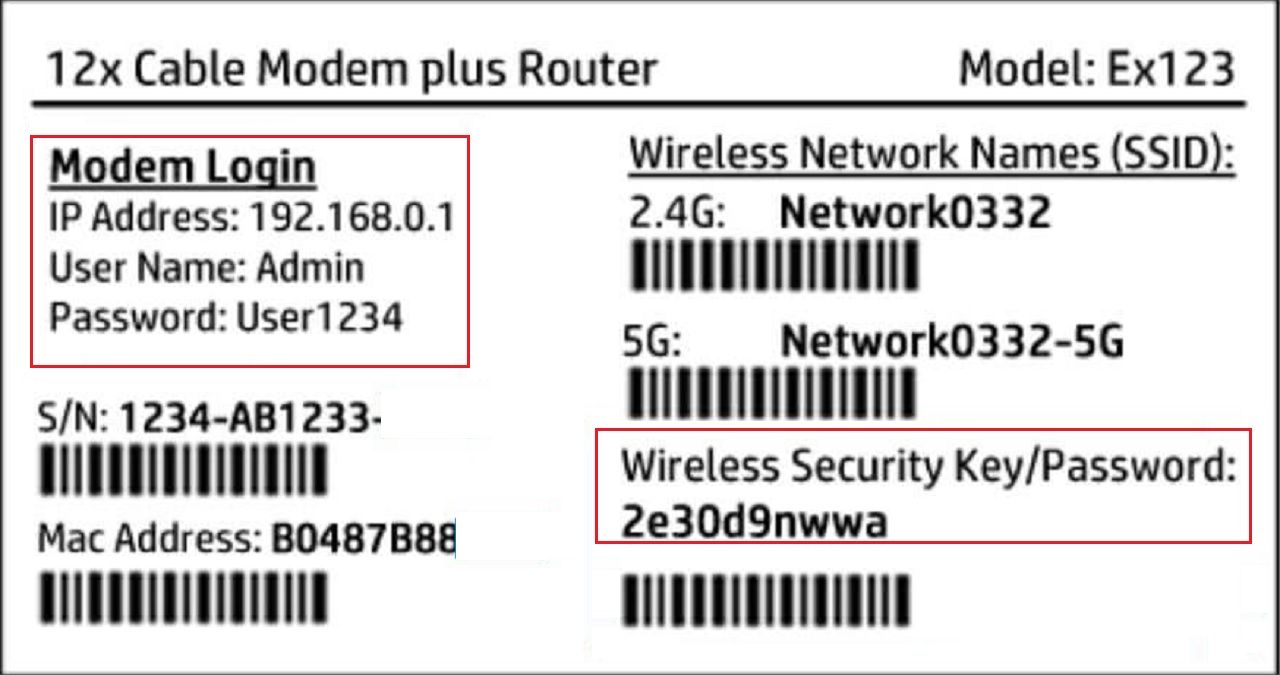
- Type your network IP address into the address bar.
This is 192.168.1.1 for most routers by default. However, if that does not work for you, you may look up your IP address on the label at the back.
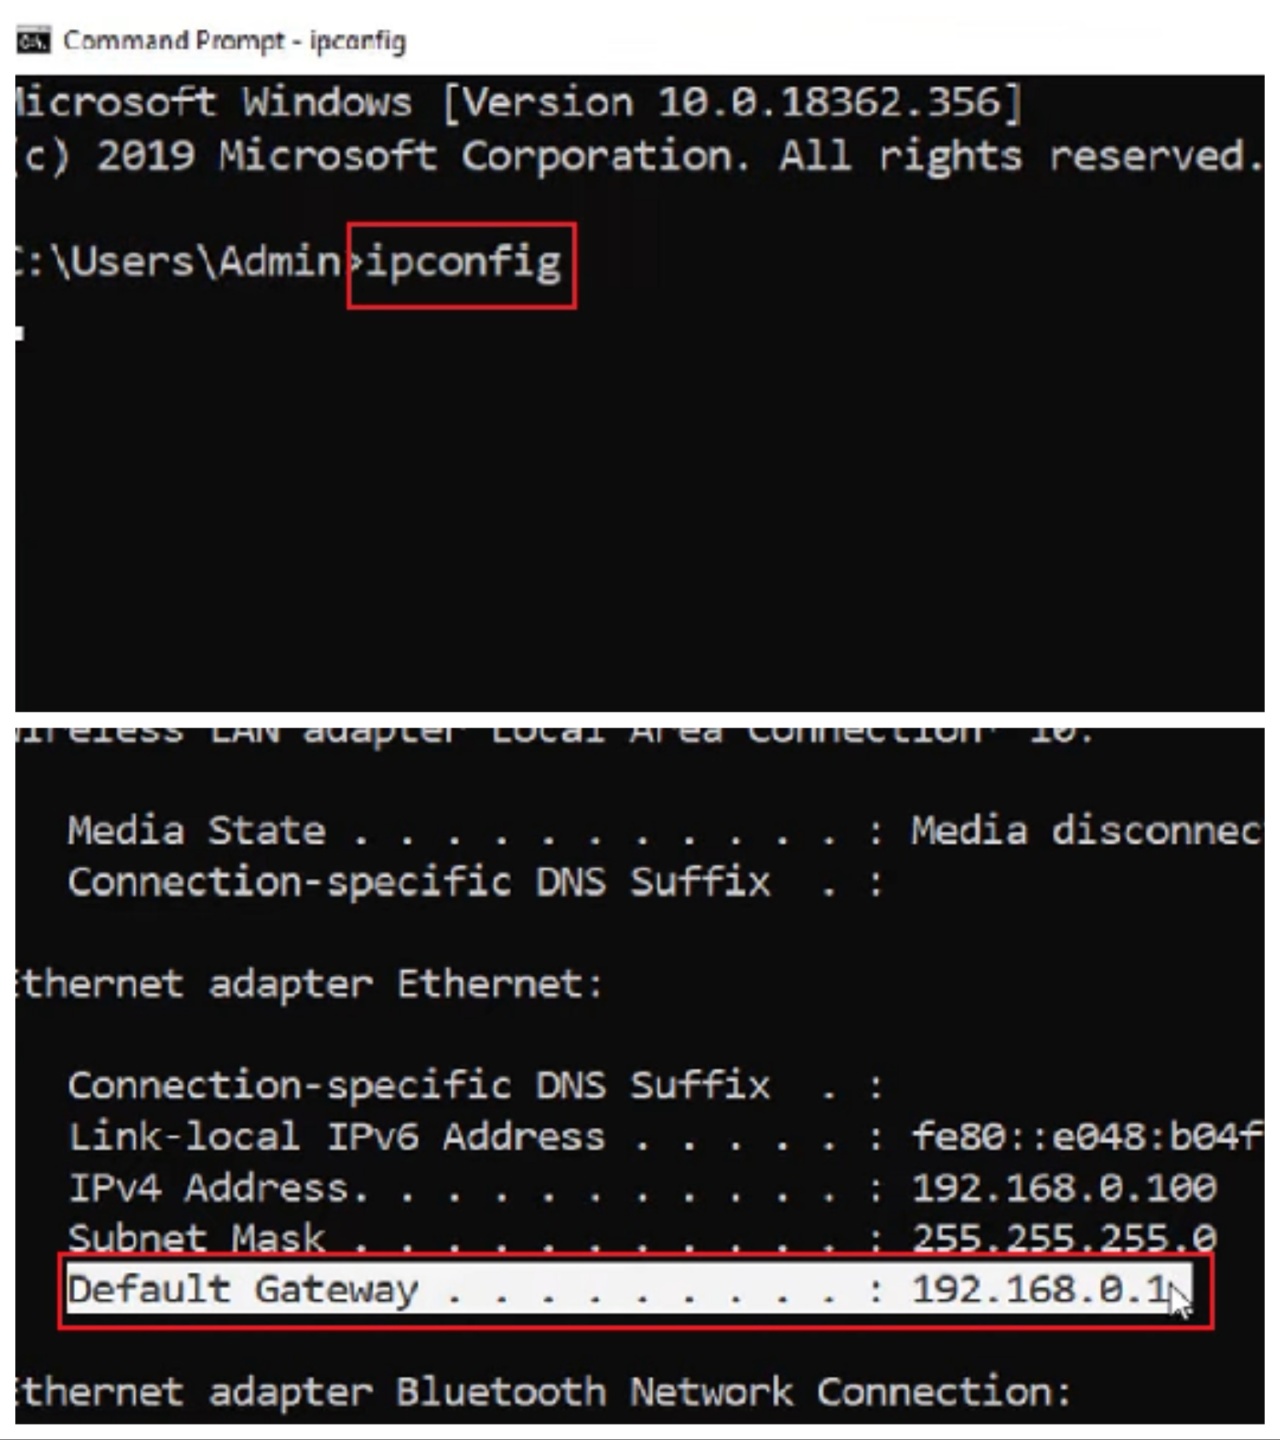
If it is not there, go to the search box, type cmd and hit enter, type ipconfig, and look for the Default gateway address. You may also right-click on your internet icon and look for details or settings.
In a MAC computer, click on the Wi-Fi symbol at the top, scroll down, and click on Open Network Preferences from the dropdown context menu.

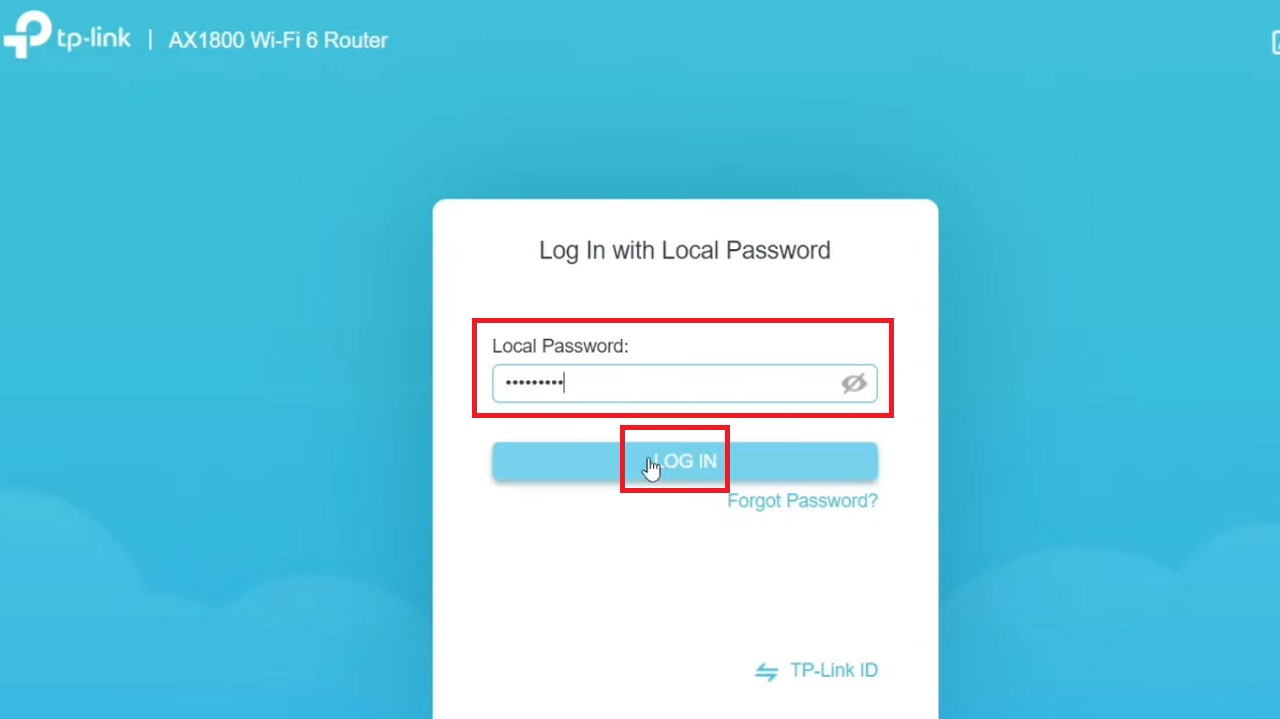
- On the following page, type in your admin credentials to LOG IN to the admin panel. These are usually ‘admin’ by default for username and password.
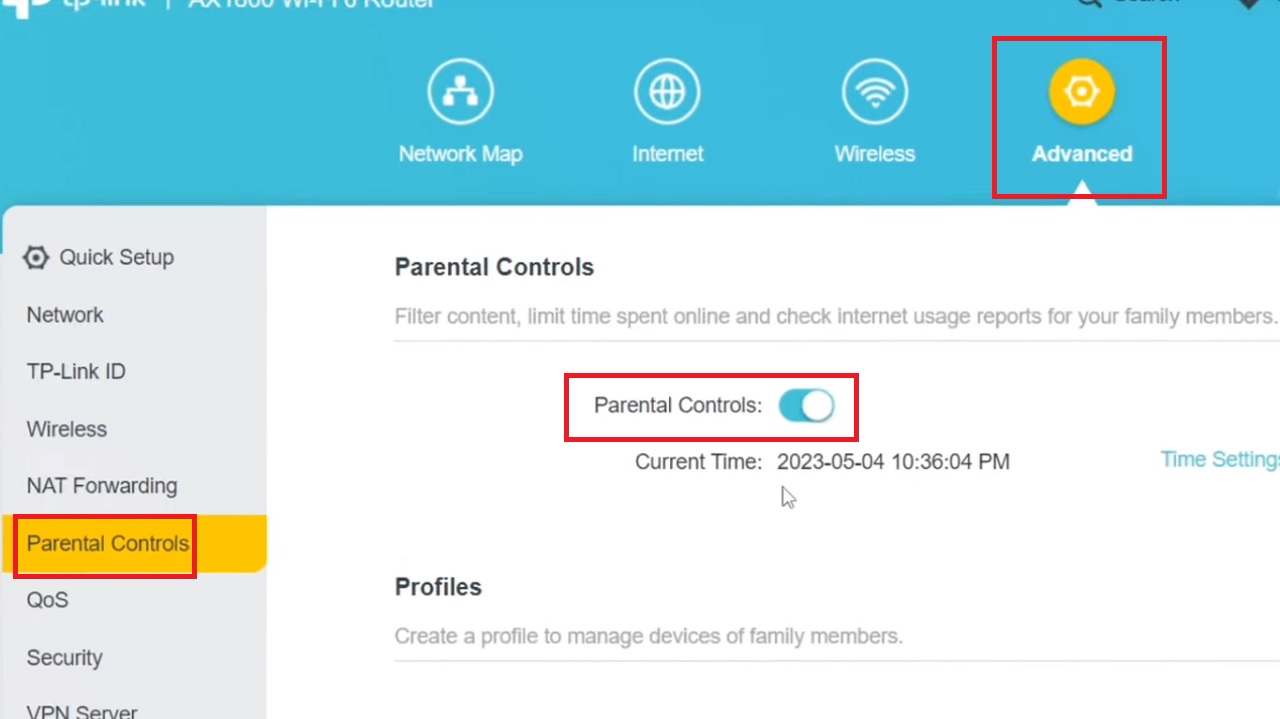
- Now, go to Advanced.
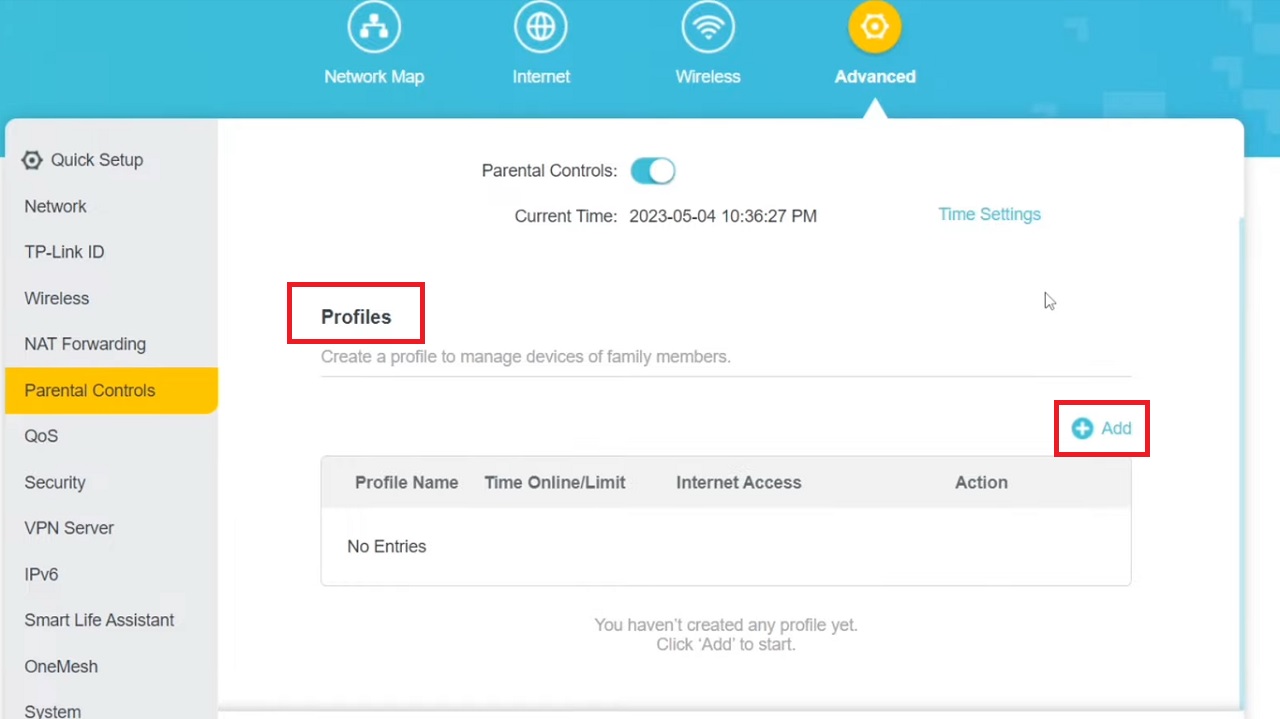
- Click on Parental Controls on the left pane of the following window.
- Toggle the sliding switch next to Parental Controls to enable it.
- Scroll down the page a bit and go to the Profiles section.
- Then, Click on Add.
- Give a Profile Name in the Basic Info page.
For example, let’s name it Kids.
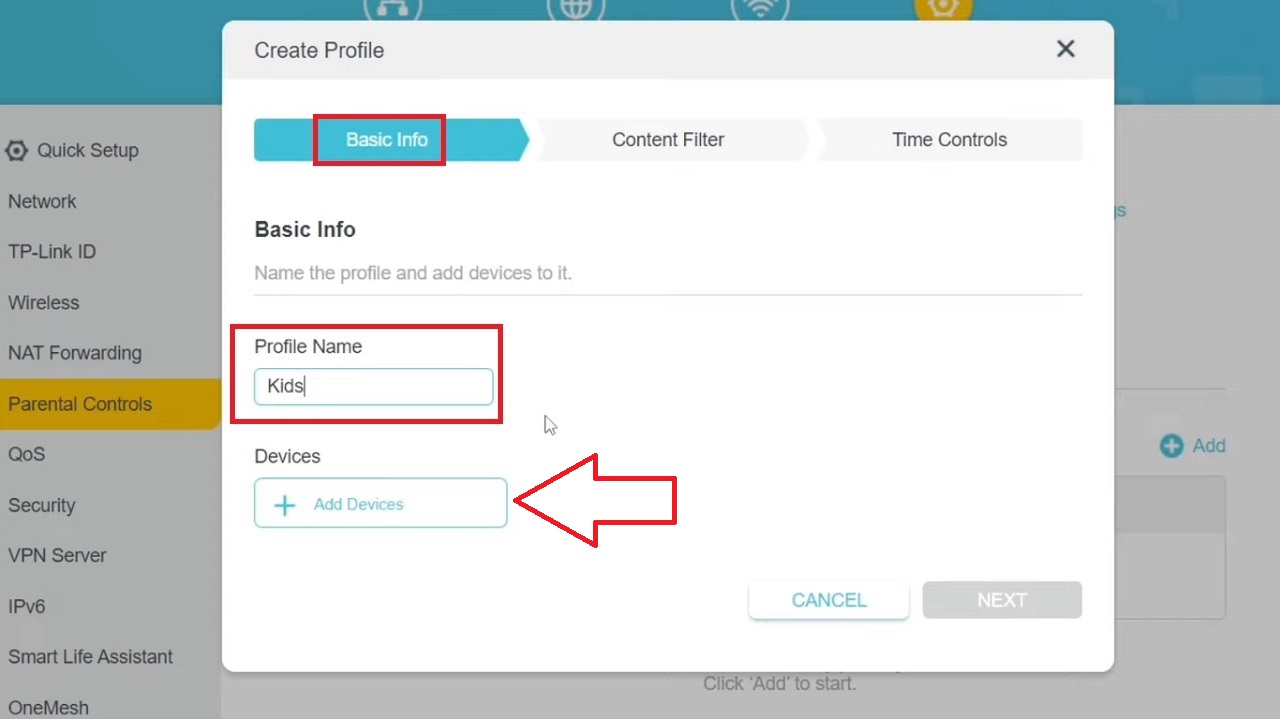
- Now, click on the + Add Devices button below, shown by the red arrow in the image above.
- To Add Devices to Profile, select the access device by clicking on the check box next to it. The device will show up on the right side of the window. You may add a number of devices in the same way.
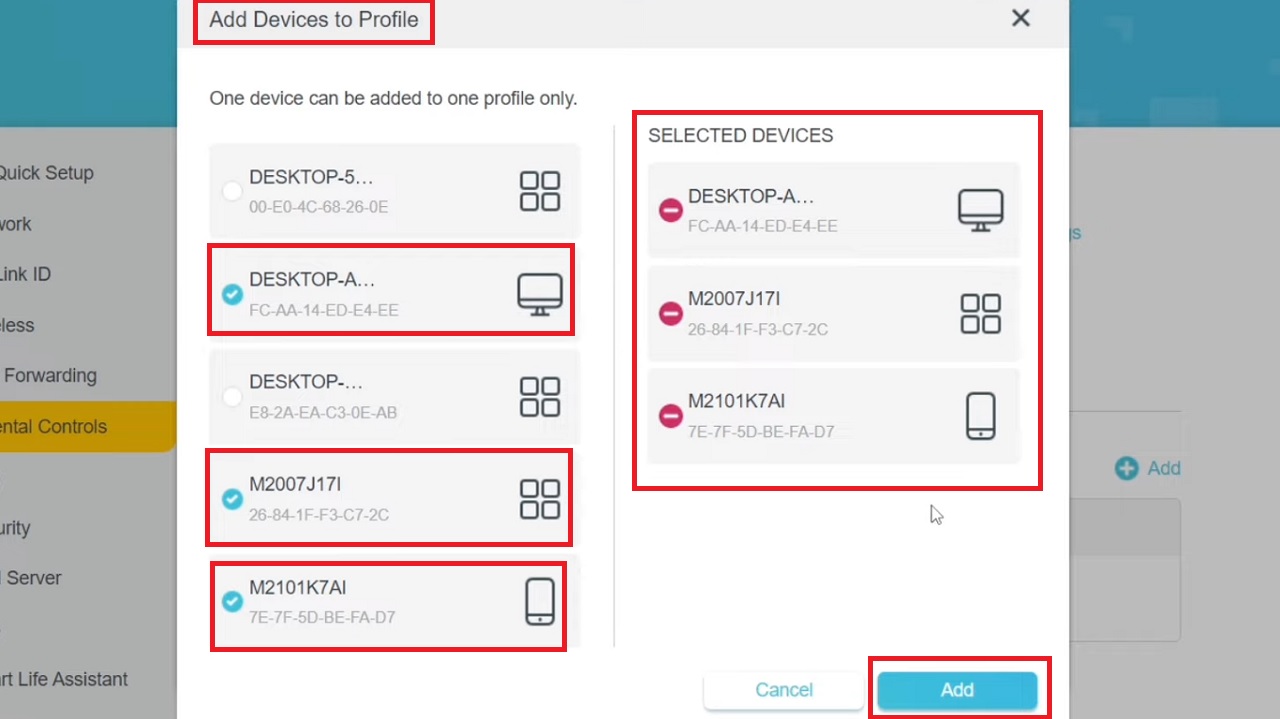
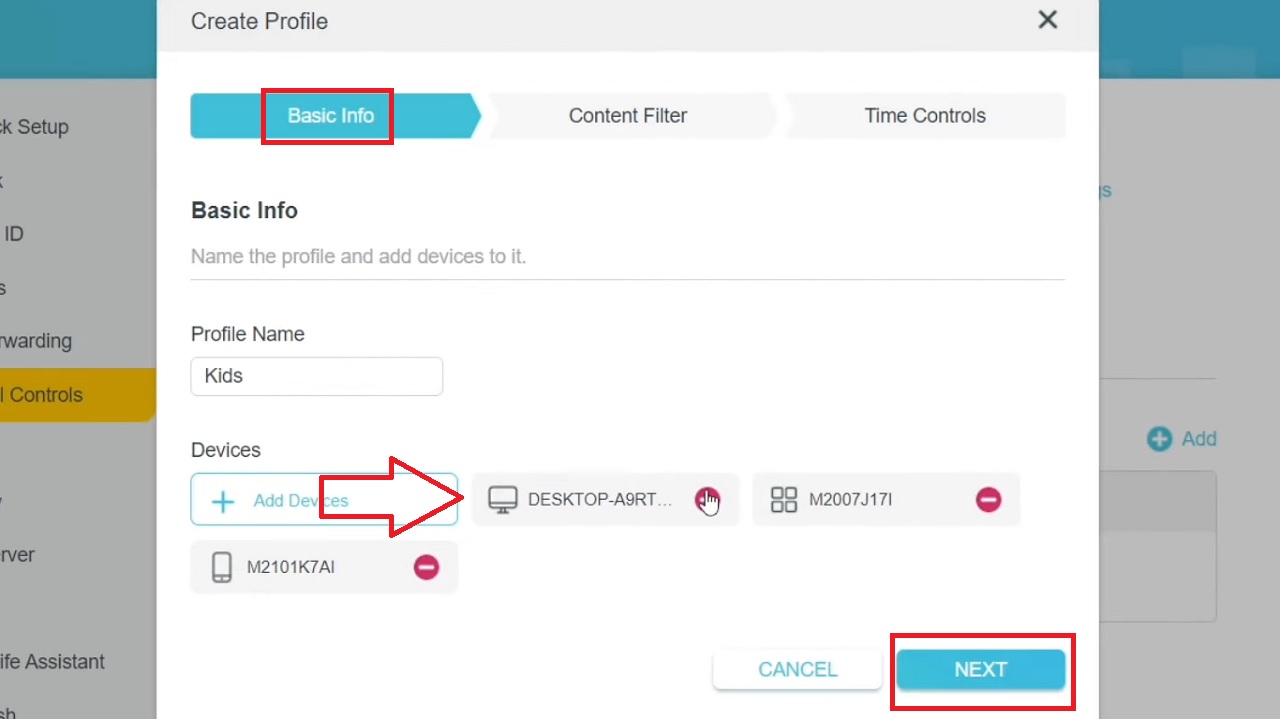
- Click on the Add button below. All the selected devices will be added to the Kids profile and displayed on the Basic Info page.
- Click on the NEXT button below.
Alternatively, you can also input the Device Name and MAC Address manually. Find the Devices Under Parental Controls page, type in the necessary details, and clicking on the OK button to save the changes.
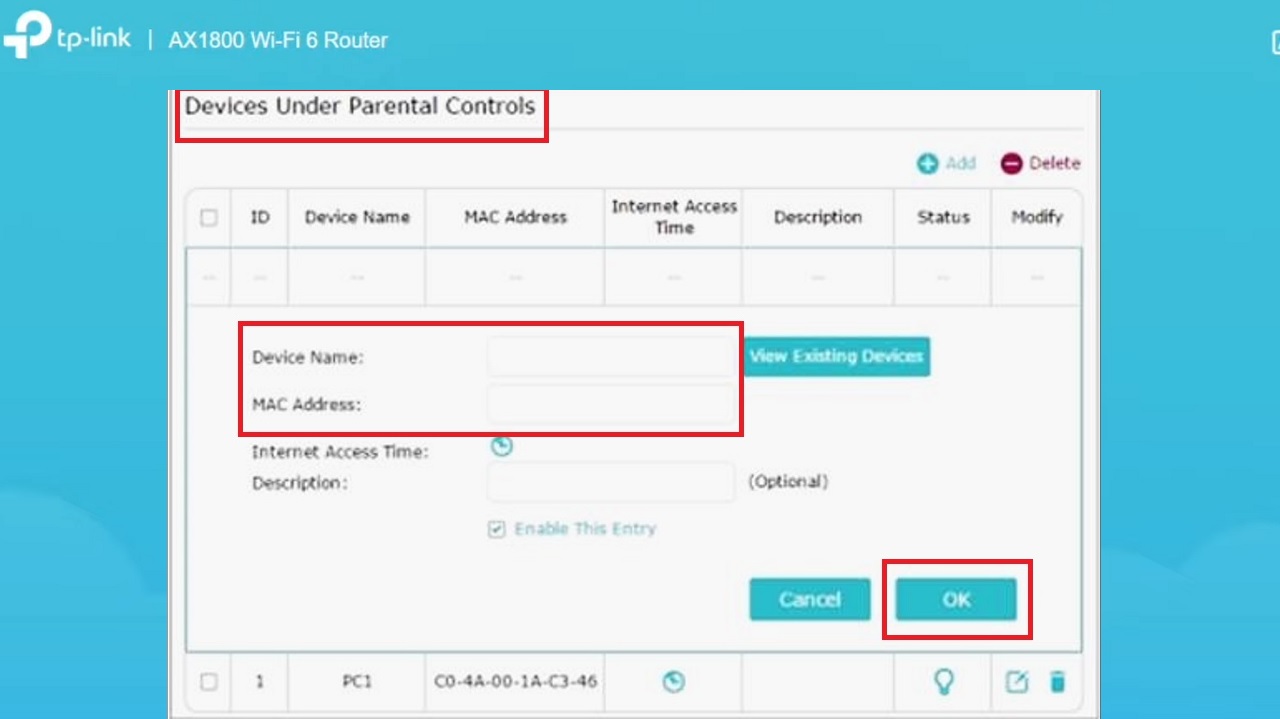
Note: You will need to know the MAC address of each of the devices in this case.
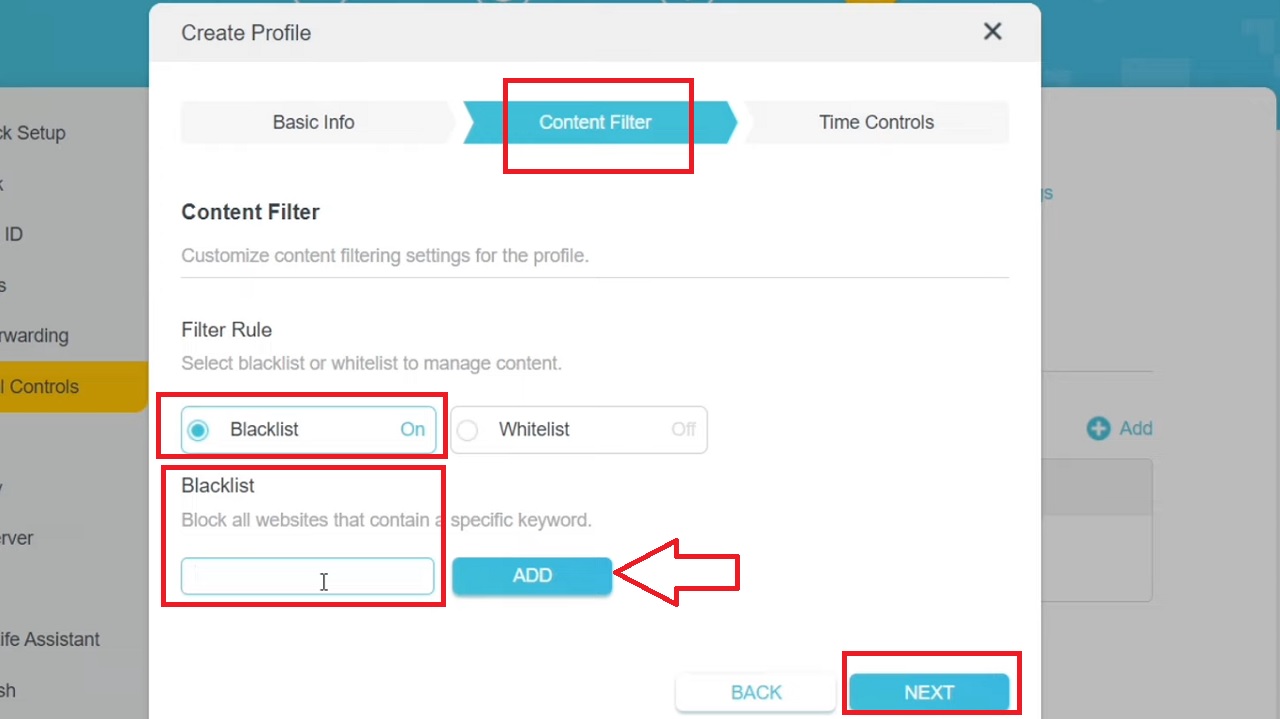
- In the following Content Filter window, set Blacklist to On.
- Type the name of the websites you want to block in the relevant box.
- Click on the ADD button.
- Click on the NEXT button.
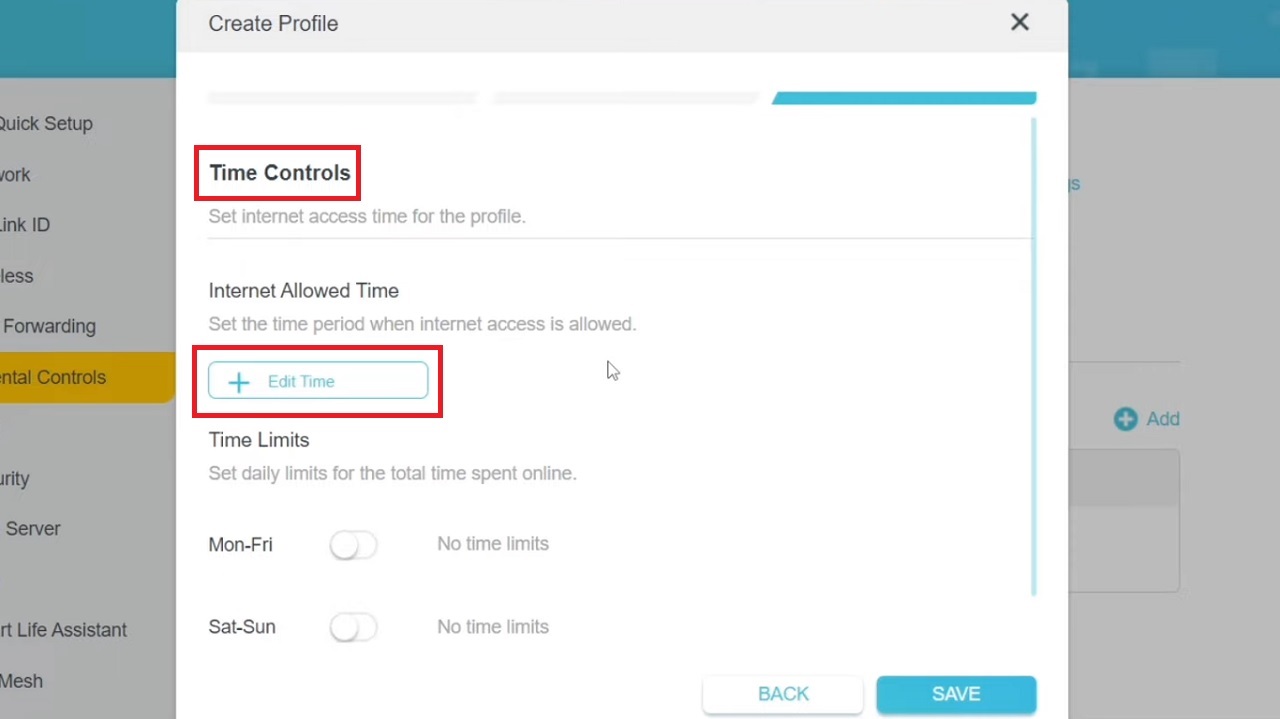
This will take you to the Time Controls page.
- Click on the + Edit Time button on this page.
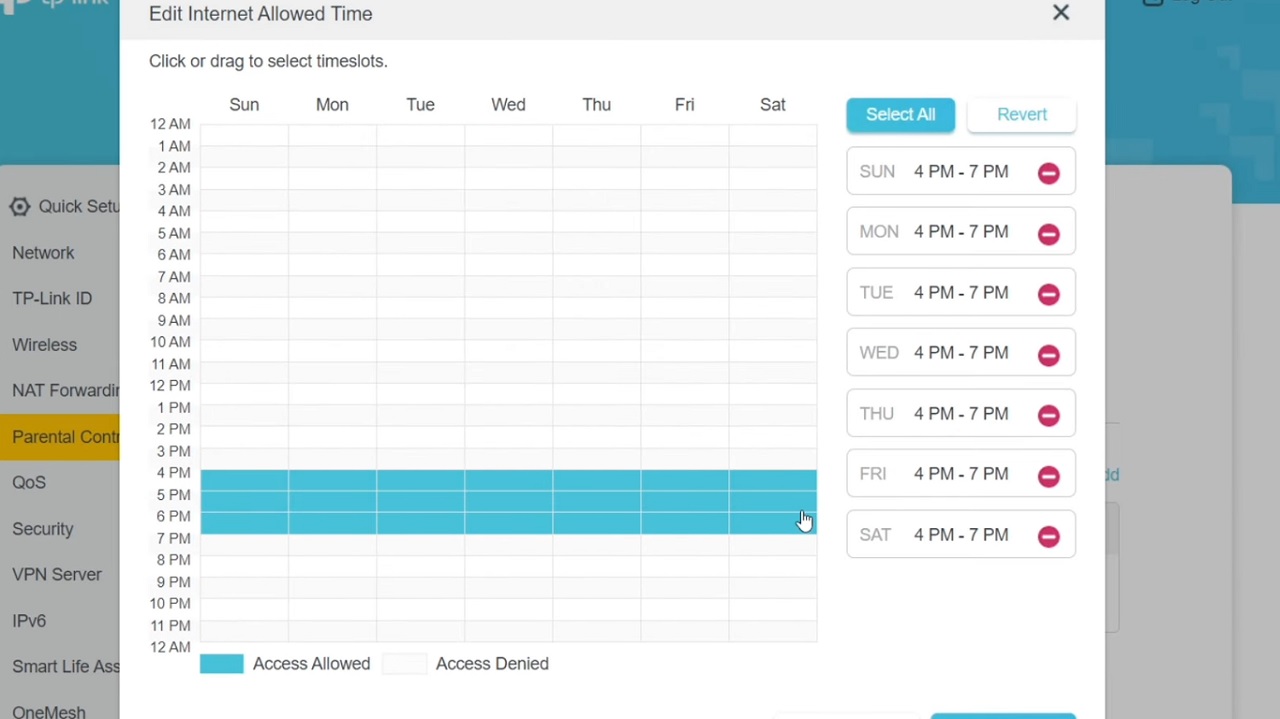
Now, on the following Edit Internet Allowed Time page, if you click on the Select All button above it will allow your kids to have internet access for seven days a week for unlimited time, which is not recommended.
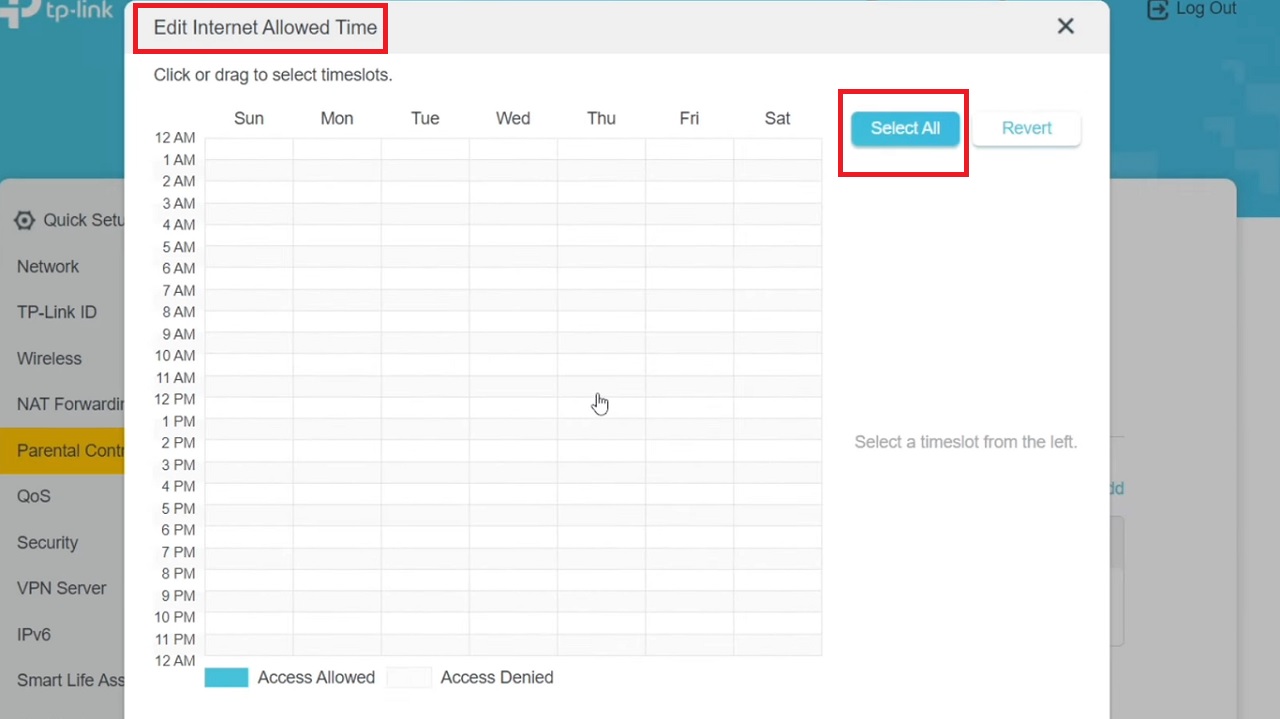
So, set the time limits to create a time schedule of your choice.
- Select the days and times of access to the internet.
For example, let us set the internet access time for the kids from 4 to 7 p.m. for seven days. Select and drag the mouse to set it. The settings will be displayed on the right side, as shown below:
If you want them to give additional internet access time during the weekend, follow the same process to set the timings as shown below:
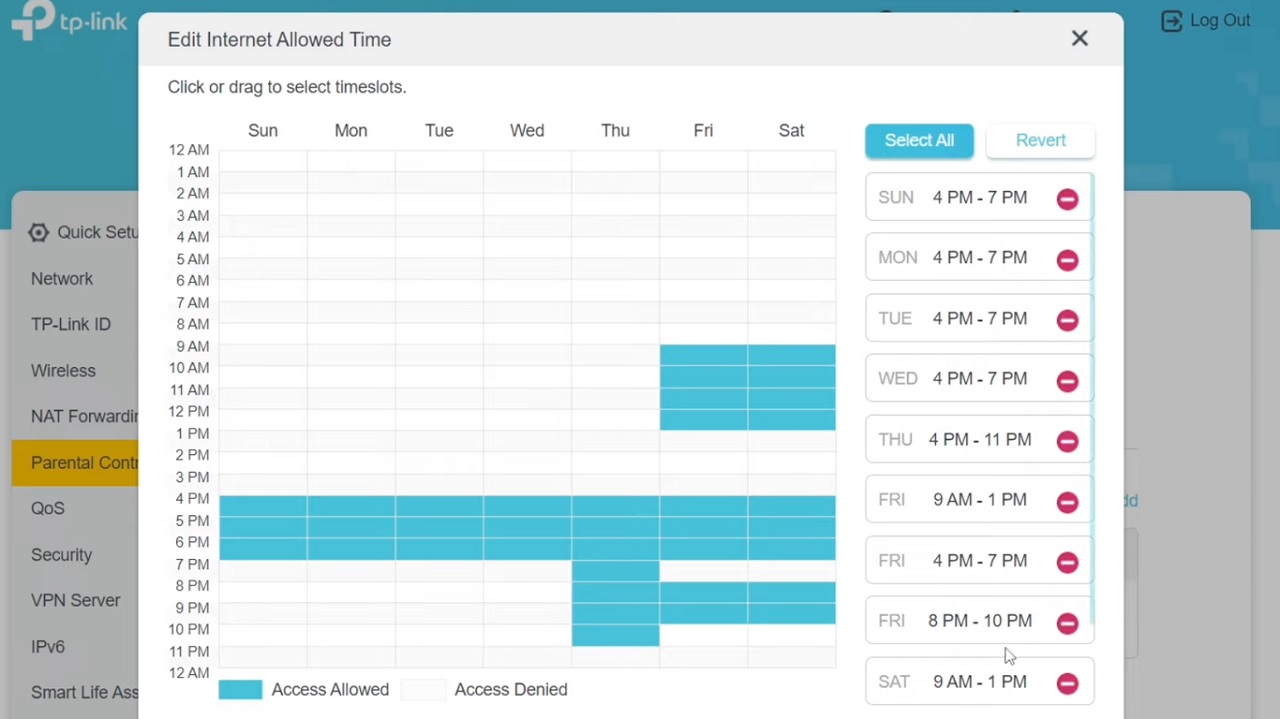
Now, finally, click on the SAVE button below, (not shown in the picture) to apply the changes and complete the setup.
Conclusion
In conclusion, setting up parental control on your router is a simple but crucial step in protecting the online experience of your kids.
If you follow the simple steps charted in this guide, you can manage their internet access time and protect them from harmful websites to promote a safe digital environment.