
It is quite easy to install and activate a second hard drive on your PC. Here is a step-by-step guide which will help beginners and enthusiasts alike during the installation process of an additional drive and ensure a successful experience and smooth installation.
Additionally, you will also learn how to activate the second drive, which involves everything from creating partitions to formatting and assigning drive letters to have a fully functional hard drive.
Here are the methods that you can follow.
In This Article
KEY TAKEAWAYS
- Adding a second hard drive to the PC allows increasing storage space, system performance, lifespan of the drives, and lots of other benefits.
- The first part of the process involves installing the hard drive in the appropriate drive bay and fixing the data and power cable.
- The second part involves activating the drive by initializing the disk, creating partitions, formatting and assigning a drive letter using the Disk Management utility.
What are the Reasons to install a Second Hard Drive?
You may run out of space soon if you have only one hard drive installed on your computer. You will then need to install a second hard drive to store more programs, files, and multimedia content without having to frequently delete the old ones.
It is also a very good solution to add another hard drive while upgrading your system. The significant reasons behind it are:
Data segregation: It will allow proper segregation of data and organize things more efficiently with much better storage management.
You can use one to store all programs and the operating system and the other to store all your personal documents, files, financial records, music, photos, and videos.
Enhanced system performance: When programs and other data are well segregated, it is easier for the system to find and access them.
This will eventually add to the performance of the system as a whole due to enhanced read and write speeds because of less data congestion.
This will eventually help in performing resource-heavy tasks such as running virtual systems, gaming or video editing.
Efficient backup solution: You can use the additional drive as your backup. This will be a much more effective solution to protect your vital files. When you save them on your second hard drive, it protects against loss of data due to data redundancy.
It will give you peace of mind when the primary hard drive fails knowing that your data is safe on the other. You can recover it quickly and easily and save yourself from unexpected data disasters.
Use multiple operating systems: If you use different operating systems, a second hard drive is almost essential. Having two operating systems in different drives and creating dual-boot setup will help in switching between them quickly and easily without affecting the performance.
It is very helpful for enthusiasts, developers and other users who work in diverse software environments.
Enhance the lifespan: The additional hard drive will save the primary hard drive in particular from having to read and write continually, which will reduce its lifespan.
Since the workload will be divided, each hard drive will now face less stress and lower usage to have a positive effect in their lifespan and the reliability of your storage system.
Ways to Install Second Hard Drive
The process of installing a second hard drive in a PC starts with finding a compatible hardware and the appropriate cables. Henceforth, there are two stages of this process – physical installation and activation.
First, you need to install the drive in the available bay and connect the cables for power and data.
Then, you will need to activate the drive. For that you will have to boot the PC > Access the operating system > Open the Disk Management utility > Initialize and format the second hard drive.
There are also a few other aspects involved in the activation process, which is explained in detail below.
Method: Installing the Hard Drive and Activating Via Disk Management
The first part of the process involves installing the hard drive into the right slot and connecting the cables properly.
STEPS TO FOLLOW:
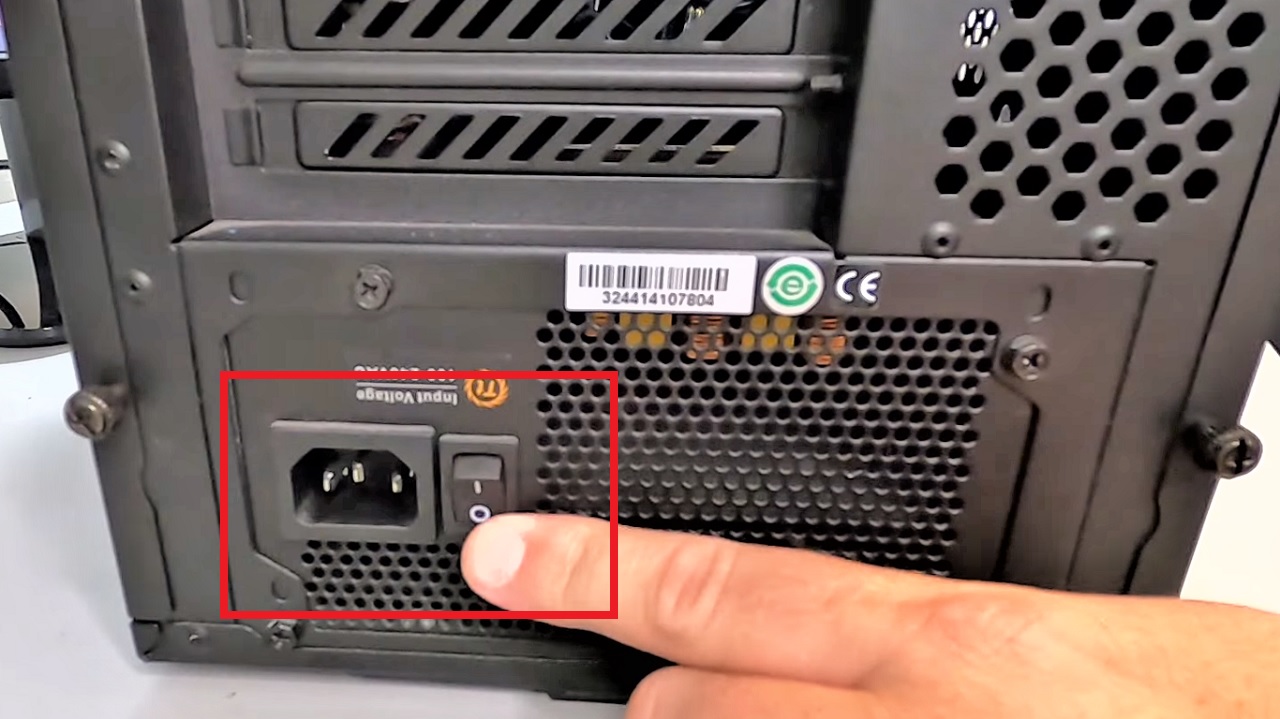
- Turn the power switch off.
- Unplug the power cord.
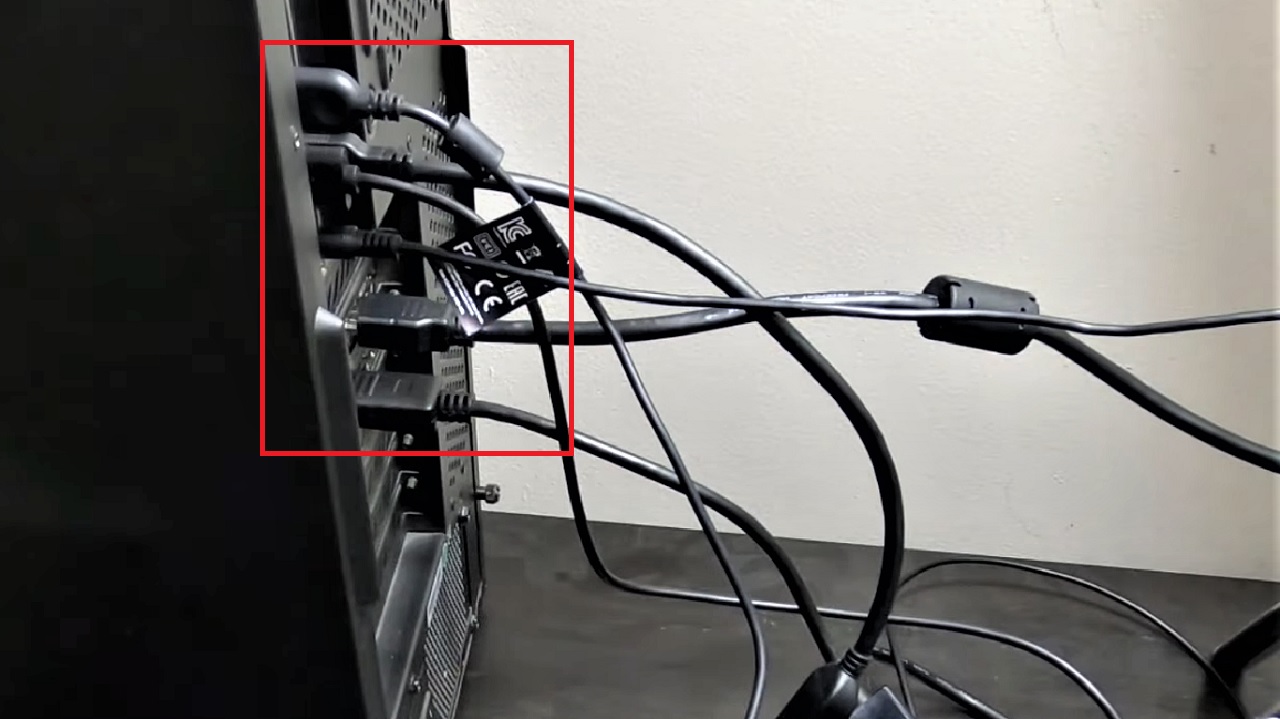
- Unplug all the cables from the back of your PC.
- Remove the screws at the back. (You may need a screwdriver for it, depending on the type of the screws).
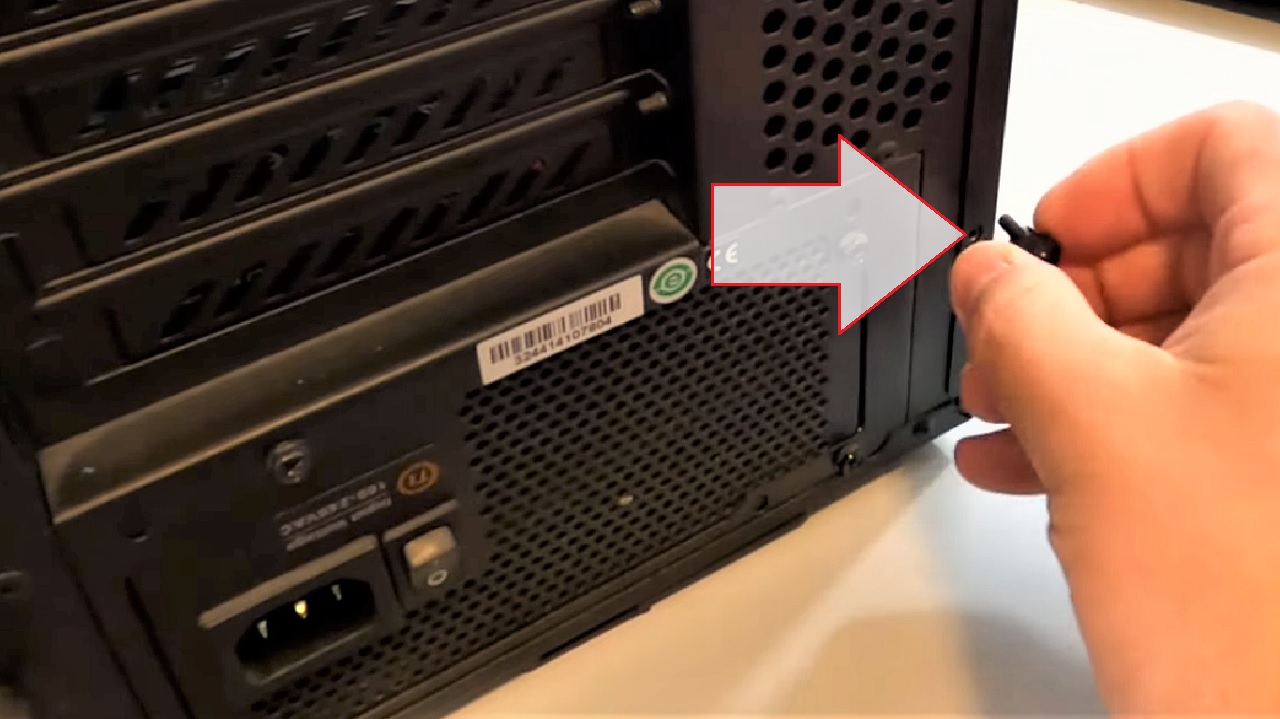
- Slide the side cover of the computer case off.
- Look for the two-and-a-half-inch drive slots to install the drive.
If you are using a larger hard disk drive, select the appropriate slots. Additionally, you may also need to buy the right type of mounting kits for that, as shown in the image below:

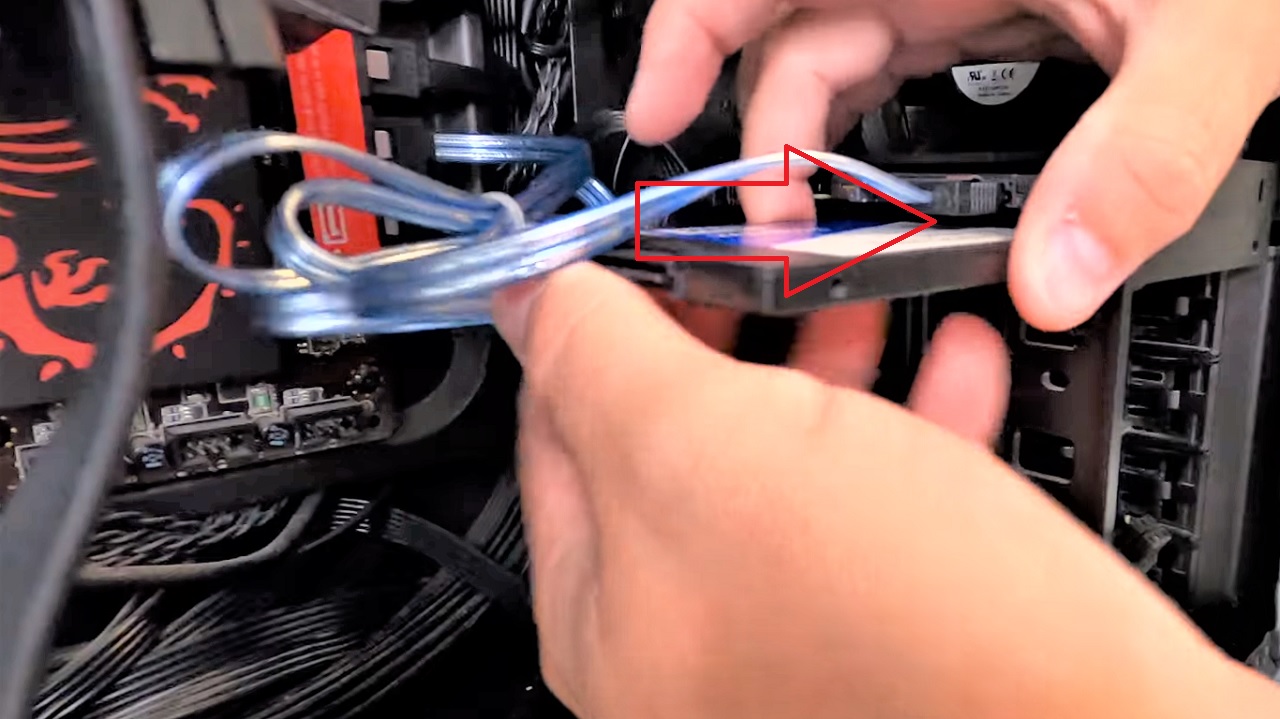
- Check the direction of the drive so that it is installed in the right way because these are usually unidirectional.
- Slide in the new drive (two-and-a-half-inch drive in this case) under the first one.
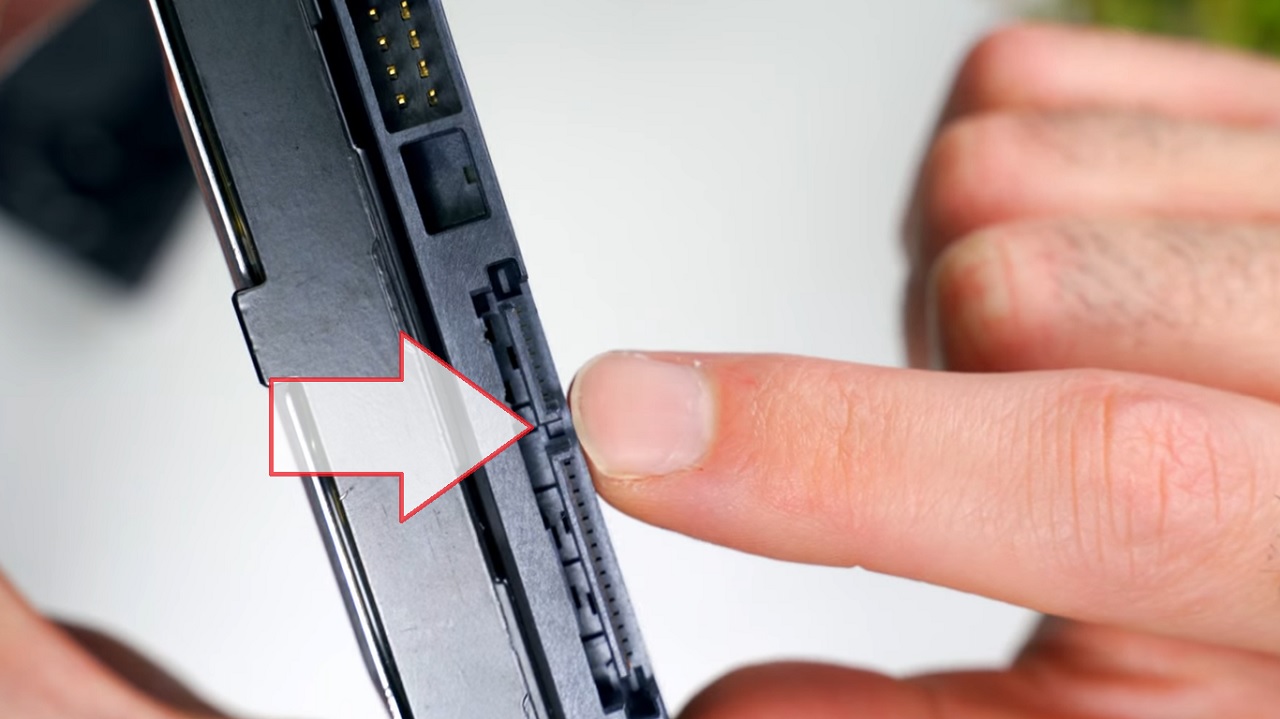
- Check the cables to ensure their right direction.
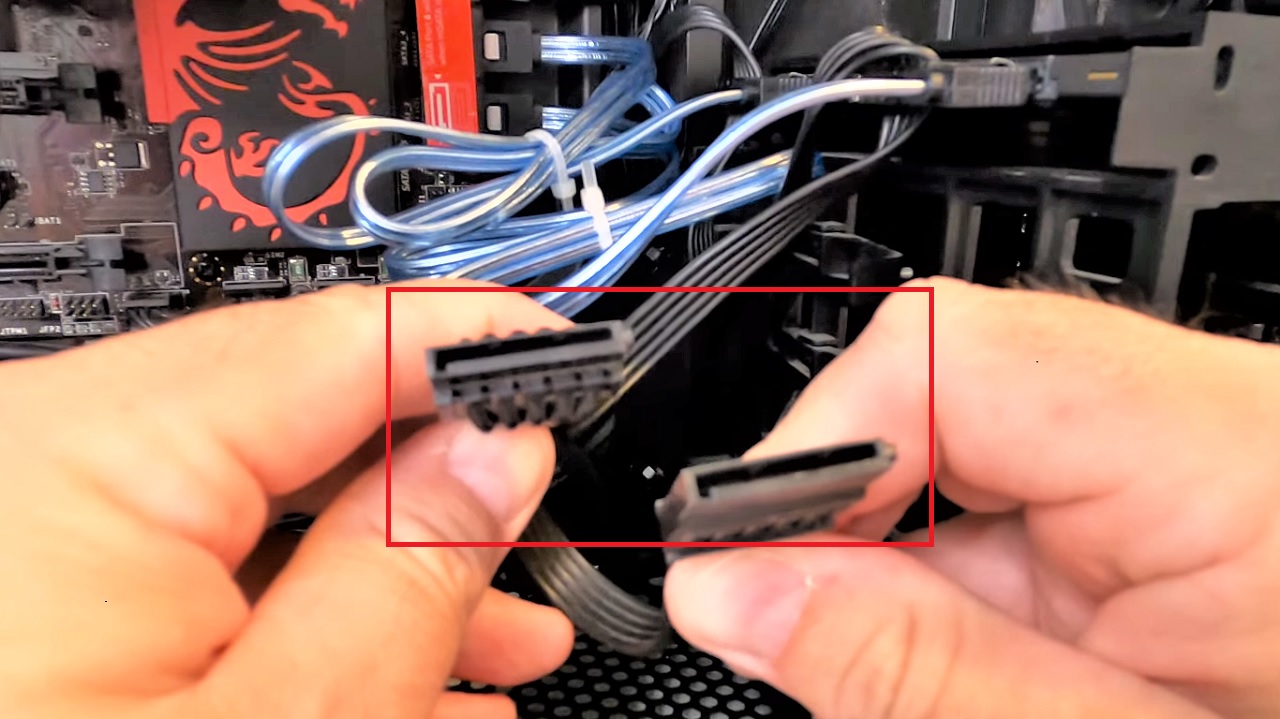
- Fix them in the appropriate slots on the respective drives.
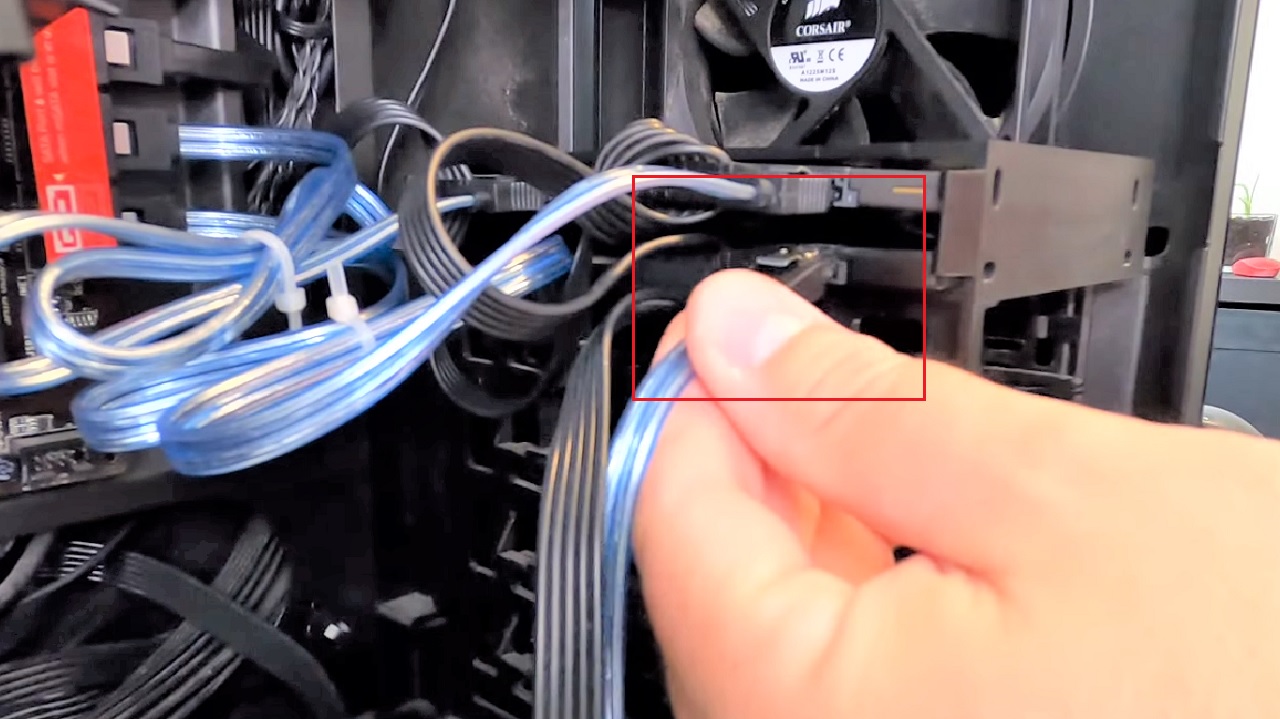
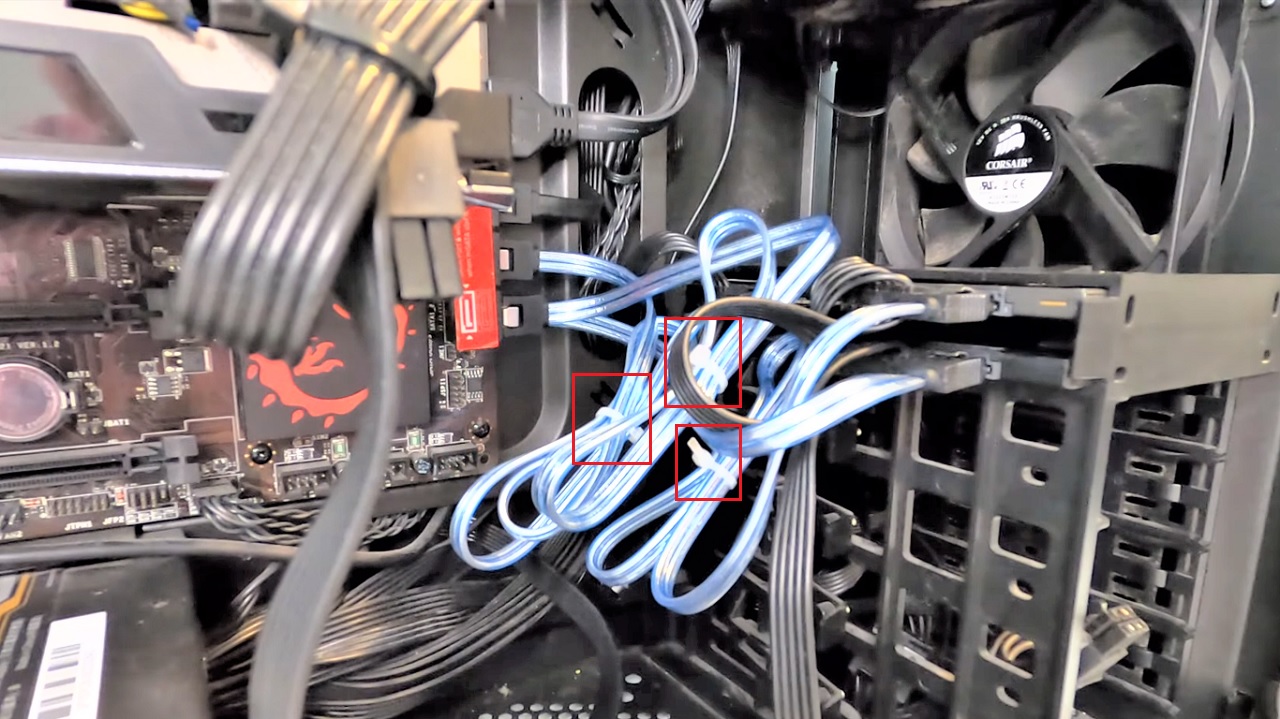
- Now Fix the SATA cable.
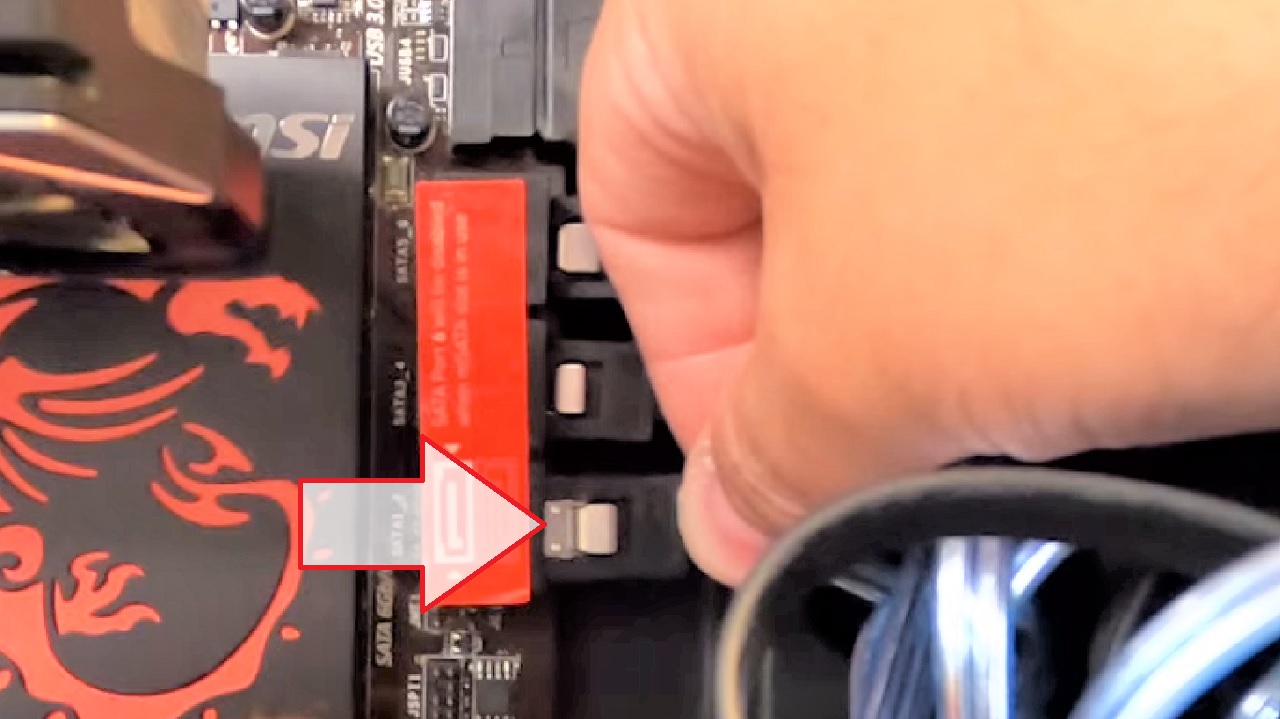
- Plugin the other end of the SATA cable into an empty slot on your motherboard.
- Zap strap the cables and tuck them nicely to look neat.
- Replace the cover of the computer case and the screws.
- Plug in all the cables and connectors at the back.

- Turn on the power supply.
You are now done with the first stage of the process. The second stage involves activating the newly installed additional hard drive from the Disk Management utility. The steps to follow for that are as follows:
- Go to the search box beside the Start Menu.
- Type disk.
- Left-click on Create and format hard disk partitions option from the Best match.
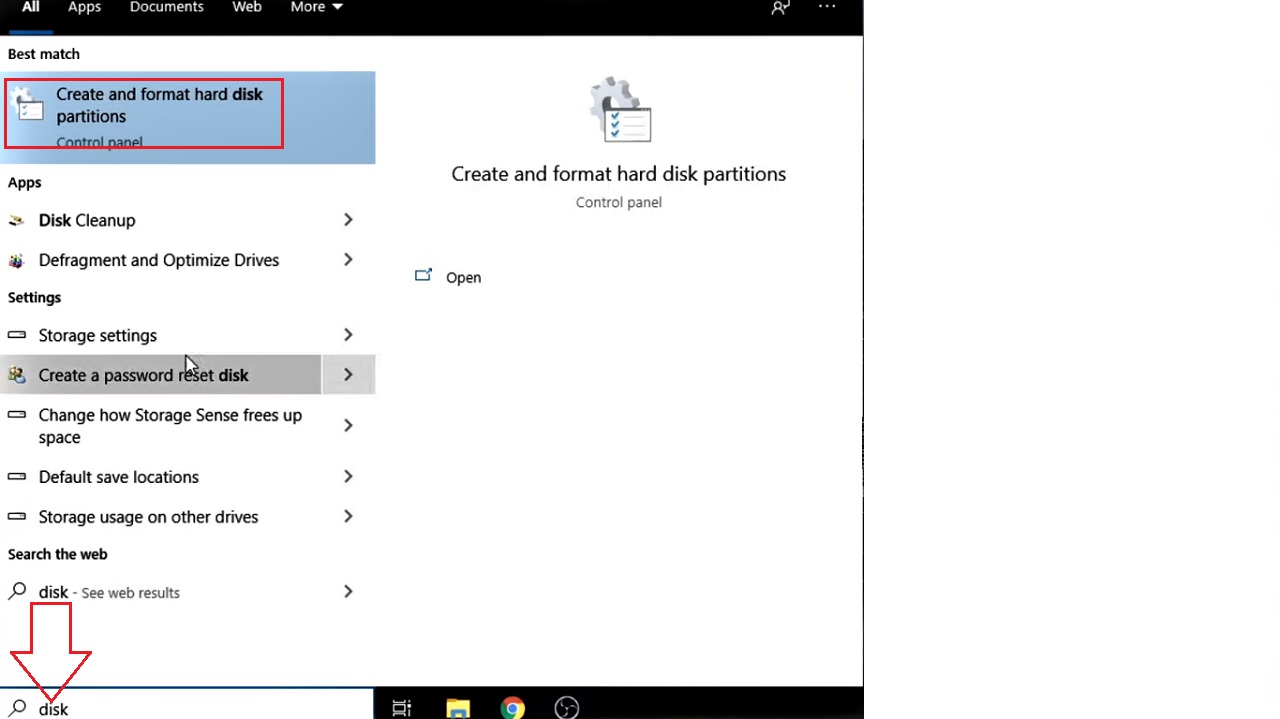
This will open the Disk Management utility.
Alternatively, you can right-click on the Start Menu and select Disk Management option from the menu.
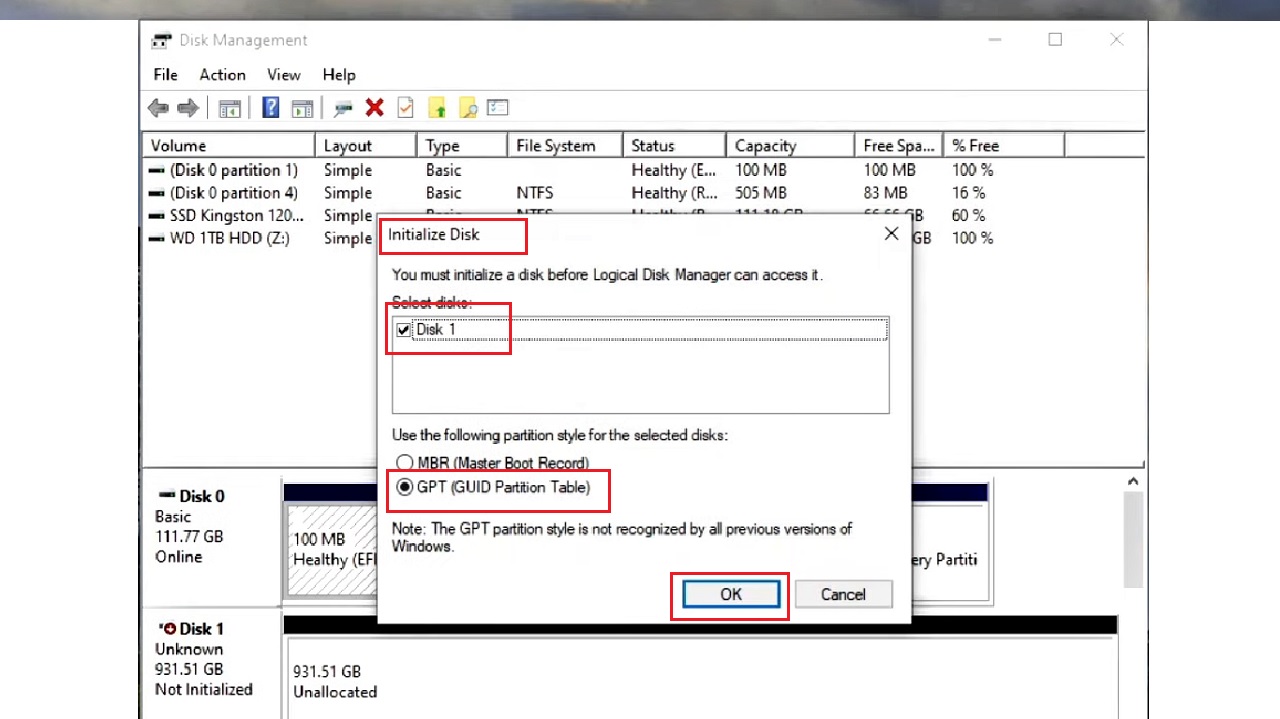
- You will see the Initialize Disk pop up.
- Click on the small circular button next to GPT (GUID Partition Table) under ‘Use the following partition style for the selected disks:’ You may choose MBR if the drive has a smaller capacity and supports the old partition style.
- Click on the OK button.
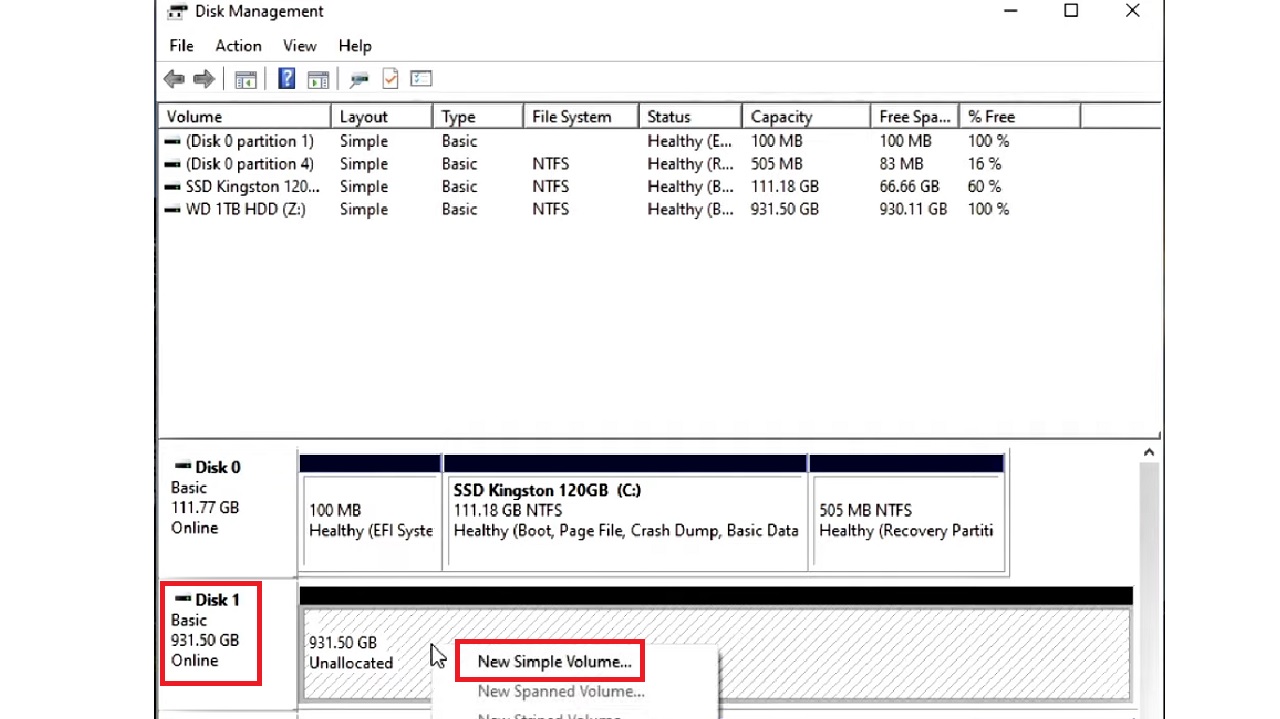
- In the Disk Management window, note that the new hard drive that you installed in your PC (Disk 1 in this case) shows Unallocated.
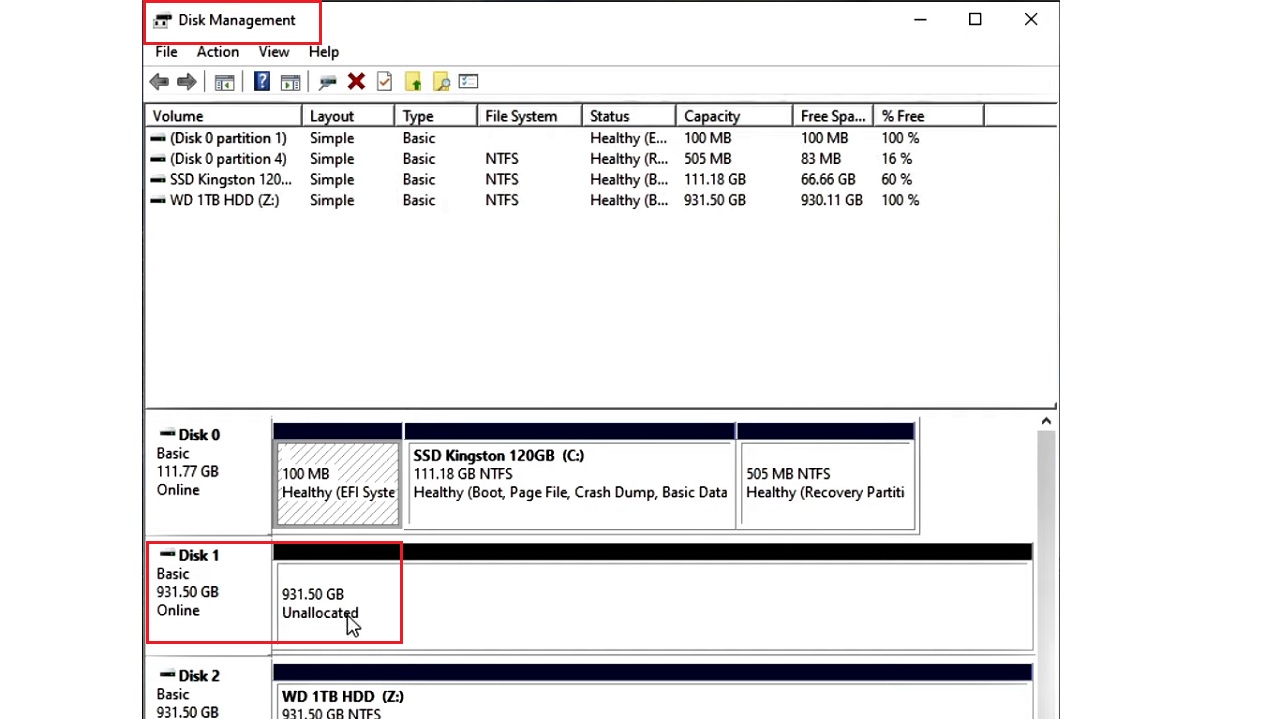
- Right-click on this disk.
- Select New Simple Volume from the options in the drop-down menu.
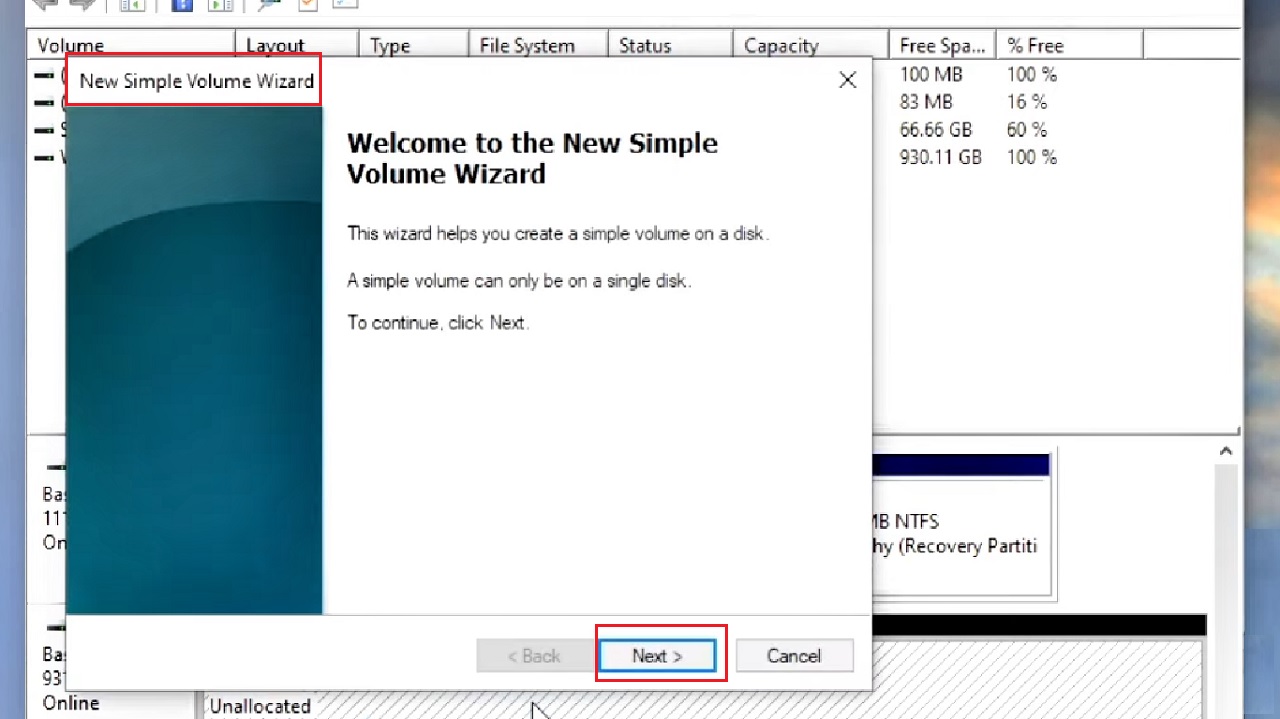
- This will open the New Simple Volume wizard.
- Click on the Next button.
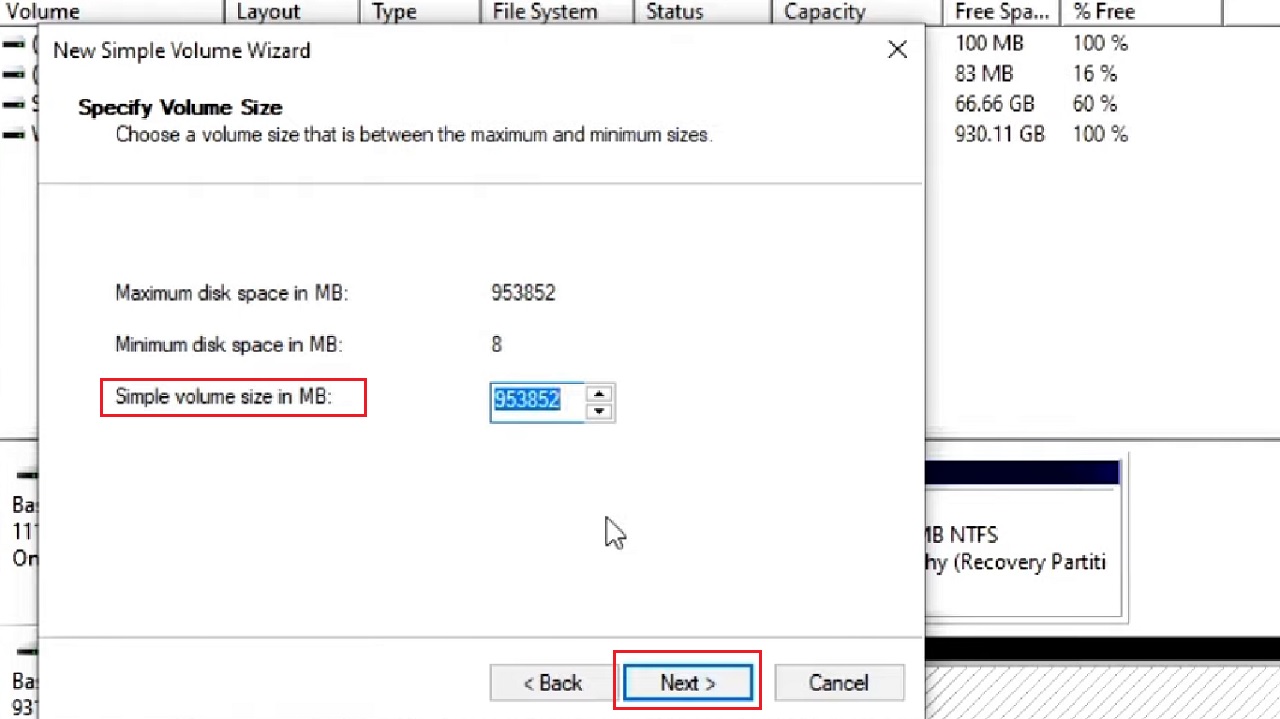
- Also, click on the Next button in the following window leaving the Simple volume size in MB as it is.
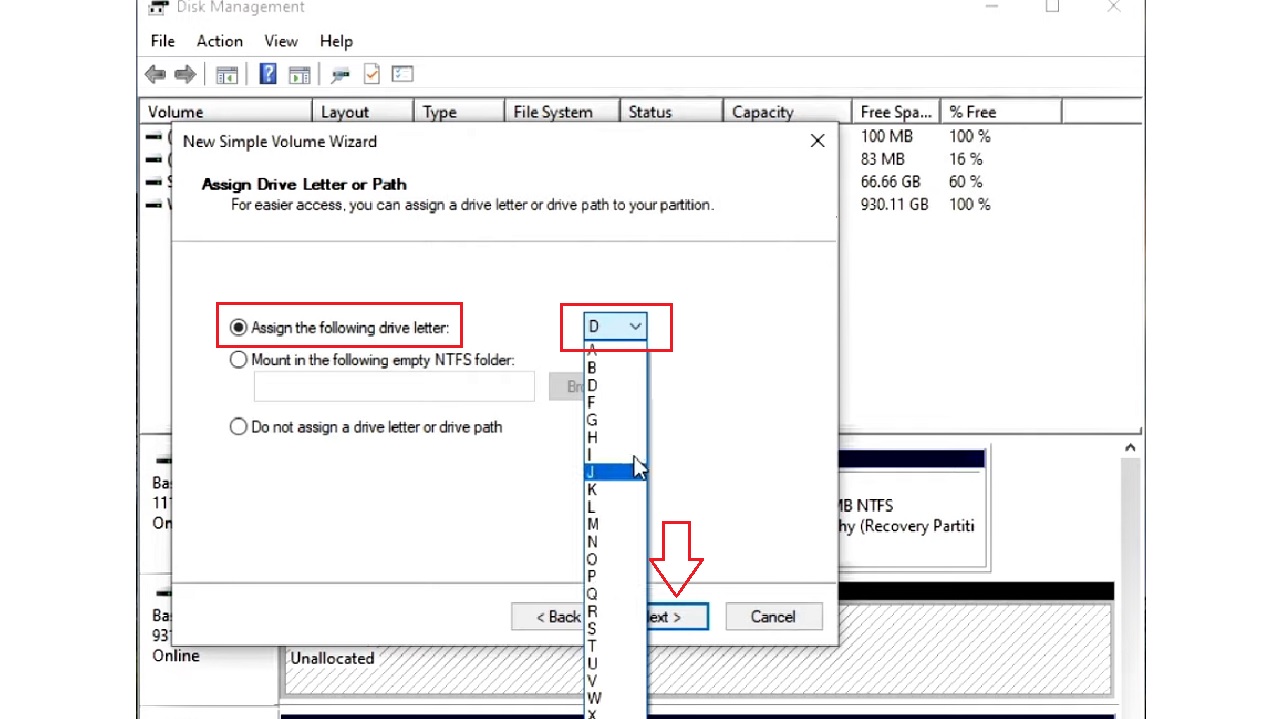
In the following window Assign Drive Letter or Path, you may leave it as it is and click on the Next button.
- However, if you want to assign a new letter, click on the small circular button next to Assign the following drive letter.
- Click on the arrow next to the box with a letter.
- Choose a letter from the drop-down options.
- Click on the Next button.
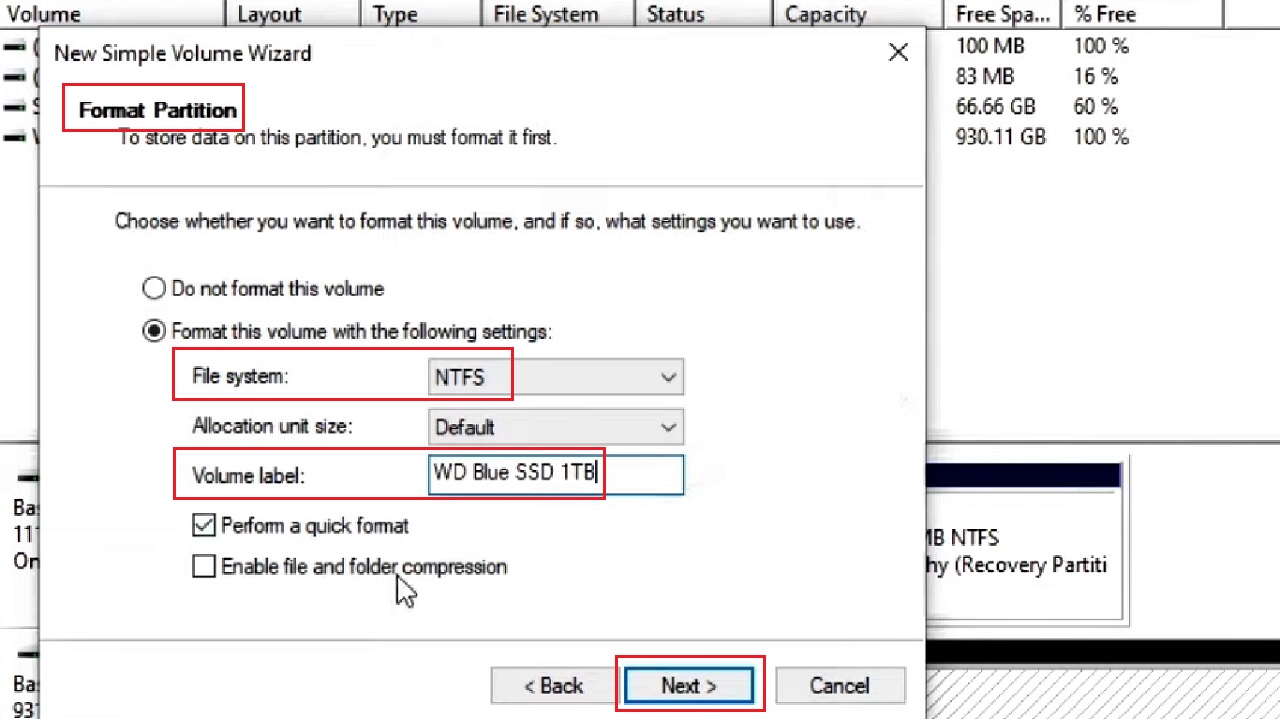
- In the following Format Partition window, choose the File system as NTFS.
- You may or may not give your hard drive a new Volume label. (It is given WD Blue SSD 1TB in this case).
- Click on the Next button.
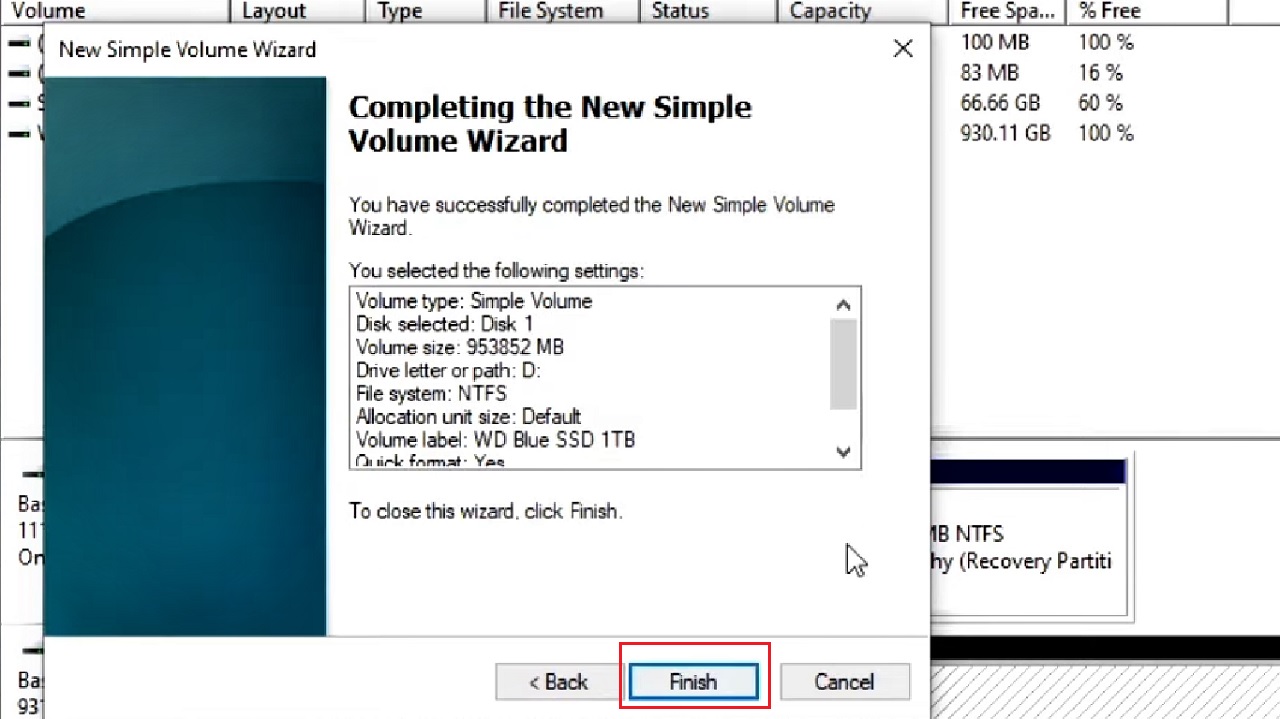
- Click on the Finish button in the New Simple Volume wizard window that pops up.
This will format the new hard drive and activate it with a Healthy (Basic Data Partition), as shown in the image below:
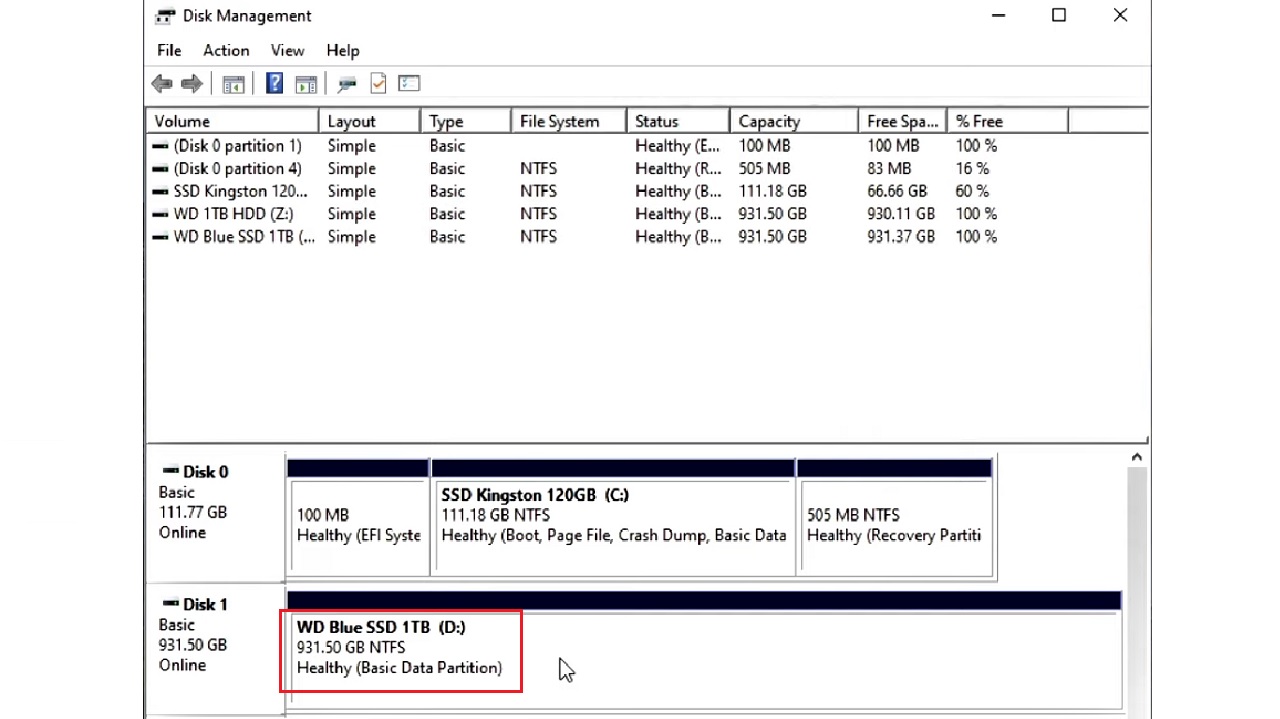
So, now the second hard drive will be accessible on your computer system.
Conclusion
Installing a second hard drive in a computer system is probably one of the most common upgrades.
And, as you can see from this article, you do not need to take your PC to the service station. It is a simple DIY process.