
If you encounter the ‘To Run This Application You Must Install .NET Core’ error it can be frustrating.
However, this guide provides short and straightforward steps to troubleshoot and resolve the issue.
In This Article
KEY TAKEAWAYS
- There are many reasons for the ‘To Run This Application You Must Install .NET Core’ error to occur from outdated app to improper .NET Core installation.
- The app must match with the .NET Core version to function properly.
- There are different ways to fix the error from repairing the app to reinstalling .NET Core.
- Modifying the path in Environmental Variables may also resolve the issue.
- Sometimes, enabling the .NET framework features may resolve the issue.
What Causes ‘To Run This Application You Must Install .NET Core’ Error?
The most significant reason the ‘To Run This Application You Must Install .NET Core’ error occurs is a missing or incomplete installation of .NET Core.
Some other probable reasons are:
- Corrupted app or .NET Core installation
- Outdated .NET Core version
- Misconfiguration or incorrect paths in the Environment Variables
- Disabled .NET Framework features
How to Fix ‘To Run This Application You Must Install .NET Core’ Error?
You can fix the ‘To Run This Application You Must Install .NET Core’ error, you must repair or install .NET Core from the official .NET download page.
Some other ways to fix the issue are:
- Enabling the .NET framework features
- Repairing and resetting the corrupted app
- Checking and modifying the path in Environment Variables
Here are the easy steps to follow.
Method 1: Enable All .NET Framework Features
The first this to check is whether or not the .NET frameworks are enabled. If not enable them.
STEPS TO FOLLOW:
- Press the Windows and R keys together. This will open the Run dialog box.
- Type appwiz.cpl and hit Enter.
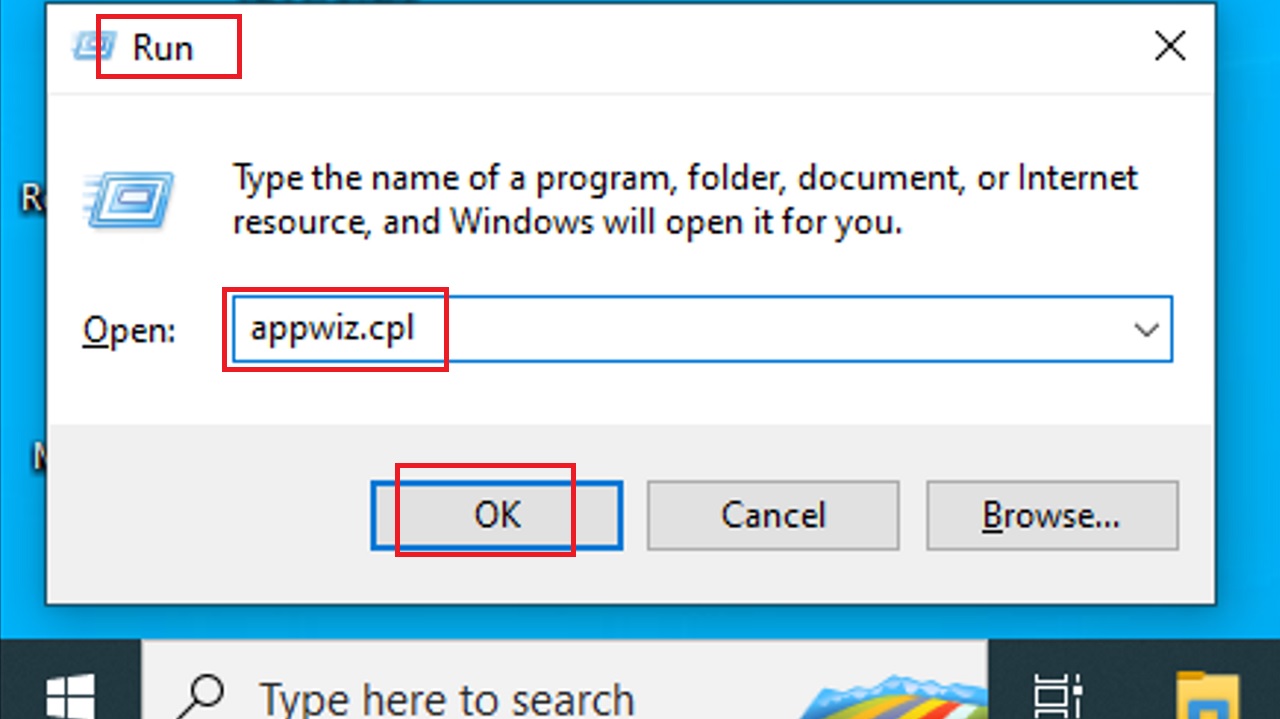
- This will open the Programs and Features window.
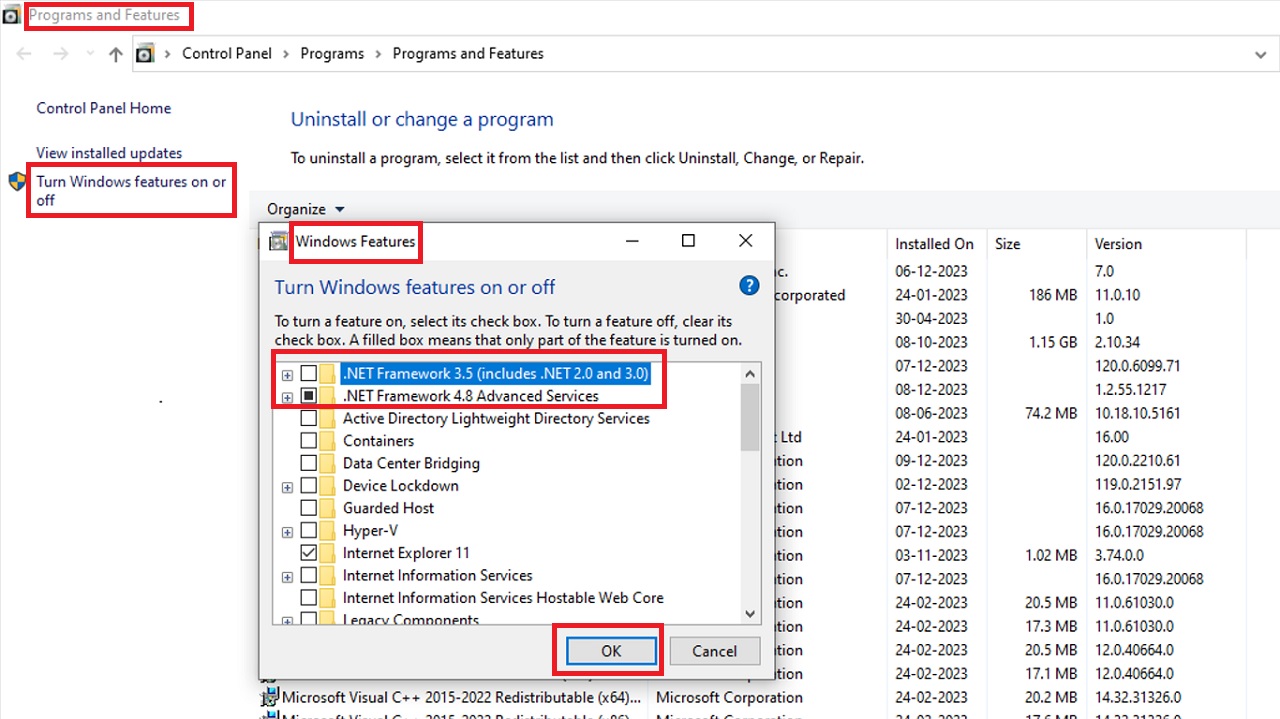
- On the left side of the window, click on Turn Windows features on or off.
- In the following Windows Features window, select all square boxes next to anything you find the .NET framework written.
- Click on the OK button.
Restart your system and check whether the issue is resolved. If it has not been resolved, move on to the next solution.
Method 2: Repair and Reset the Corrupted App
Sometimes an app may be corrupted and cause this issue. To resolve this, you will need to repair and reset the app, if you know which one it is.
STEPS TO FOLLOW:
- Press the Windows and I keys.
- Click on Apps in the Settings window that opens up.

- Scroll down and select the app that is corrupted on the right side of the following window under Apps & features.
- Click on Advanced options.

- On the following page, scroll down to find Reset and click on the button.

When the process is complete, restart your PC and check whether or not the issue has been resolved. If that does not work, follow the next method.
Method 3: Uninstall and Reinstall the App
If fixing the app does not resolve the issue, uninstalling and reinstalling it might.
STEPS TO FOLLOW:
- Follow the steps above to find the corrupted app.
- This time click on the Uninstall button.

You may reinstall it from the Microsoft Store if it is a Microsoft application or from the manufacturer’s website. If this does not fix the error, move to the next solution.
Method 4: Install the .NET Core
One easy way to fix the issue is to install .NET Core as you are asked.
STEPS TO FOLLOW:
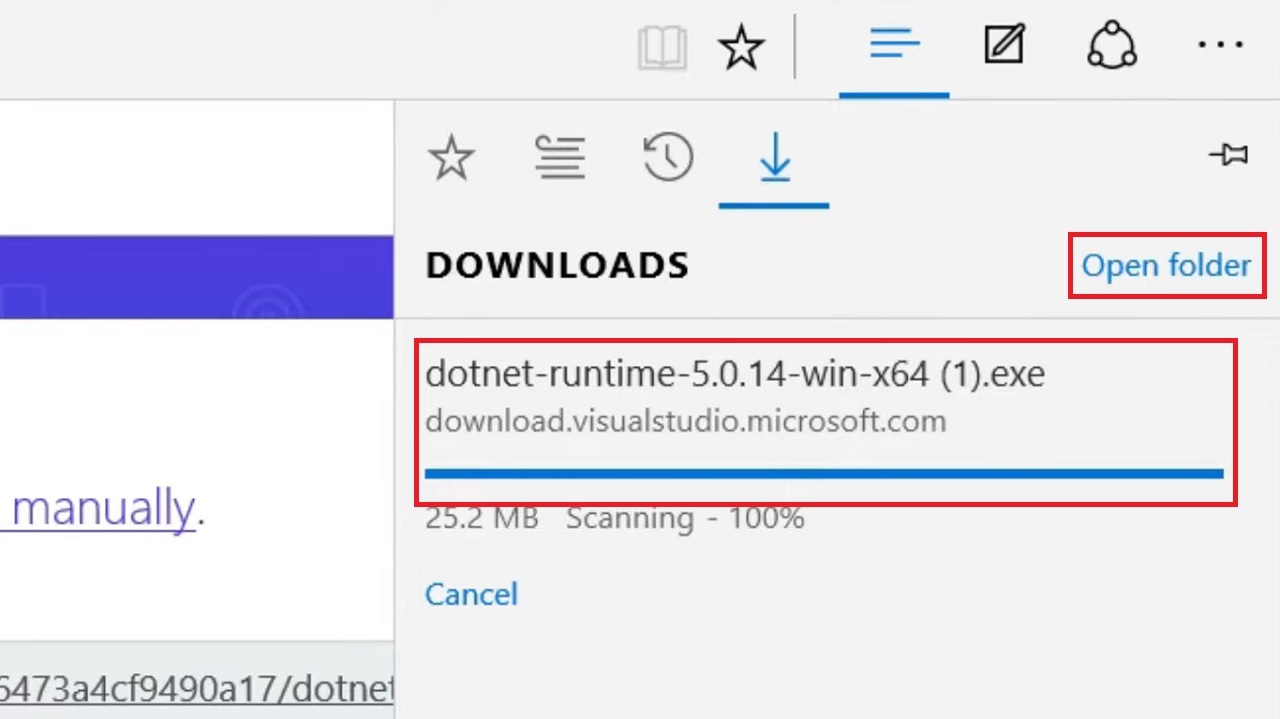
- Open Google Chrome.
- Type https://dotnet.microsoft.com/en-us/download/dotnet/5.0 in the address bar.
- When the page opens, click on Download.

- In the following screen, click on the Download x64 button under Run Desktop Apps.

- Let it download completely. When it is downloaded, click on Open folder.
- When you see the next screen, click on the Install button.
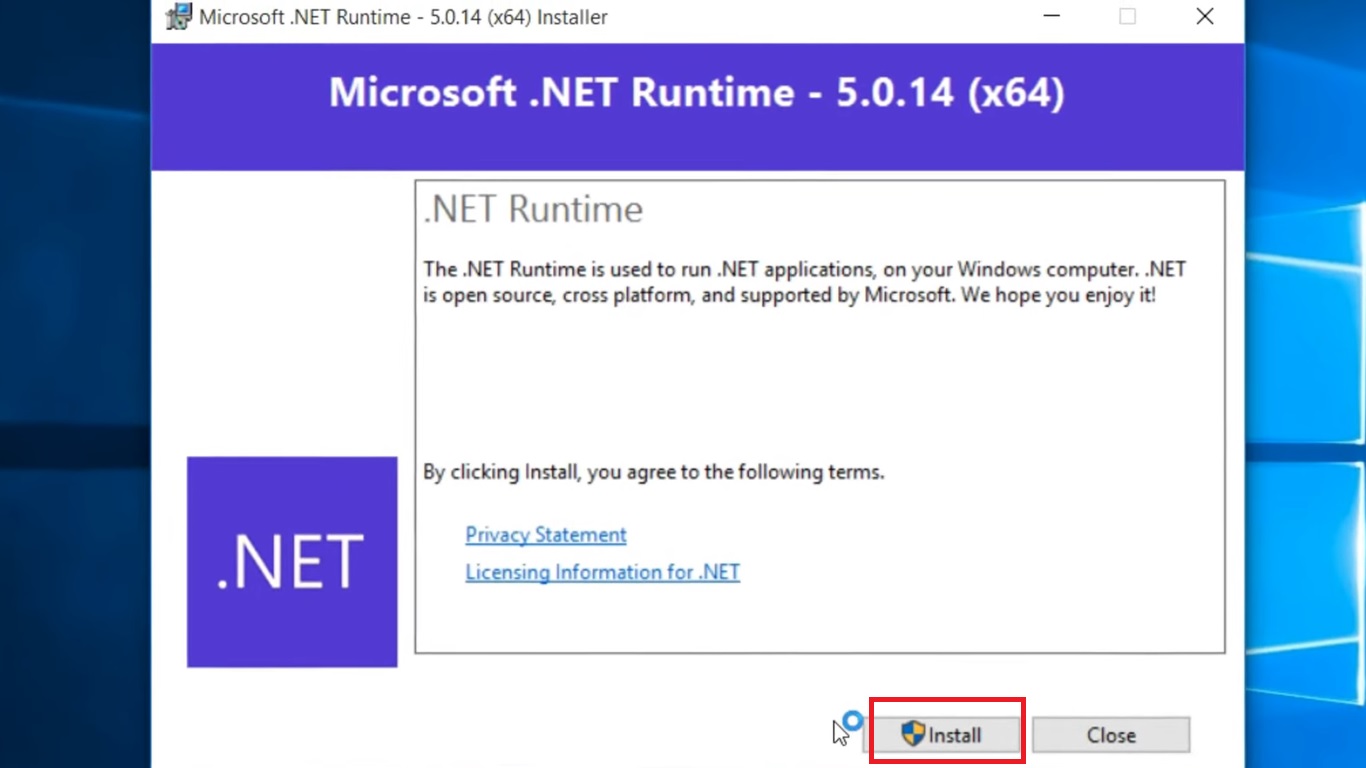
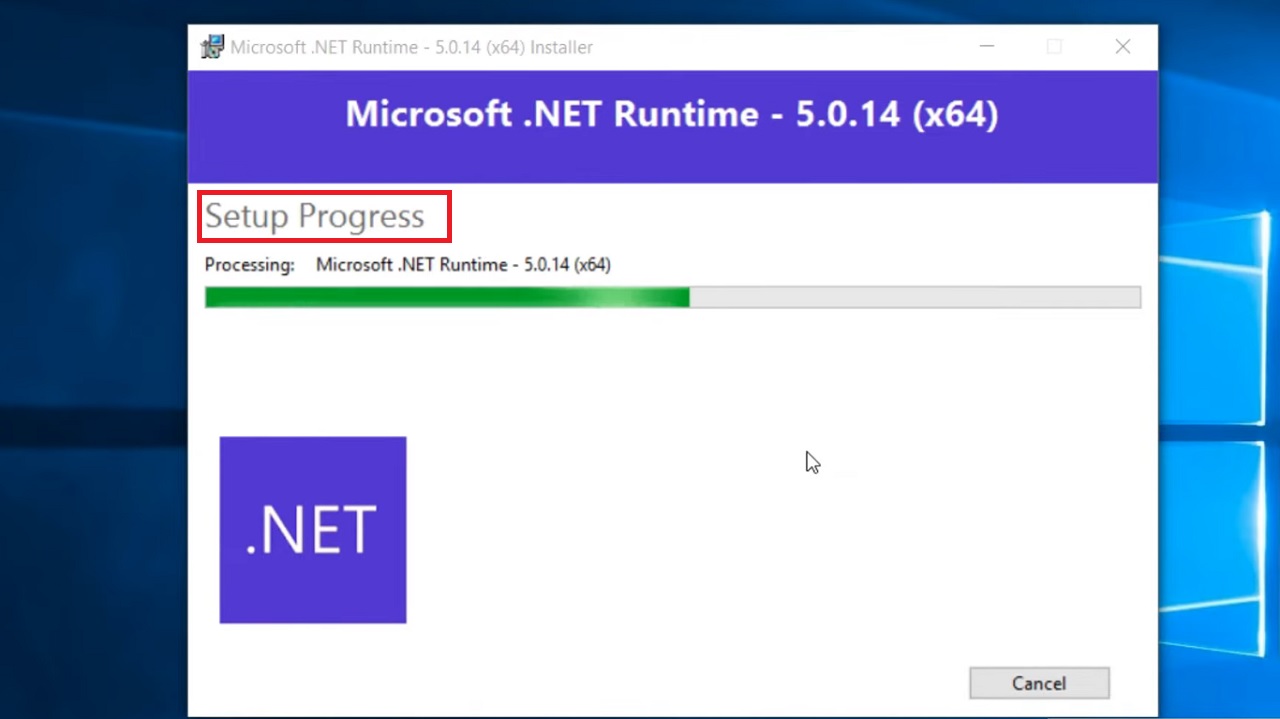
- You will see a window showing the Setup Progress.
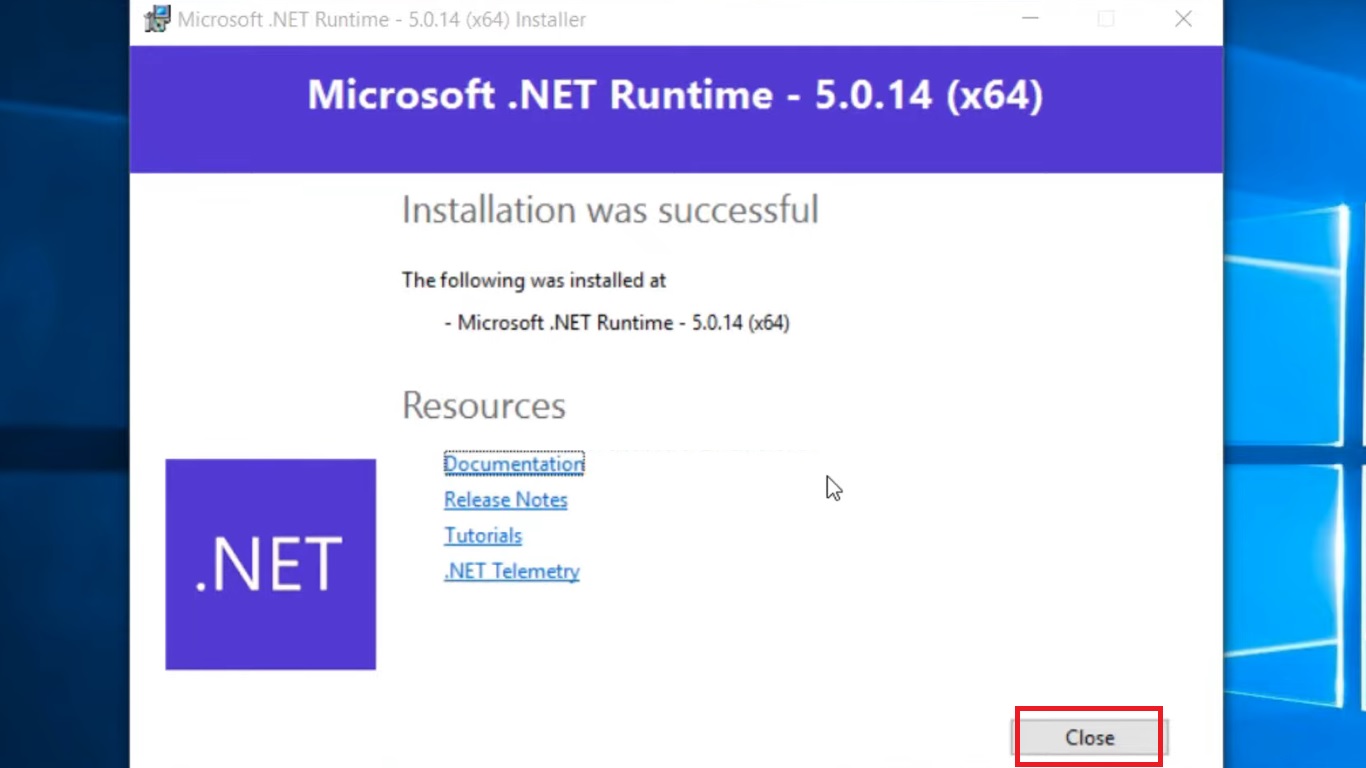
- When the setup process is complete and you see the following window, click on the Close button.
- Now, Restart your computer system.
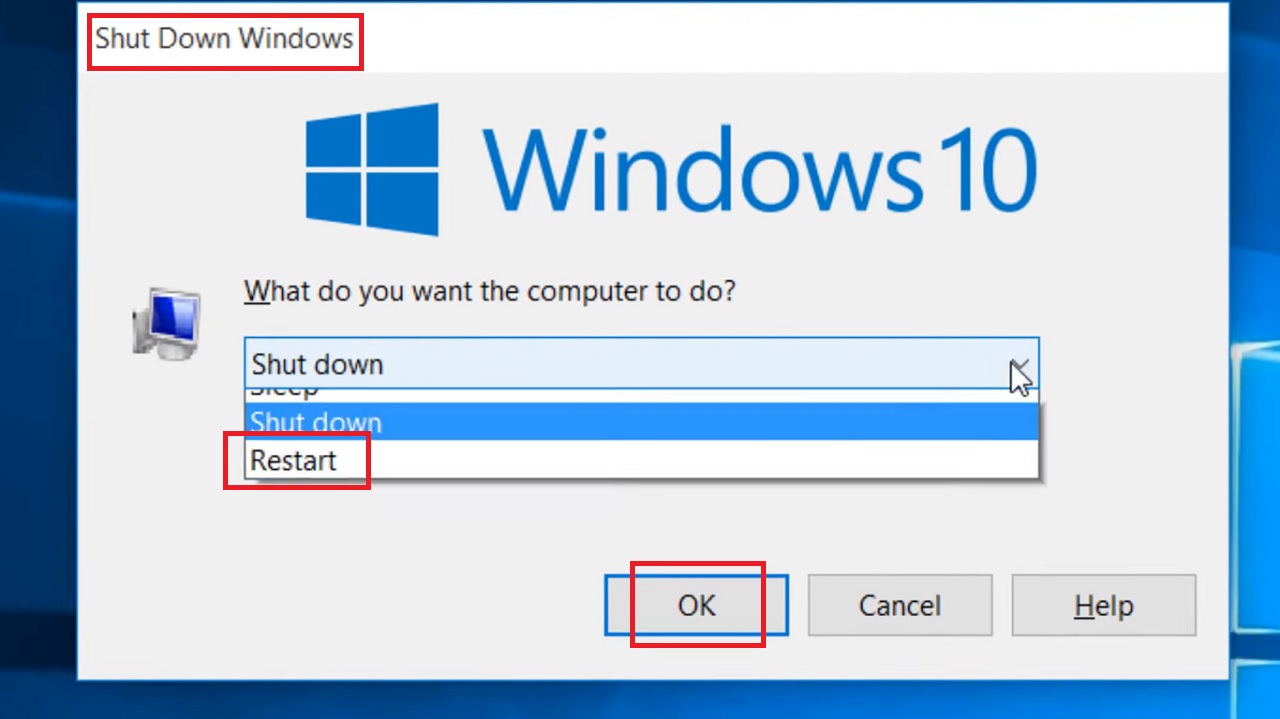
The issue should be resolved. If it persists, follow the next method.
Method 5: Checking and Editing the .NET Core Path
You may check the .NET core path in the Environment Variables feature and then edit it if necessary to resolve the issue. This will help it to find the necessary components to run an app.
STEPS TO FOLLOW:
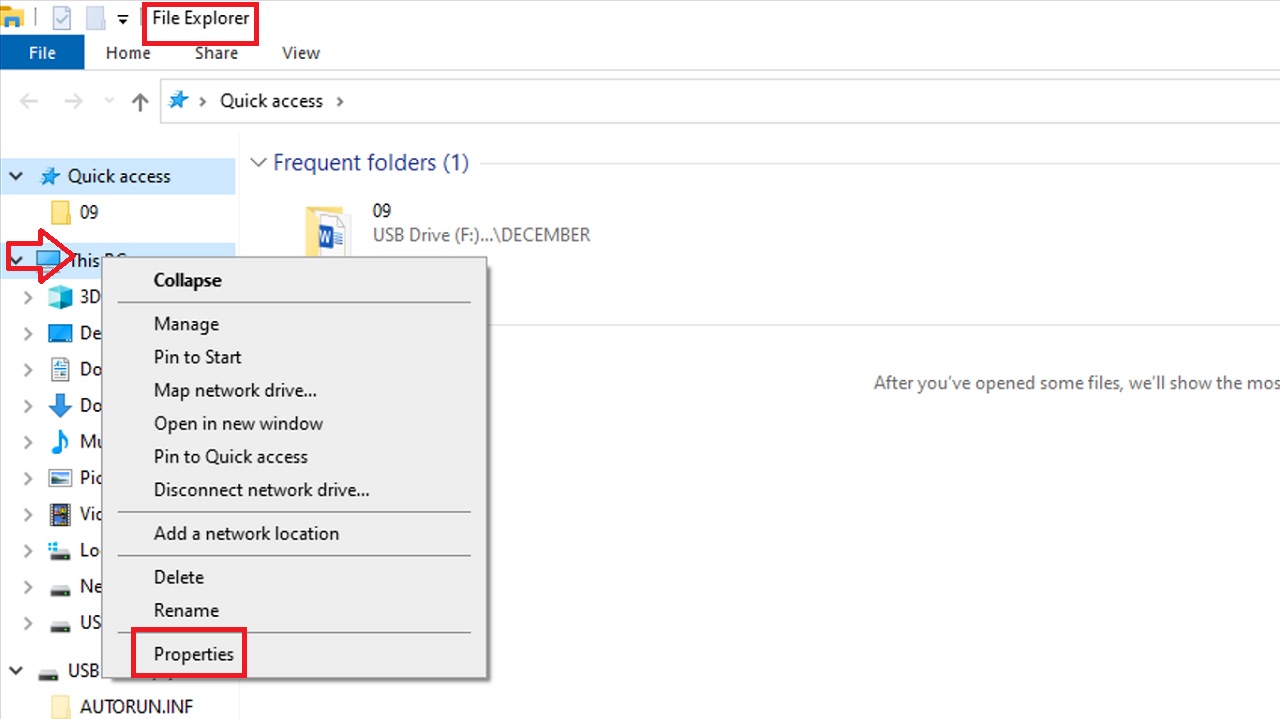
- Press the Windows and E keys together on your keyboard. This will open the File Explorer.
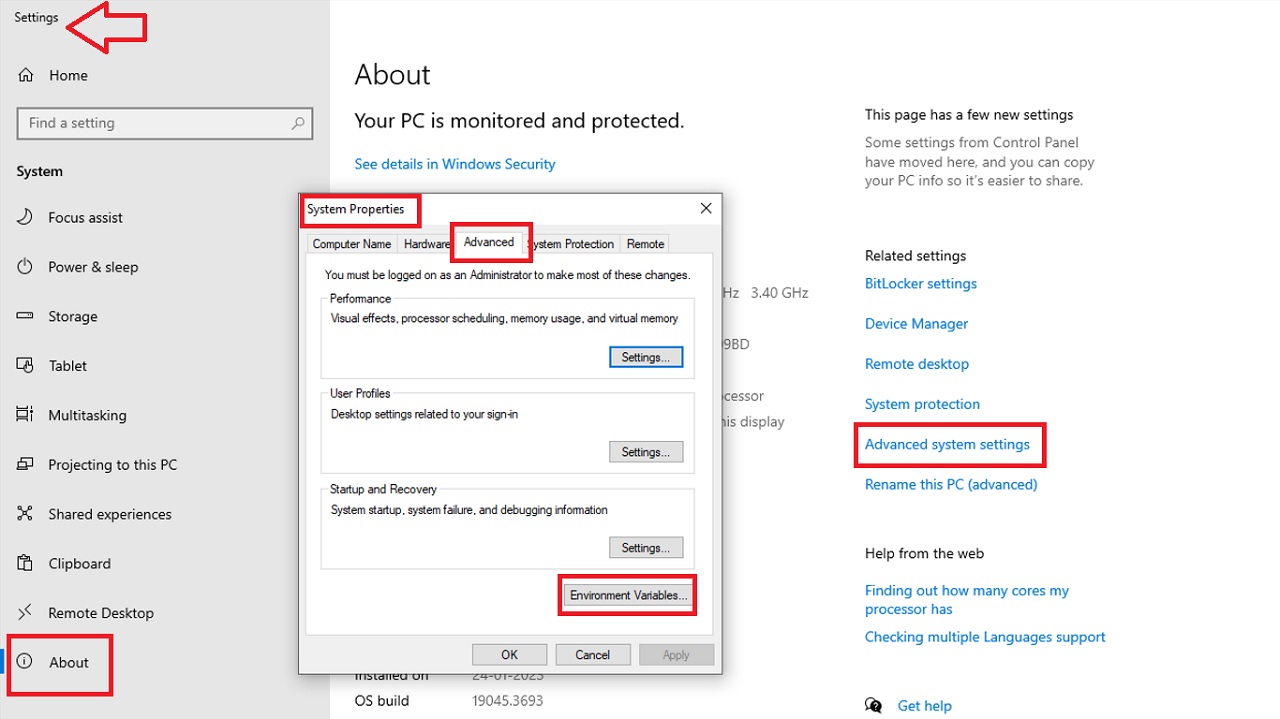
- Right-click on This PC option on the left.
- Select Properties.
- Scroll down to the About section on the Settings page.
- Then click on the Advanced system settings option.
- In the System Properties window, go to the Advanced tab.
- Click the Environment Variables button below.
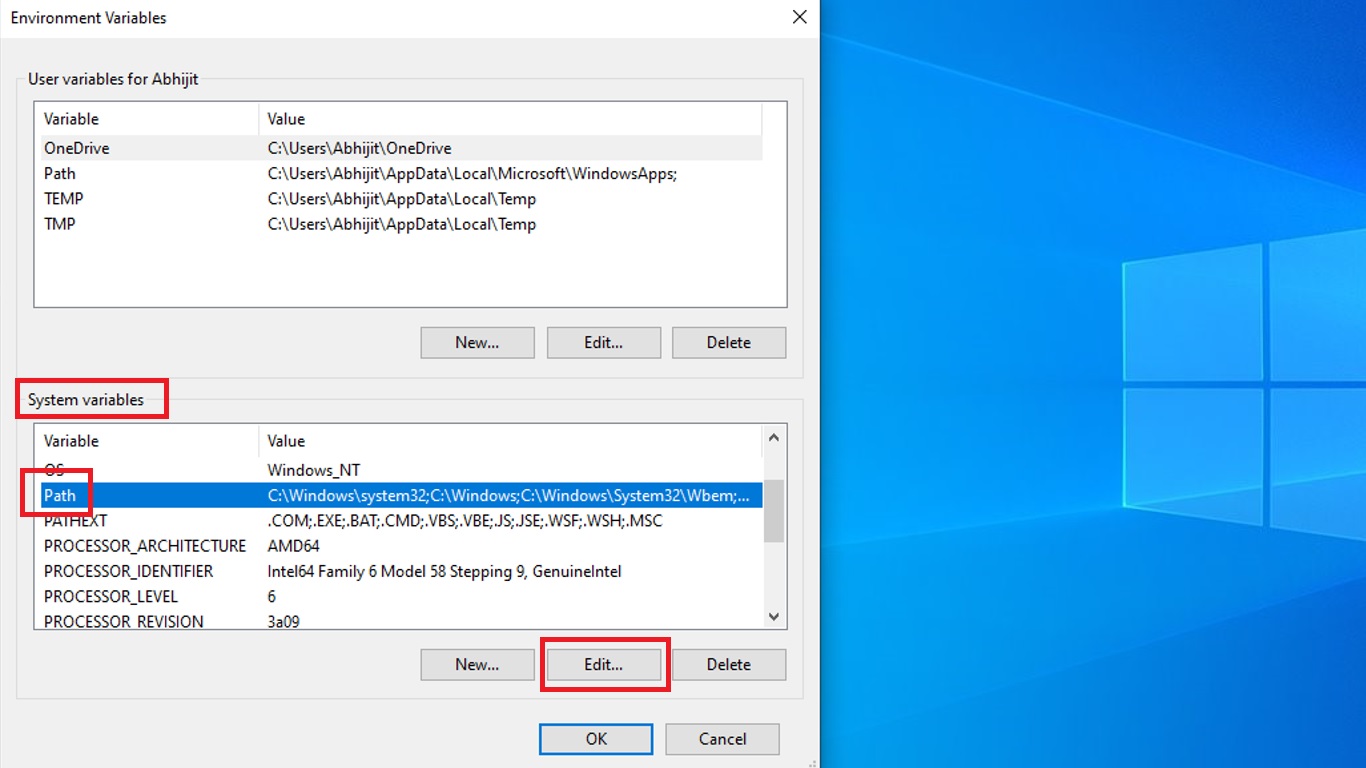
- Navigate to the System variables section.
- Select Path under the Variable column.
- Click the Edit button.
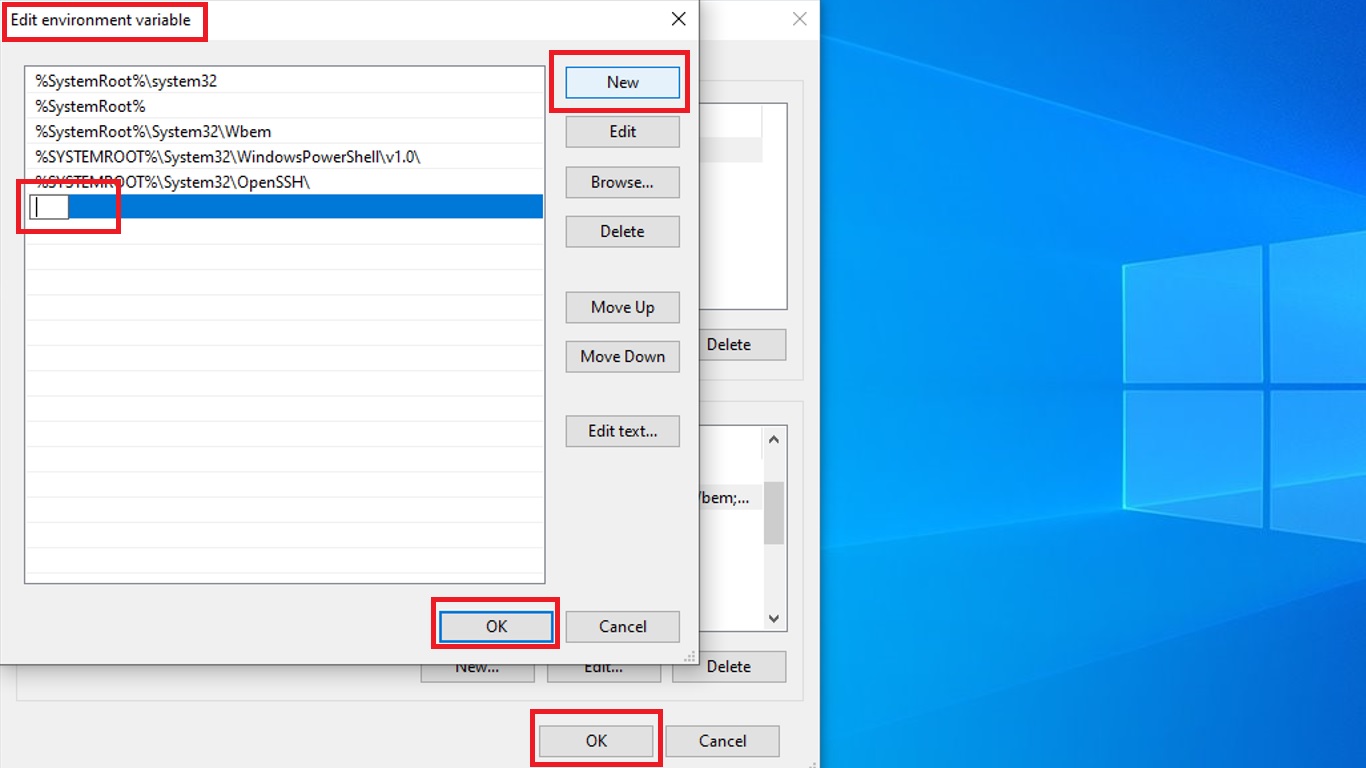
Here, check if the path to the .NET Core installation folder is present. Typically, the folder path will be like C:\Program Files\dotnet.
If the .NET Core path is not there or is not correct, then you must follow these steps to resolve the issue:
- Click on the New button located in the top-right corner in the Edit environment variable window.
- Type C:\Program Files\dotnet in the box.
- Press OK.
- Then click on the OK button to close the Environment Variables window.
Finally, you will need to restart your computer system to save the changes made and the issue will be resolved.
Conclusion
In conclusion, fixing the ‘To Run This Application You Must Install .NET Core’ error is quite simple.
Follow these steps and you will enjoy uninterrupted application functionality.