
The VPN blocked by the router is a common problem where the Internet Service Providers (ISP) restrict access to some websites.
This is quite an annoying issue but luckily there are some specific ways to overcome the issue of the routers blocking the VPN.
Though a bit tricky, you can make your VPN undetectable by the ISP making it impossible for them to block it via the router.
Here in this article, you will find some of the most effective solutions shortlisted and explained for you to perform when you find the VPN is blocked by the router.
In This Article
KEY TAKEAWAYS
- Changing the VPN server might often resolve the issue of the service being blocked by the router.
- If the router is not configured properly and is creating the issue, the most obvious solution is to modify its settings.
- If the Windows Defender Firewall is causing the issue, you can fix it by disabling the firewall to eliminate conflict with the VPN service.
- If the VPN software is not installed correctly on your computer or is not compatible with your router, reinstalling the right one will fix the issue.
- More often than not, changing the access ports or the tunneling protocols might prevent the router from blocking the Virtual Private Network service.
Why is VPN Blocked by Wi-Fi Router?
The most significant reason to block a Virtual Private Network or VPN by Wi-Fi, which is a tool that helps one to be completely anonymous, is to be vigilant against scams and fraud.
In some other situations, such as in workplaces, schools and colleges, VPNs might be blocked by the administration deliberately.
This is because they want to limit the access of the users to a few specific websites that they think to be untrustworthy.
Sometimes, the VPN is blocked by the ISPs purposely, especially those that like to snoop around and collect the browsing data of the users and then sell it!
A few websites might also block the VPN with an intention to prevent malicious practices or there might be some legal issues.
The streaming platforms might also block your VPN to protect their copyrights and abide by their geographical licensing restrictions.
Depending on the legislation of some countries regarding online censorship, VPN might also be blocked considering it as illegal.
You can only access and see only those sites that they want you to see and therefore you lose access to free internet.
Some other reasons of the VPN being blocked by the router are:
- There might be specific VPN server problem
- The router settings might be incorrect or configured improperly so that it conflicts with the VPN running
- The router firewall in your system might create conflict with the VPN service thinking that it is a threat
- The VPN software might be installed incorrectly or it might not be compatible with the router
- There might be VPN license problems with specific streaming platforms
- The main router might not allow a VPN passthrough if you use multiple routers
So, your VPN might be blocked for several reasons but it can be surpassed in several ways, as explained below.
Ways to Fix VPN Blocked by Wi-Fi
The best way to resolve the issue of a blocked VPN by Wi-Fi is, well, another VPN. If only a specific IP gets blocked, then you can resolve the issue by connecting to a VPN that will assign you a new IP address.
You can easily unblock your VPN for streaming sites especially by simply changing the VPN server. Just go to the homepage of your VPN and choose a server that is not blocked.
You might try switching between different tunneling protocols such User Datagram Protocol (UDP) or Transmission Control Protocol (TCP) to find whether or not that works.
Using a VPN with a big server pool and a lot of features is a good way to bypass IP blocking, domain blocking, QoS or Quality of Service filtering, port blocking,
Deep Packet Inspection (DPI) and other issues with the VPN service. This way you can use different IP addresses when one is blocked.
You might also use stealth protocol to make your VPN undetectable and bypass firewalls and hence DPI and QoS filtering will not be able to block your VPN.
Often, changing the access ports might help a lot in resolving the issue of a blocked VPN by Wi-Fi.
Traffic obfuscation is also a useful solution to resolve the issue of a blocked VPN by Wi-Fi. Open the VPN home page and click on ‘Obfuscated servers’ option.
Note: The process or its name can be a bit different depending on the type of VPN service you are using. For example, in Surfshark, Traffic Obfuscation is often called the Camouflage Mode. However, the basics are the same.
Now, here are the steps to follow for some of the processes to resolve the VPN blocked by Wi-Fi issue.
Note: For demonstration purposes, NordVPN is used in most of the methods. You might have other VPNs to which the same processes are applicable, depending on their interface.
For other solutions, the interfaces might differ depending on the manufacturer and model of the router. So, check yours.
Also note that all these solutions might not work in all situations. It mainly depends on the specific VPN service, its features, and allowances. However, all these are worth trying.
Method 1: Clear the Cache and Cookies from Your Browser Settings
Though it might not have a direct impact, sometimes clearing the caches and cookies might allow accessing websites, and probably in some cases, resolve the issue of a blocked VPN by Wi-Fi.
STEPS TO FOLLOW:
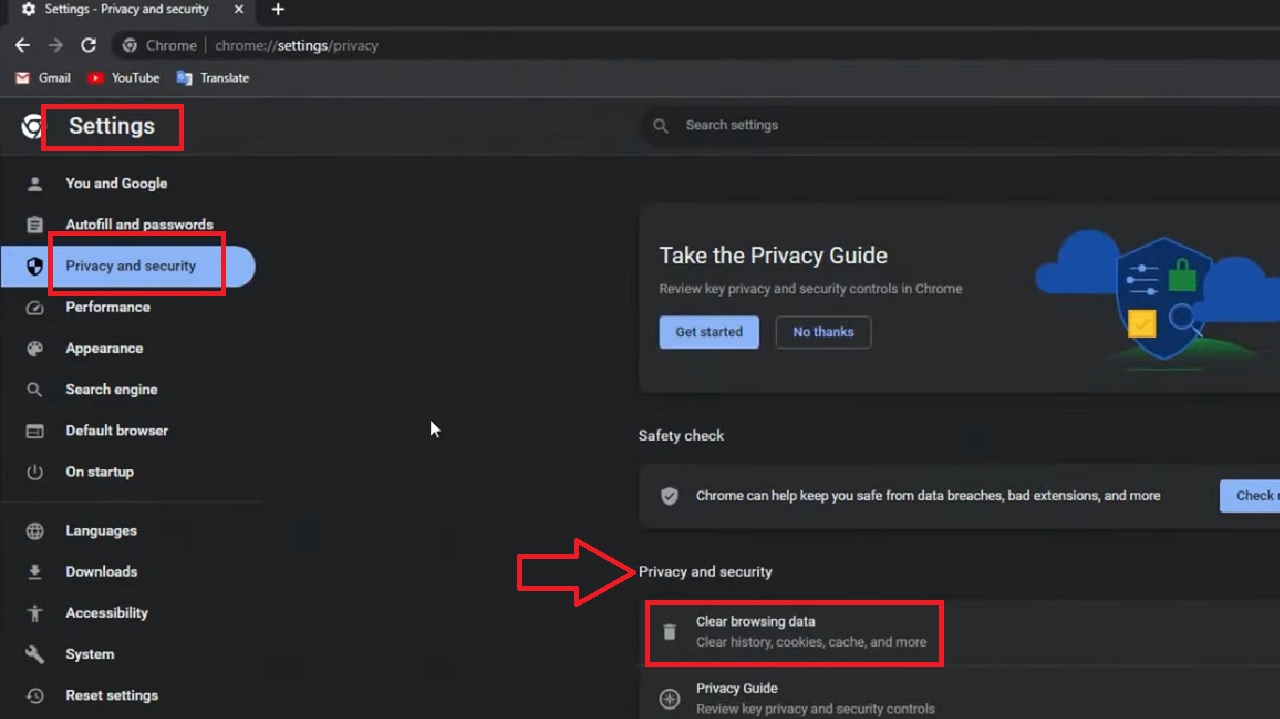
- Open your browser settings.
- Select Privacy and security under the Settings section in the left panel of the window that opens up.
- Click on Clear browsing data on the right side of the window under Privacy and security section.
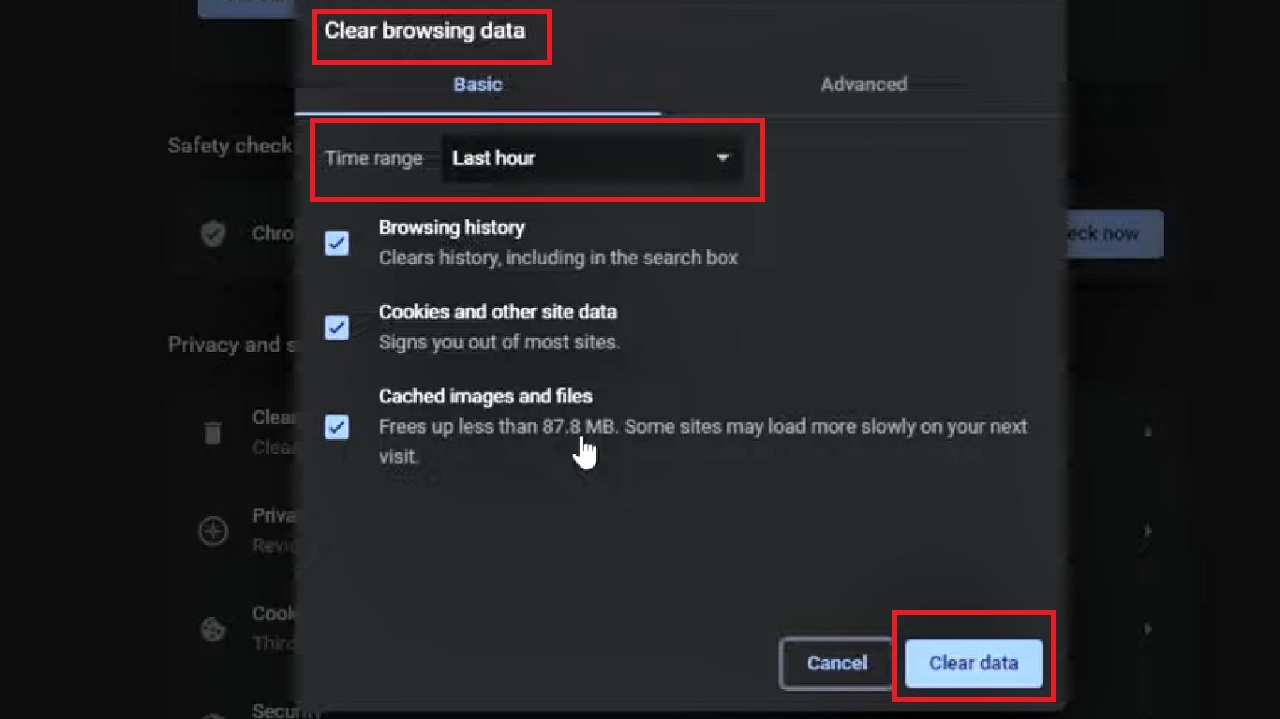
- Select the Time range from the new Clear browsing data window by clicking on the small arrow at the right side of the box and choosing your preferred options from the drop-down context menu.
- Finally, click on the Clear data button below.
This will, however, not do anything apart from fixing problems with the streaming platforms.
Method 2: Change the DNS Settings of the Router
A lot of times, the default settings of the DNS of your router might cause this issue. Changing the Domain Name System, in some cases therefore might be a useful solution to it.
STEPS TO FOLLOW:
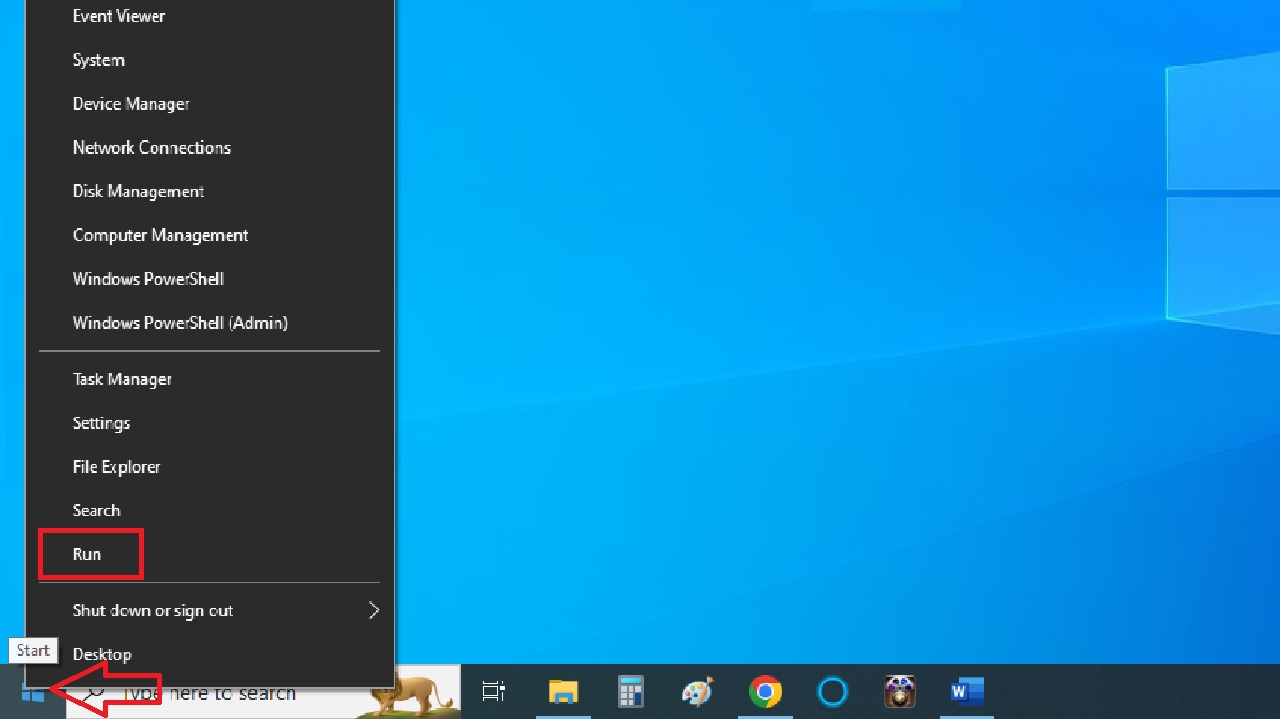
- Right-click on the Start Menu button and select Run from the options that appear.
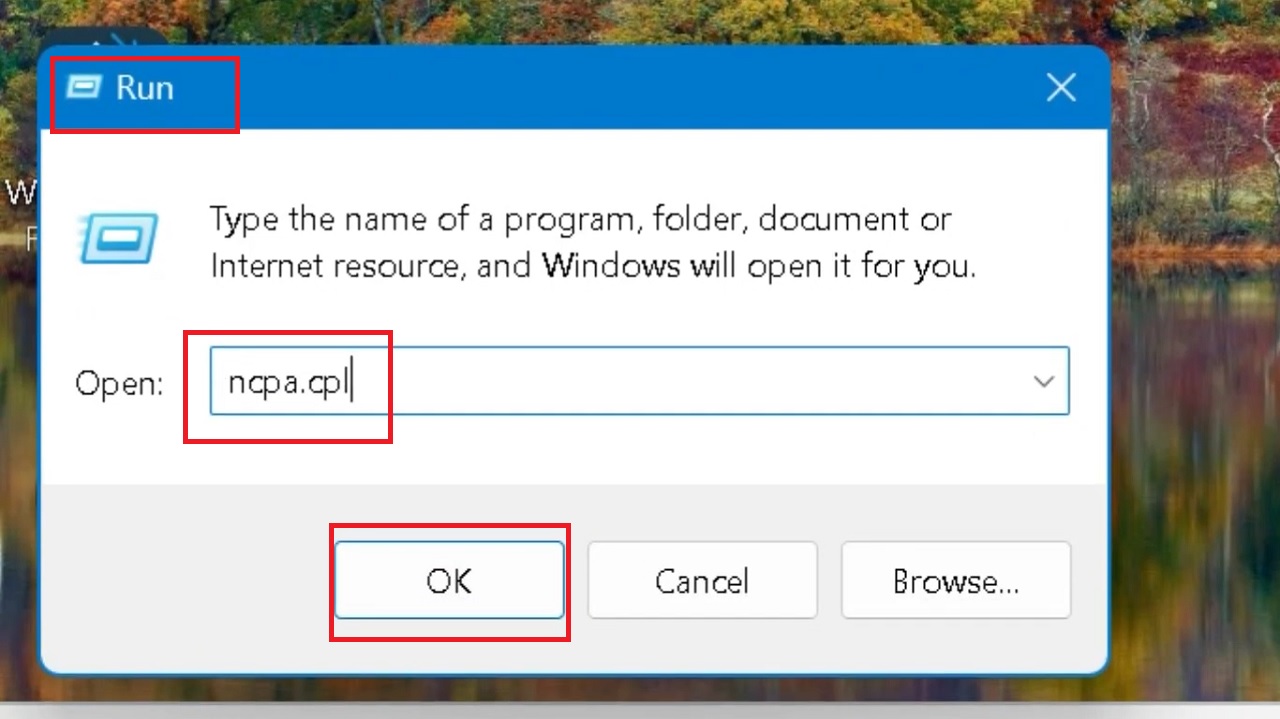
- In the Run dialog box, type in ncpa.cpl and hit the Enter key on your keyboard or click on the OK button on the Run dialog box.
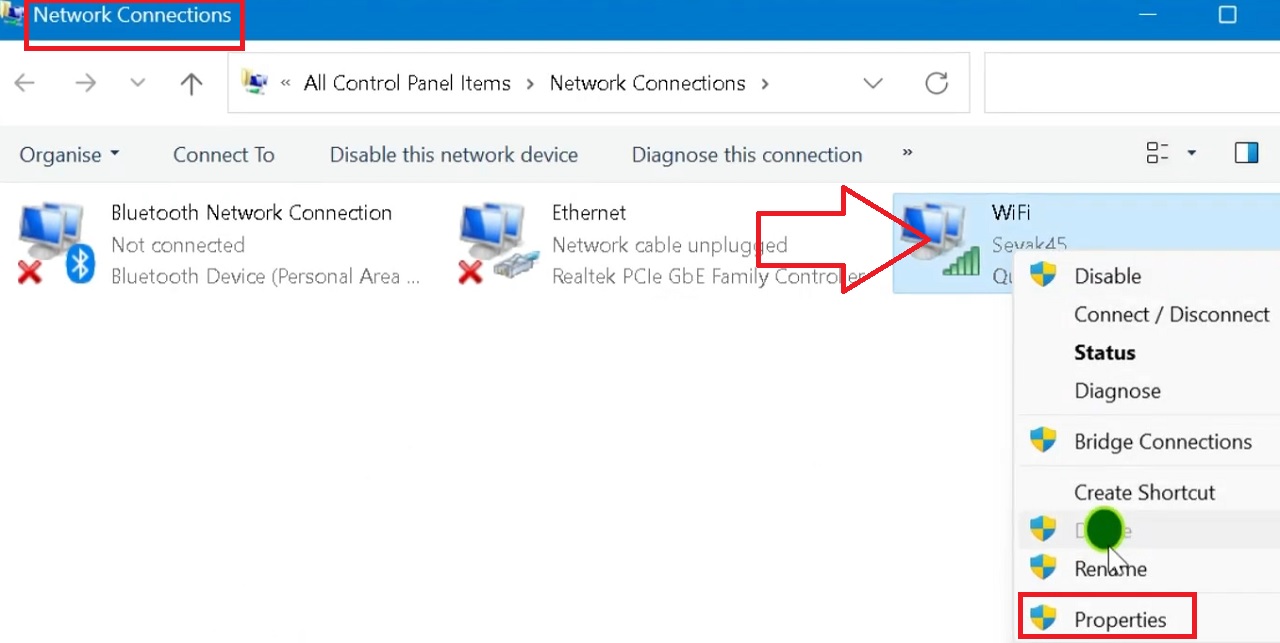
- This will open the Network Connections window. Right-click on your Wi-Fi connection.
- Select the Properties option from the drop-down menu.
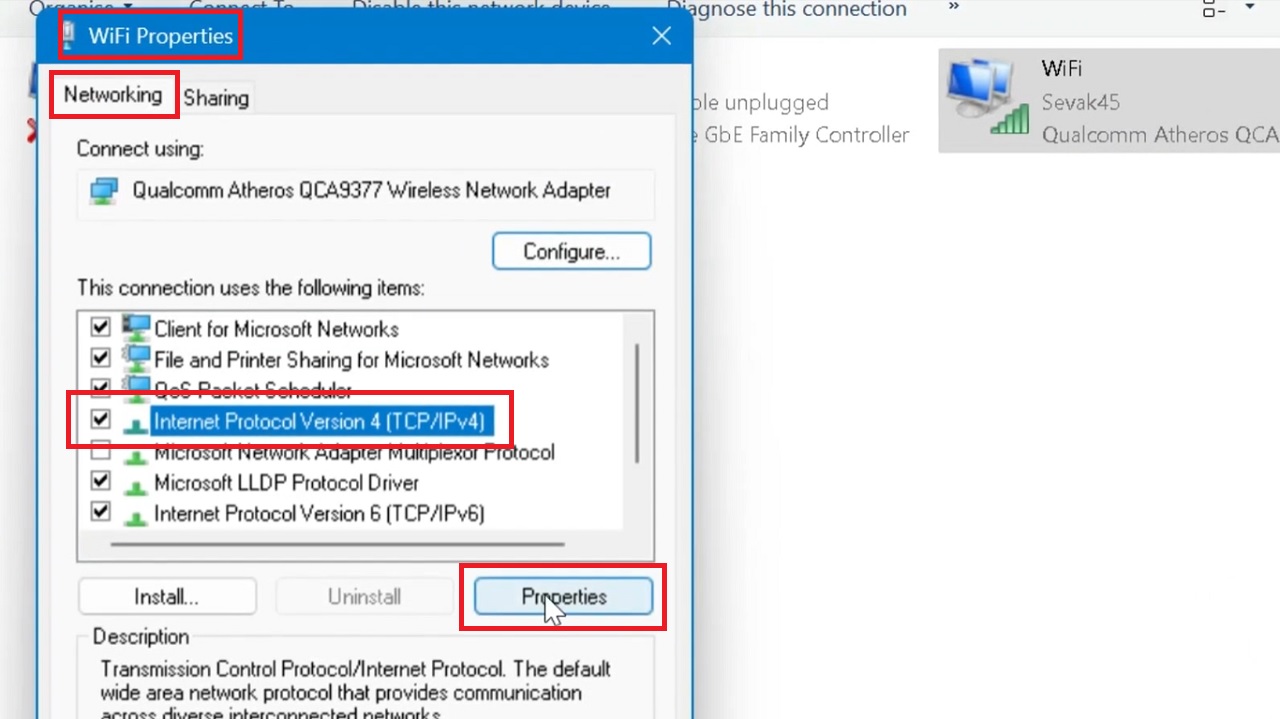
- In the Wi-Fi Properties window that opens next, select the Internet Protocol Version 4 (TCP/IPv4) from the list in the box under ‘This connection uses the following items in the Networking tab.
- Click on the Properties button below.
- In the following Internet Protocol Version 4 (TCP/IPv4) Properties window, click on the small circular button next to ‘Use the following DNS server addresses.’
- Type in 8.8.8.8 in the box next to the Preferred DNS server.
- Then type in 8.8.4.4 in the box next to the Alternative DNS server.
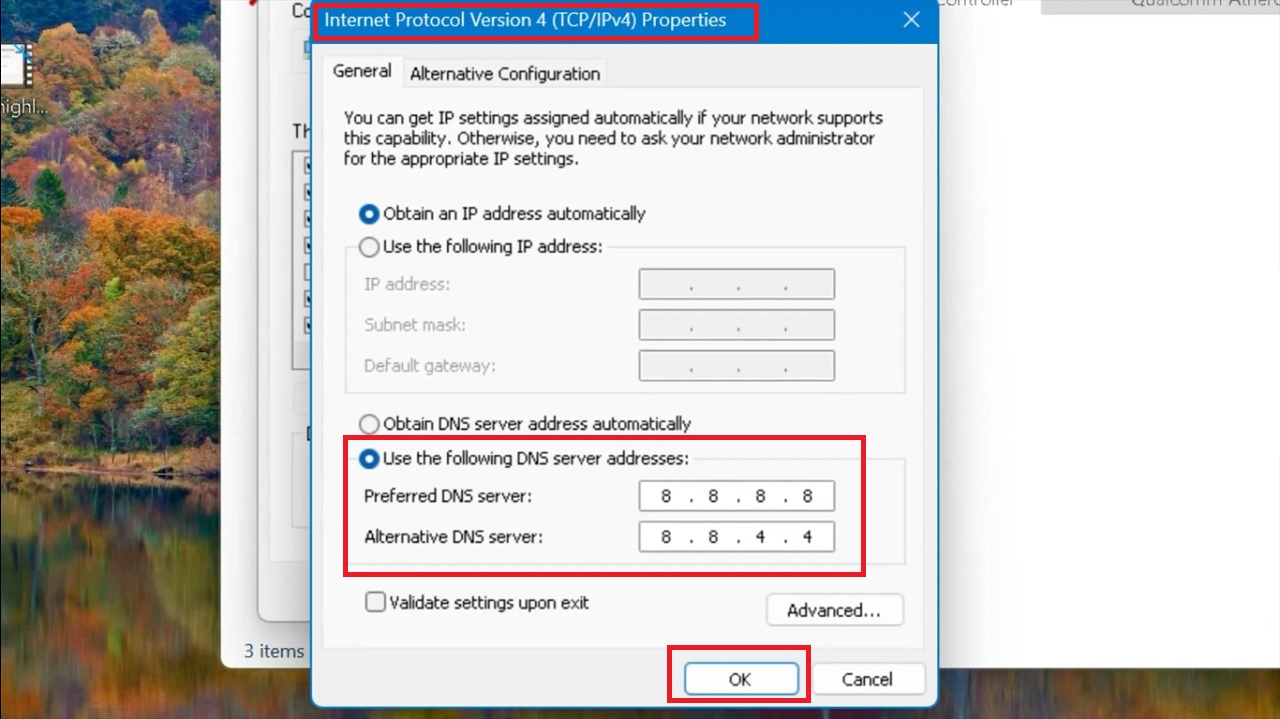
- Finally, click on the OK button to save the changes and exit.
- Close all previous windows that are open.
Now, restart your computer system and check whether or not the issue has been resolved. Ideally, it should. If the problem still persists, then try fixing it by the next method.
Method 3: Make Changes in Private and Public Network Settings
The Windows Defender Firewall might cause this issue sometimes. Making some changes in the settings from the Control Panel might help in fixing the problem.
Note: Consider this as a temporary solution. It is not recommended that you disable firewall permanently or for a long time due to potential security threats.
STEPS TO FOLLOW:
- Go to the search box next to the Start Menu.
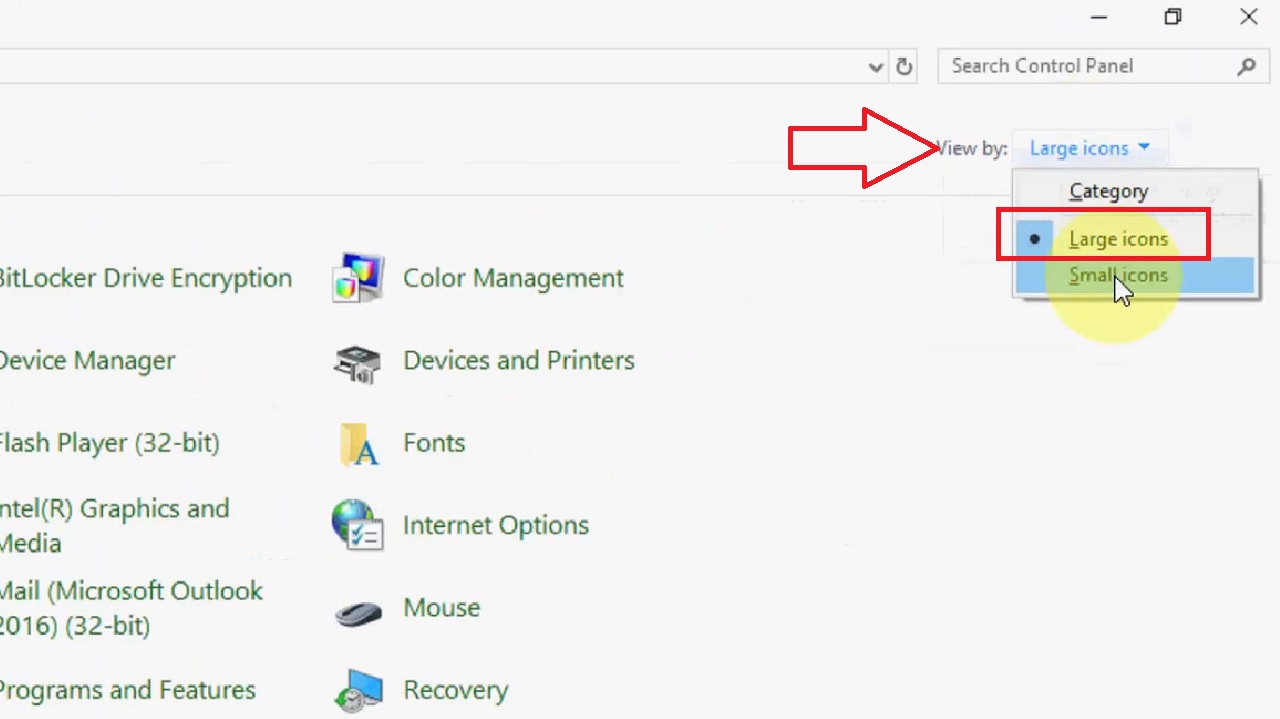
- Type control panel and hit the Enter key on your keyboard.
- Select Large icons in the View by box.
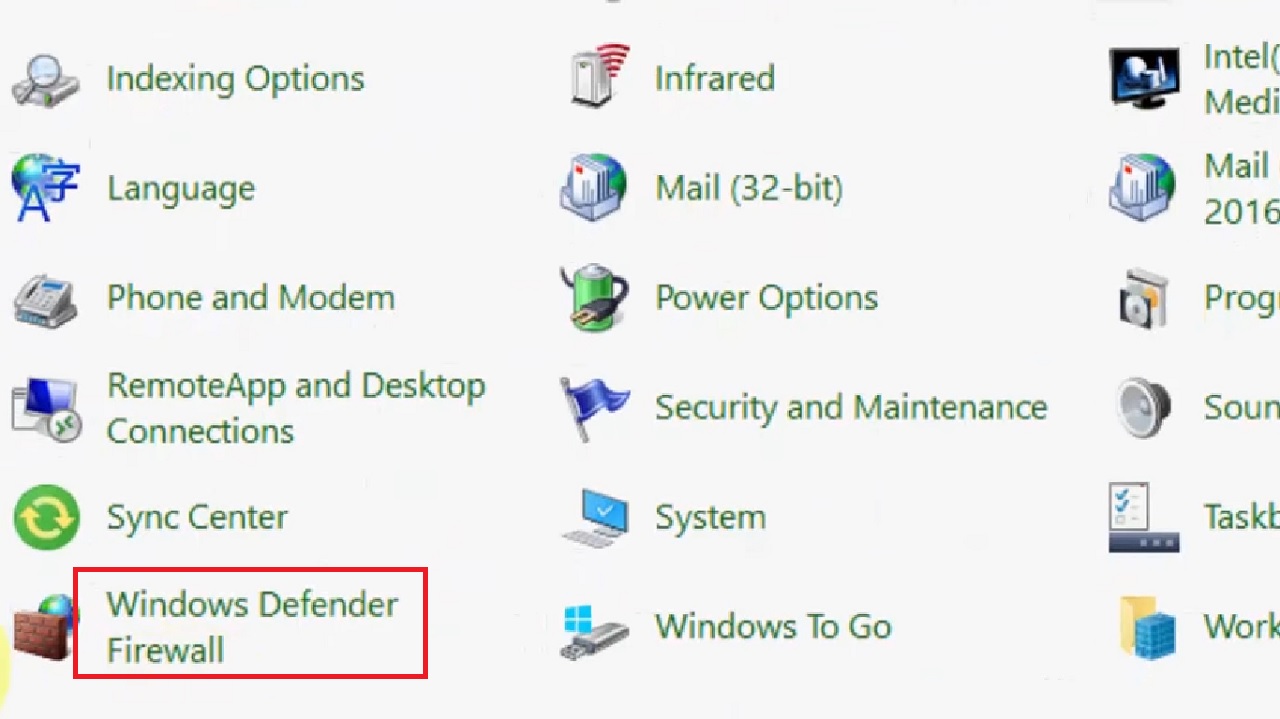
- Click on Windows Defender Firewall.
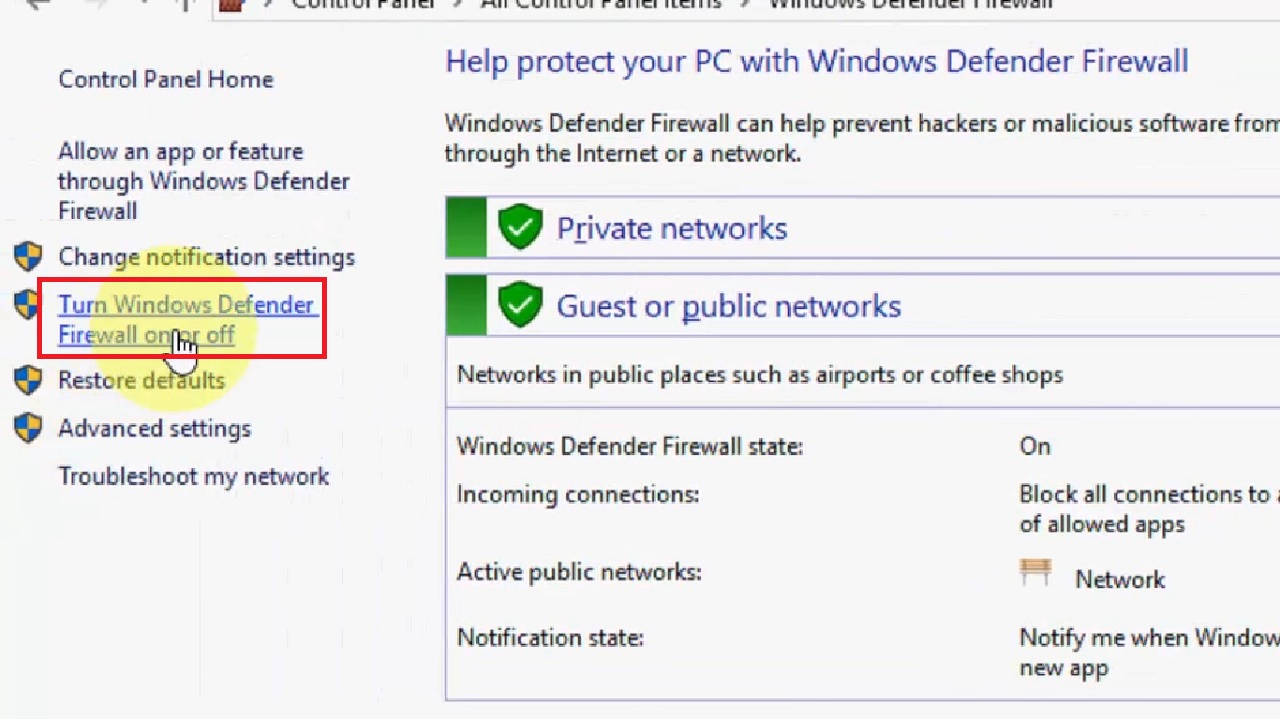
- Click on ‘Turn Windows Defender Firewall on or off’ in the left panel of the Windows Defender Firewall window that appears.
- In the following Customize settings for each type of network window click on the small circular button next to Turn off Windows Defender Firewall (not recommended) under the Private network settings as well as under the Public network settings section.
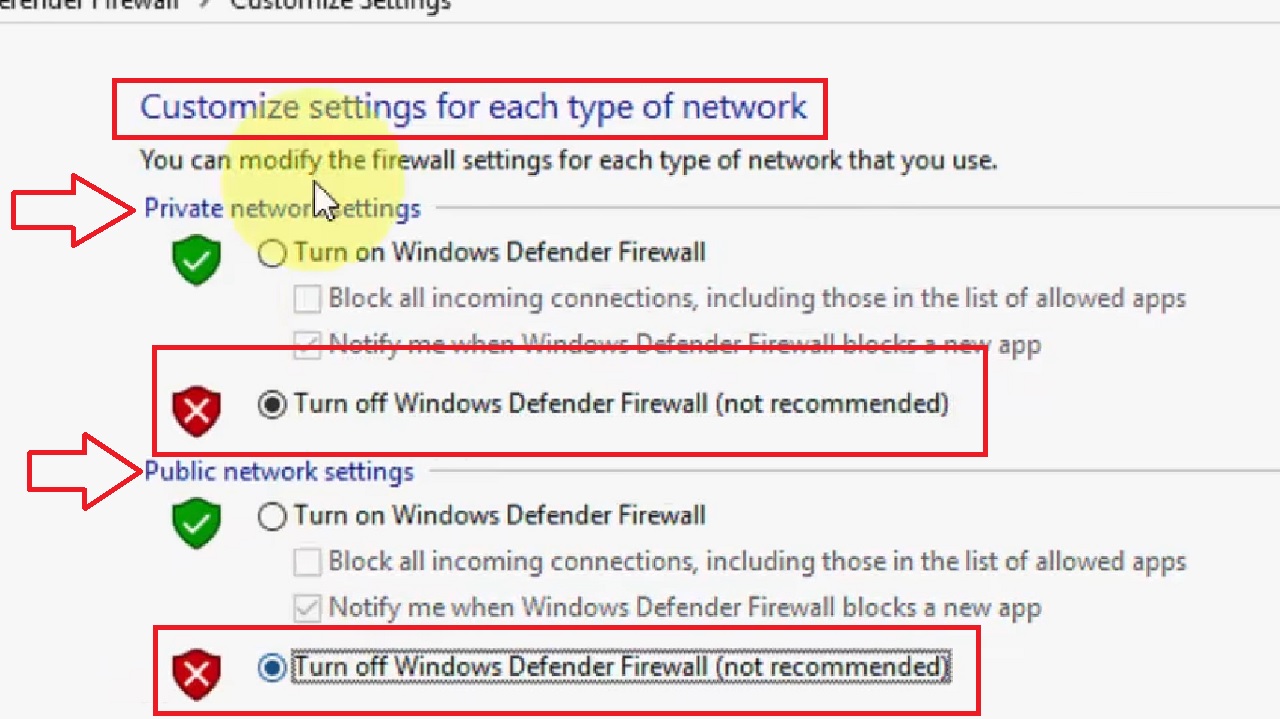
- Click on Save (not shown in picture) and exit.
This should resolve the issue. If the problem still persists, you might move on with the next method.
Method 4: Setting Advanced Options and Disabling Firewall Protection
Making changes in the Advanced Options of VPN and then disabling Firewall might also help in resolving the issue many times.
STEPS TO FOLLOW:
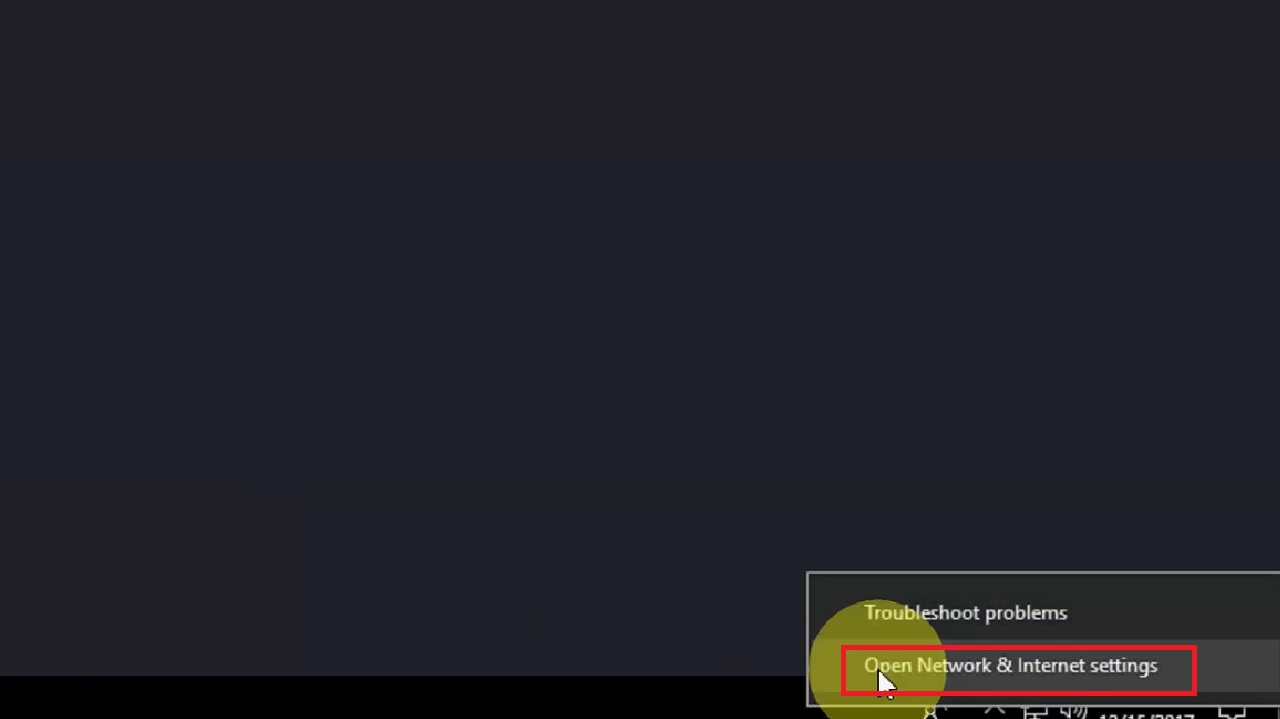
- Right-click on the network icon on your taskbar on the right side.
- Click on Network and Internet settings.
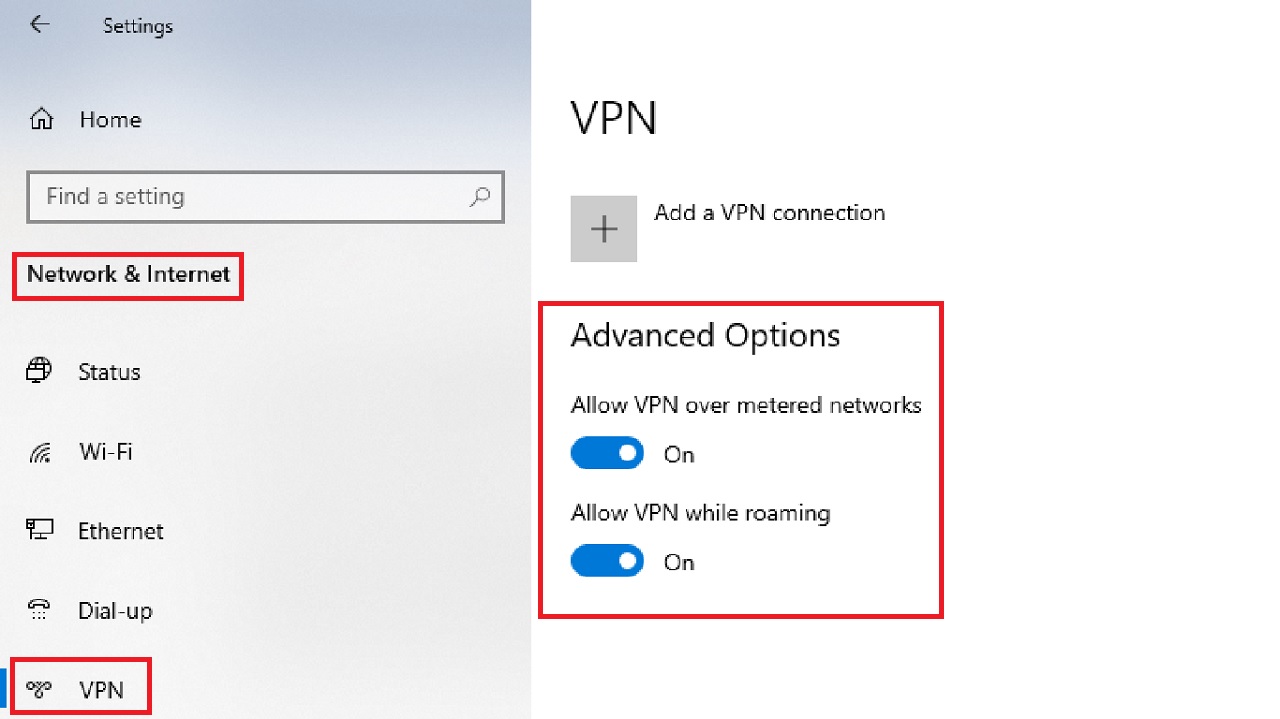
- Select VPN from the left pane of the Network & Internet window.
- Make sure that both ‘Allow VPN over metered network’ and ‘Allow VPN while roaming’ options under the Advanced Options are switched on. If they are not, drag the sliding switch to turn them On.
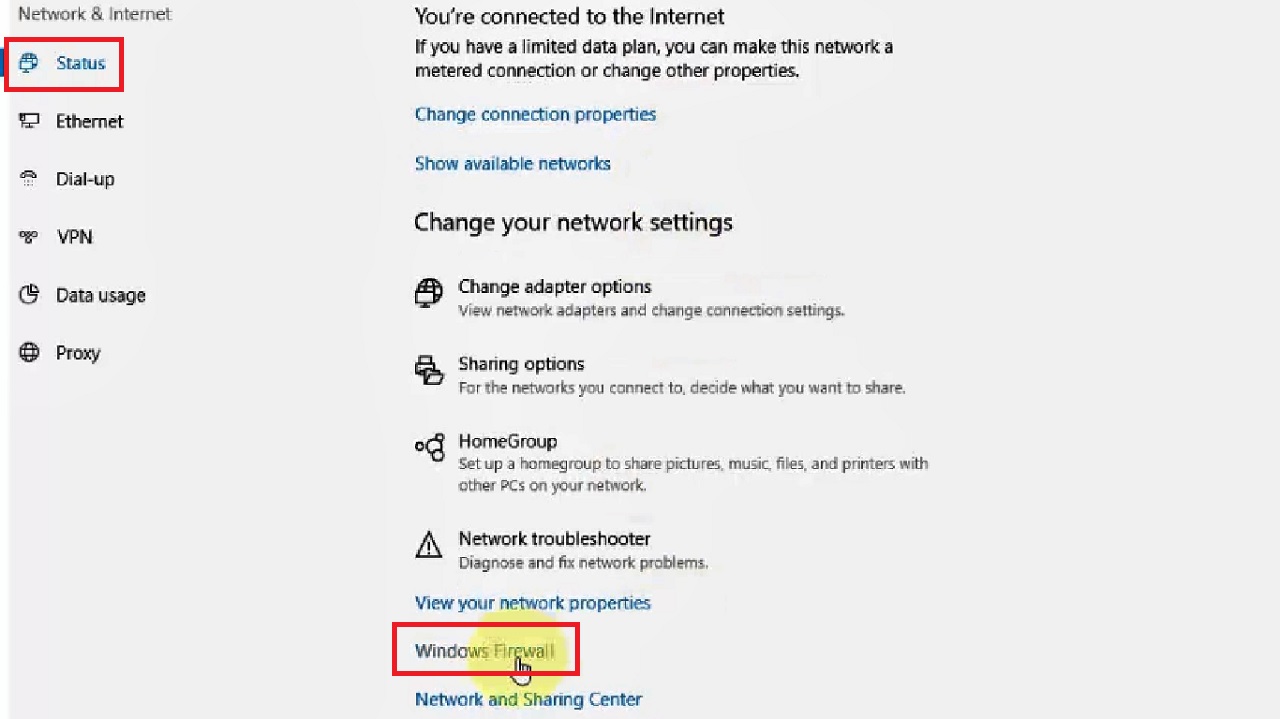
- Now, go back to the Status section in the left panel.
- Scroll down to find Windows Firewall at the bottom on the right side of the window.
- Click on it.
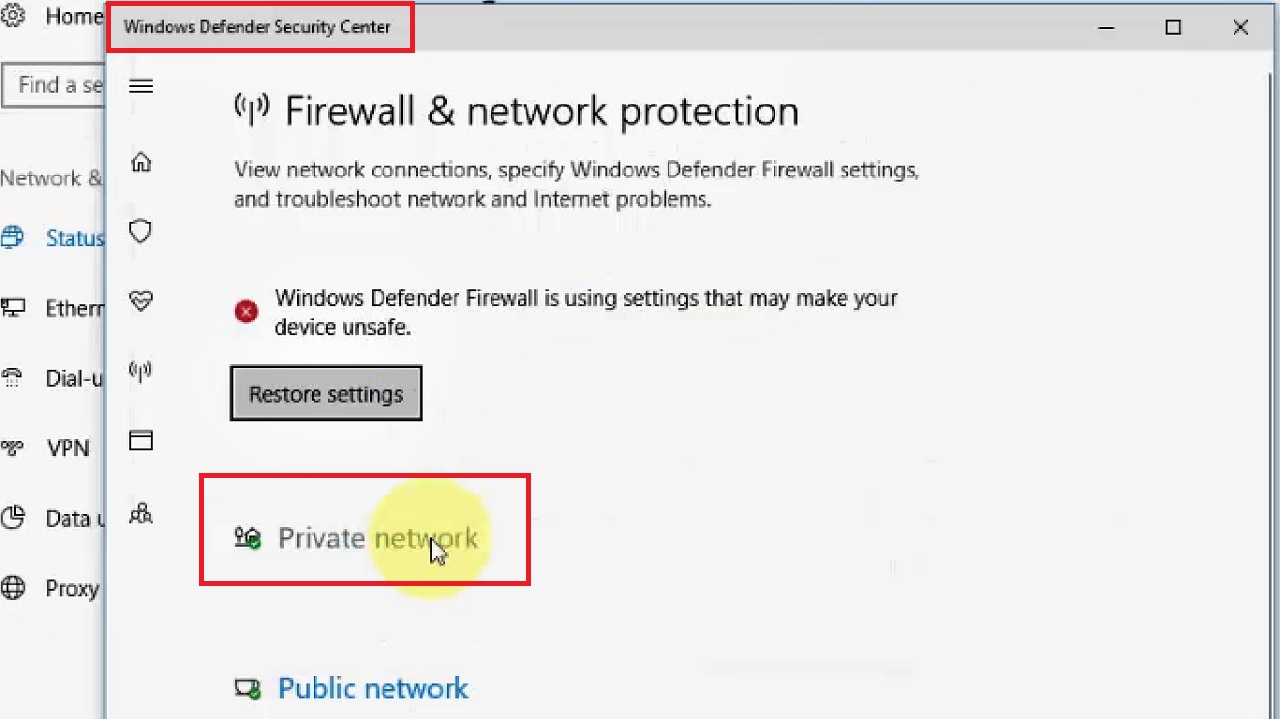
- In the following Windows Defender Security Center window, click on the Private network option.
- In the following Private network page, drag the sliding switch to Off.
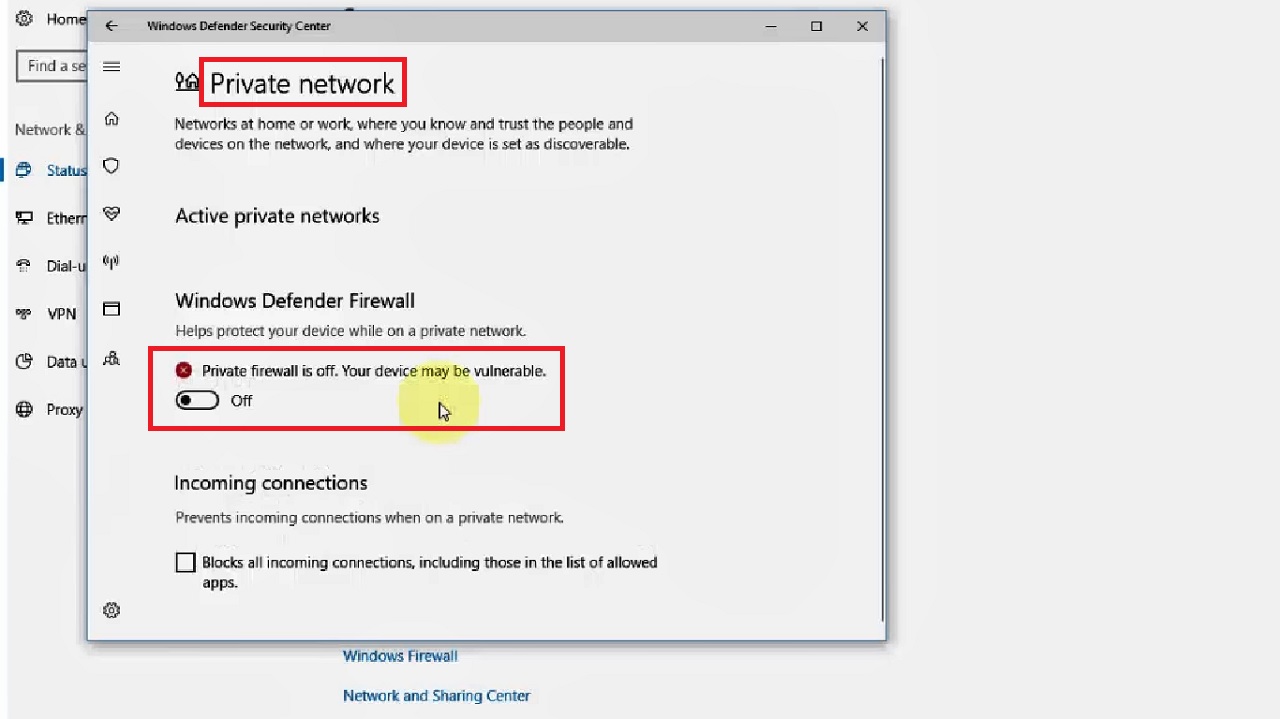
Repeat the same step for the Public network.
Note: Once again, beware of disabling firewall and exercise extreme caution while working with the firewall disabled.
However, this might solve the issue temporarily. If it does not, then you should try the next solution.
Method 5: Change the Tunneling Protocol
Sometimes, a VPN might be blocked for a specific protocol. In that case, you might try to resolve this issue by changing the tunneling protocol to TCP or UDP.
STEPS TO FOLLOW:
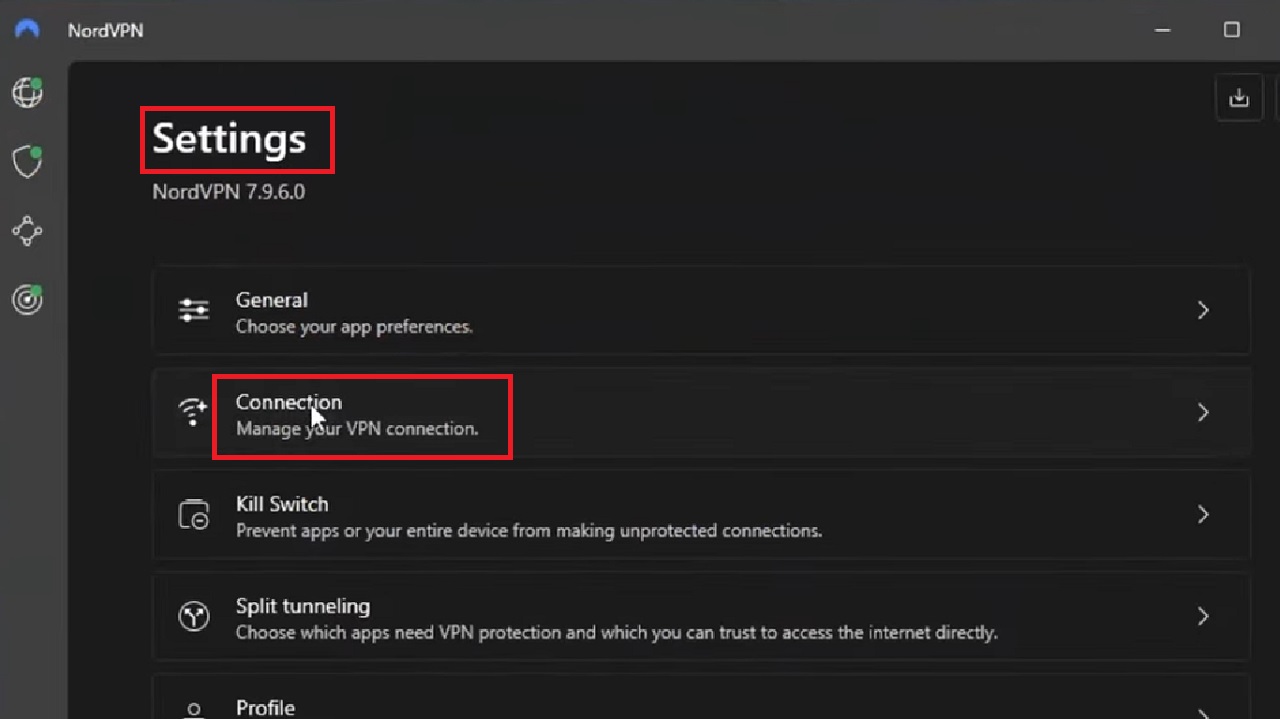
- Open Settings.
- Click on Connection to manage your VPN connection.
- Click on the box at the right-hand side of the Connection window. Select your preferred protocol from the drop-down options instead of Auto (Recommended).
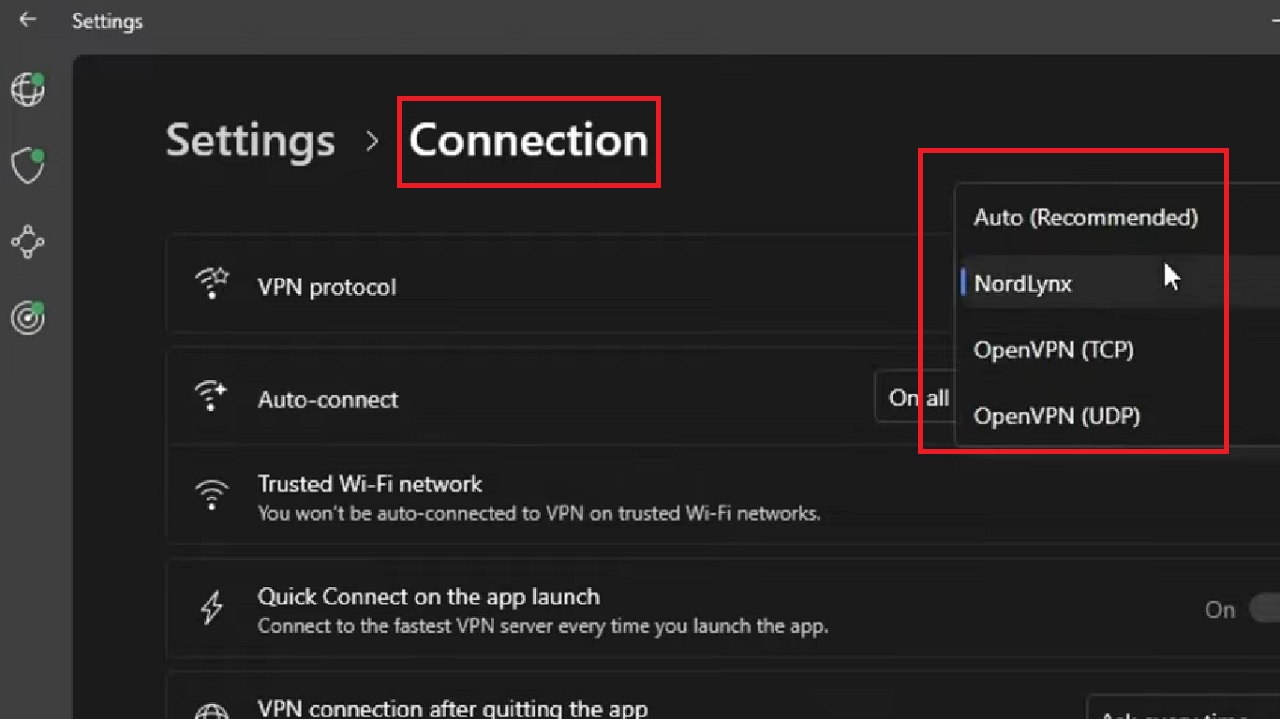
Now, check if the issue is resolved.
Note: These changes might however have an impact on your internet speed making it significantly slow, especially if you are using an OpenVPN TCP.
Method 6: Change the Configuration of the Router Manually
If the configuration of the router is not correct, it might block VPN. Therefore, making changes in it manually by performing a system reset might be a helpful fix.
STEPS TO FOLLOW:
- Connect your system to the router.
- Press the Reset button at the back by a sharp object till the power LED starts blinking.
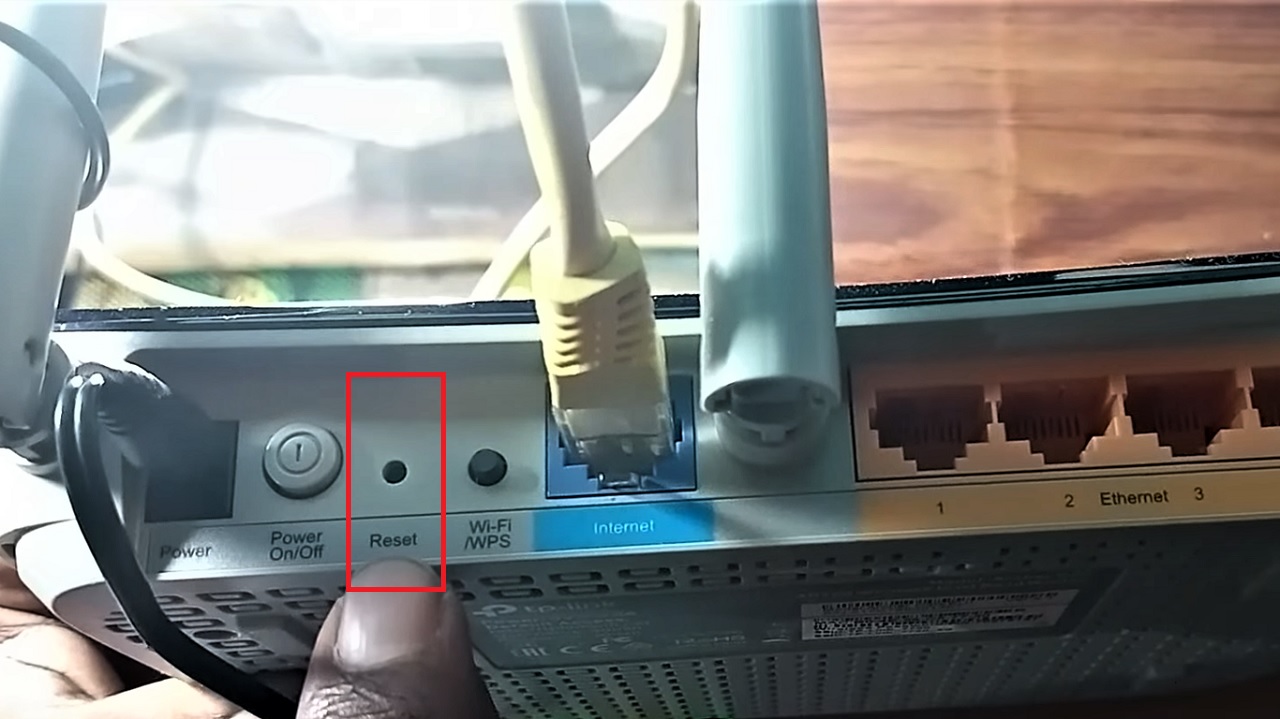
When the process is complete, reconnect and check whether the issue is resolved or not. If it still persists, move on to the next solution.
Method 7: Uninstall and Reinstall VPN
If the VPN software creates the issue, it is better to uninstall, then reinstall it from the official website. Though it does not guarantee, sometimes it might help fixing the issue.
STEPS TO FOLLOW:
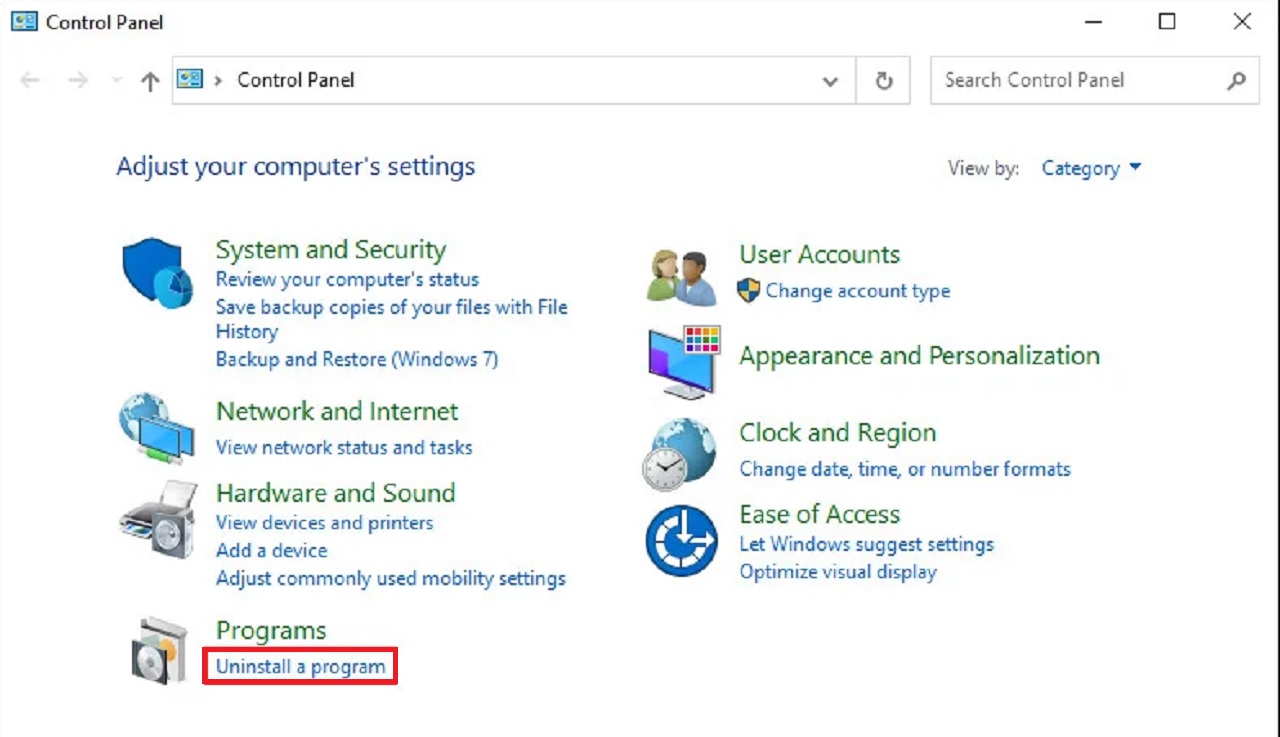
- Open the Control Panel as you did in Method 3.
- Select Category in the View by box.
- Select the Uninstall a program option under Programs.
- In the new Uninstall or change a program window, look for the VPN service in the list.
- Then right-click on it.
- Click on the Uninstall option from the drop-down context menu.
- Follow the instructions to uninstall the VPN application.
When the uninstalling process is complete, open Google Chrome > Visit the official website of the VPN service > Reinstall it.
Finally, launch it and check whether the problem is fixed or not.
Method 8: Update the Router Firmware
Installing the latest firmware in your router might often resolve the issue of a blocked VPN. So, you can give it a try as well.
STEPS TO FOLLOW:
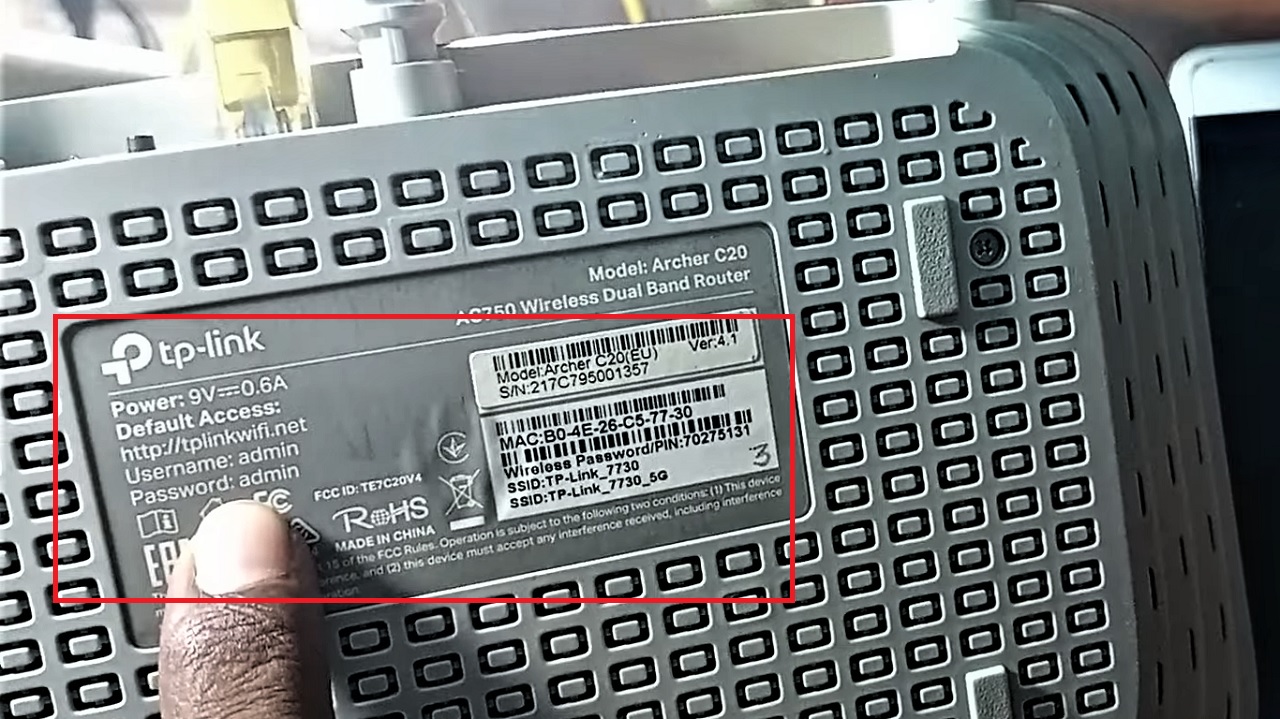
- Check the login details provided by your manufacturer on the label at the back of the router.
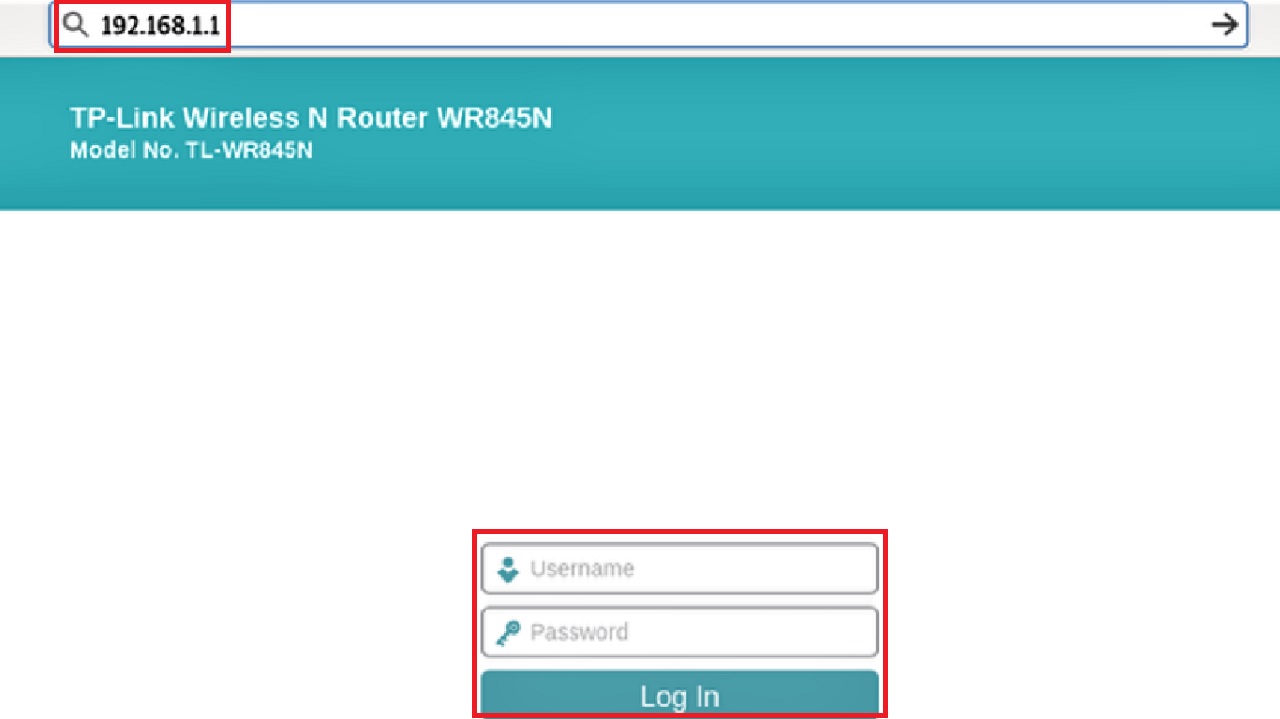
- Launch any browser.
- Click on the search bar and type the IP address, which is usually 192.168.1.1.
- Now, login to the web portal using your username and password.
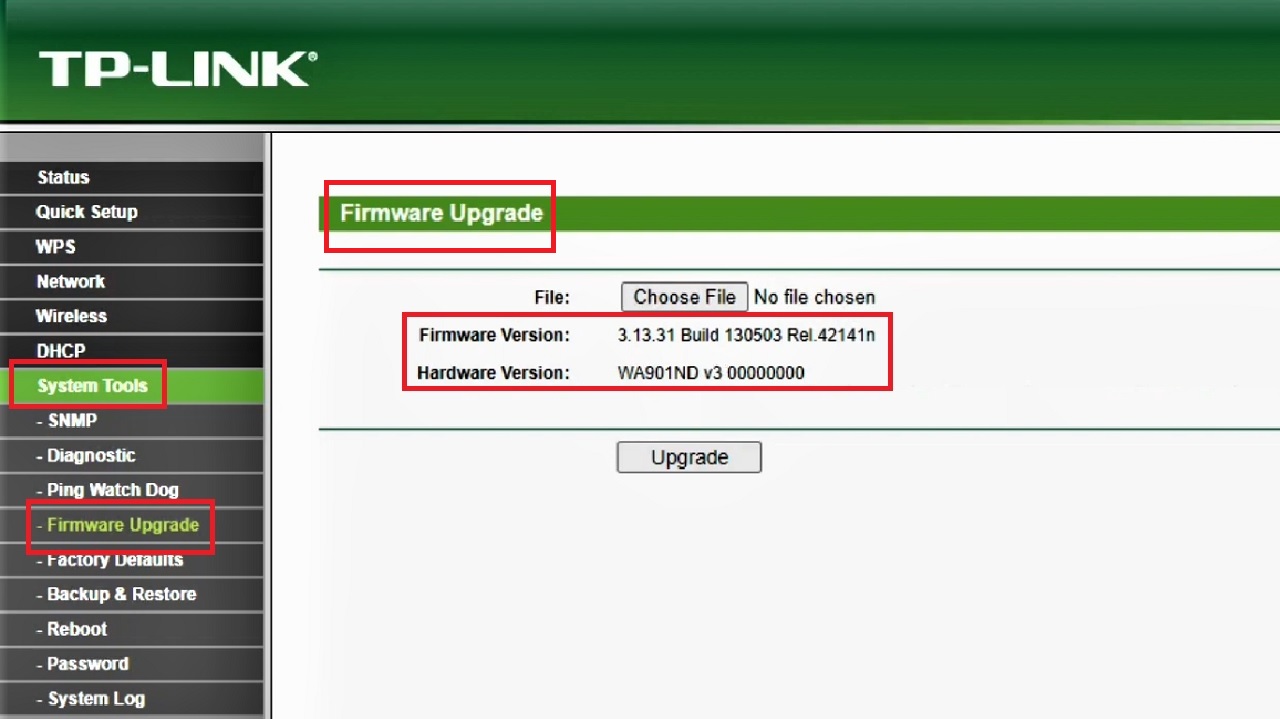
- Next, click on System Tools on the left pane of the window that opens.
- Select Firmware Upgrade under it.
- Check the versions of the router firmware and hardware.
- Go to your browser once again.
- Type Tplink firmware version upgrade and hit enter.
- Go to All Support at the top right side of the window that appears.
- Select Download Center.
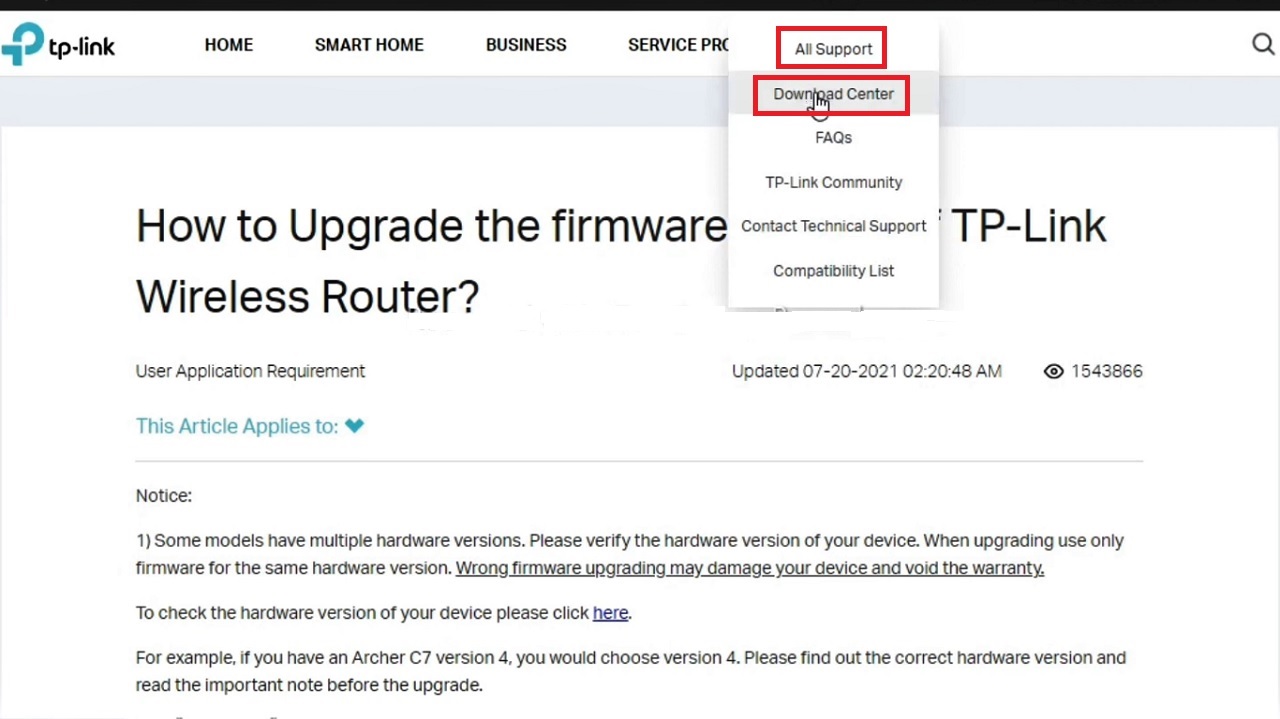
- Type your Model Number. (TL-WA901ND, in this case, for example).
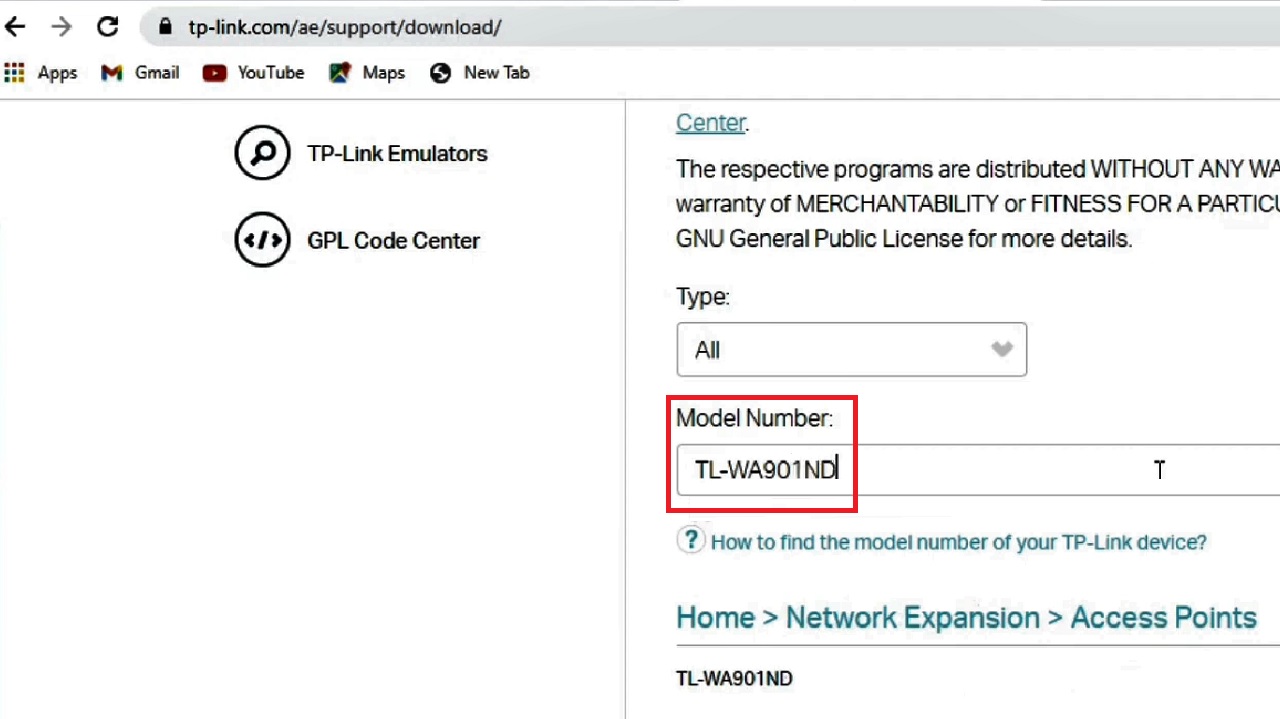
- Choose the correct hardware version in the following window.
- Scroll down and click on Firmware.
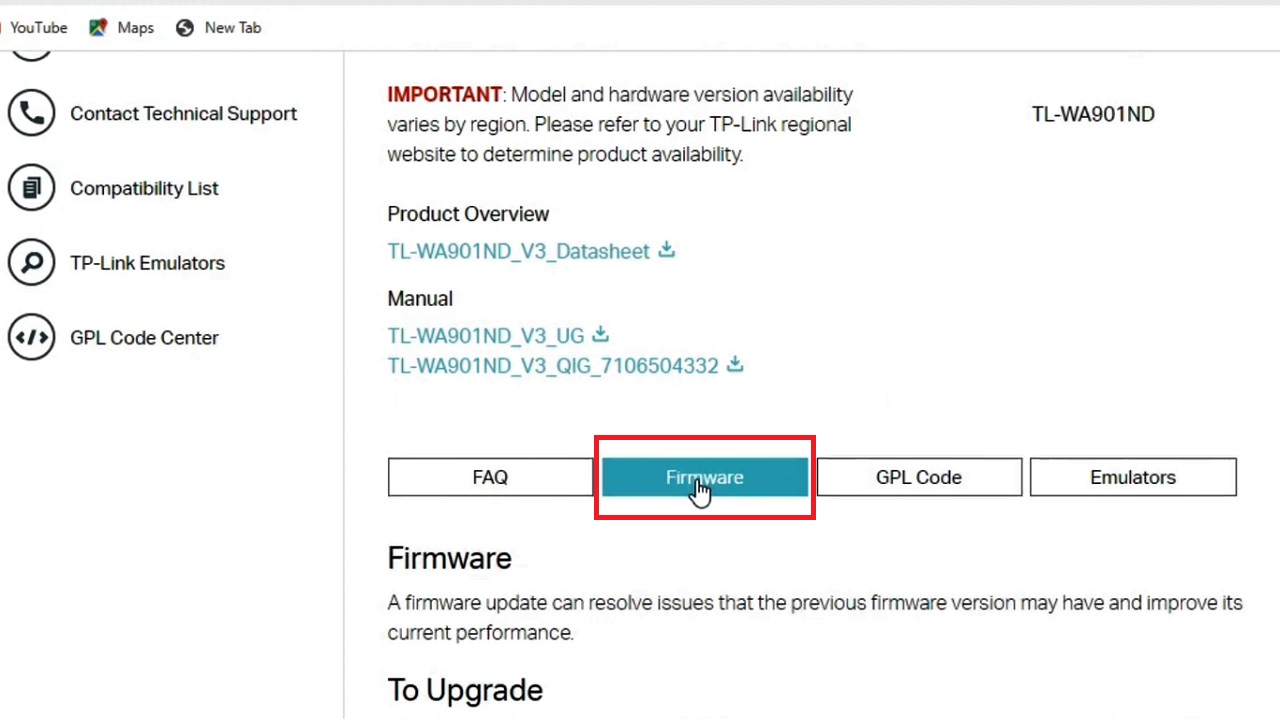
- Choose the latest version from the list and click on the download button.
- Go to the Downloads folder.
- Right-click on the downloaded file.
- Click on Extract.
- This will start the downloading process and Please wait until the system reboots.
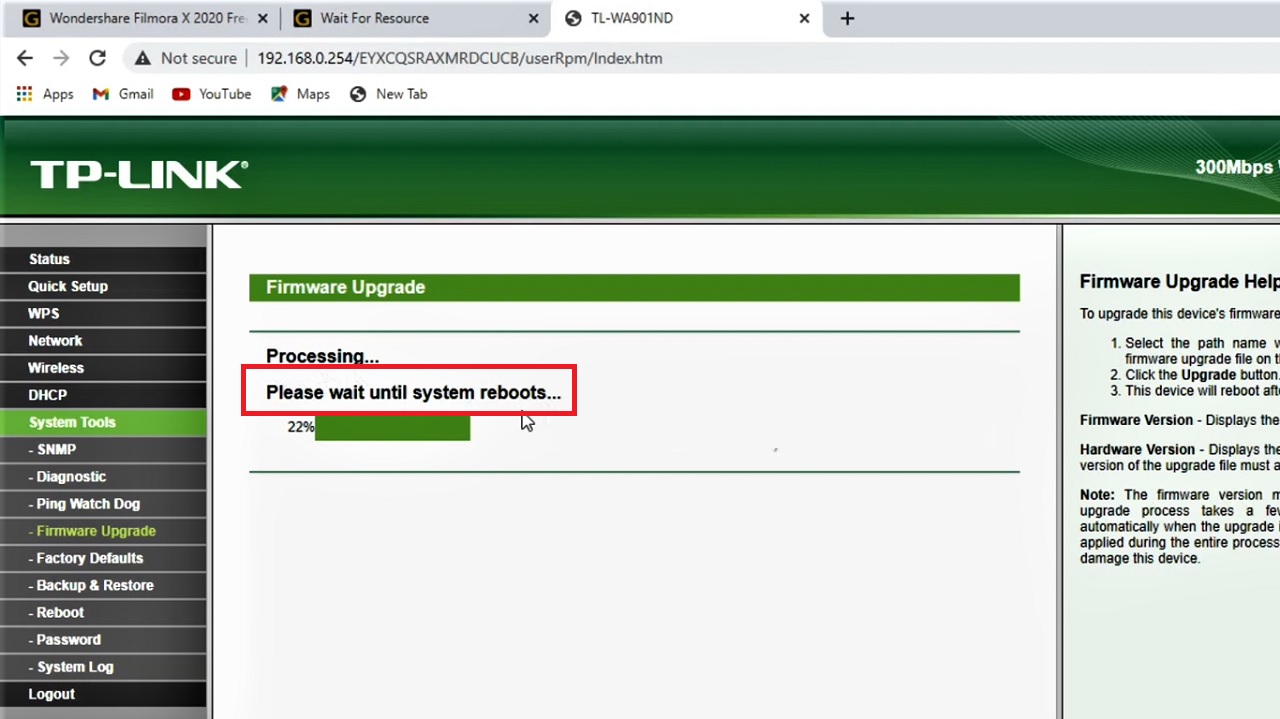
- Then select the Basic Settings option.
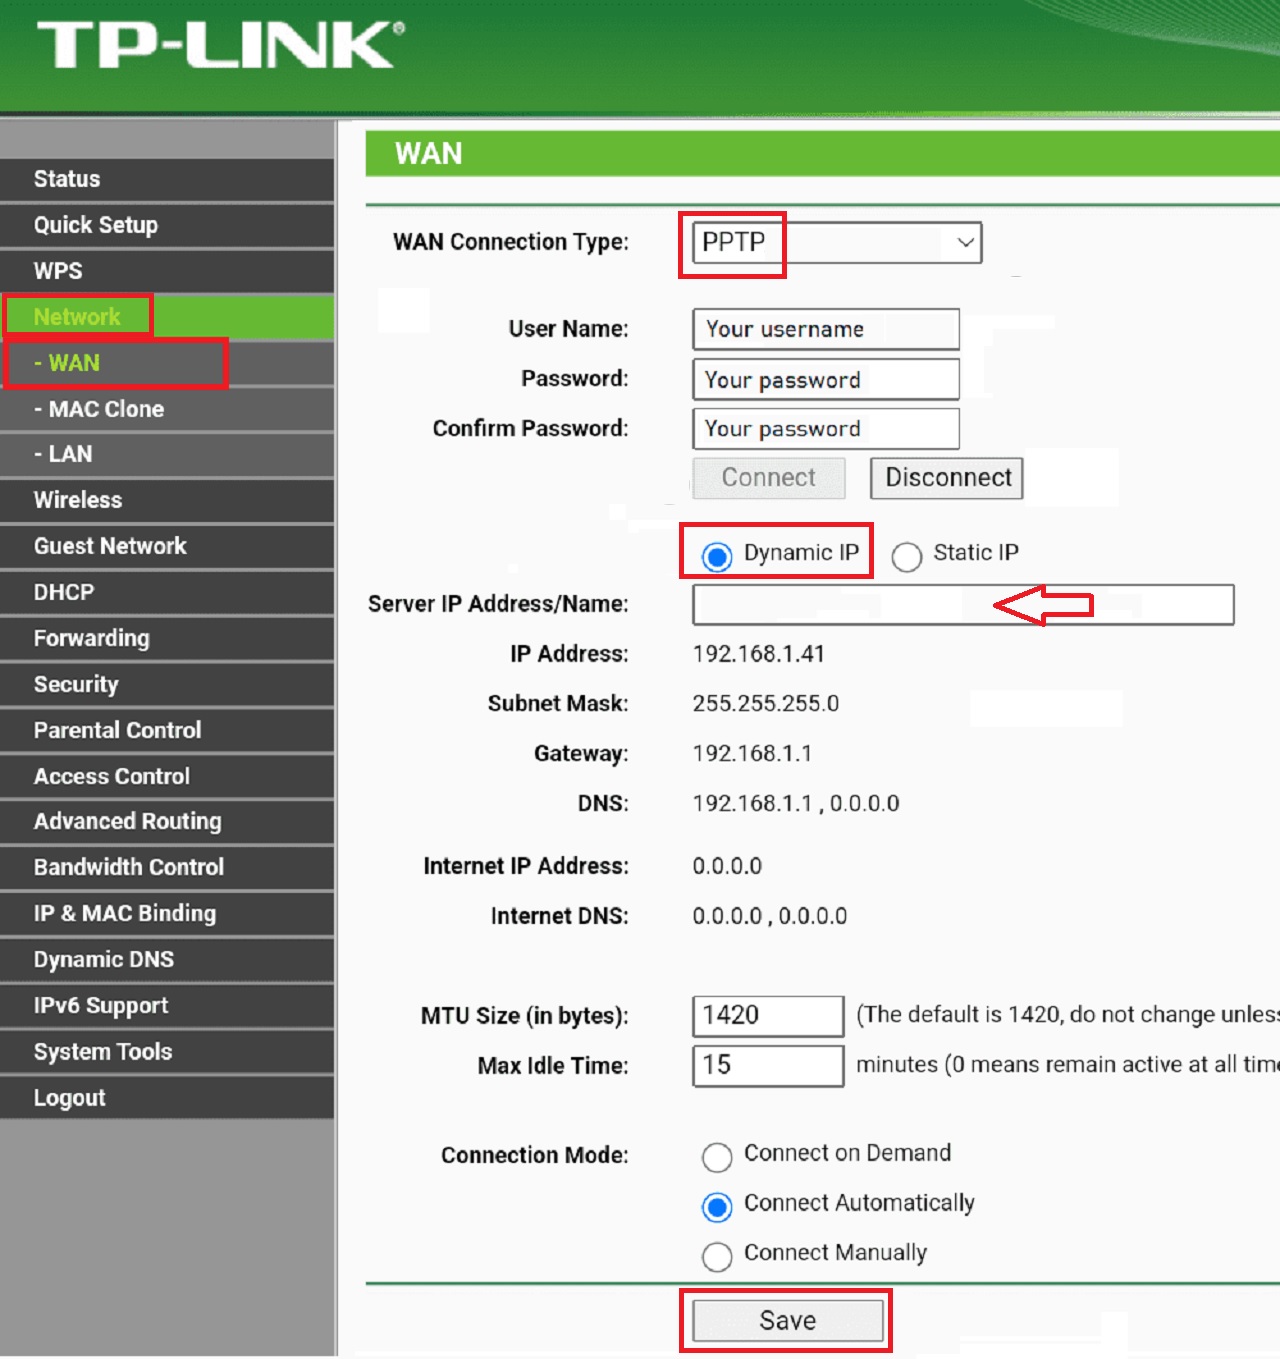
- Click on Network.
- Then, click on Network.
- Now select WAN under it.
- Select the PPTP option by clicking on the small arrow at the right in the box next to WAN Connection Type.
- Select Dynamic IP.
- Type the IP address or hostname of your VPN server along with other details as required.
- Click on the Save option.
Finally, launch the VPN service and connect it. Check whether or not the VPN is working now. Ideally, it should.
Conclusion
So, these are some of the solutions for a blocked VPN by Wi-Fi.
However, if all of the above solutions fail to resolve the issue, you might contact the customer service.
If they cannot solve your issue, then you must choose the right VPN service after thorough research and switch to it.