
You may need to map drives to access from your computer just like a local drive. However, you may also need to remove it if you do not need it.
There are multiple ways to do so. If you are not aware of these ways, fortunately, you are at the right place. This article will guide you through.
In This Article
KEY TAKEAWAYS
- Removing a mapped drive from a computer can be accomplished easily by disconnecting it from the File Explorer, if the option is available.
- Running a delete drive command will also enable you to delete a mapped drive from your computer.
- Mapped drives can also be removed from the registry Editor.
- If you want to remove a mapped drive from the context menu, using the Registry Editor or the Group Policy feature is recommended.
Why Do You Need to Delete Mapped Network Drive?
The most obvious reason to delete a mapped drive from your computer is that you do not need it anymore. Keeping it in such a situation will only create more branches on your network unnecessarily.
Another significant reason to delete mapped network drives is that it makes tracking the link of a particular drive to a folder much more difficult.
How to Delete Mapped Network Drive?
The easiest way to delete a mapped network drive from your PC is to simply disconnect the drive-in question from the File Explorer.
However, this option may not be available in the first place, depending on the settings of your PC. In that case, you can delete it in other ways, such as:
- By using the Registry Editor
- By using the Command Prompt
You can also delete it from the context menu by using the Registry Editor and the Group Policy feature.
The steps to follow for each method are explained hereunder.
Method 1: Disconnect the Drive from the File Explorer
You can select the particular drive you want to delete from your network from the File Explorer and simply disconnect it.
STEPS TO FOLLOW:
- Open Quick Access or This PC from the File Explorer.
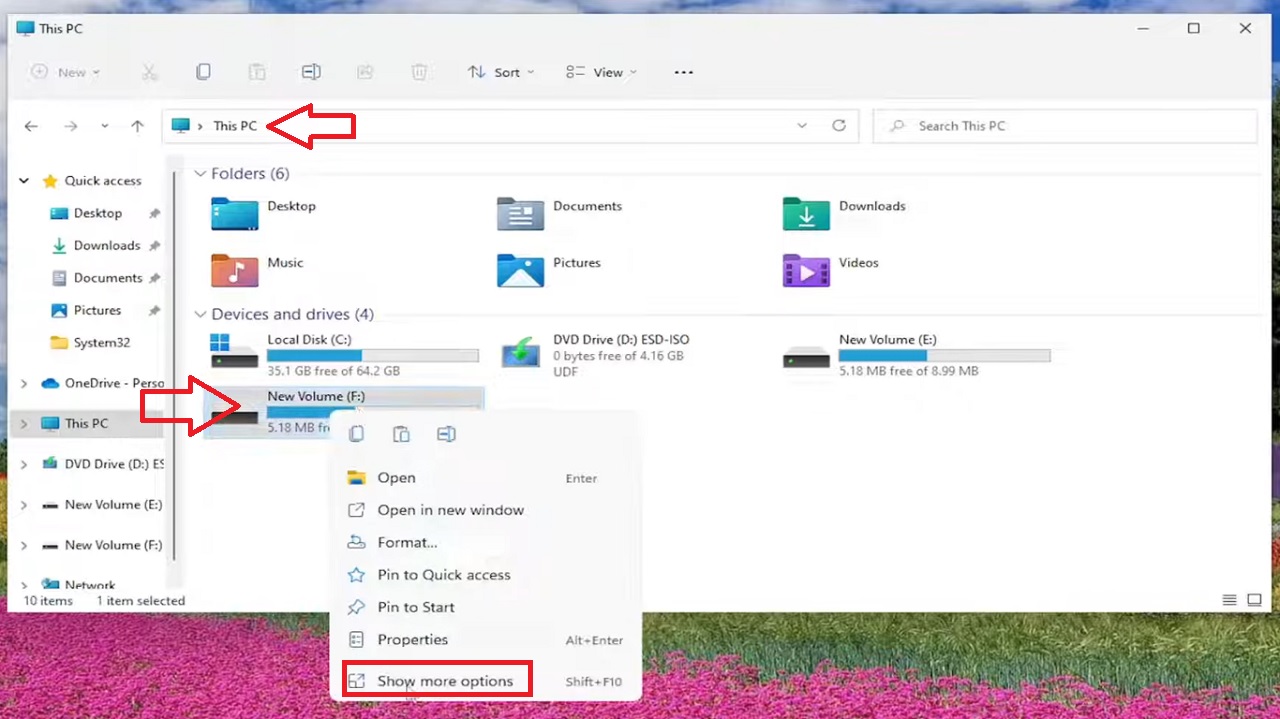
- Right-click on the drive in question. You can do it on the left panel if you are accessing it from Quick access or on the window on the right if you are accessing it from This PC.
- If it is available in the list of options in the following window, click on Disconnect.
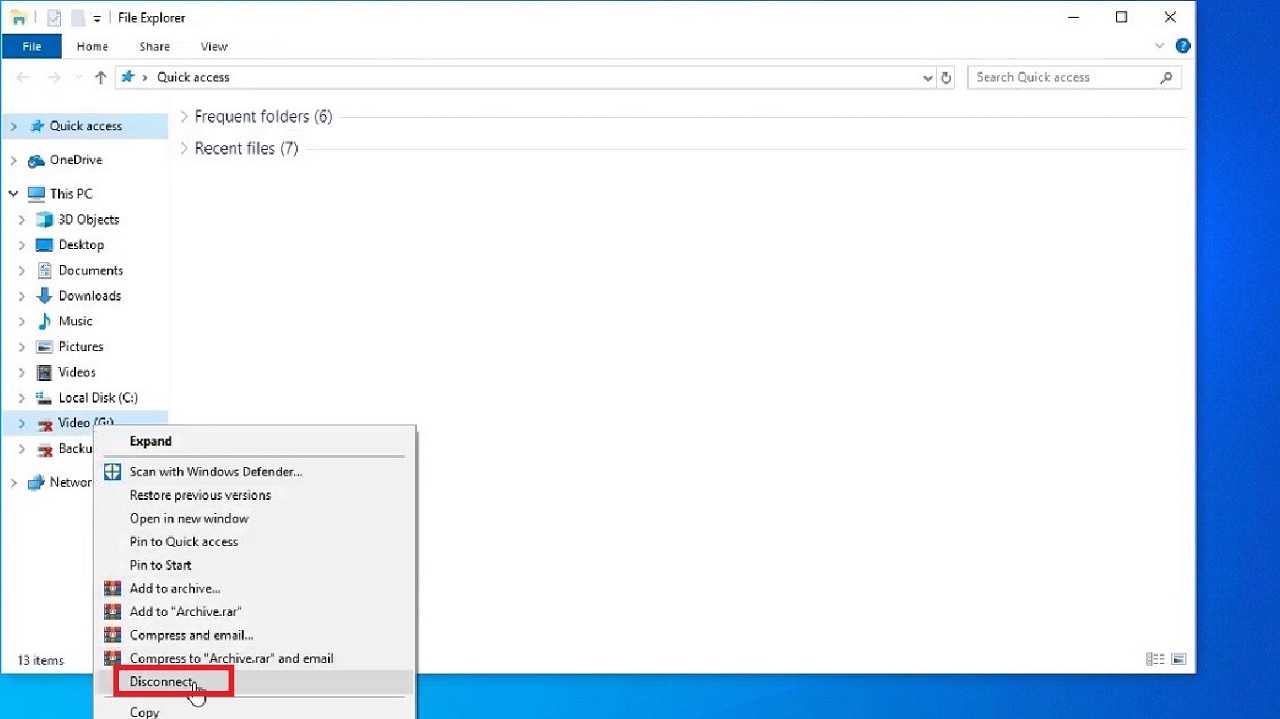
- Sometimes, you may need to select Show more options before you find the Disconnect option as shown below if you are accessing the drive from This PC.
When you disconnect, the mapped drive will be removed from the window.
Method 2: From the Command Prompt
Assuming that you know the particular path of the drive you want to remove, you can run a command in the Command Prompt to remove it.
STEPS TO FOLLOW:
- Open the Command Prompt by typing it in the quick search box next to the Start menu and hitting Enter. (Make sure to select Run as administrator before hitting Enter.)
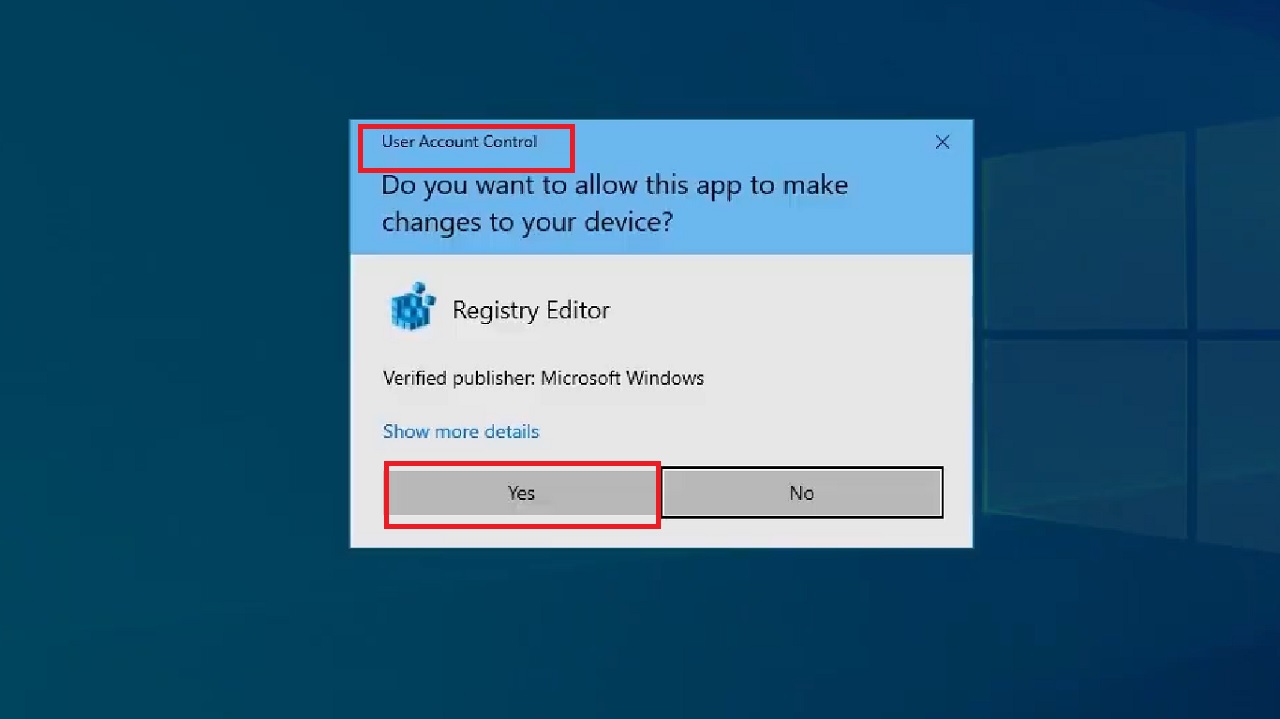
- Click on the Yes button on the User Account Control window if it appears.
- In the Command Prompt window, type in the command net use Z: /delete and hit Enter.
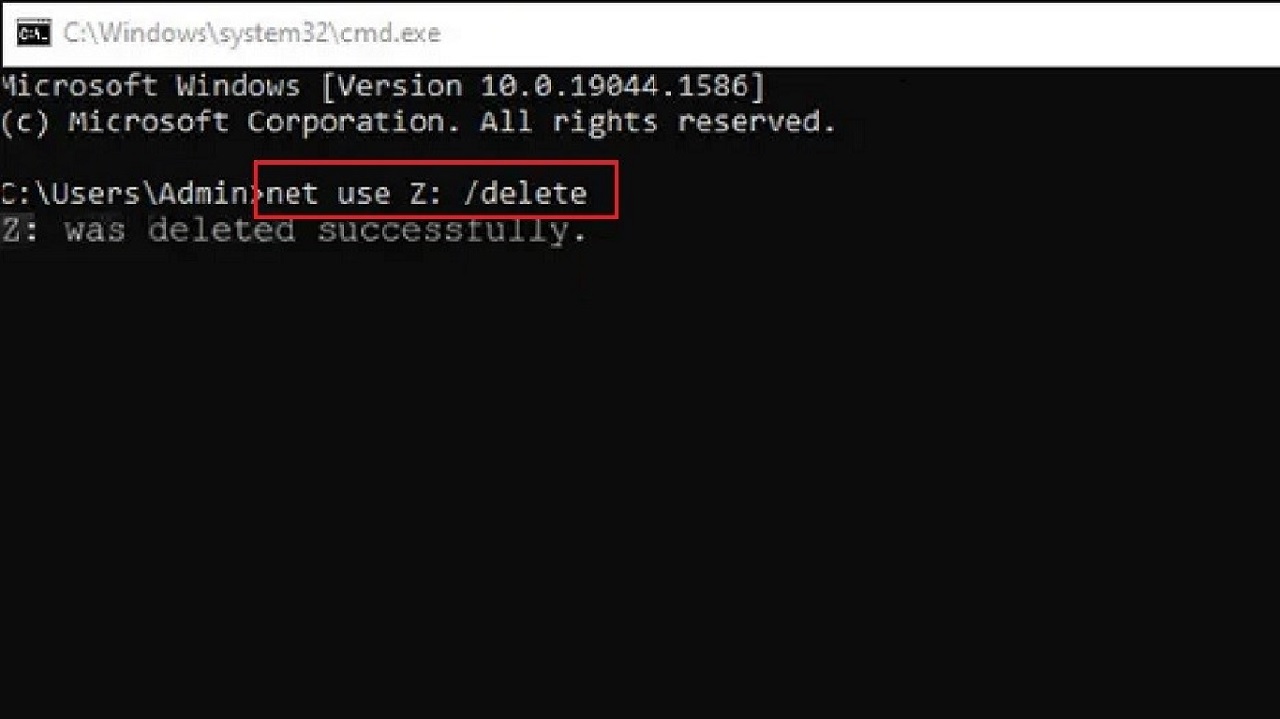
Note: The letter Z in the above command is just for example. You must replace it with the specific letter of the drive you want to remove.
If you have more than one mapped drive and want to delete them all at once, run the command net use*/delete and hit Enter.
You may be asked whether or not you wish to continue. Type Y and hit Enter.
If you do not want any confirmation and want to delete multiple drives, use the command net use*/delete/y and hit Enter.
It will delete all the mapped drives on your computer.
Method 3: From Registry Editor
You may also use the Registry Editor to remove the mapped drive from your computer.
STEPS TO FOLLOW:
- Go to the search box > type regedit > hit Enter.
- Click on the Yes button on the User Account Control window.
Once the Registry Editor window opens, expand the following folders in the exact same order:
- HKEY_CURRENT_USER
- Software
- Microsoft
- Windows
- CurrentVersion
- Explorer
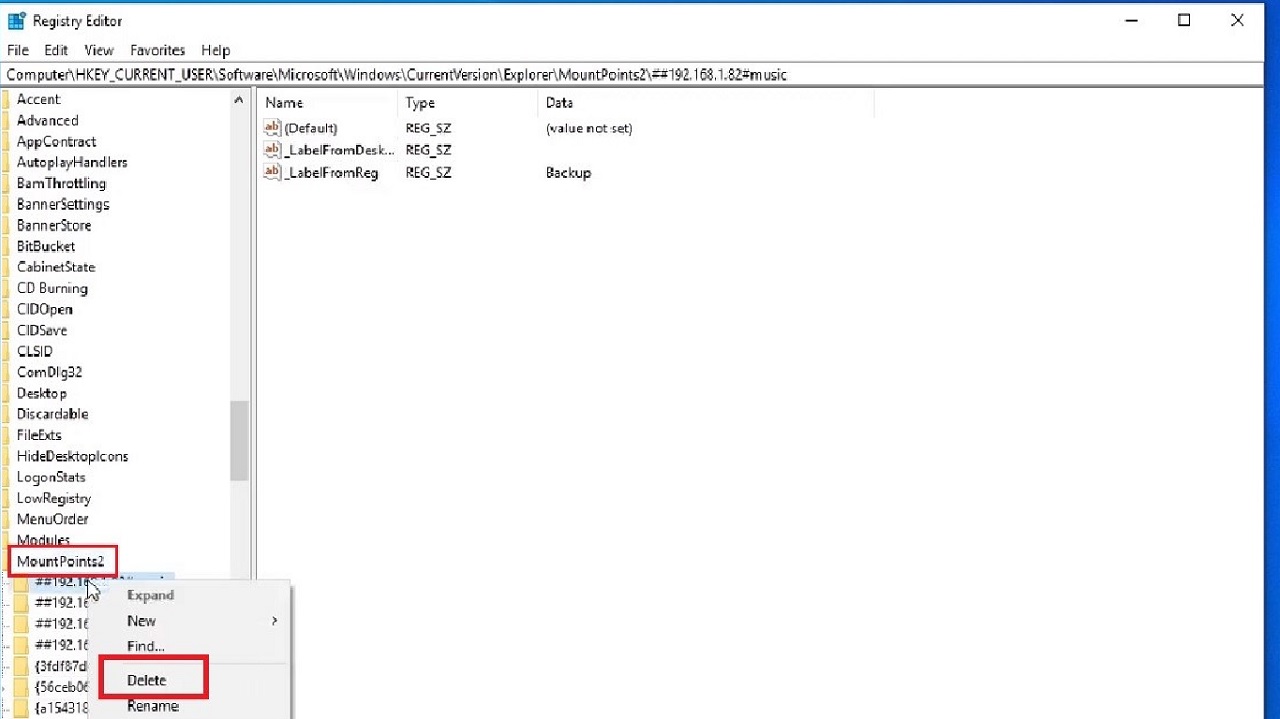
- MountPoints2
You will see different keys of drives here. Select and right-click on the drive you want to delete.
- Press Delete from the drop-down options.
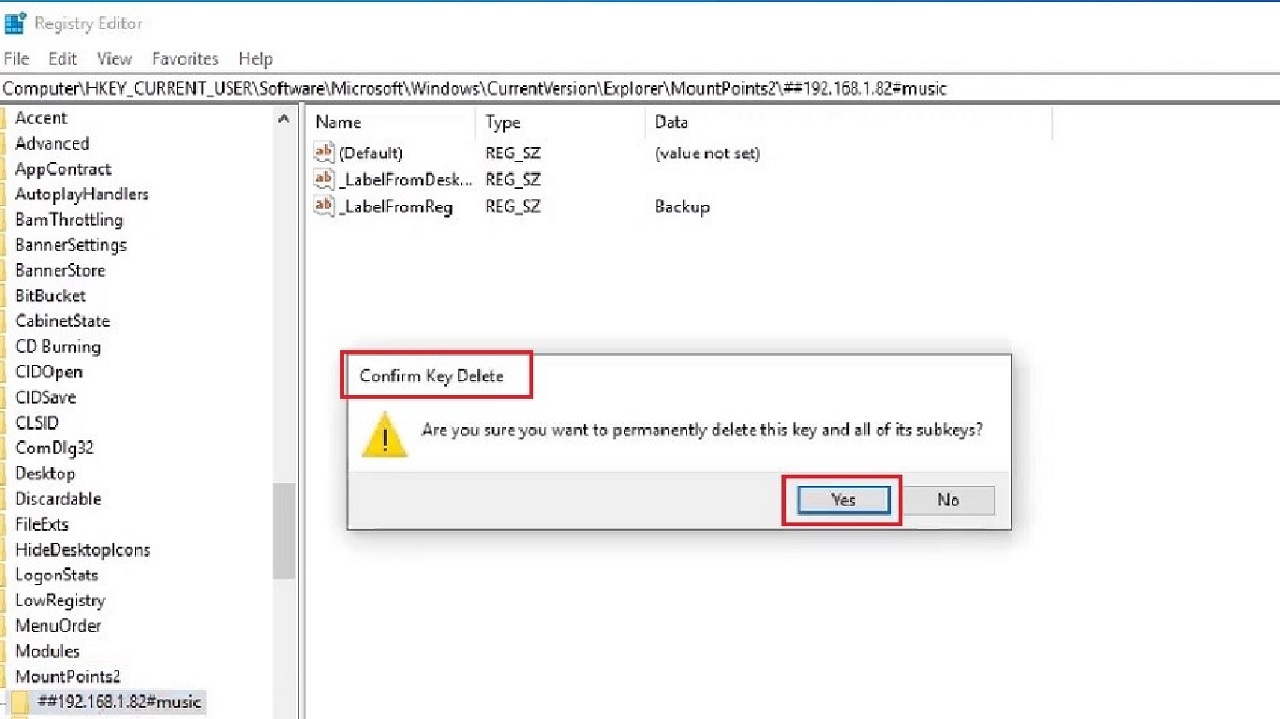
- Click on the Yes button in the Confirm Key Delete window.
If you want to delete more drives, do the same with them.
Then, once again, navigate to the following fodders in the registry:
- HKEY_CURRENT_USER
- Network
Here you will find the registry keys of all the network drives. Select the one you want to delete following the same process as above.
Now, close the Registry editor, restart your PC, and open the File Explorer. The network drive will not be visible there anymore.
If you want to remove the mapped drive from the context menu by using the Registry Editor, you should follow these particular steps:
Navigate to the following path:
- HKEY_CURRENT_USER
- Software
- Microsoft
- Windows
- CurrentVersion
- Policies
- Explorer
When you reach the Explorer key, go to the right side and right-click on the blank area.
- Click on New.
- Select DWORD (32-bit) Value from the drop-down options.
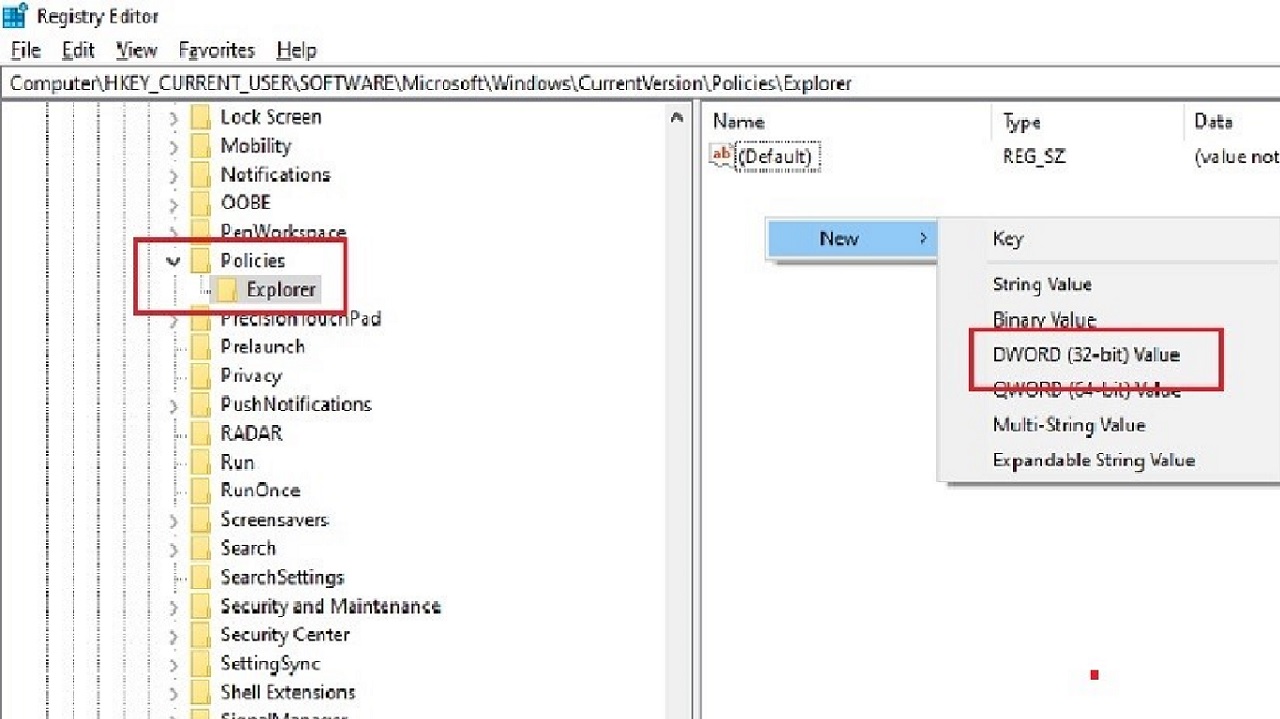
- Give the new key a name NoNetConnectDisconnect.
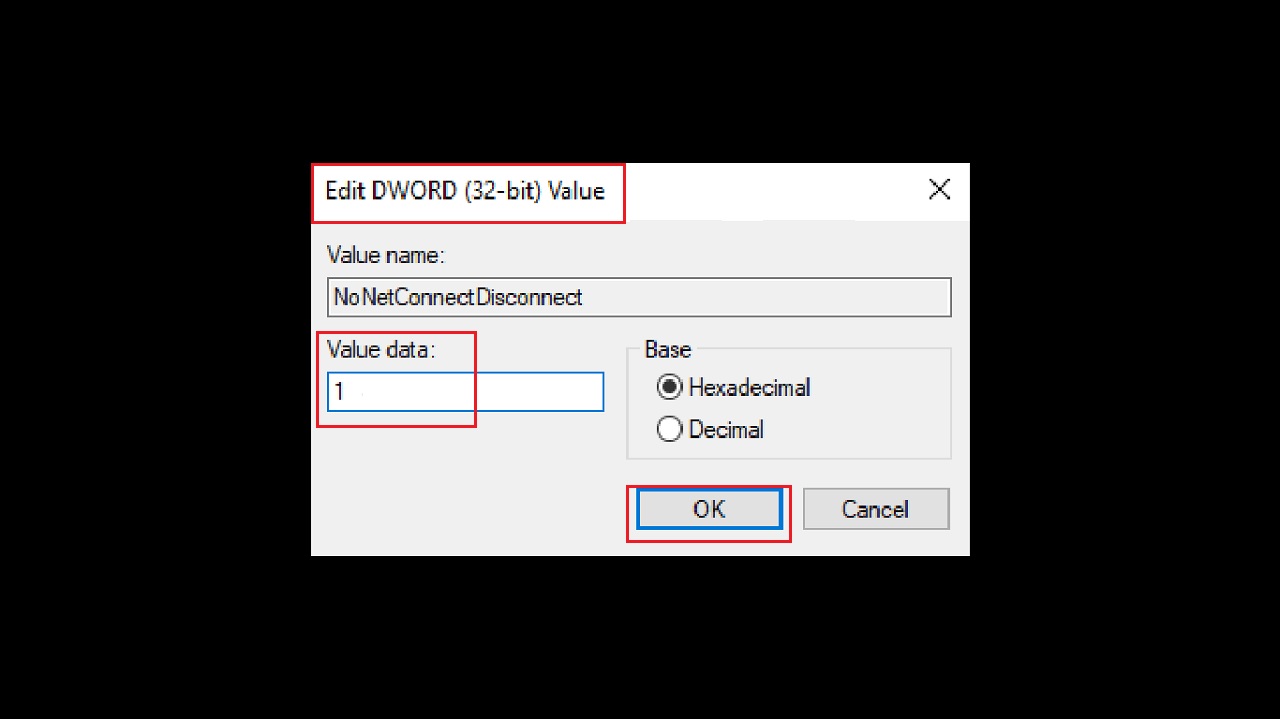
- Double-click on it.
- In the Edit DWORD (32-bit) Value window, change the Value data to 1 in the relevant field.
- Click on the OK button to save the changes and exit.
Restart your computer and this will delete the mapped network drive from the context menu on your computer.
Method 4: By Using the Group Policy Feature
This is another way to delete the mapped network drive from the computer by using the Group Policy Feature.
STEPS TO FOLLOW:
- Press the Windows and R keys together on your keyboard, type gpedit.msc in the run prompt and hit Enter.
You can also do the same in the search box next to the Start menu.
- When the window opens, click on the small downward arrow to expand User Configuration.
- Do the same for the Administrative Templates under it.
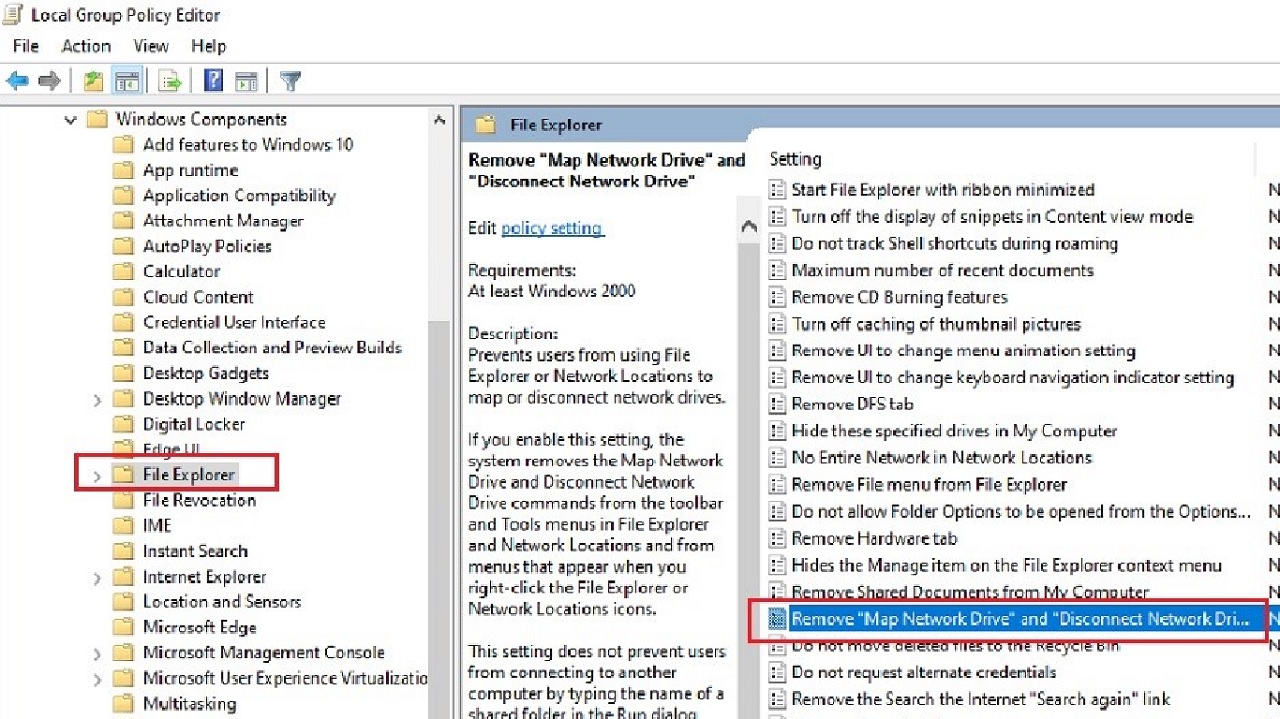
- Select Windows Components and expand it in the same way.
- Select File Explorer and double-click on it to open it.
- Look at the right side, select the policy called Remove Map Network Drive and Disconnect Network Drive.
- Double-click on it.
- Click on the small circle button in the following window next to Enabled.
- Click on the Apply button and then on the OK button to save the changes.
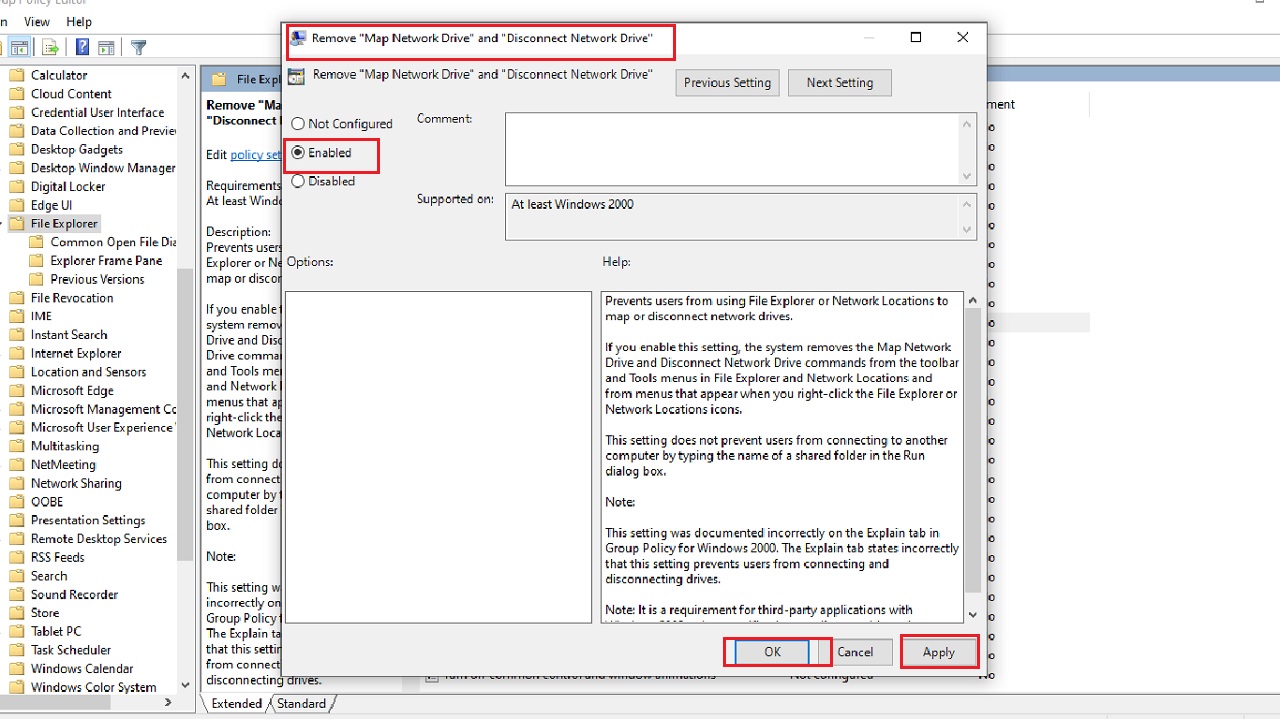
This will delete the mapped network drive from your computer.
Conclusion
So that is all you have to do to delete a mapped drive from your computer.
Try any one of the above methods and ensure that your network is not branched unnecessarily.