
You may experience various types of router issues while using it and one of the most common problems is the inability to access the IP address.
While restarting the computer might resolve the issue in most cases, it may not always be effective.
In that case, you might try a few other solutions that might help in resolving the issue.
If you are unfamiliar with the solutions, you will find them all in this article. Keep reading.
In This Article
KEY TAKEAWAYS
- A simple solution to the issue of being unable to connect to the router IP address is to restart the router or reset it to factory settings.
- Running the flush DNS command in the Command Prompt and renew command may sometimes allow you to connect to the router IP address.
- Trying a completely different browser to access the router settings might also resolve the issue.
- Checking and ensuring that the TCP/IPv4 protocol can detect the IP address and the DNS server address automatically may also fix the error.
- Make some changes in the Internet Options and use some advanced connection settings in order to get access to your router IP address.
Why Can’t You Connect to Router IP?
There can be several reasons for you being unable to connect to your router IP but the most common reason is that the connection you are using to access it may be unstable or insecure, such as the Wi-Fi in a public place or a hotel.
Another common reason for users not being able to access the router IP address is that they might be typing the address in the search box instead of the address bar of the browser, though this is a rare case.
There are a few other probable causes for this issue to occur, such as:
- Power surge
- Interference from other wireless routers in the vicinity
- Wrong configuration
- Bad cable if you are using Ethernet connection
- Entering incorrect IP address
- Hardware issue with the wireless router
- Firewall blocking
Irrespective of the causes of this issue, here are some solutions that might resolve the issue and let you access your router IP address again.
Ways to Fix Cannot Connect to Router IP Error
You may try making some changes in the Internet Options to connect to your router IP address along with making use for advanced connectivity options.
You may also disable Windows Defender Firewall to resolve the issue, but remember, this is not a permanent solution due to the potential security threats.
However, to do this, you will have to Go to Settings > Privacy & security > Windows Security > Firewall & network protection > Public network and toggle the sliding switch to Off.
Some other simple fixes to try before moving on to the relatively complex ones include:
- Turning off and restarting the router after some time
- Resetting the router by pressing the small reset button at the back for about 10 seconds
- Trying a different browser
- Checking and changing the TCP/IPv4 protocol settings if necessary
- Running a few specific commands in the Command Prompt
- Updating the router firmware
- Disabling any kind of web proxy for browsing
- Using a different system or Ethernet if you are using Wi-Fi or vice versa
Now, here are the detailed explanations of the relatively complex solutions.
Method 1: Run a Command in the Command Prompt
One of the easiest ways to fix the issue of being unable to connect to your router IP address is to run a few commands in the Command Prompt as shown below.
STEPS TO FOLLOW:
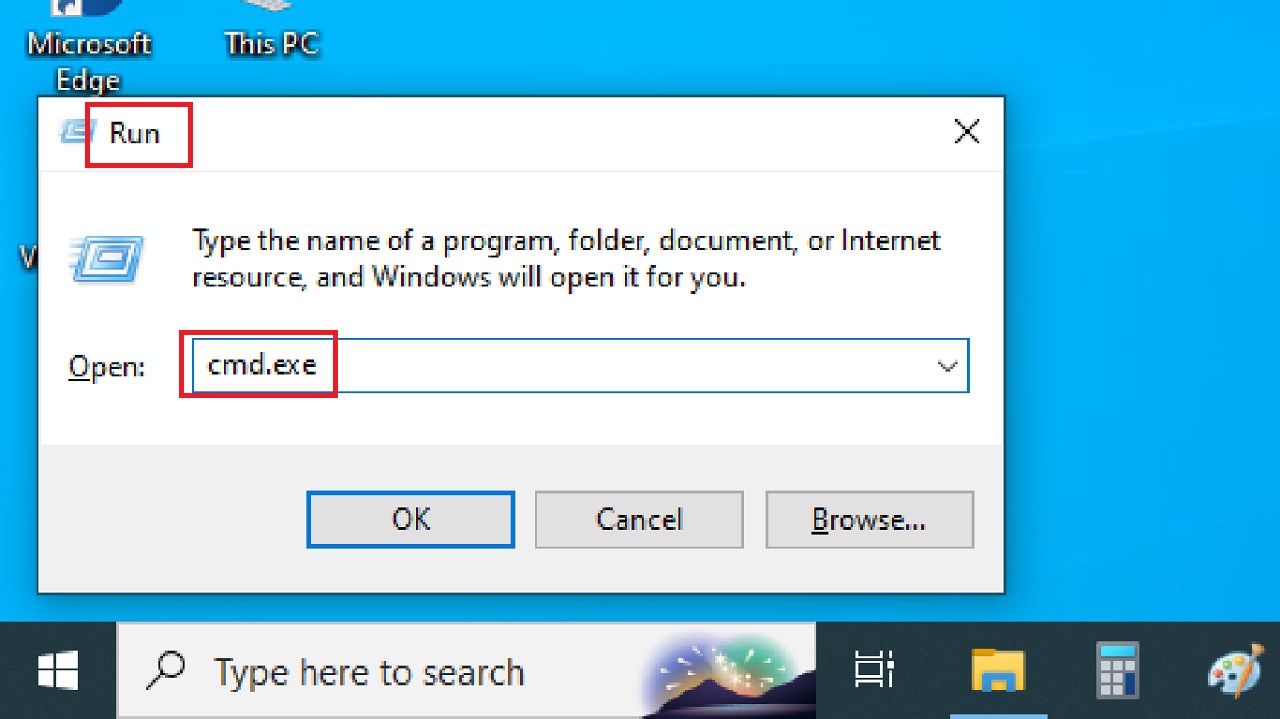
- Press the Windows and R keys on your keyboard together to open the Run dialog box.
- Type in cmd.exe in the box.
- Press CTRL + SHIFT + ENTER keys on your keyboard together to open the elevated Command Prompt window.
- Click on the Yes button in the User Account Control window to access the Command Prompt.
- Type ipconfig /flushdns and press the Enter key on your keyboard.
- When you see that the system has flushed the DNS Resolver Cache successfully, type in the next command ipconfig /renew and hit Enter.
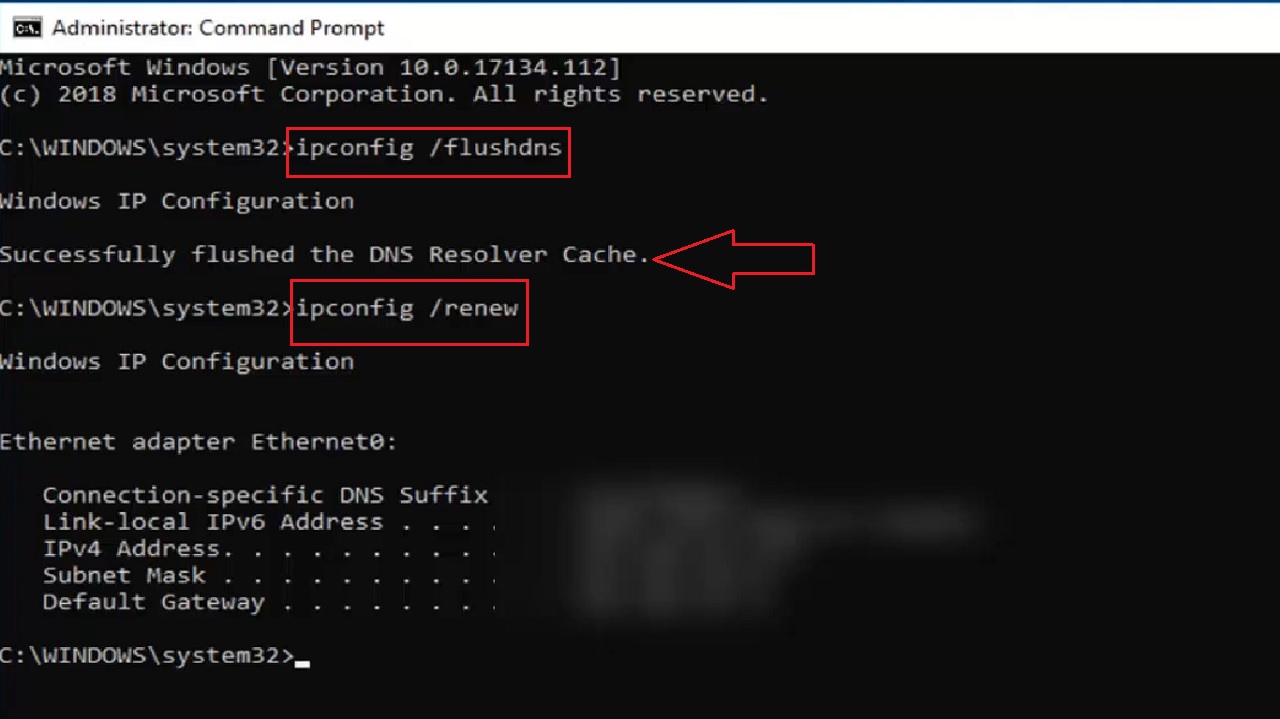
- Restart the computer system.
Often, doing this much will resolve the issue. However, if it does not then proceed with the next method.
Method 2: Connect from One Browser or the Other
Type the IP address of your router in your browser to connect to it. If that does not allow access, try a different browser.
STEPS TO FOLLOW:
- Assuming that you do not know the IP address of your router, check the Default Gateway address. Repeat the process of the above method and type ipconfig and press the Enter key on your keyboard.
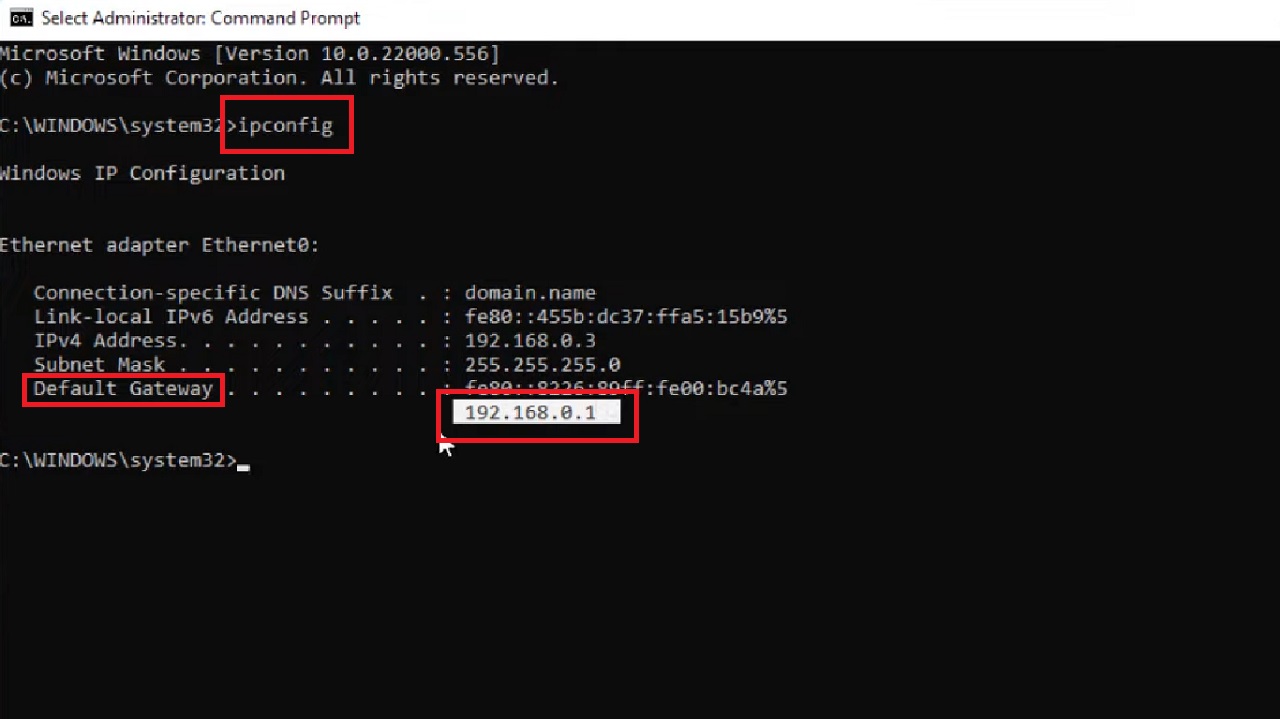
- Note the Default Gateway, which is the IP address, marked by a red box in the image above.
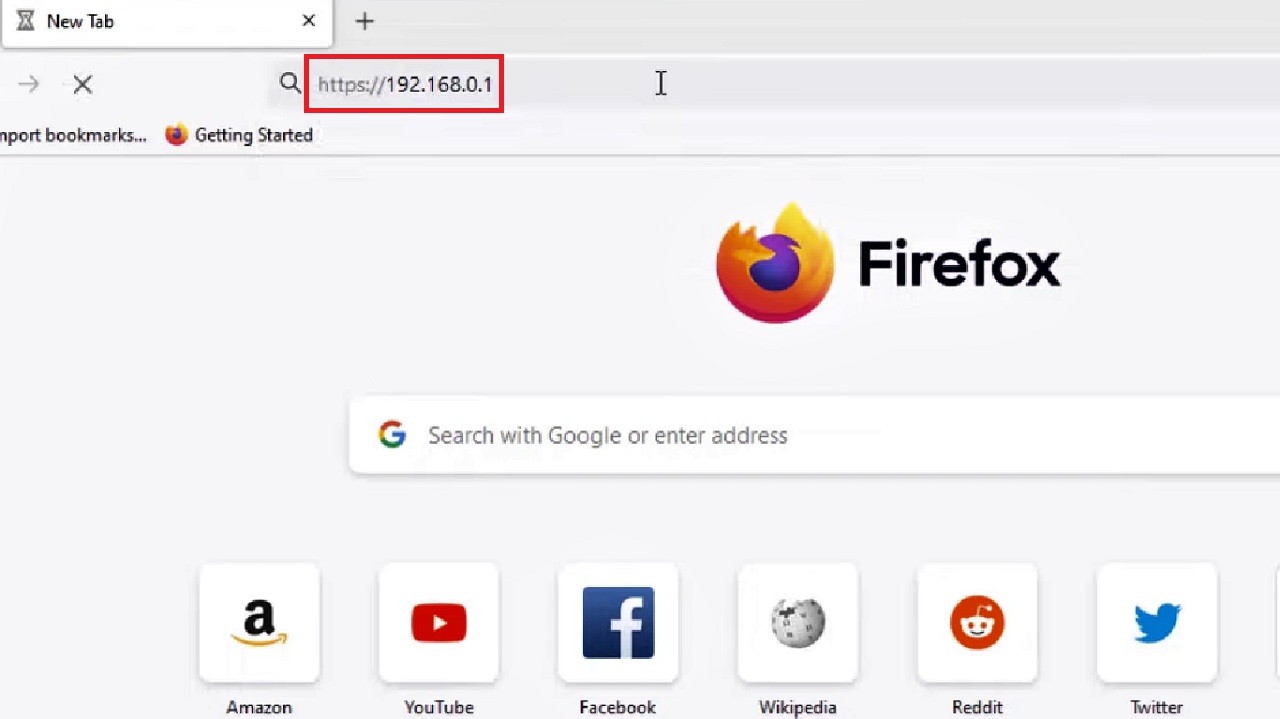
- Open Firefox browser or any one of your choice.
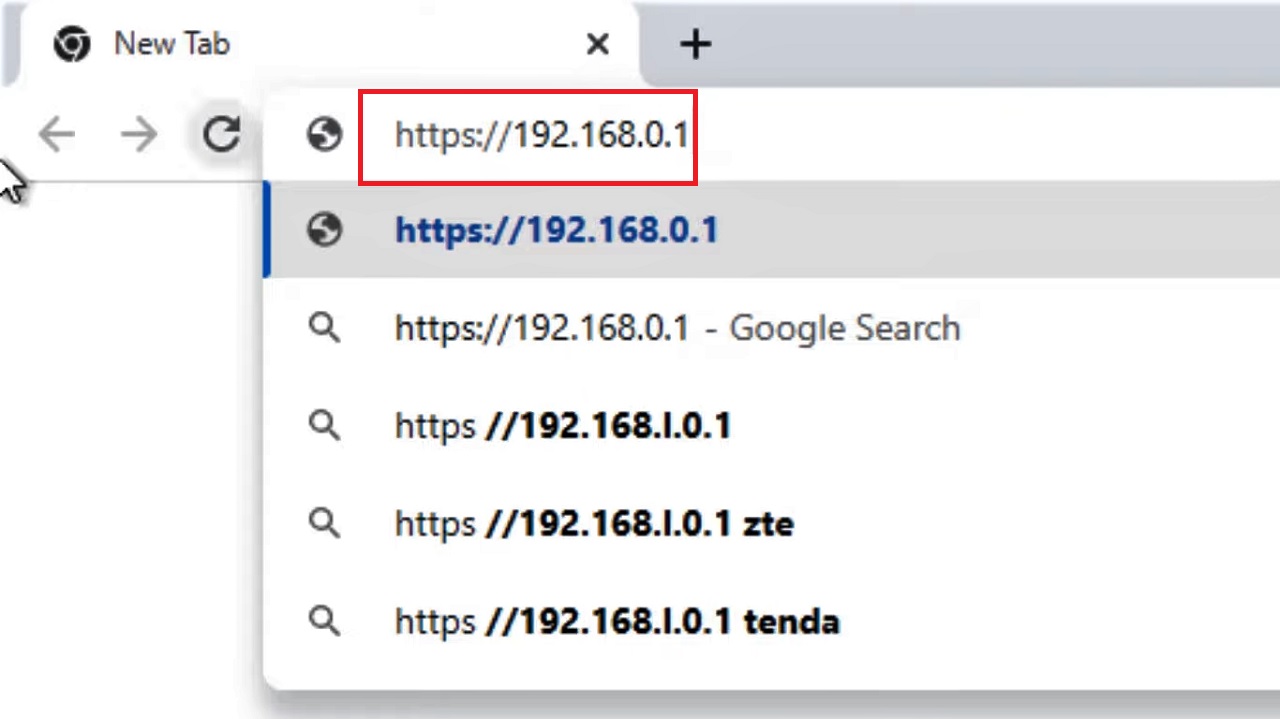
- Type in the same Default Gateway address, 192.168.0.1 in this case, in the search bar and hit Enter.
Important note: Do not forget to type https:// before the address.
However, you may get an ‘Unable to connect’ message like below:
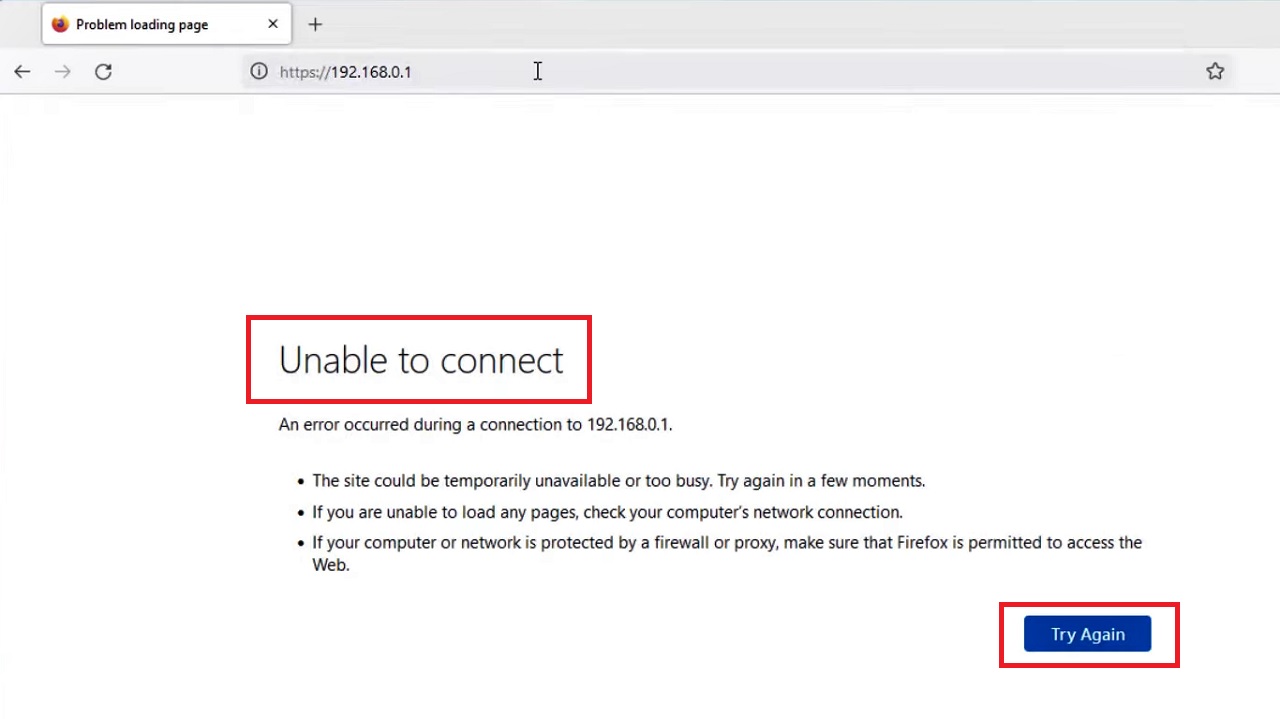
In that case you can use a different browser, type the same IP address and try to connect, as shown below:
You will be able to connect to your router IP now.
If that does not work, move on to the next method.
Method 3: Make Changes in the Internet Protocol in the Control Panel
You can also use the Control Panel of your PC to make changes in the internet protocol in order to rectify the issue of cannot connect to the router IP address.
STEPS TO FOLLOW:
- Open the Run dialog box again as before.
- Type ncpa.cpl in the box and press the OK button or hit the Enter key on your keyboard.
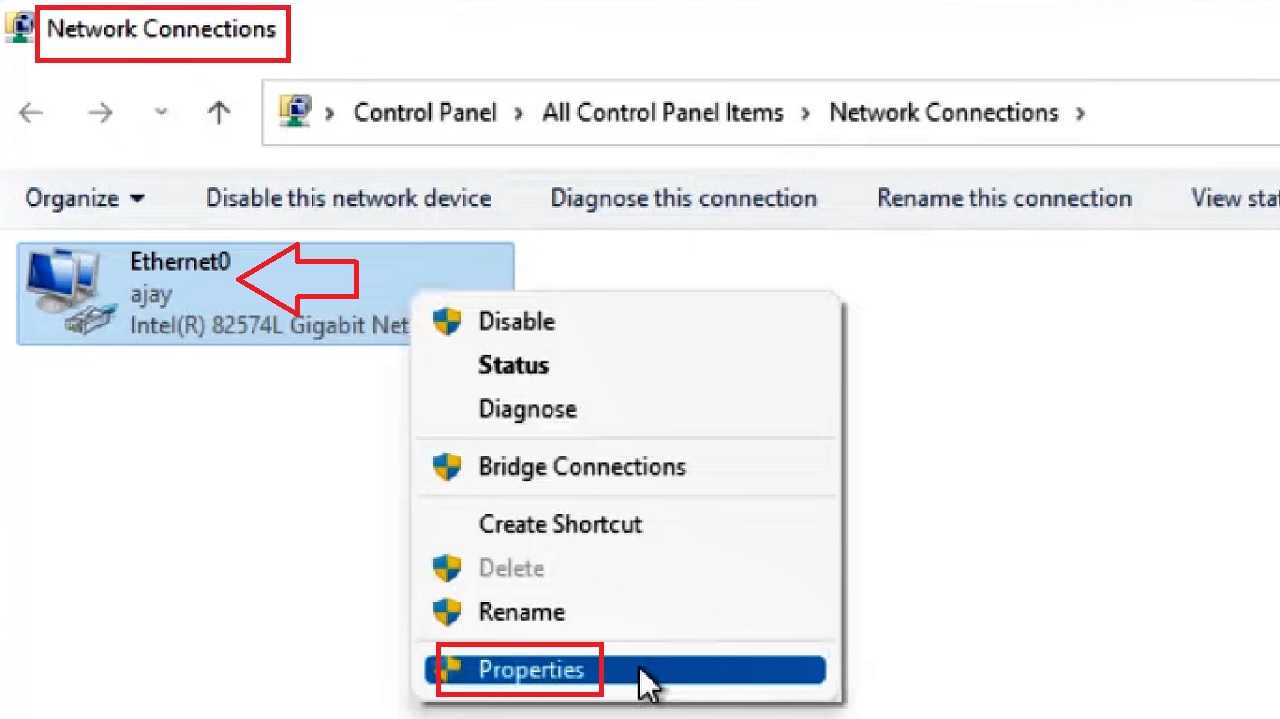
- This will open the Network Connections window. Right-click on your network adapter in this window and select the Properties option from the drop-down context menu.
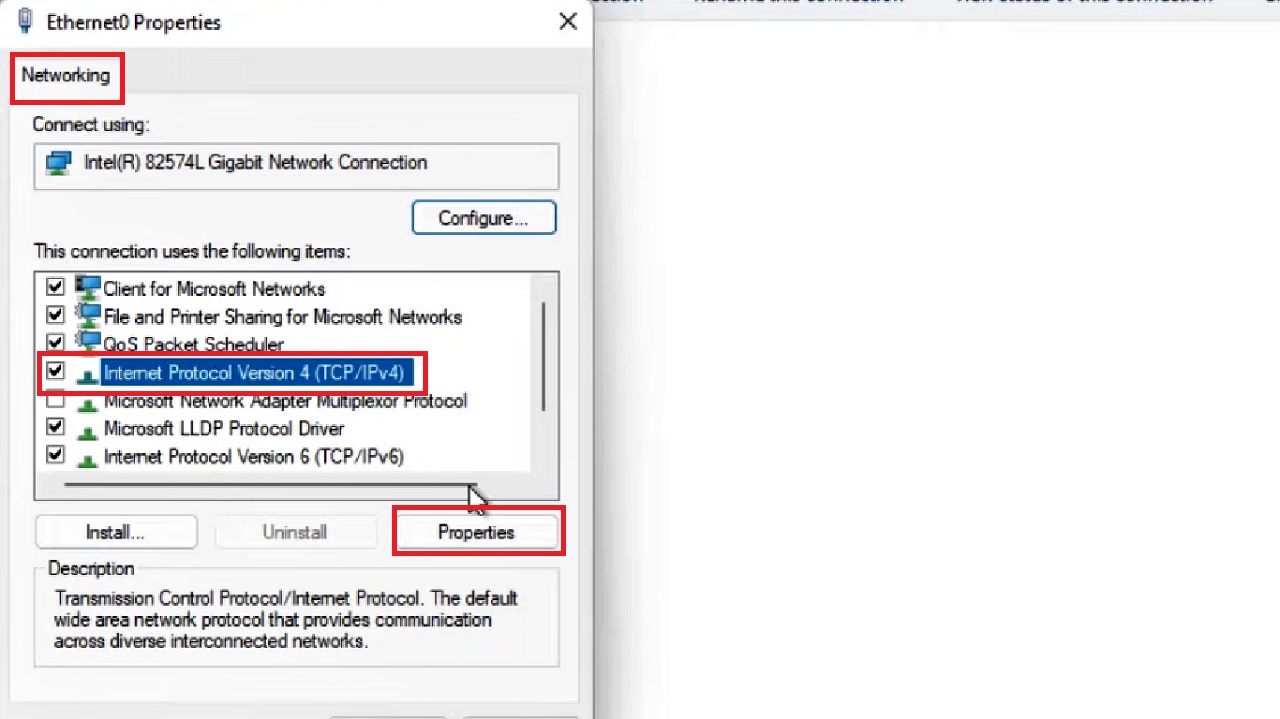
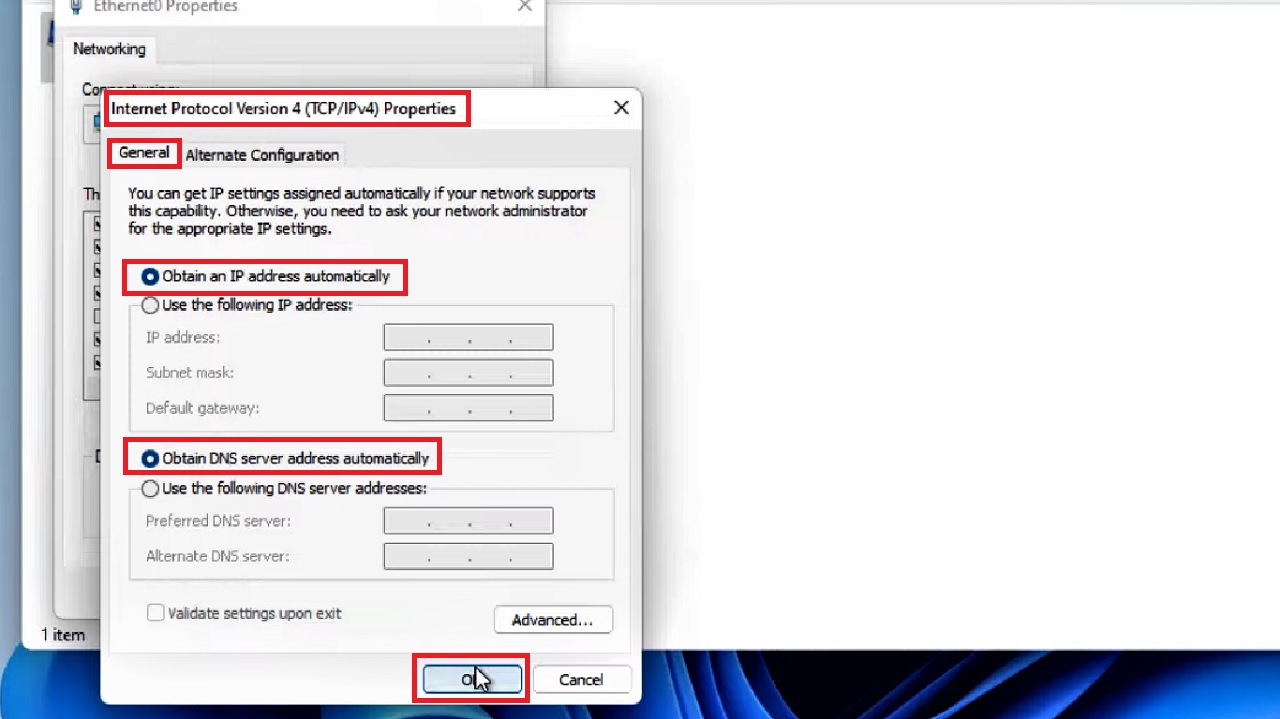
- Select Internet Protocol Version 4 (TCP/IPv4) in the following window under the Networking tab.
- Click on the Properties button below.
- Make sure that the small circular buttons next to ‘Obtain an IP address automatically’ and ‘Obtain DNS server address automatically’ are both checked in the following Internet Protocol Version 4 (TCP/IPv4) Properties window.
- Click on the OK button below to close the window.
Close all windows and now check whether or not you can access your router IP address.
Method 4: Make Changes in the Internet Options or Internet Properties
There are a few specific changes that you can make in the Internet options to resolve the issue of being unable to connect to the router IP address. (The IP address 192.168.1.1 is used in this method for demonstration).
Note: Depending on the configuration and where you access it, either the Internet Options or Internet Properties window may open up. However, the process to be followed are the same.
STEPS TO FOLLOW:
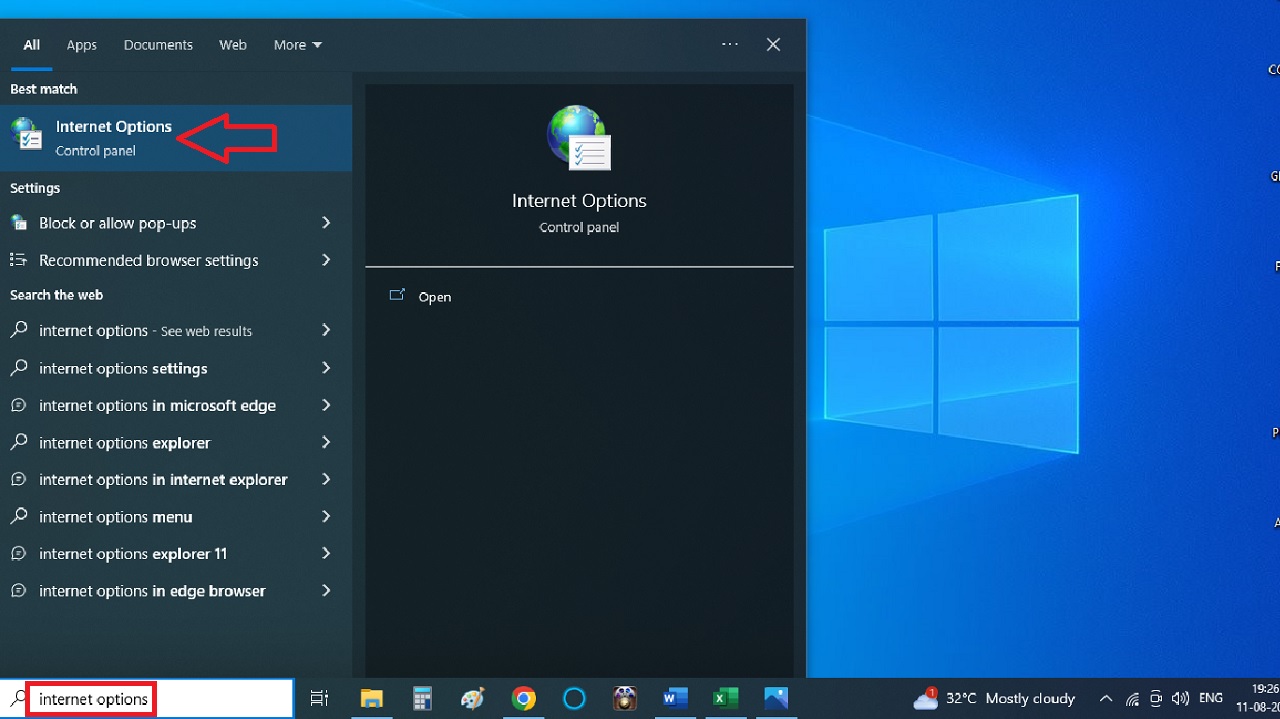
- Go to the search box next to the Start Menu > Type internet options > Hit Enter.
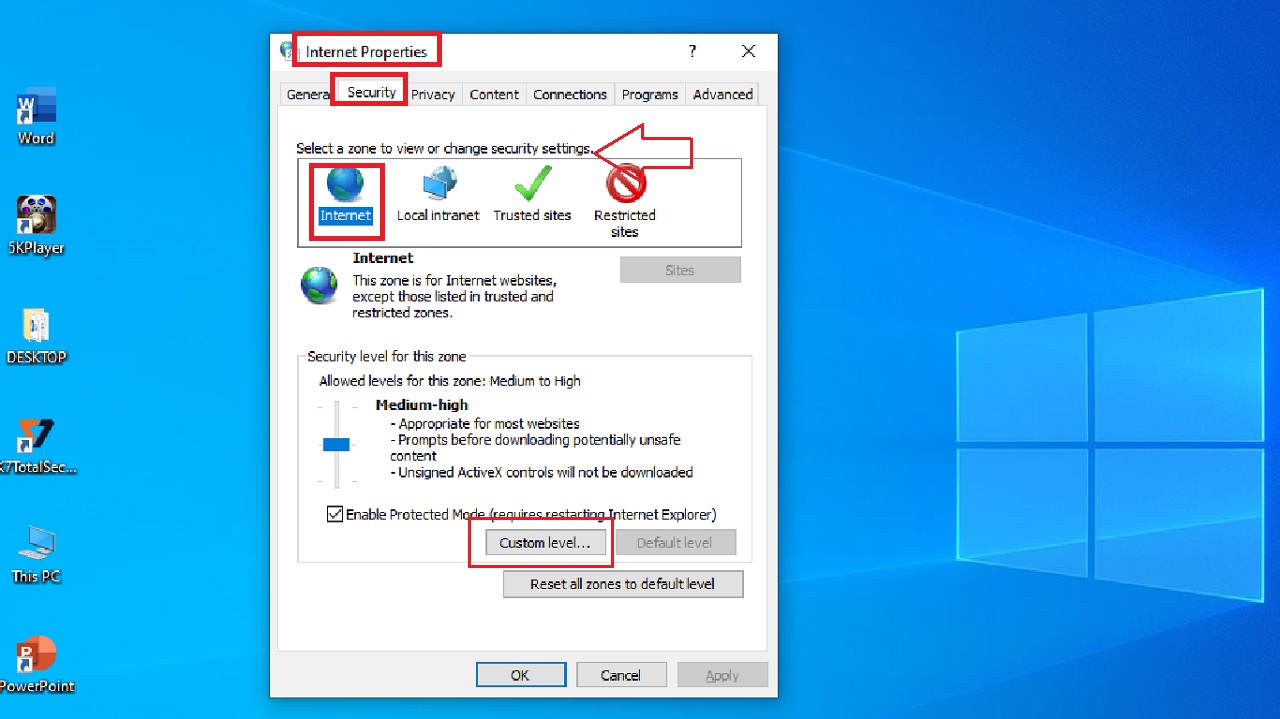
- Go to the Security tab on the Internet Properties window.
- Select the Internet icon from the list in the box labeled ‘Select a zone to view or change security settings.’
- Click on the Custom Level button below.
You can also access it directly by clicking on the Change settings window, if there is any, in the ‘Can’t connect securely to this page’ error message.
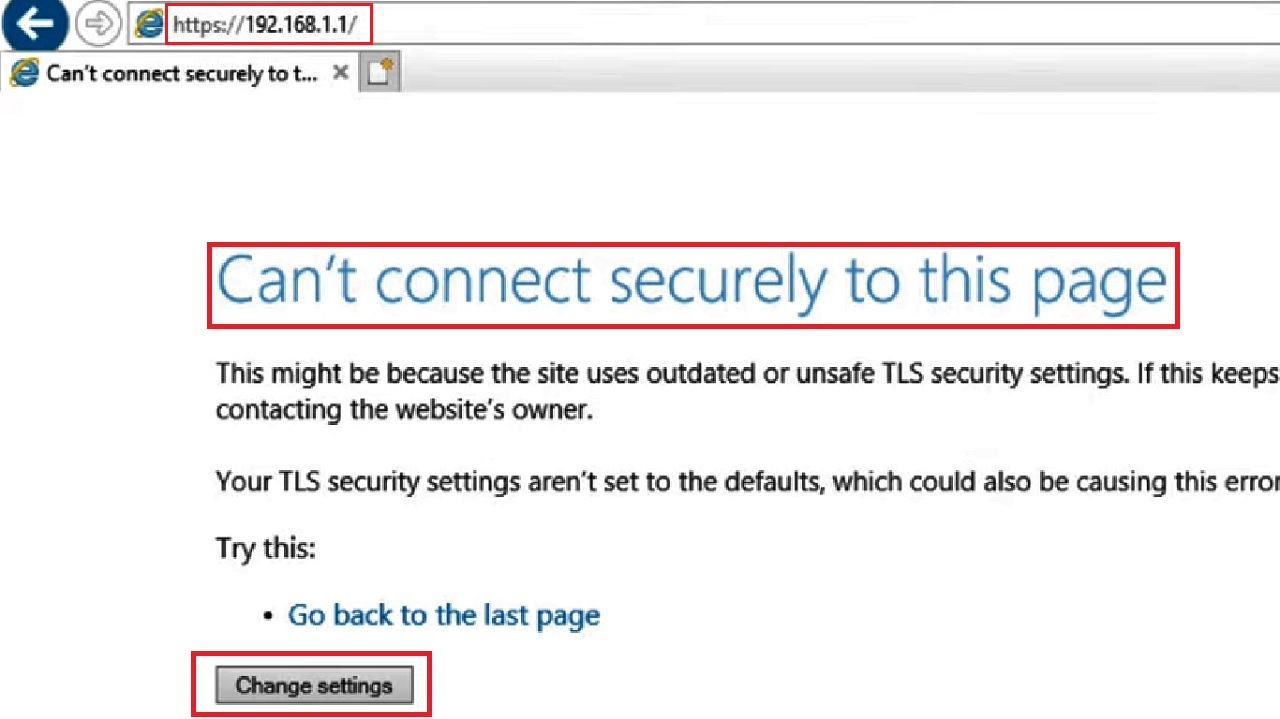
In that case, the Internet Options window might open. Follow the same process as above.
The next steps to follow are the same irrespective of the name of the window.
- In the following Security Settings – Internet Zone window, scroll down to find Display mixed content option in the list in the box under Settings.
- Check the small circular button next to Enable.
- Click on the OK button below.
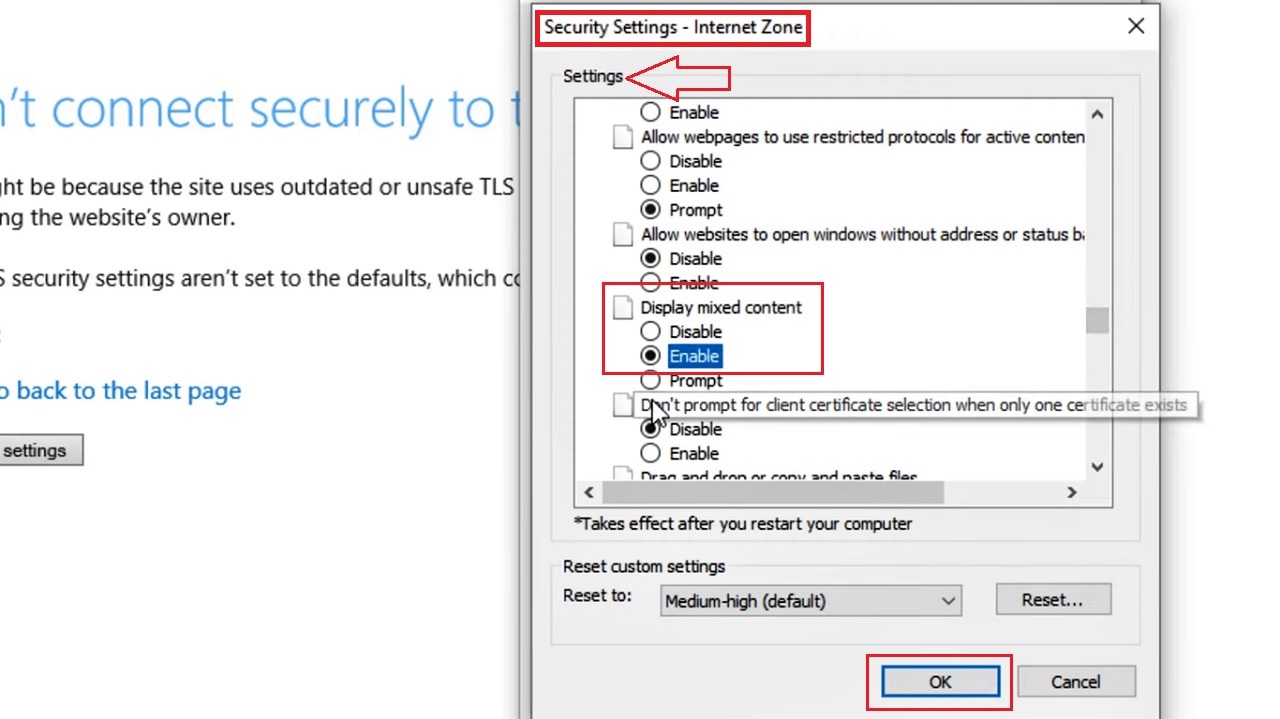
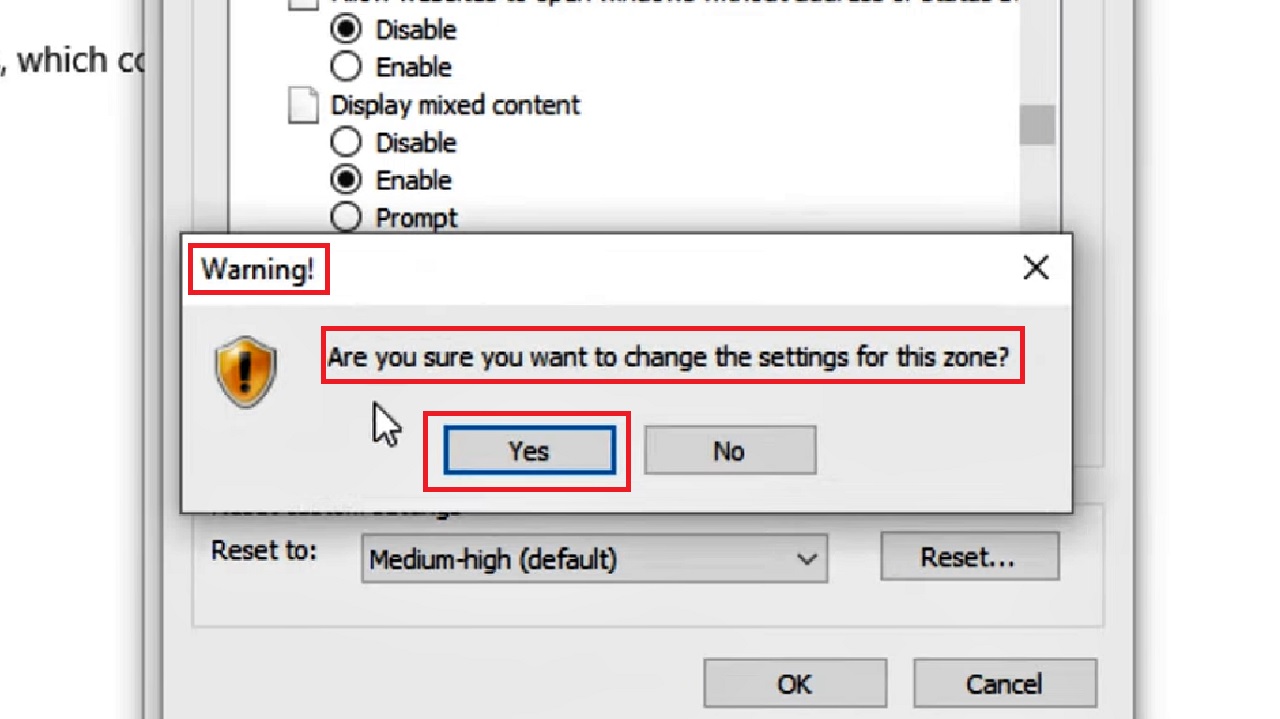
- Then click on the Yes button when you see the warning window asking ‘Are you sure you want to change the settings for this zone?’
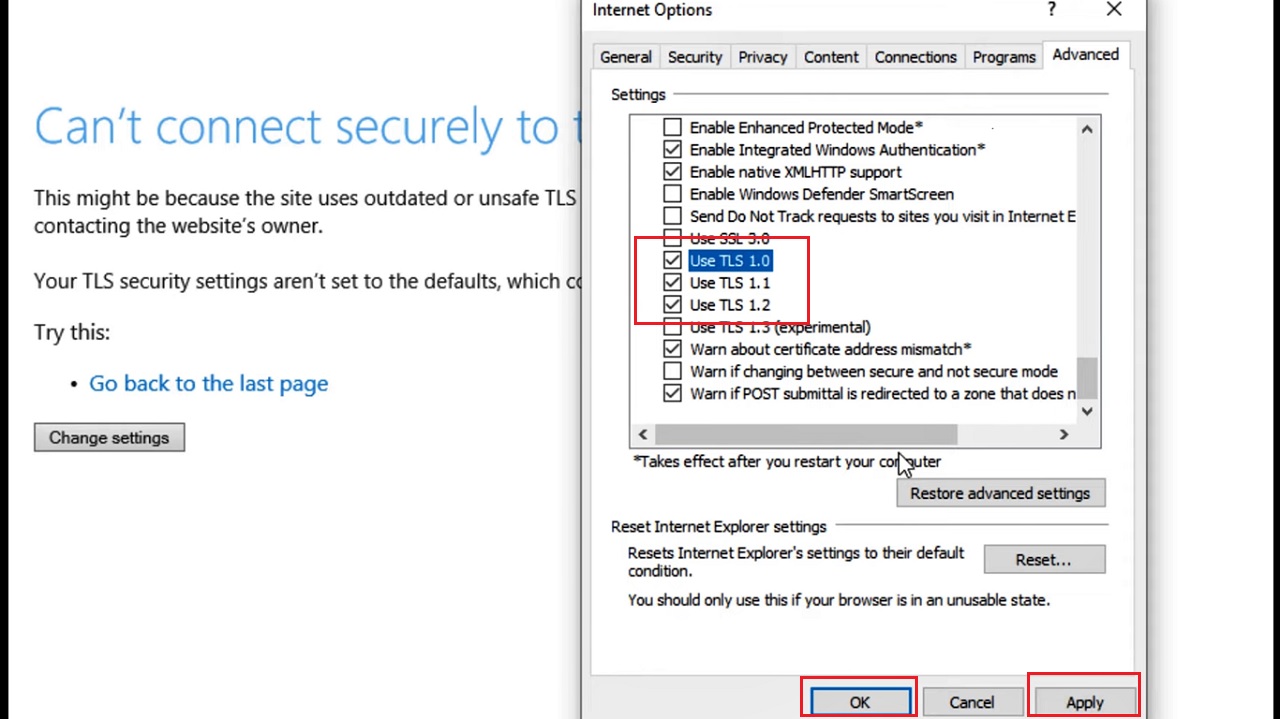
- Now go to the Advanced tab on the Internet Options or Internet Properties window.
- Scroll down the list displayed in the box under Settings once again and check the small square boxes next to each of ‘Use TLS 1.0,’ ‘Use TLS 1.1,’ and ‘Use TLS 1.2.’
- Click on the Apply button and then on the OK button to apply and save the changes.
Now, close all windows and try connecting to your router IP address through your browser. You will be able to connect this time since the login page will appear as shown in the image below:
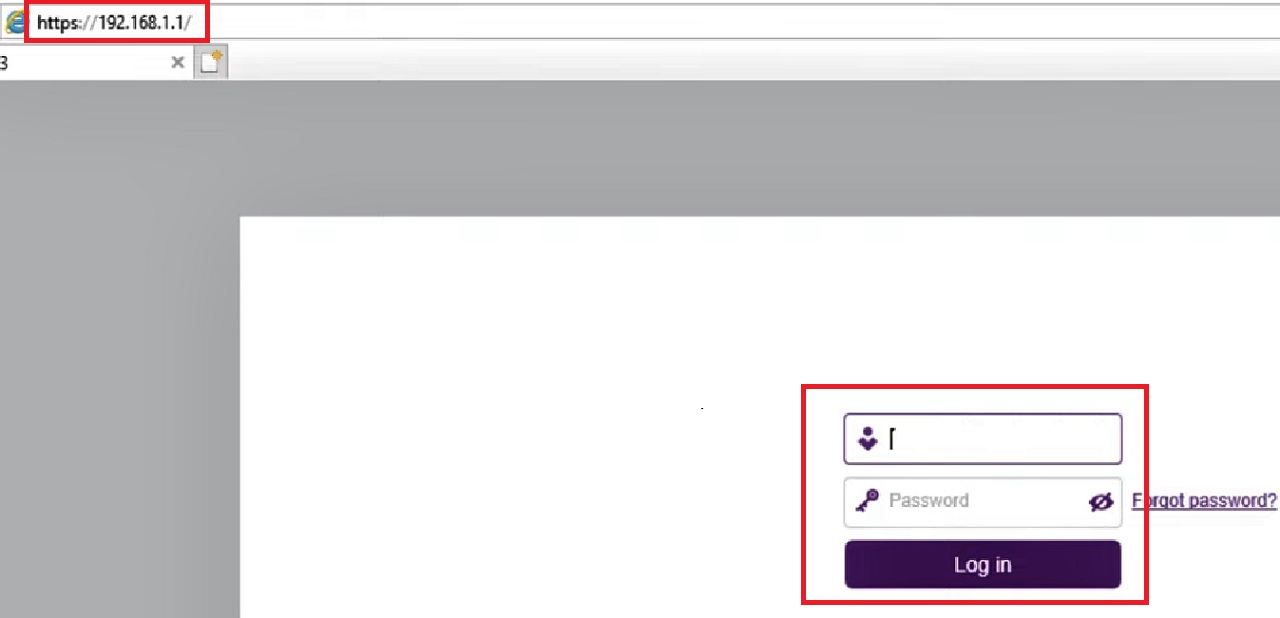
Use your username and password to login to the home page of the website of the router.
Conclusion
So, as you see, the issue of being unable to access your router’s IP address is quite common and can happen due to quite a few technical reasons apart from erroneous entries.
The solutions mentioned above might resolve the issue caused due to technical reasons.