
There may be times when you might not be able to run the Hosted Network because it simply would not start.
This may cause some inconveniences, though it is temporary and not a severe issue.
There are a few simple solutions to the Hosted Network could not be started issue but right at the outset check whether or not your computer system supports the Hosted Network feature by running a command in the Command Prompt.
If it does, then you can try the solutions explained in this article.
In This Article
KEY TAKEAWAYS
- You may resolve the issue of the Hosted Network could not be started on your PC by changing the network adapter settings.
- Disabling and then enabling the network adapter from the Network Connections in the Control Panel is another easy and quick fix to the issue.
- The issue might also be resolved if you enable the Microsoft Hosted Network Virtual Adapter from the Device Manager.
- Often making changes in the power management settings of the network card may start the Hosted Network on your computer system.
- Sometimes, simple solutions such as updating the Wi-Fi driver can fix the issue and make the Hosted Network run again.
What Causes the Hosted Network Couldn’t Be Started Error?
One common cause for the Hosted Network could not be started is that the PC configuration or setting does not support this feature in the first place.
If it does, then the issue may be the cause of a misconfiguration in the network adapter settings.
Sometimes, the default settings of the power management of the network card may also cause this issue.
There are also some other reasons for the users being unable to start the Hosted Network on their PCs, such as:
- Faulty or outdated Wi-Fi drivers
- Downgrading Windows to an earlier version
- Improper settings of the Wi-Fi card
- The Microsoft Hosted Network Virtual Adapter may be disabled
- The necessary sharing settings in Windows may not be selected
- Internal issues in the network adapter
- The settings of the Wi-Fi card may not be correct
The solutions to the issue are however quite easy and are effective in most situations.
How to Fix Hosted Network Couldn’t Be Started Error?
One common and easy solution to the issue is to check whether or not your system supports the feature and then change the configuration in the network adapter settings.
You may also try fixing the issue by turning the virtual adapter on or by disabling and enabling the network adapter from the Device Manager and the Control Panel respectively.
If the driver of your Wi-Fi is outdated, you will need to update it to rectify the error of Hosted Network could not be started.
To fix the issue, you should open the Device Manager by pressing the Windows and X keys > Right-click on your network adapter > Click on the Update driver option > Follow the on-screen instructions > Restart the system > Try to run the Hosted Network.
You may also try to roll back the driver to its previous version by opening the Device Manager > Expanding the Network adapters category > Double-clicking on the Wi-Fi adapter > Going to the Driver tab > Clicking on Roll Back Driver > Following the instructions in the wizard > Rebooting the system and trying to run Hosted Network again.
However, before moving on to the solutions to this issue, make a few checks. These checks are often ignored but might resolve the issue if they cause the problem. One of these checks is making sure that the Wi-Fi adapter is turned on!
Now, in addition to the above, there are also a few other fixes that you can try to rectify the problem of the Hosted Network cannot start in your PC. These are:
- Make changes in the power management of the network card
- Change the settings of the Wi-Fi card
- Run the network adapter troubleshooter
- Changing the sharing settings
- Modifying the settings of the Wi-Fi card
Follow the steps mentioned for each and rectify the issue.
Method 1: Check for Hosted Network Support and Disable and Enable Network Adapter
To start with, you should check whether your PC supports the Hosted Network feature or not by running a specific command in the Command Prompt.
If it does and you are facing the issue, then you may try resolving it by fixing any issues in the network adapter by disabling and enabling it.
STEPS TO FOLLOW:
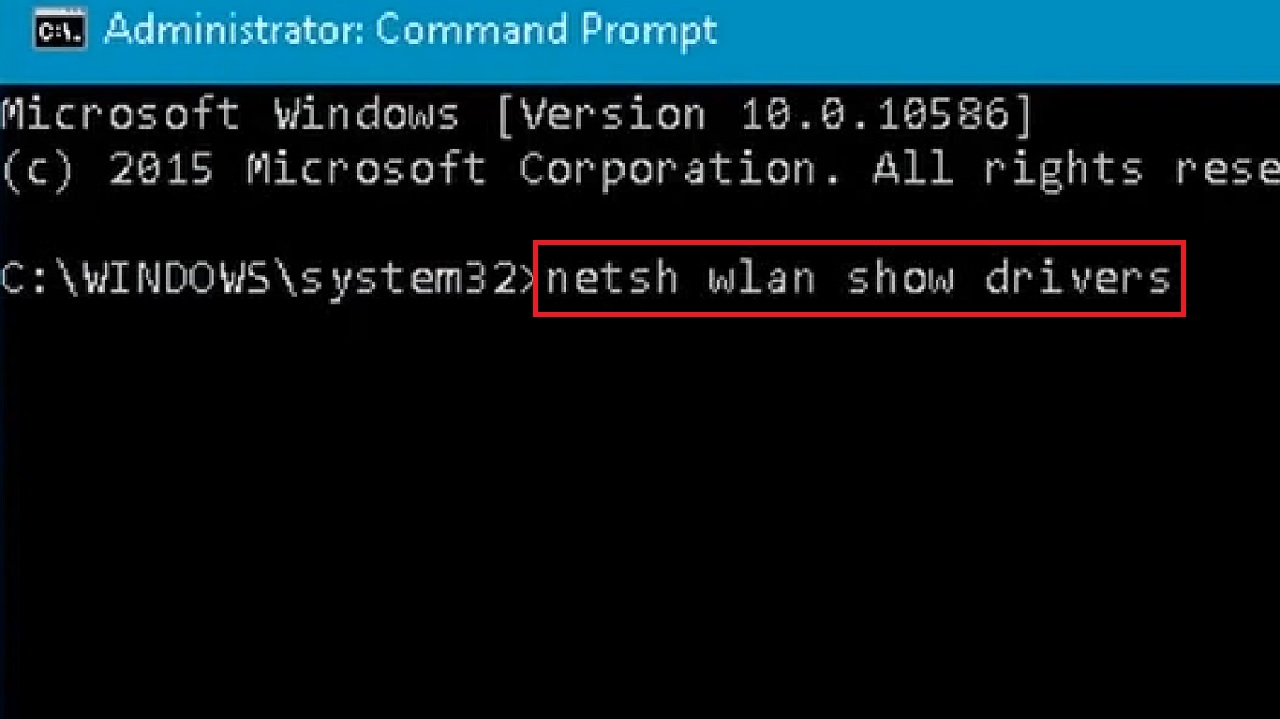
- Go to the search box next to the Start Menu > Type cmd > Right-click on Command Prompt > Left-click on Run as administrator.
- This will open the elevated Command Prompt. Type in the command netsh wlan show drivers and hit the Enter key on your keyboard.
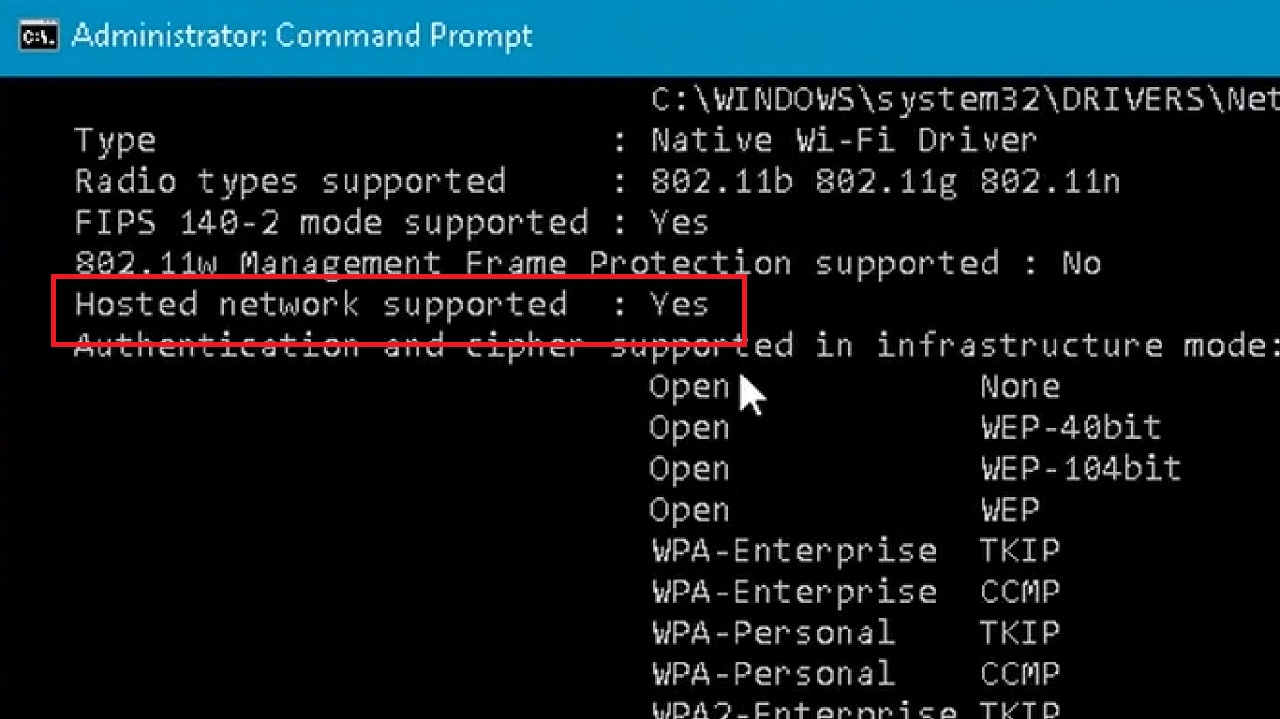
If your system supports the Hosted Network feature, it will be marked Yes next to Hosted network supported, as shown in the image below:
Now, make changes in the network adapter settings by disabling and enabling it first from the Network Connections in the Control Panel to fix any internal issues in it. The steps to follow for this process are:
- Press the Windows and R keys on your keyboard together to open the Run dialog box.
- Type ncpa.cpl in the box and hit enter to open the Network Connections window.
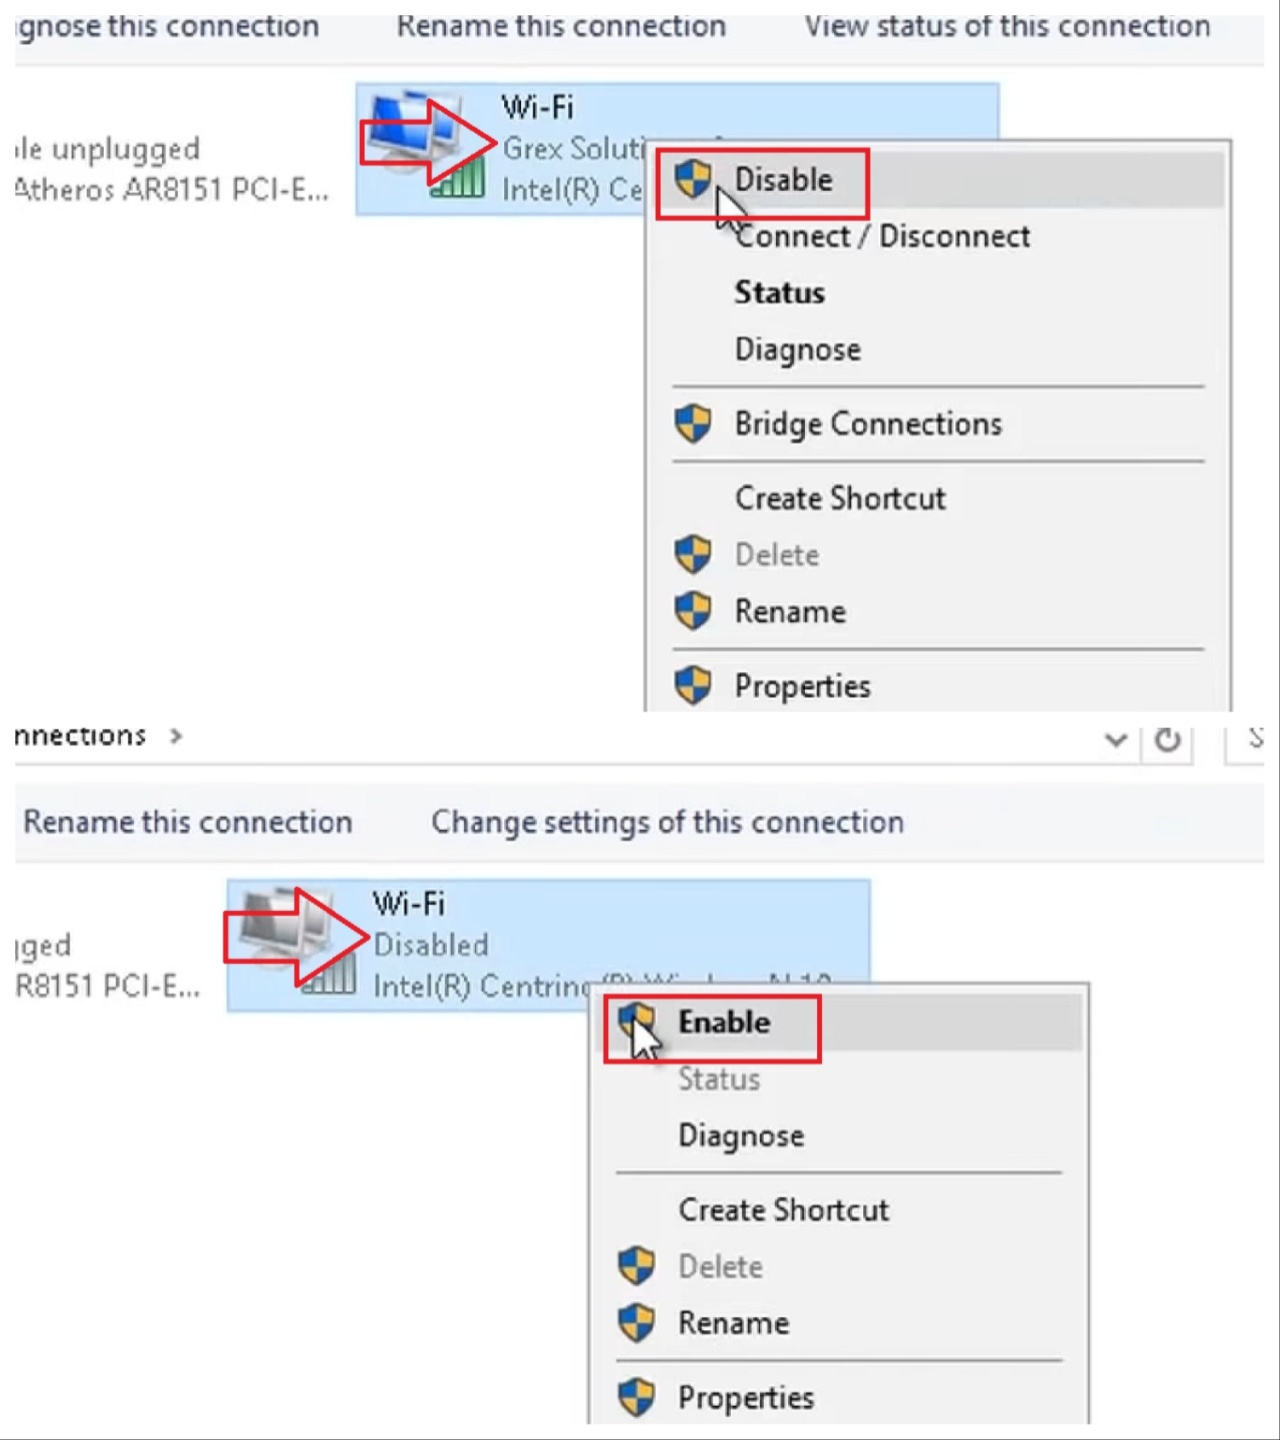
- Right-click on your Wi-Fi adapter.
- Click on the Disable option from the drop-down context menu.
- After some time, right-click on it again and this time choose the Enable option.
Now restart your computer system and after it restarts check whether or not the issue is resolved.
If the problem still persists, you might be successful in resolving the problem with the next solution.
Method 2: Enable the Microsoft Hosted Network Virtual Adapter from the Device Manager
You may also try to enable the network adapter from the Device Manager and try to fix the issue of the Hosted Network could not be started.
STEPS TO FOLLOW:
- Right Click on the Start Menu.
- Click on Device Manager from the options that appear.
- Go to the View tab at the top of the Device Manager window.
- Click on Show hidden devices from the drop-down context menu.
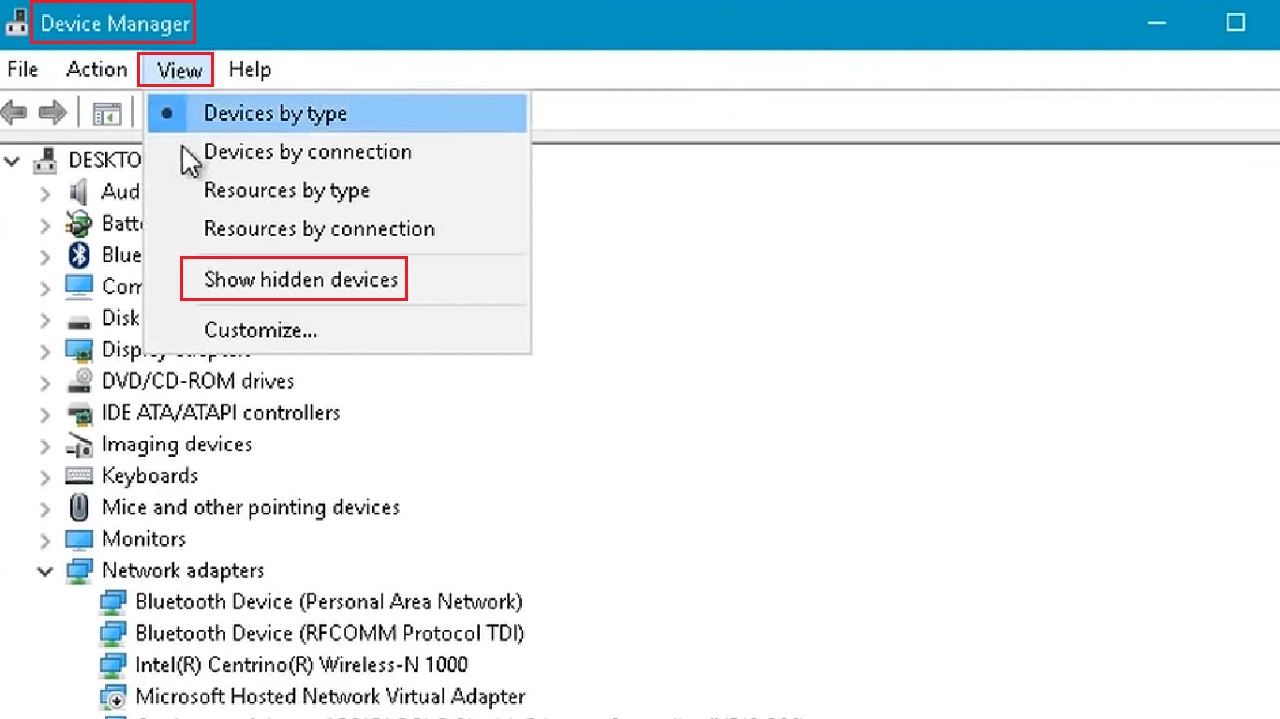
- Come down to Network adapters.
- Click on the small arrow next to it.
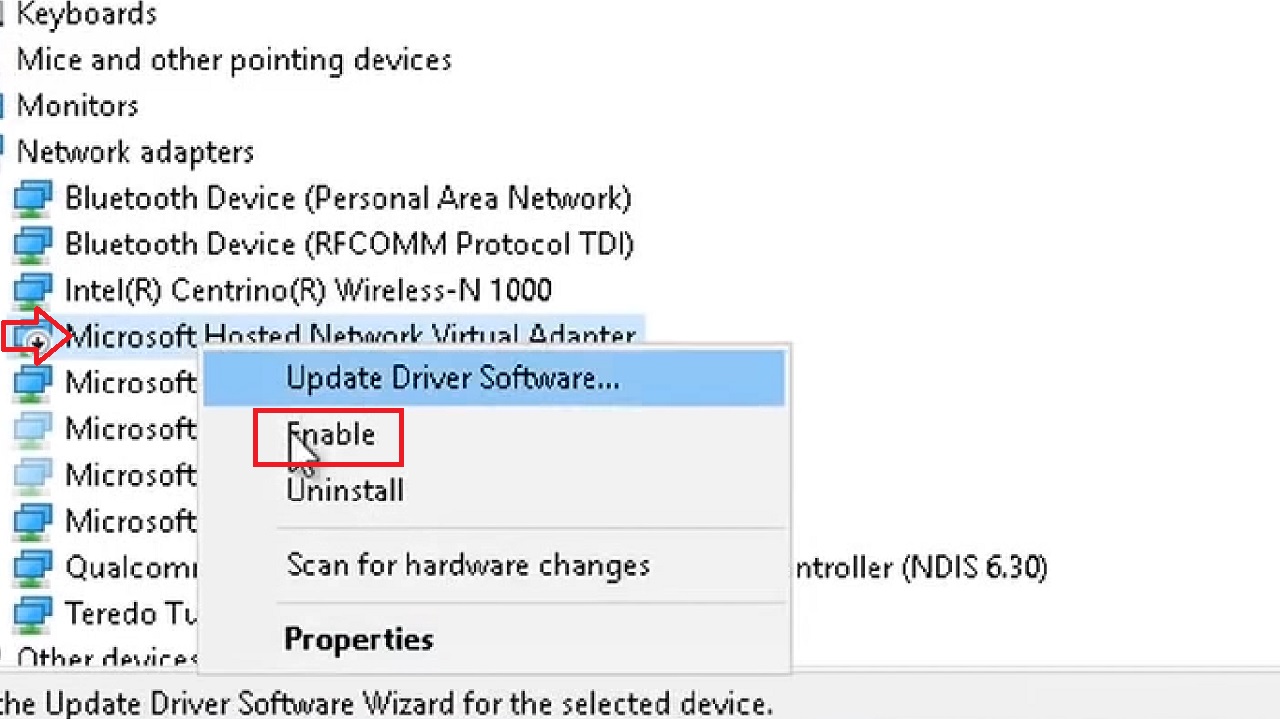
- Select Microsoft Hosted Network Virtual Adapter.
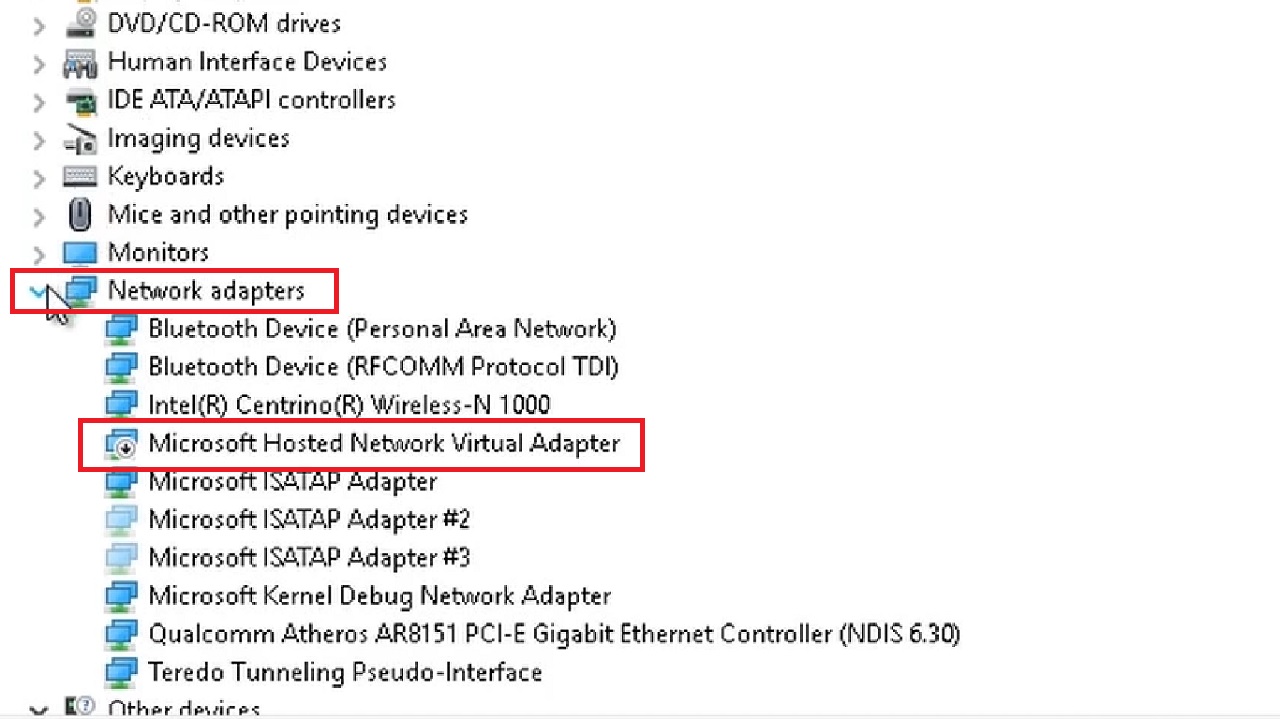
- Right-click on it.
- Click on the Enable option from the drop-down context menu, if it is disabled.
- Now close the Device Manager window and restart your computer system.
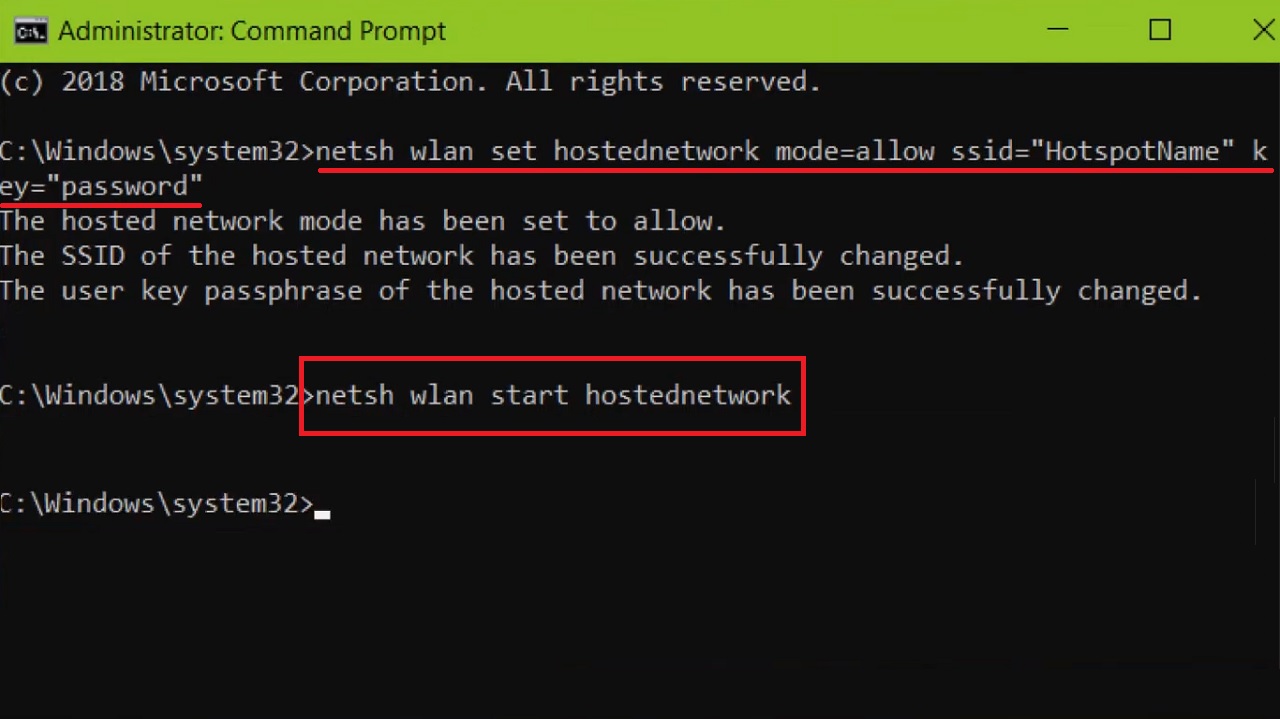
- Then, open the Command Prompt window again as before after the system restarts.
- Type the commands netsh wlan set hostednetwork mode=allow ssid=”HotspotName” key=”password” and netsh wlan start hostednetwork one by one and hit Enter every time to start the Hosted Network.
It might resolve the issue and run the Hosted Network.
If it does not resolve the issue, then move on to the next method.
Method 3: Make Changes in the Power Management Settings
Sometimes the default settings of the Power Management feature of the network card might need to be changed to resolve the issue of the Hosted Network could not start.
STEPS TO FOLLOW:
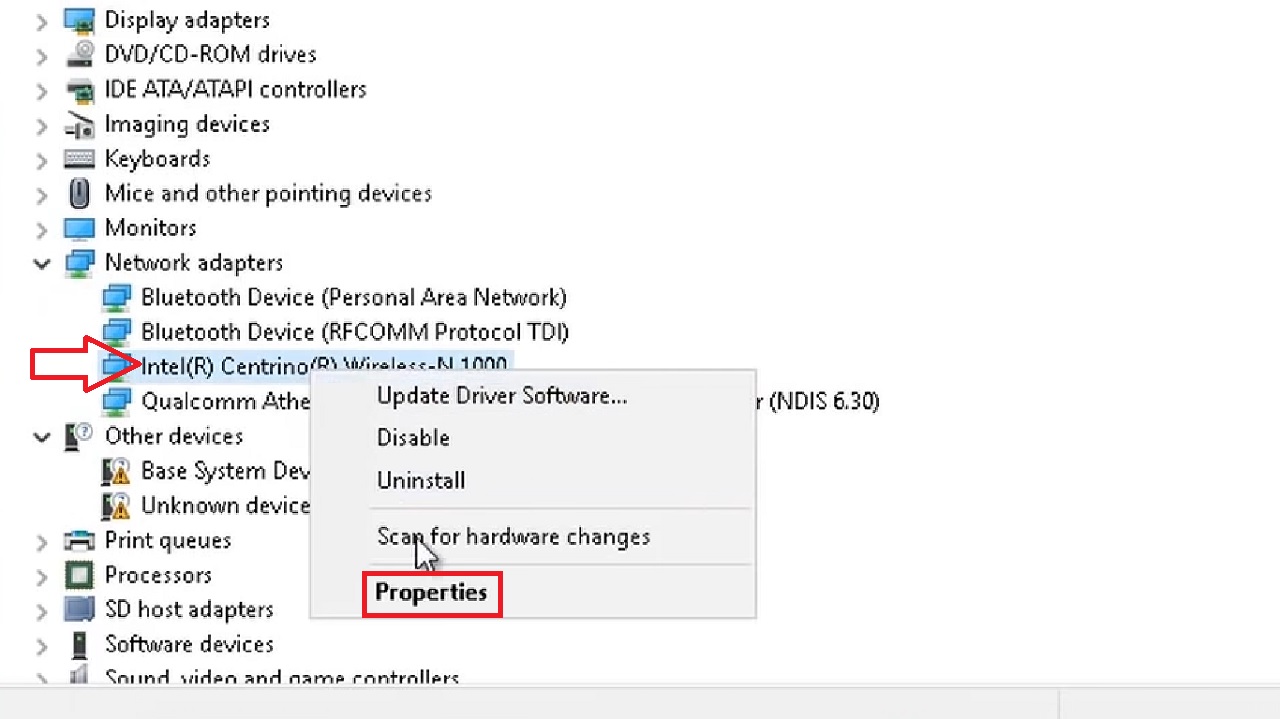
- Open the Device Manager as before and expand the Network adapters.
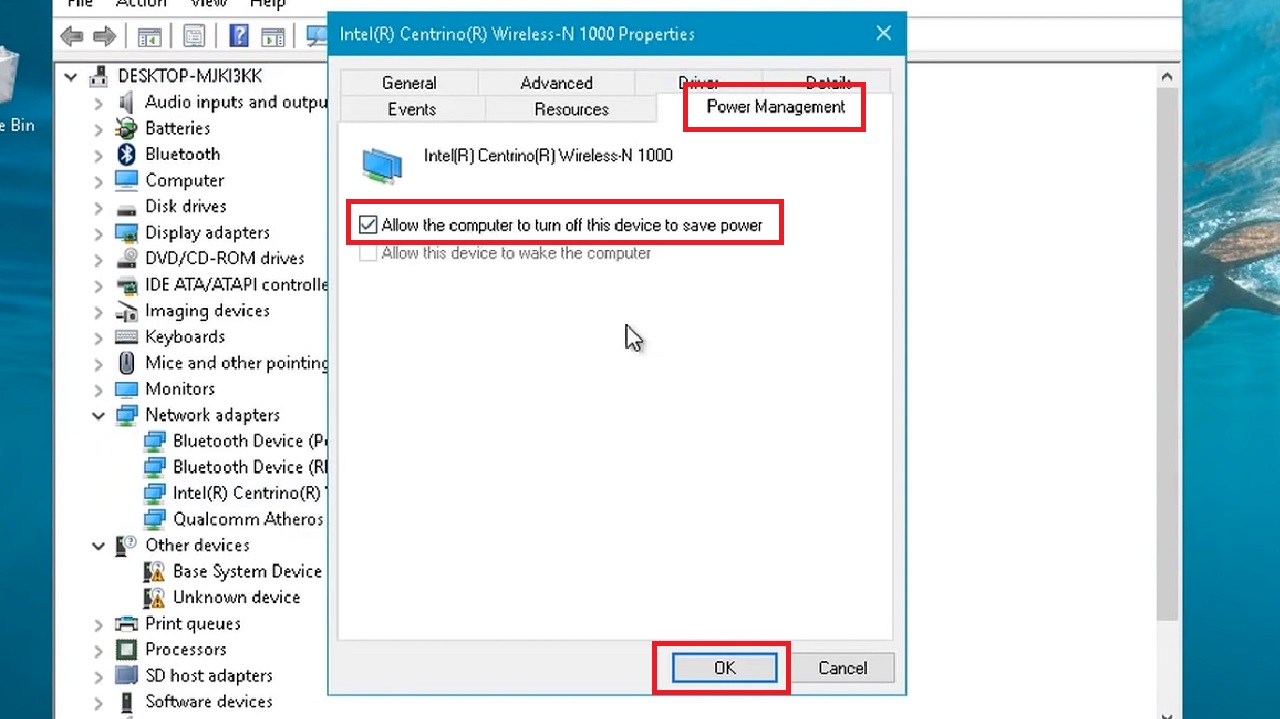
- Now right-click on the network card and click on the Properties option from the drop-down context menu.
- Go to the Power Management tab in the following window.
- Check the small square box next to ‘Allow the computer to turn off this device to save power.’
- Click on the OK button to save the change and close the window.
Restart the computer now and after it reboots, try running the Hosted Network as before. The issue might be resolved this time.
However, if the problem is still not resolved, you should move on to the next solution.
Method 4: Change the Settings of the Wi-Fi Card
Sometimes changing the settings of the Wi-Fi card might resolve the issue of Hosted Network not starting.
STEPS TO FOLLOW:
- Open Device Manager as before.
- Go to the Wi-Fi adapter.
- Double-click on it.
- Select Properties from the drop-down menu options.
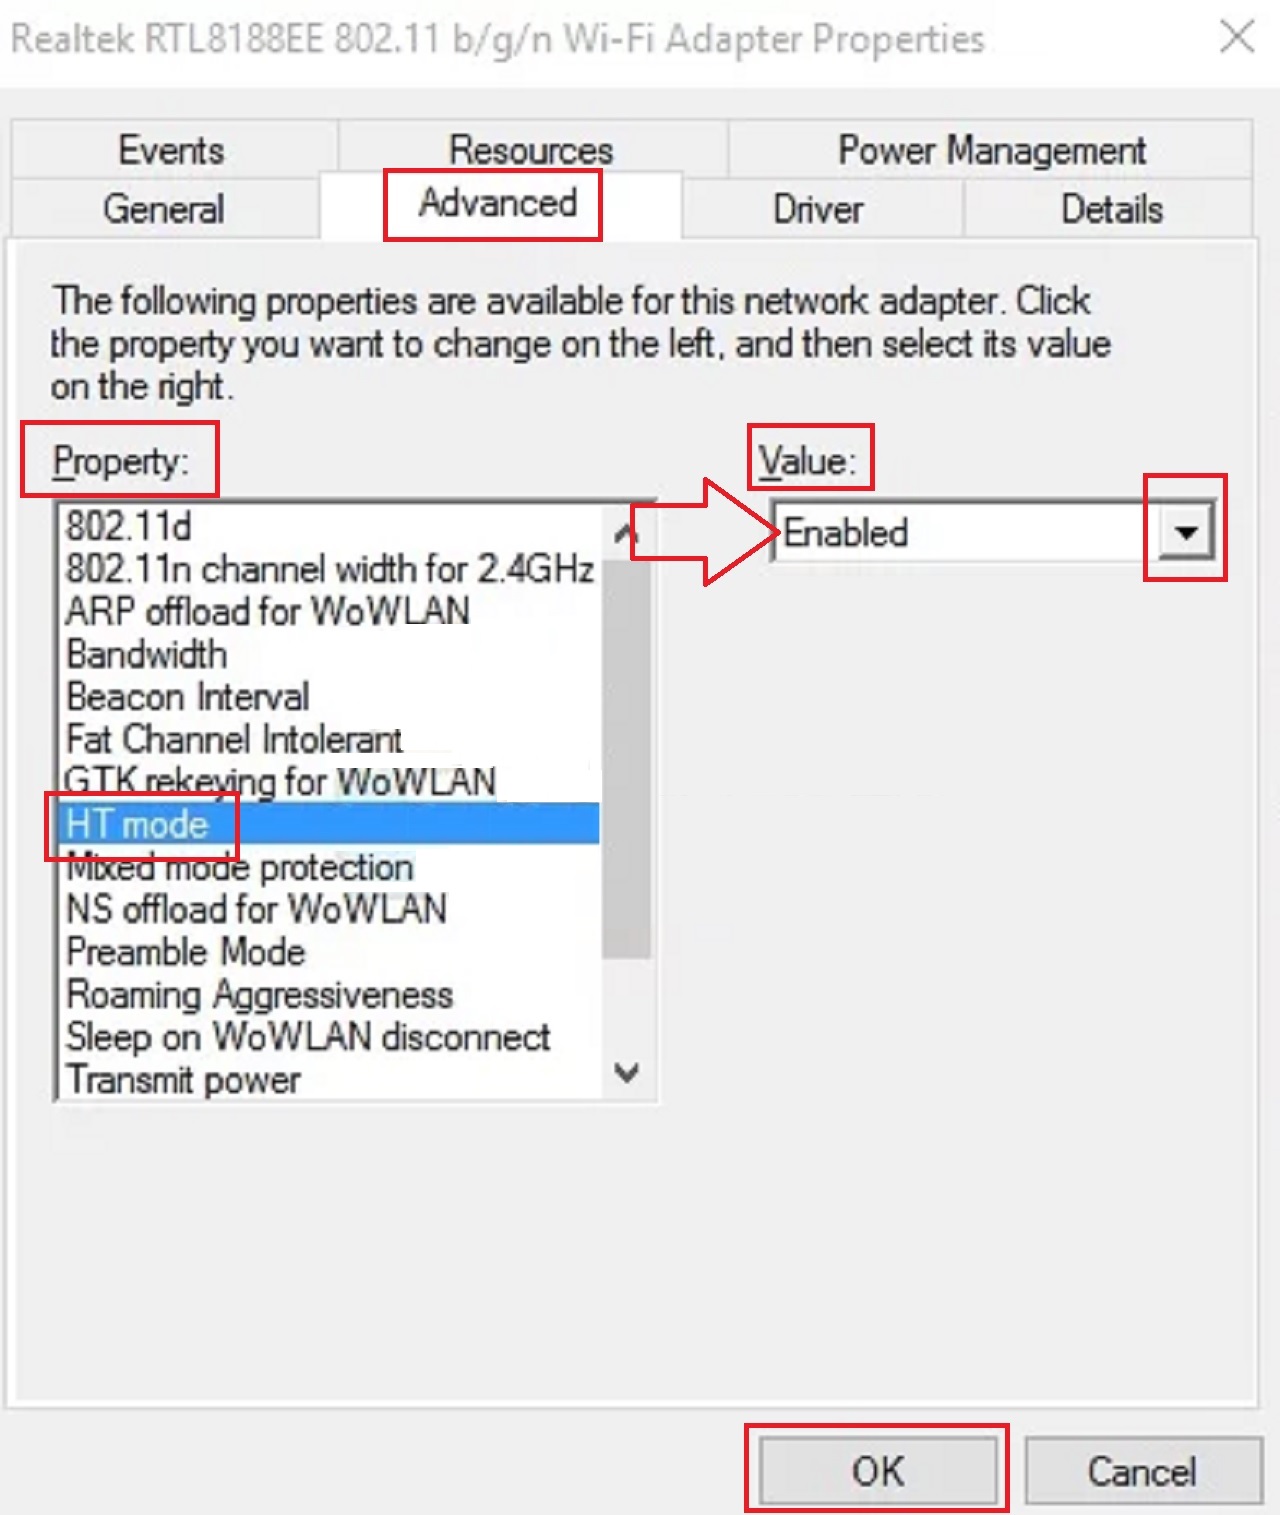
- Go to the Advanced in the following window.
- Check the list in the box under Property and scroll down to find the HT mode property.
- Go to the box under Value on the right side.
- Click on the small arrow in the box.
- Choose the Enabled option from the drop-down list.
- Click the OK button to save the change.
Now, restart the system and check whether or not you can start the Hosted Network on your computer now.
If it does not, then there may be some issues within the network adapter. In that case, you may try the next method.
Method 5: Run the Network Adapter Troubleshooter
Often, the network adapter troubleshooter may resolve the issue of the Hosted Network cannot be started, if there is any internal issue with the network adapter.
STEPS TO FOLLOW:
- Click on the Start Menu.
- Select Settings or the gear icon in the options window.
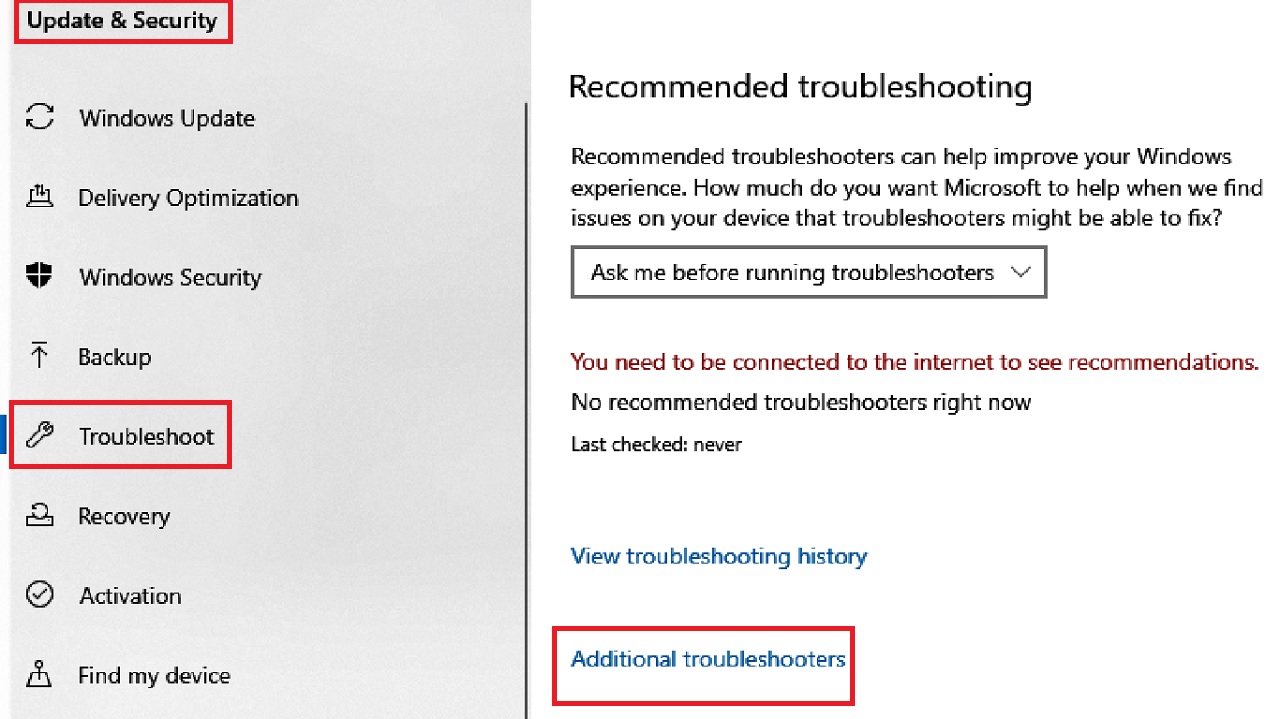
- Go to Update & Security.
- Click on Troubleshoot in the left panel of the Update & Security window.
- Select Additional troubleshooters.
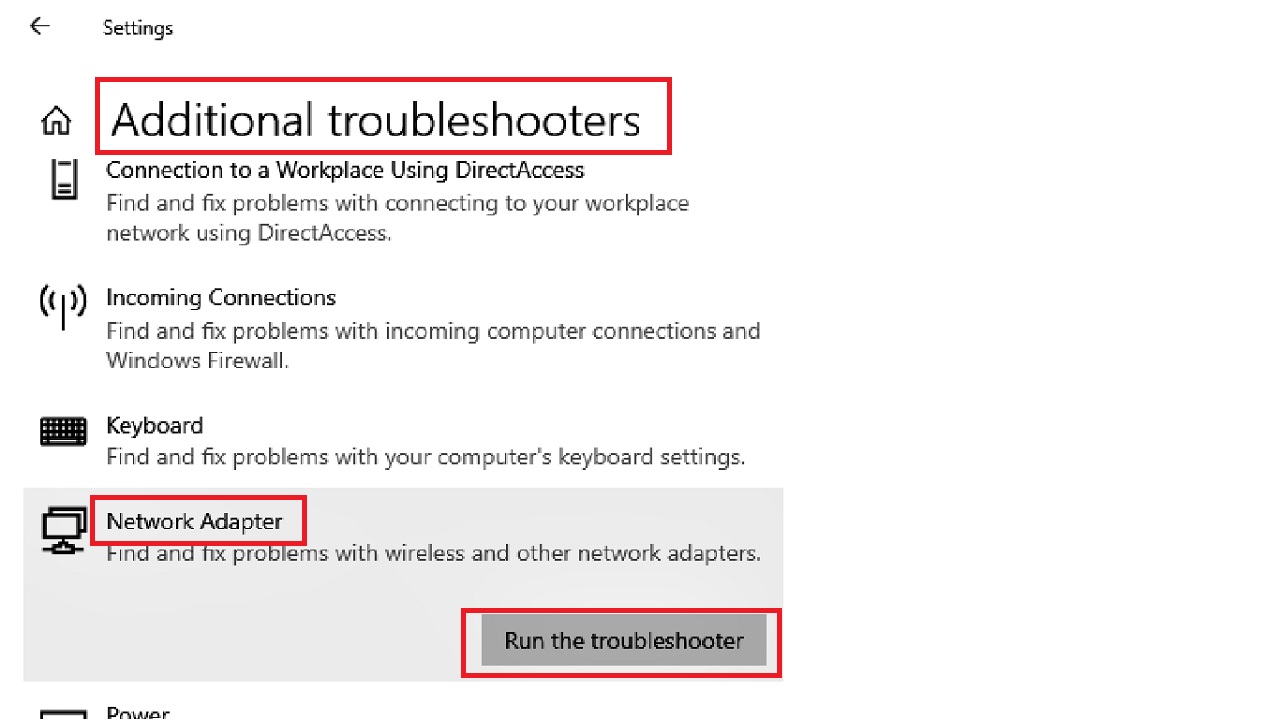
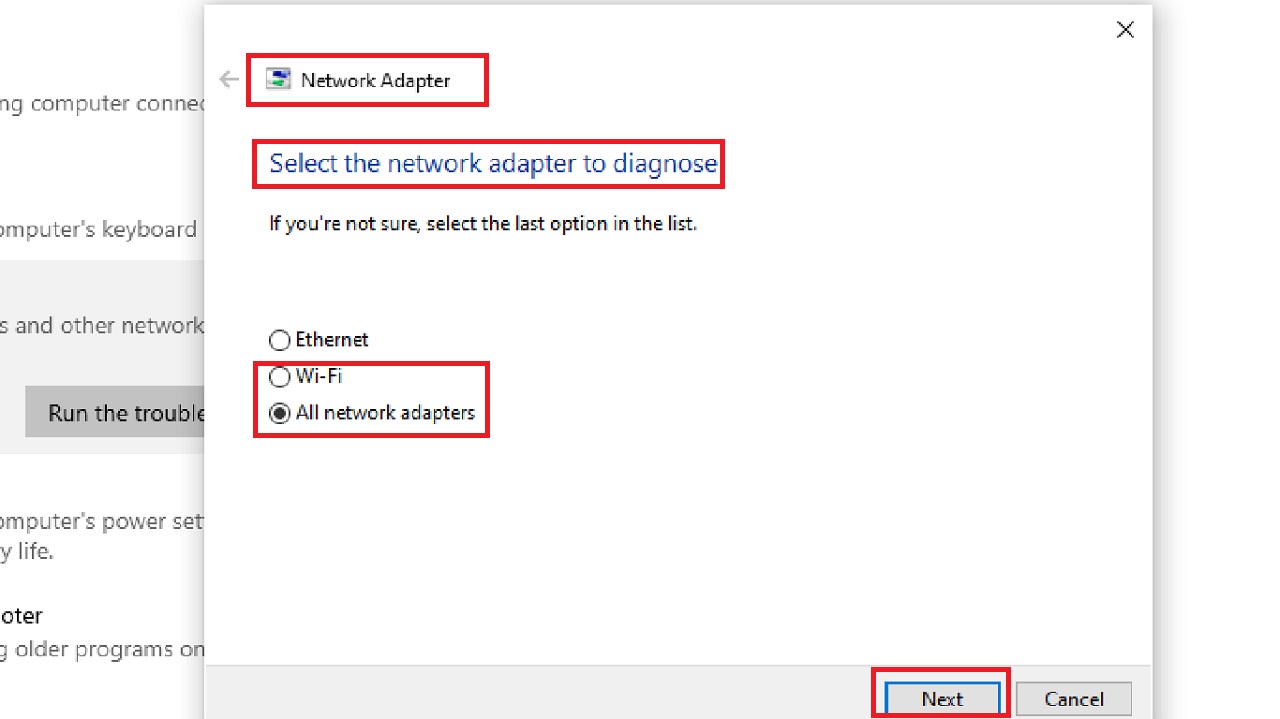
- Click on Network Adapter in the following Additional troubleshooters window.
- Click on the Run the troubleshooter button.
- In the following Network Adapter window, Select the network adapter to diagnose. You may choose Wi-Fi or All network adapters.
- Click on the Next button.
- Follow the on-screen instructions as and when they appear.
When the troubleshooting process is complete, restart your computer system and try running the Hosted Network when it restarts. It should start running now.
Method 6: Check and Change the Sharing Settings
You may even check and change the sharing settings to rectify the issue of the Hosted Network not starting.
STEPS TO FOLLOW:
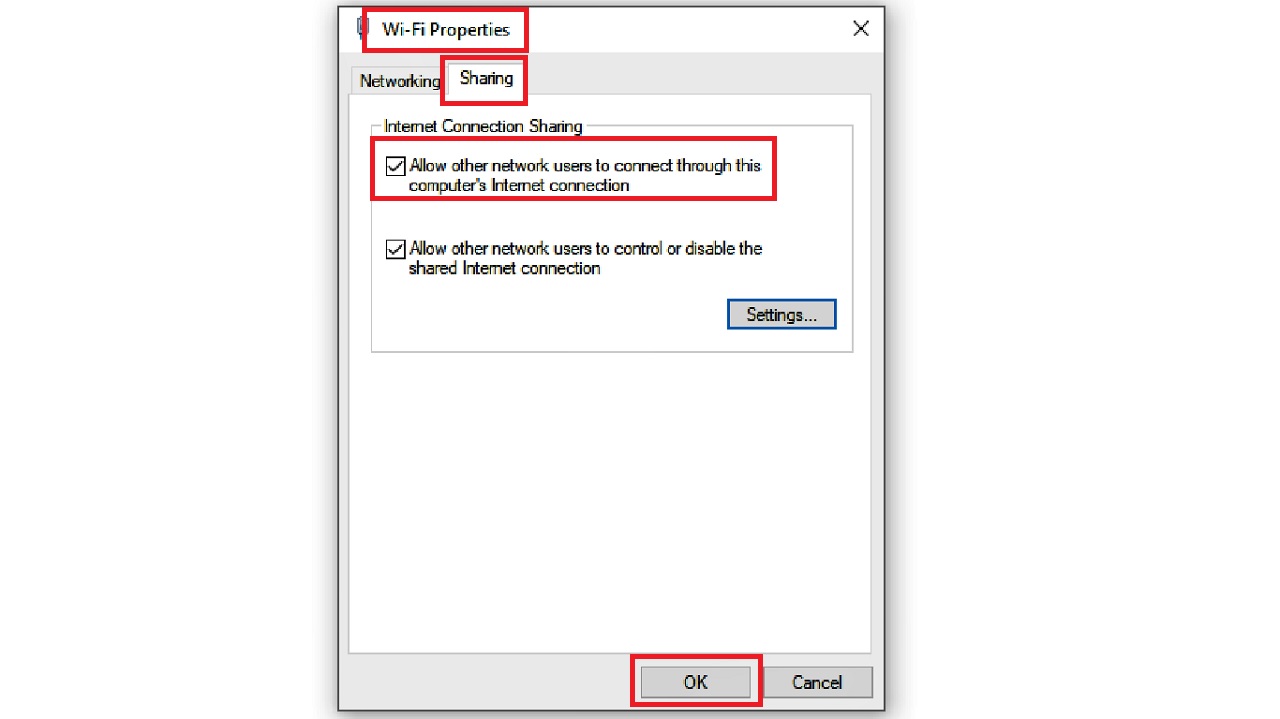
- Open the Network Connections window from Run > Select your Wi-Fi connection > Select Properties as before.
- Go to the Sharing tab in the Wi-Fi Properties window.
- Now click on the small square box next to ‘Allow other network users to connect through this computer’s Internet connection’ option to select it.
- Click on the OK button below to confirm the settings and close the window.
Now, restart the system and then try to run the Hosted Network, which should run this time.
Conclusion
So, now that you know about the fixes to the issue of Hosted network could not be started, you should not bother if you ever experience this error.
Instead, you should try any one of the solutions mentioned above to fix the issue easily and quickly to put things back to normal again.