
You can change your NAT (Network Address Translation) quite easily. This guide outlines three methods to change your NAT type, each applicable to different router configurations and scenarios.
The step-by-step tutorial will guide you through the processes.
In This Article
KEY TAKEAWAYS
- Changing the NAT type enhances network performance, online gaming experience, and online communication, and lowers latency.
- You can change NAT by turning network discovery on.
- Enabling UPnP will change the NAT type to an open setting.
- Configuring port forwarding is another useful way to change NAT type.
Why Do You Need to Change NAT Type?
It may be required at times to change your NAT type to optimize your online experience with smoother and faster connections. It will allow you to play multiplayer games with your friends without restrictions making it more enjoyable.
Depending on your network and particular online activities, there are some other reasons to change your NAT type. These are:
- To minimize lag and reduce latency
- To use voice and video communication services, such as Voice over Internet Protocol (VoIP) and video conferencing
- Faster streaming and downloads
- To host online services, such as web servers and game servers
- To get remote access to devices connected to the network
- To resolve connectivity issues by using it as a step for troubleshooting
- To allow specific peer-to-peer applications to run more effectively
- For better overall performance of the network
Now, explore the methods to change your NAT type.
How to Change NAT Type?
You can change your NAT type by turning the Universal Plug and Play protocol or UPnP on.
Other ways to change NAT type are:
- Turning network discovery on
- Port forwarding
Here are the steps to follow.
Method 1: Turn on UPnP on the Router
Turning on UPnP or Universal Plug and Play protocol may change the NAT type.
Note: The admin panel interface of your router may be a bit different from the router used in this demonstration. Refer to your router manual for precise instructions.
STEPS TO FOLLOW:
- Go to search > Type cmd > right-click on it > Select Run as administrator.
- In the Command Prompt, type ipconfig and note the Default Gateway address to know your router’s IP address.
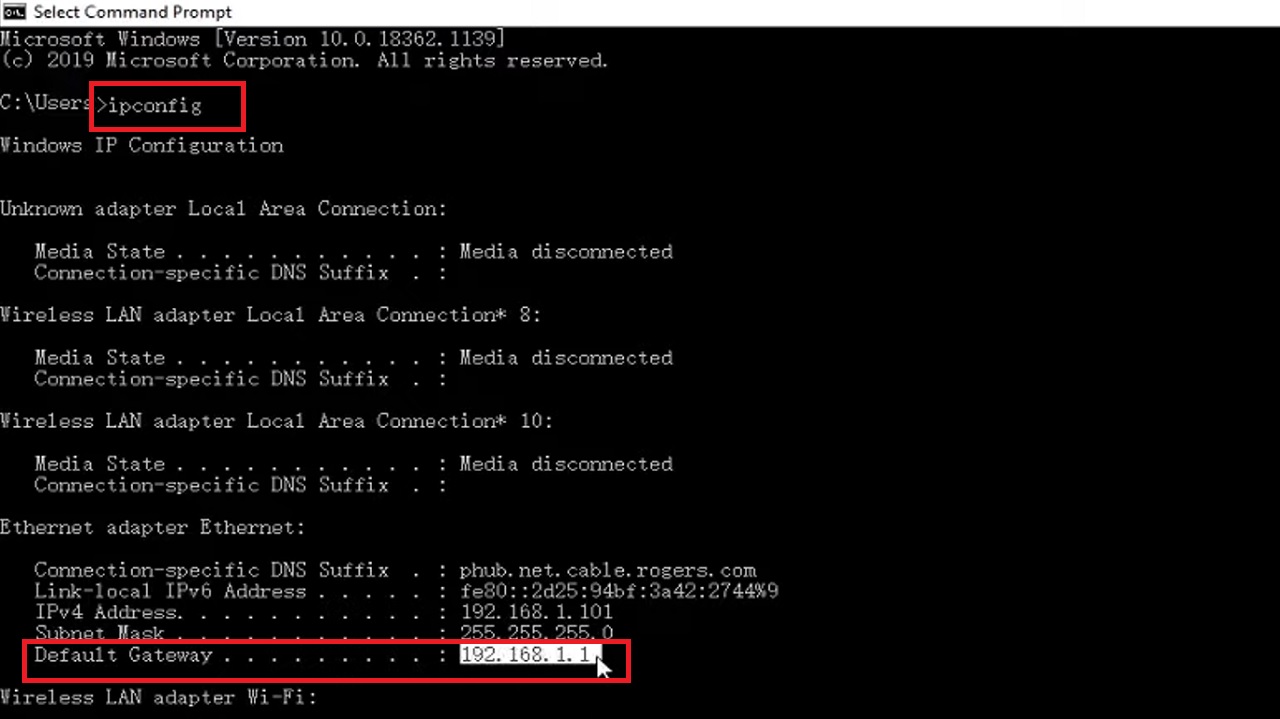
You may also find it on the label at the back.
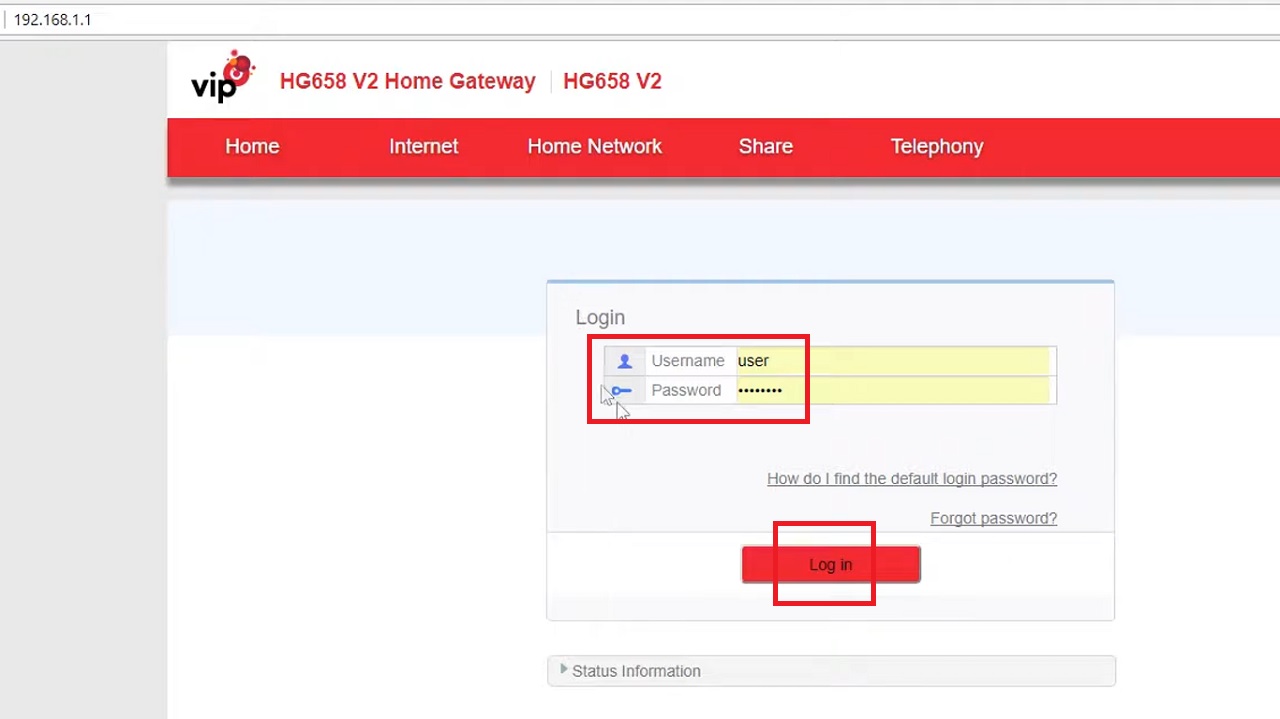
- Now, open a web browser.
- Type the IP address.
- Log In to the admin panel of your router by typing the Username and Password.
- Go to Home Network.

- Select LAN Interface.
- Find UPnP and then open it.
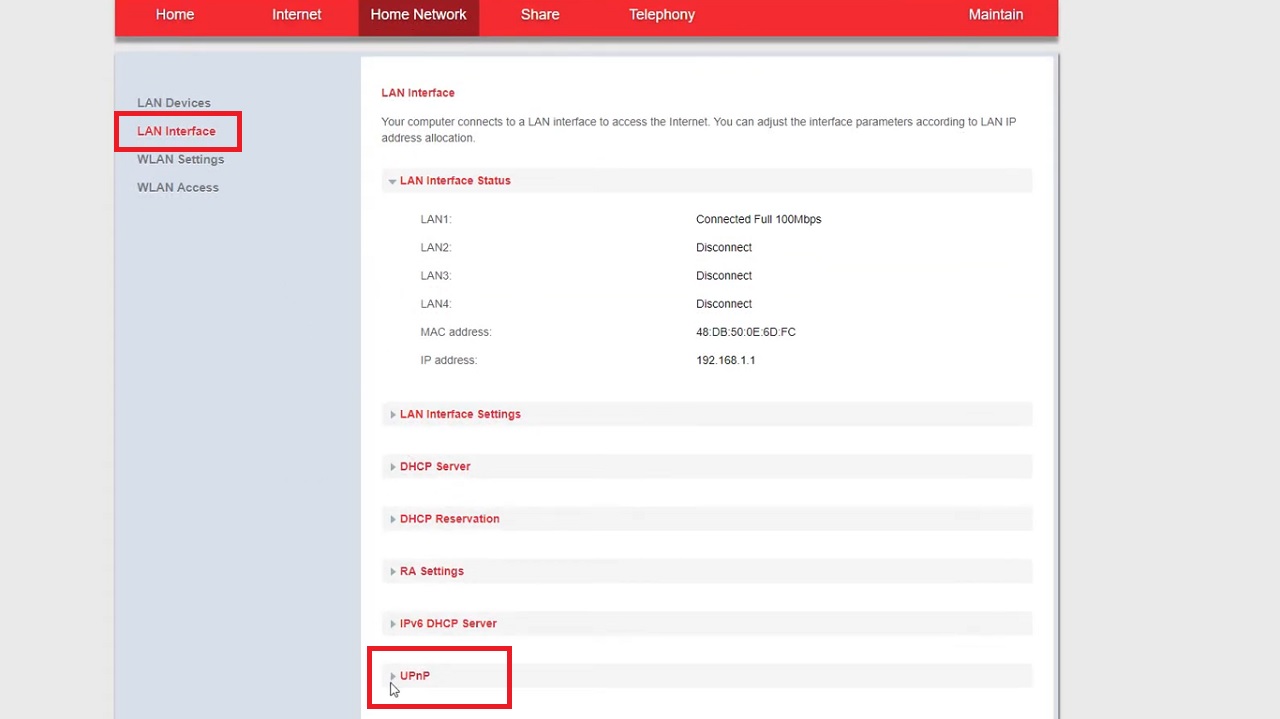
- Click on the arrow next to UPnP.
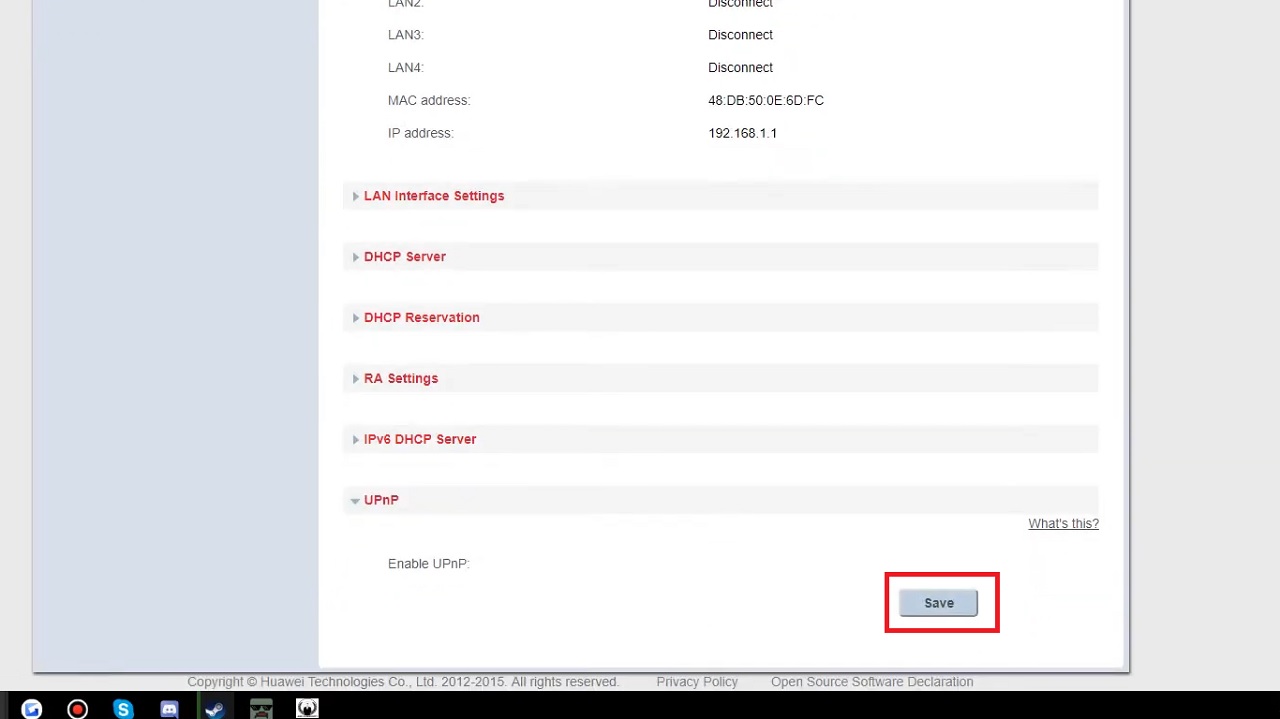
- Click Save and close the window.
Method 2: Port Forwarding
Port forwarding is another way to change the NAT type.
Note: Here a TP-Link router is used.
STEPS TO FOLLOW:
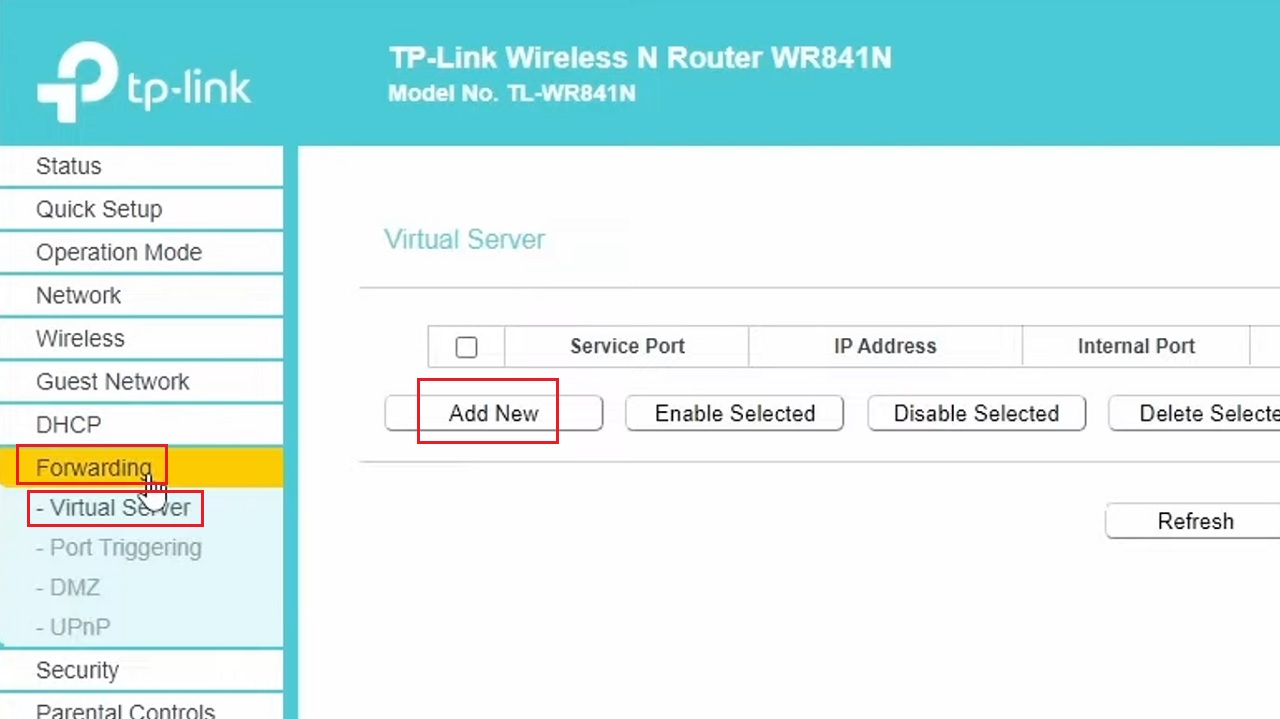
- Log into your router admin panel.
- In the left panel, click on Forwarding.
- Then click on Virtual Server in the expanded option.
- Click on the Add New button on the right side of the window.
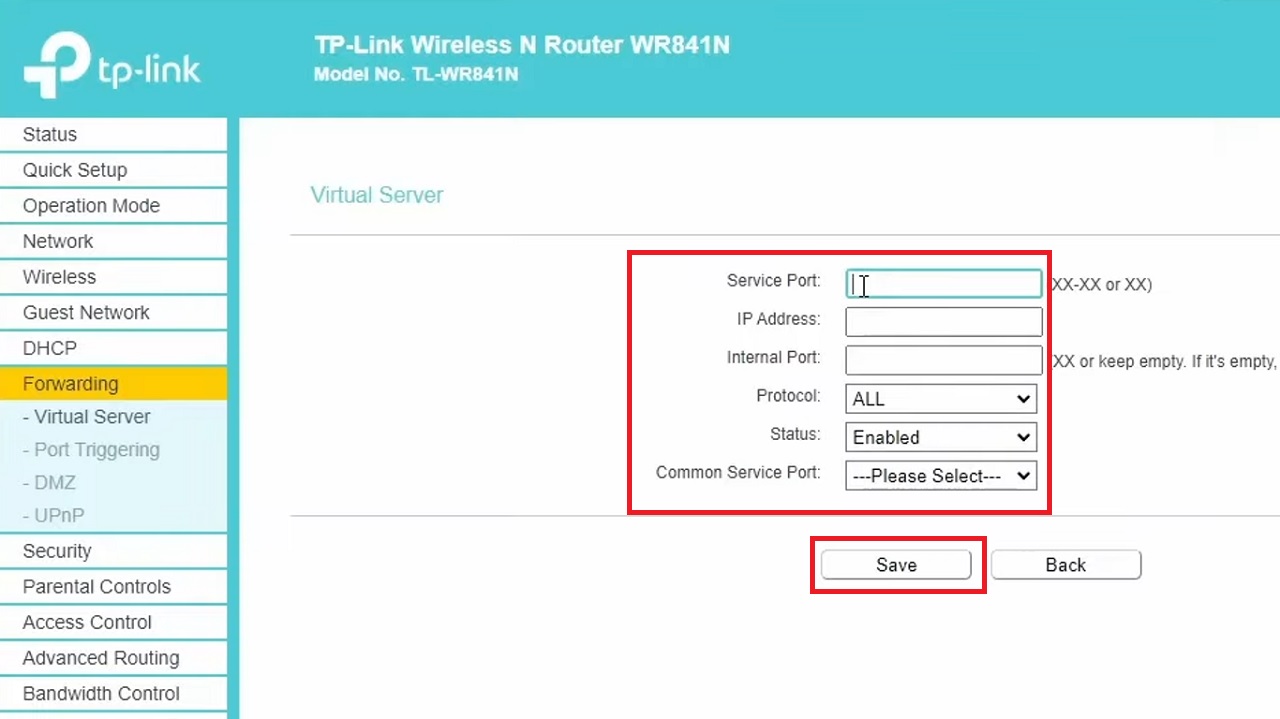
- In the following window fill in the details of the port you want to forward to in the relevant boxes.
- Click on the Save button.
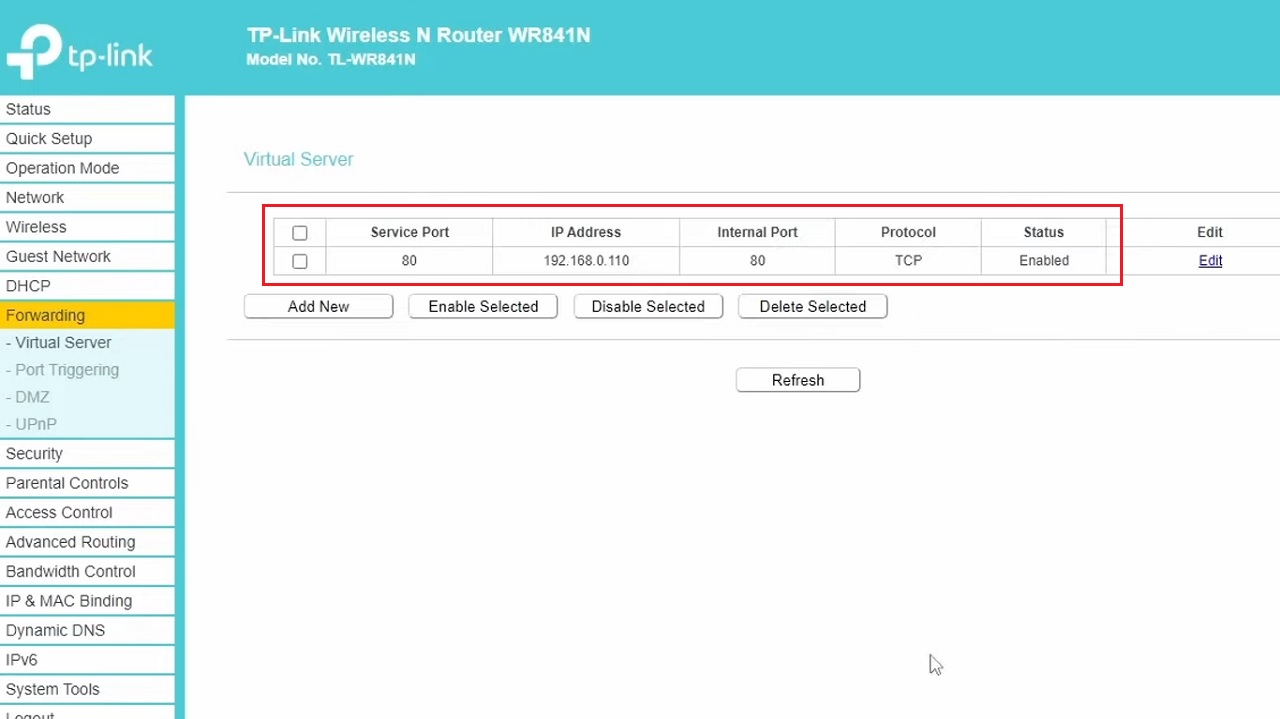
The changes will be displayed in the following window, as shown in the figure below:
Method 3: Turn Network Discovery On
Turning network discovery on will enable the UPnP from the computer side and change the NAT type.
STEPS TO FOLLOW:
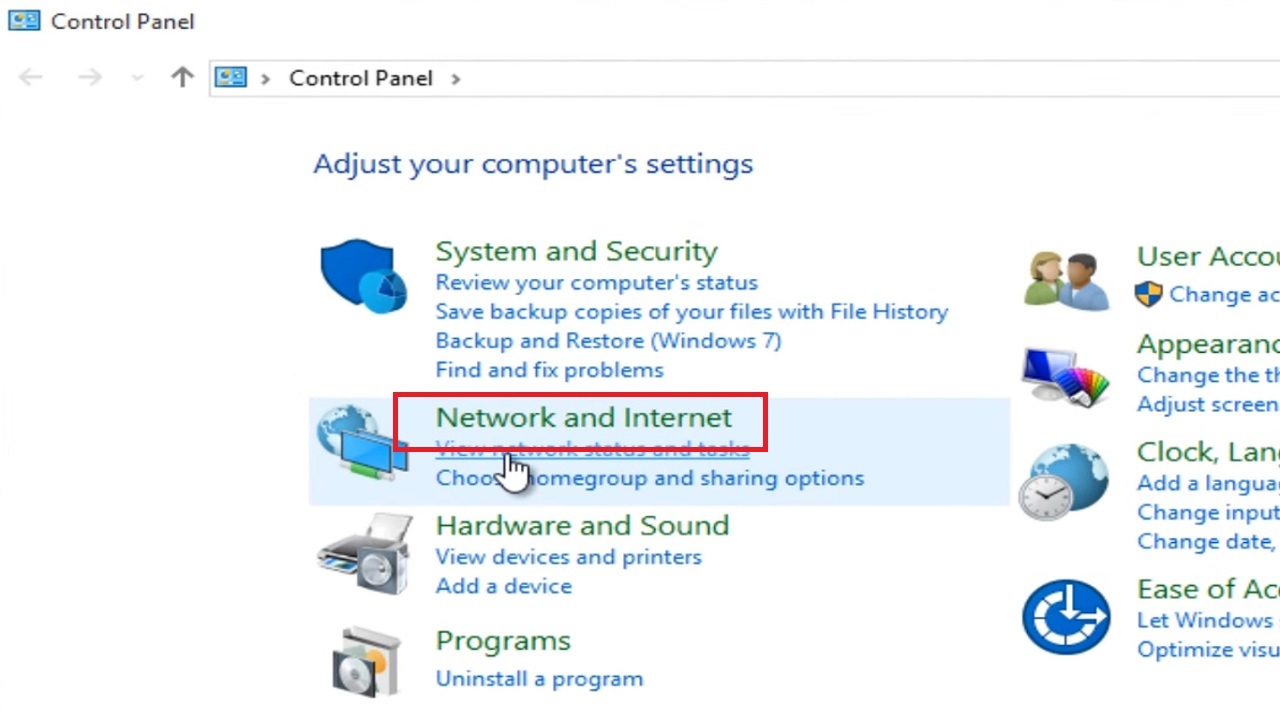
- Go to the search box > Type control panel > Hit Enter.
- Select Network and Internet.
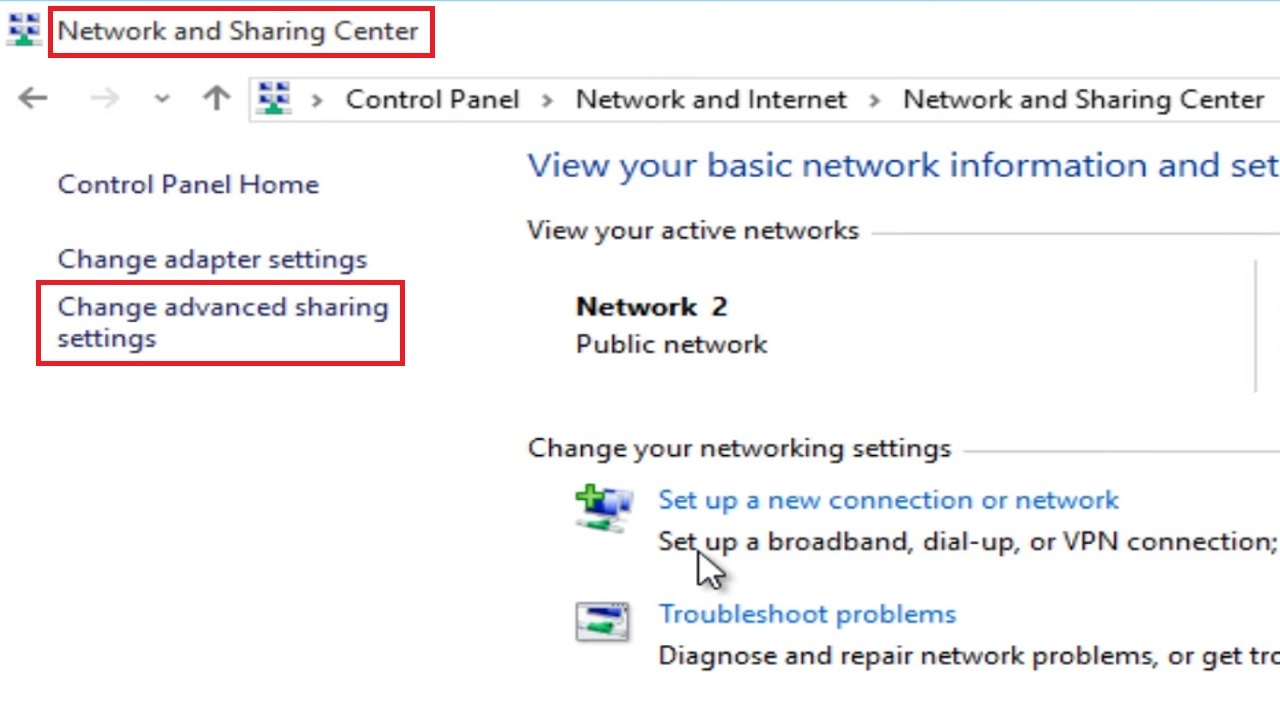
- Go to the Network and Sharing Center.
- In the Network and Sharing Center window click on Change advanced sharing settings.
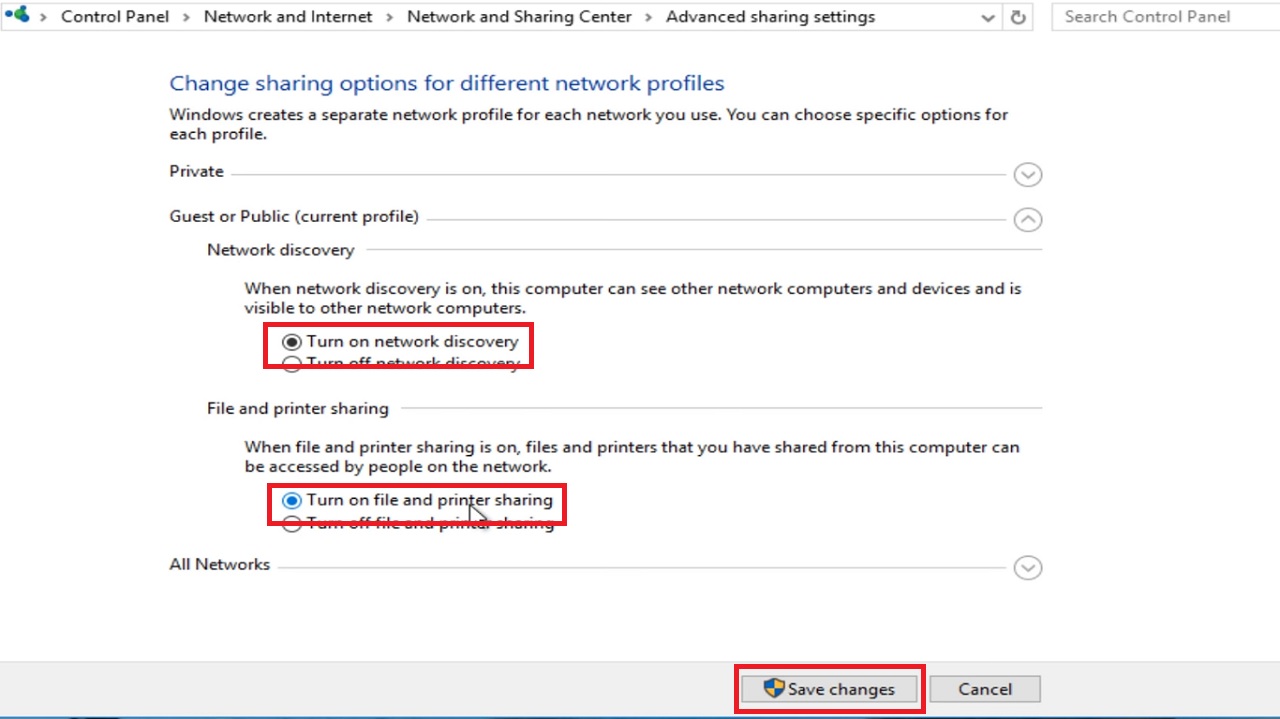
- Click on Turn on network discovery directly below the Network discovery category.
- Also, Turn on file and printer sharing.
- Click on the Save changes button.
If you see the User Account Control window pop up, click on the Yes button to have the administrator privileges to make the change.
Conclusion
In conclusion, it is crucial to know how exactly you can change your NAT type for improved network performance and online gaming experience.
It will give you more flexibility to adjust your network settings according to the specific scenario and needs.
However, follow these steps referring to your router’s manual.