
If a firmware upgrade on your router malfunctions, you will not be able to use the router. In that case, you will need to downgrade the firmware to an earlier release.
Fortunately, there are some quick and easy steps to do this. Continue reading this article to know the methods.
In This Article
KEY TAKEAWAYS
- Visit the manufacturer’s website.
- Download an earlier compatible firmware version of your router.
- Create a static IP address.
- Upload the downloaded firmware file.
- Reset the router.
Why Do You Need to Downgrade Router Firmware?
There are several reasons to downgrade the router firmware and it entirely depends on the particular situation and requirements of the user. It is mostly done to resolve the issues caused due to an upgrade.
Some of the issues that can be resolved by firmware downgrade are:
- Incompatibility of software
- Instability of network
- Reduced performance
- Security vulnerabilities
Users also downgrade firmware because they are used to the useful features, settings, and interface of the old firmware. Few are more convenient using stock firmware than custom firmware and therefore may go for a downgrade.
You may also need to downgrade the firmware of your router if there is an incomplete or bad update or if the beta or experimental version is creating issues.
Sometimes downgrading firmware is necessary if you want to use it as a troubleshooting process.
Ways to Downgrade Router Firmware
You will have to visit the website of the router manufacturer to download the earlier version of the router from there and then upload it to your router.
Additionally, you will also have to do the following:
- Create a static IP address
- Reset the router
Note: Downgrading of router firmware should be done only when there is no other alternative left. It should also be done with extreme caution since there can be security vulnerabilities temporarily.
Always create a backup before you start the process and follow the instructions of the manufacturer. Make sure that you downgrade to a version that is compatible with your router model.
For demonstration purposes, a D-Link router is used here. Your router interface may vary if it is a different model but the basic processes are the same.
Method: Download and Install Earlier Version from Manufacturer’s Website
To downgrade your router firmware, you will have to download an earlier version of the firmware and install it in your router.
STEPS TO FOLLOW:
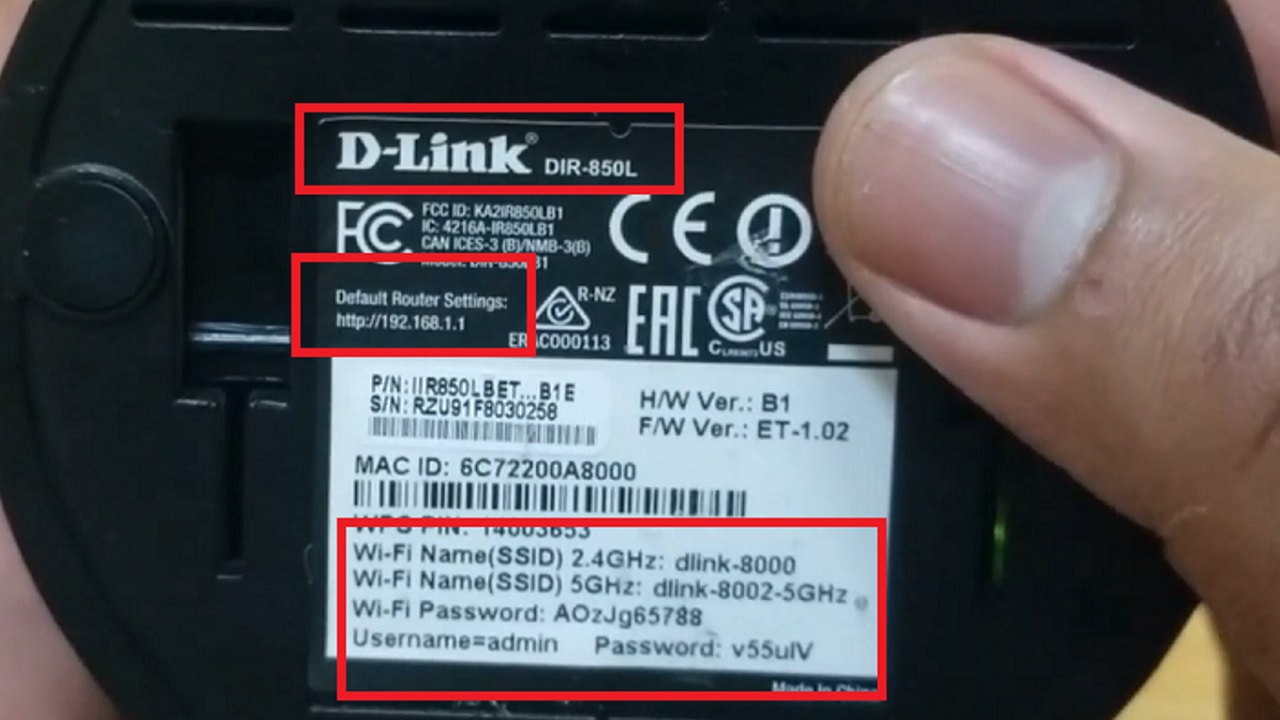
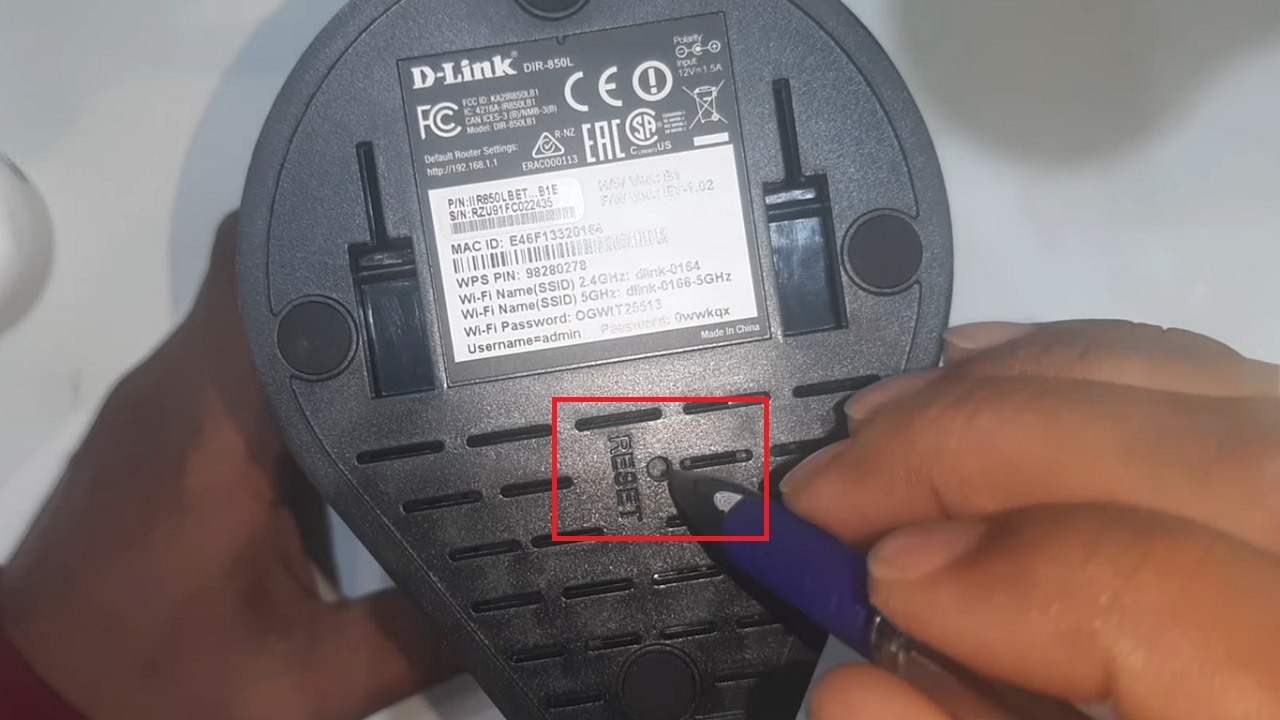
- First of all, check your router label at the back for the model number and other login details. (It is D-Link DIR 850L in this case).
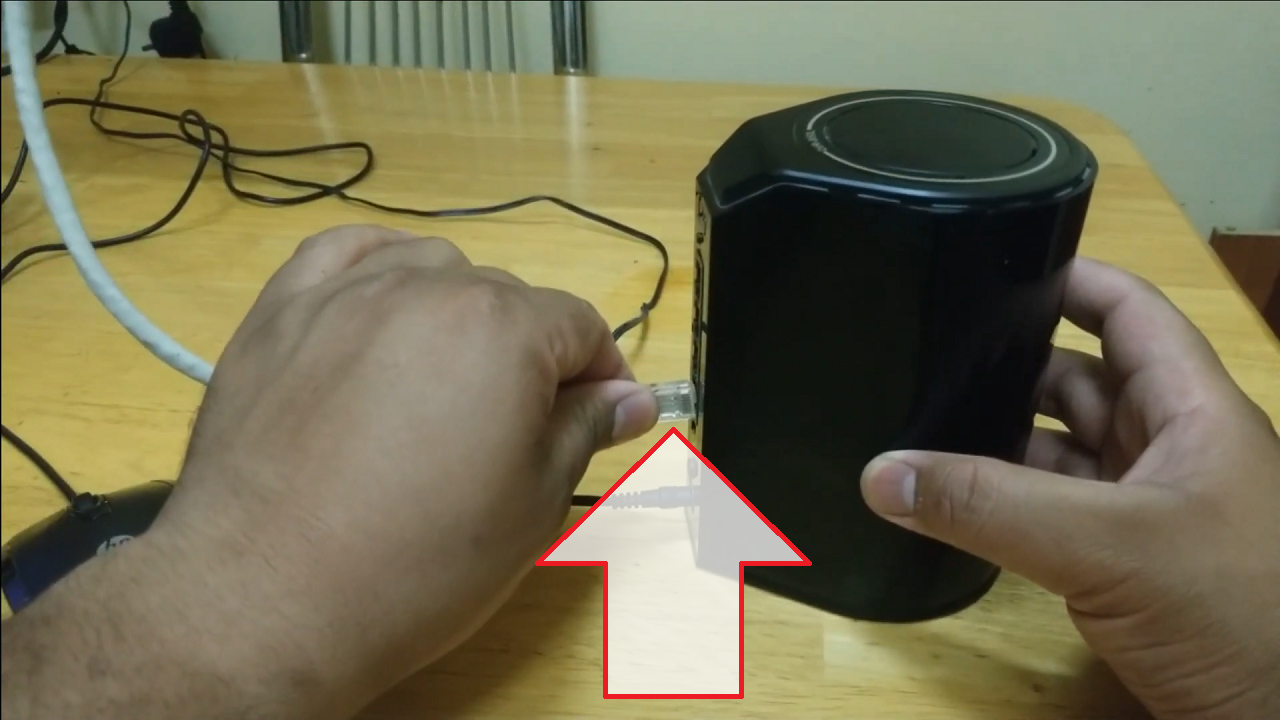
- Connect an Ethernet cable to your router.
To check the current version of your router firmware, follow these steps:
- Open your web browser.
- Type the IP address 192.168.1.1 (written on the label) in the address bar.
- Hit the Enter key on your keyboard.
If you do not find the IP address on the router label, you can follow these steps:
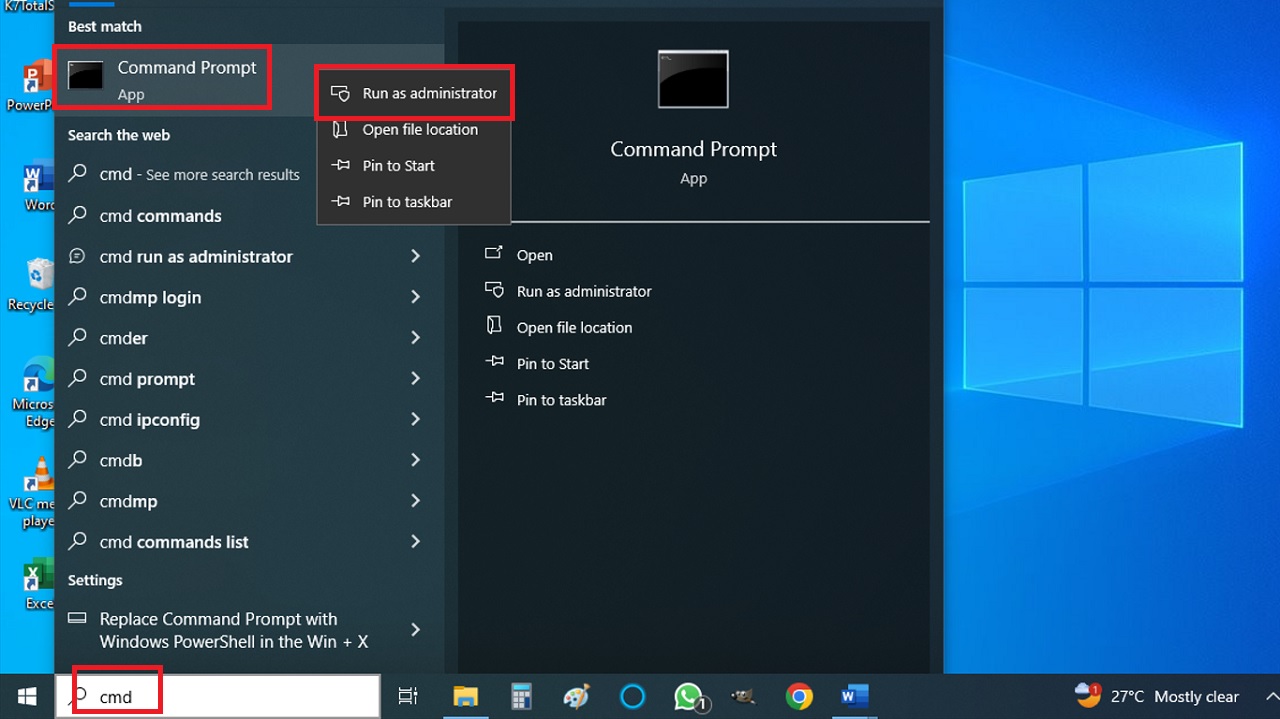
Go to the Windows search box next to the Start Menu > Type cmd > Right-click on the best match > Choose Run as administrator.
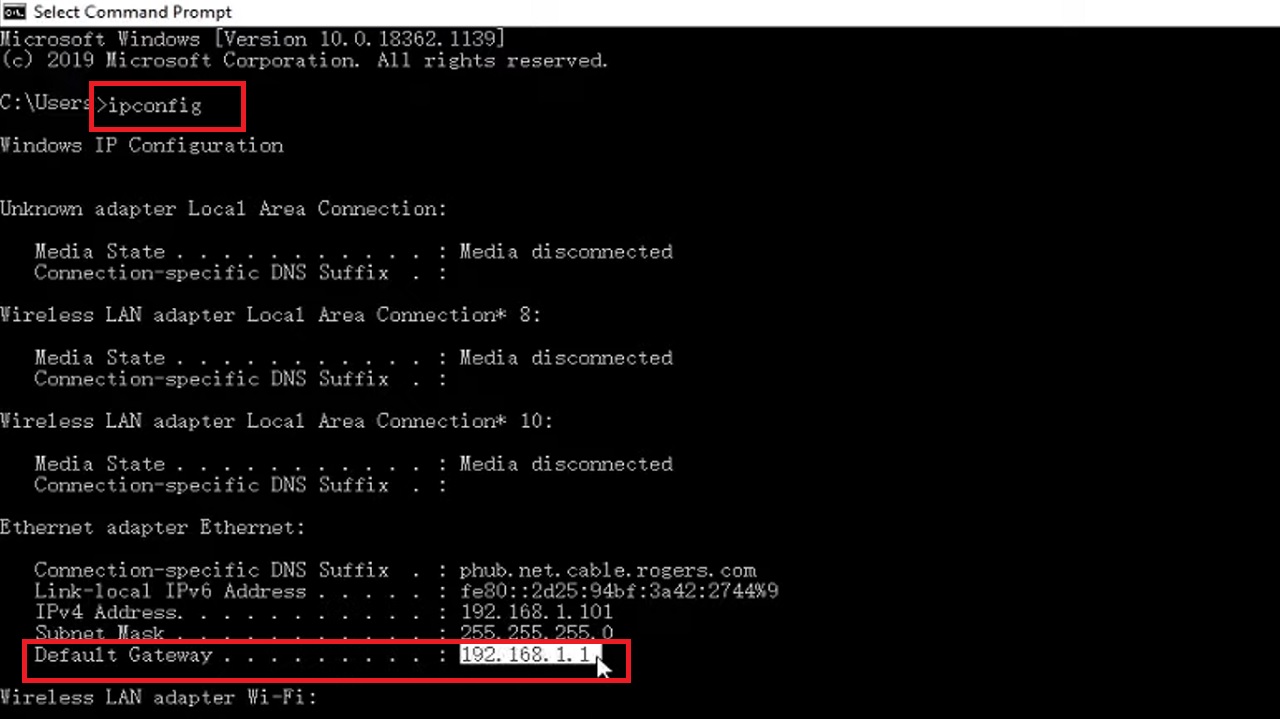
- Now, type ipconfig in the Command Prompt window and hit Enter.
- Check the Default Gateway address.
Now, to download an earlier version of your router firmware follow these steps:
- Go to your web browser.
- Open the D-Link website.
- Click on the Firmware button on the left pane under Downloads.
- Choose an earlier version of your router firmware.
- Click on the download button.
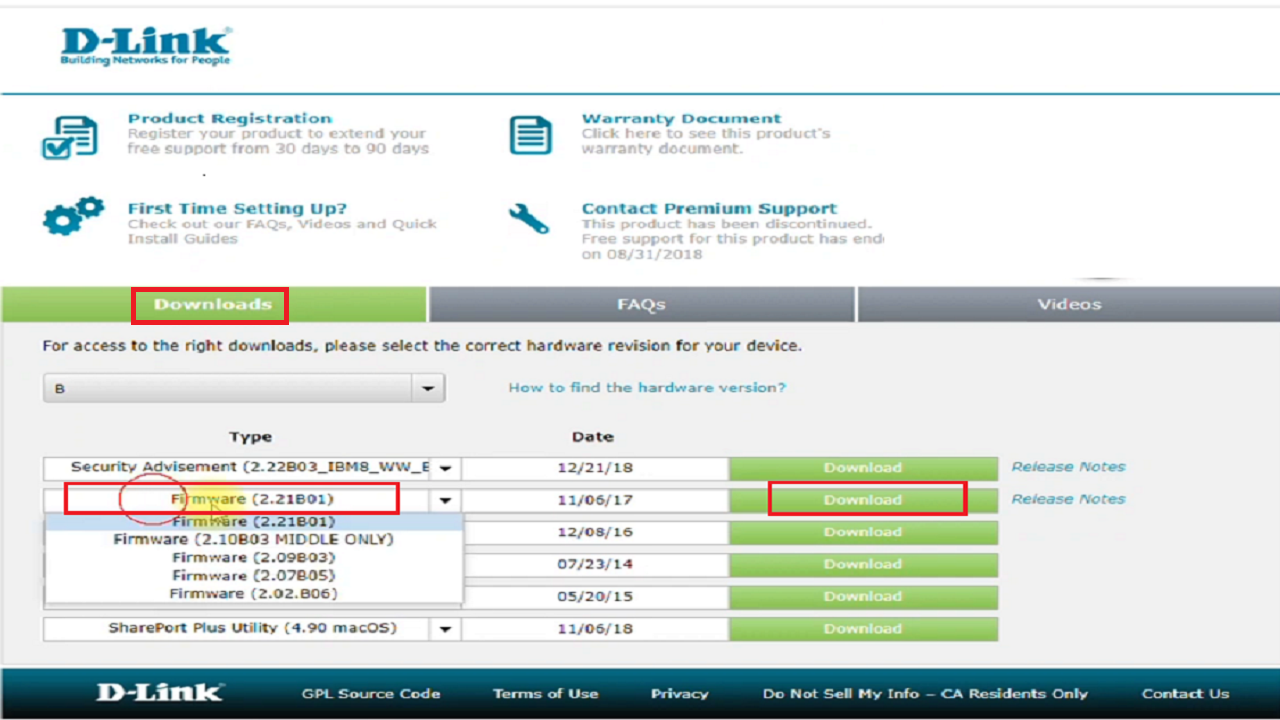
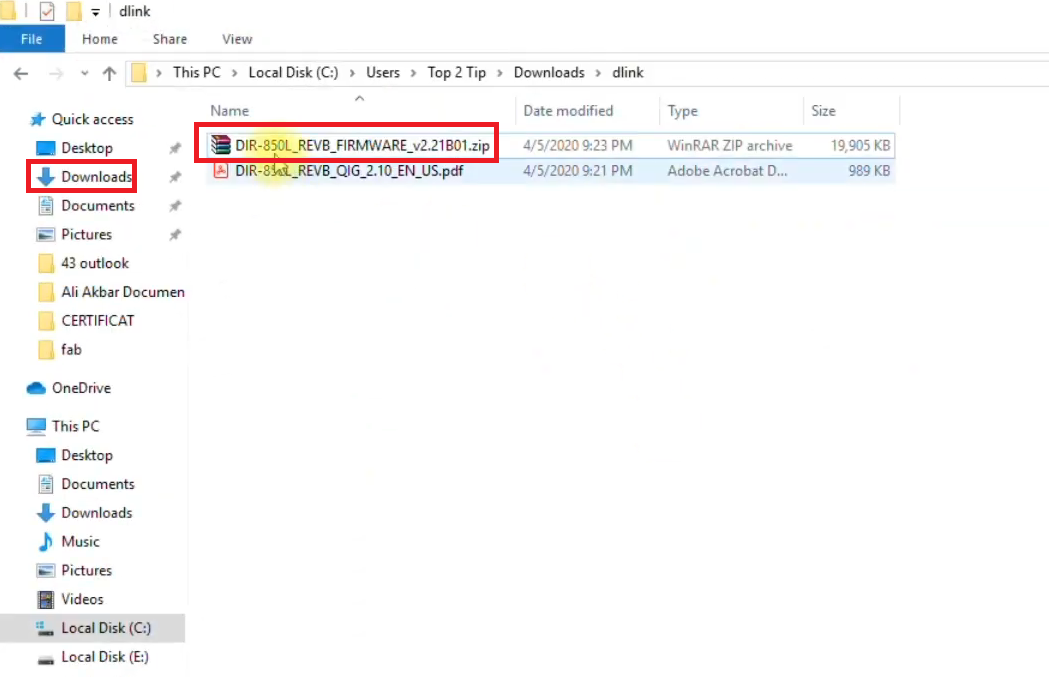
- It will be saved in your Downloads folder as a compressed file, as shown in the figure below:
Now, you have to create a Static IP on your PC by following these steps:
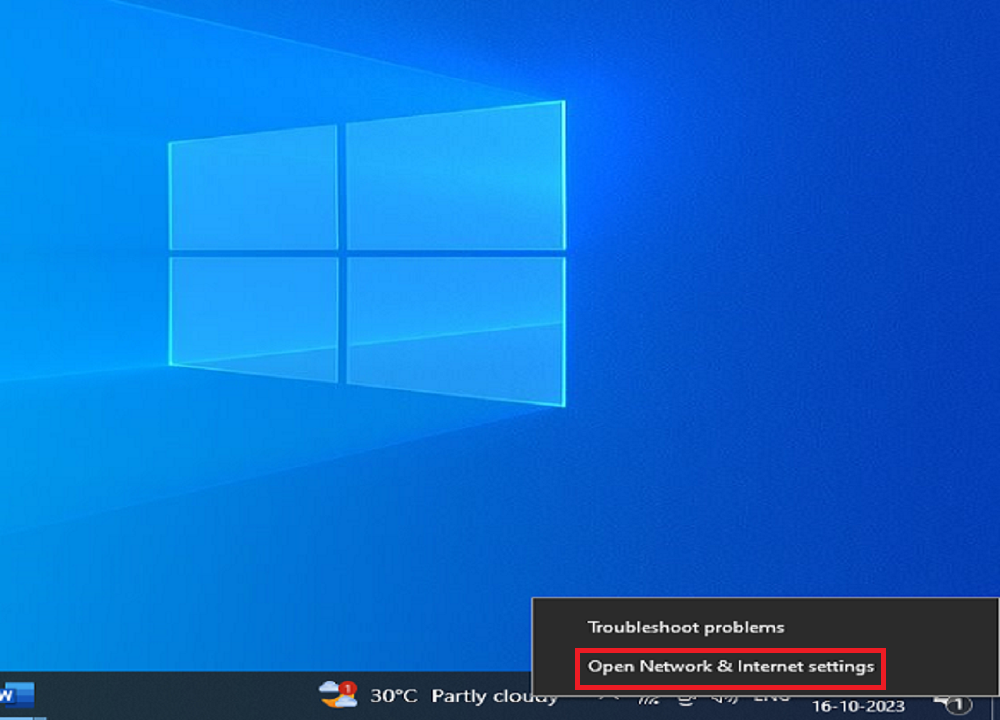
- Go to and right-click on network settings or the wireless icon on the bottom-right of the taskbar.
- Click on Open Network & Internet settings.
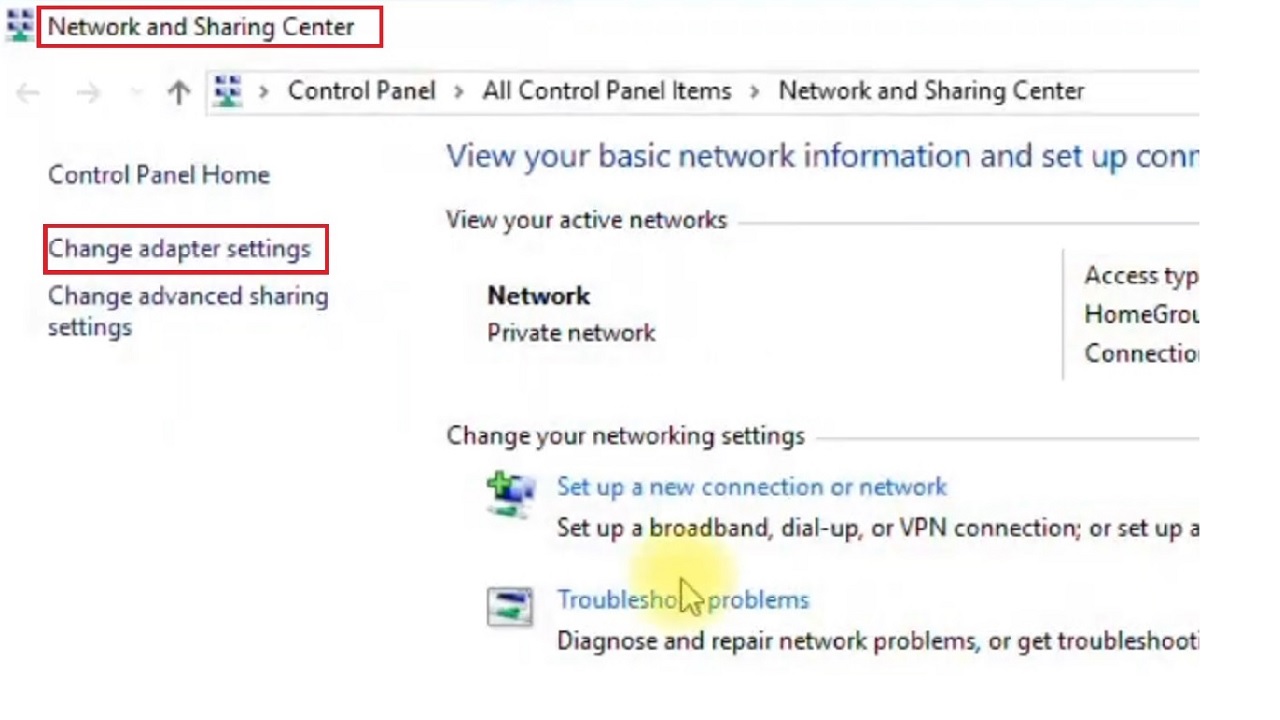
- Click on Change adapter settings in the Network and Sharing Center window that appears.
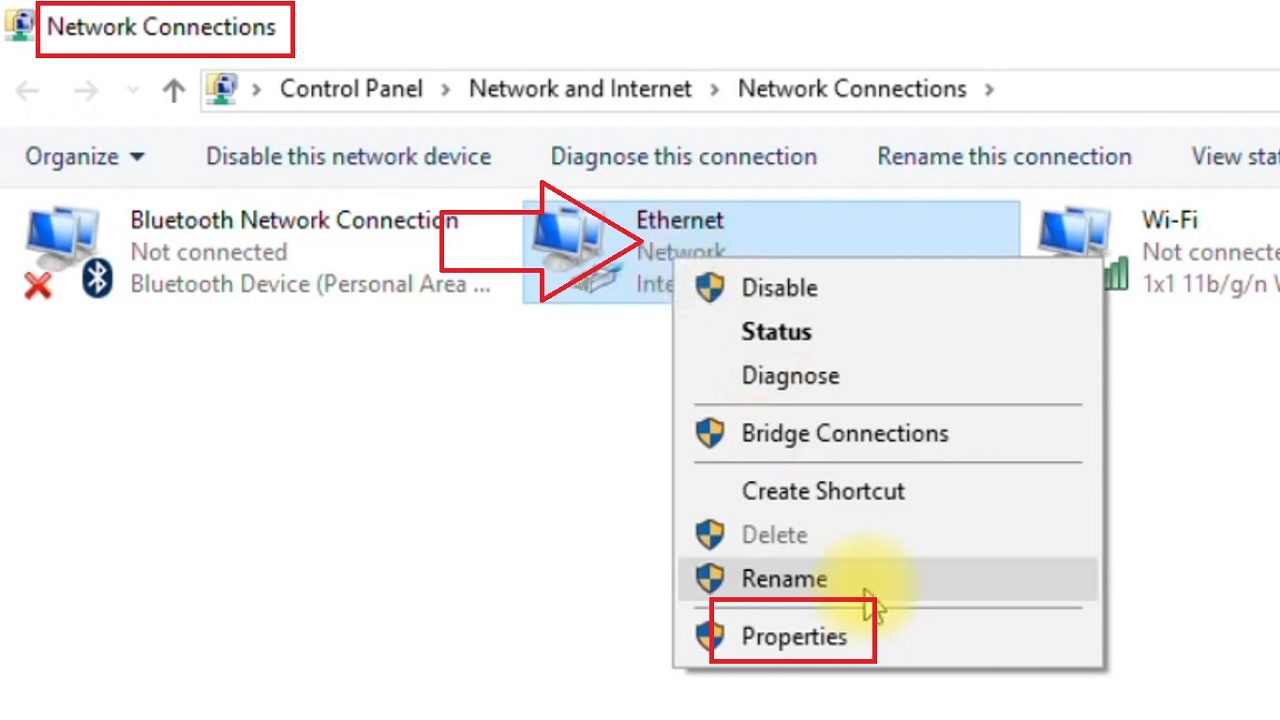
- Right-click on Ethernet in the Network Connections window.
- Select Properties from the dropdown context menu.
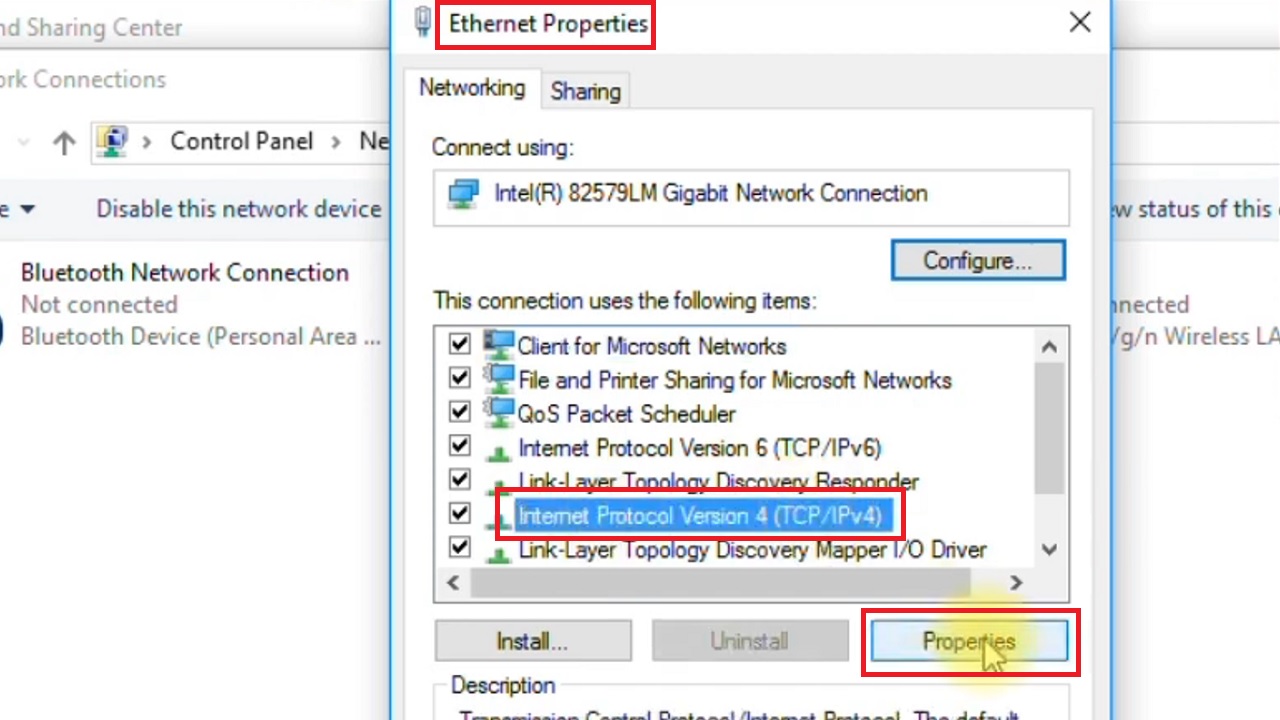
- Select Internet Protocol Version 4 (TCP/IPv4) from the list in the Ethernet Properties window.
- Click on Properties.
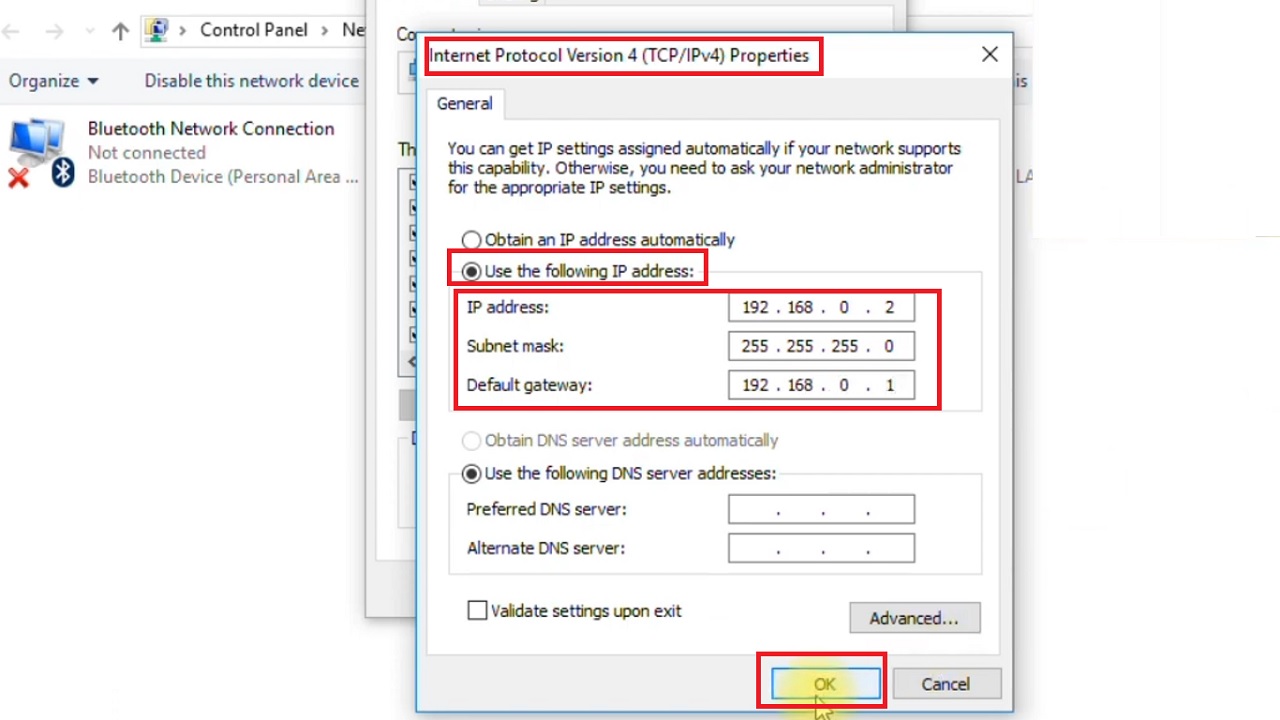
- In the following Internet Protocol Version 4 (TCP/IPv4) Properties window, click the small circular button next to ‘Use the following IP address’.
- Then, enter the IP address, Subnet mask, and Default gateway as shown in the figure.
- Click on the OK button.
Now, you will have to set the router in the recovery mode. For that follow these steps:
- Switch off your router.
- Take a pen, paper clip, or any sharp object.
- Locate the Reset button at the back of the router.
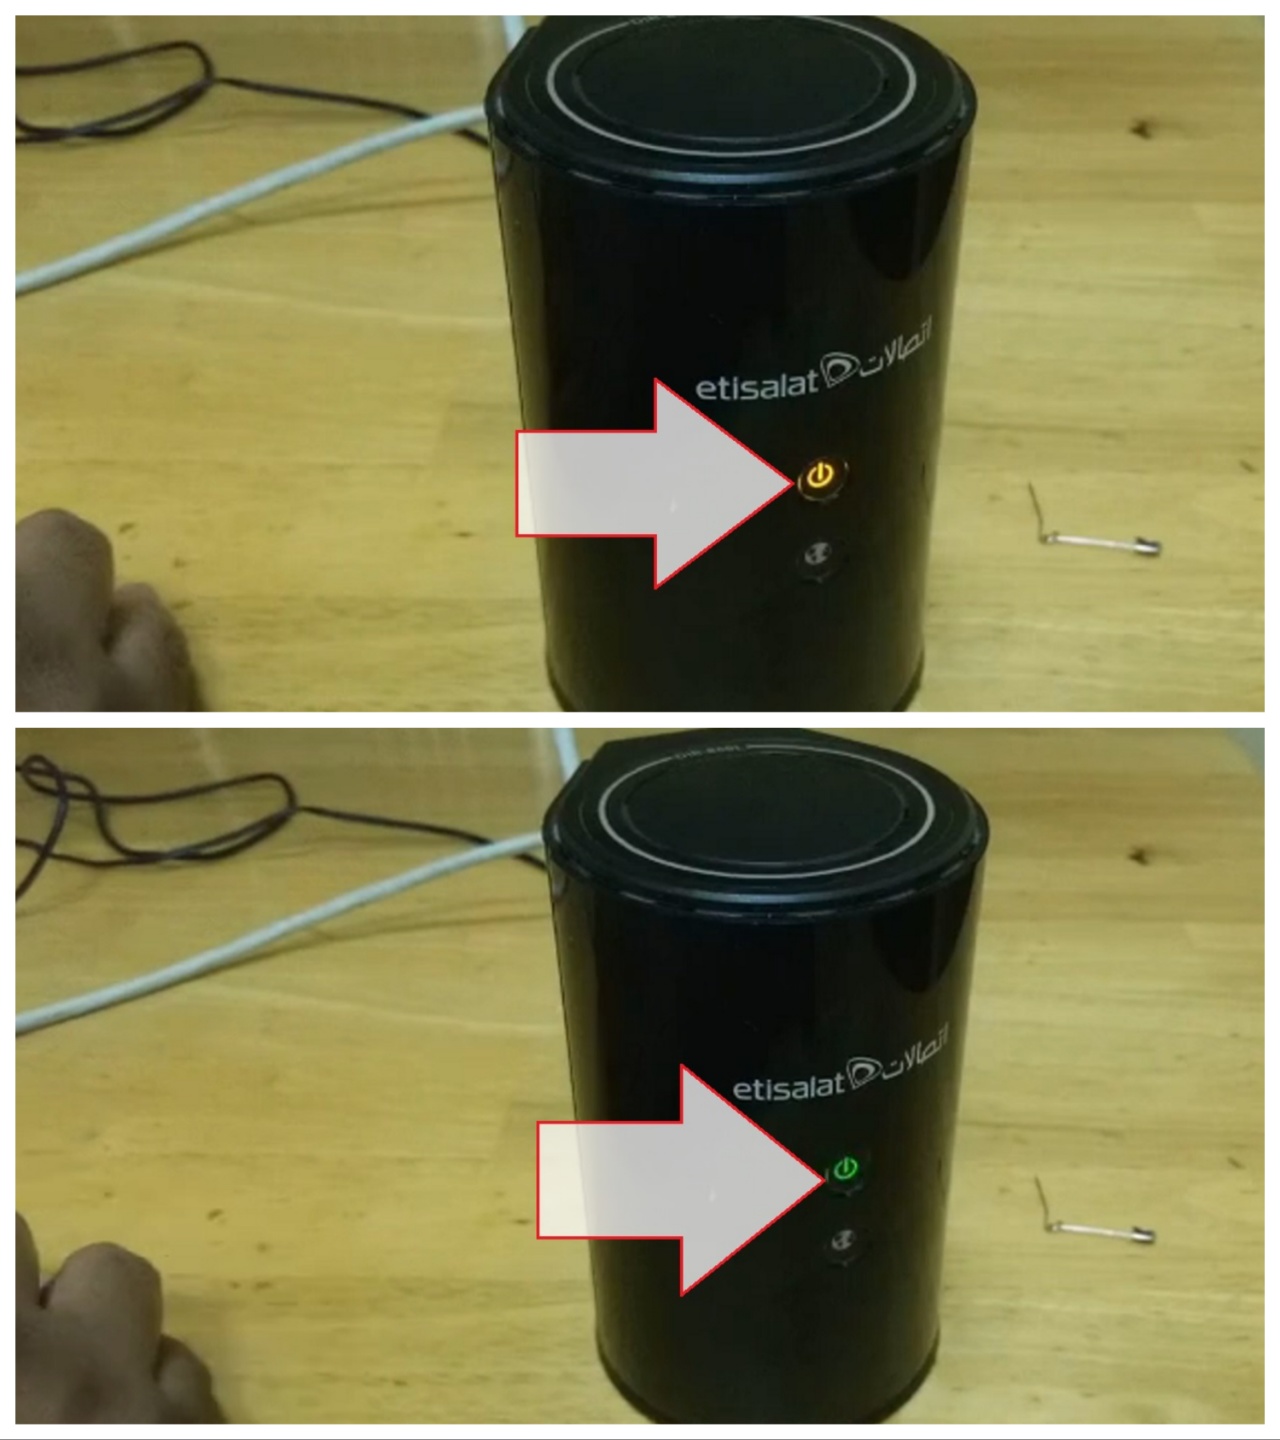
- Press and hold it until you see the orange light blinking.
- Release the reset button.
- Now, go back to your browser.
- Type the IP address 192.168.0.1 and hit Enter.
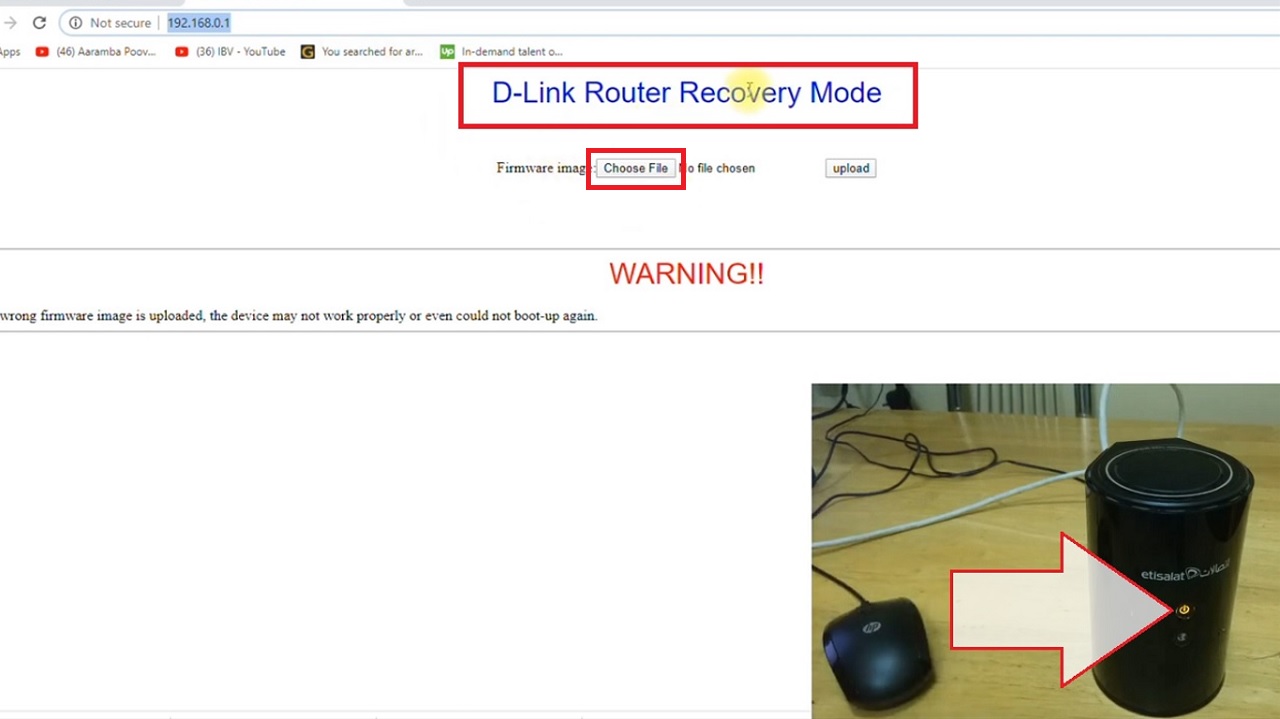
- It will open the D-Link Router Recovery Mode page.
- Click on the Choose File button.
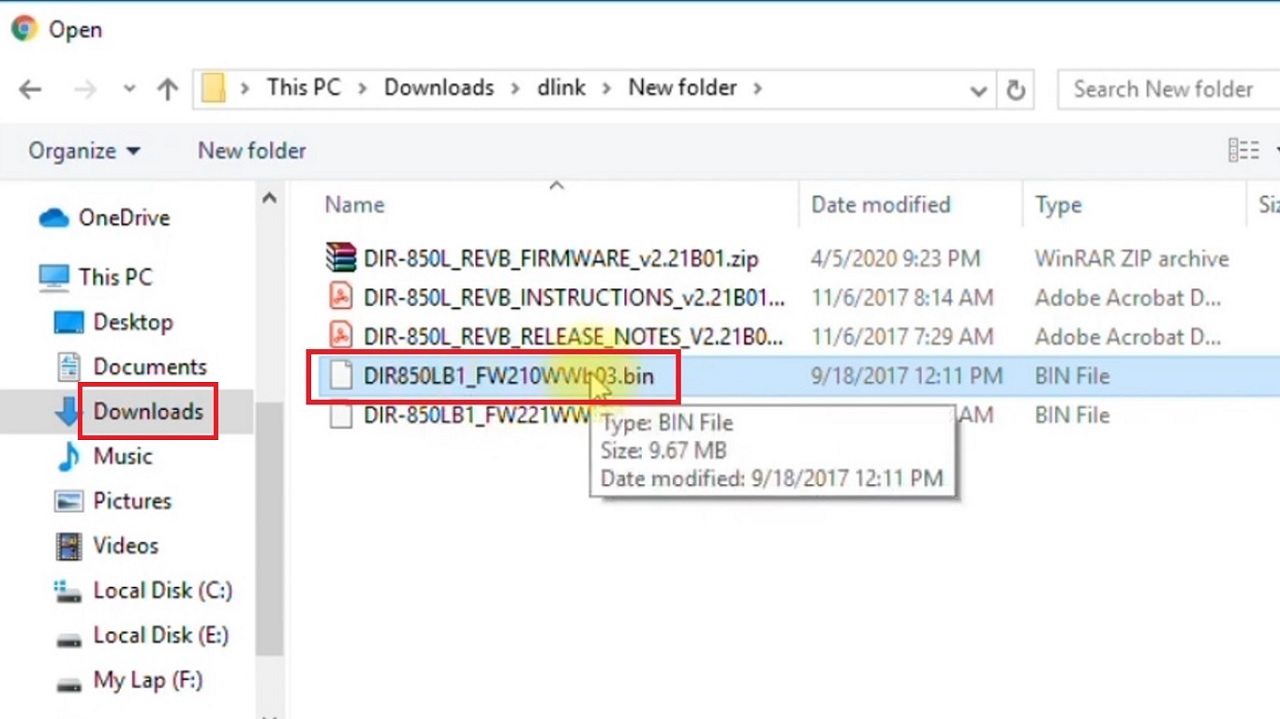
- Go to the Downloads folder.
- Select the downloaded file and right-click on it.
- Select Extract Here from the dropdown options.

- Select the right file from the Downloads folder.
- Click on the Open button (not shown in the image) below.
- Click on the upload button on the D-Link Router Recovery Mode page.
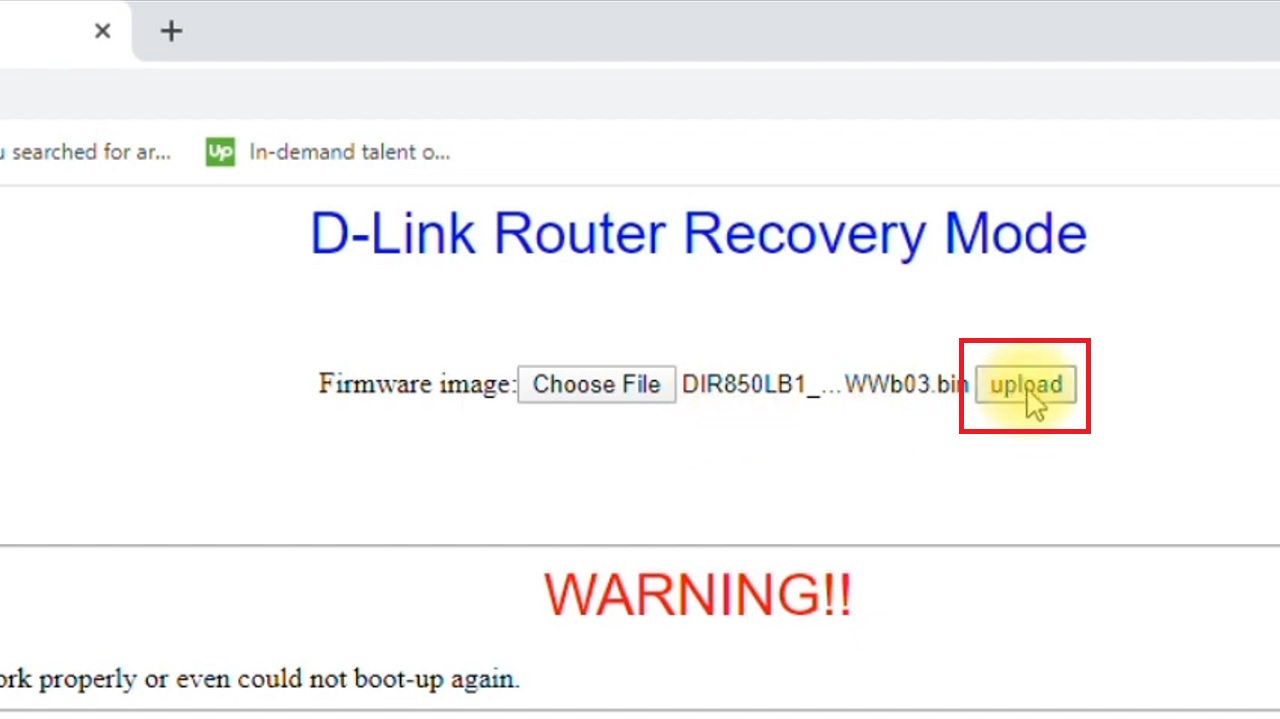
- It will take some time. Let it upload till the Power light on the router disappears.
- Now, you will see the following page saying Upgrade successfully!
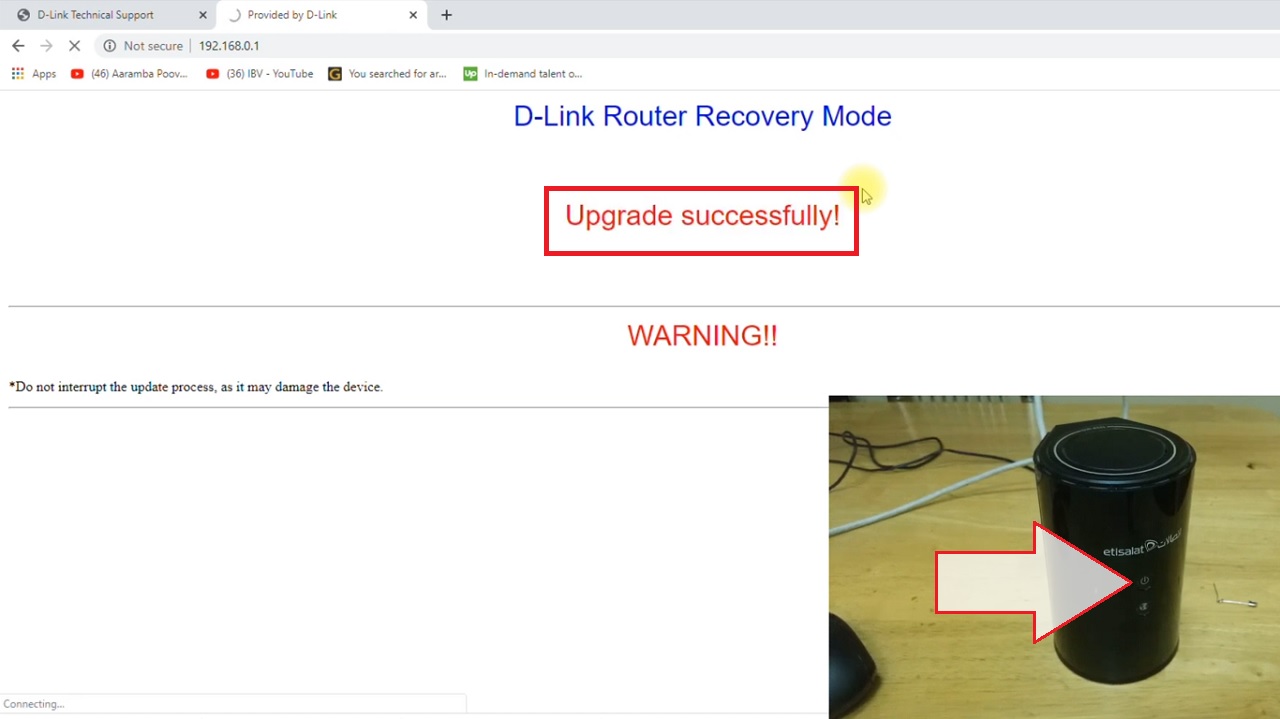
- The router will restart and you will see the Power light is on. It will be orange first and will soon become green.
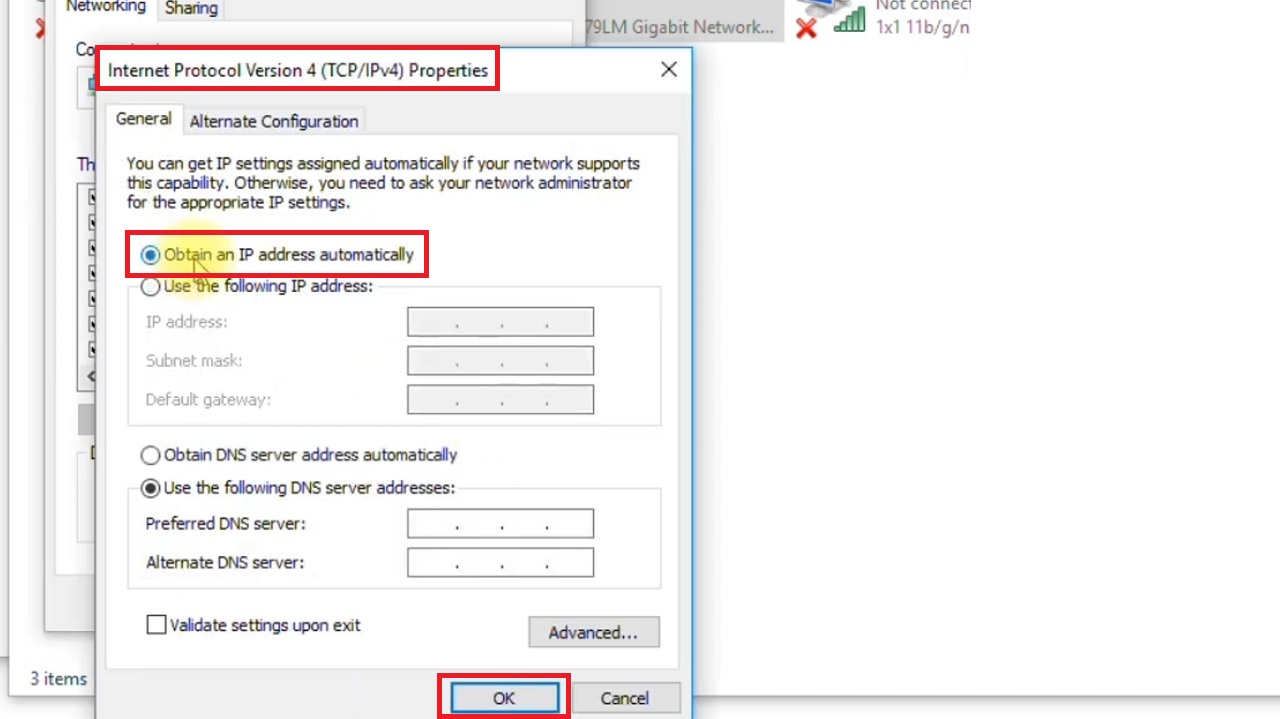
- Now, go back to the Internet Protocol Version 4 (TCP/IPv4) Properties window as before.
- Uncheck the checked circle and click on the radio button next to ‘Obtain an IP address automatically.’
- Click on the OK button.
- Go to the Admin panel of your router from the web browser.
- Log In directly since there is no password.
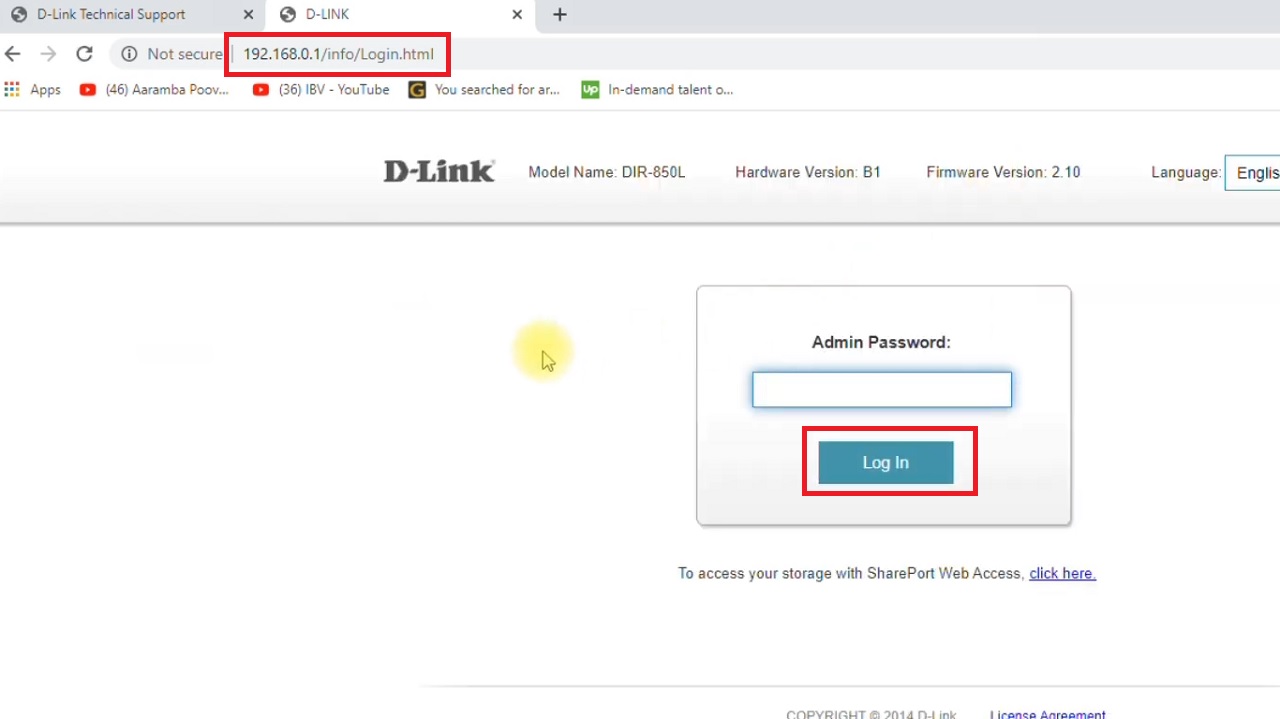
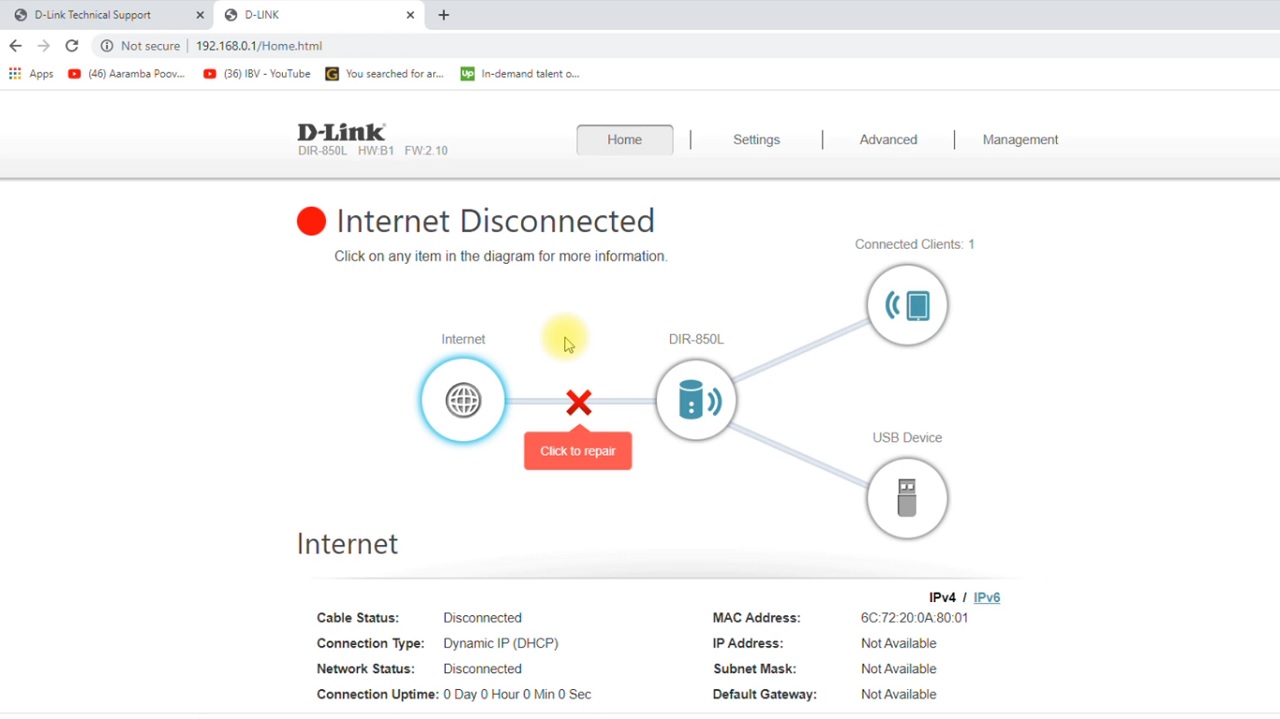
- Your router will be ready for use when you see the following window:
Conclusion
Downgrading the router firmware to an earlier version is an effective way to resolve issues caused by router upgrades.
Simply follow the steps outlined in this article to make your router functional again.