
There are Wi-Fi routers that support only 2.4 GHz and a few that can work both on 2.4 GHz and 5 GHz radio frequencies as well.
However, in some situations, you may not be able to connect to the 5 GHz frequency easily.
Here are some ways in which you can resolve the issue, provided your PC and router are compatible with it and support this radio frequency.
In This Article
KEY TAKEAWAYS
- You may connect to 5 GHz Wi-Fi by changing the configuration of the Wi-Fi properties in the Network & Internet feature.
- Another useful way to connect to 5 GHz Wi-Fi is by changing the network adaptability, if allowed.
- If your Wi-Fi card does not support 5 GHz connectivity, you can simply use an external 5 GHz adapter or dongle to get connected.
- If the PC is not allowing you to connect to the 5 GHz Wi-Fi, you may restart it and then uninstall and reinstall the device and then try connecting.
- If you are using a Mac computer system, you can make changes in the System preferences to connect to the 5 GHz Wi-Fi.
Why Do You Need to Connect to 5 GHz Wi-Fi?
You will need to connect to the 5 GHz Wi-Fi connection for better performance and speed. Also, you may want to switch to a less-congested network.
You may also want to change it to have HD-quality video streaming so that you have a much better gaming experience.
However, remember that the 5 GHz wireless frequency has a shorter range.
How to Connect to 5 GHz Wi-Fi?
One easy way to connect to the 5 GHz Wi-Fi is to change the settings of the wireless mode in the Wi-Fi properties.
Sometimes, if allowed, you can change the network adaptability if your system supports both 2.4 GHz and 5 GHz radio frequencies.
A few other useful ways to get connected to the 5 GHz network, if allowed, are:
- Updating your outdated driver and then connecting to 5 GHz
- Using an external adapter if the built-in Wi-Fi card does not support 5 GHz connectivity
- From the web portal of your router
However, please note, all these solutions will only work depending on the compatibility of your device.
In Windows Computers:
Here are the couple of methods to follow to connect to the 5 GHz Wi-Fi in Windows computers.
Method 1: From the Network & Internet Settings
You can connect to the 5G network from the Network & Internet settings in the Action Center.
STEPS TO FOLLOW:
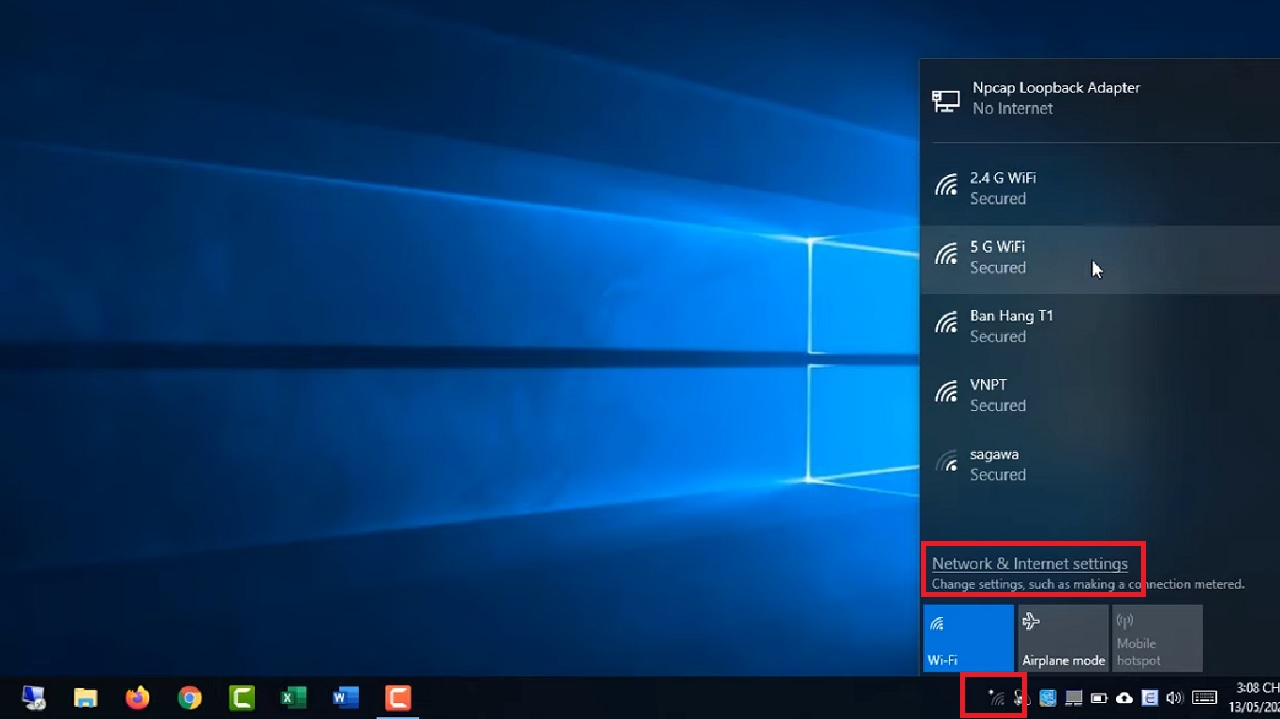
- Click on the network icon on the right side of the task bar to open the Action Center.
- Click on Network & Internet settings.
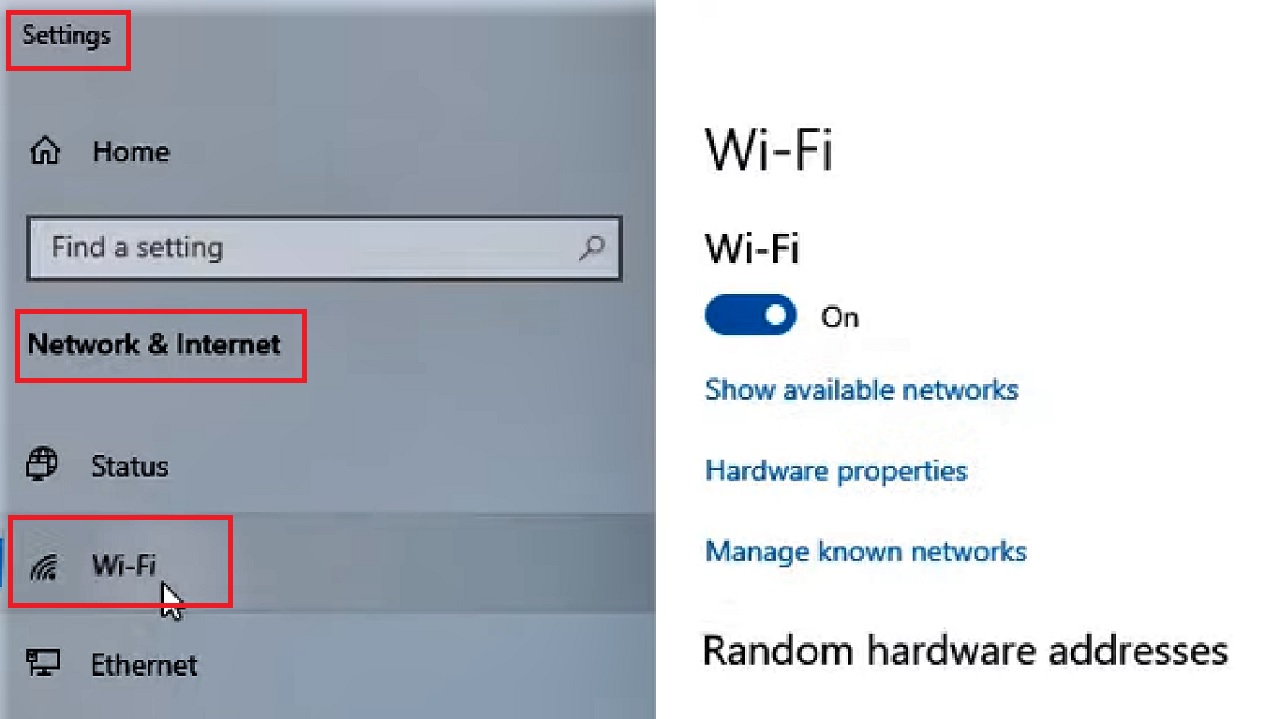
- Select Wi-Fi from the left panel under Network & Internet in the Settings window that appears next.
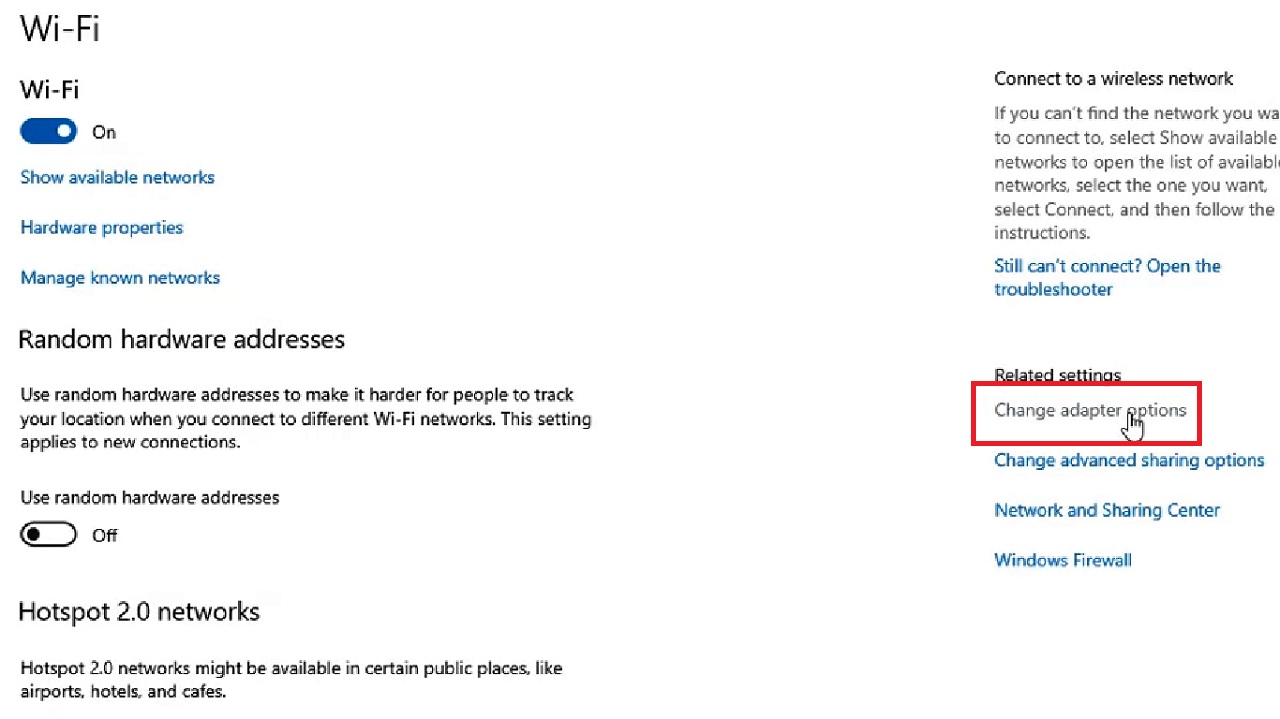
- Click on Change adapter options on the right side of the following window.
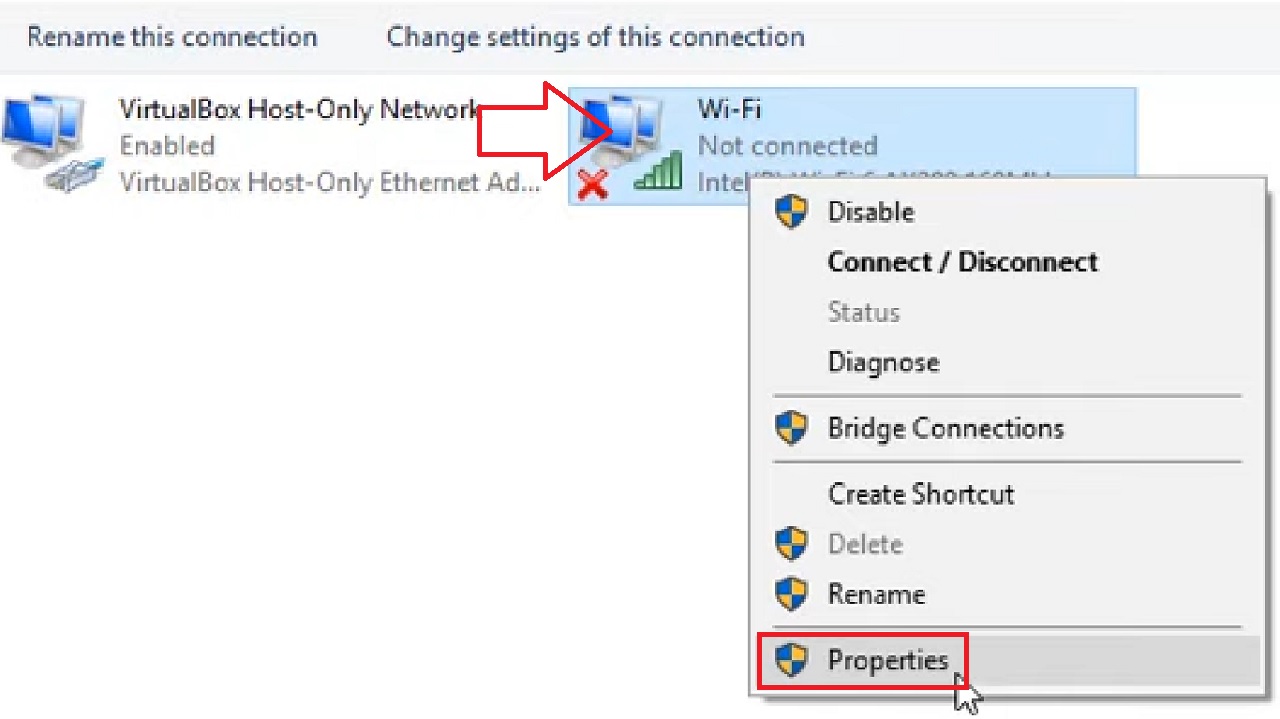
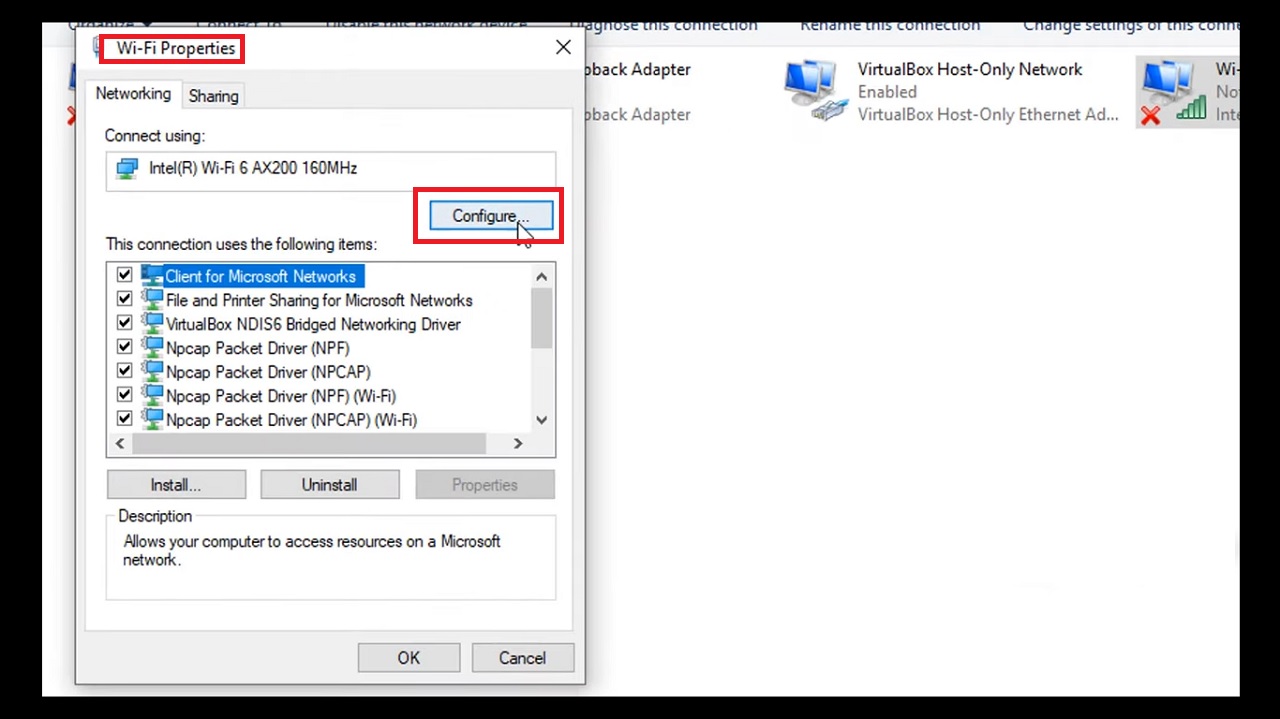
- In the Network Connections window, right-click on your Wi-Fi adapter and select Properties from the drop-down context menu.
- In the following Wi-Fi Properties window, click on the Configure button.
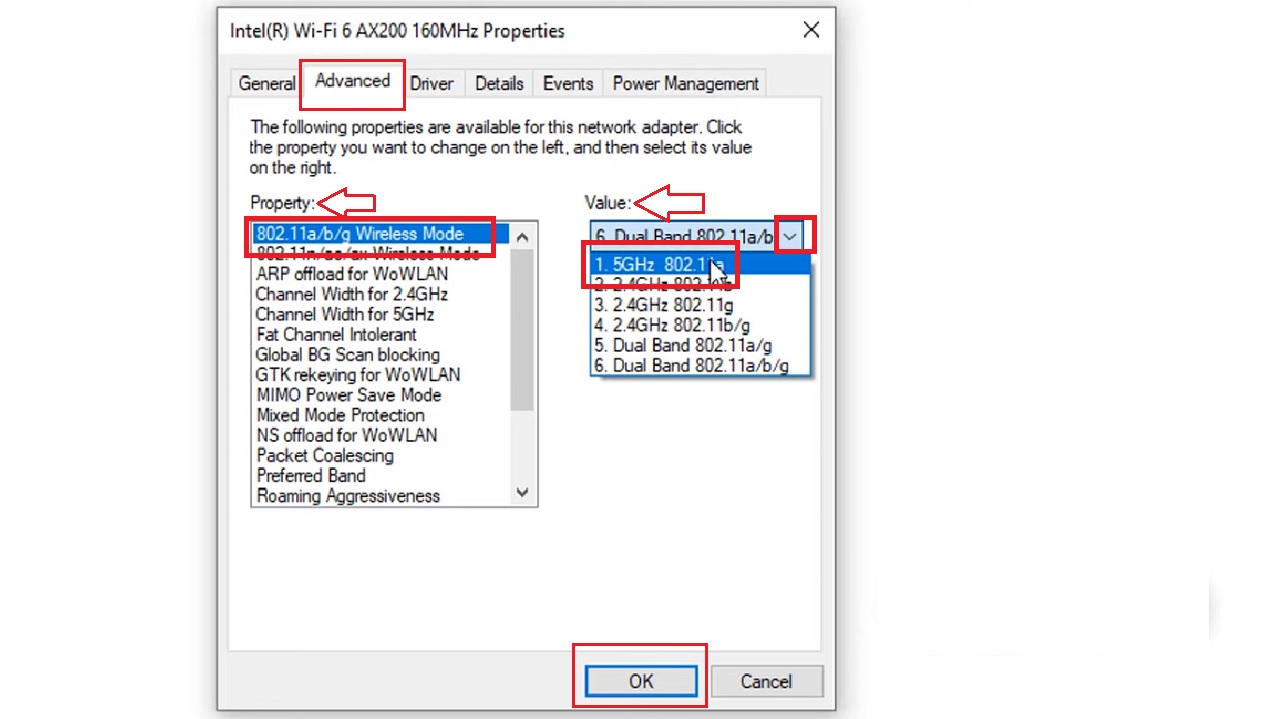
- Now, in the following window, go to the Advanced tab.
- Select the 802.11a/b/g Wireless Mode from the list in the box under Property.
- Click on the small arrow on the right side of the box under Value.
- Select 5Ghz 802.11a option from the drop-down list.
- Click on the OK button.
- Go to the Action Center again as before.
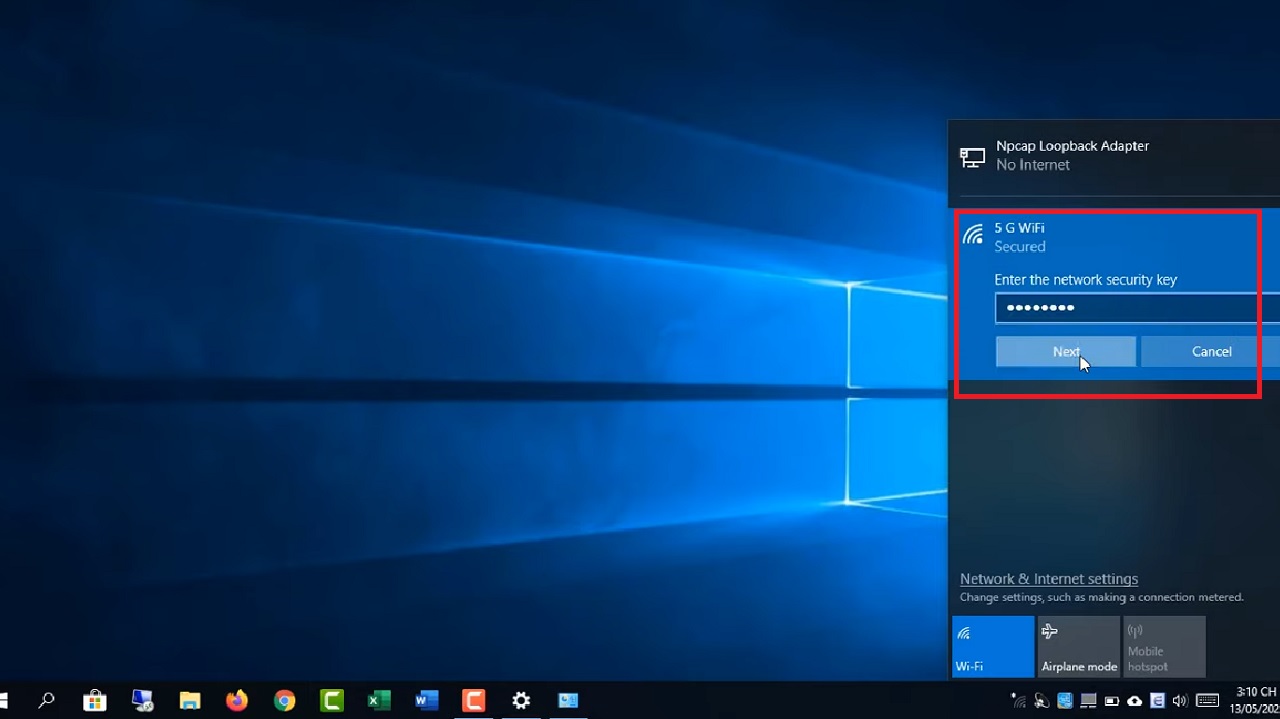
- Click on 5 G Wi-Fi.
- Enter the Network security key or password.
- Click on the Next button.
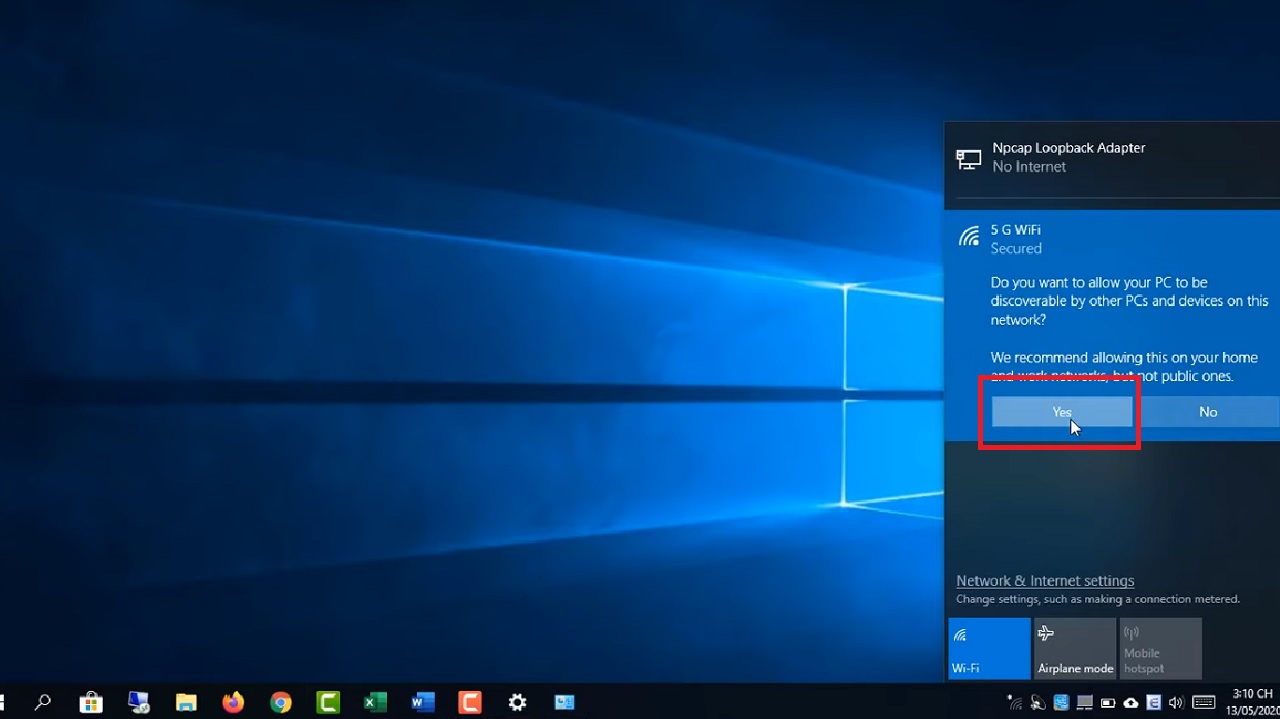
- Click on the Yes button when you are asked ‘Do you want to allow your PC to be discoverable by other PCs and devices on this network?’
- To check the details, go to the search box next to the Start menu > Type cmd > Right-click on the Command Prompt > Select Run as administrator from the options > Hit Enter.
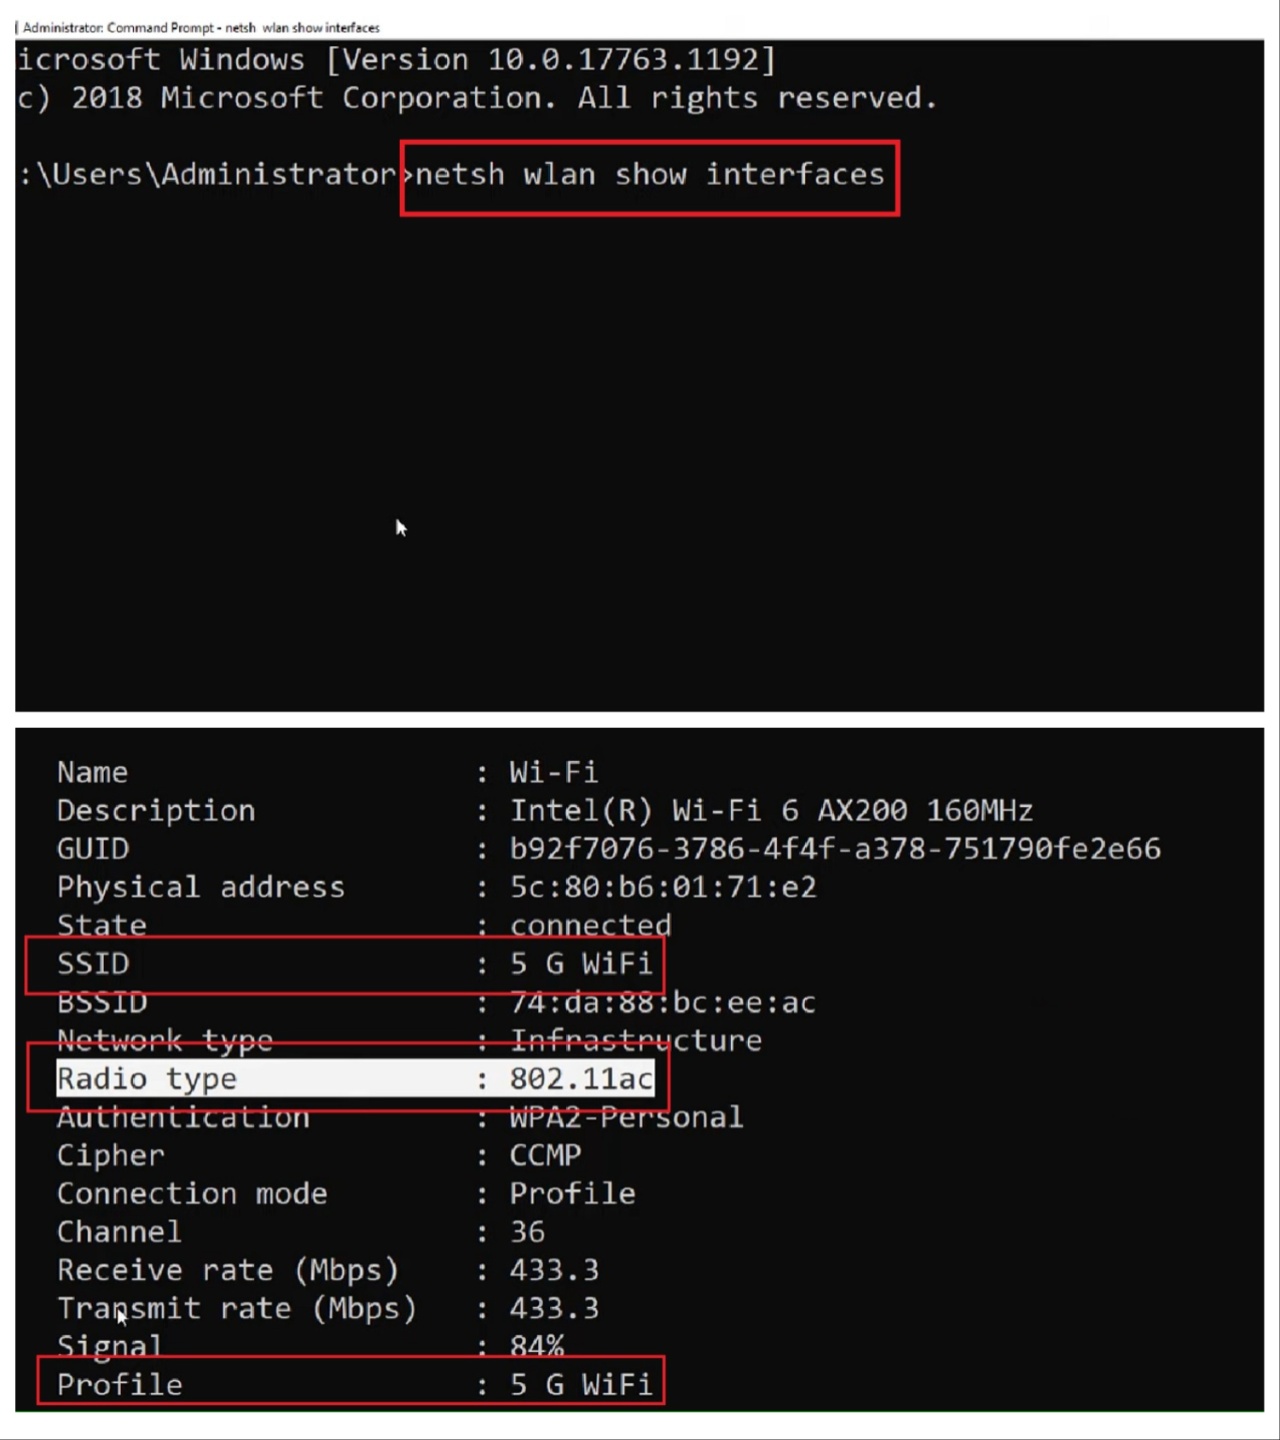
- In the Command Prompt window, type the command netsh wlan show interfaces and hit Enter.
- The profiles will be displayed in the return result.
- Type exit and close the windows.
Method 2: Check and Change Network Adaptability
Sometimes, you may be able to connect to 5 GHz even if you have a dual-band router because the computer may not have this capability in the first place. So, check it and make it work.
STEPS TO FOLLOW:
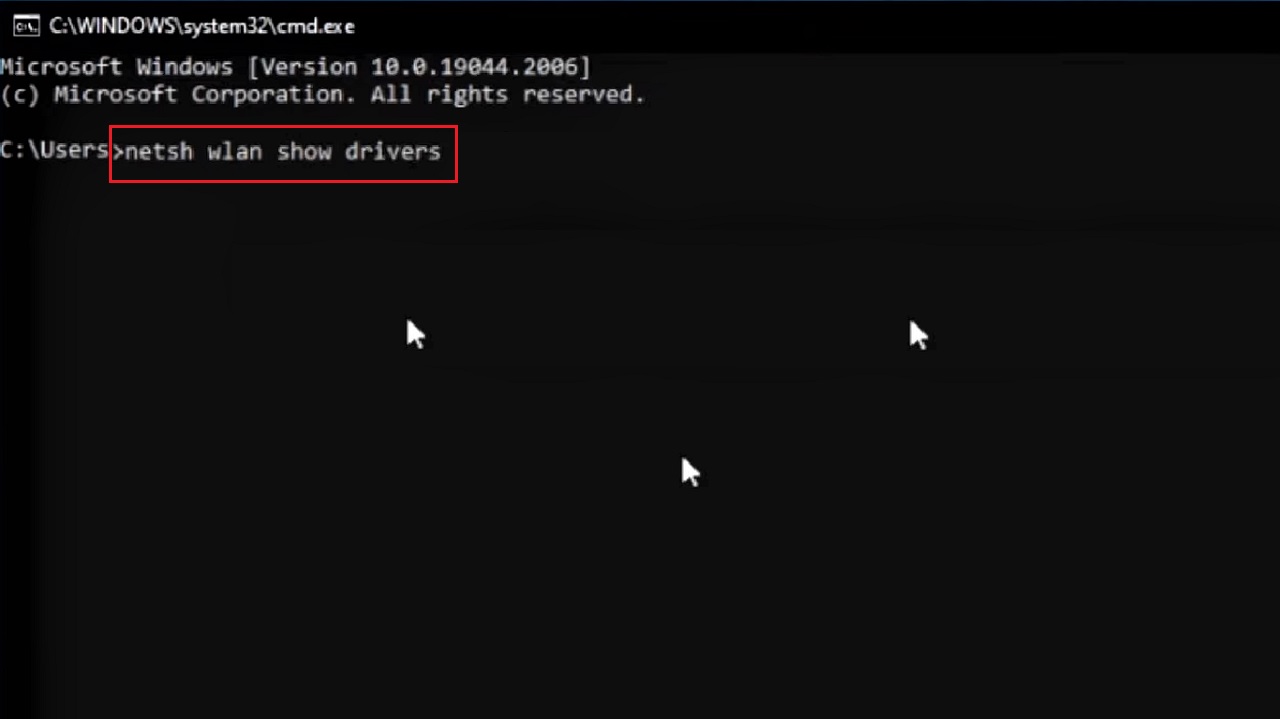
- Open the Command Prompt as before.
- Type in the command netsh wlan show drivers and press the Enter key on your keyboard.
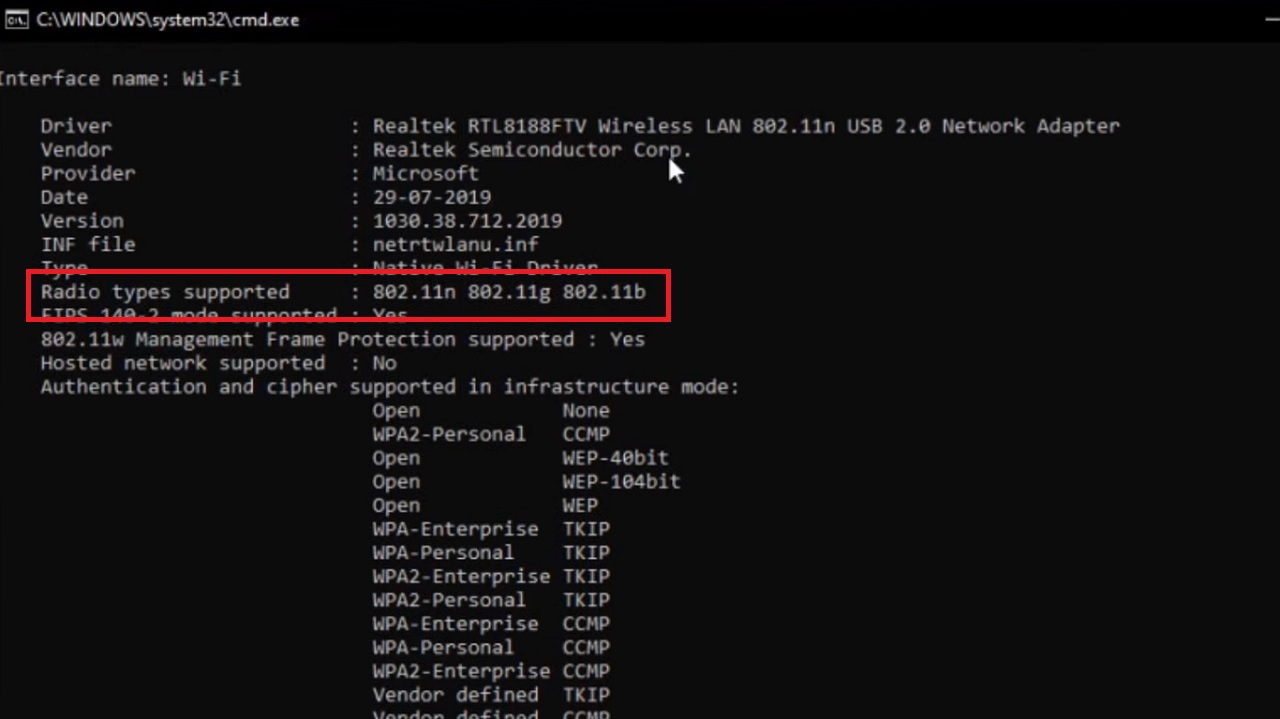
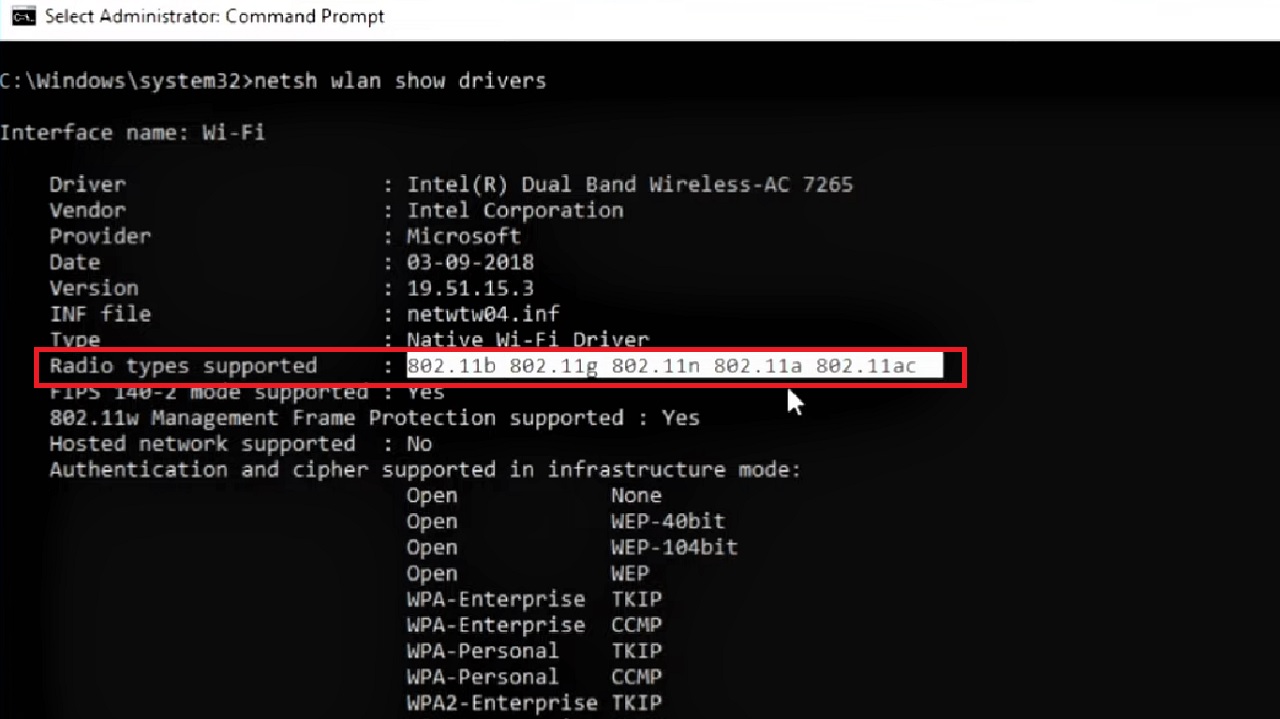
- Check for the Radio types supported section.
- If it says 802.11n, 802.11g, 802.11b, it means your system supports 2.4 GHz Wi-Fi only.
- On the other hand, if it says 802.11b, 802.11g, 802.11n, 802.11a, 802.11ac, it means it supports both 2.4 GHz and 5 GHz Wi-Fi connectivity.
If it supports both radio frequencies, you may change the network mode or adaptability it in the following way:
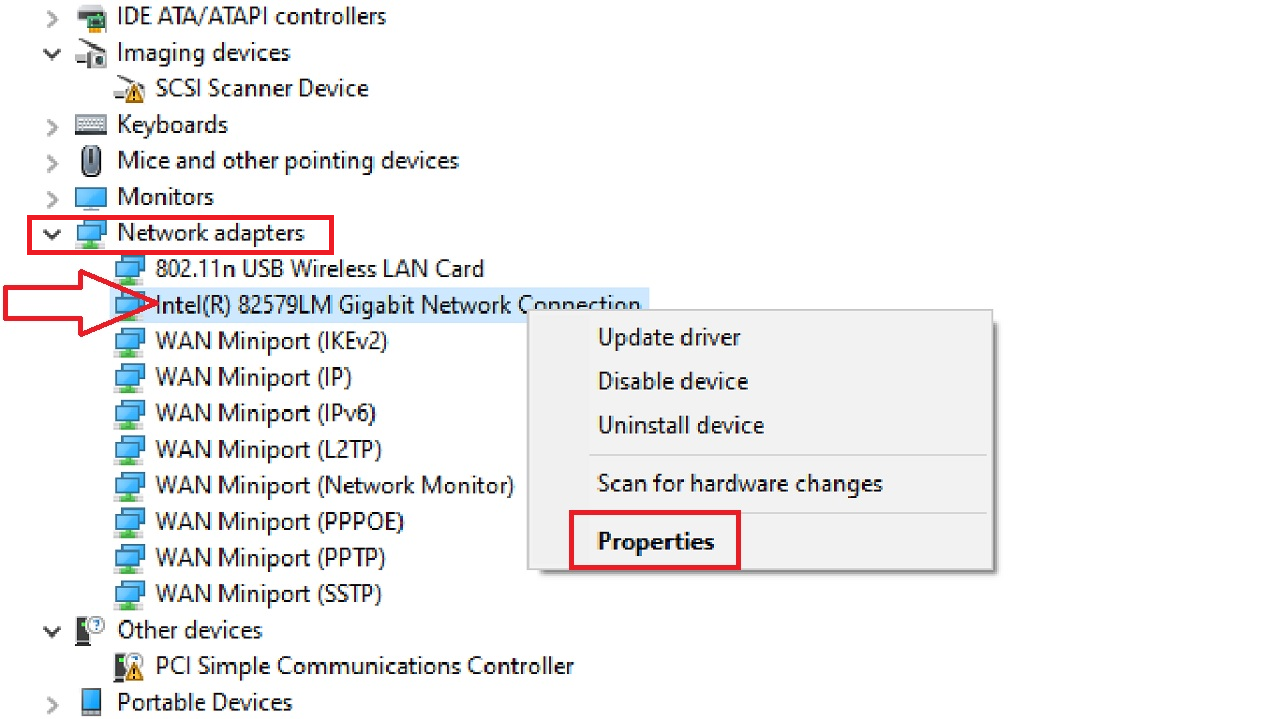
- Right-click on the Start Menu.
- Choose Device Manager from the list of options that appears.
- In the Device Manager window, click on the small arrow next to Network adapters to expand it.
- Select your wireless adapter and right-click on it.
- Select Properties form the drop-down context menu.
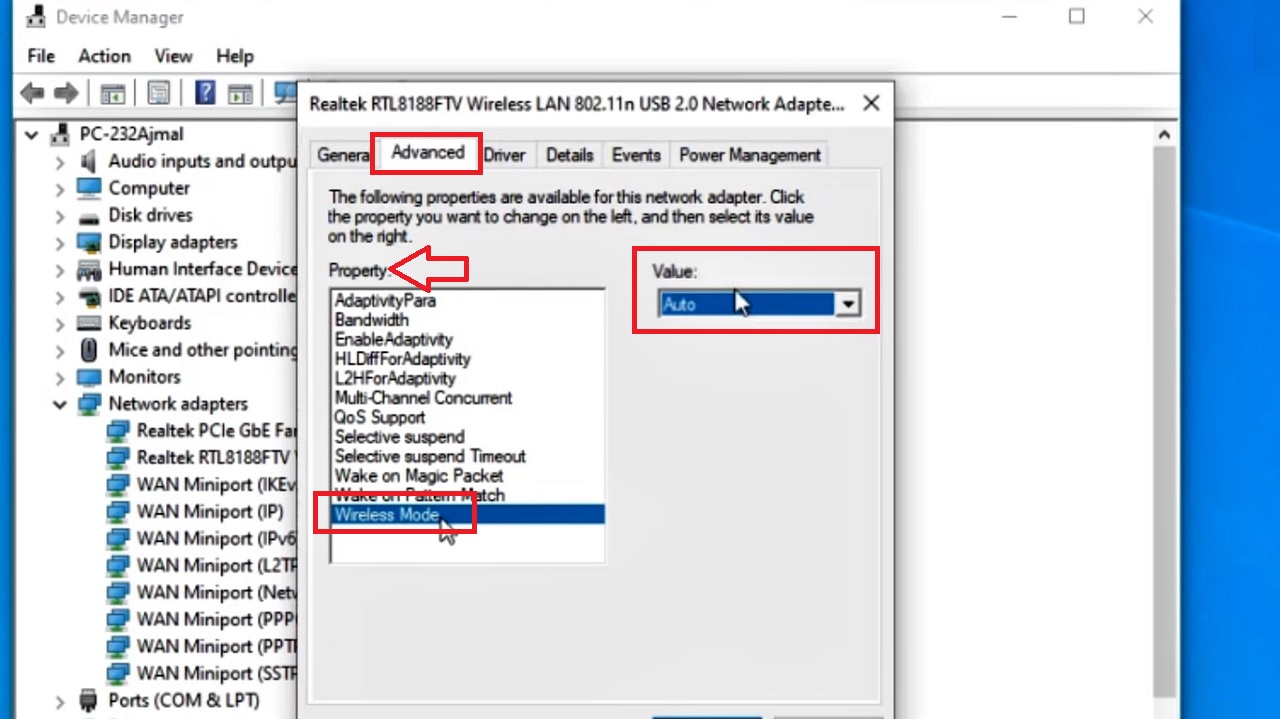
- In the following window, look for Wireless Mode in the list of properties in the box under Property.
- Select it.
- Click on the small arrow on the right of the box under Value.
- Select Auto from the drop-down options.
- Now select Selective suspend property from the list and change it to Prefer 5GHz band in the Value field.
- Also do the same for Preferred Band property
- Finally, click on OK to save the changes and exit.
- Now, restart your PC.
You should be able to see and connect to 5GHz Wi-Fi by following the last few steps of the previous method.
Method 3: From the Web Portal of Your Router
The web portal of your router will also allow you to make the change to connect to the 5 GHz Wi-Fi instead of the default 2.4 GHz connectivity.
STEPS TO FOLLOW:
- Open Google Chrome.
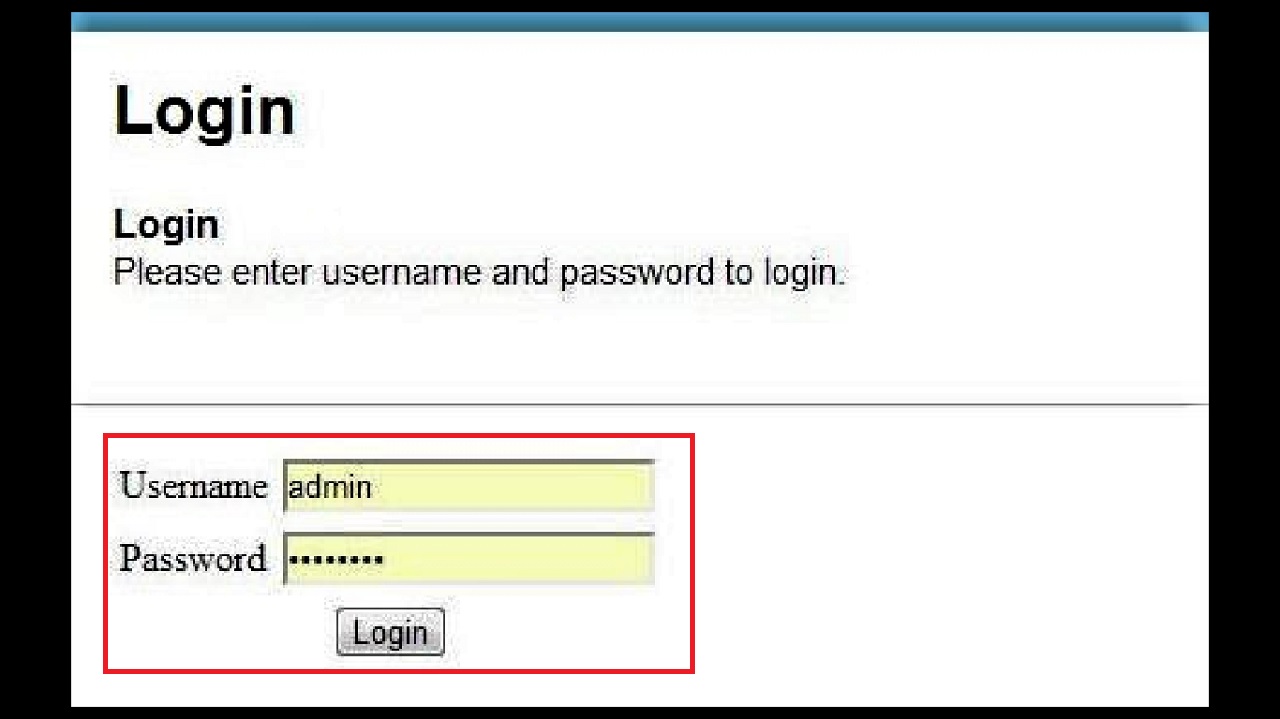
- Login to the web portal of your router using the IP address printed on the label at the back of your router.
- Go to the router settings page by using your username and password.
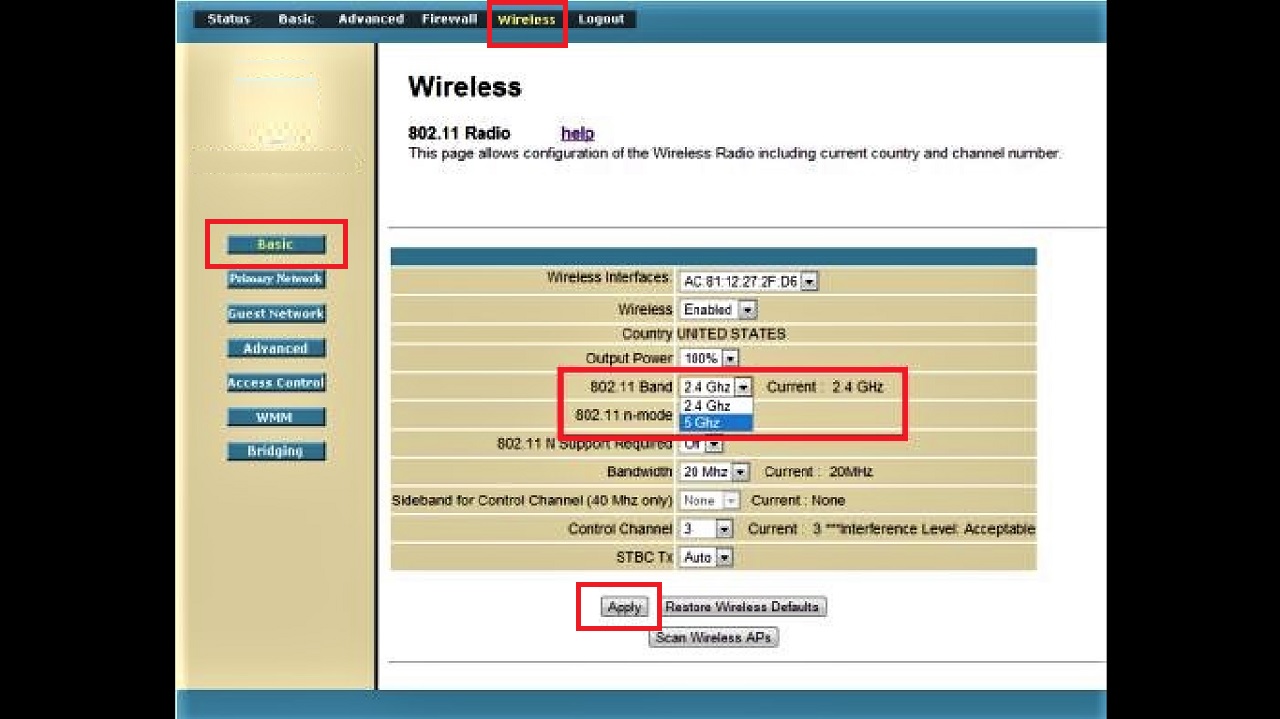
- Choose the Wireless tab on the new window to edit your wireless settings.
- Select Basic from the left pane of the window that appears.
- Change the 802.11 band from 2.4 GHz to 5 GHz.
- Click on the Apply to save the changes made in the settings.
Now, you can connect to the 5 GHz band.
Method 4: Uninstall and Reinstall Device
You may also try uninstalling and reinstalling the device from the Device Manager and then try to connect to 5 GHz Wi-Fi, if your PC does not allow you to connect to it in the first place.
STEPS TO FOLLOW:
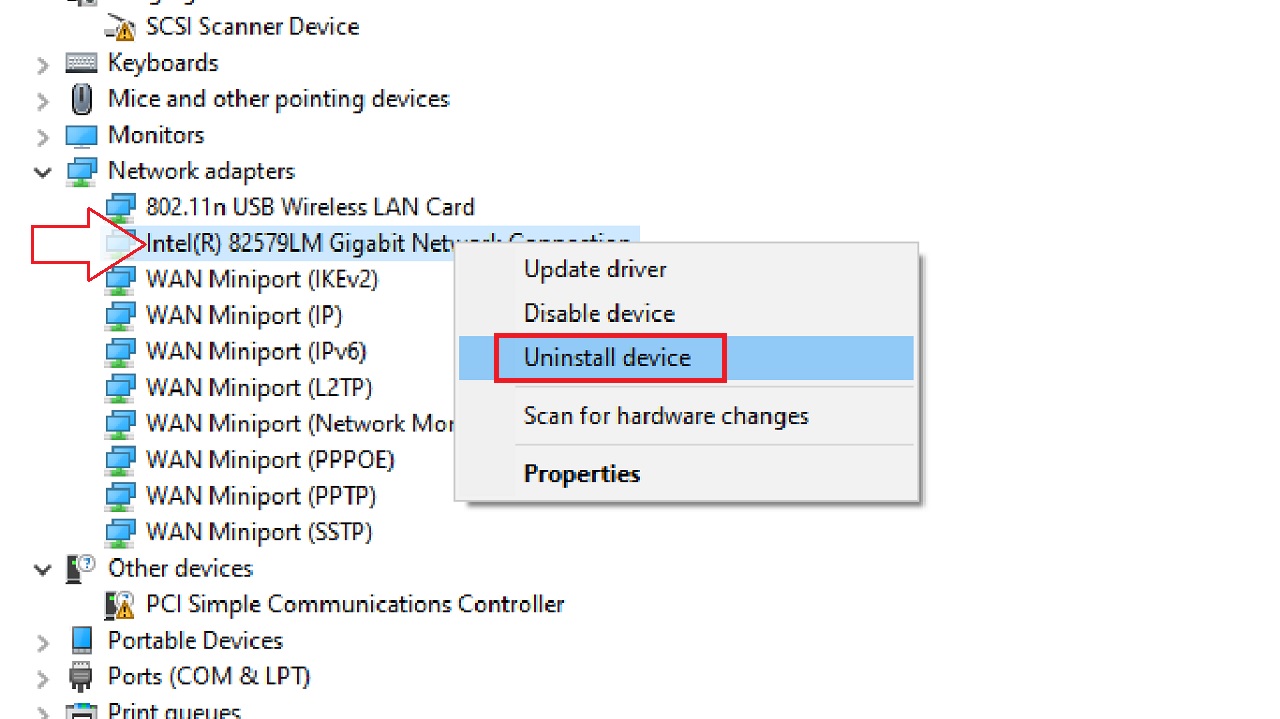
- Open Device Manager as you did in Method 2 and right-click on your wireless network adapter.
- Select Uninstall device.
- Click on the Uninstall button below in the Uninstall Device window that appears.
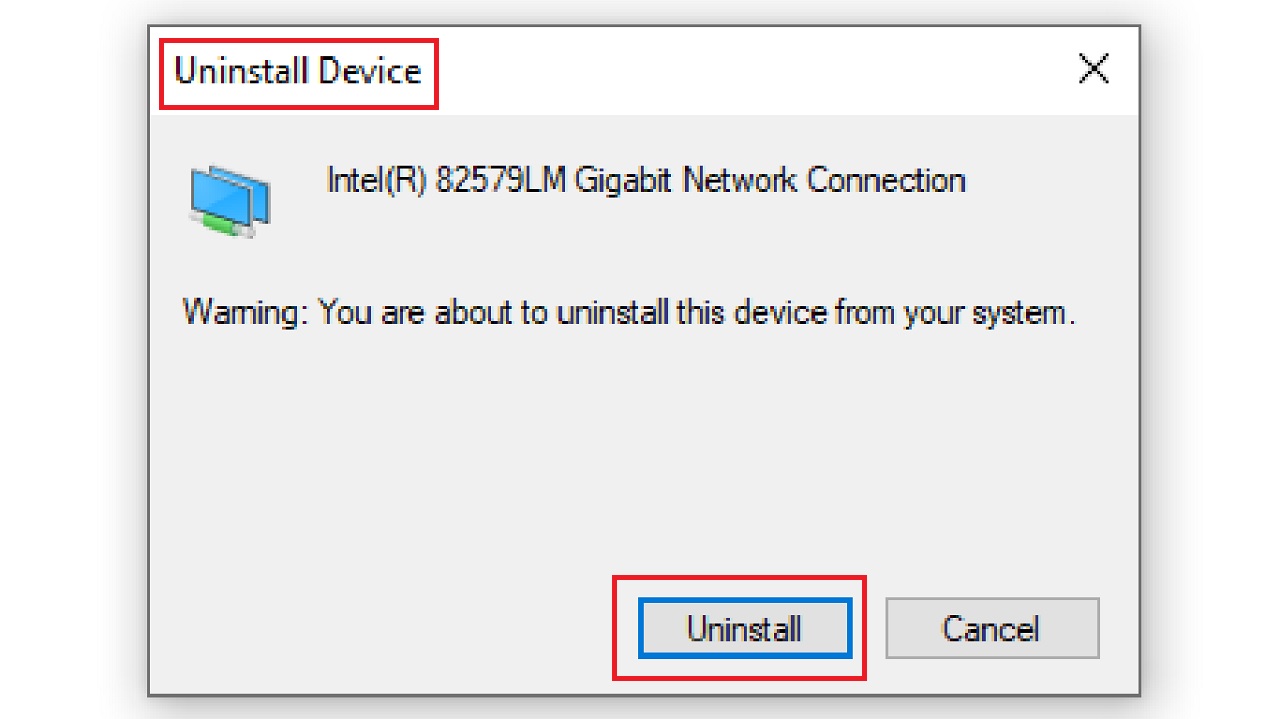
You will not see the wireless network adapter in the Network adapters list now.
- Now, click on the Action tab at the top of the window,
- Select the Scan for hardware changes option from the drop-down menu.

The system will identify the missing wireless network adapter and reinstall it. When it does, you will see it again in the Network adapters list.
Close the window and now you may try connecting to the 5 GHz Wi-Fi band.
In Mac Computer Systems:
If you are using a Mac computer system, the process to follow is a bit different.
Method 5: From the System Preferences
You will need to access System Preferences on your Mac PC to make the necessary changes.
STEPS TO FOLLOW:
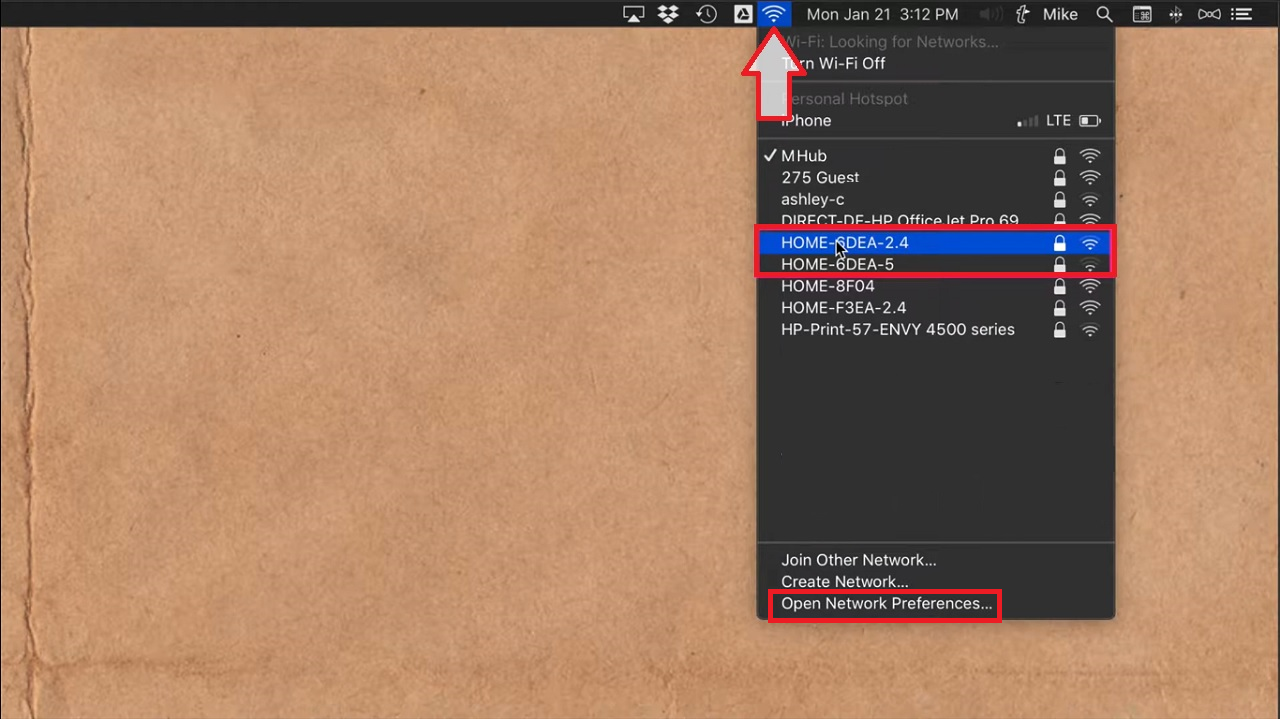
- First, click on the network icon at the top of your screen to check whether or not your system supports both the radio frequencies.
- If it supports, click on Open Network Preferences at the bottom.
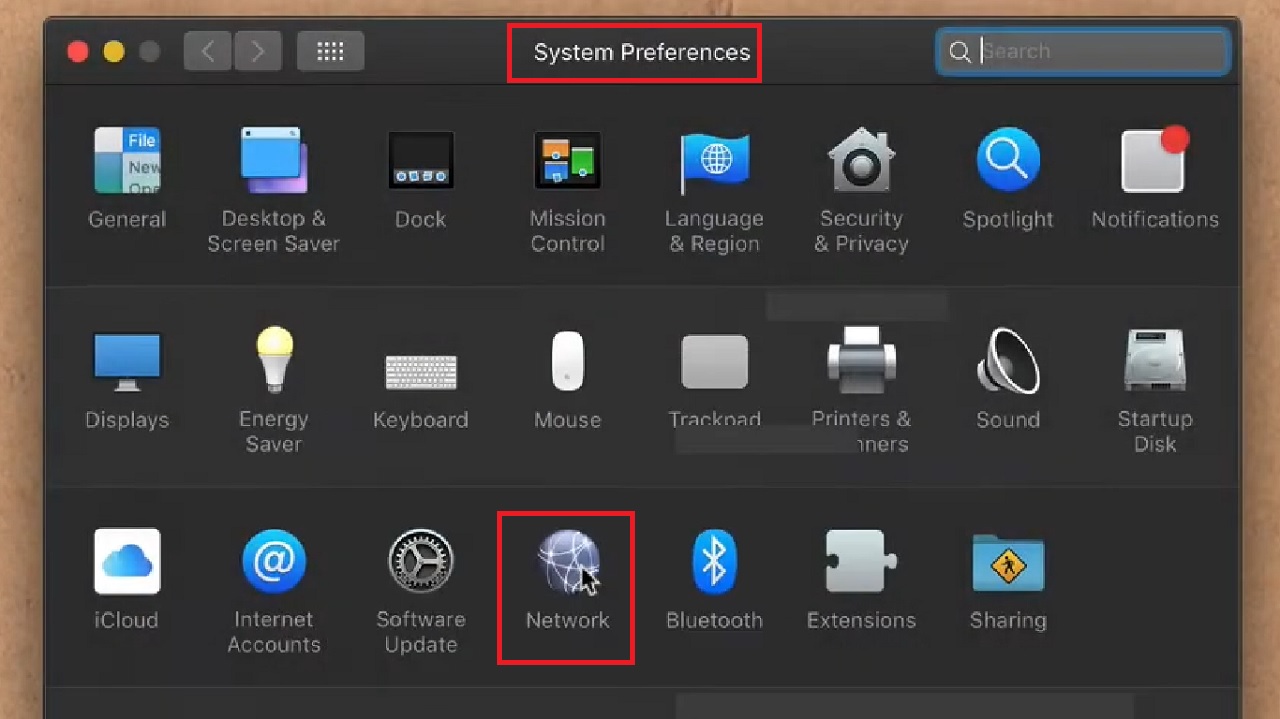
Alternatively, you can also click on the Apple icon at the top-right corner of your screen and click on System Preferences to open the same window.
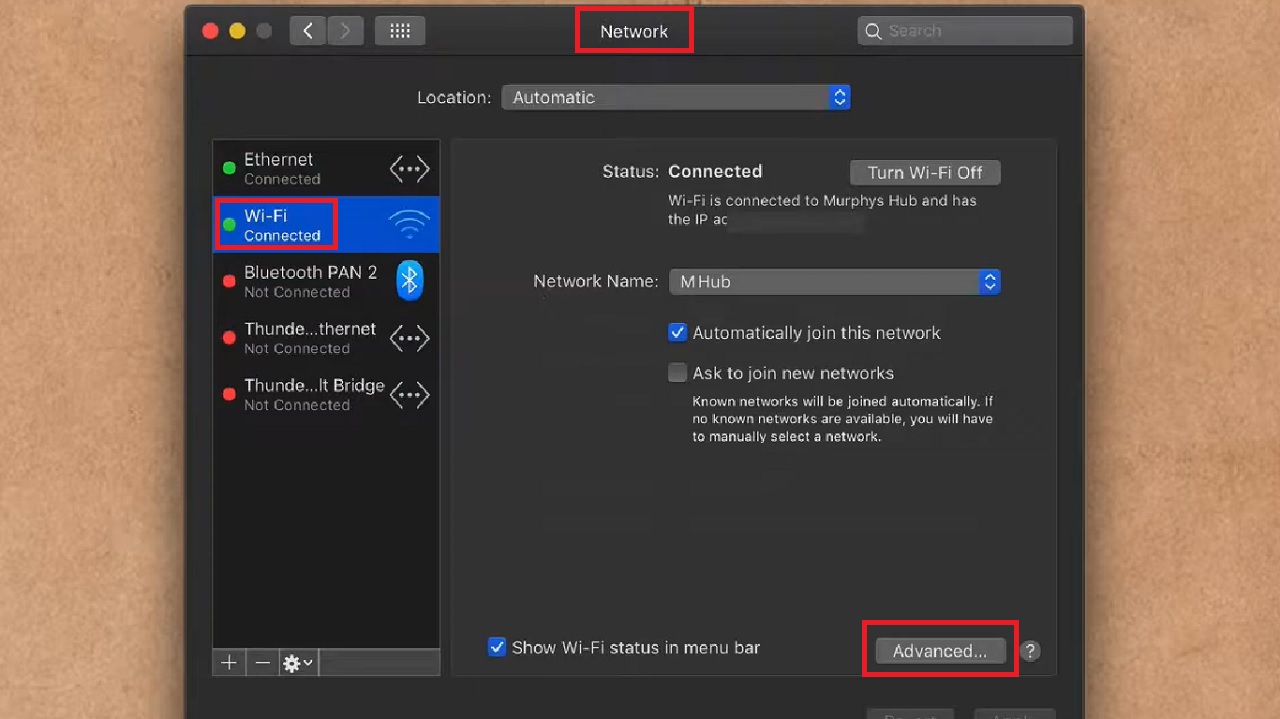
- In the System Preferences window, click on the Network icon.
- Select Wi-Fi in the left panel of the following Network window.
- Click on the Advanced button below on the right side of the window.
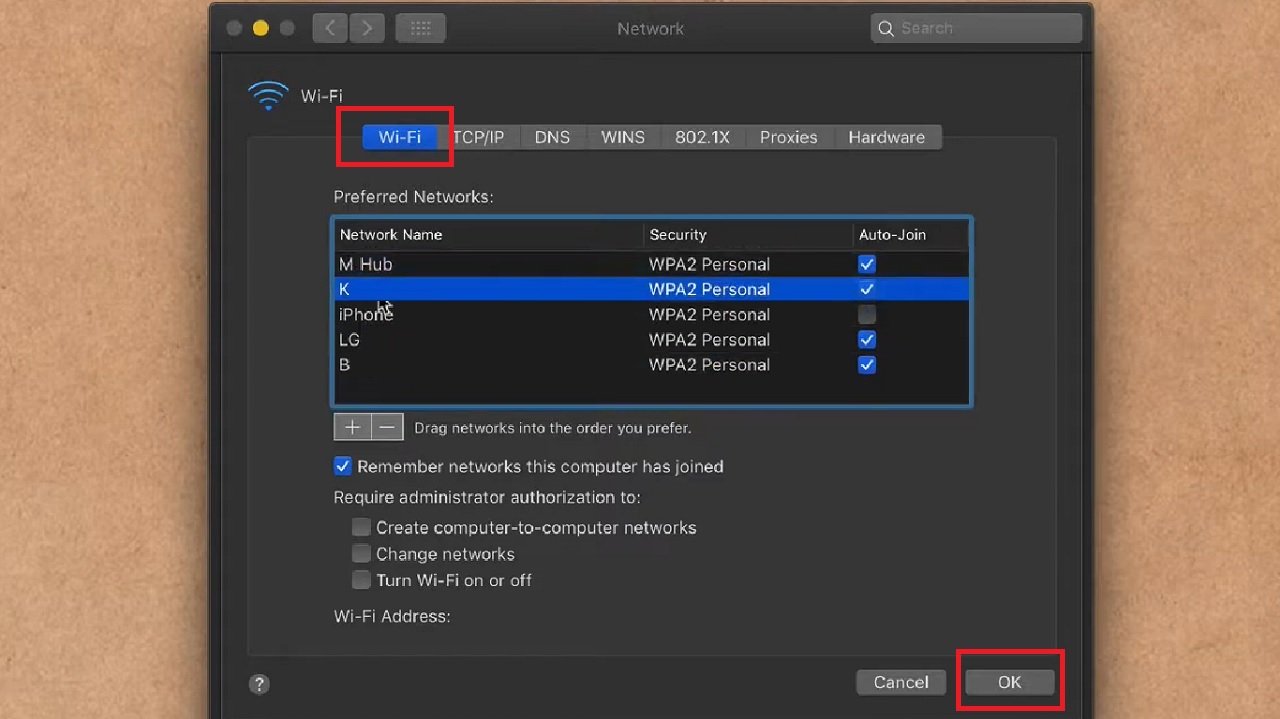
- Make sure you go to the Wi-Fi tab in the following window.
- Choose the preferred network and drag it to the top.
- Click on the OK button below.
- Then click on the Apply button in the Network window.
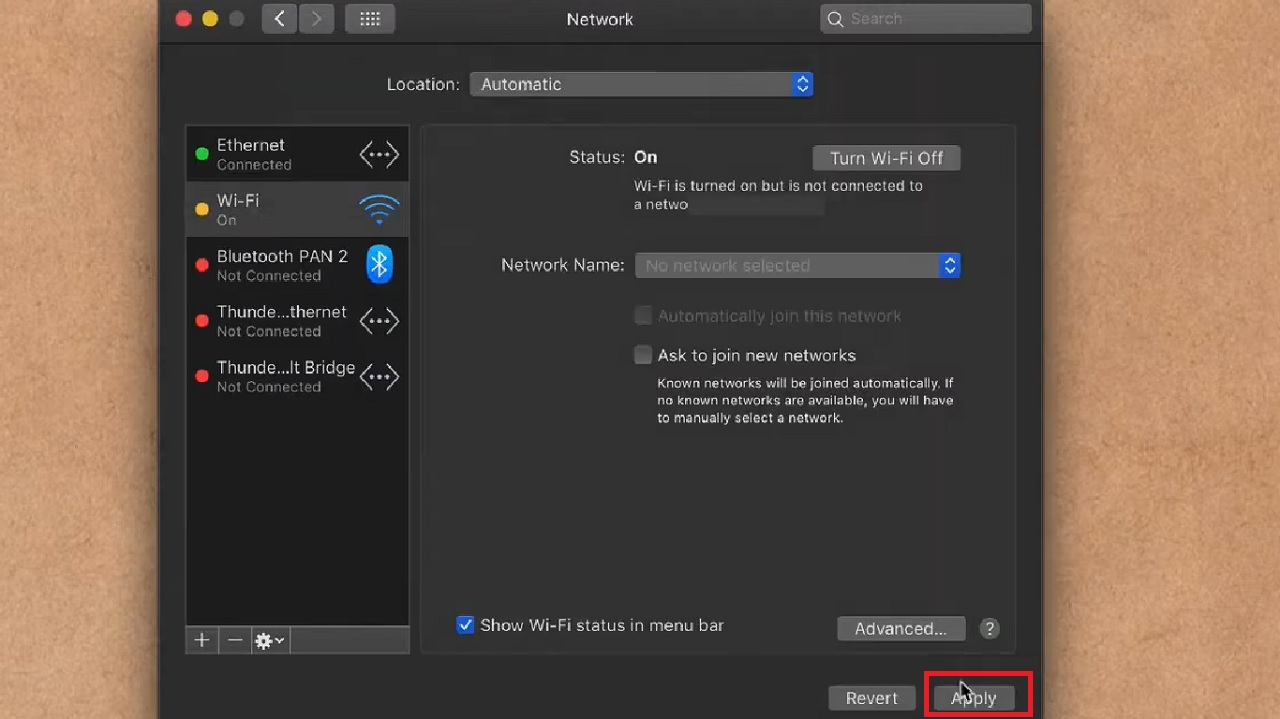
This will update the modem and you will now be connected to your preferred network, 5 GHz Wi-Fi.
Conclusion
It is very easy to connect to 5 GHz Wi-Fi, if your device is compatible and you have a dual band router.
Now that you know the steps, you can easily make the change and experience the higher speed of the internet.