
A hard drive may be full for no apparent reason but there may be many things happening in the background that you are not aware of.
In order to resolve the issue, you need to identify the programs, files, or folders that are filling up the hard drive and consuming space without any real benefits and remove them.
The processes involve simple disk cleanup to system restore. There are also a lot of other ways in which you can resolve the issue. If you are not aware of them, you can find all the methods here in this article.
In This Article
KEY TAKEAWAYS
- There are different reasons for a hard drive to get full with no reason which are mainly due to technical faults and errors in the system.
- More often than not, emptying the Recycle Bin when it is full can resolve the issue. You can also try adjusting the custom size from here.
- Using the Disk Cleanup feature and adjusting system protection with respect to usage may also help in freeing up adequate space in the hard drive.
- Temporary files and hidden folders often consume a significant amount of space on the hard drive. Delete them and regain a significant amount of free space.
- Running a malware and virus scan or the Optimize Drives feature can free up hard drive space and resolve the issue.
Why Hard Drive is Full for No Reason?
At most times, a hard drive may show full in the File Explorer window for no reason due to technical reasons. Sometimes, there may be a few software programs that can cause this problem as well.
Another significant reason for such a thing to happen is that the hibernation option is enabled. This will create a lot of backups of your data and fill up the hard drive.
Some other reasons for this issue to occur are:
- Existence of viruses or malware
- Third-party software interference or creating log files
- Overstuffed WinSxS folder
- System file corruption
- Existence of numerous large temporary files and other hidden files
- The Recycle Bin may be full
However, the issue can be fixed with some simple and advanced solutions, as explained hereunder.
How to Fix Hard Drive is Full for No Reason?
One of the best ways to resolve the problem of a hard drive showing full for no reason is to check the files and folders showing within it and deleting those you do not need, appearing unknown or strange, or showing 0 bytes in size.
You may also try some other easy fixes, such as:
- Optimizing storage space by removing the unnecessary files automatically
- Emptying Recycle Bin
- Extending the drive
- Using the Reduce Clutter feature to delete files that you do not need any more
- Moving large files to an external storage
- Deleting system junk, app and browser cache manually
- Deleting language packs
- Removing backups for iOS devices if any
- Running a system scan for viruses and malware
- Running disk cleanup
- Turning hibernate off
There are a few third-party software tools that you can use, but you can also do it manually.
Here are a few advanced and more proven solutions to the issue of a hard drive being full with no reason.
The steps to follow, as suggested below, are not very complex but it will need some time, patience and effort on investigating and identifying the actual culprit.
Method 1: Check and Delete Unnecessary Files or Folders
One best way to resolve the issue of the hard drive showing full while it is actually not is to check individual items and delete those you do not want, preferably the ones that are consuming a lot of space, from the This PC folder.
STEPS TO FOLLOW:
- Open File Explorer.
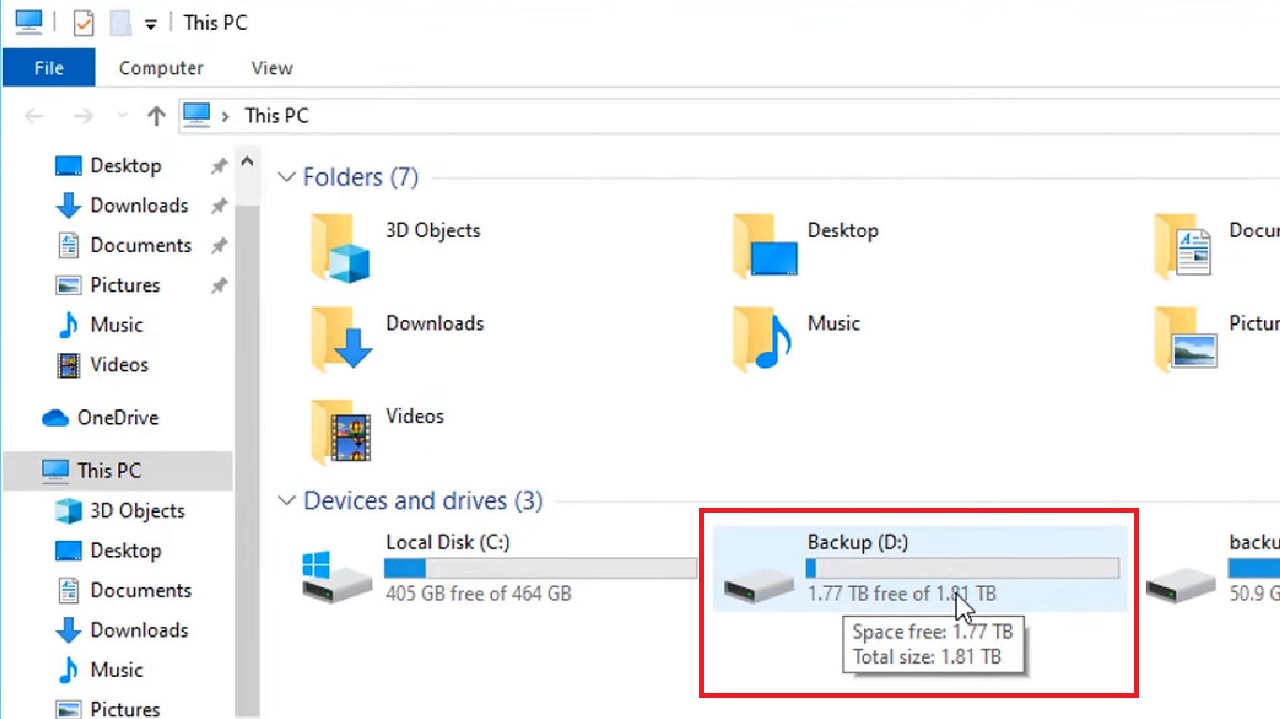
- Go to This PC.
In this example, assume that it is Drive D, (named Backup (D:) here) that needs to be rectified.
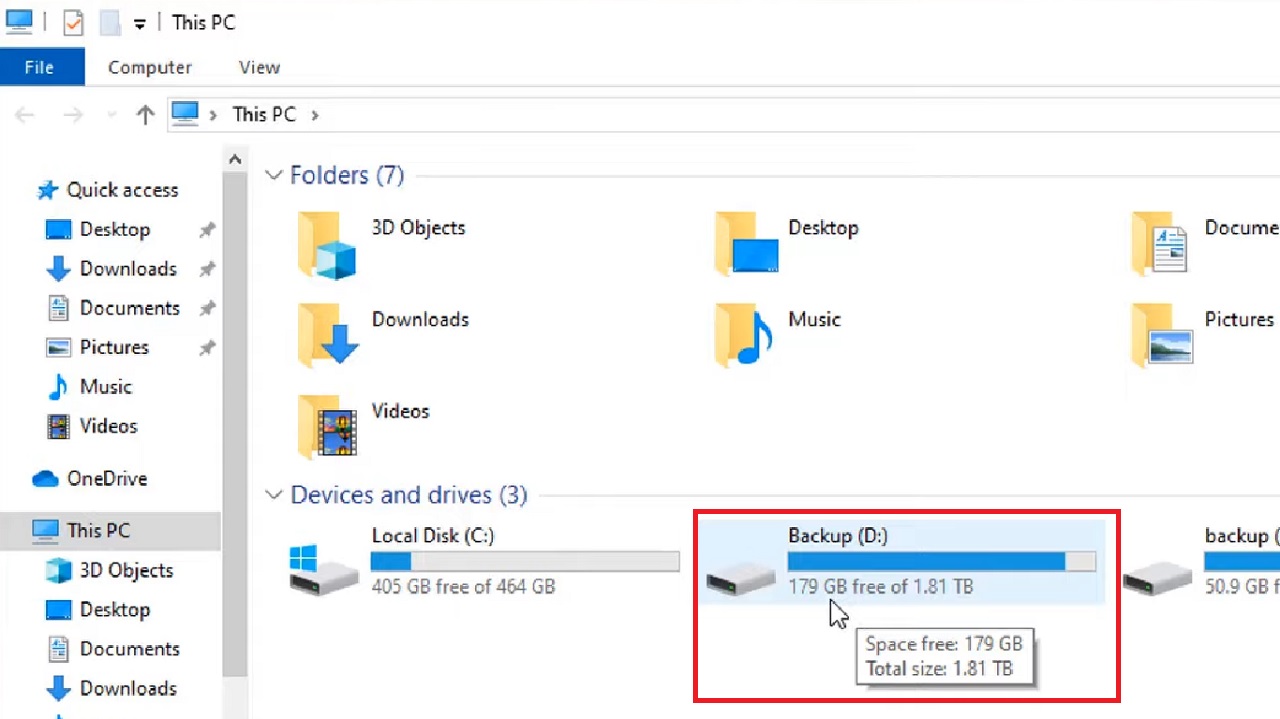
As you can see, the 2 TB drive shows just 179 GB of free space.
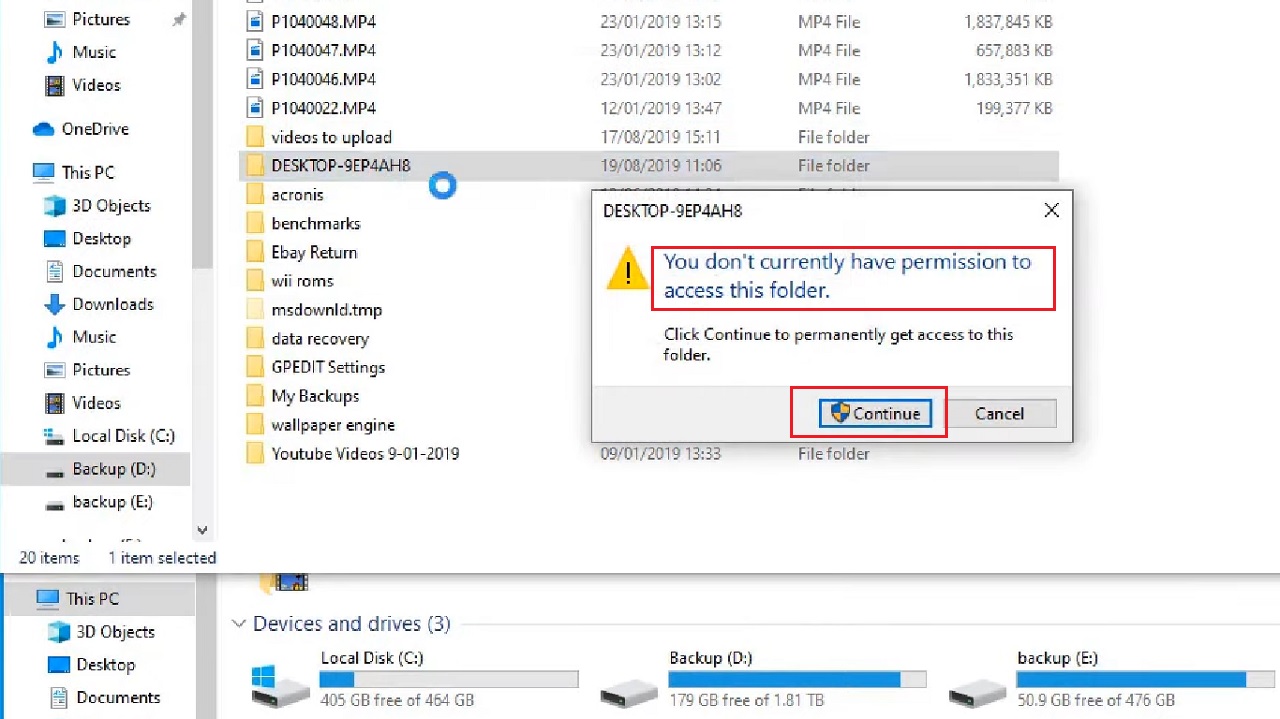
Double-click on the drive to open it and see its contents. Some files or folders will be really small, measuring in KB, but there will be others with no indication under the Size column, as shown in the figure below:
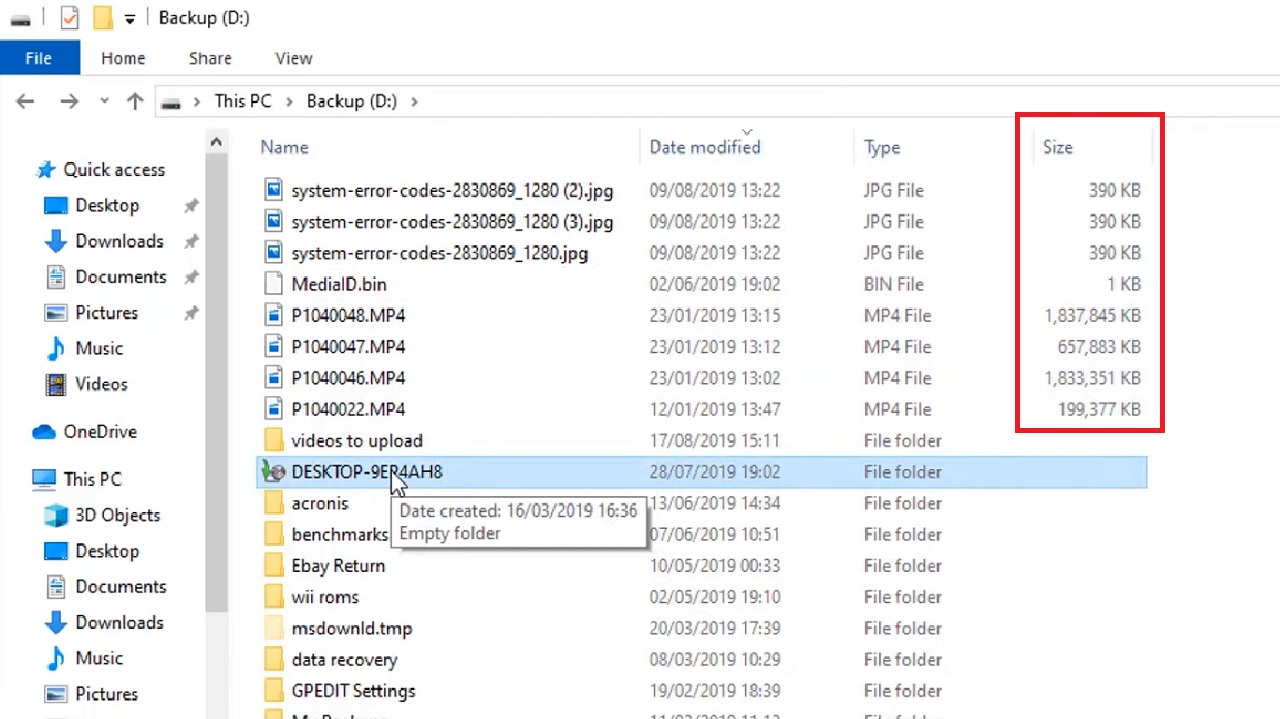
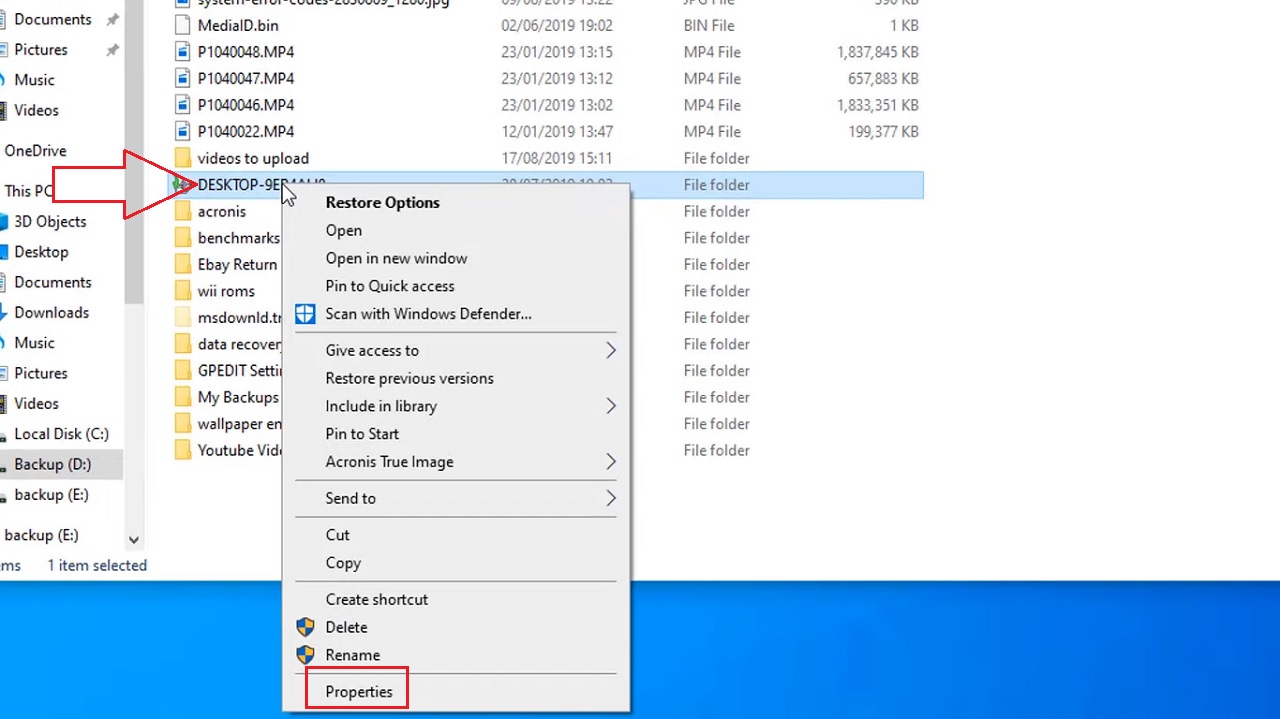
- Right-click on a folder that you suspect, DESKTOP-9EP4AH8, for instance.
- Select Properties from the options in the drop-down menu.
- In the DESKTOP-9EP4AH8 Properties window under the General tab, it shows 0 bytes in Size and contains no files or folders.
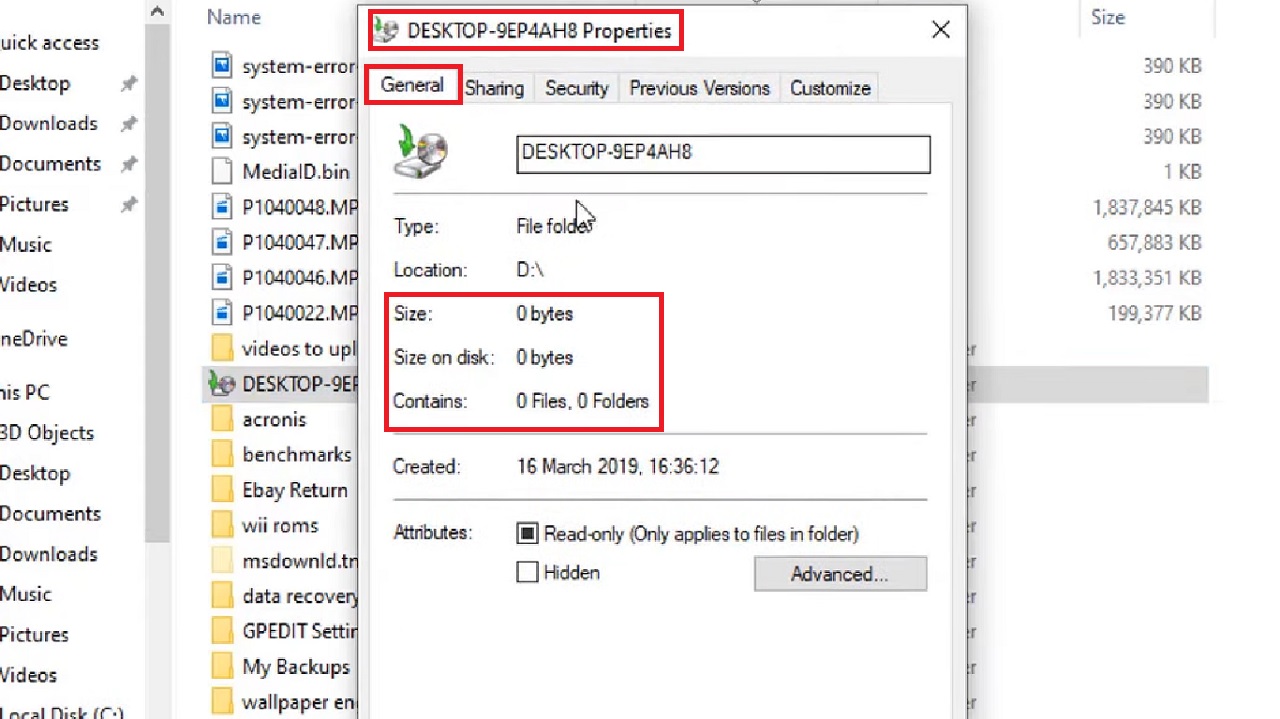
- This means that this folder is empty and can be deleted. When you click on it to open, you will see it actually is not empty.
- So, right-click on it as before and now choose the Delete option if you do not need it.
If the folder is too big to recycle, you may get to see the Delete Folder window which will say that ‘This folder is too big to recycle.’ Click on the Yes button to confirm that you want to delete it permanently.

You may also get to see a window with a warning sign telling you that ‘You don’t currently have permission to access this folder.’ Click on the Continue button.
When the folder is deleted, your hard drive now will show exactly how much it is free, 1.77 TB from 179 GB here, as shown in the image below:
You may go on to delete a few other such files or folders for which the hard drive is showing full for no reason.
Method 2: Adjust the Custom Size from Recycle Bin
One useful way to resolve the issue is to empty the Recycle Bin when it is full and adjust the Custom size from the Recycle Bin Properties.
STEPS TO FOLLOW:
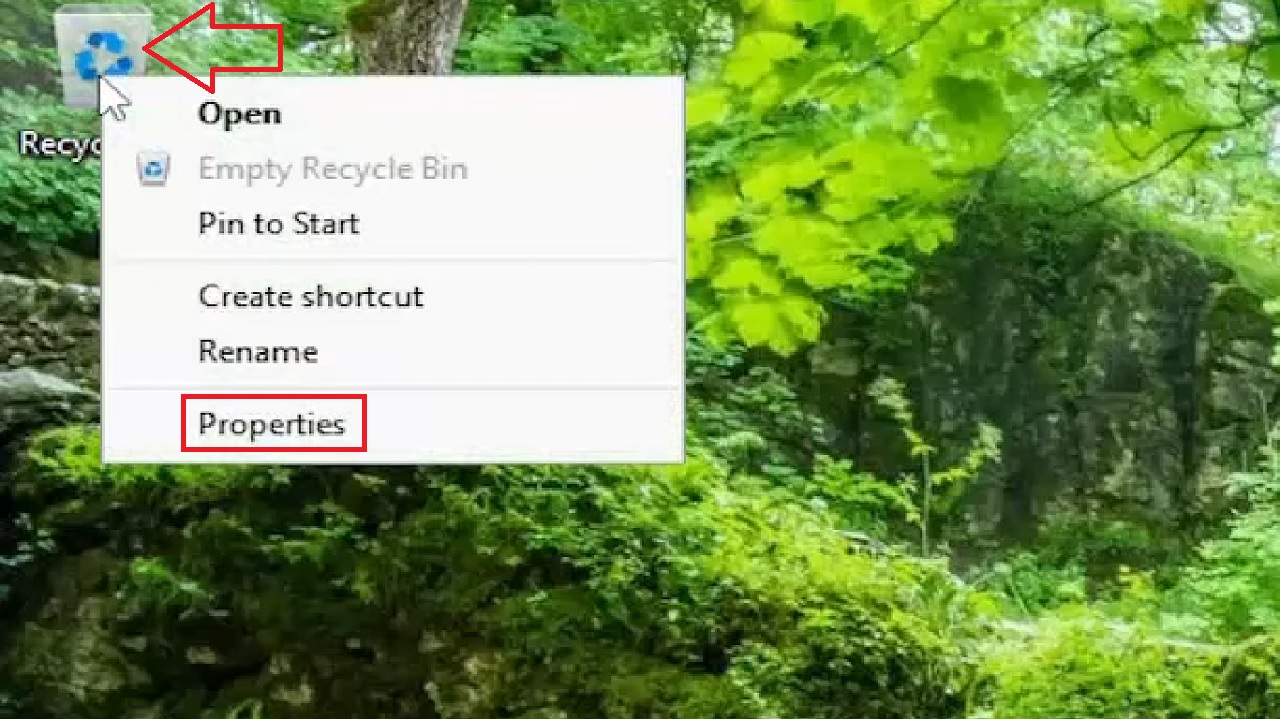
- Right-click on the Recycle Bin.
- Select Empty Recycle Bin.
- When done, right-click on it again and select Properties from the drop-down menu.
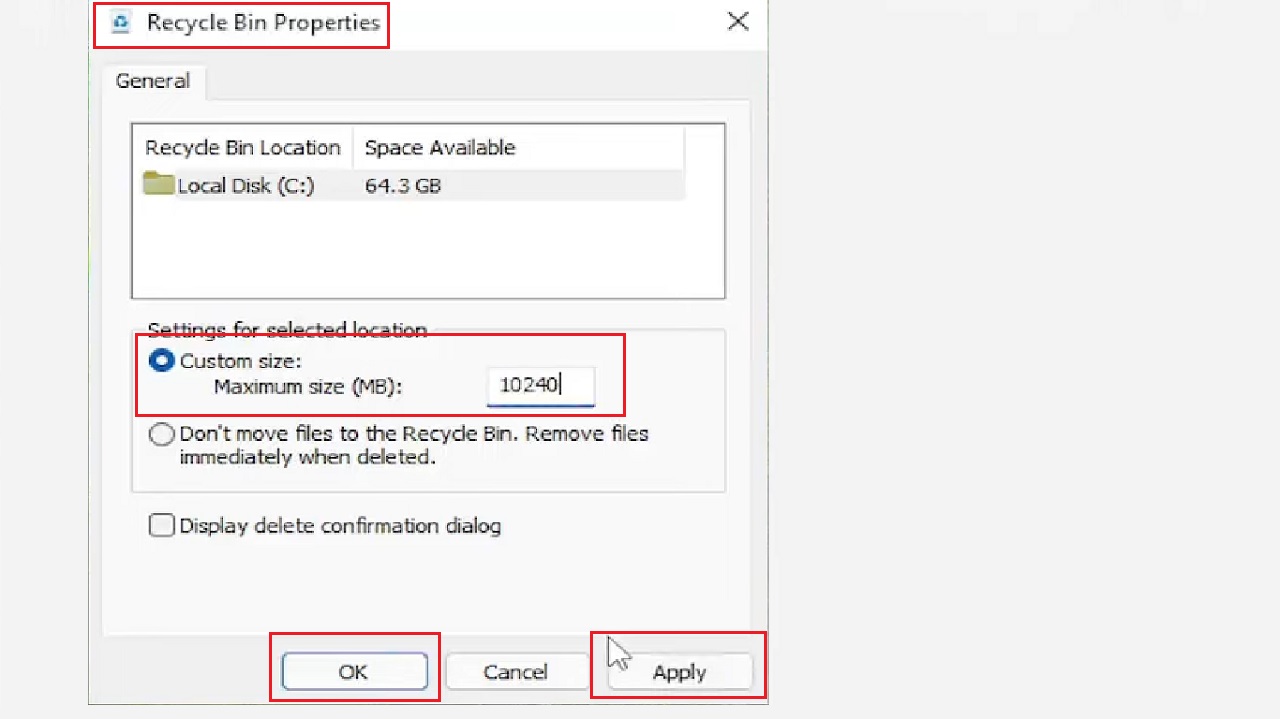
- In the Recycle Bin Properties window that appears, adjust the Custom size. Do not make it too large. Make it 10240 MB maximum, for example.
- Click on the Apply button and then on the OK button.
This may resolve the issue and you may see the actual free size of your hard drive again.
Method 3: Using the Disk Cleanup Feature
You can remove the unimportant files and folders that may be consuming the space of the hard drive by using the Disk Cleanup feature to resolve the issue.
Assume, it is Drive C you are dealing with.
STEPS TO FOLLOW:
- Go to the search box > Type disk cleanup > Hit Enter.
- Make sure that everything in the box under Files to delete is check marked in the Disk Cleanup for (C:) window.
- Then select Clean up system files.
- Click on OK in the following window.
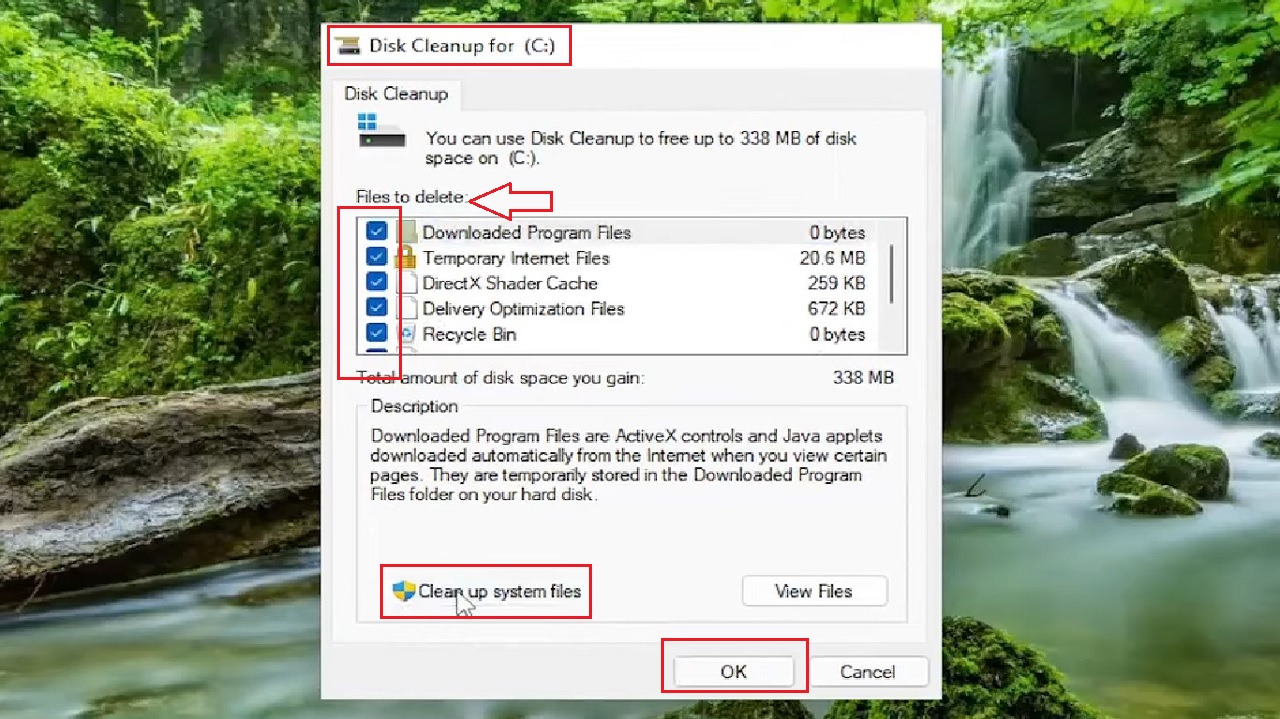
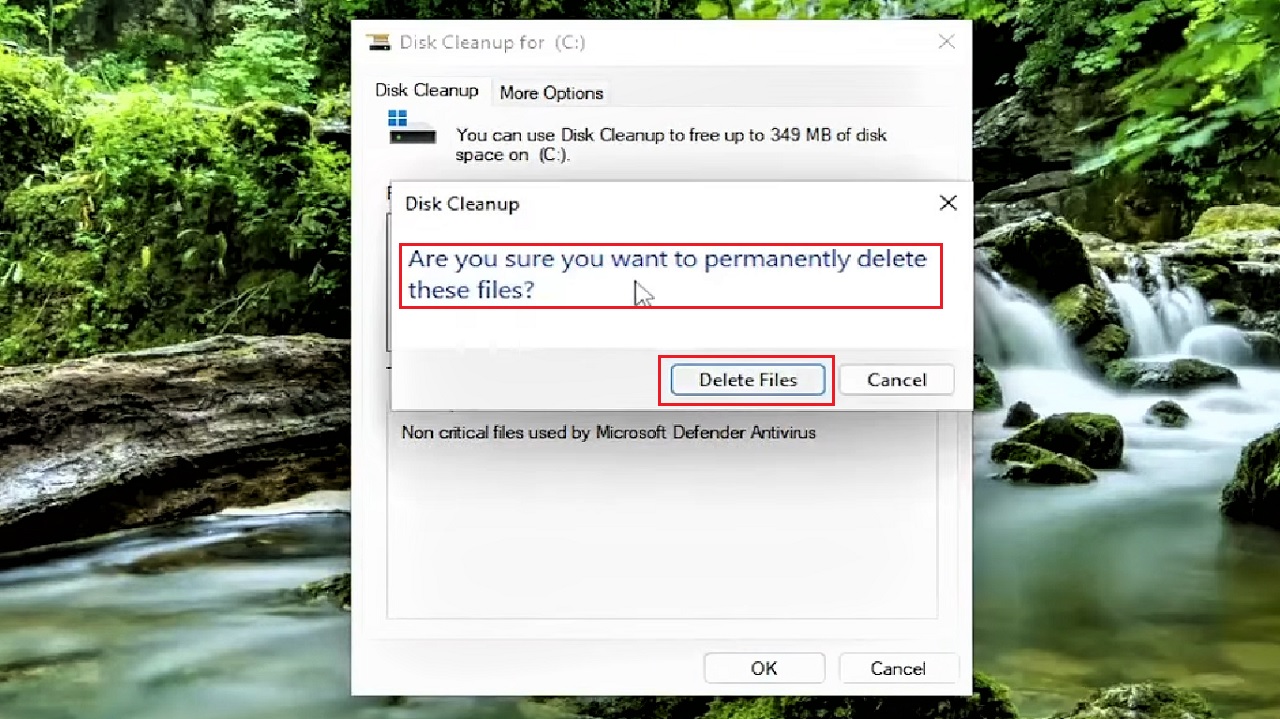
- Select Delete Files in the window asking you Are you sure you want to permanently delete these files?
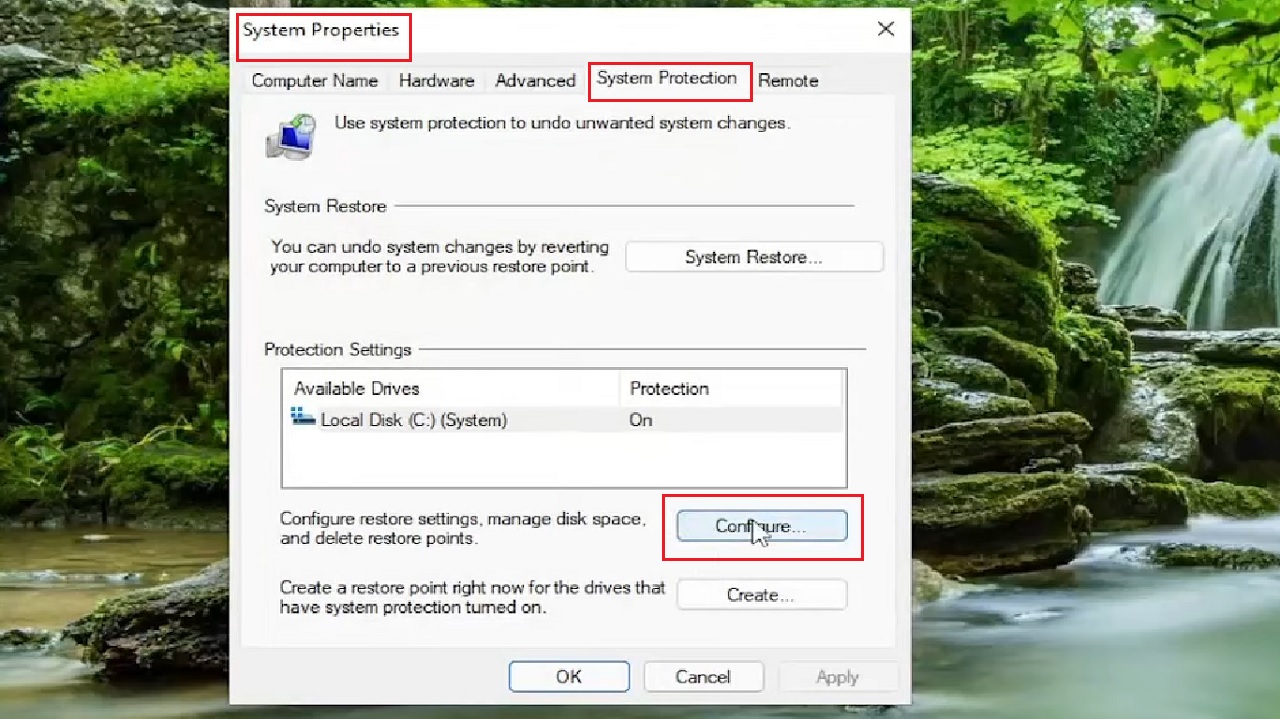
- When it is done, open up the search menu again > Type in system restore > Hit Enter.
- Go to the System Protection tab in the System Properties window.
- Select the Configure button.
- Slide the switch next to Max Usage located below in the System Protection for Local Disk (C:) and set it to about 10% at the most.
- Click on the Apply button to save the changes.
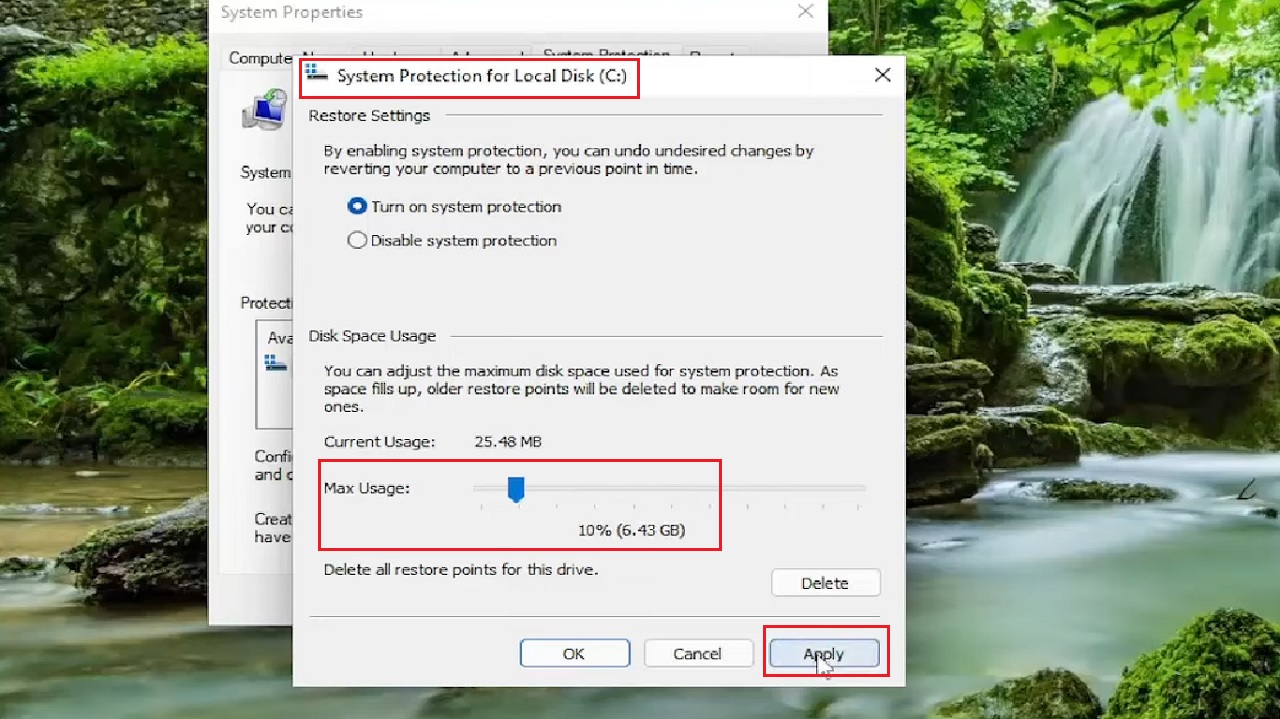
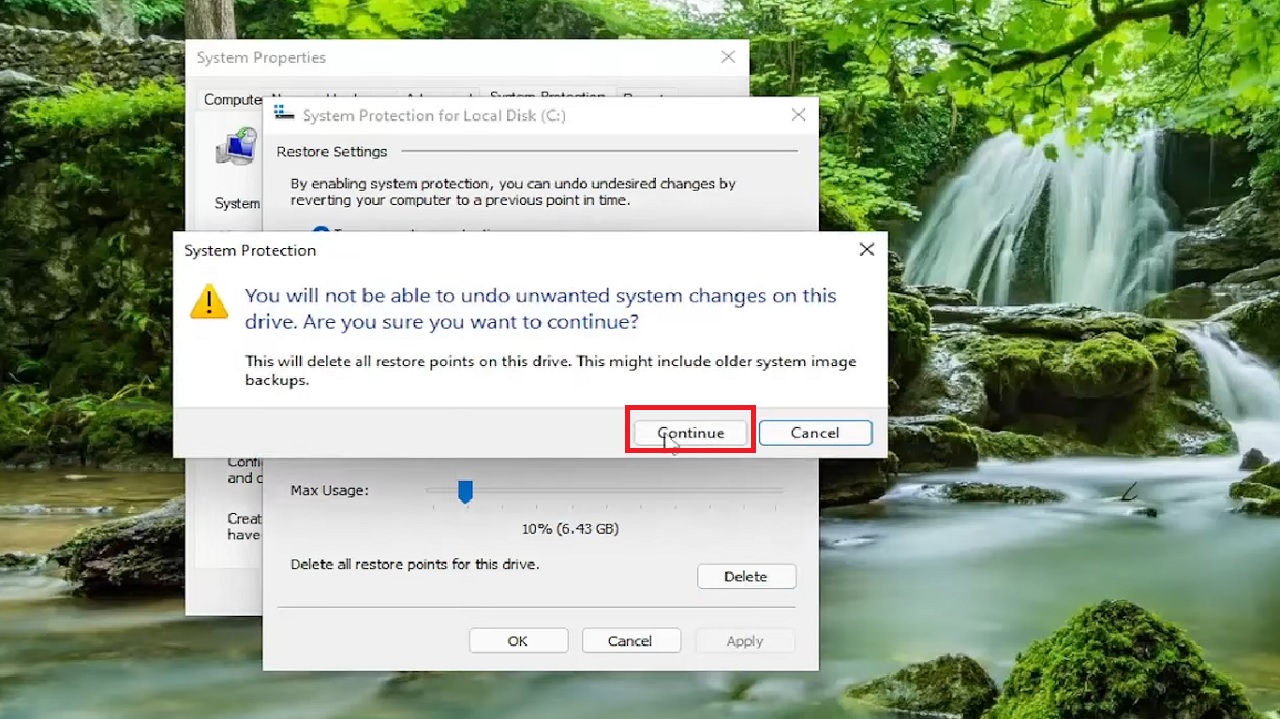
- Then, click on the Delete button next to where it says Delete all restore points for this drive. (Just under the red box in the above image).
- Select Continue in the following window.
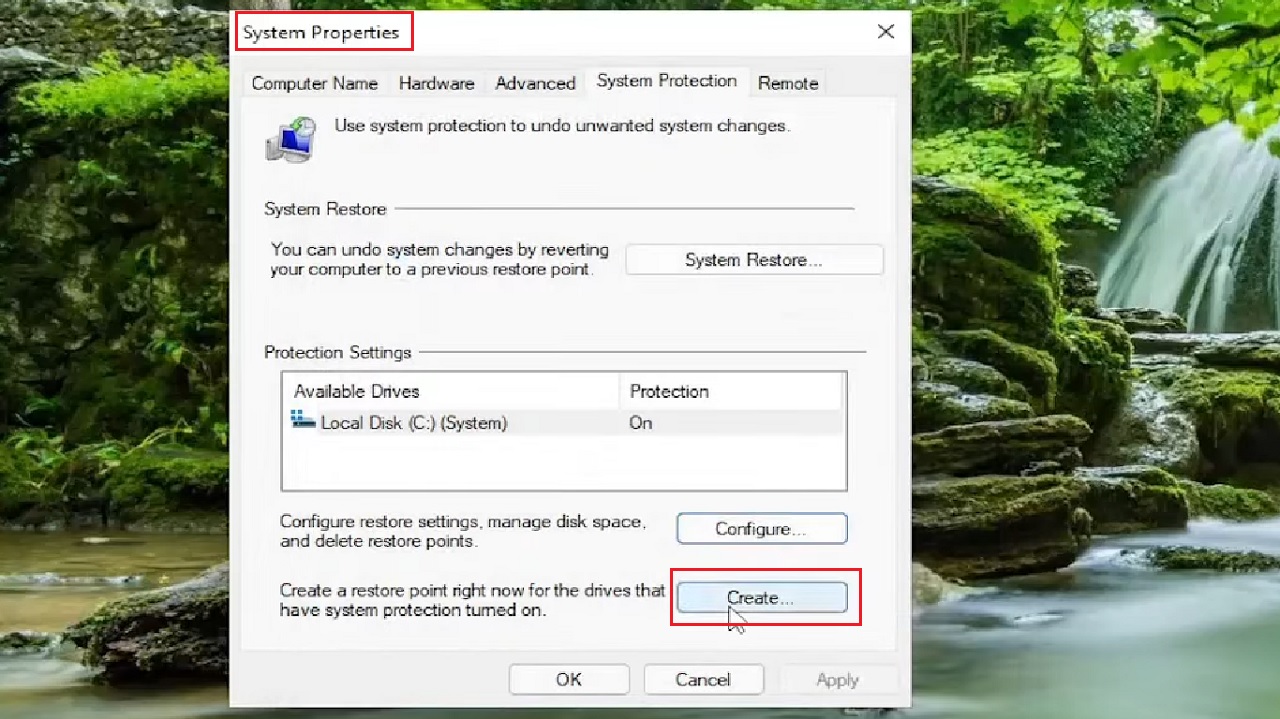
- Now, go back to the System Properties window and click on the Create button.
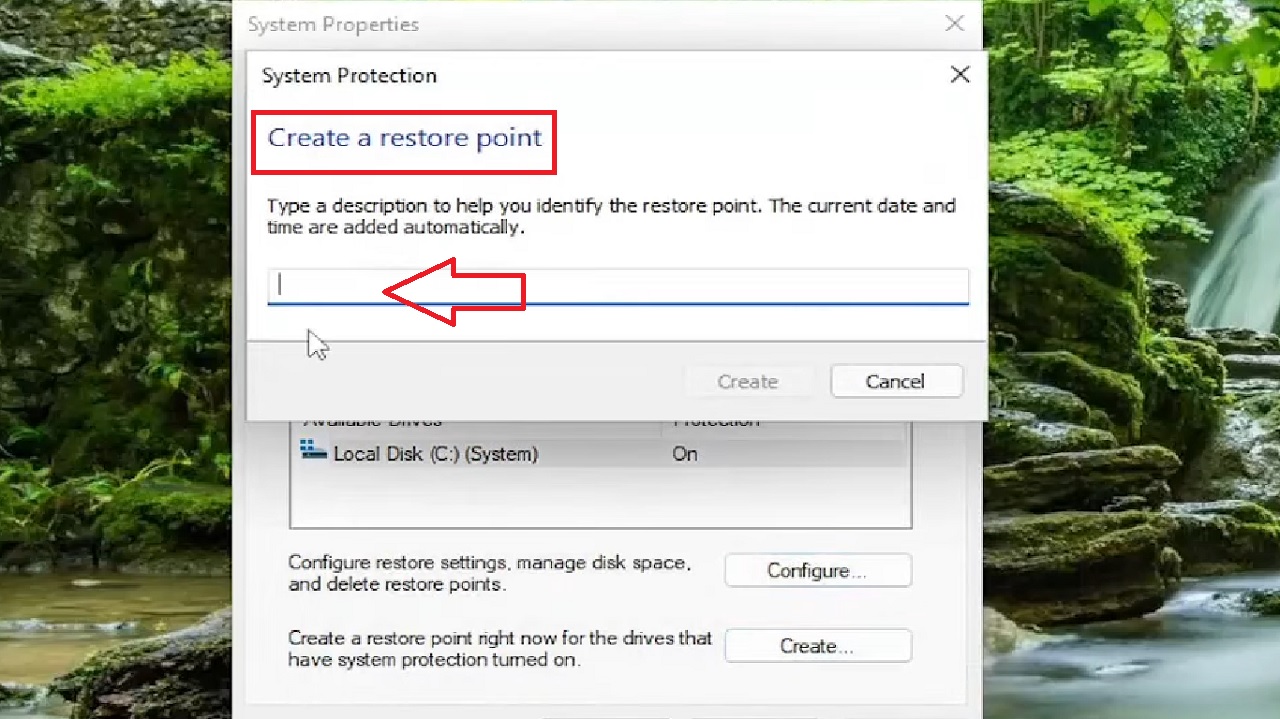
- Create a restore point and name it as you like and click on the Create button again, which is blurred in the image below.
- When the process is complete, click on the Close button on the window confirming that ‘The restore point was created successfully.’
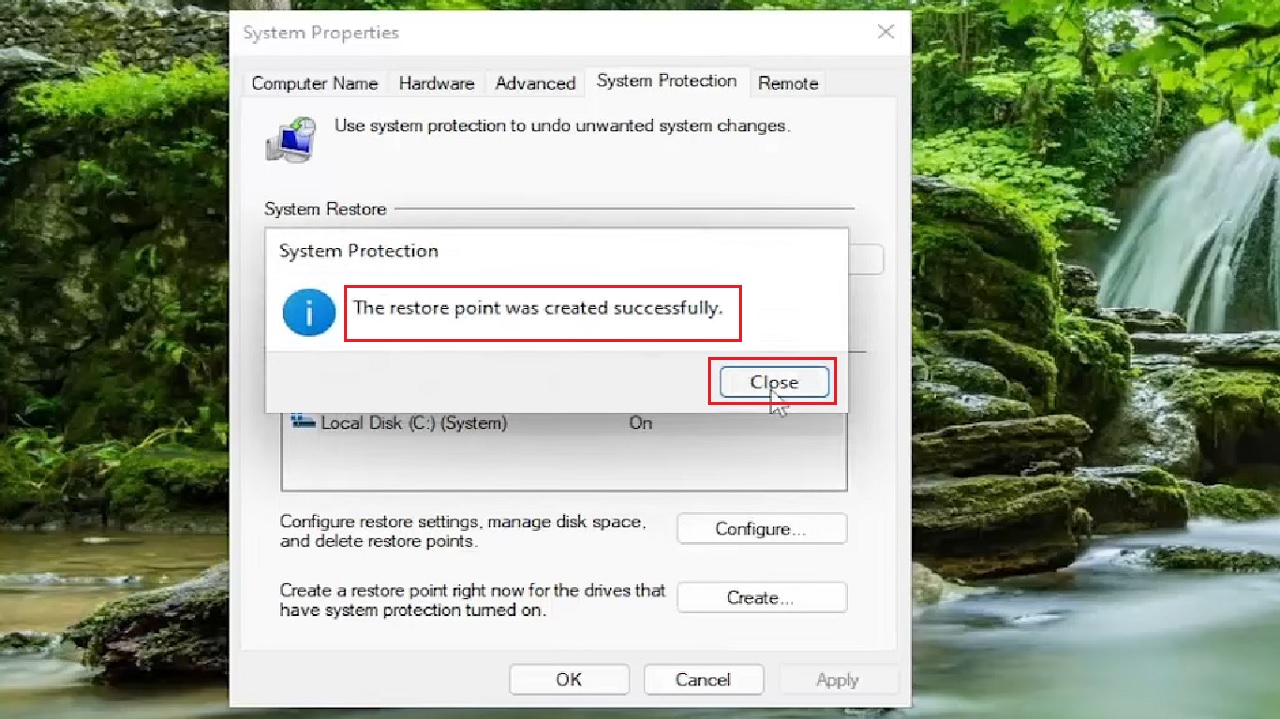
This will clear out the old restore points. The entire process will free up a lot of space and will show in the File Explorer as well.
Method 4: Check and Delete the Hidden Items
You can search for hidden items on the hard drive from the File Explorer and delete them to free up a large amount of free space.
STEPS TO FOLLOW:
- Open File Explorer and go to This PC.
- Select the affected drive. (Local Disk (C:), once again, for example). Note it has just 334 MB of free space.
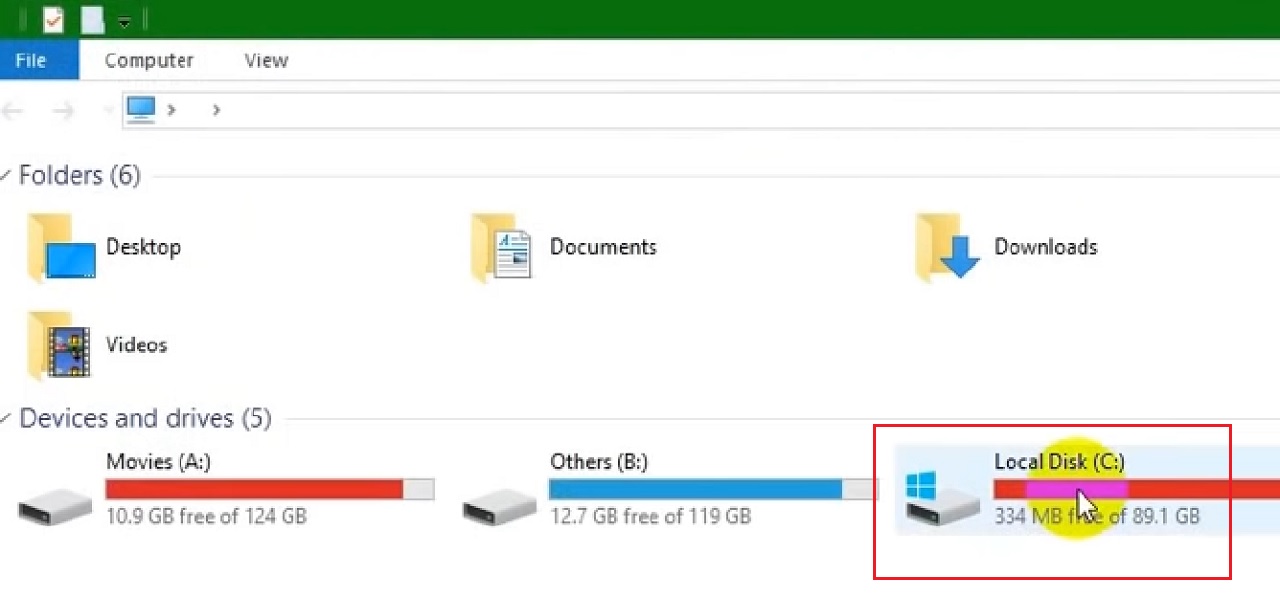
- Double-click on it.
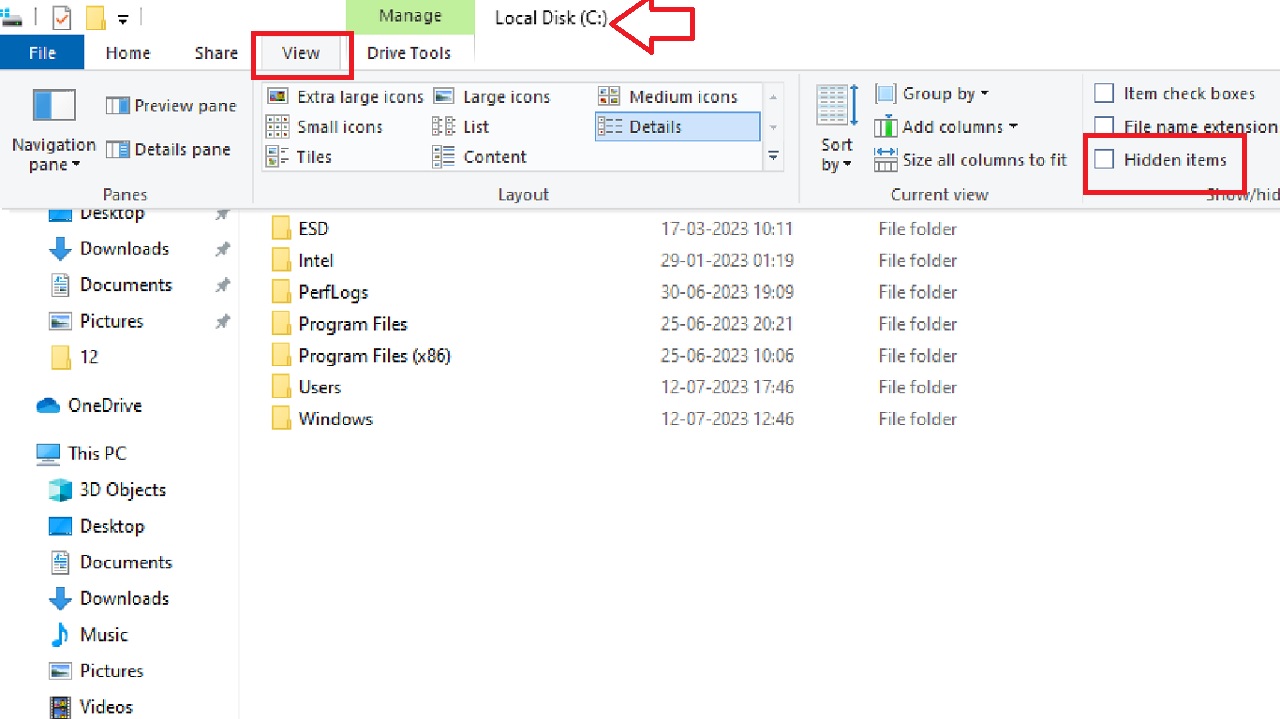
- Go to the View tab at the top.
- Select Hidden items by clicking on the small square box beside it.
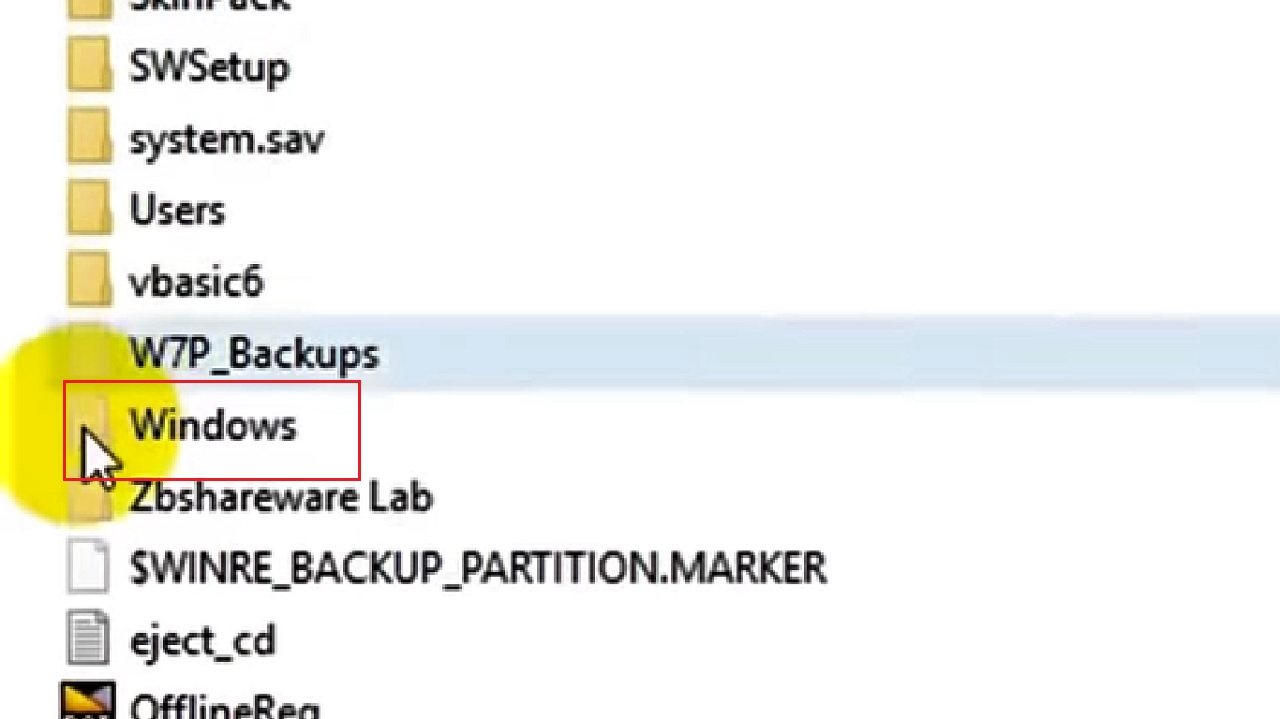
- Scroll down the following window and look for the Windows folder.
- Double-click on it.
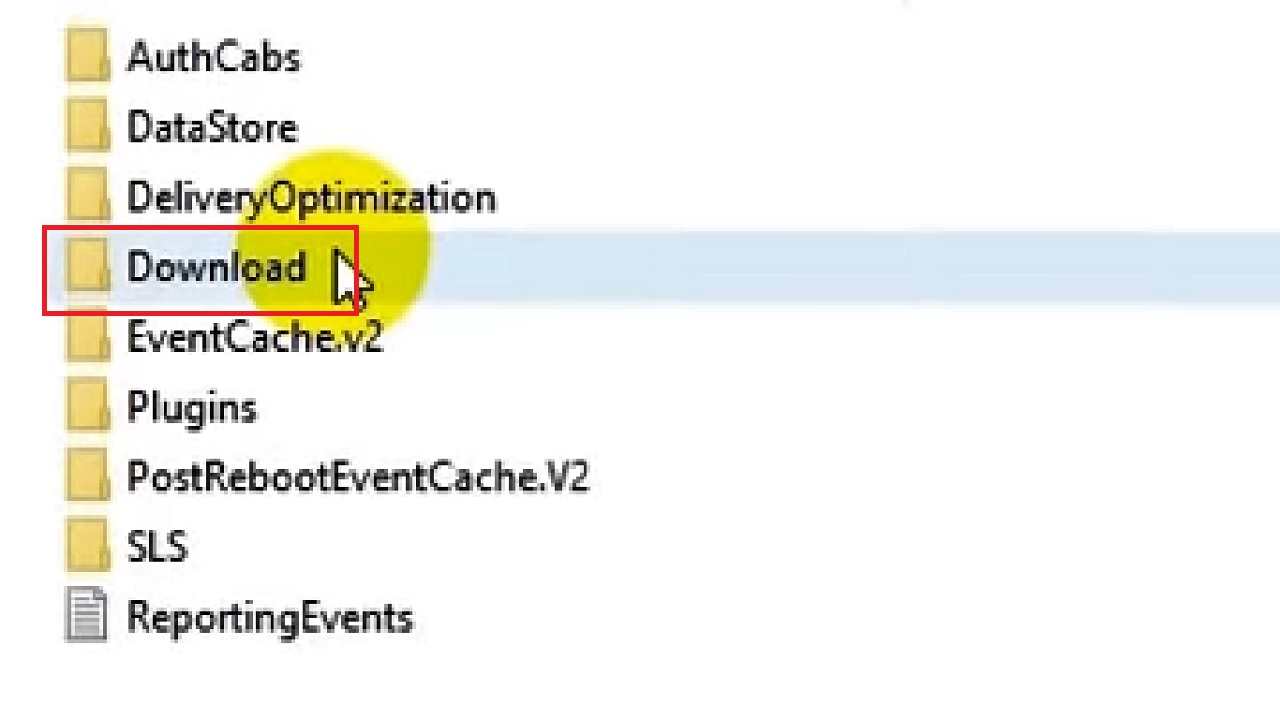
- Inside the Windows folder, look for SoftwareDistribution folder.
- Click on it to open it.
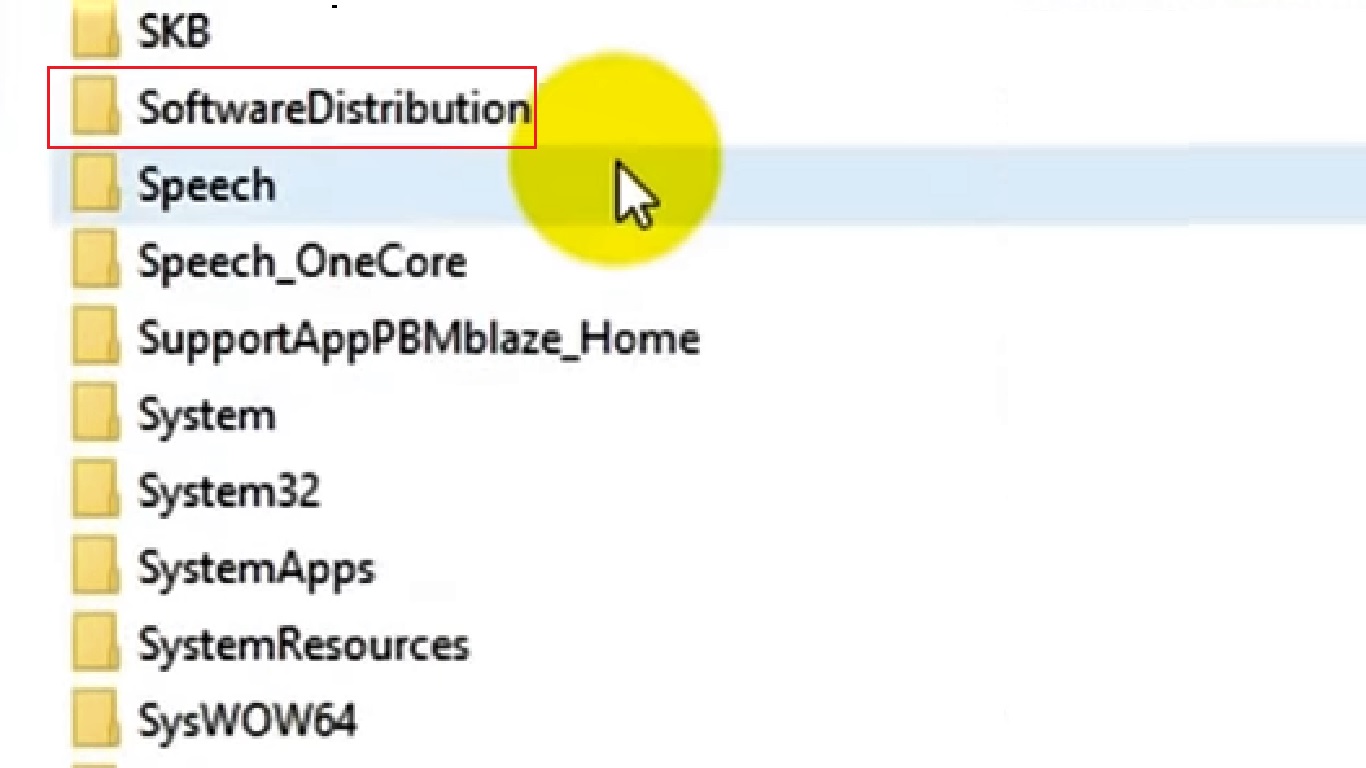
- Now open the Download folder from the SoftwareDistributon folder.
- Select all the files inside this folder, right-click on them, select the Delete option from the drop-down menu.
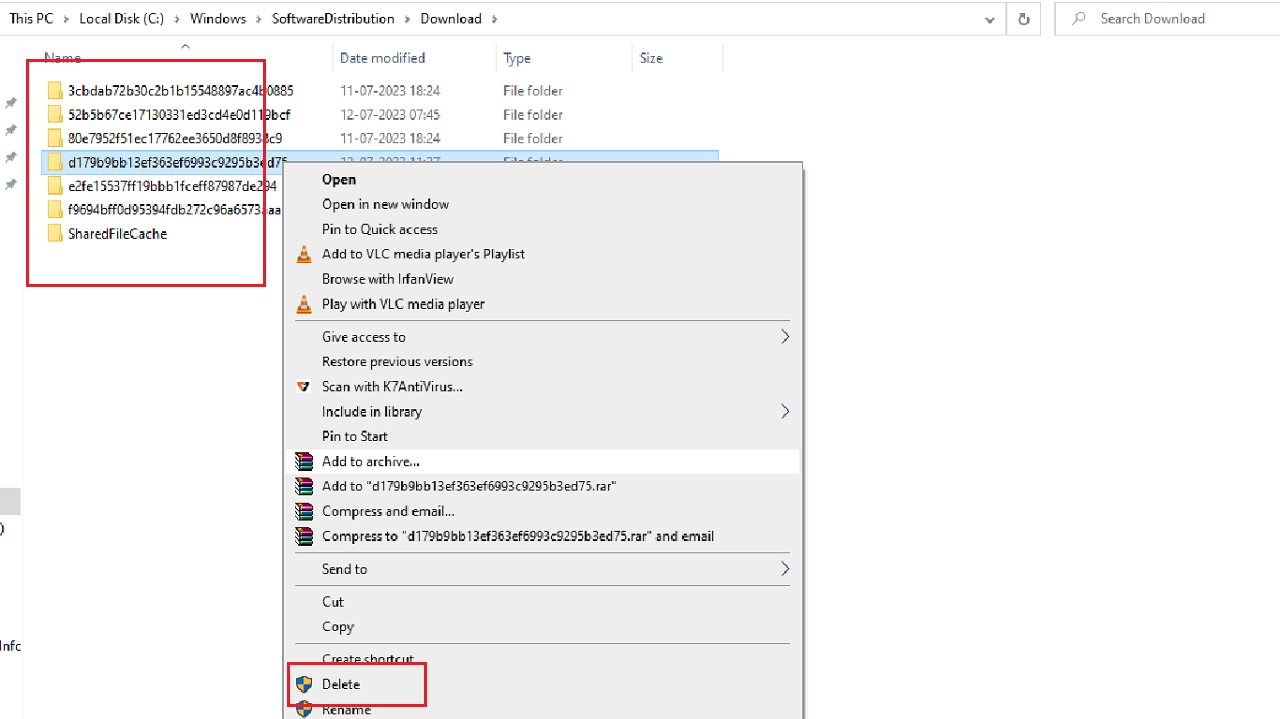
- Empty the Recycle Bin.
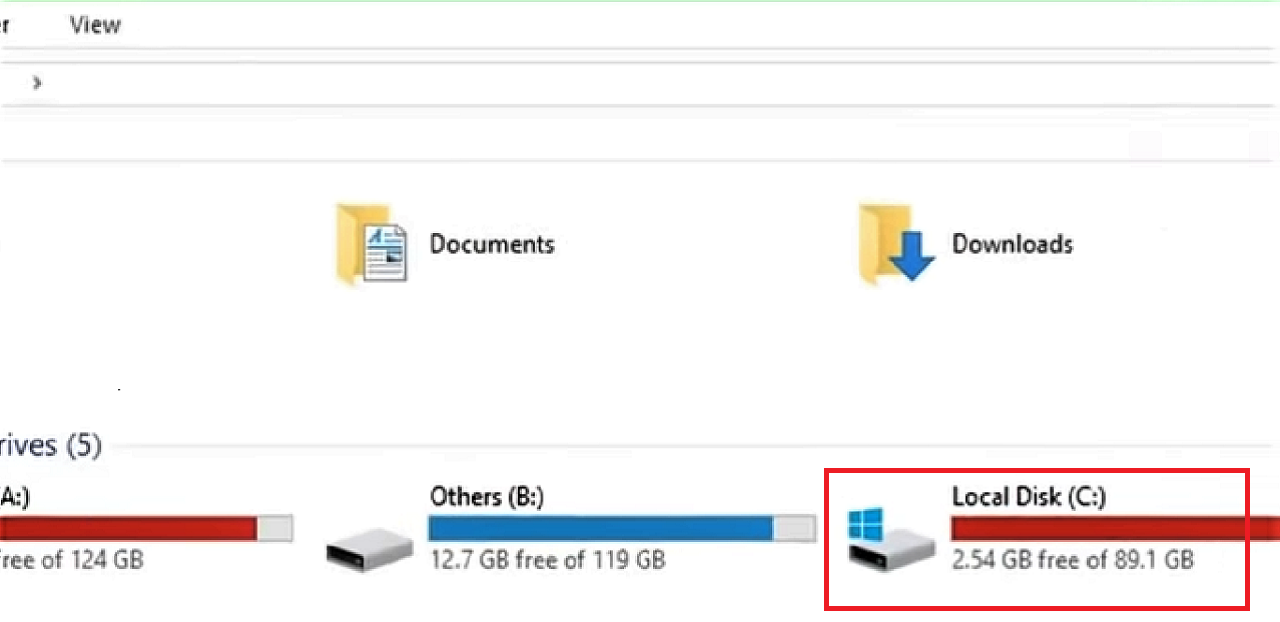
- Go to This PC to check the drive space. Note that its free space is now increased from 334 MB to 2.54 GB.
Close the File Explorer window.
Method 5: Optimize Drives
In most cases, running the Optimize Drives function can also resolve the issue.
STEPS TO FOLLOW:
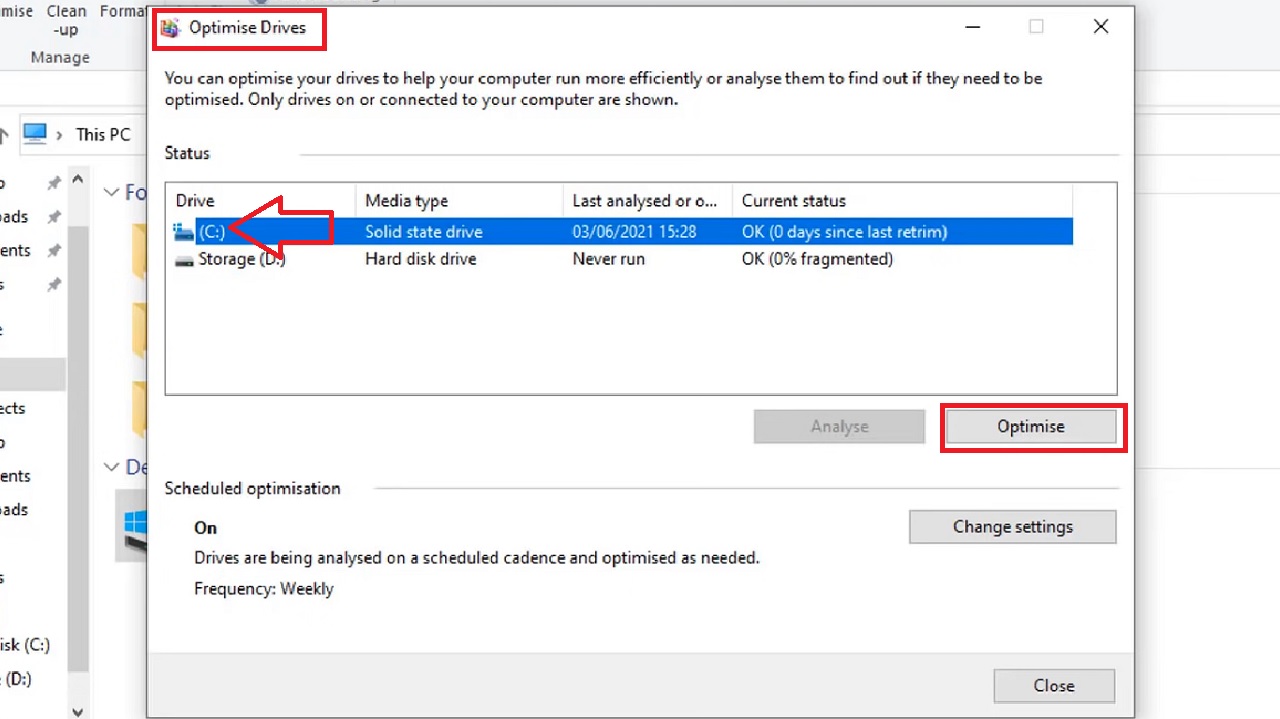
- Go to File Explorer > Select This PC > Right-click on the affected drive (Drive C for example) > Select Properties > Select Optimize in the following window.
- Click on the Optimise button in the Optimise Drives window.
Alternatively, you can also type the command chkdsk C: /f in the CMD console and press Enter.
If that did not resolve the issue, then follow the next steps.
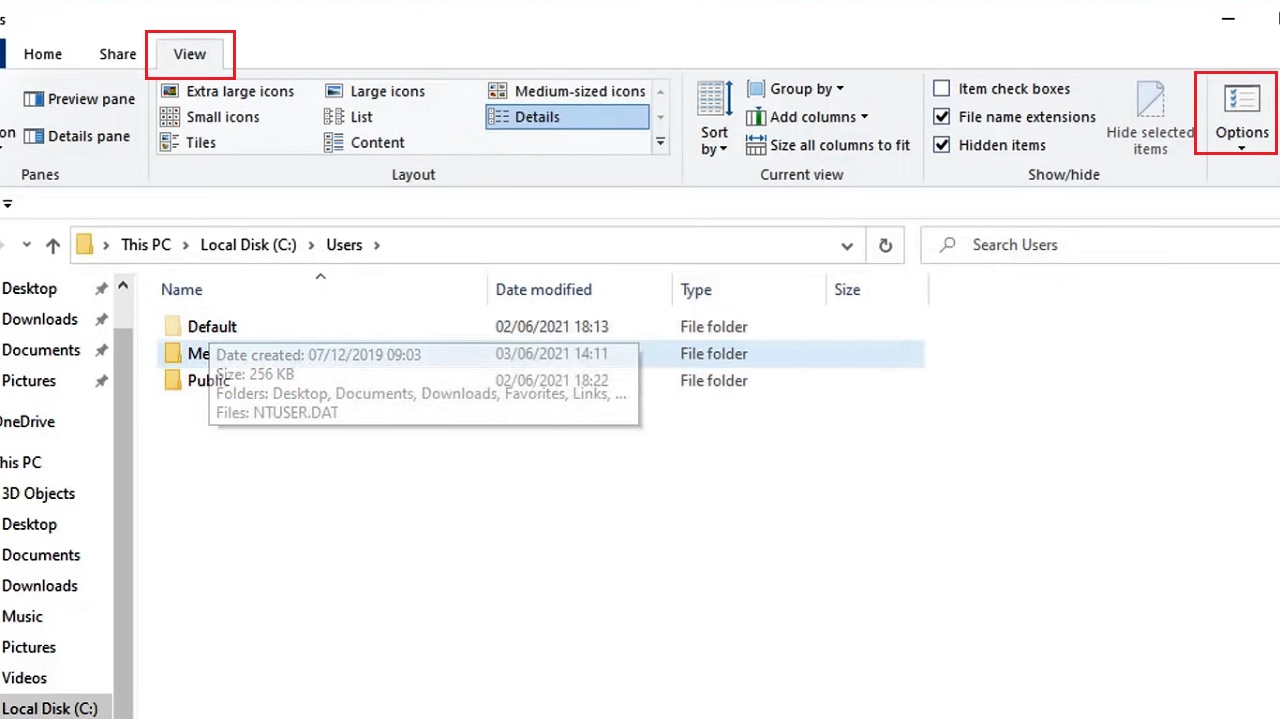
- Go to the View tab at the top.
- Select Options at the far right.
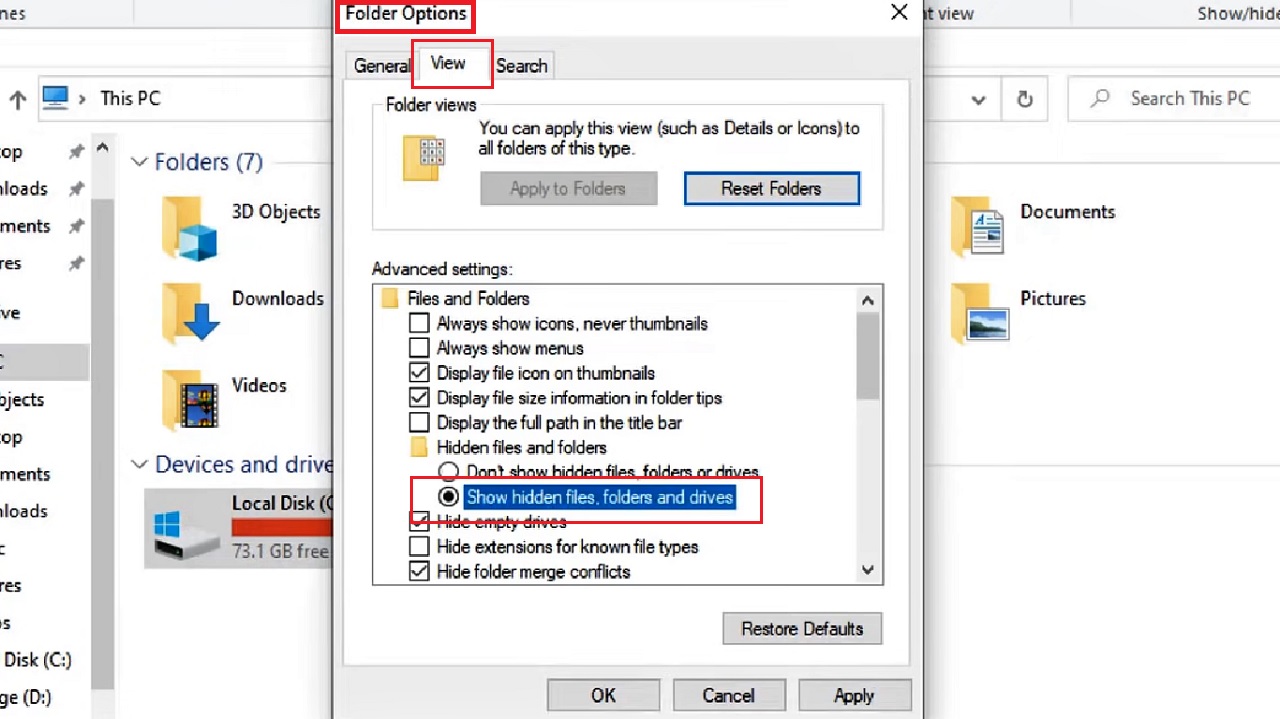
- Go to the View tab in the Folder Options window that appears.
- Click on the small circular button next to Show hidden files, folders and drives.
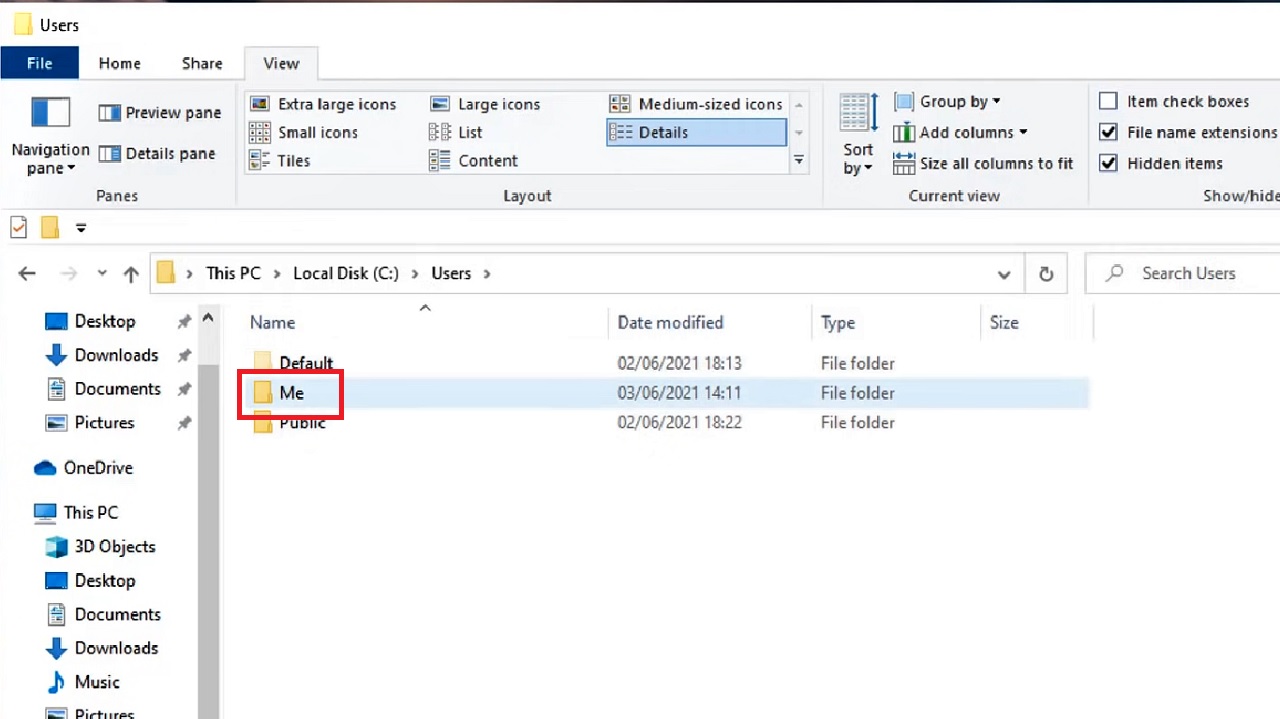
- Choose your user account. (Me in this case).
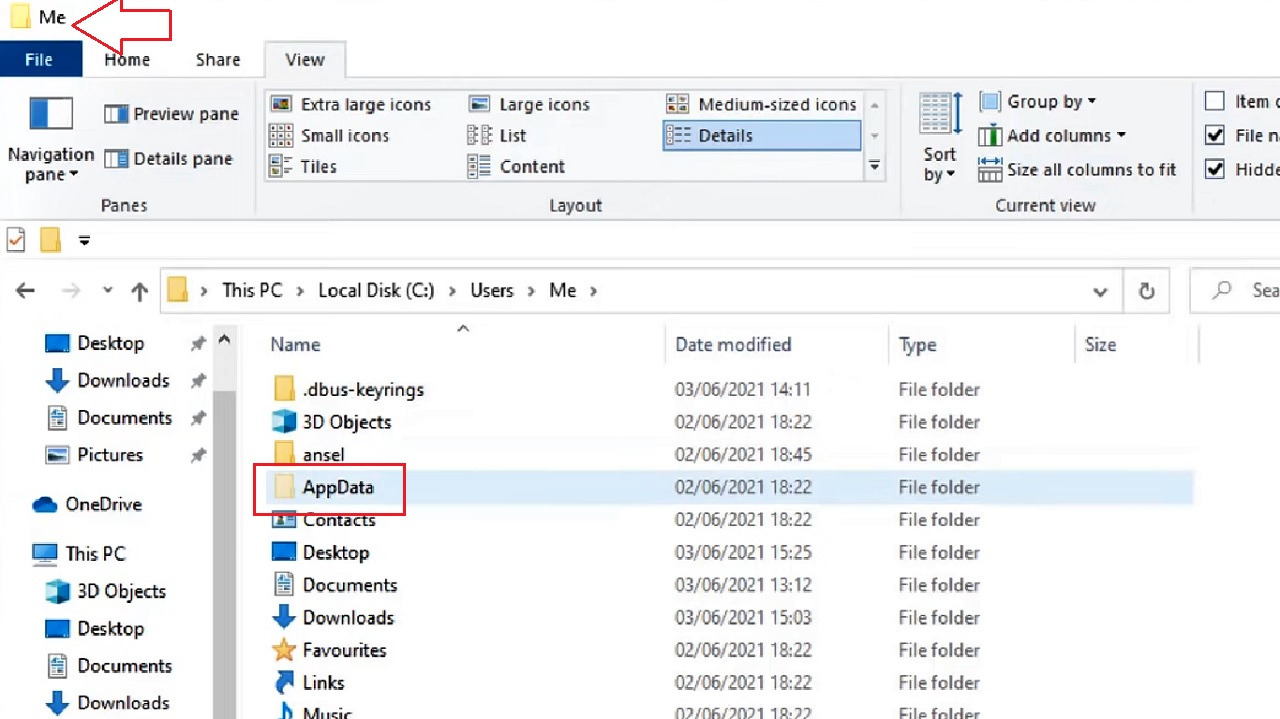
- Then select the AppData folder in the next window.
- Select the Local folder next.

- Look for the folder called Temp inside it and click on it.
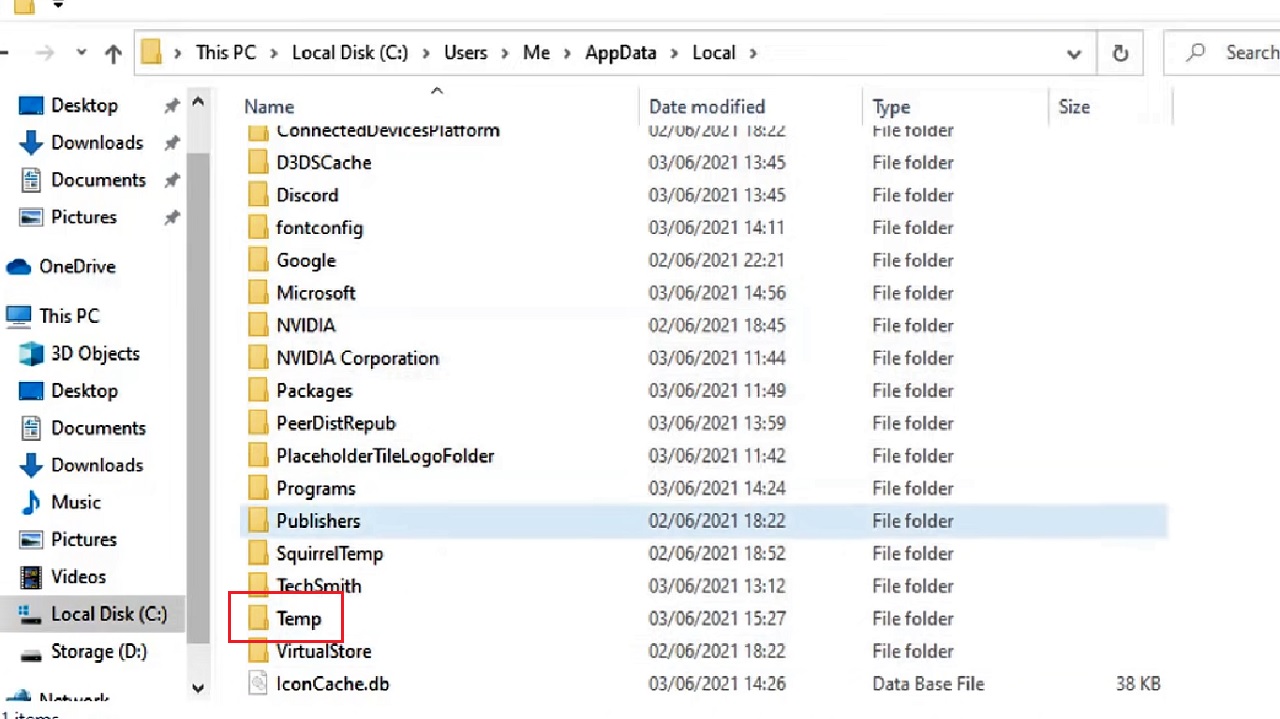
- Inside the Temp folder, look for files that are consuming a large space. Delete them.
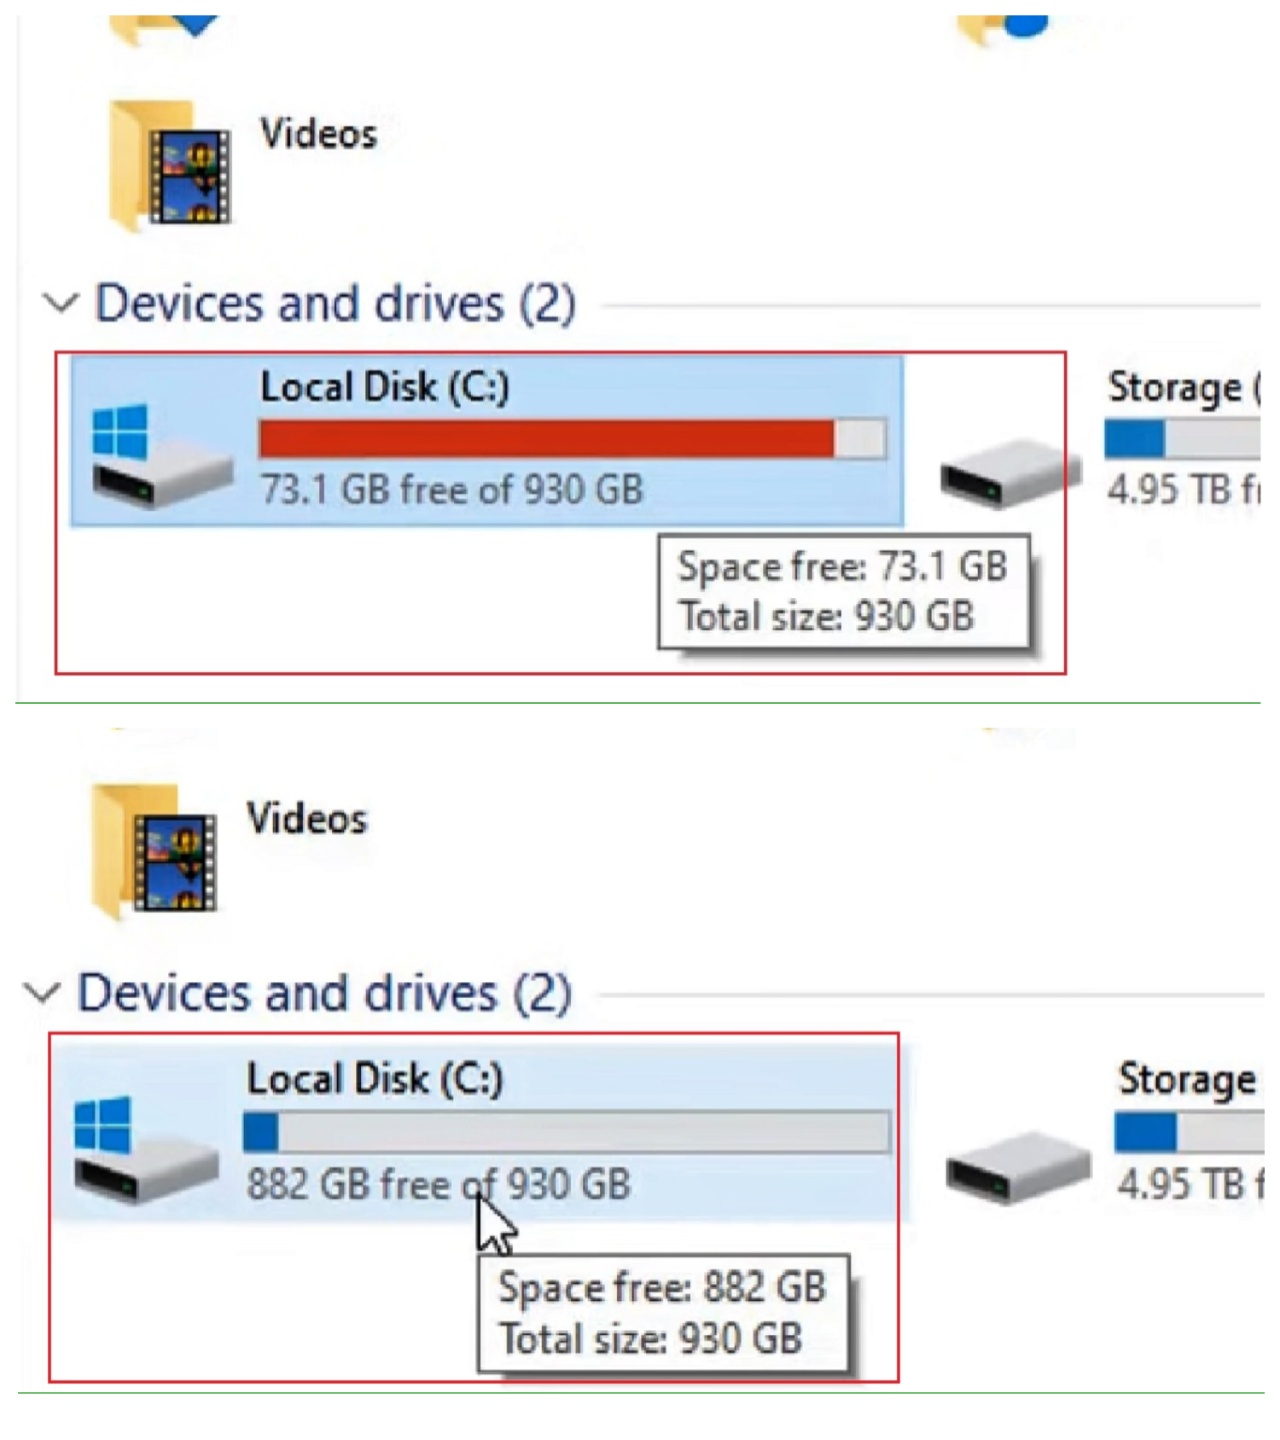
Now your drive will have a lot of free space. Notice the difference of free space in the twin image below:
Method 6: Turn Off Hibernation Option
If the hibernation option is turned on, numerous backups of your data will be created unnecessarily, consuming a lot of space on your hard drive. So, turn it off.
STEPS TO FOLLOW:
- Go to the search box and type cmd > Choose Run as administrator > hit Enter.
- In the command prompt window type in the command powercfg.exe /hibernate off and hit Enter.
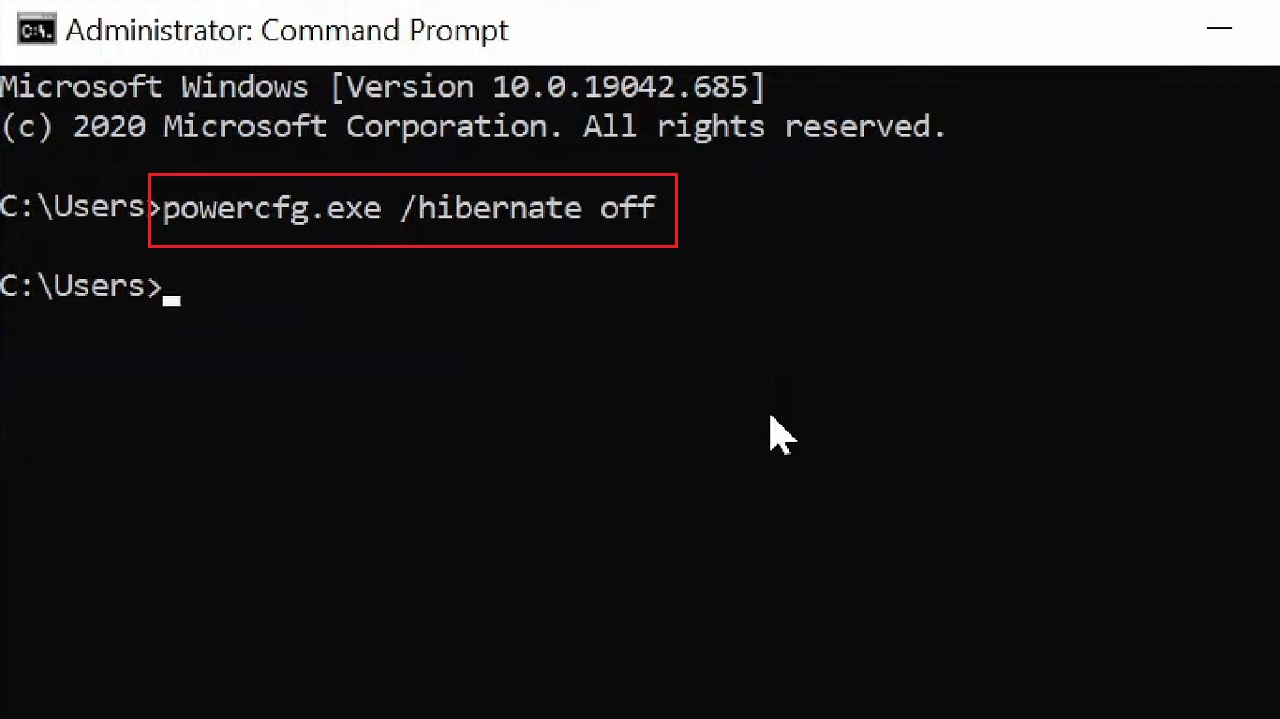
This will turn the hibernate option off and resolve the issue of your hard drive filling up for no reason.
Method 7: Reboot Your PC in a Clean Boot State
If any third-party software is creating log files and consuming a significant amount of space on your hard drive, rebooting your computer in a clean boot state is perhaps the best solution.
STEPS TO FOLLOW:
- Press the Windows and R keys on your keyboard together to open the Run dialog box.
- Type the command msconfig in the box and hit Enter.
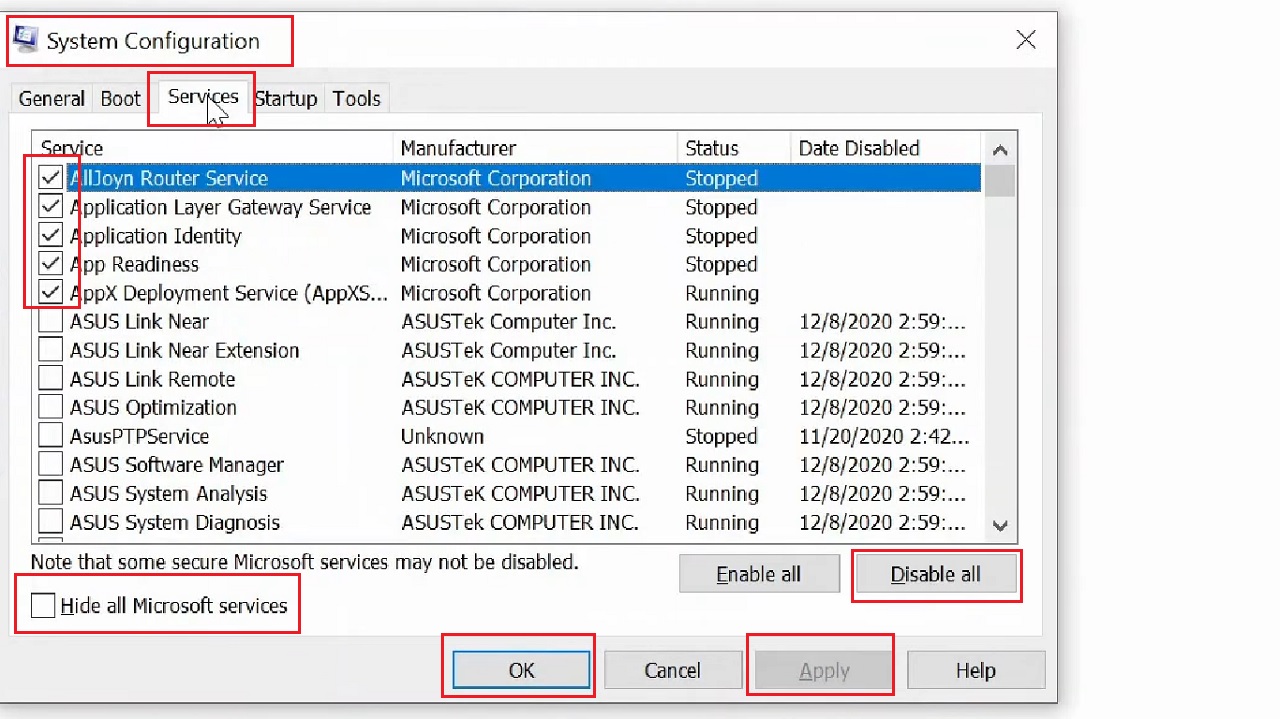
- Go to the Service tab in the System Configuration window.
- Click on the small square box next to Hide all Microsoft services.
- If there are any other services checked, click on the Disable all button to stop those services as well.
- Click on the Apply button to save the changes and then click on the OK button to close the Window.
- It will bring up a small window saying that You may need to restart your computer to apply the changes. Click on the Restart button in this window.
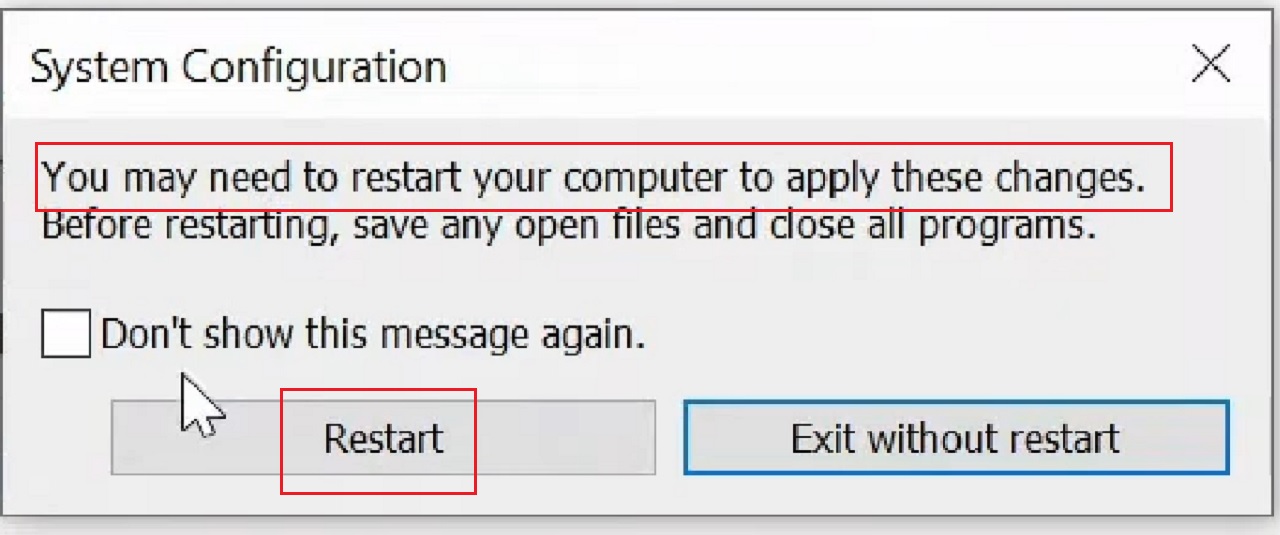
This may resolve the issue.
Method 8: Reduce the Size of WinSxS Folder
Reducing the size of the WinSxS folder will also free up space on your hard drive.
Note: Exercise extreme caution while performing the steps of this method. Any mistake will cause severe damage to the computer system and its functionality since this folder stores all necessary directory files for Windows operation.
If you are not sure what you are doing, skip this method.
STEPS TO FOLLOW:
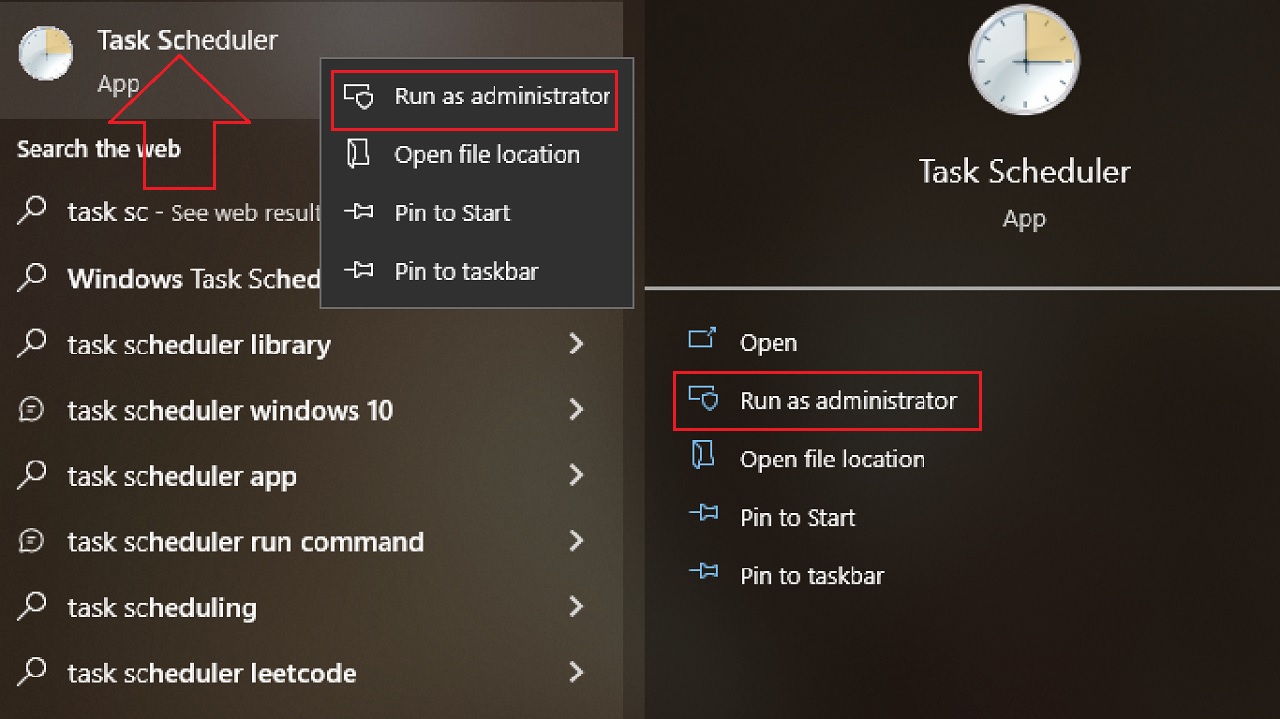
- Go to the search box next to the Start Menu.
- Type task scheduler.
- Select Run as administrator from the right side of the window or from the drop-down menu you get after right-clicking on the app.
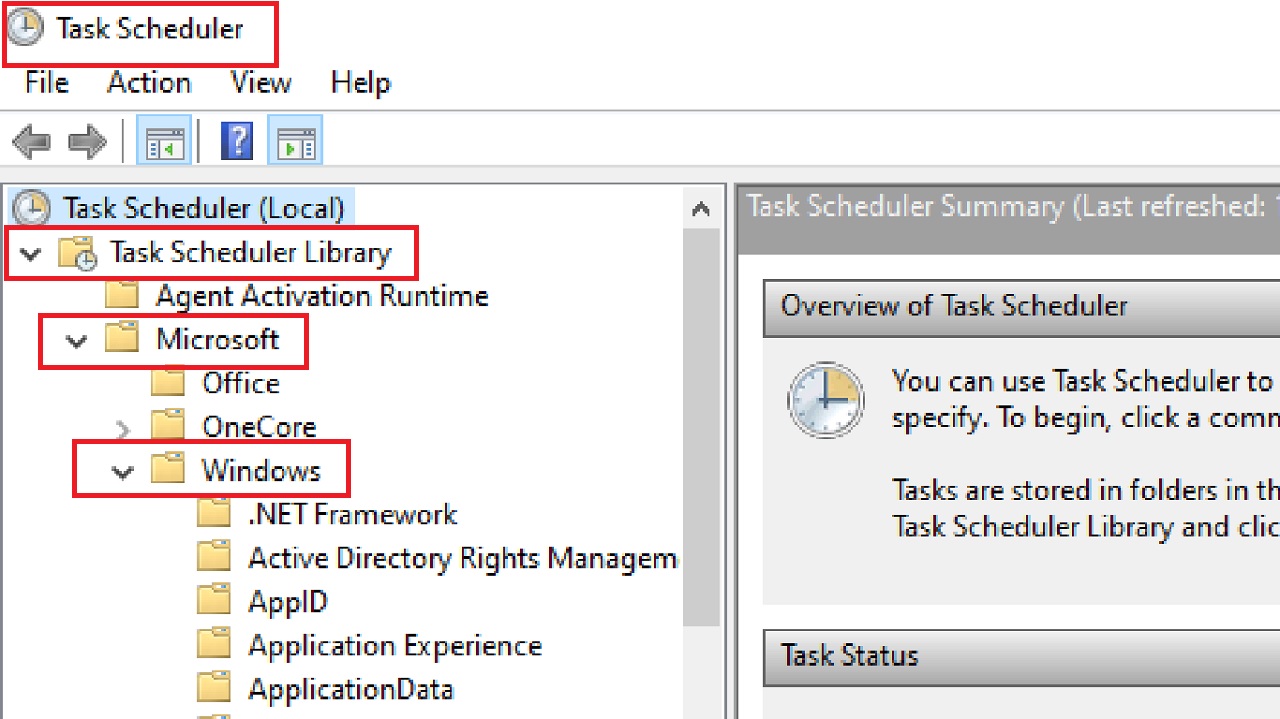
- Double-click on the Task Scheduler Library folder in the left panel of the Task Scheduler window.
- Click on the small arrow next to it to expand it.
- Do the same consecutively for Microsoft and then on Windows from the respective expanded list.
- Select Servicing under the Windows folder and double-click on it to expand it.
- Select StartComponentCleanup in the central pane of the window.
- Click on Run at the far-right panel under the Selected Items tab.
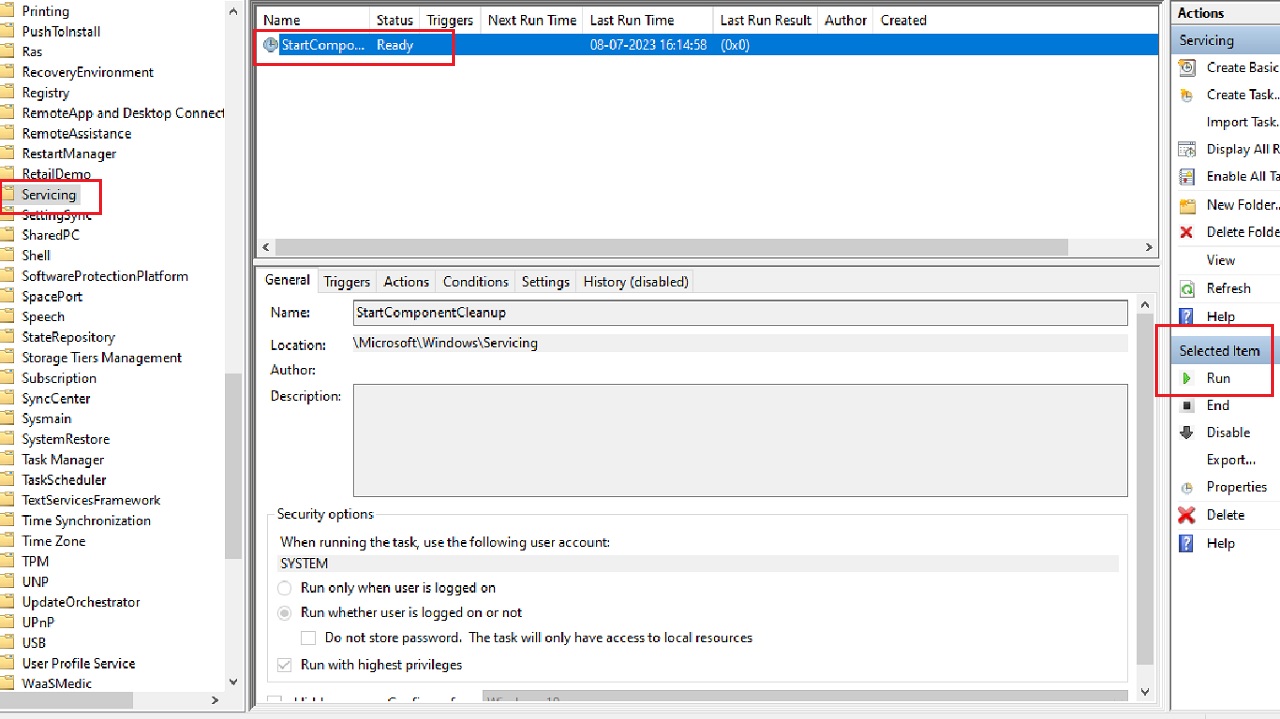
Close the window once the process is complete.
Conclusion
So, if your hard drive is full for no rhyme or reason? Try one of these solutions to fix the issue.
These methods are applicable on all versions of Windows operating systems.