
You may see a red light on your router and not be able to connect to the internet to enjoy surfing.
There is no need to worry in such situations because, in this guide, you will find some straightforward, clear, and effective solutions on how to fix the issue.
In This Article
KEY TAKEAWAYS
- Check the physical connections of your router for secure power, DSL, and Ethernet cable connections.
- Turn the router off and turn it on after some time for a complete power cycle.
- Perform a factory reset on your router by holding the reset button for about 10 to 15 seconds and reconfigure the settings after it reboots.
- Inspect the router hardware for any issues and replace them, if you have the technical knowledge, or contact the router manufacturer’s support.
- Contact your Internet Service Provider to ensure there isn’t any outage in your area or any billing or payment issues for the service.
Why is There a Red Light on the Router?
Issues with the router connection are the primary cause of a red light. It can be due to a loose connection or a faulty or damaged cable.
In addition, some other reasons for this issue are:
- Outage or disruption in internet service
- Unpaid bills, billing issues, or account suspension by the ISP
- Overheating of the router
- Outdated router firmware or errors in it
- Router hardware failures and faults
- Congestion or high network traffic in your area
- Malware infection or security breach
- Incorrect or misconfigurations in router settings
- Scheduled maintenance or upgrades by the ISP
This issue can be resolved in some simple ways as described below.
Ways to Fix Red Light on Router
Checking the cables for any loose connections is the first basic step to resolve the issue of red light on the router.
The other simple steps include the following:
- Power cycling or restarting the router
- Resetting the device to default factory settings
- Checking and replacing hardware components at fault
- Contacting the ISP for assistance
Here are the detailed descriptions of each of the solutions, step by step.
Method 1: Power Cycle the Router
Often, simply power cycling the router may resolve the issue since it can remove temporary glitches in it and restore things to normal.
STEPS TO FOLLOW:
- Press the Power button on the router to turn it off.

- Unplug it from the power source.
- Wait for about 30 to 60 seconds, more the better if it is overheated.
- Plug it into the power source again.
- Switch it on.
- Allow a few minutes for the router to boot to normal again and establish a connection.
If that did not help resolve the issue, try the next method.
Method 2: Check the Physical Connections of the Cables on the Router
Sometimes, basic checks like checking the physical connections can resolve the issue of a red light on a router caused typically by loose connections or damaged cables.
STEPS TO FOLLOW:
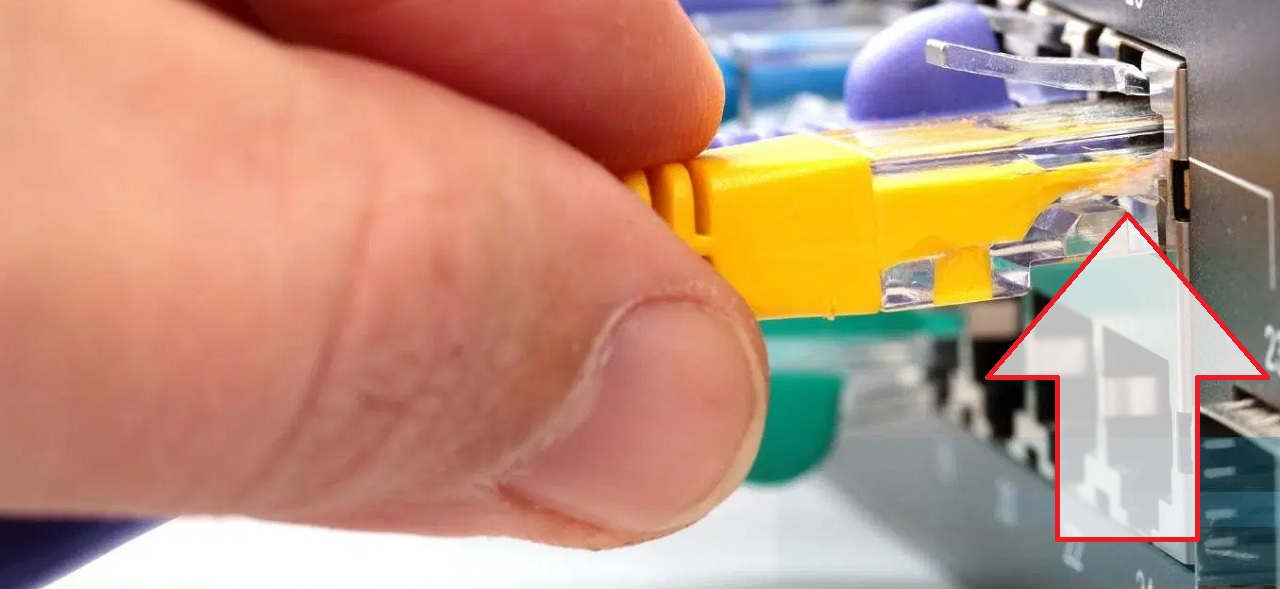
- Inspect the cable connections to ensure they are securely connected to the router in the correct slots and are not loose.

- If there are any loose connections, reset the cables firmly after disconnecting them.
- Especially check the fiber optic cable. Remove and refix this cable very carefully because it is extremely delicate. (The port location may vary from one router model to another).
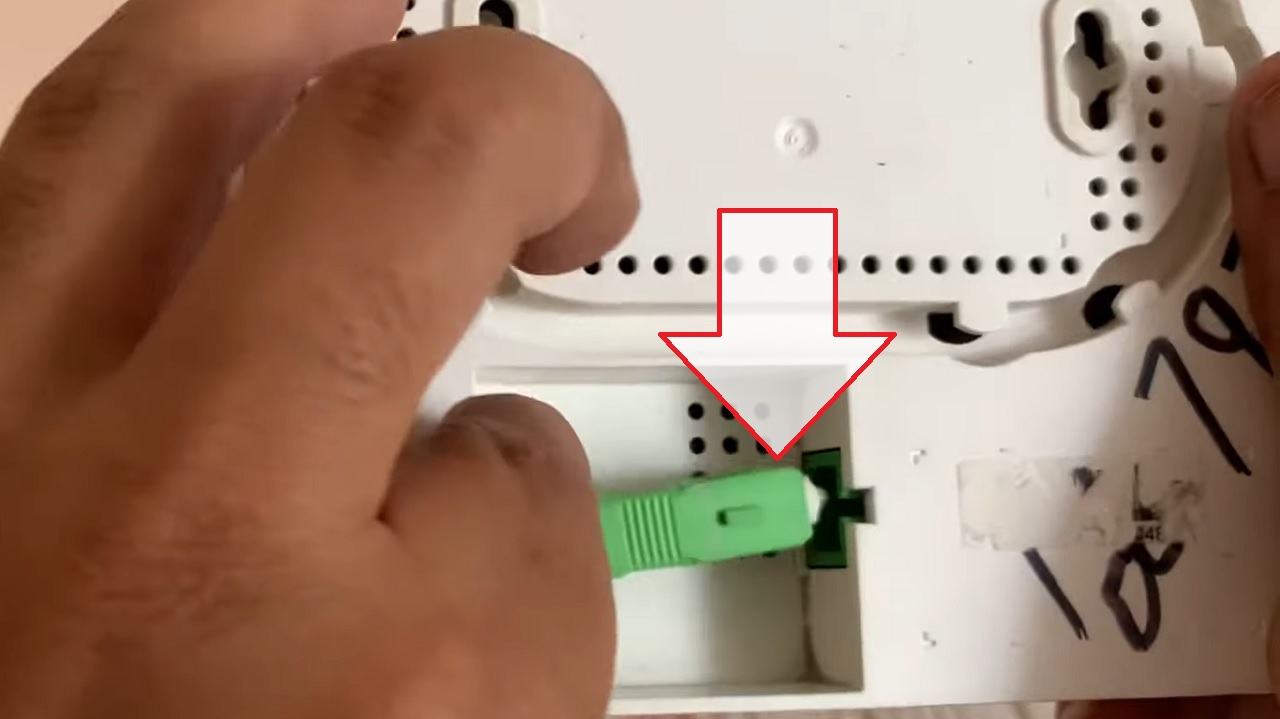
- Power the router back on after ensuring all connections are okay.
- Check the modem connection, if you are using a separate one, and check for green or blue lights which indicate it is Online.
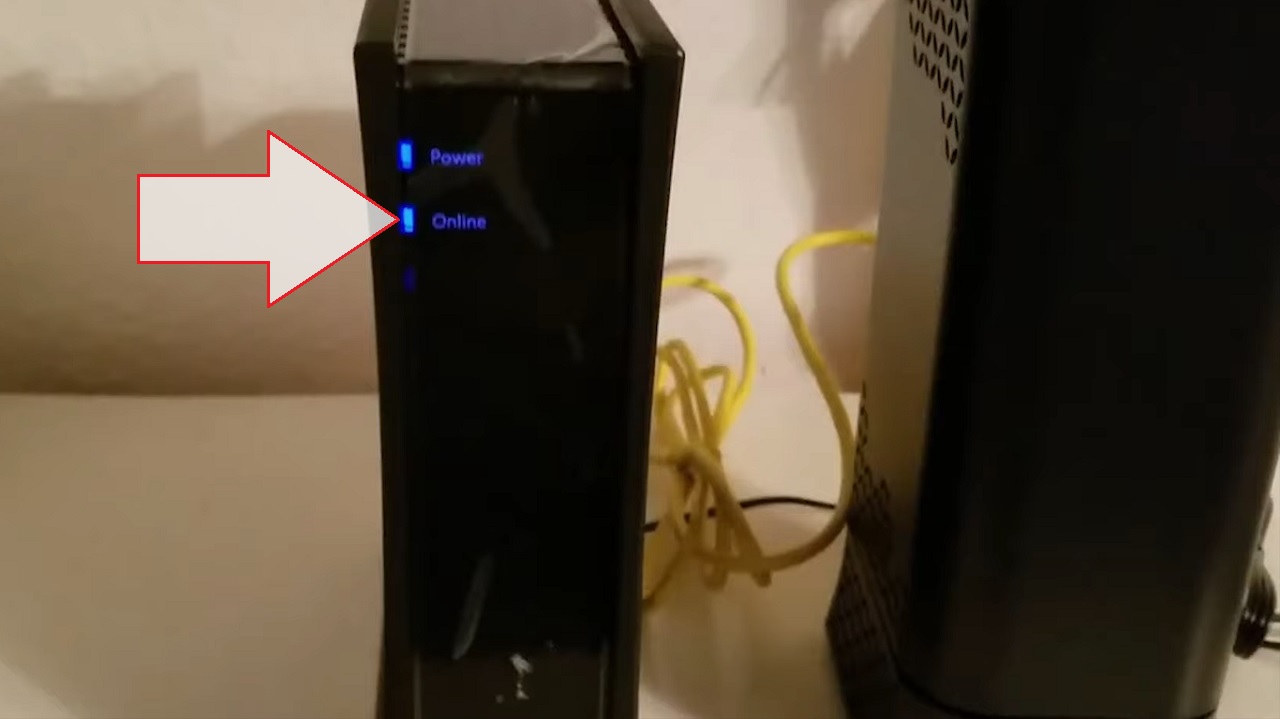
If it is not on, check and refix the cables.
If all connections are perfect but the issue persists, try the next method.
Method 3: Perform a Router Reset
Resetting the router back to its factory settings and configuring it again from scratch may sometimes resolve the red-light issue.
STEPS TO FOLLOW:
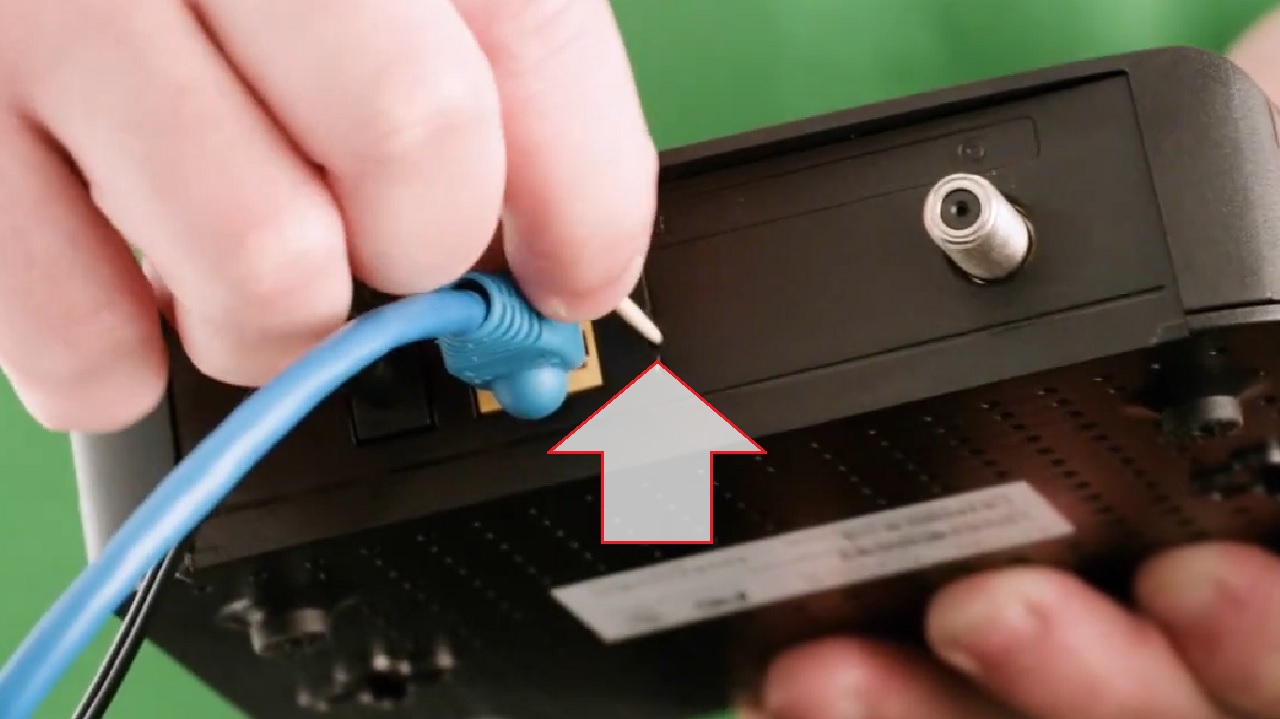
- Find the Reset button at the back of your router. It is usually a small recessed button.

- Use a toothpick or any sharp object to press the Reset button and hold it for about 10/15 seconds.
- Release the button after the specified time.
Now, reconfigure the settings of the router including network name (SSID) and password.
Note: A Tenda router is used for demonstration in this case. Your router model may be different and so the interface may vary a bit. However, the reconfiguration process is the same.
To start with, check the IP address of your router, which is usually on the label at the back of your router. However, if it is not there, follow these steps:
- Go to the search box > Type control panel > Hit Enter > Go to Network and Internet > Select Network and Sharing Center > Double-click on the active network.
- In the following window, Ethernet or Wi-Fi status, depending on your particular active network, click on the Details button.
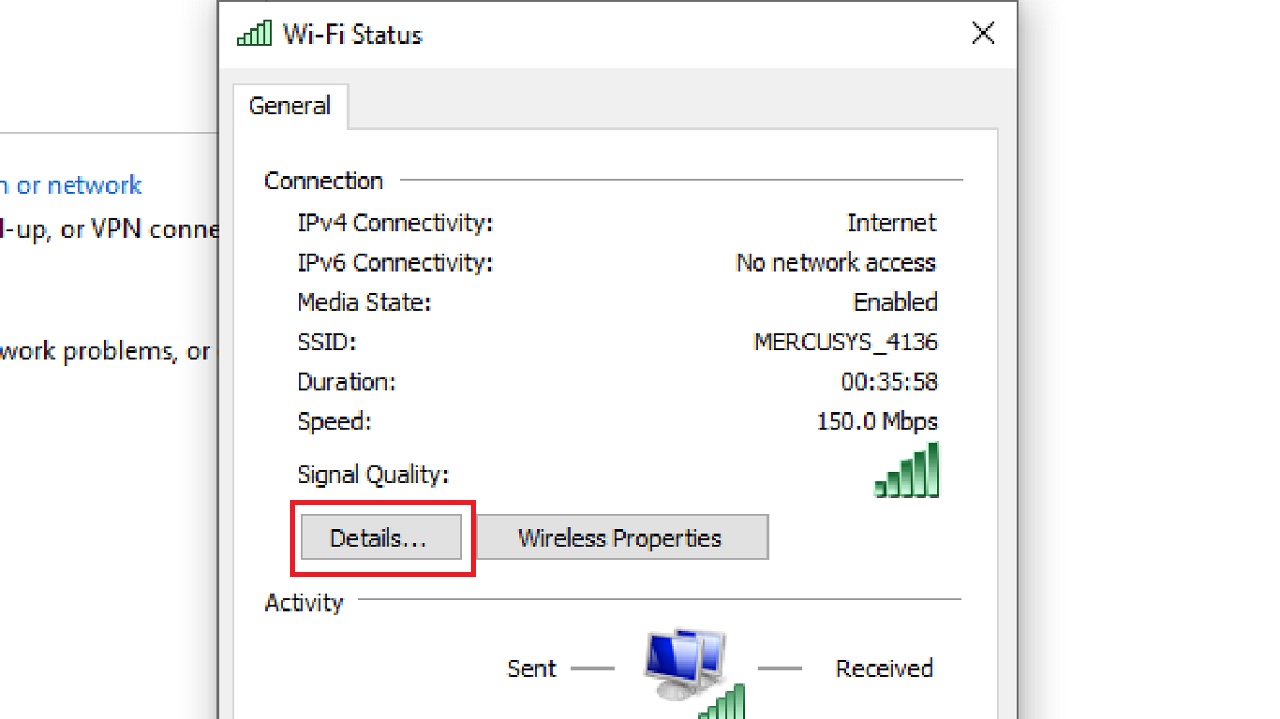
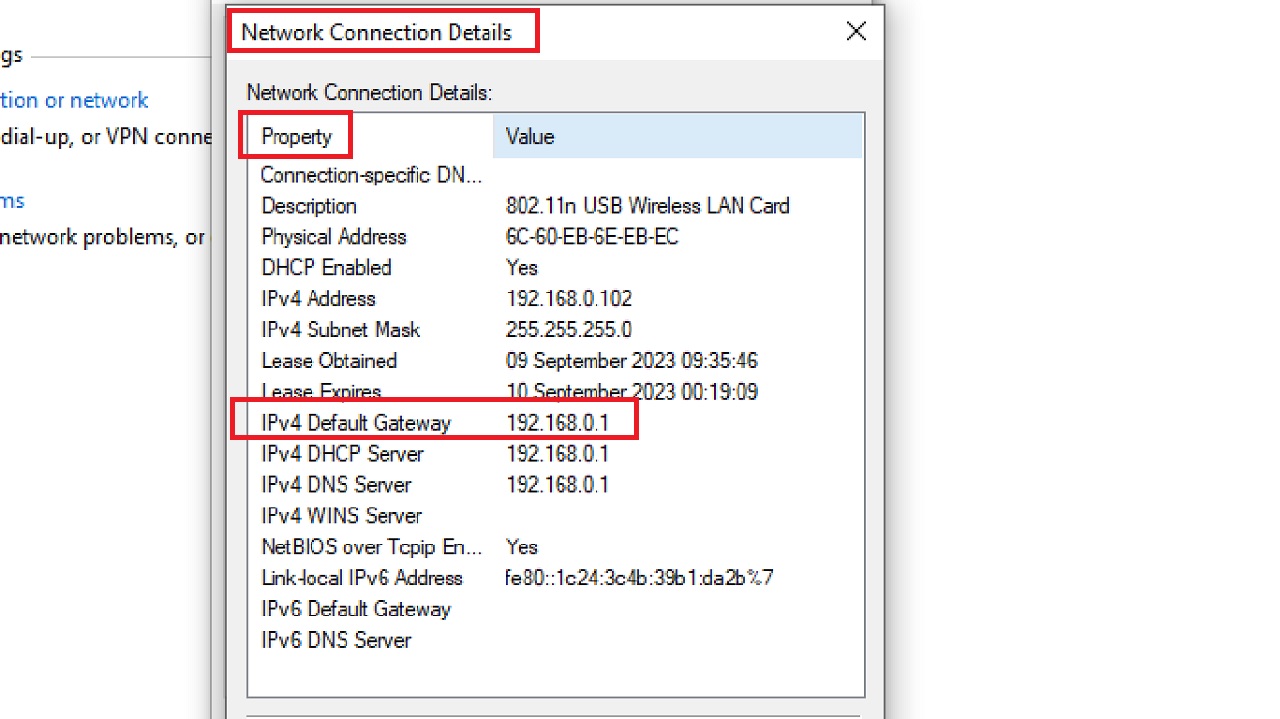
- In the Network Connection Details window under the Property tab, check and note the IPv4 Default Gateway address.
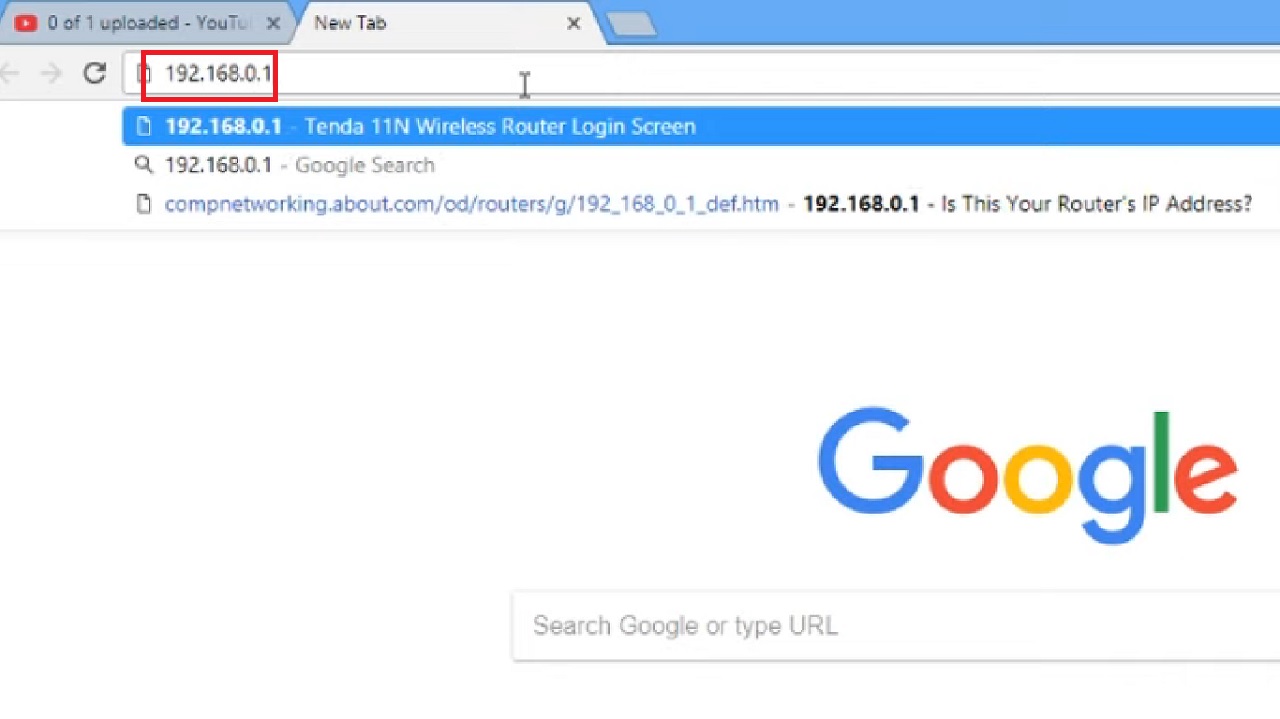
- Now, open your web browser. It is Google Chrome in this case.
- Type the IP address 192.168.0.1 in the address bar and hit the Enter button on your keyboard.
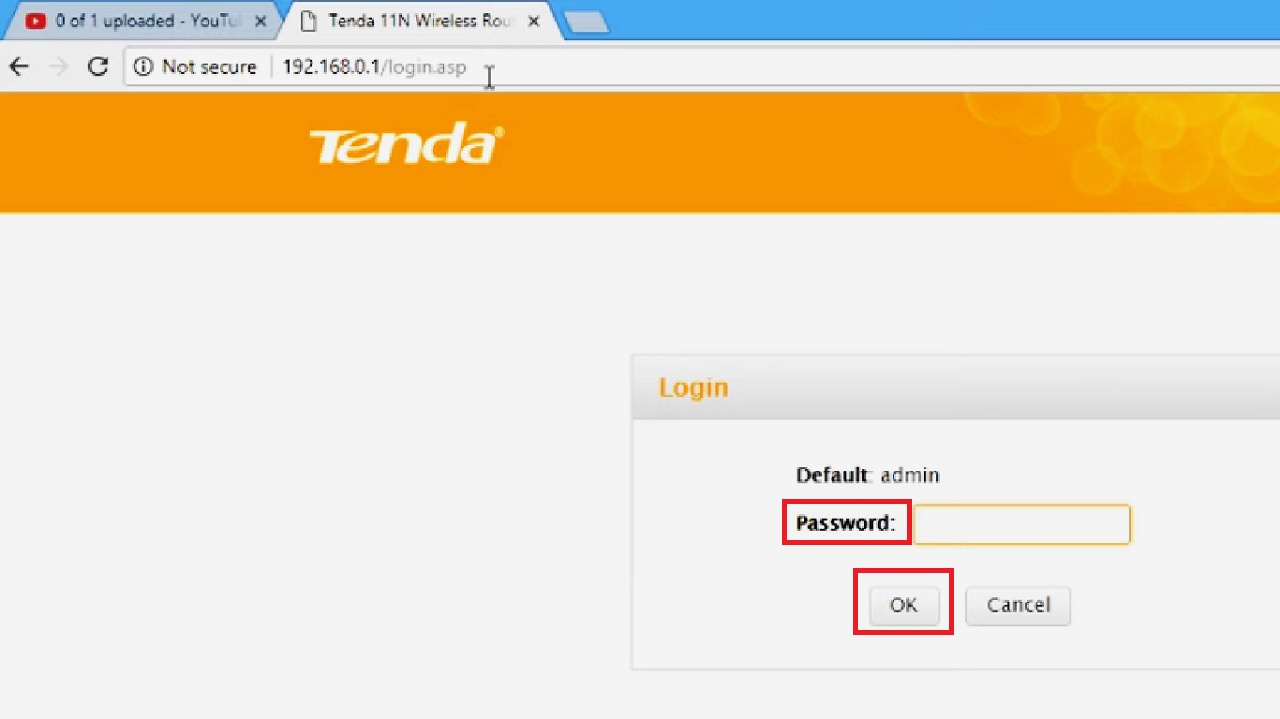
- On the homepage of Tenda, type the Password, which is usually ‘admin,’ if you have not changed it before.
- Click on the OK button.
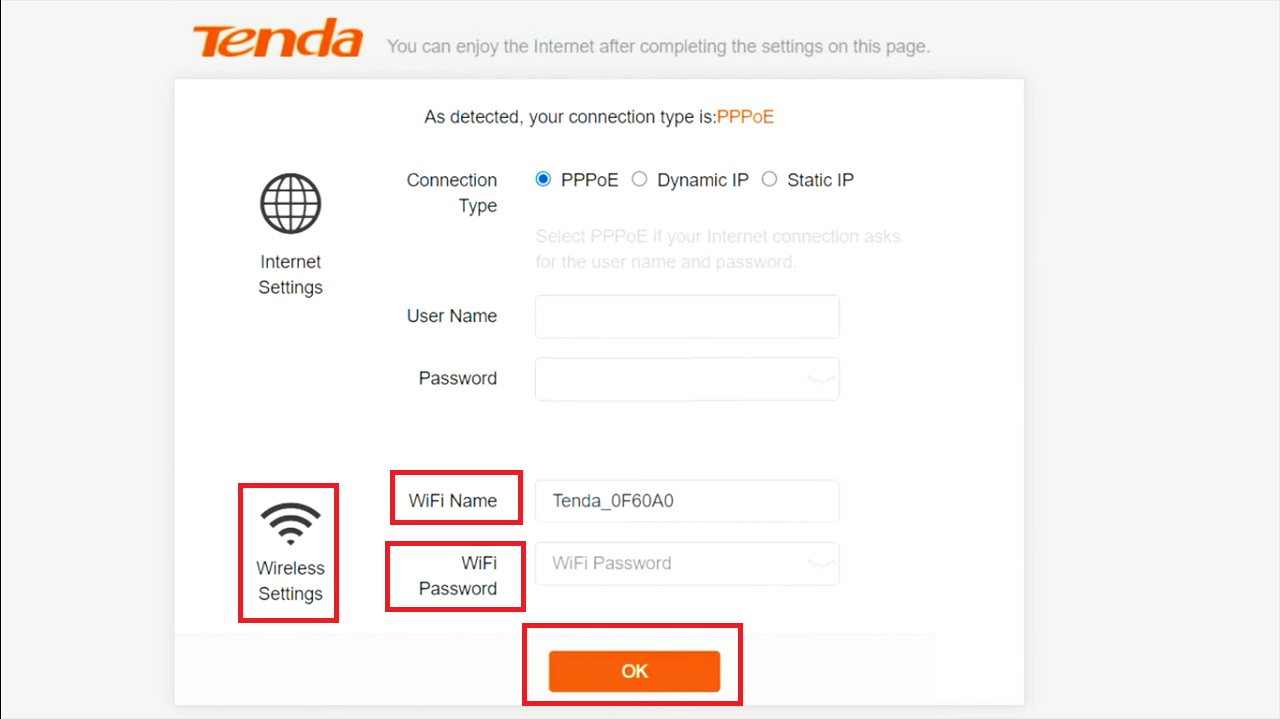
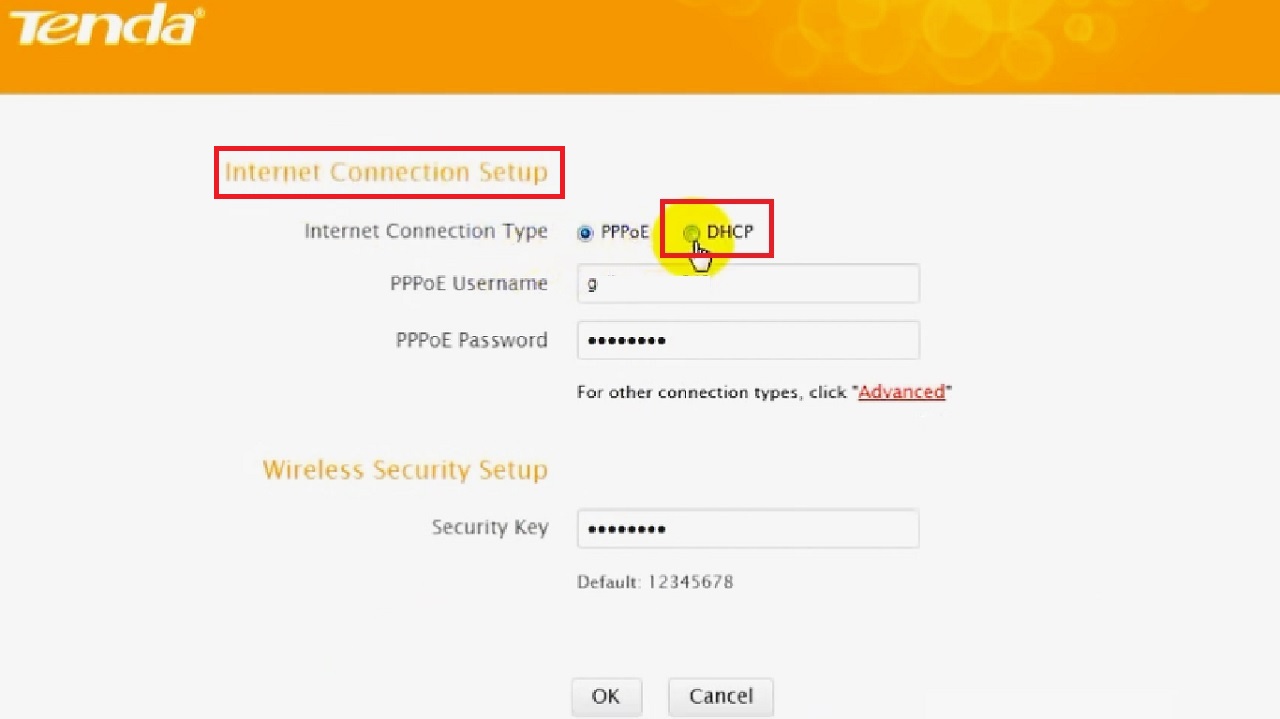
In the following window, under Internet Settings, select your connection type.
- If your Internet Service Provider gives you a PPPoE username and password, select PPPoE and enter your PPPoE username and password given by your ISP.

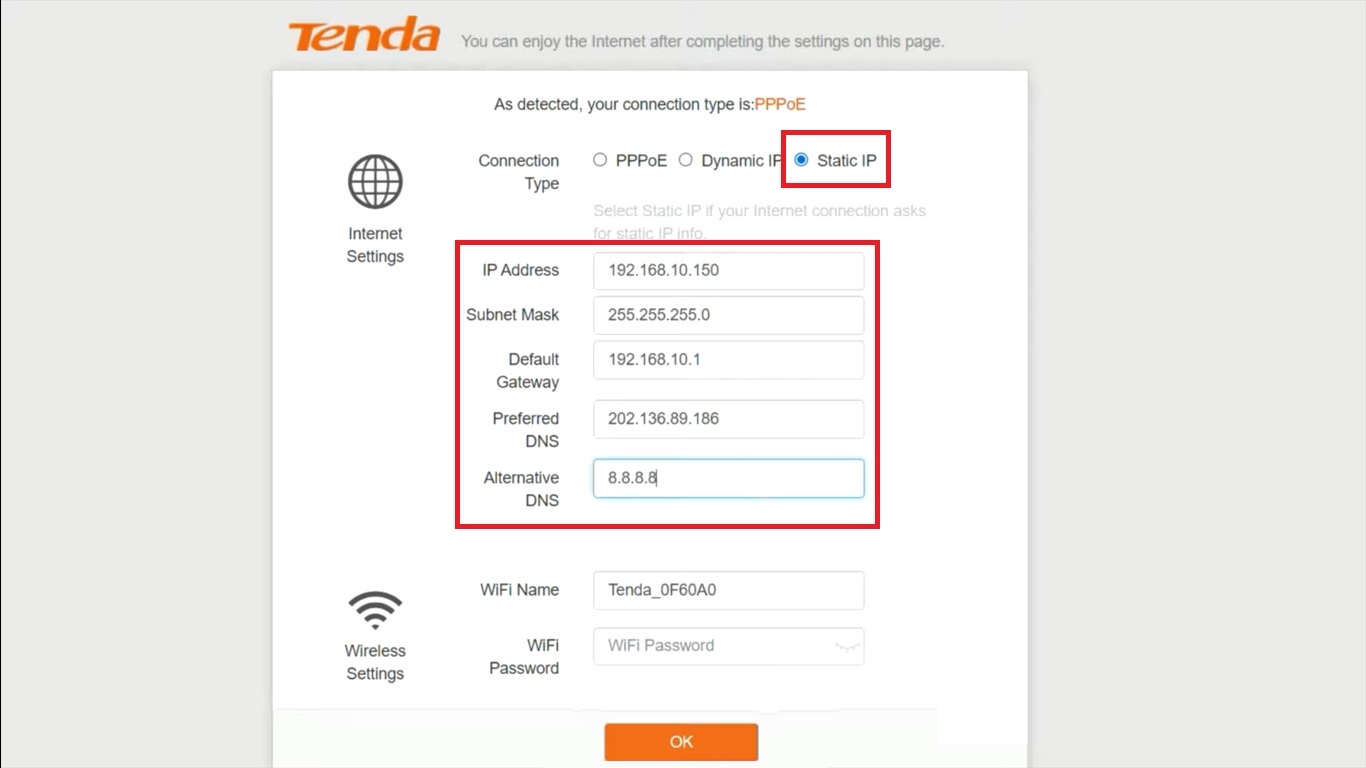
- If your Internet Service Provider gives you a public IP or static IP address, select the Static IP option and enter the IP address, subnet mask, gateway, DNS servers, and other details given by your Internet Service Provider.
- Go to the Wireless Settings section below it.
- Confirm or change the Wi-Fi Name of the wireless network, also called SSID.
- Enter the Wi-Fi Password or wireless network password you have chosen. (Make sure that it is strong enough and is not less than 8 characters).
- Then, finally click on the OK button to finish the Tenda router setup and configuration.
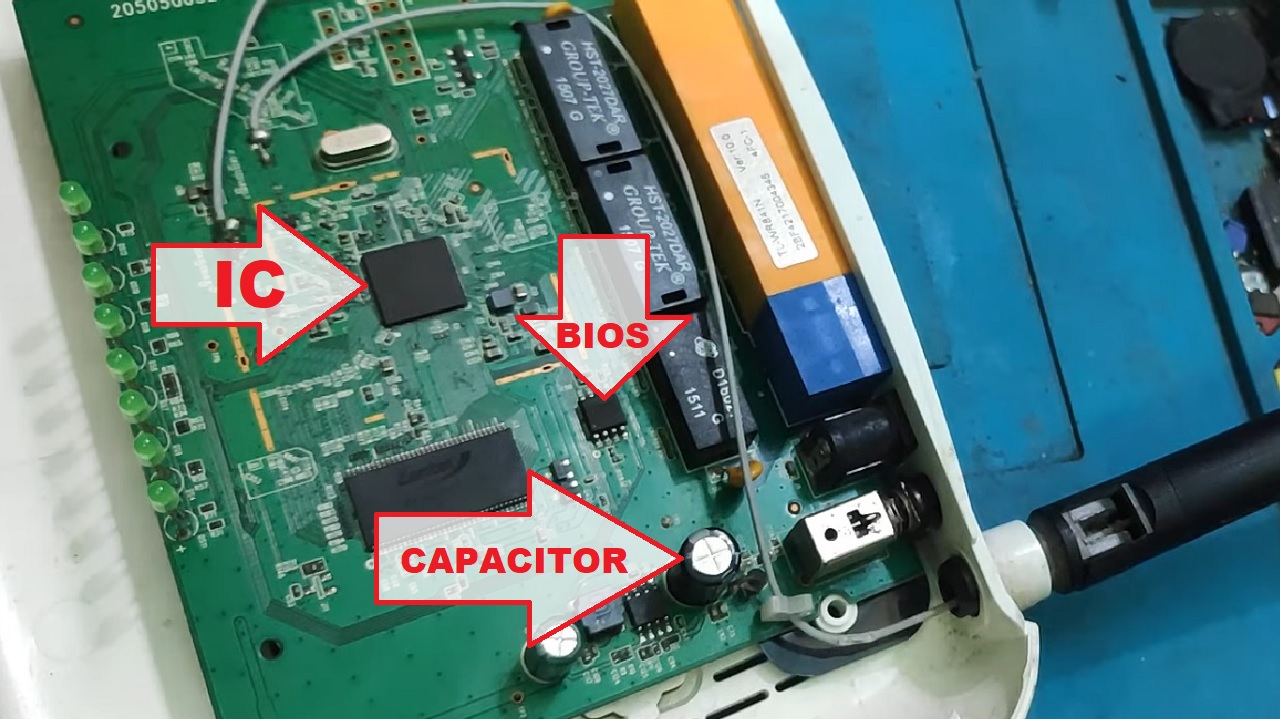
Method 4: Check Hardware Components Inside the Router
Some internal components of the router may also cause this issue. Check these components and clean or replace them if necessary, such as a swollen capacitor.
At most times, rust and Sulphur deposits on the pins of the main Integrated Circuit on the PCB and cause this issue. Clean it to fix the problem.
Note: If you do not have the necessary tools or knowledge, skip this step and call for a professional technician.
Here a TP-Link router is used for demonstration purposes. Remember, the design and outlay may vary from one router model to another.
STEPS TO FOLLOW:
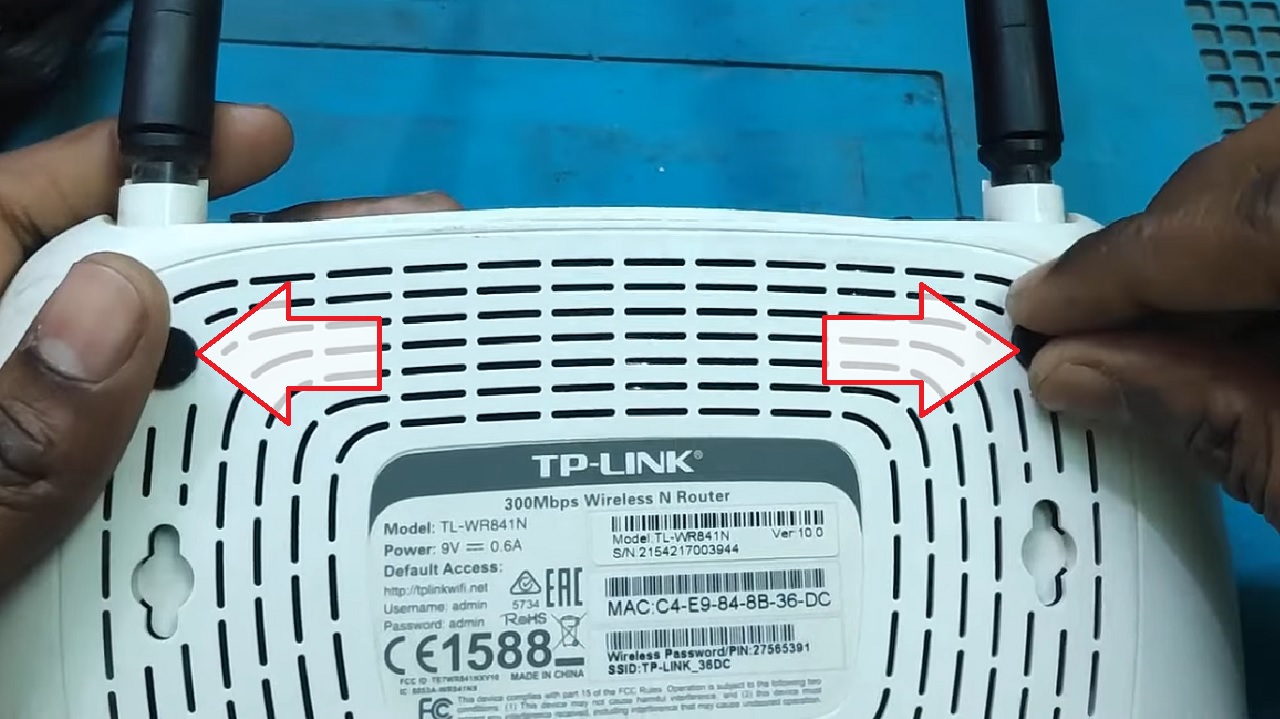
- Remove the rubber caps on the backside of the router.
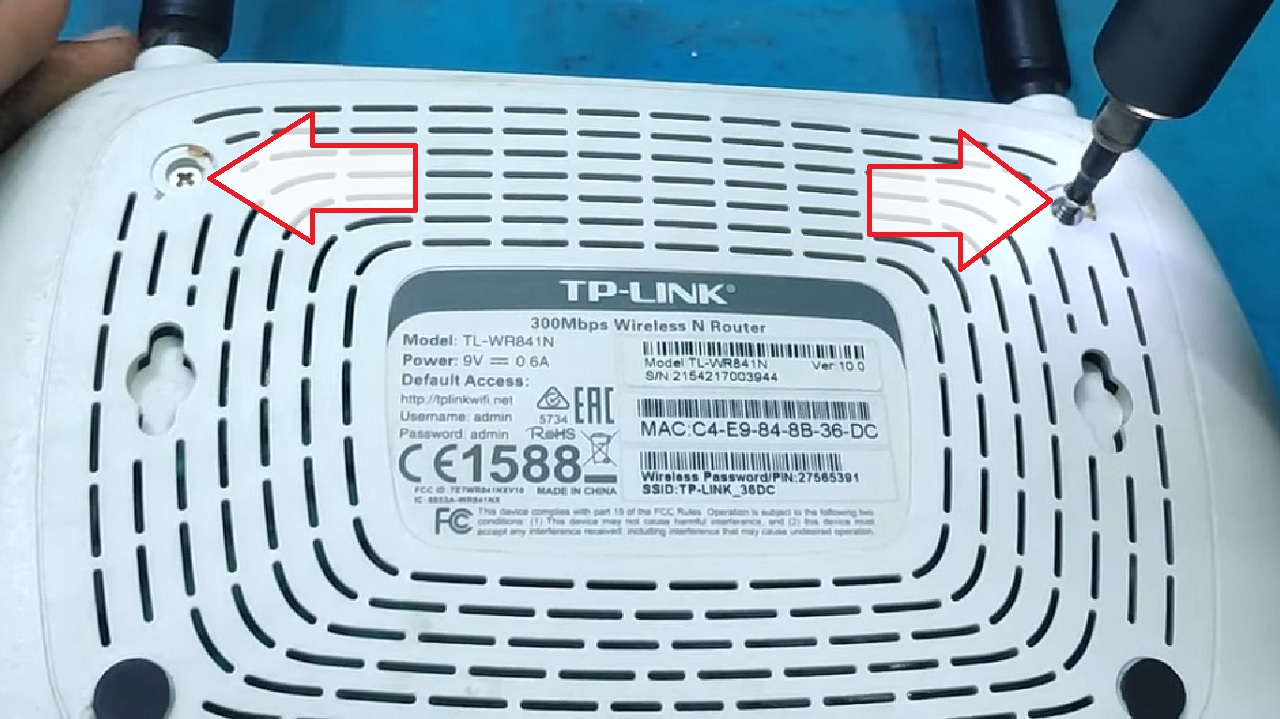
- Remove the screws.
- Carefully remove the enclosure.
- Take a look at the different components on the Printed Circuit Board.
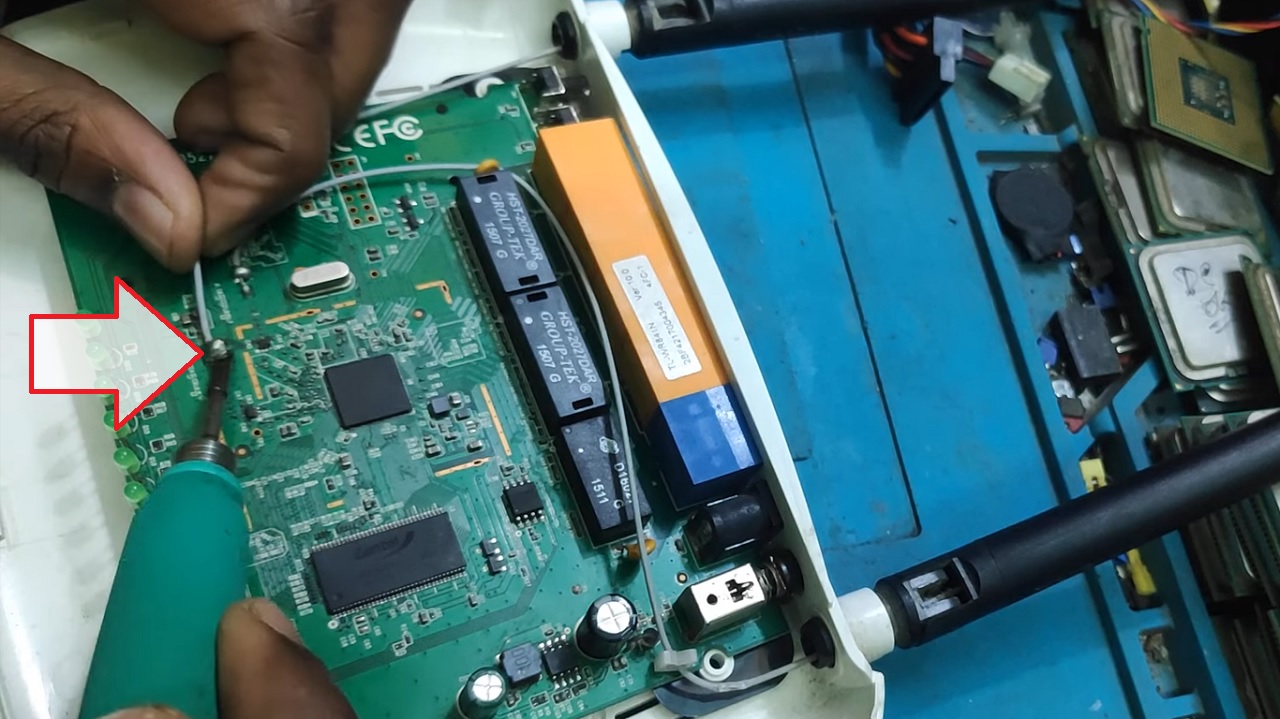
- De-solder one or both antenna connections for easy access.
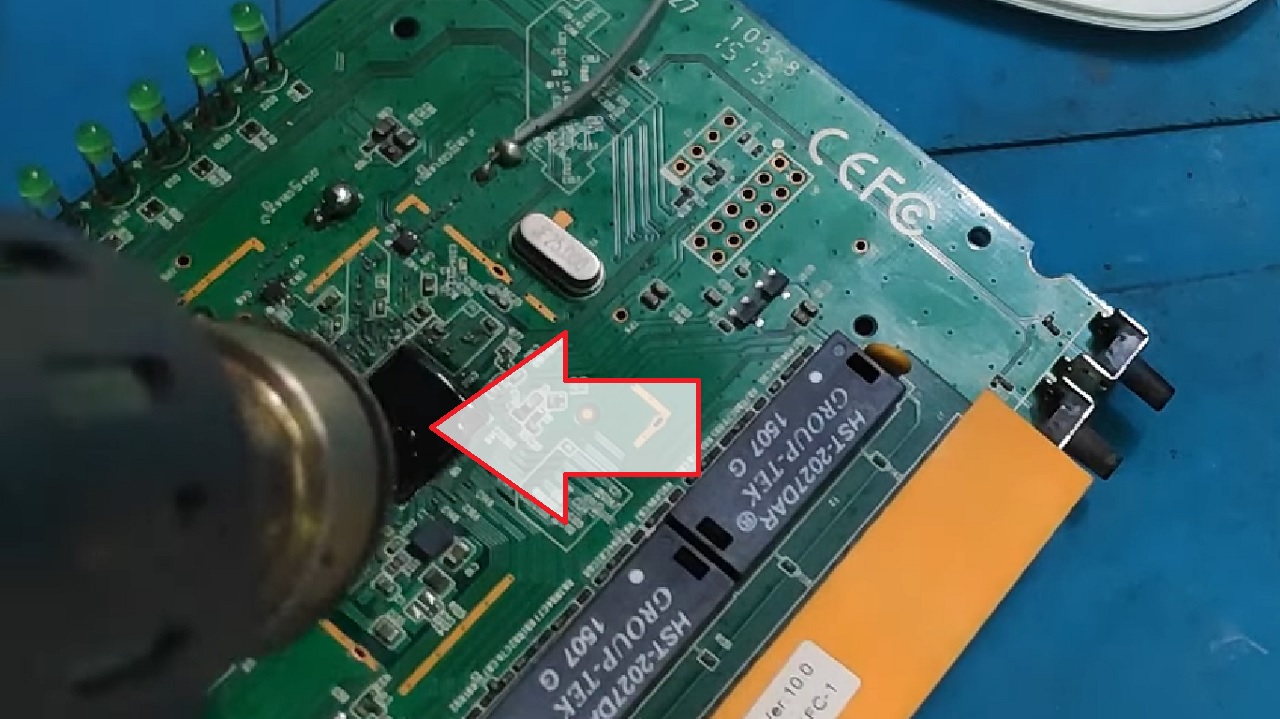
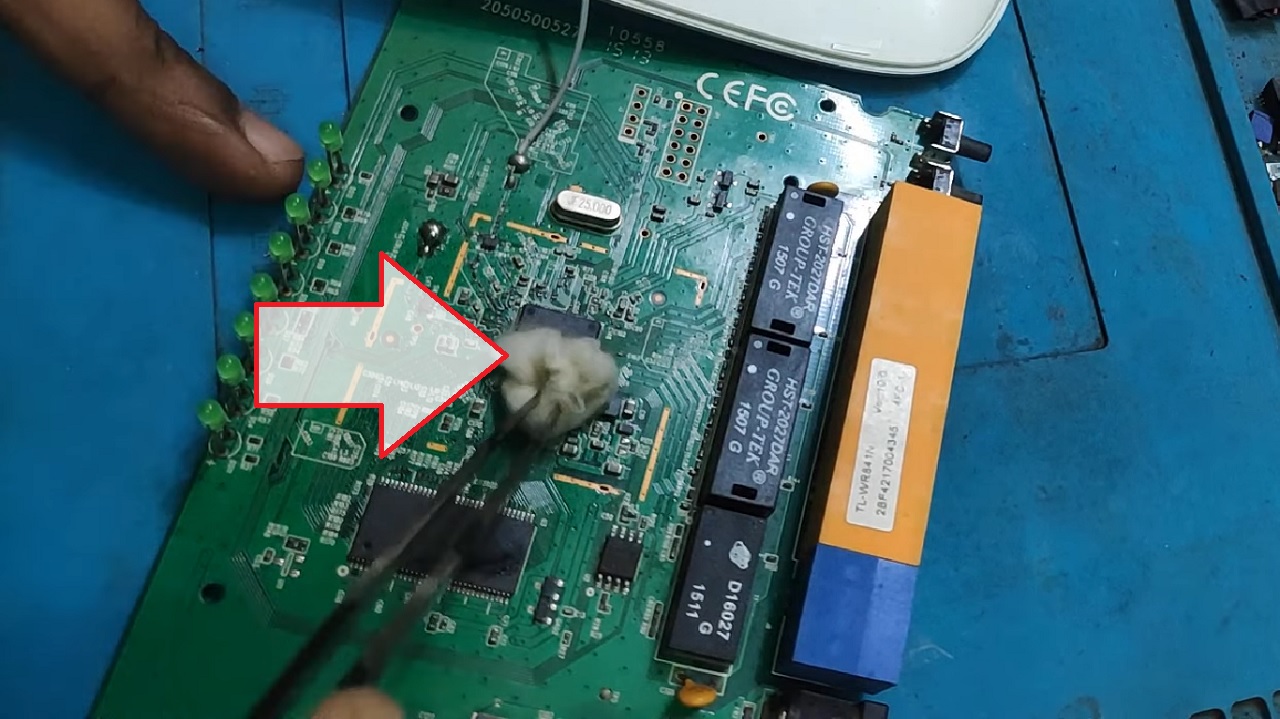
- Put some cleaning solution on the IC you suspect has rust or Sulphur deposits on its pins.

- Heat it carefully and let it cool.
- Clean it with a compressed air can.
- Apply some more cleaning liquid and clean the sides of the IC with a toothbrush.
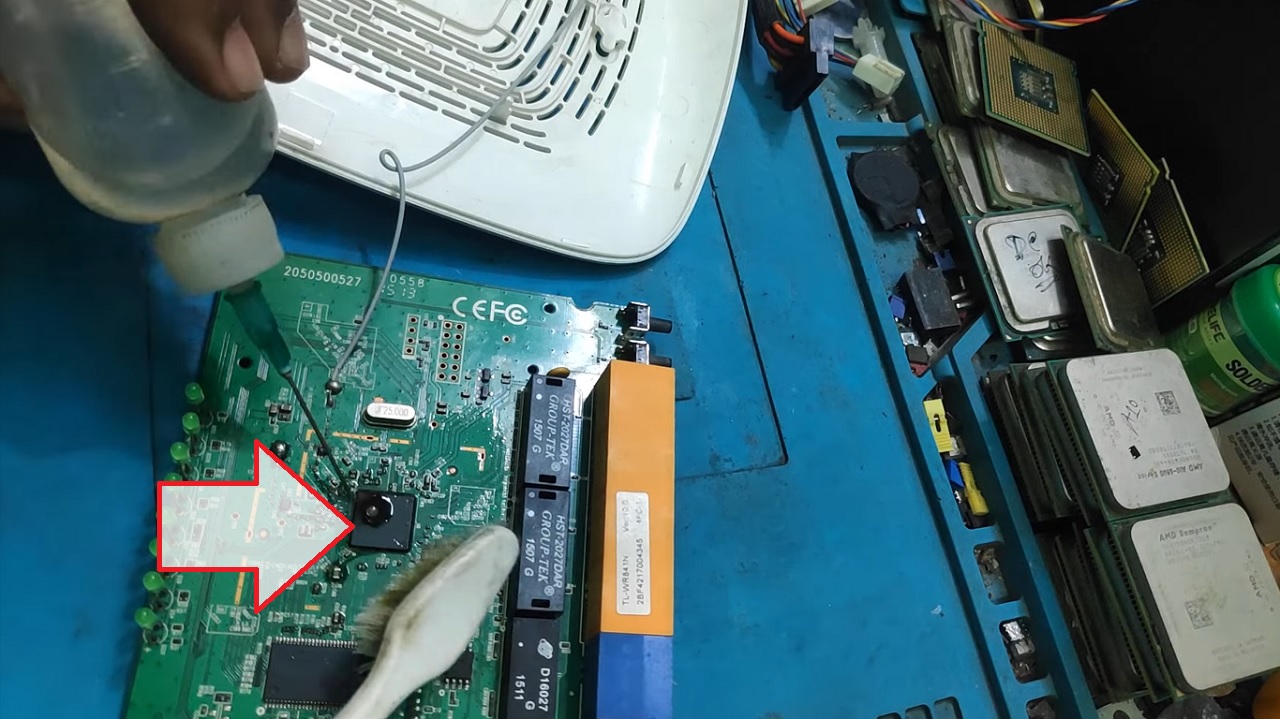
- Use a cotton swab to further clean and dry the IC.
- Replace the cover, screws, and the rubber caps properly in their places.
Connect and check whether the issue is resolved. Instead of the red LOS (Loss of Signal) indicator, the Wi-Fi LED indicator should be on now, as shown in the image below:
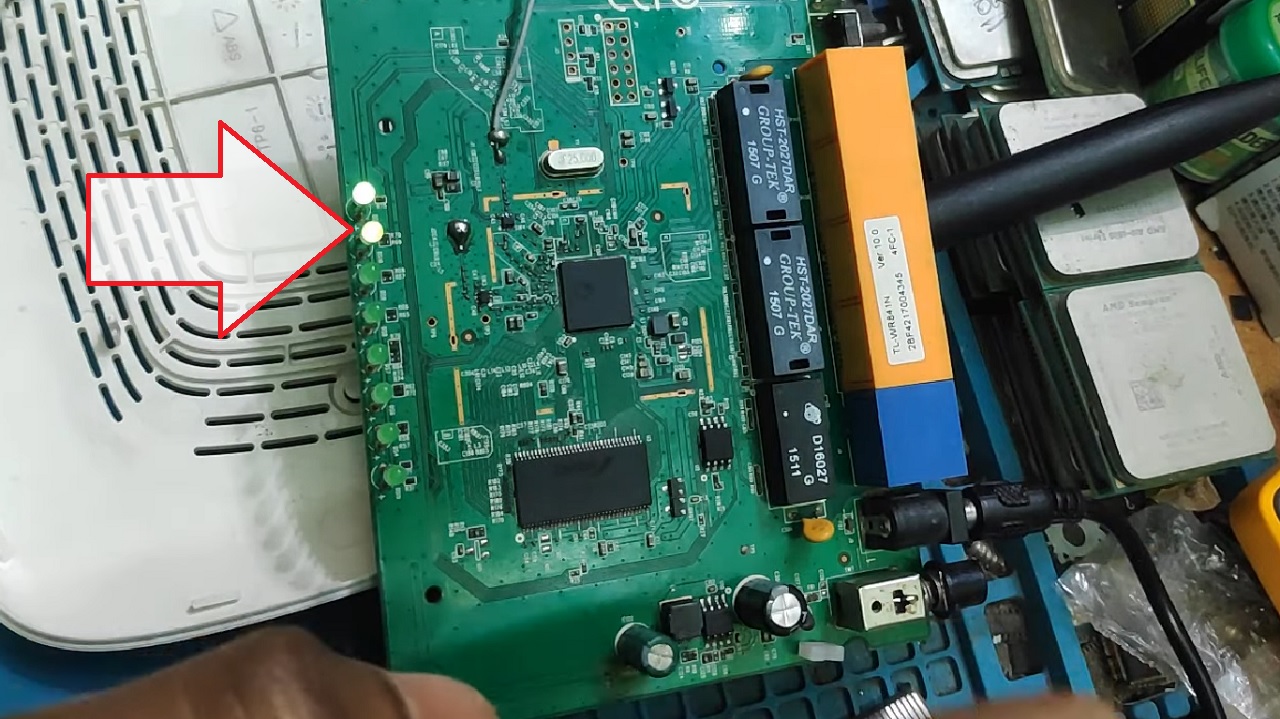
If you still see the red light on your router, try the next solution.
Method 5: Change WAN Settings to Obtain Automatic IP Address
In most cases, changing the Wide Area Network (WAN) settings to obtain an automatic IP address (DHCP) from the ISP can potentially help resolve the red-light issue on the router.
This is a useful and effective step to follow if the issue is specifically caused due to incorrect IP configuration.
Note: A Tenda router is used in this demonstration.
STEPS TO FOLLOW:
- Log into the admin web interface of the router as before.
- Go to Internet Connection Setup. (The name and location may vary depending on the make and model of the router).
- Click the radio button next to DHCP.
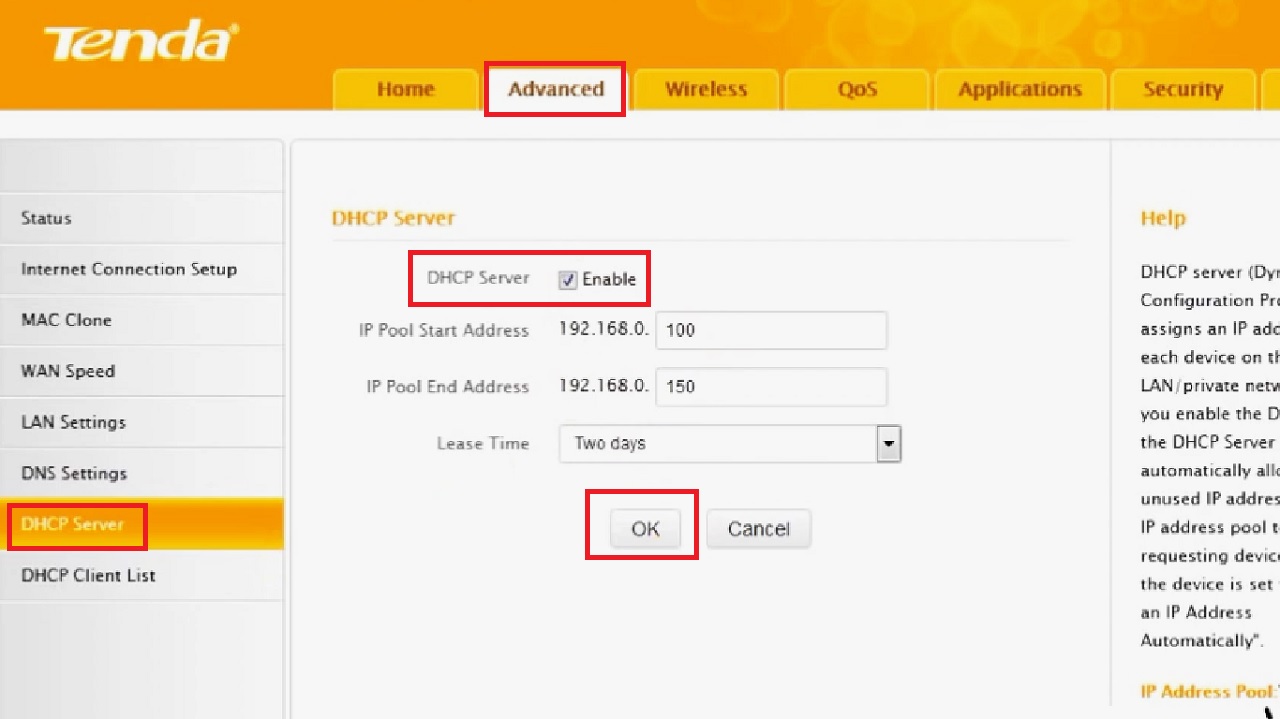
- In the following window in the DHCP Server page, click on the box next Enable alongside DHCP Server in the Advanced tab.
- Click on the OK button to save and apply the changes.
Now, reboot the router. After the device reboots, wait for some time for it to establish the new WAN connection.
Check if the red light is gone and the green or blue lights are on to indicate a successful connection.
If this solution does not work, and none of the above can resolve the red-light issue on your router, consider contacting your ISP or a qualified service technician to repair your router, if possible.
Conclusion
These are the most effective troubleshooting solutions for a router displaying a red light.
Try one or a combination of these steps, according to the situations, cause and need, to make your router function properly again.