
You may have a better plan and speed limit but still experience slow internet speed on your PC. This can be very annoying and frustrating, especially when your work needs high speed internet all the time.
However, there is no need to call the service provider up or take your PC to the local service station for repair.
Check the internet speed on other devices first. If the internet speed is high on other devices but slow on your PC, here are the proven solutions to fix this issue.
Follow these methods and save time, energy, hassle, and frustration.
In This Article
KEY TAKEAWAYS
- Some quick ways to increase the internet speed on your PC include moving the router closer to the PC and removing other wireless devices.
- Using dual 2.4 GHz and 5 GHz bands and making some other changes in a couple of specific properties of the network adapter may also help.
- You may switch to an Ethernet connection if you are experiencing slow internet speed on your PC.
- Disabling the Virtual Private Network, if it is crappy, to a more reliable free VPN may also increase the speed of the internet on your PC.
- Changing to a more reliable open source DNS and limiting the bandwidth to a lower percent have often increased the internet speed on a PC.
What are the Reasons for Slow Internet Speed?
The speed of the internet on your PC will depend largely on the speed limit provided by the Internet Service Provider (ISP).
It is based on the type of plan you choose. If you have a low plan and speed limit, the internet speed will be slow.
However, assuming that you have a higher plan and speed limit, sometimes you may experience slow internet speed on your PC, and there are some good reasons for it.
For example, if you are using any random or unreliable Virtual Private Network (VPN) to protect your privacy, in the process it may be reducing the internet speed.
A few other reasons for a slow internet speed on a PC are:
- Too many apps running in the background
- Multiple data and bandwidth hungry processes are running at the same time
- The distance between the PC and the router is larger
- The hard drive of the system is clogged
- There are too many devices using the same connection
- Viruses or malware existing in the system
- Outdated network drivers
- Outdated router firmware
- Incorrect network settings
- Too much data stored in the cache
- Faulty or damaged cable, in case you are using an Ethernet connection
Just as the reasons for a slow internet are many, so are the solutions for it, which are described in the following section of this article.
Ways to Fix Slow Internet Speed
The most common and easiest way to fix the slow internet speed is to restart the system and the router, run respective troubleshooters, update all drivers, and place the router closer to the system.
In addition, there are also a few other solutions based on the reason for the issue. These are:
Running an antivirus software programs to remove viruses and malware from the system that may be interfering with and consuming bandwidth
- Clearing browser and other caches
- Using an Ethernet connection instead of Wi-Fi
- Replacing the damaged or faulty cable if you are using Ethernet connection
- Using a Wi-Fi extender
- Using an ad blocker
- Using fewer system on the same connection
- Rectifying misconfigured network settings
Disabling the VPN temporarily and checking whether the internet speed has increased is another useful solution to the issue. If it has increased, then you are using a poor VPN. Switch to a better free VPN.
Here are the easy and not-so-easy solutions for fixing the slow internet speed on a PC described in detail.
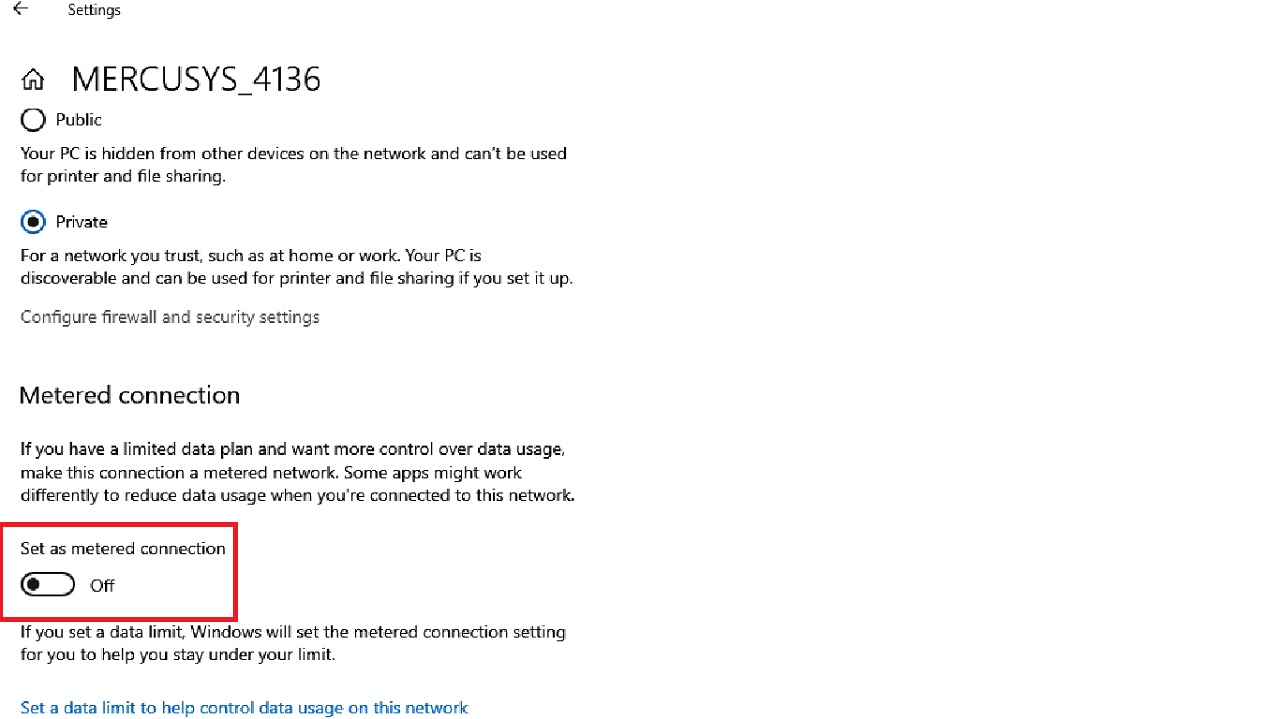
Method 1: Turn off Metered Connection
Usually, the metered connection for your Wi-Fi will be turned on by default. Turning it off may fix the issue of a slow internet speed.
STEPS TO FOLLOW:
- Click on the Start Menu > Open Settings > Go to Network & Internet > Go to Wi-Fi > Click on it to open its properties.
- Now, drag the sliding switch under Set as metered connection to Off.
You may follow the same process if you are using an Ethernet connection.
You may now restart your computer system and after it reboots, check the internet speed.
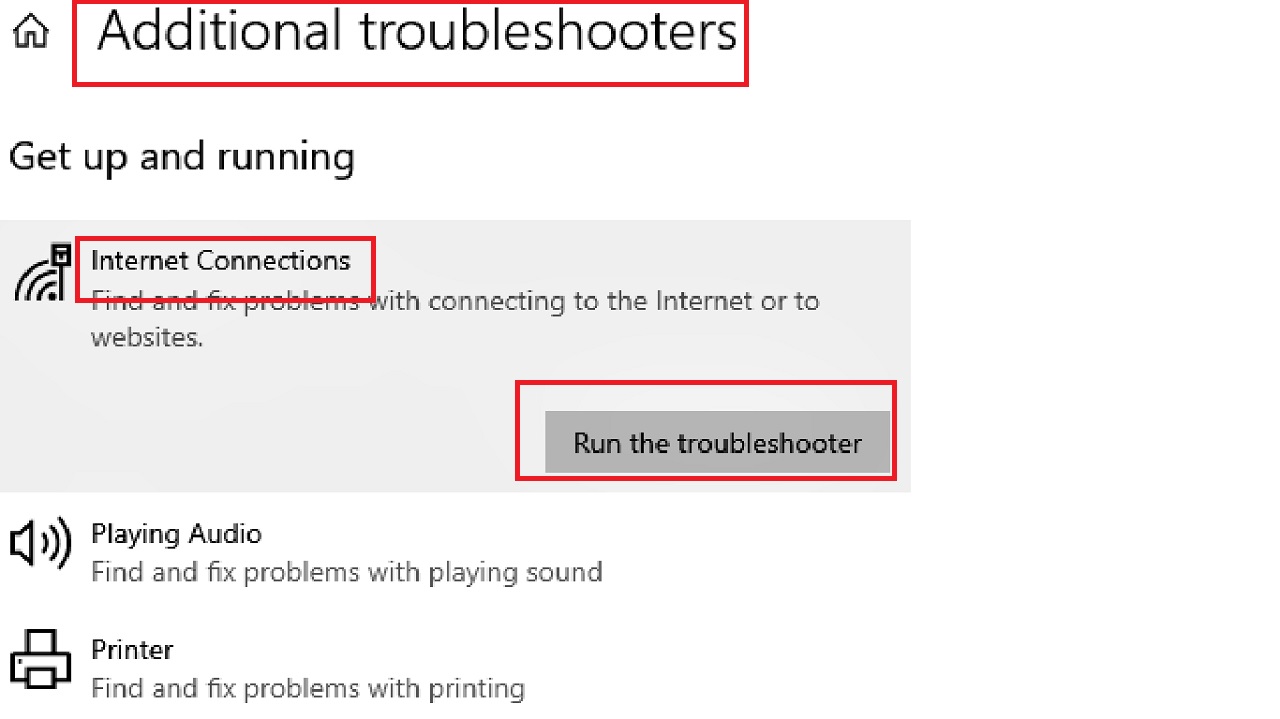
Method 2: Run Internet Connections Troubleshooter
There may be underlying issues with the internet connections which you may not be aware of. Running the Internet Connections troubleshooter can fix these issues and restore the normal speed of your internet.
STEPS TO FOLLOW:
- Go to the search box next to the Start Menu > Type troubleshoot settings > Go to Additional troubleshooters.
- Locate Internet Connections troubleshooter > Run the troubleshooter.
Follow the on-screen instruction to complete the process. When it is done, close all windows, restart your system and run a speed test to find whether the internet speed has increased or not.
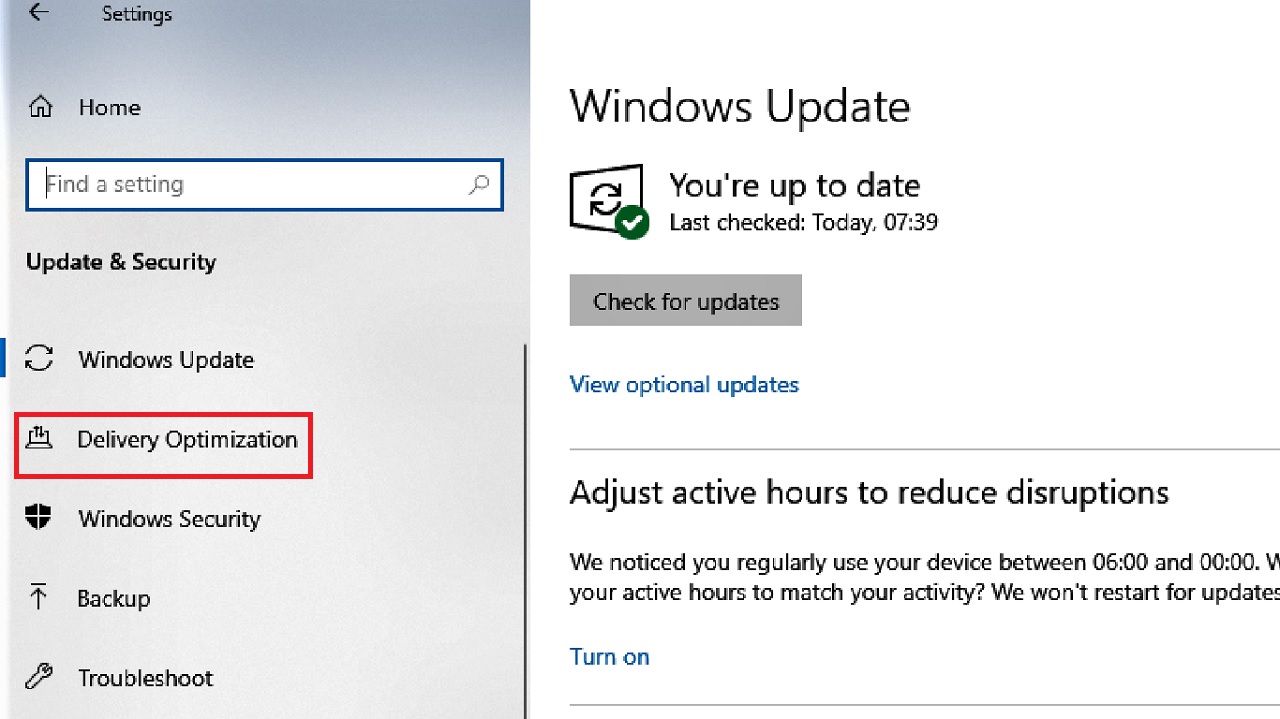
Method 3: Reduce Windows Update Bandwidth
Normally, Windows update runs in the background. If it uses a lot of data and bandwidth, it will slow down your internet speed. So, lower it down.
STEPS TO FOLLOW:
- Press the Windows and I keys on your keyboard together to open Settings.
- Now, Select Update & Security > Go to Delivery Optimization.
- Here, drag the sliding switch next to ‘Allow downloads from other PCs’ option to turn it off.
- Now, go to the Advanced options below and click on it to open it.
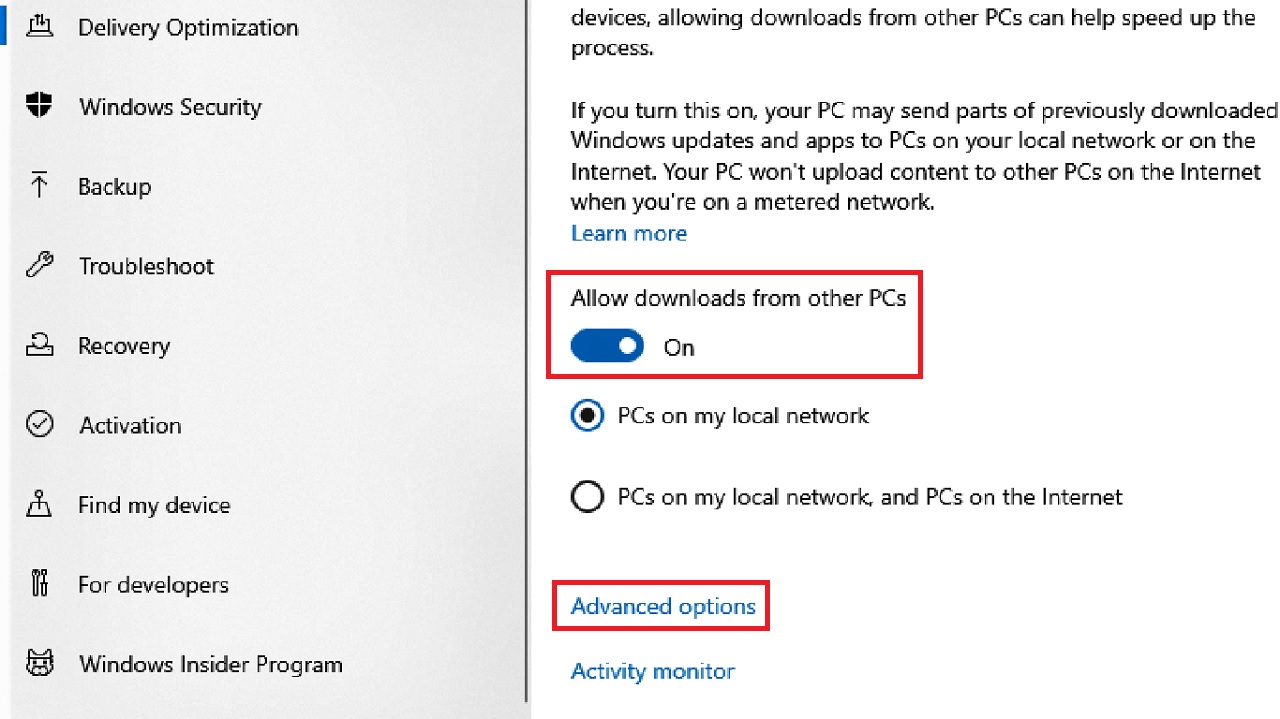
- In the following window, check both the boxes next to ‘Limit how much bandwidth is used for downloading updates in the background and foreground under Absolute bandwidth in the Download settings section.
- Specify the bandwidth you want it to use in the two boxes for respective download actions.
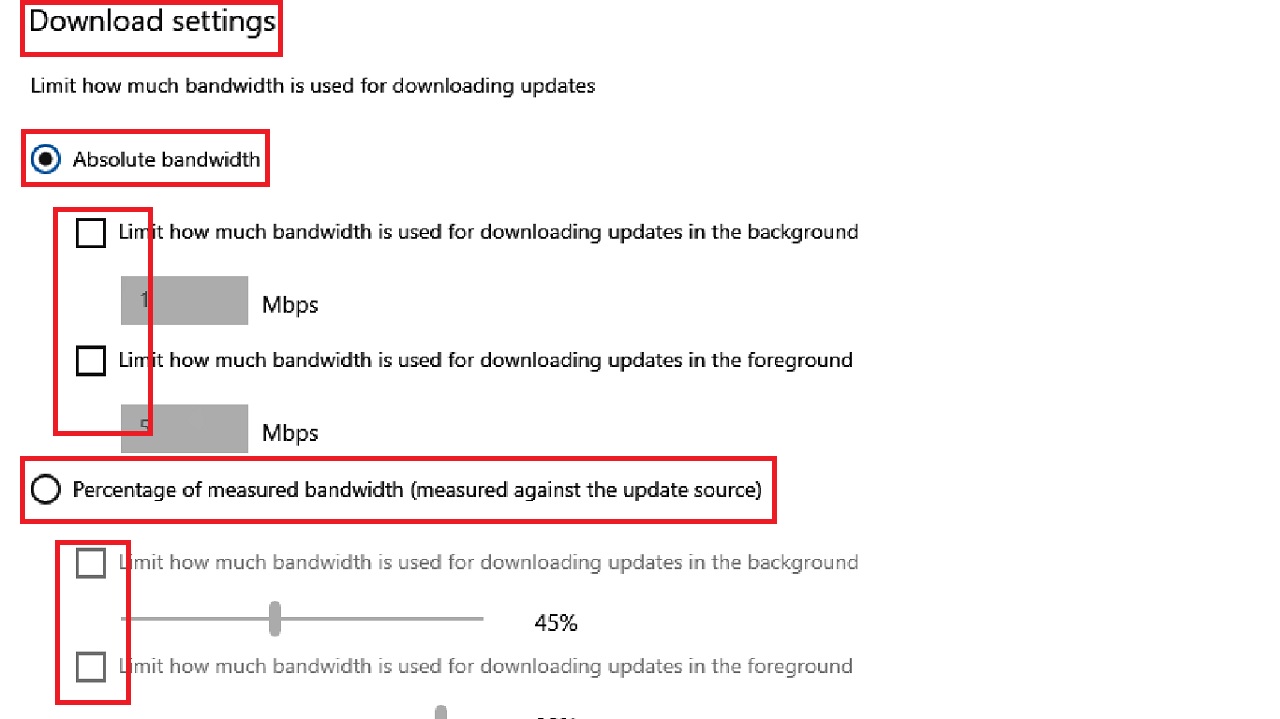
You may also specify the percentage of the measured bandwidth by checking the two boxes and then sliding the switch on the horizontal bar under each to the left to reduce it.
Now check whether or not the speed of the internet is higher.
You may also make adjustments to turn off Windows update feature temporarily, when you do not need it. This will reduce data and bandwidth consumption, and in the process increase the internet speed.
The steps to follow are:
- Go to the search box > Type services > Hit Enter.
- In the Services (Local) page, look for Windows Update.
- Right-click on it.
- Select the Properties option from the list in the menu.

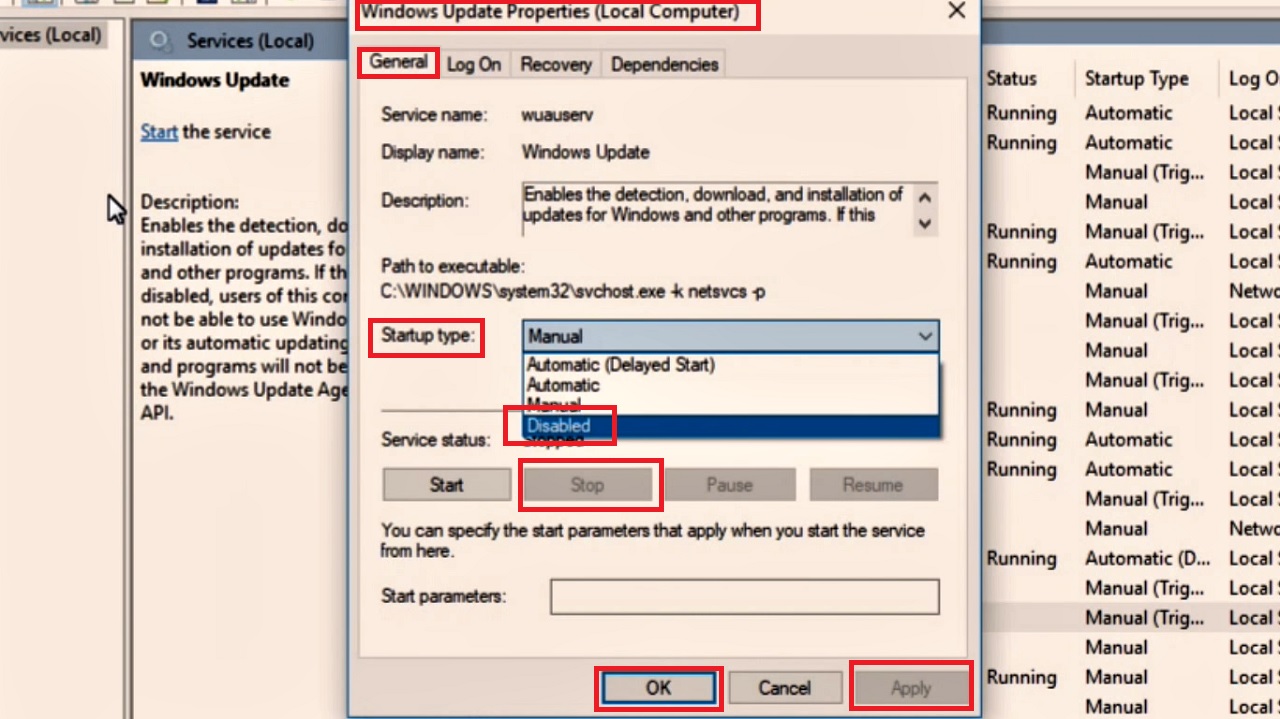
- In the following Windows Update Properties (Local Computer) window under the General tab, first click on the Stop button if you find the Service status to be Running.
- Then, click on the small downward arrow on the right side of the box next to Startup type.
- Select Disabled from the options in the drop-down list.
- Click on the Apply button and them on the OK button to save the changes and close the window.
Now, when you want this service to be running, follow the same process but change the Startup type to Automatic before you click on the Apply and OK button.
Method 4: Terminate Processes Consuming a Lot of Data
There are plenty of processes ongoing on your computer that may also consume a high amount of data and internet bandwidth and, as a result, reduce its speed. End these high data consuming processes.
STEPS TO FOLLOW:
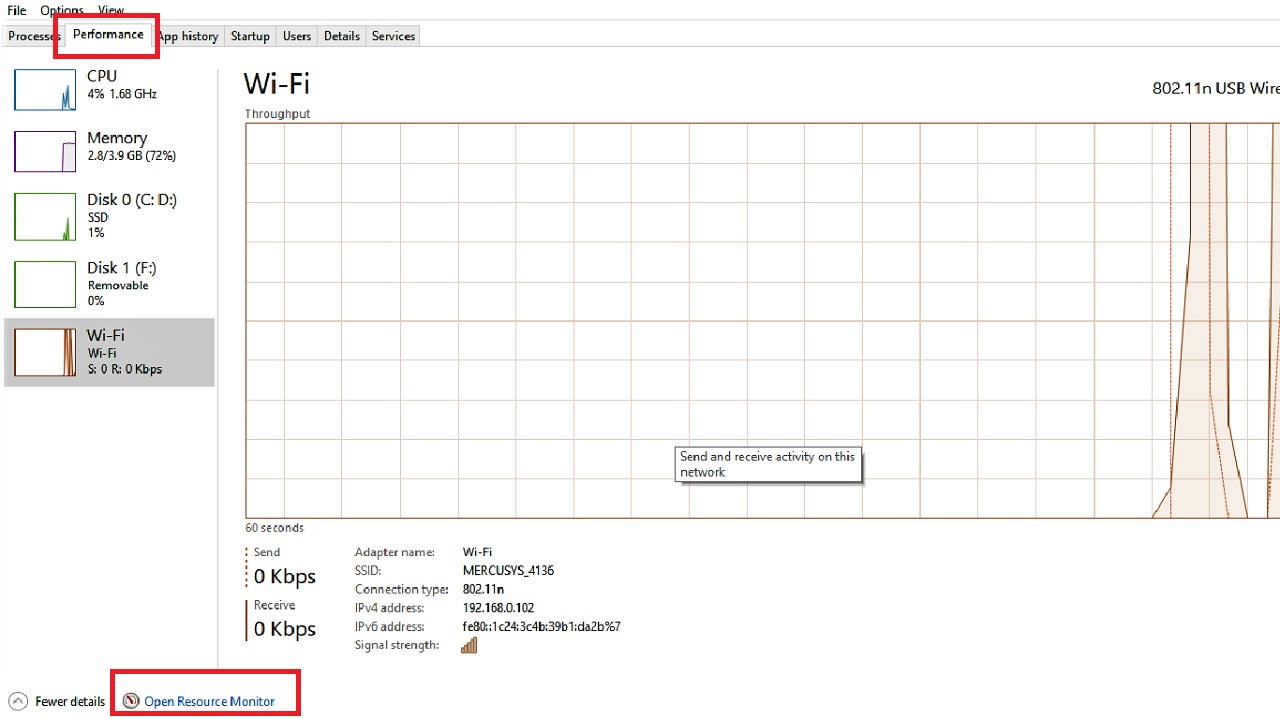
- Press the CTRL + SHIFT + ESC keys on your keyboard together to launch the Task Manager.
- Go to the Performance tab.
- Click on Open Resource Monitor at the bottom of the window.
- In the following Resource Monitor window, go to the Network tab.
- Look for the processes in the box under Processes with Network Activity that are consuming a large amount of data.
- Right-click on each of them.
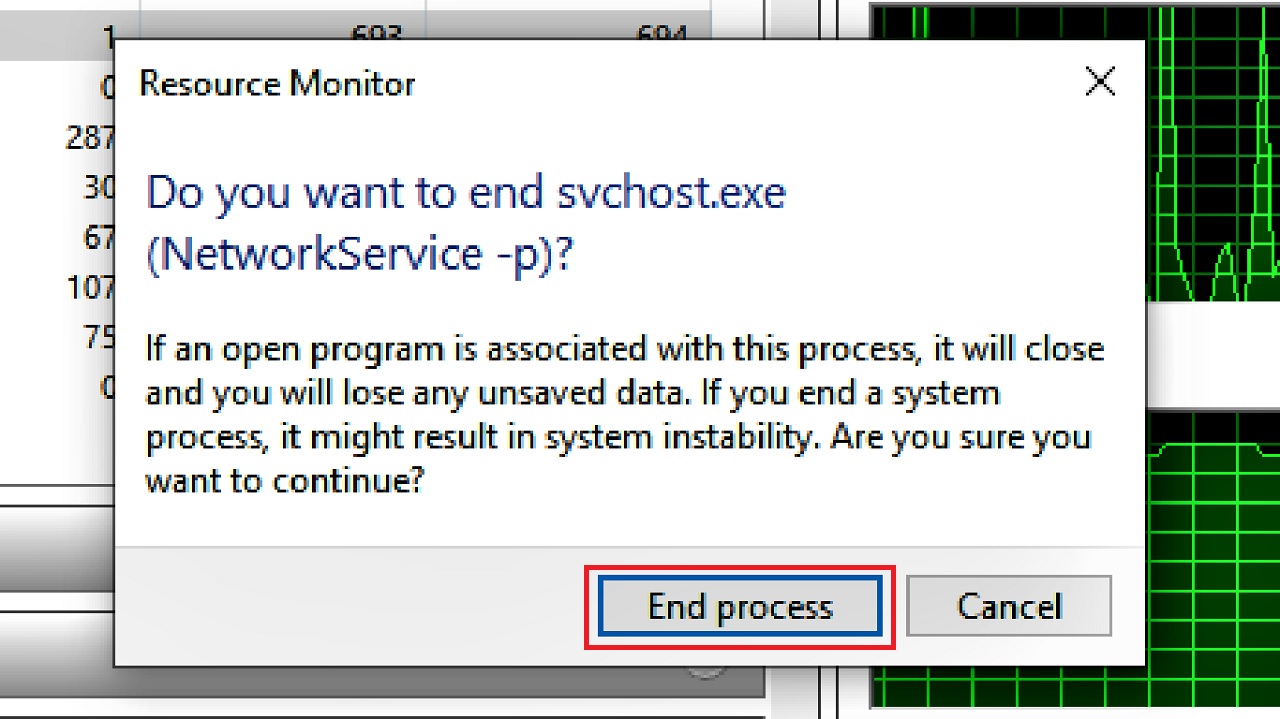
- Select End Process from the list of drop-down options.

- Click on the End Process button in the following window asking for your confirmation.
Check through a speed test whether the internet speed is higher now. If it is not, then try the next method.
Method 5: Disable Data Consuming Apps Running in the Background
Almost similar to the above process, you may also disable the background apps that are consuming a high amount of data and bandwidth.
STEPS TO FOLLOW:
- Click on the Start Menu > Select Settings or the gear icon from the options.
- Go to the Apps.
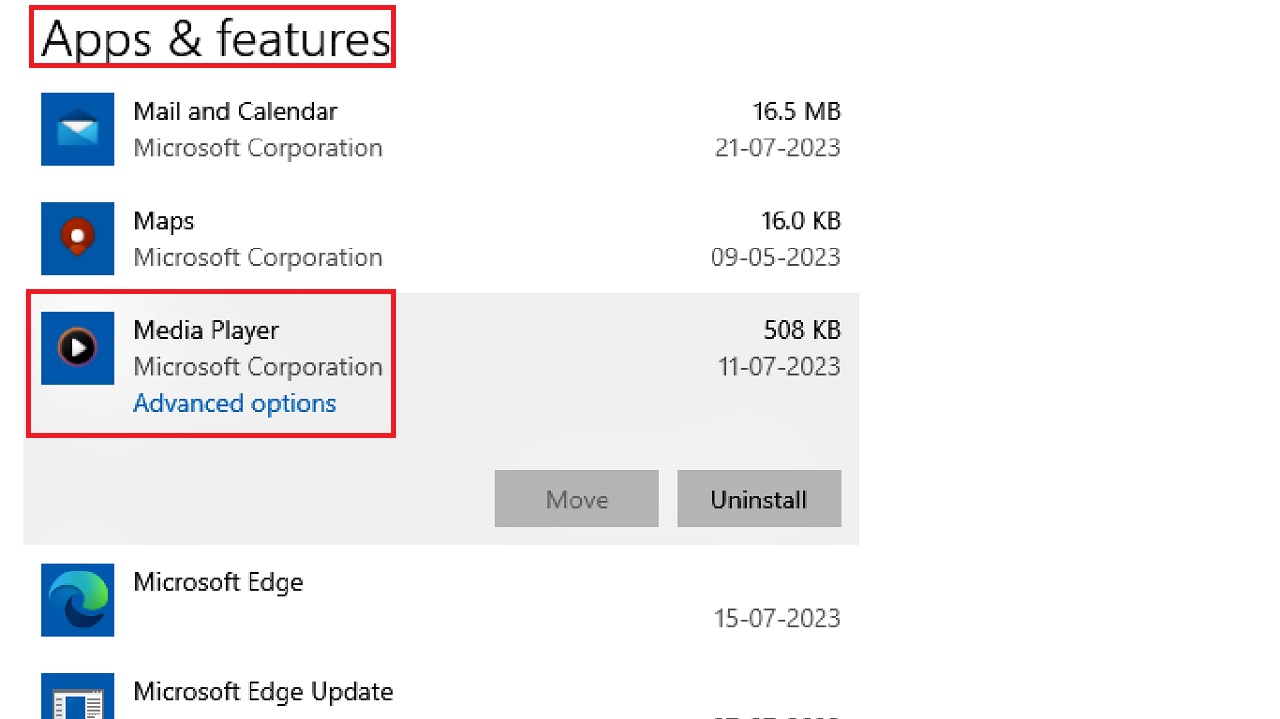
- In the Apps & Features window, scroll down to locate the app consuming high data and that you want to disable. (Media Player in this case).
- Click on it.
- Select Advanced options.
In some operating systems, you may have to click on the three dots at its right and then select the Advanced options.
- In the new window, go to Background apps under App permissions.
- Slide the switch to OFF.

This will increase the speed of your internet.
Method 6: Update the Network Driver
This is a simple solution to a lot of issues related to the network, including slow speed. So, update the network card drivers to resolve the issue.
STEPS TO FOLLOW:
- Right-click on the Start Menu.
- Select Device Manager from the options.
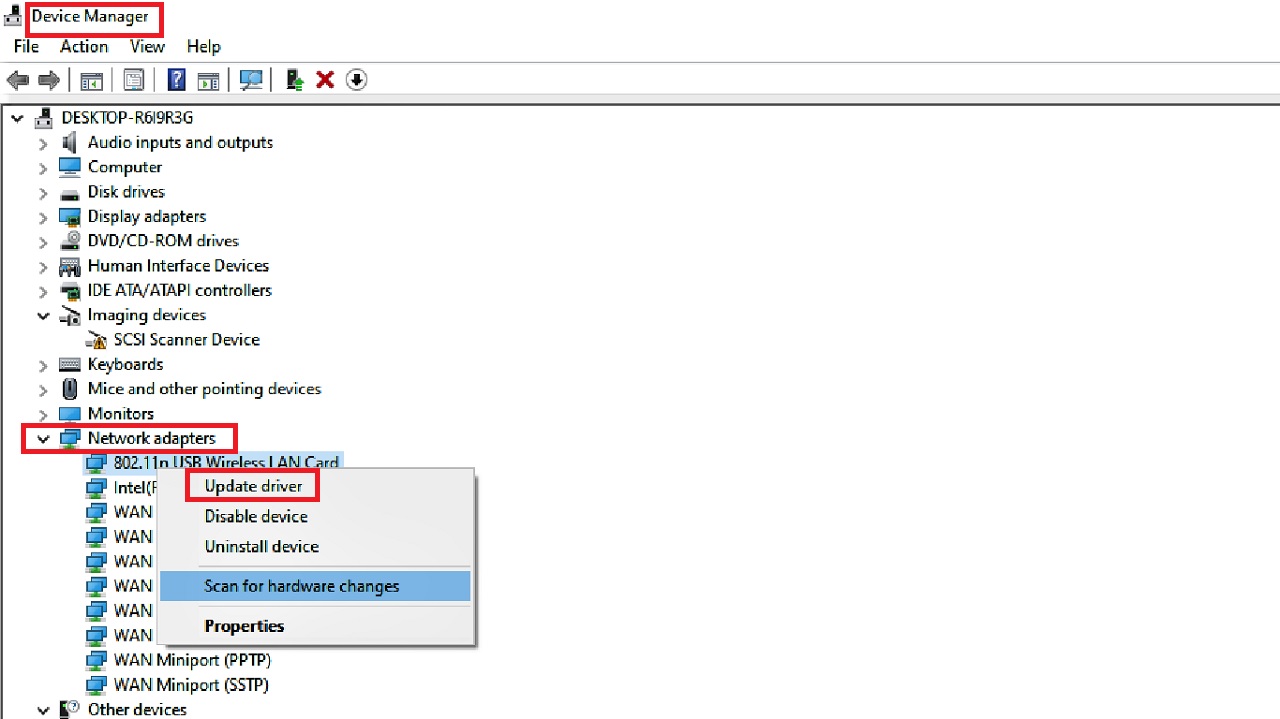
- Expand Network adapters in the Device Manager window.
- Right-click on your network card, Wi-Fi or LAN.
- Select Update driver from the drop-down options.
- Follow the onscreen instructions to complete the process.
Once it is done, check the internet speed for improvement.
Alternatively, you may also uninstall the drive by clicking on the Uninstall device option from the drop-down menu, close all windows, restart the system. This will reinstall the updated driver automatically.
Method 7: Change the DNS Server
Sometimes the custom Domain Name System (DNS) server may also cause some issues and reduce the internet speed during their working process. Changing it to a better and faster alternative DNS such as Google DNS or Open DNS
STEPS TO FOLLOW:
- Open the Run dialog box by pressing the Windows and R keys together on your keyboard.
- Type in ncpa.cpl in the box and hit Enter key or press the OK button.
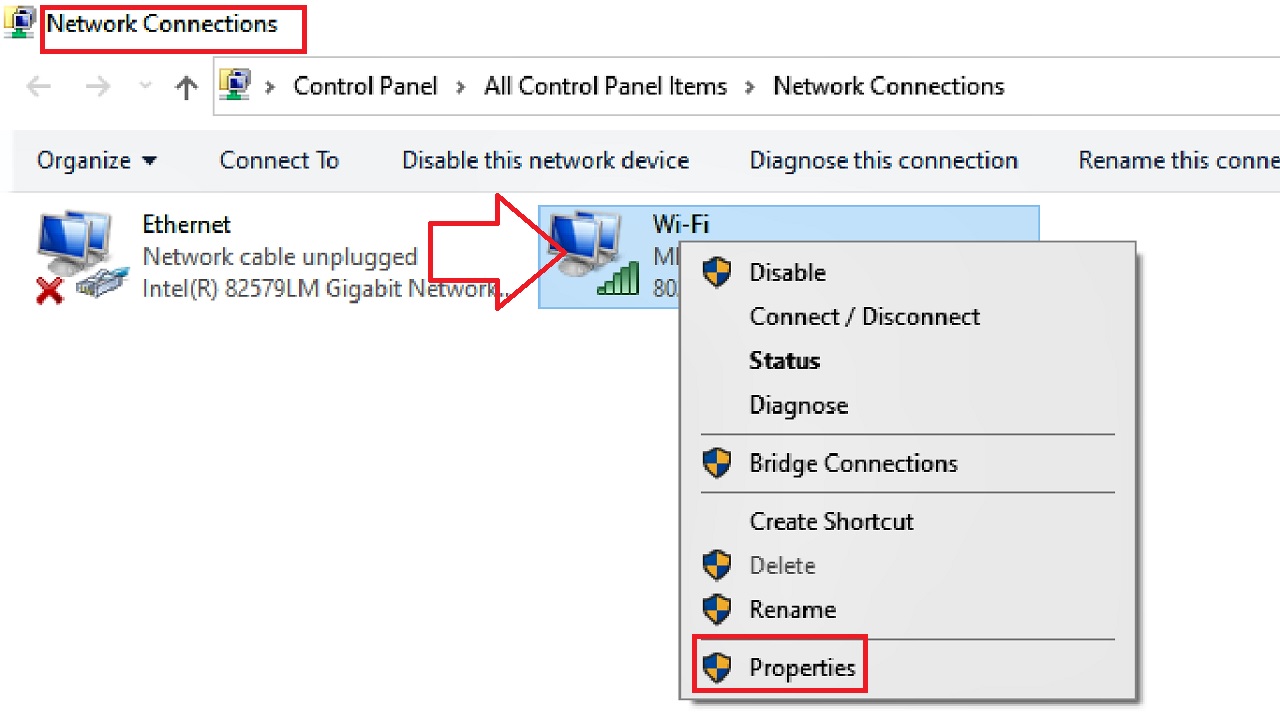
- In the Network Connections window that appears, go to your internet connection, Wi-Fi or Ethernet.
- Right-click on it.
- Select Properties from the drop-down options.
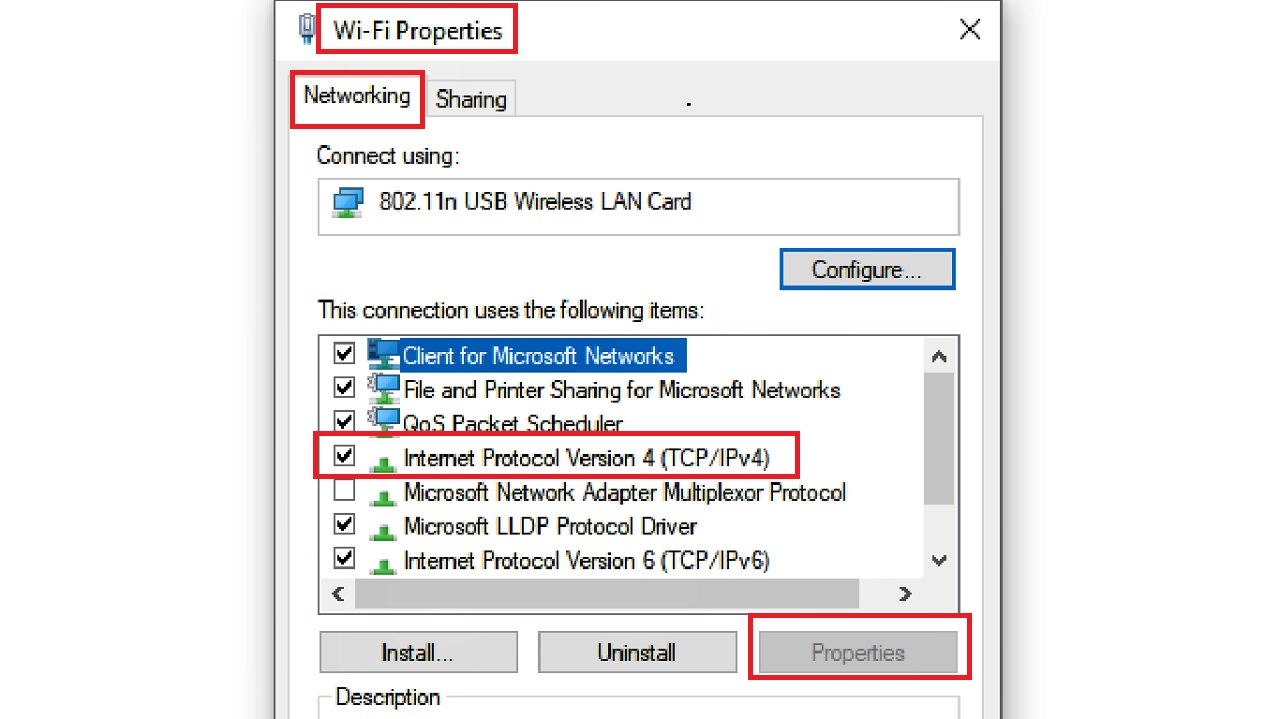
- In the following Wi-Fi Properties window under the Networking tab, double-click on the Internet Protocol Version 4 (TCP/IPv4) settings.
- Click on Properties below.
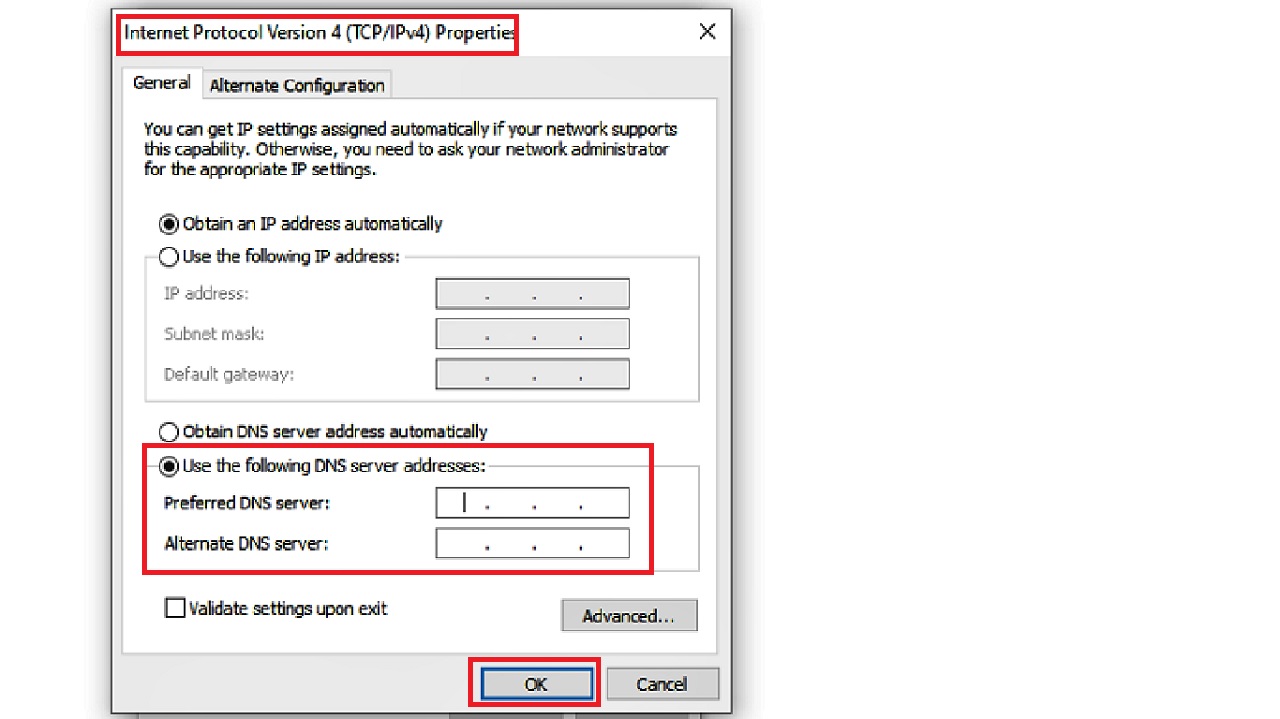
- In the Internet Protocol Version 4 (TCP/IPv4) Properties window that pops up, click on the small circle next to ‘Use the following DNS server addresses’ under the General tab.
- Now, in the field next to the Preferred DNS server enter 8.8.8.8 or 1.1.1.1.
- And in the field next to Alternate DNS server enter 8.8.4.4 or 1.0.0.1,
- Press the OK button to save the changes and exit the window.
Restart your computer system and this might resolve the slow internet speed issue.
Method 8: Reset the Network Settings
Sometimes, there may be some issues underlying the Network settings that may reduce the speed of your internet. The best thing to do is reset the settings.
STEPS TO FOLLOW:
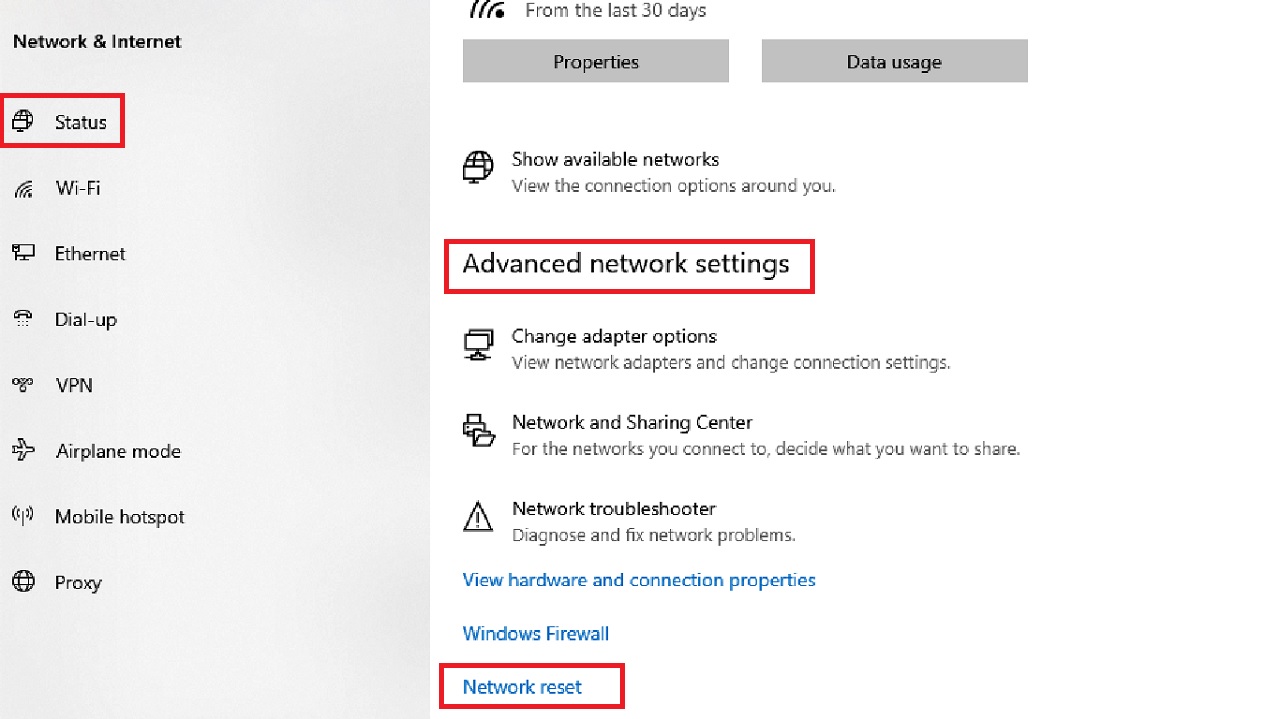
- Go to Settings as before > Open the Network & Internet tab > Go to Advanced Network settings.
- In the next window under the Status option, click on Network reset.
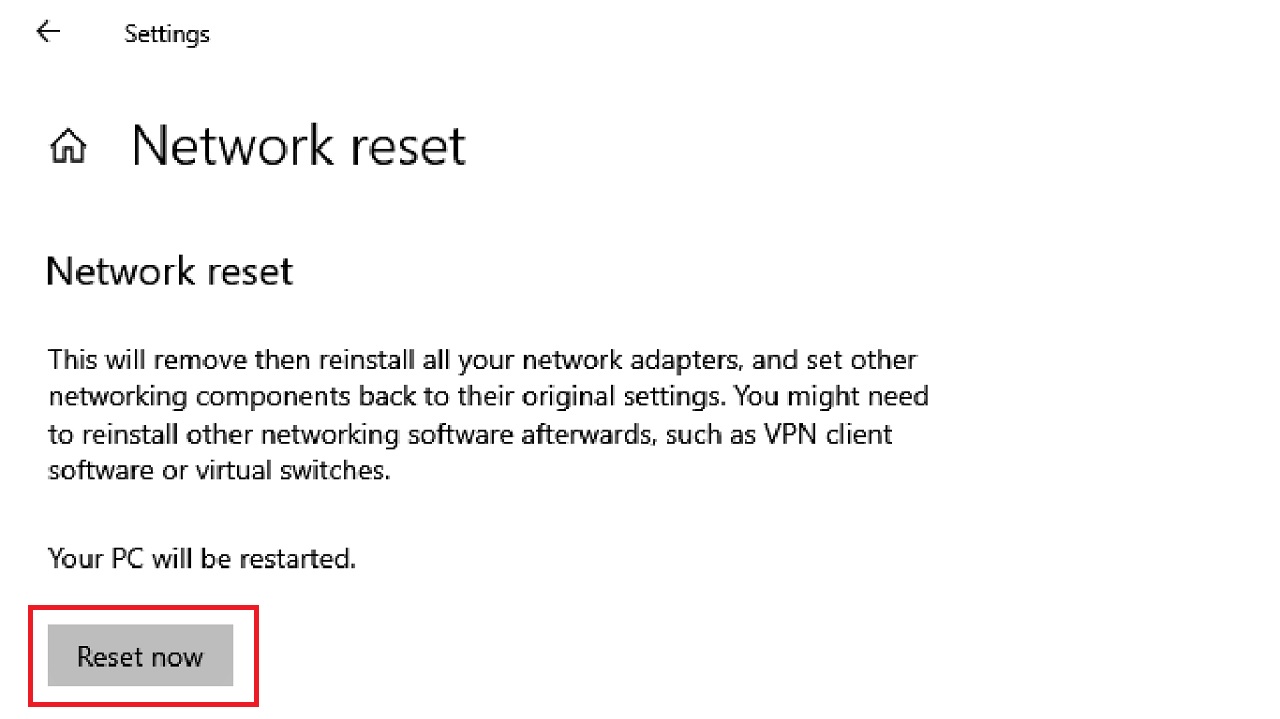
- Click on the Reset now button on the next window.
- Click on the Yes button in the Network reset window when it appears to confirm that you are sure that you want to reset your network settings.
Wait for the process to be complete, close all windows, and restart your computer.
When the system restarts, check the internet speed by performing a quick speed test which will show whether it has increased or not.
Method 9: Use the Command Prompt to Reset Winsock
Sometimes, you may need to make additional adjustments apart from clearing the DNS to make the internet run at a high speed as before.
STEPS TO FOLLOW:
- Go to the search box next to the Start Menu > Type cmd > Right-click on the best match > Choose Run as administrator > Hit the Enter key on your keyboard.
- Type in the command ipconfig /flushdns and hit Enter.
Wait for the command to be executed. When the system has completed flushing the DNS Resolver Cache successfully, type in the command netsh winsock reset and hit Enter.
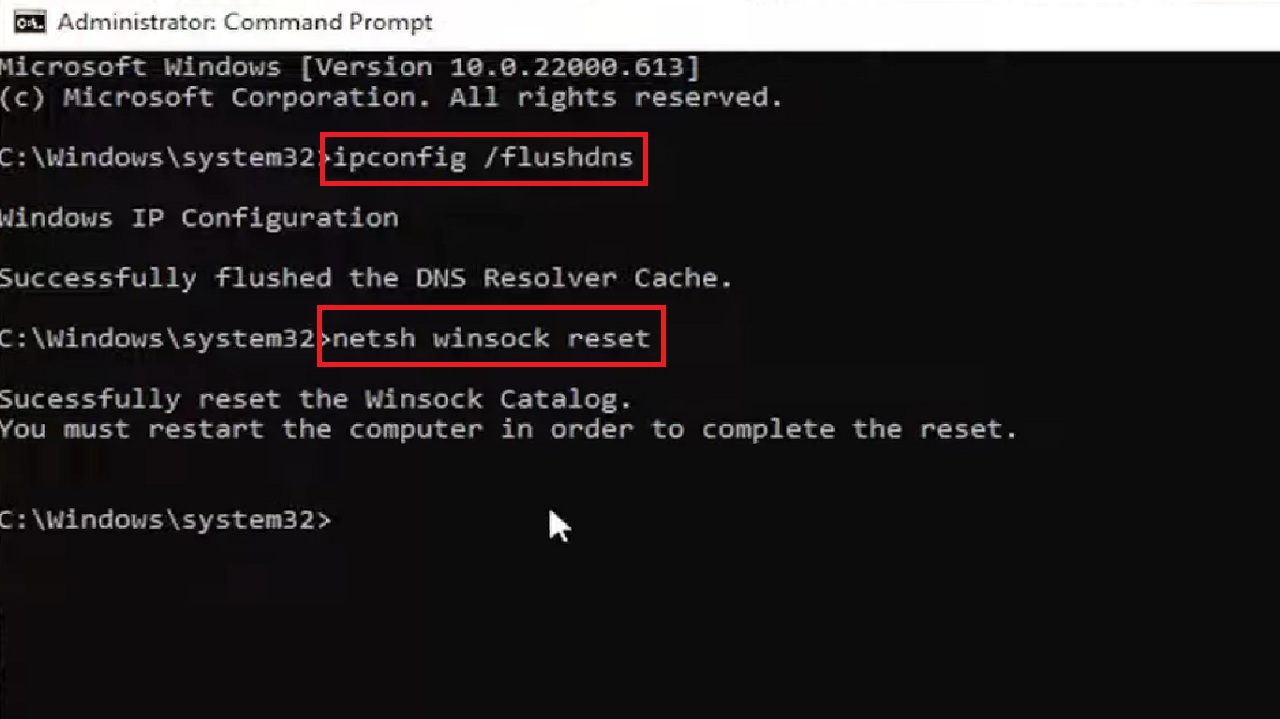
Again, wait for the system to finish the process. Then restart your computer and now the internet should be running faster.
Method 10: Make a Change in the Power Management from the Control Panel
A feature in Windows allows the computer to turn the device off to save power. Sometimes, disabling this feature can increase the internet speed.
STEPS TO FOLLOW:
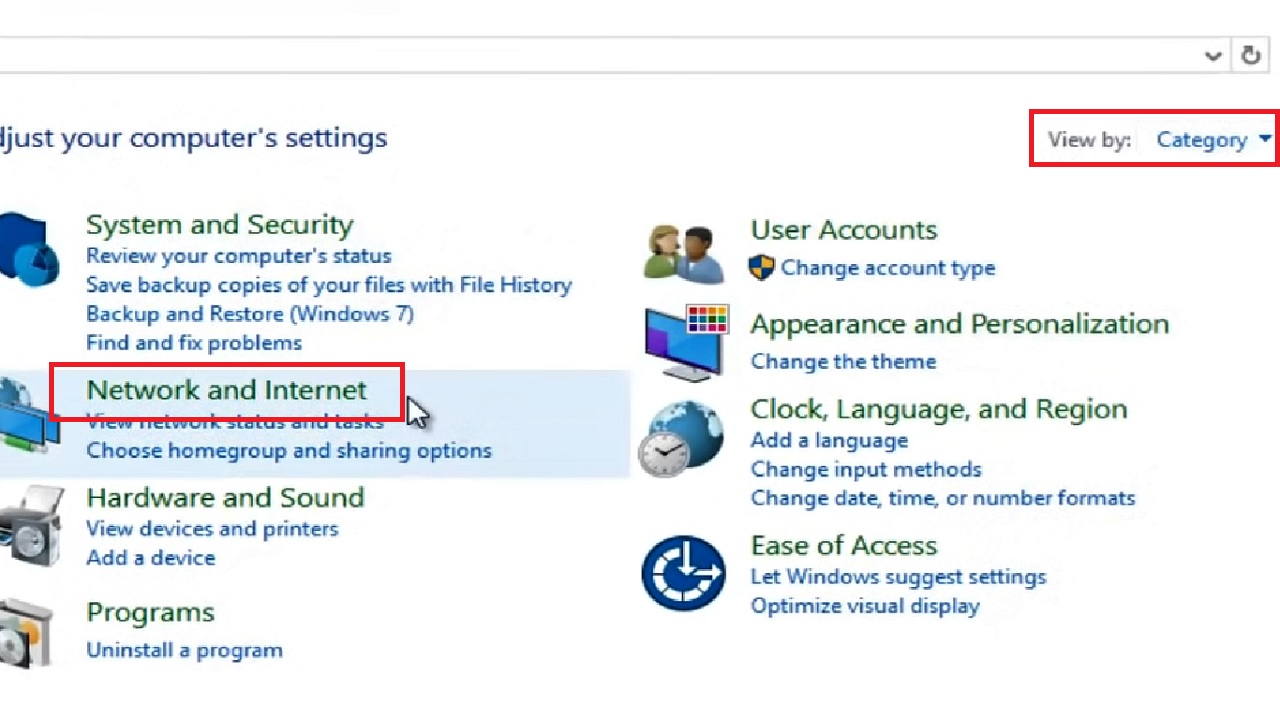
- Type control panel in the search box and hit the Enter key on your keyboard.
- Set View by to Category on the top-right side of the Control panel window.
- Left-click on Network & Internet.
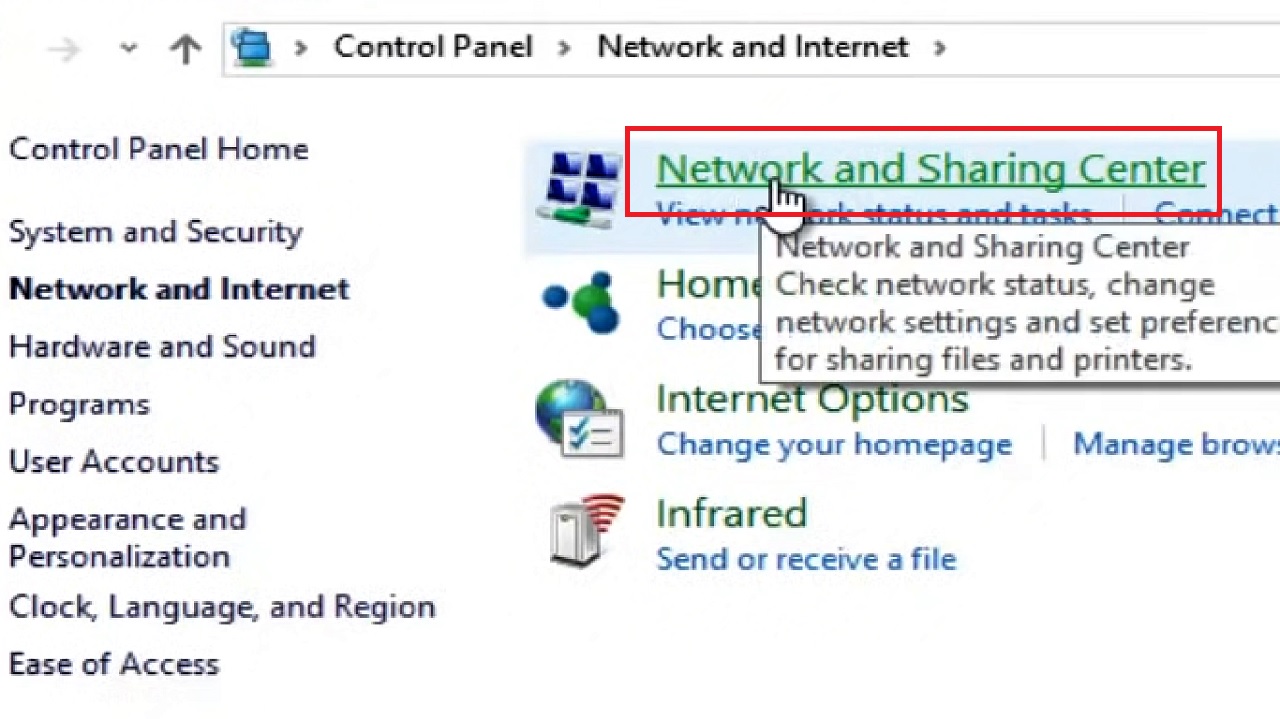
- Left-click on Network and Sharing Center.
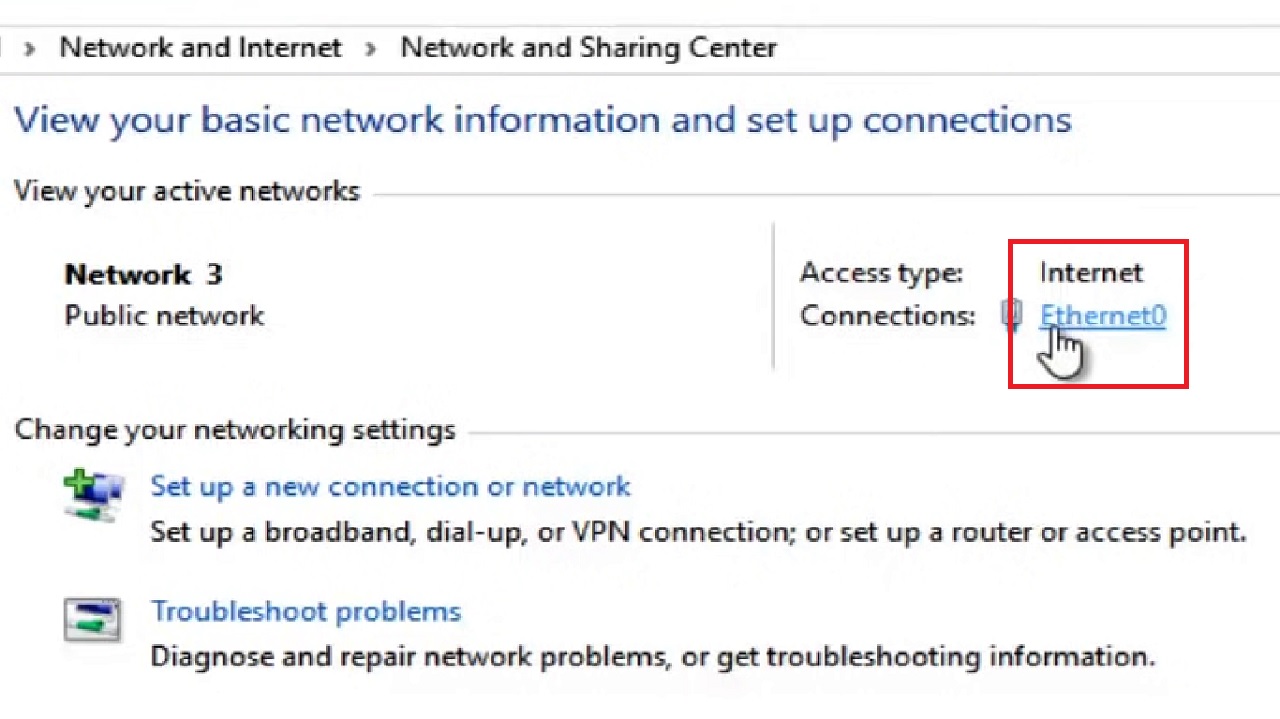
- Open the connection type by clicking on the Network and Sharing center window one time. (It can be Wi-Fi or Ethernet and will be hyperlinked in blue – Ethernet0 here in this case).
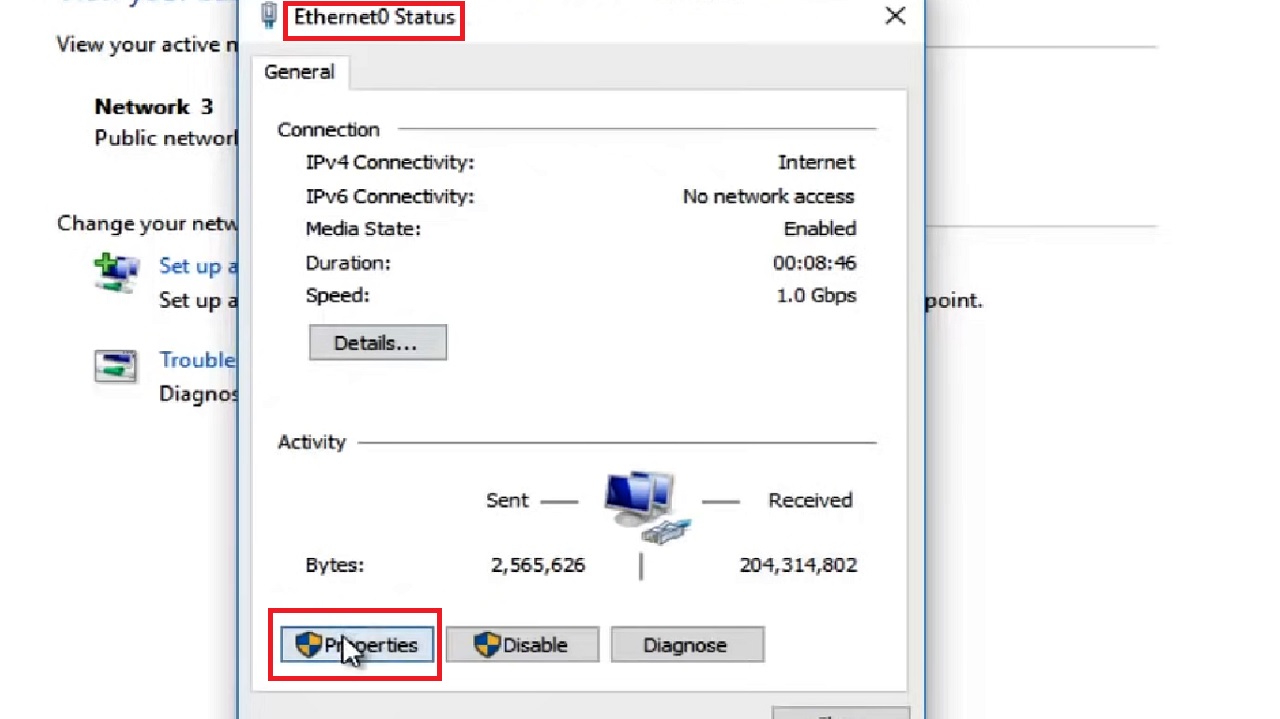
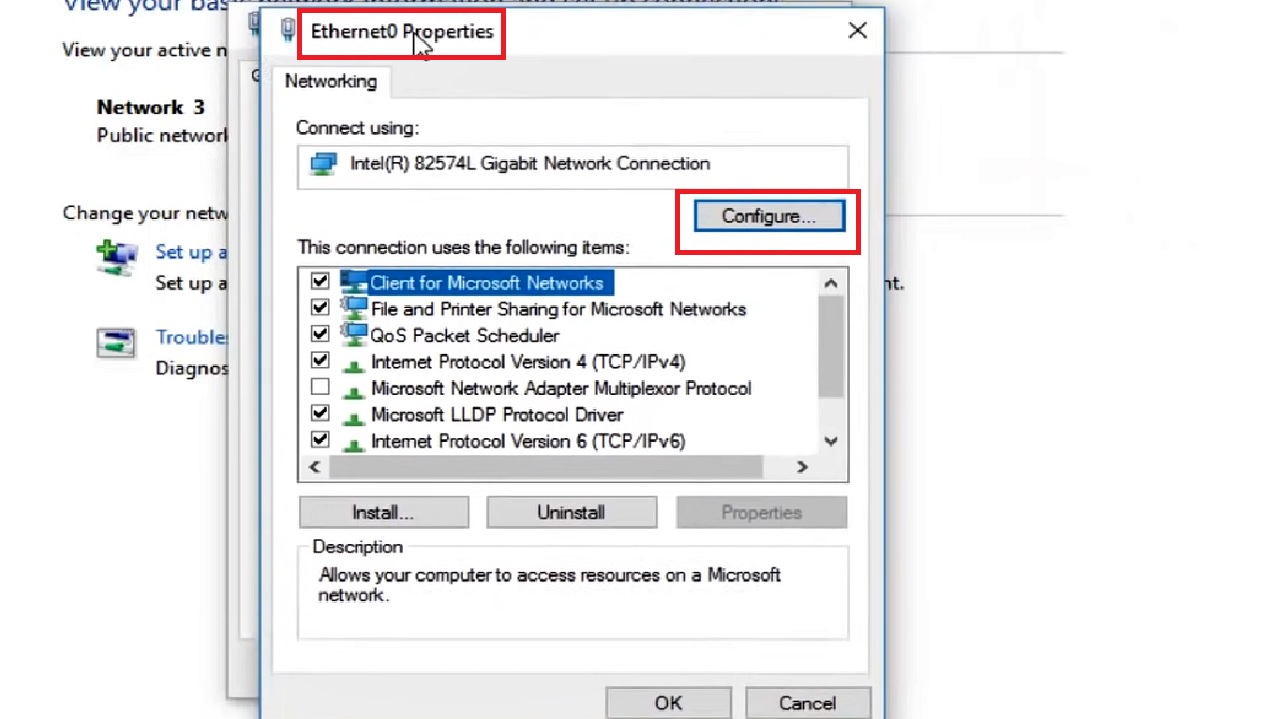
- Click on the Properties button below in the Ethernet0 Status window.
- Click on the Configure button in the Ethernet0 Properties window that appears.
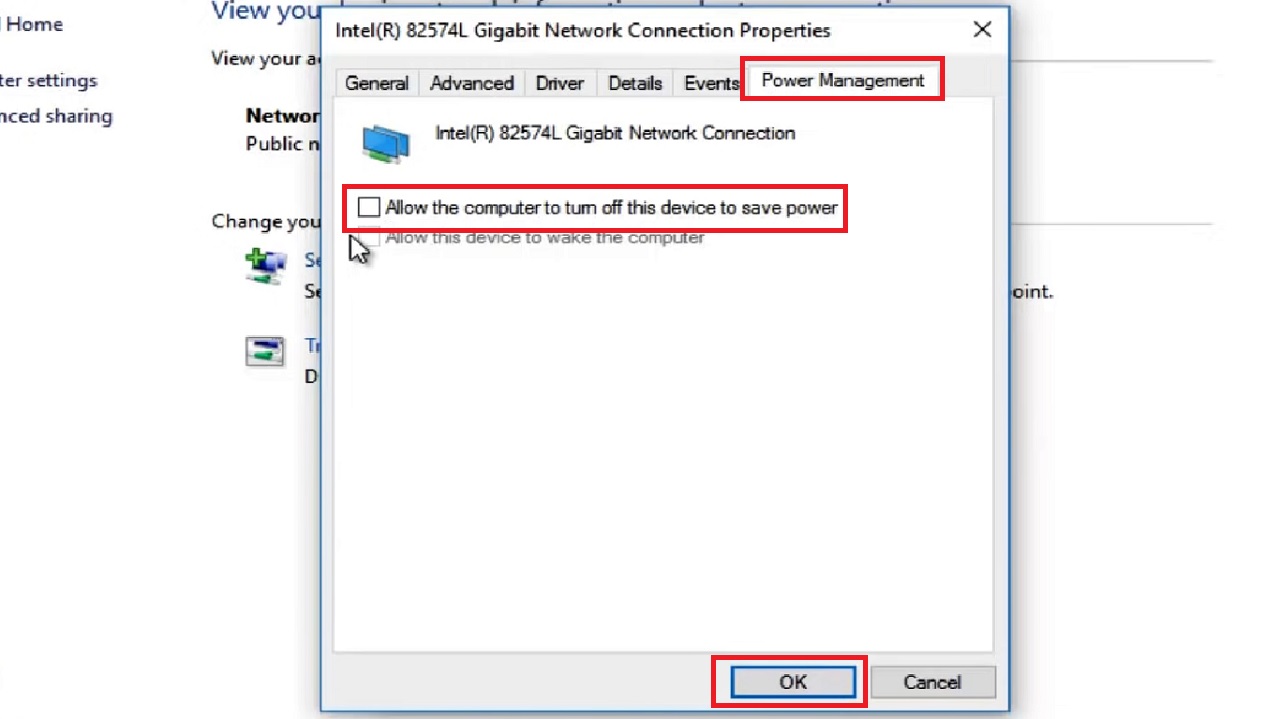
- Go to the Power Management tab in the following window.
- Make sure that the small square box next to ‘Allow the computer to turn off this device to save power’ is unchecked. Usually, it will be checked. Click on the box to uncheck it.
- Click on the OK button to save the changes and close the window.
This will improve the internet speed a little bit. If it does not or if the change in the internet speed is not significant, follow the next method.
Method 11: Configure a Few Properties of the Network Adapter
You can make a few changes in the configurations in the properties of the network adapter, such as disabling Fat Channel Intolerant and others. This way you can increase the network speed and also make the connection better.
STEPS TO FOLLOW:
- Open the Network Connections window as you did in Method 7 and right-click on your network connection.
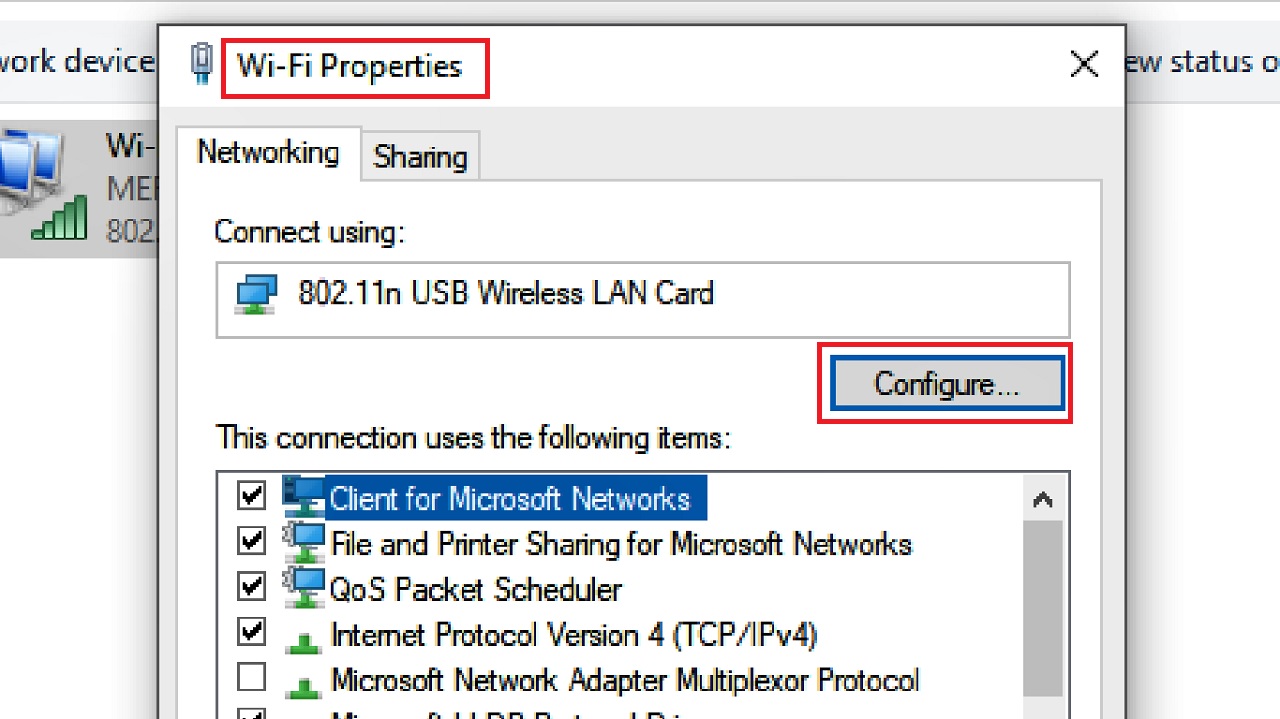
- Select Properties this time.
- Click on the Configure button in the WiFi Properties window.
- In the following window, go to the Advanced tab.
- Look for Fat Channel Intolerant in the box under Property.
- Select it.
- If it shows Disabled in the box under Value on the right shown as in this image, which is its default settings, you must change it to Enabled.

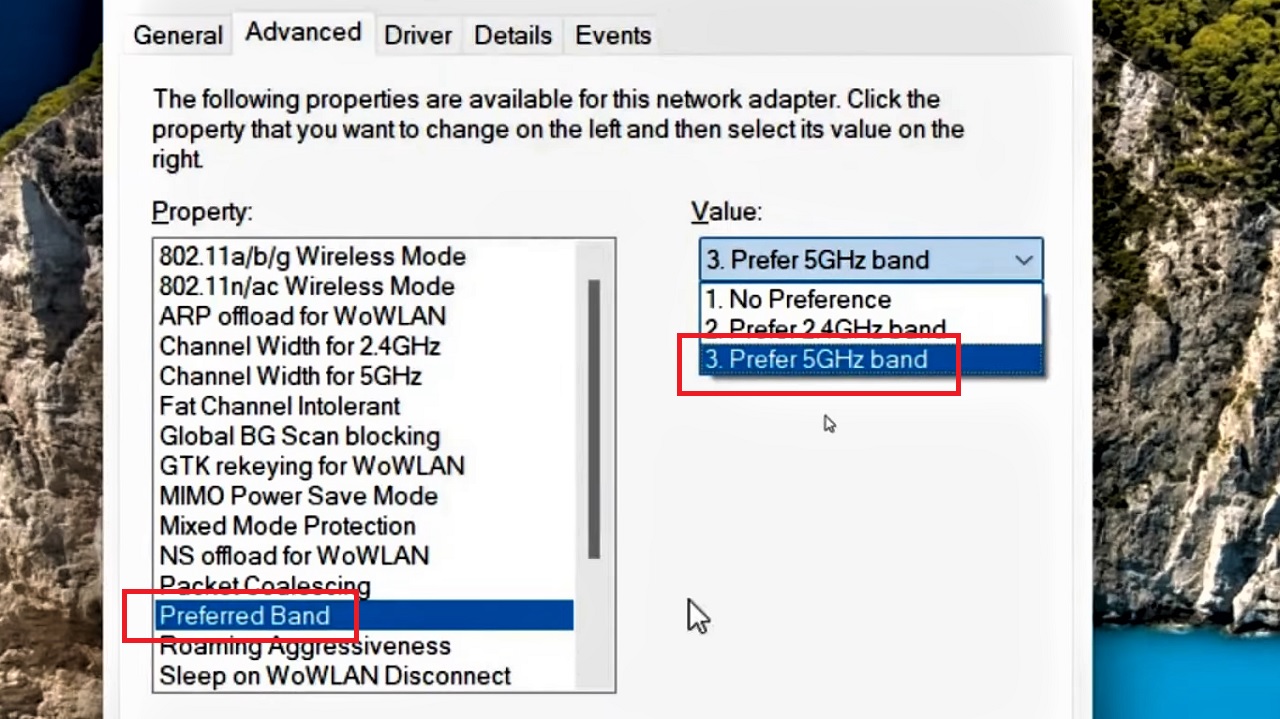
- Now, go further down and select Preferred Band.
- Go to the box under Value on the right side and click on the small arrow to open the options.
- If you have the option Prefer 5 GHz band, select it.
- Next select Roaming Aggressiveness.
- Make sure it is set to lowest.

- Next look for the 802.11 a/b/g Wireless Mode.
- Make sure the Value is set to Dual Band 802.11 a/b/g.

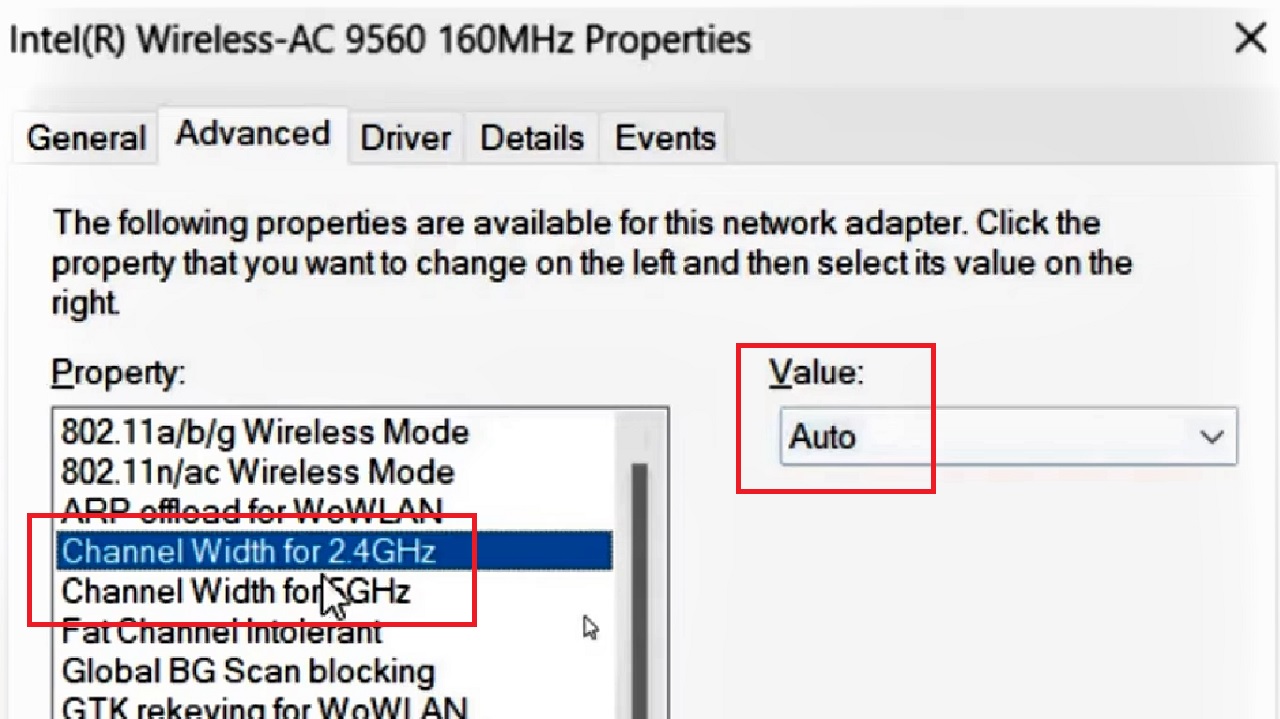
- Next, look for Channel Width for 2.4 GHz.
- Select it.
- The value should be set to Auto.
- Similarly, the Channel Width for 5 GHz must also be set to Auto.
- Once all these settings are made, click on the OK button below to save the changes made and close the window.
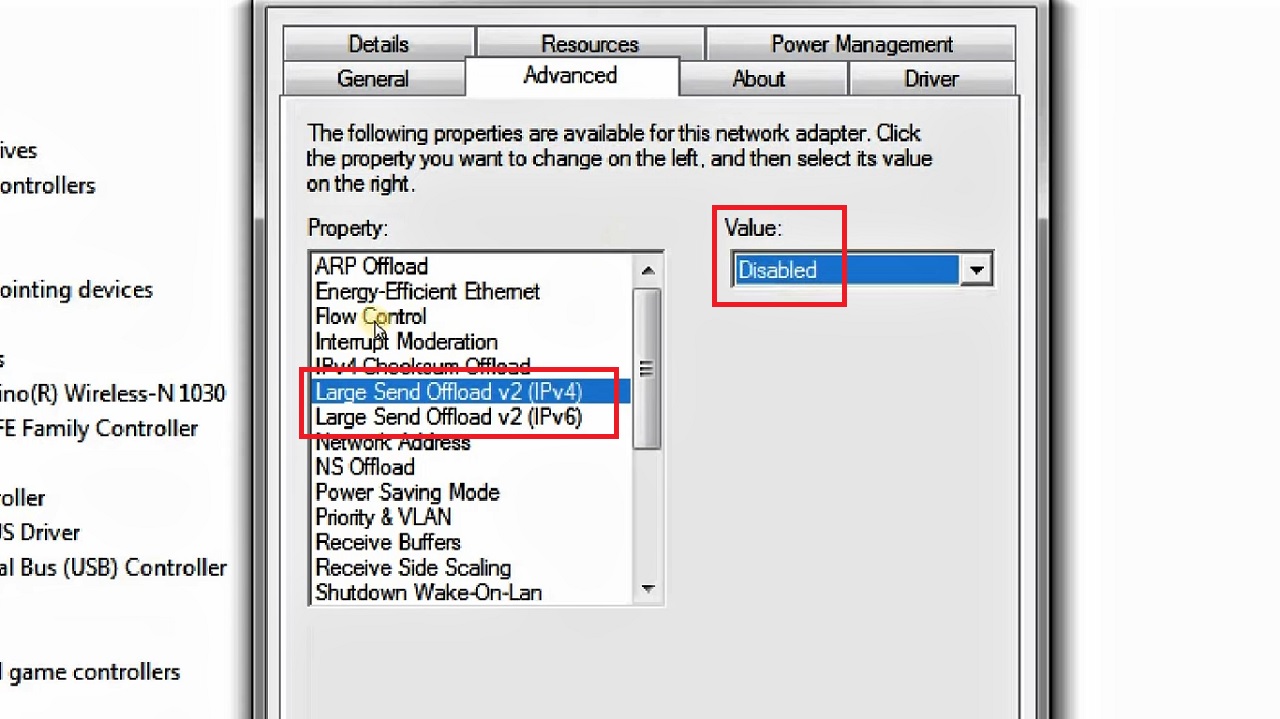
- Next up, look for Large Send Offload v2 (IPv4) and Large Send Offload v2 (IPv6) properties disable them both as well, as shown in the image below:
Now, restart your computer. After it is on, reconnect to your internet.
Method 12: Turn Off the Firewall Protection
Many times, simply turning the Firewall protection off may increase the internet speed on your PC.
STEPS TO FOLLOW:
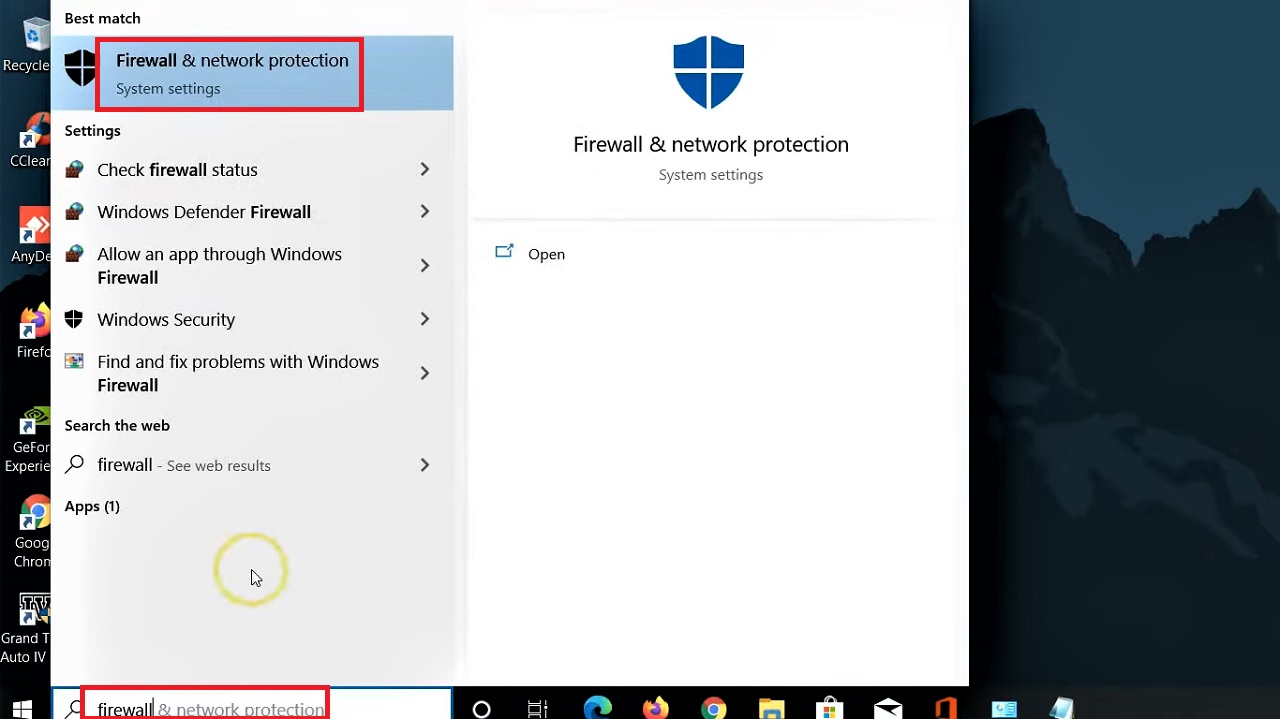
- Go to the search box and type firewall in it.
- Click on Firewall & network protection.
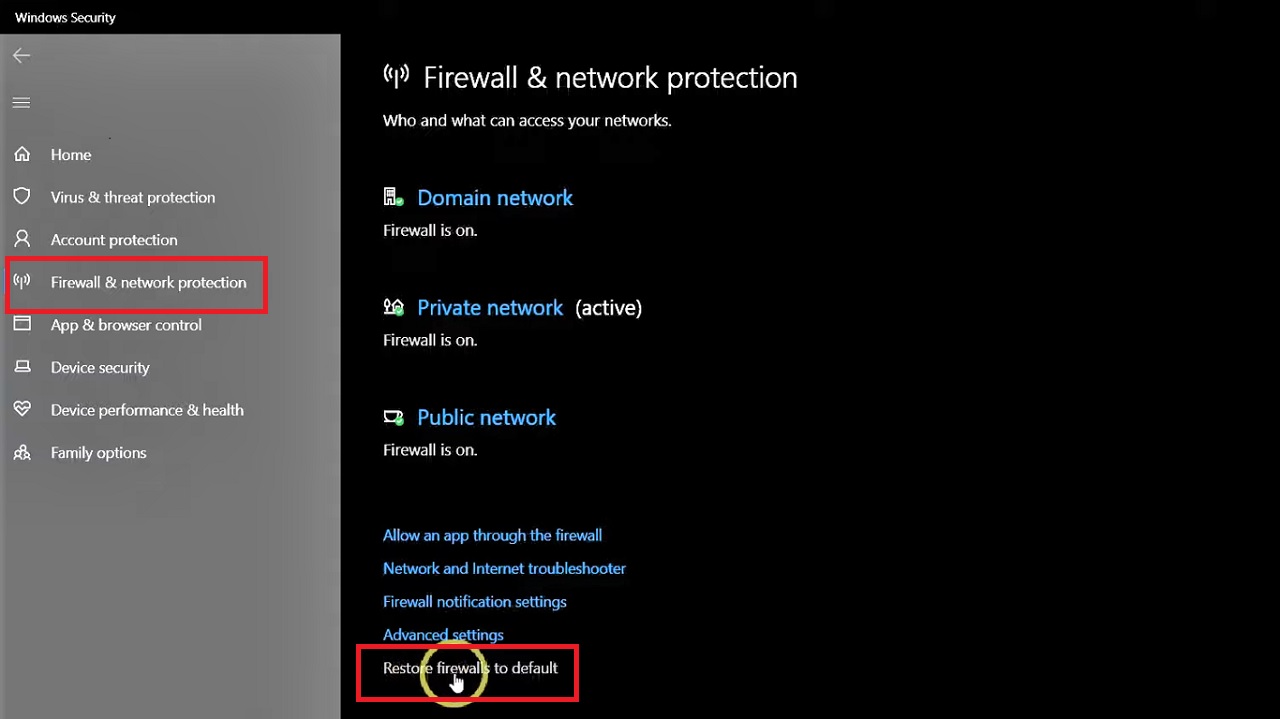
- In the new Windows Security window, under Firewall & network protection, select ‘Restore firewall to default’ at the bottom.
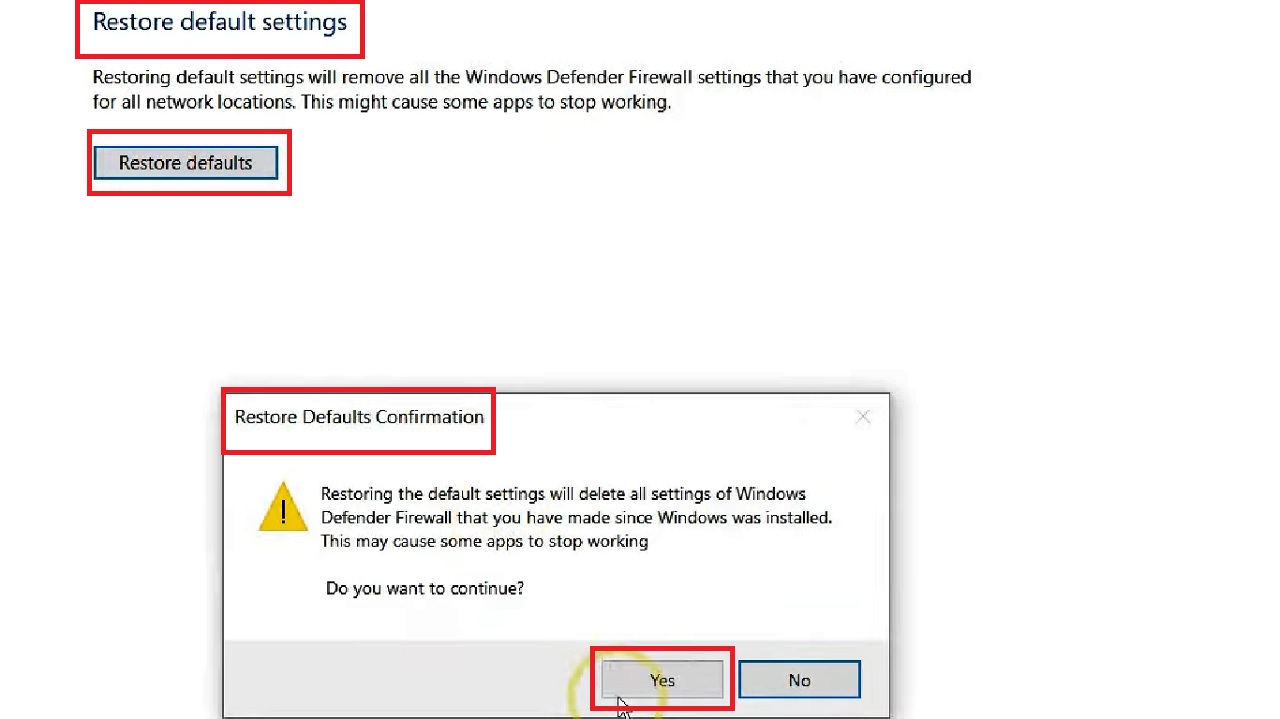
- In the following Restore default settings window, click on the Restore defaults button.
- Click on the Yes button on the Restores Defaults Confirmation window that appears next.
You may restart the PC and check your internet speed now once the system is turned on.
Method 13: Use the Network Diagnostic Feature
There may be some underlying issues with the network which you may be able to detect. Use the network diagnostic feature to identify and fix it, in addition to other troubleshooting. This may also increase the speed of your internet.
STEPS TO FOLLOW:
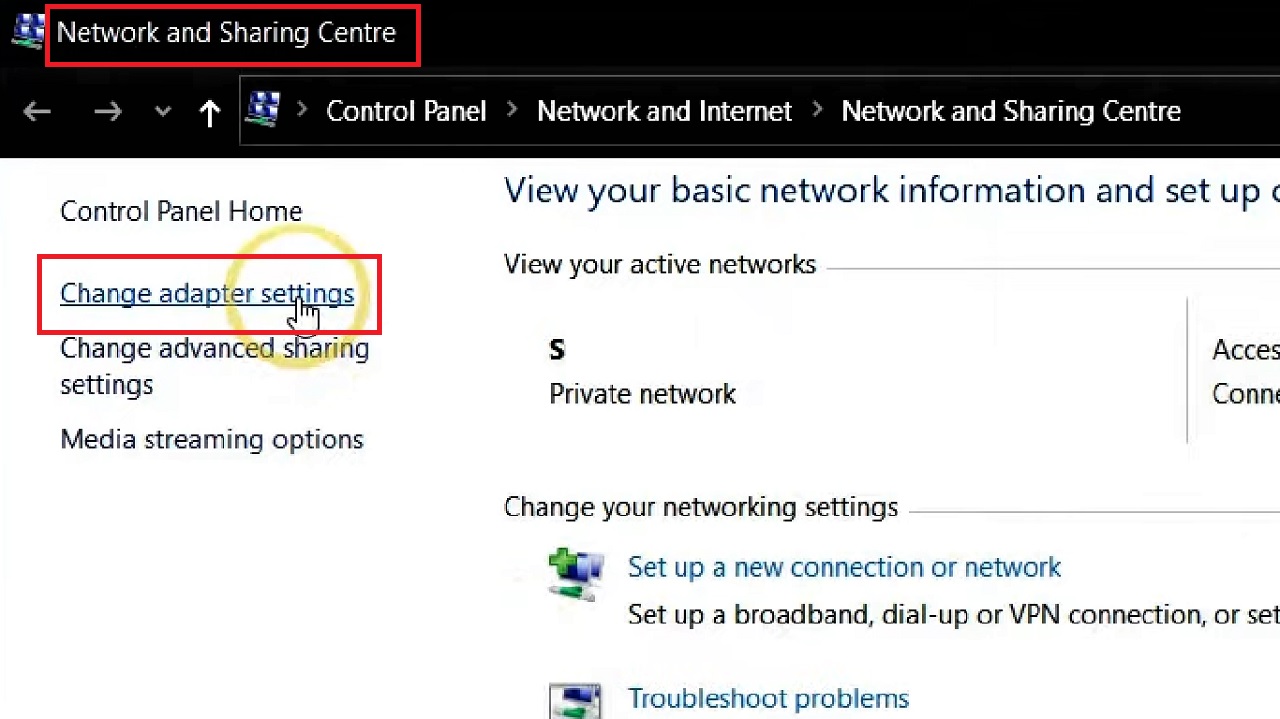
- Open Network and Sharing Center in the Control Panel as before.
- Choose Change adapter settings from the left side of the window.
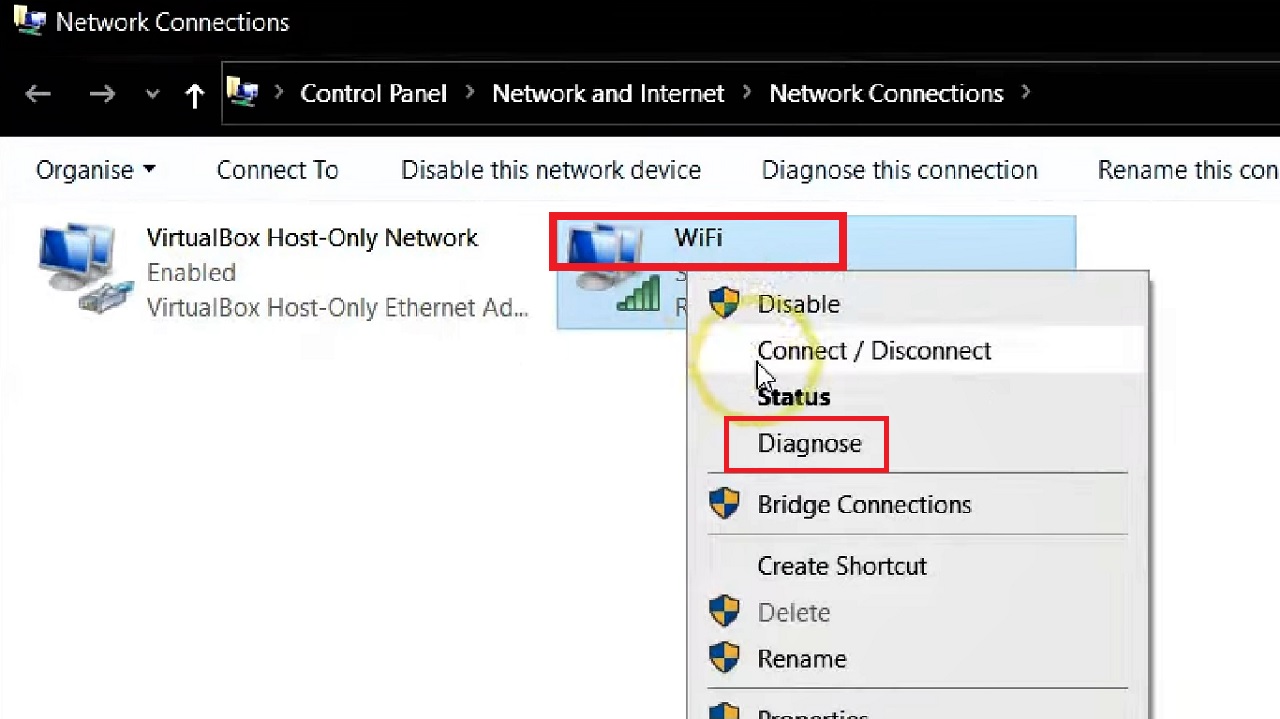
- In the new Network Connections window that pops up, select your Wi-Fi, right-click on it, and choose the Diagnose option from the drop-down menu.
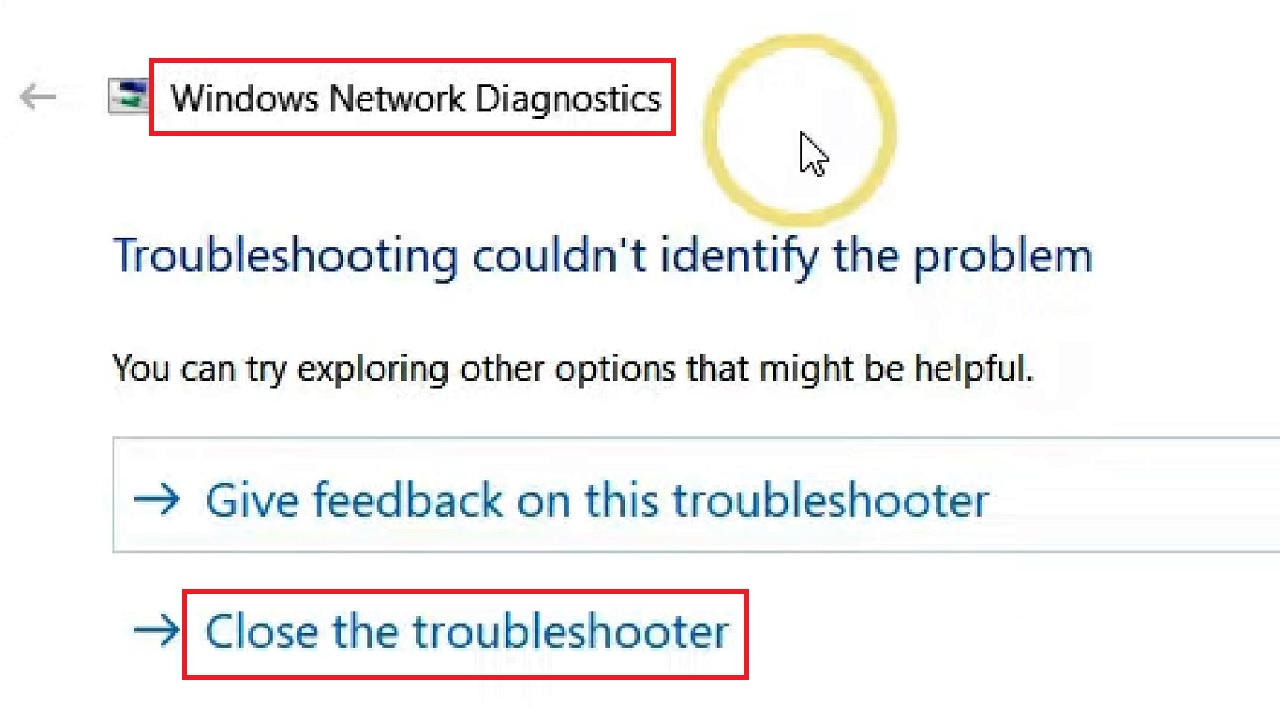
This will allow the system to check for internal issues and fix them automatically, if any. Wait for the diagnosis process to be complete.
When you see the following window, click on the Close the troubleshooter option.
Method 14: Remove OneNote
If you do not use OneNote, remove it completely so that it does not consume bandwidth unnecessarily. This will also increase the internet speed of your computer.
If you cannot remove it from the Apps & Features section in Settings, this is what you need to do.
STEPS TO FOLLOW:
- Right-click on the Start Menu.
- Select Windows PowerShell (Admin).
- Type in the command Get-AppxPackage *OneNote* | Remove-AppxPackage when the PowerShell window appears and hit Enter.
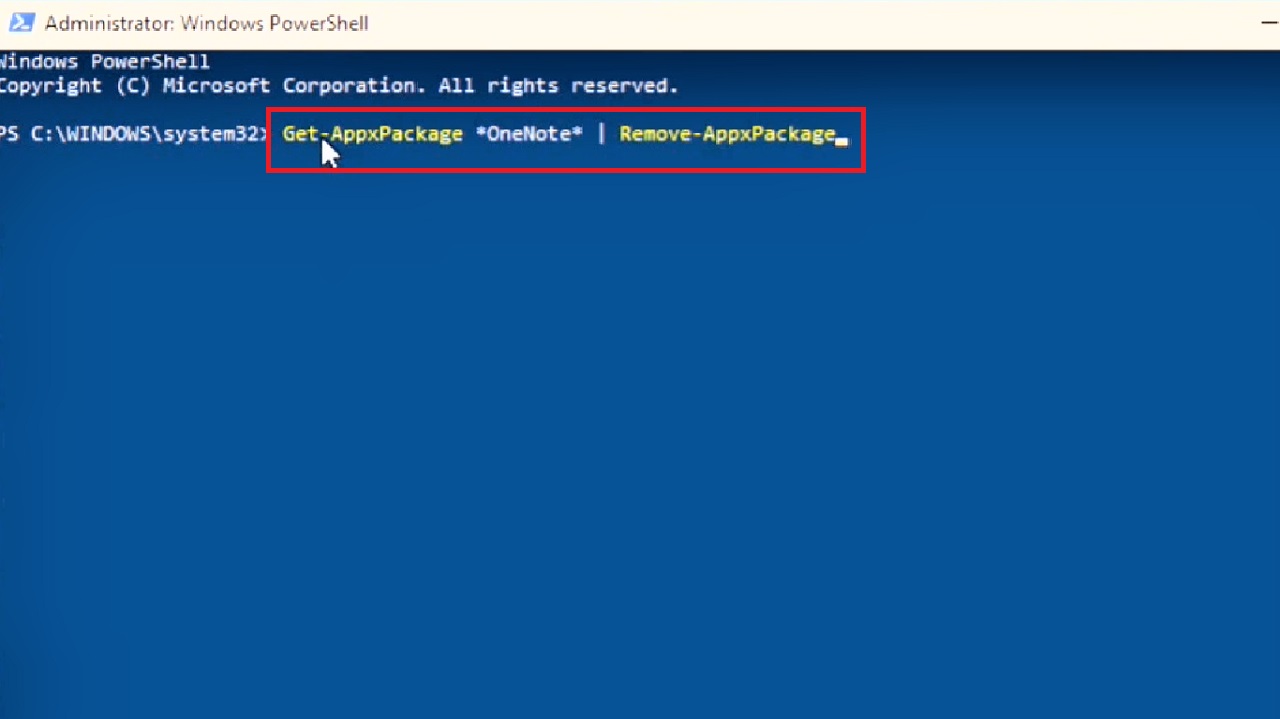
Wait for the process to complete. This will remove OneNote. Check your internet speed now. It will be higher than before.
Method 15: Disable Windows Auto Tuning Feature from the Command Prompt
Just as Windows update, disabling the Windows Auto Tuning feature can also increase the internet speed. You can do it by using the Command Prompt.
STEPS TO FOLLOW:
- Open the Command Prompt as you did in Method 9.
- Type in the command netsh interface tcp show global and hit Enter on your keyboard.
If you see that the Receive Window Auto-Tuning Level is normal, as it is in this case, you will need to disable it to prevent it from using the bandwidth to communicate with other apps.
So, type in the command netsh int tcp set global autotuninglevel=disabled and hit Enter.

Close the Command Prompt. Check now whether or not the internet speed is higher.
Method 16: Change Network Settings from the Windows Group Policy Editor
You may also try making some changes in the network settings from the Windows Group Policy Editor in order to increase the speed of the internet on your PC.
STEPS TO FOLLOW:
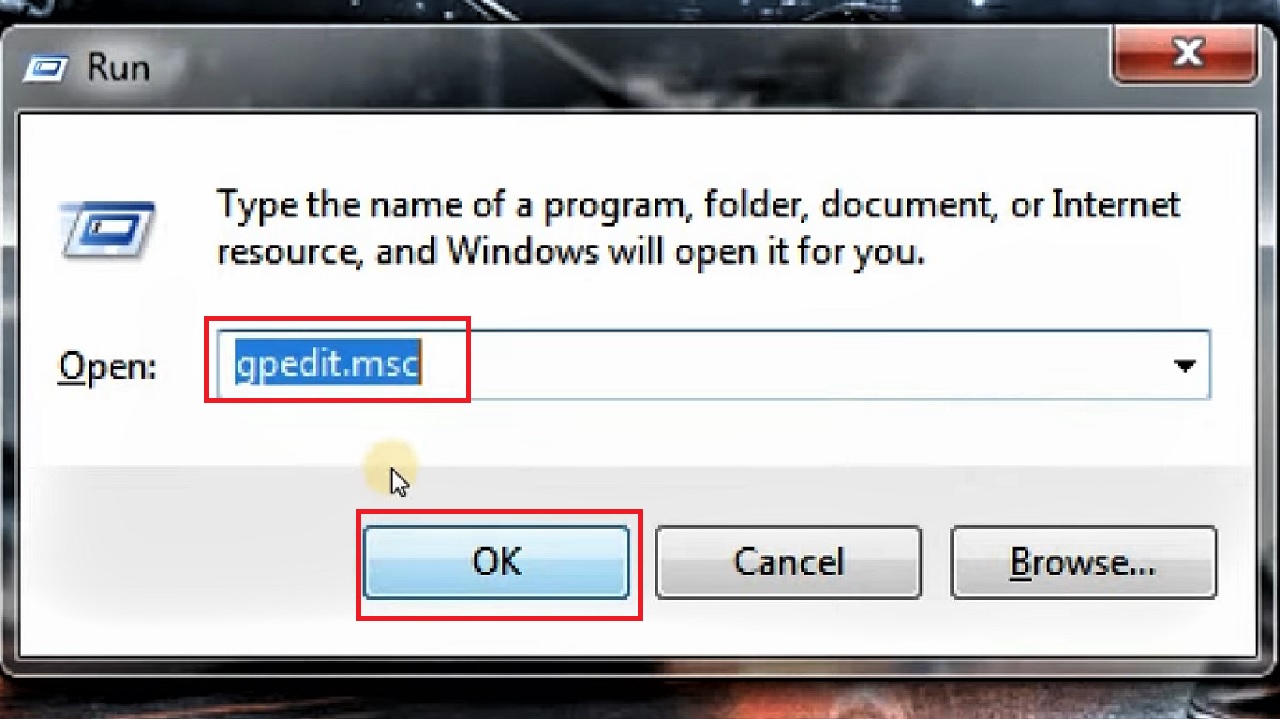
- Press the Windows and R keys on your keyboard together to open the Run dialog box.
- Type gpedit in it and click on the OK button or hit Enter.
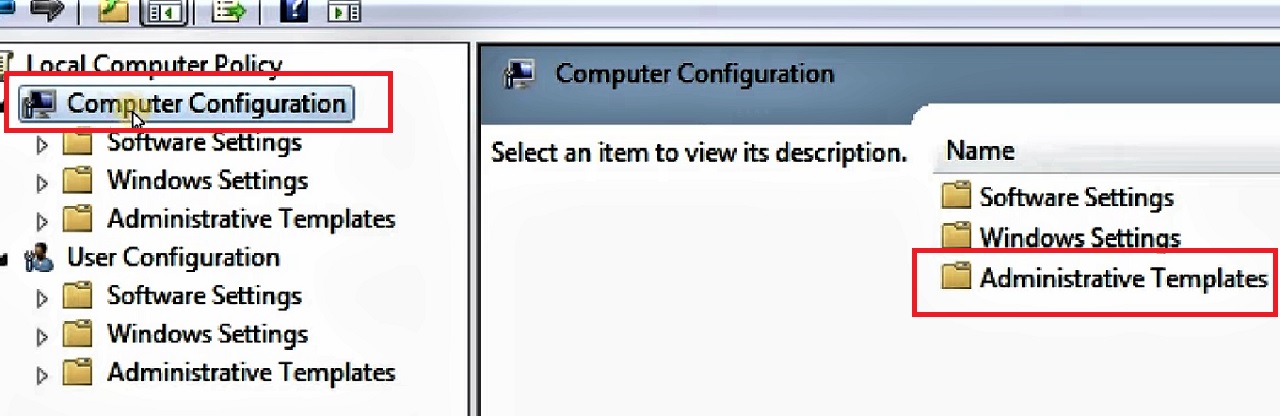
- In the Group Policy Editor window, click and open Computer Configuration on the left panel of the window.
- Click to open Administrative Templates on the right side of the window.
- Click and open the Network folder here.
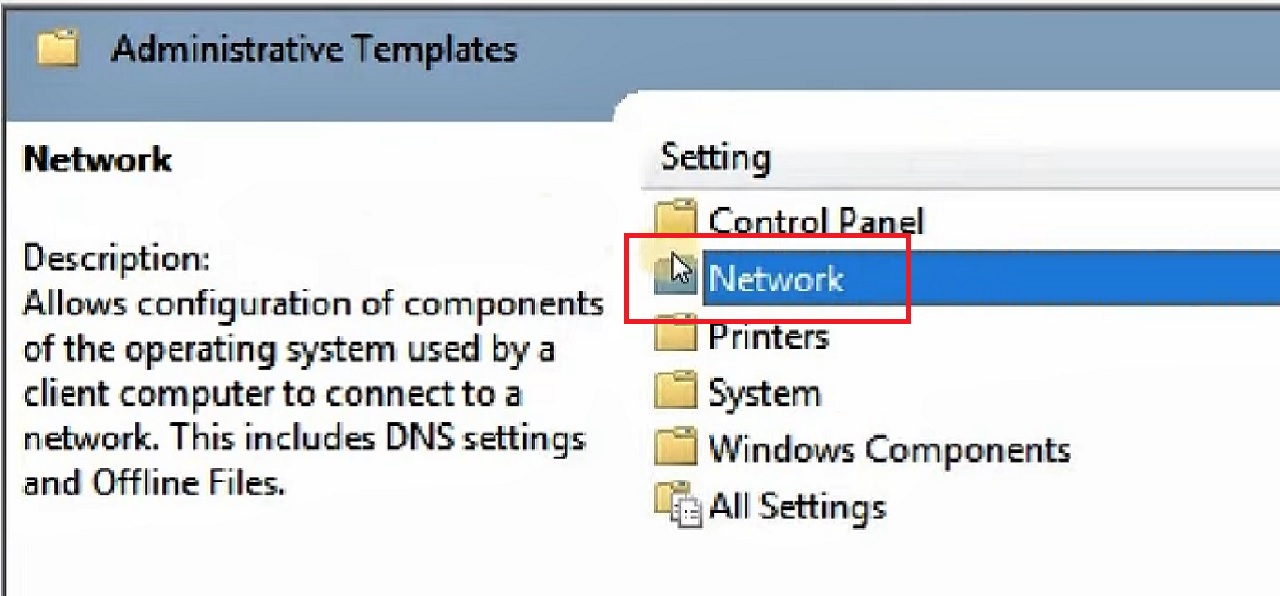
- In the following window you will see the folder named QoS Packet Scheduler.
- Click on it.
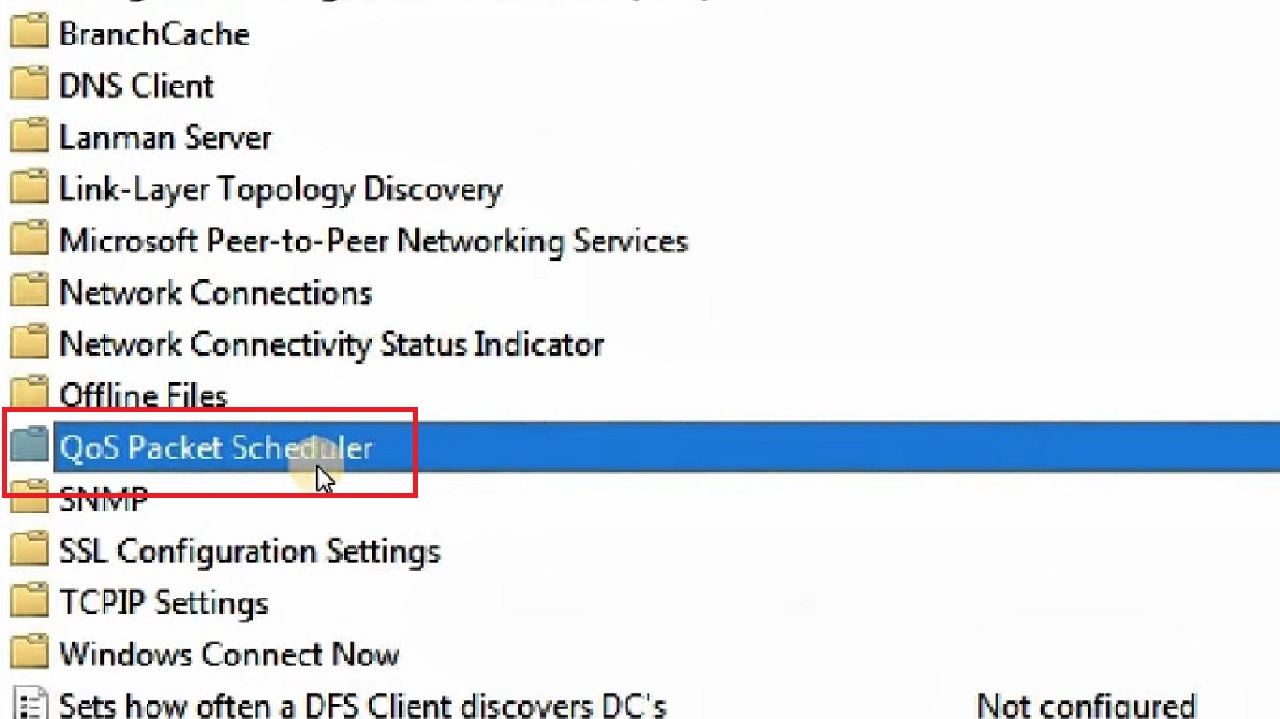
- Then, click on Limit reservable bandwidth.
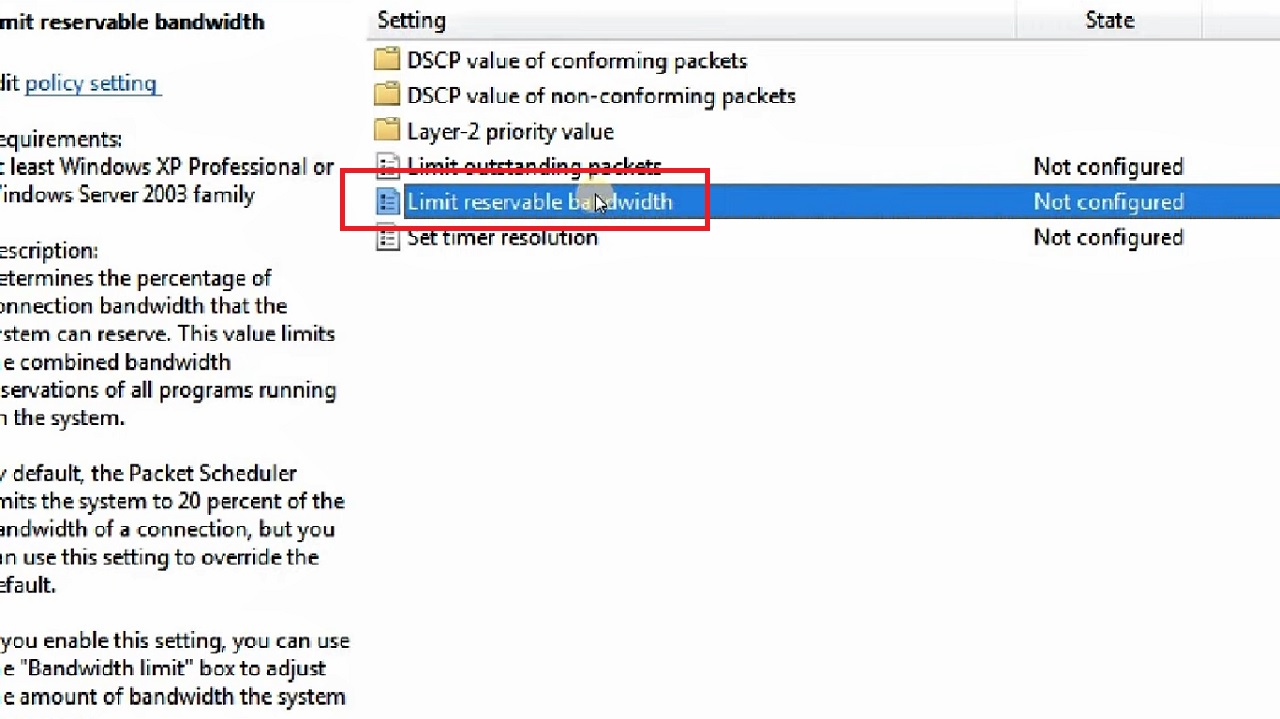
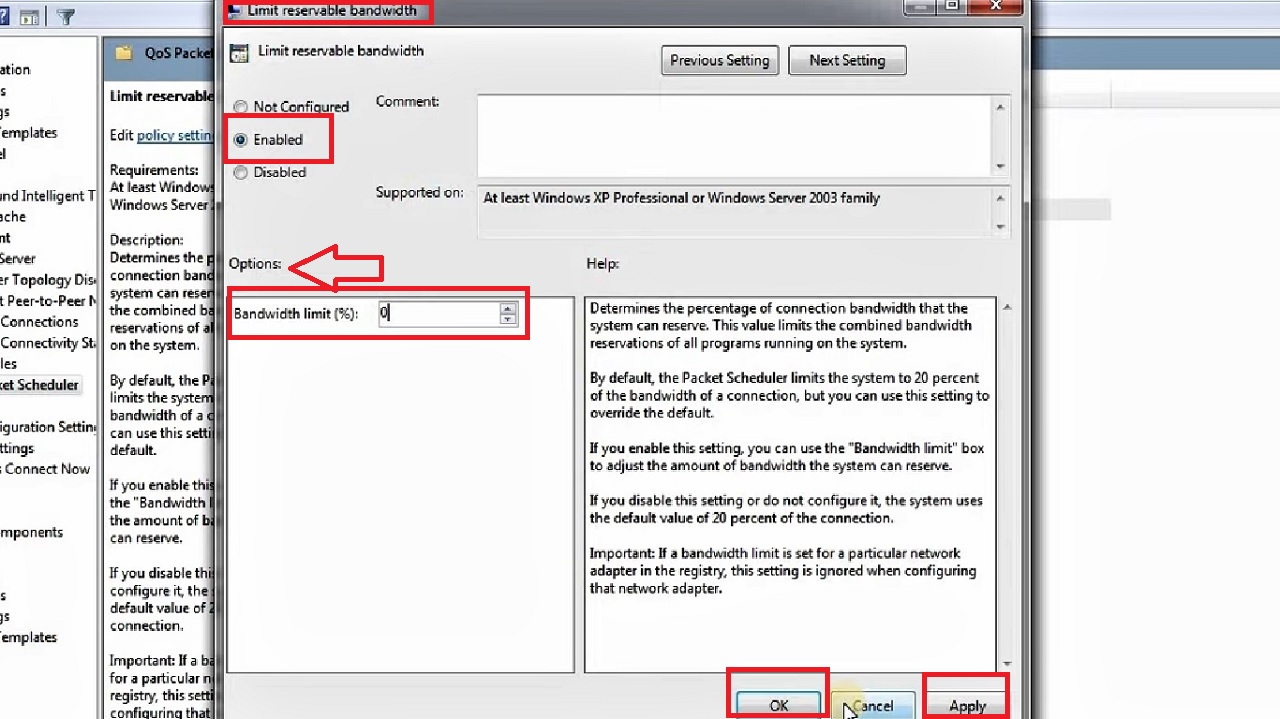
- In the new Limit reservable bandwidth window, click on the small circular button next to Enabled.
- Set the value to 0 in the box next to Bandwidth limit (%) under Options.
- Click on the Apply button and then on the OK button to save the changes.
- Close all windows.
Restart your computer system and check whether or not the internet speed has increased.
Method 17: Make Changes in Power Options
You may set the power for the wireless network adapter to maximum performance. This will also improve the internet speed significantly.
STEPS TO FOLLOW:
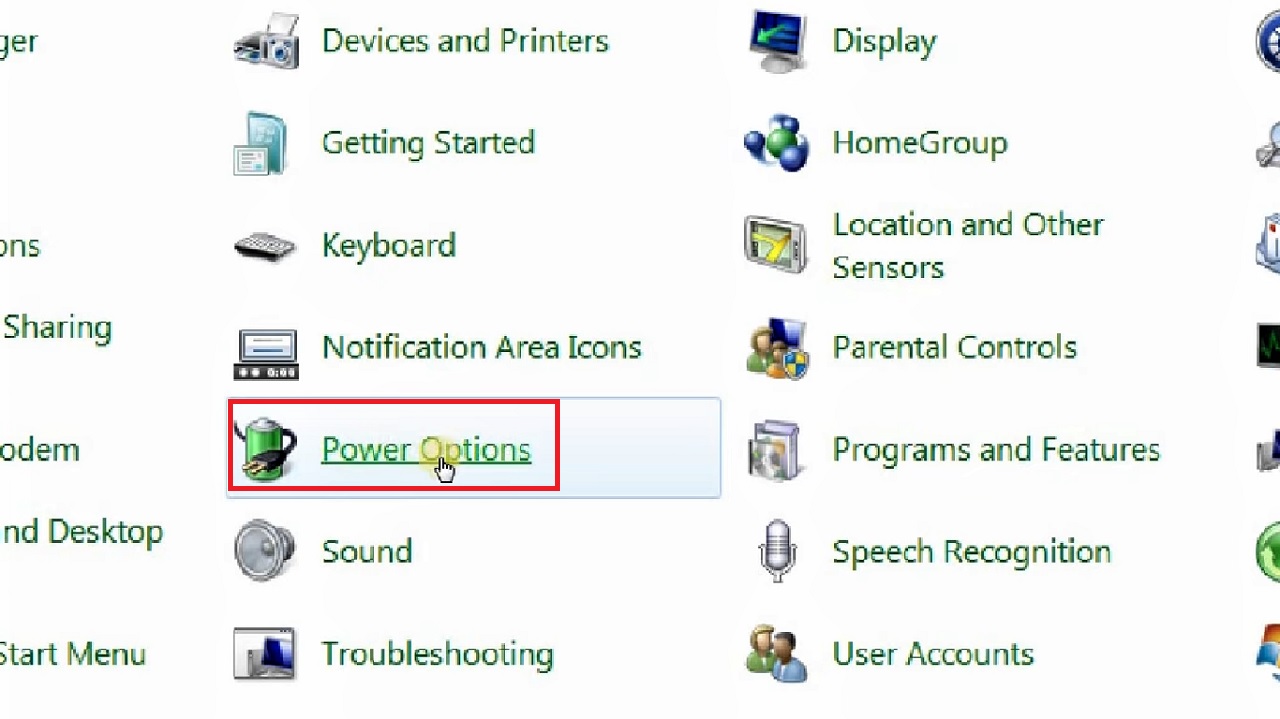
- Open the Control Panel as you did before in Method 10.
- Select Power Options from the list displayed in Large icons under View by section in the Control Panel.
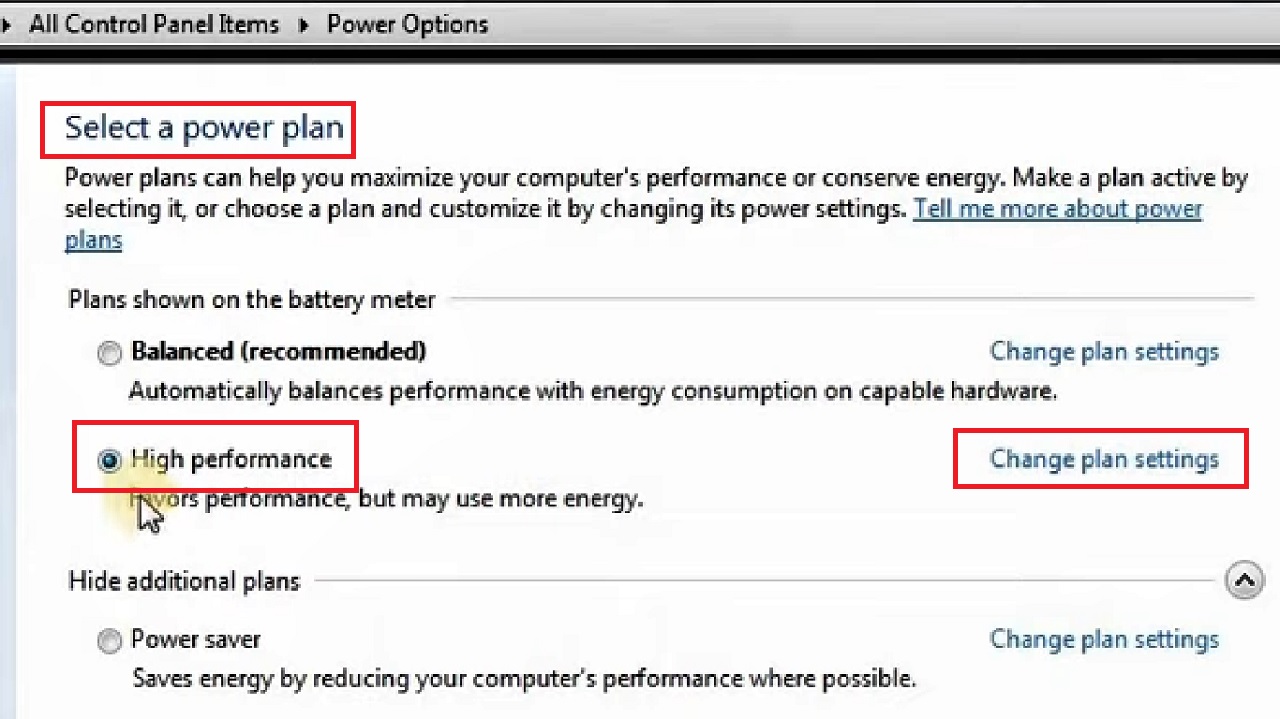
- In the next window, to Select a power plan, click on the small radio button next to High performance.
- Click on Change plan settings on the right side written in blue.
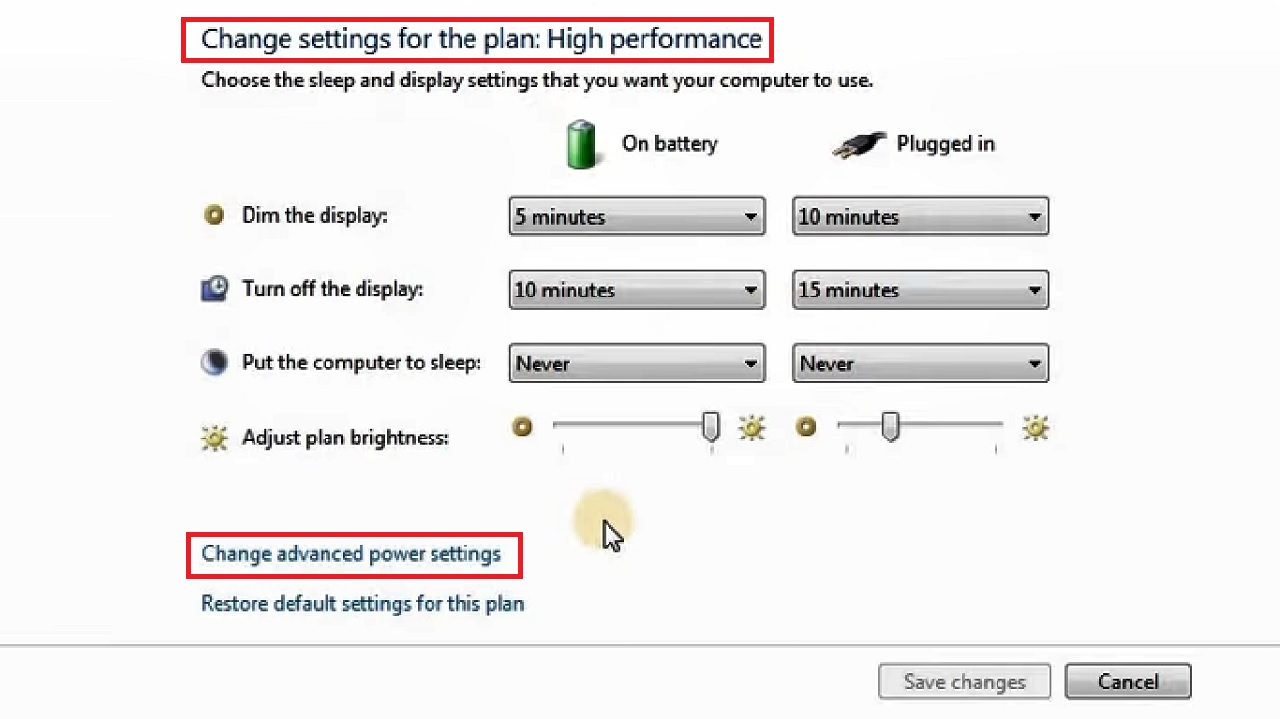
- Click on Change advanced power settings in the following window to Change settings for the plan: High performance.
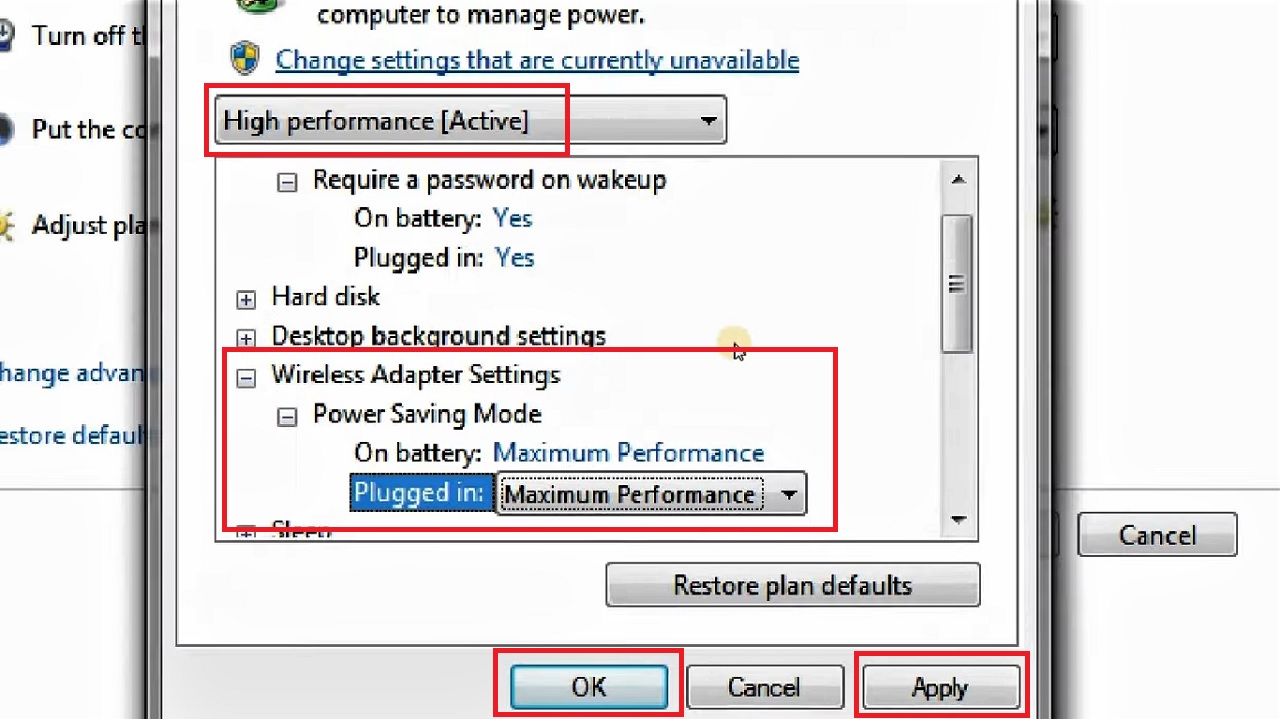
- In the following Power Options window under Advanced settings, select Wireless Adapter Settings from the box below High performance (Active).
- Click on the Plus sign next to it.
- Do the same for the Power Saving Mode
- Set the performance On battery and Plugged in under the Power Saving Mode to Maximum Performance by selecting it from the drop-down options you get after clicking on the small downward arrow alongside the respective boxes.
- Click on the Apply button
- Then, click on the OK button to save the changes.
Close all windows, restart your computer system and check your internet speed which should be higher now than before.
Conclusion
So, those were all the methods that you can try if you see that the internet speed on your PC is slow.
Remember, in some cases, only a single method may not work.
You may need to try different methods, however, since you know them all, it will not be much of a problem for you.