
You will not be able to connect devices to your system if the port of the Wi-Fi router is not working.
It will also disrupt the internet connectivity, adding to your frustration.
Through this guide, you will come to know about the probable causes and the solutions to this issue so that your router is up and running properly again.
In This Article
KEY TAKEAWAYS
- Check all cable connections to ensure they are securely plugged into the ports of your device and the router.
- Restart or power cycle the router by unplugging it, waiting for about 30 seconds, and then plugging it in again.
- Change the damaged or faulty cable to rule out the chances of it causing the issue.
- Update the firmware of the router by installing the latest version of it from the website of the manufacturer.
- You may also perform a factory reset on your router to return it to default settings and reconfigure it afterward.
Why is the Wi-Fi Router Port Not Working?
Primarily, a Wi-Fi router port may not work due to a loose connection or if the cables are connected improperly.
A few other probable reasons could be the following:
- Faulty or damaged network cable
- Hardware issue or failure of the router port
- Outdated firmware of the router
- Congestion in network traffic causing overloading
- Improper router configuration
- Power surges
- Electrical issues in the internal components of the router
- Interference from electronic devices located near the router
- Firmware and third-party software and app conflicts
- Conflicting IP address on the network
- Misconfiguration in the network port settings
- Malware, virus, or security-related issues
- Overheating of the router and its internal components
- Physical damage to the router
- Issues related to the Internet Service Provider (ISP) or outages
Irrespective of the causes, the solutions to Wi-Fi router ports not working are quite straightforward.
Ways to Fix Wi-Fi Router Port Not Working
You should start fixing the issue of the Wi-Fi port not working by making a few basic checks on your device and the router.
For example, check all cables for a snug fit and replace the network cable, if necessary. Inspect for any physical damage to the port and its pins, and restart or power cycle the router.
If the basic checks and fixes do not resolve the issue, you may try a few more-than-the-basic solutions, such as:
- Ensuring the router is located in a proper place and is not overheating
- Testing the port by using a different device or in a different location
- Checking for interference from other nearby devices and removing them if needed
- Using a different power source for the router to rule out the chances of power being the culprit
- Scanning the system for existing bugs and malware
- Disabling firewall or security software temporarily
- Performing a factory reset
- Verifying and resetting the network settings of the device if necessary
- Checking and changing the IP address to rule out chances of conflicts
- Going through the router logs and reviewing them carefully to find any error messages
- Checking and replacing the damaged, failing, or malfunctioning hardware
- Updating router drivers
- Updating the router firmware and reconfiguring it
- Contacting your ISP to know and resolve any service-related issues
Here are the steps to follow systematically for the advanced solutions to the Wi-Fi router port issue and restore the proper functionality of your network.
Method 1: Rollback or Update Drivers
If the basic checks and fixes did not work, chances are that the driver is faulty. There are a few things to do in this case.
First, roll back the driver to see whether the issue is due to incompatibility or a bug in the updated driver. If it is not, update the driver.
Finally, you must uninstall the driver and let Windows install a generic driver version for the network card.
STEPS TO FOLLOW:
To roll back the updated driver to the previous version:
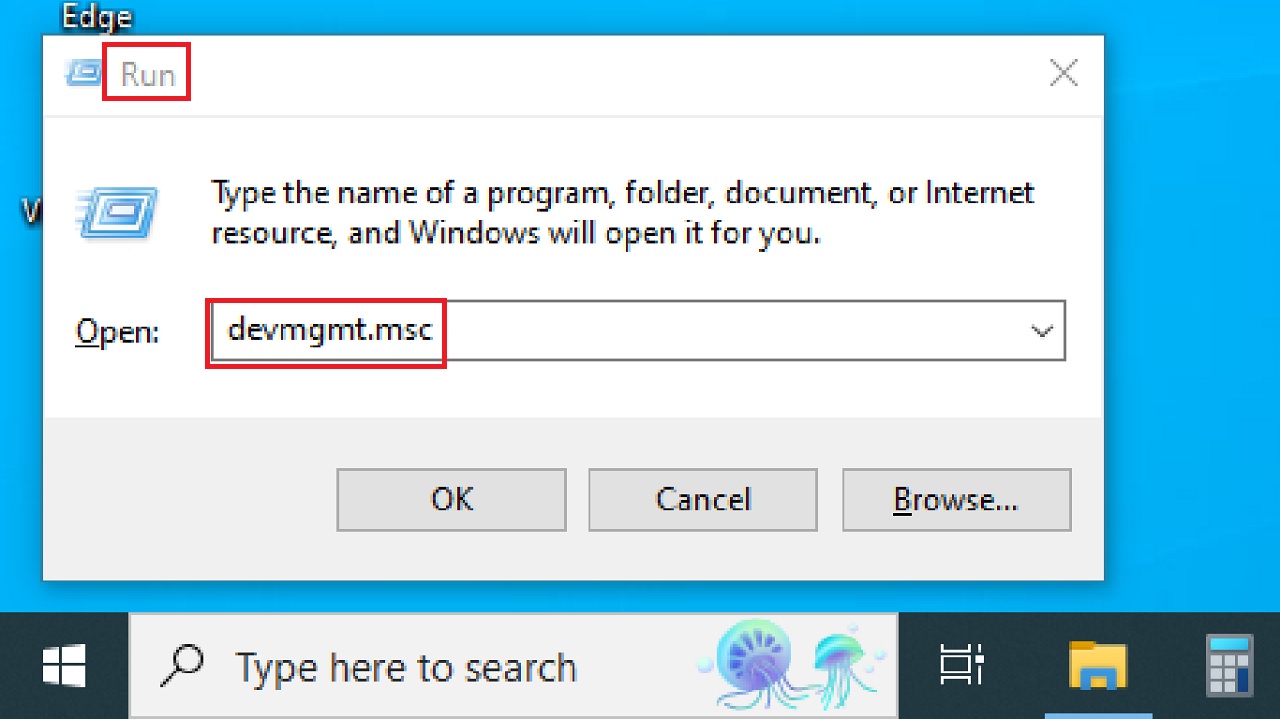
- Press and hold the Windows key and press R.
- Type devmgmt.msc in the Run dialog box.
- Hit Enter.
- In the Device Manager window, double-click on Network adapters.
- Find and double-click on your network device.
- Go to the Driver tab.
- Click on Roll Back Driver.
- Follow the on-screen instructions.
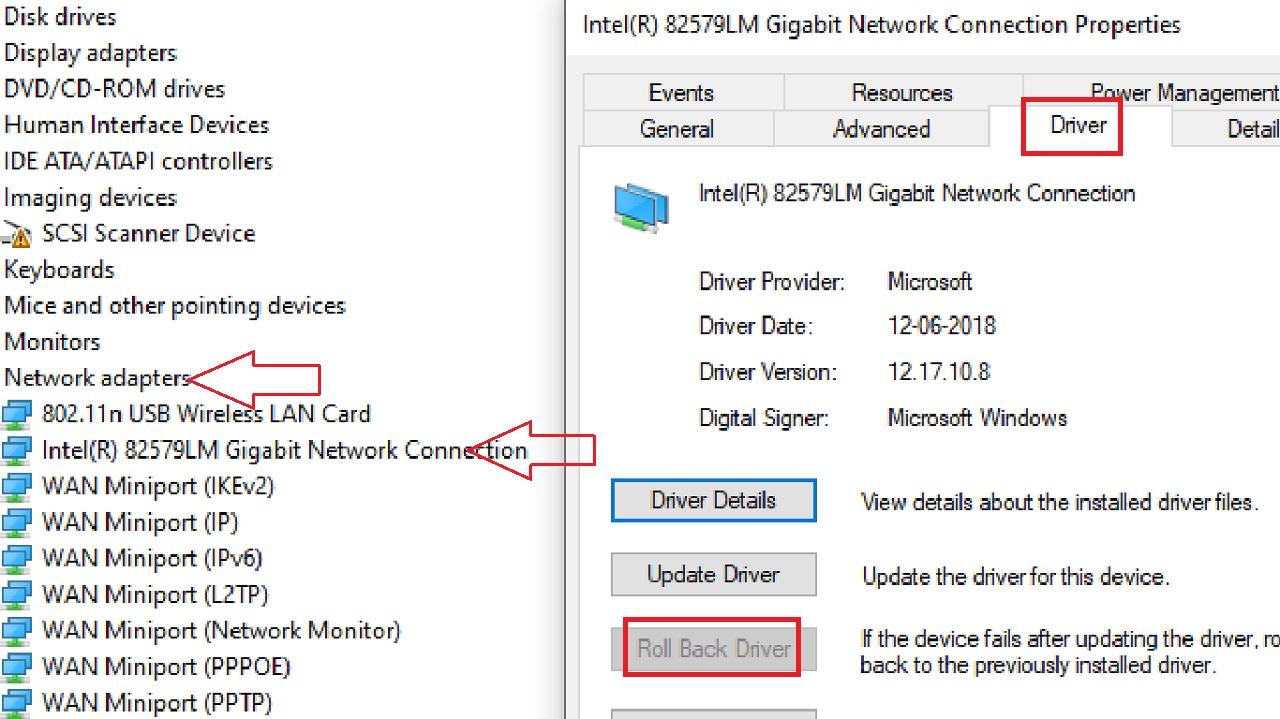
Note: If the Roll Back Driver button is greyed out, as it is in this case, you cannot go back to the previous version.
If you can, now restart the computer once the process is complete and check if the issue is solved or not. If the problem still persists, update the driver.
Note: A few of the following steps, such as downloading the latest firmware version may not work on your PC since it is facing problems connecting to the internet. So, perform them on another PC with an internet connection. Then, copy the downloaded file to the problematic system via USB.
- Follow the same steps as above in the problematic PC to find and right-click on your network device and go to the Driver tab.
- Check the Driver Version and note it down.
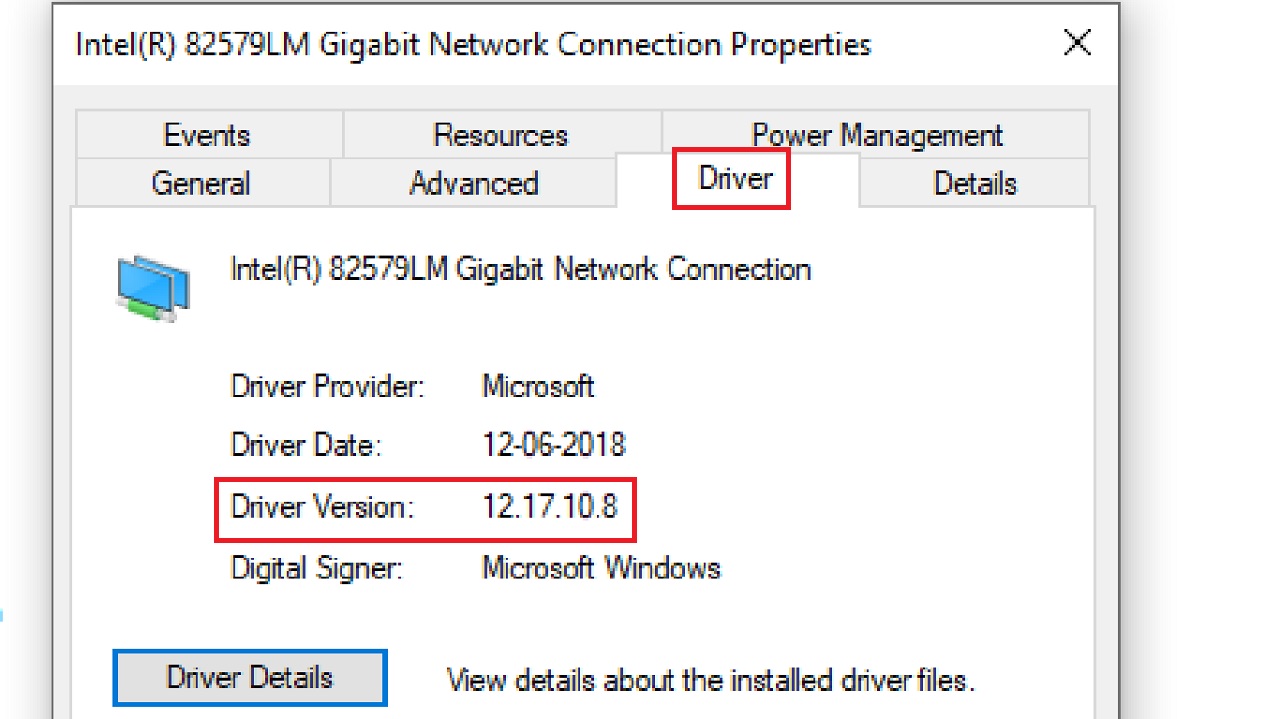
- Minimize the Device Manager window.
- Now, open your web browser on another PC with an internet connection.
- Go to your manufacturer’s website.
- Search for the latest driver for your device. Tally it with the driver version you noted before.
- Download the latest driver, install it, and save it.
- Copy it in a USB storage and transfer it to the problematic device.
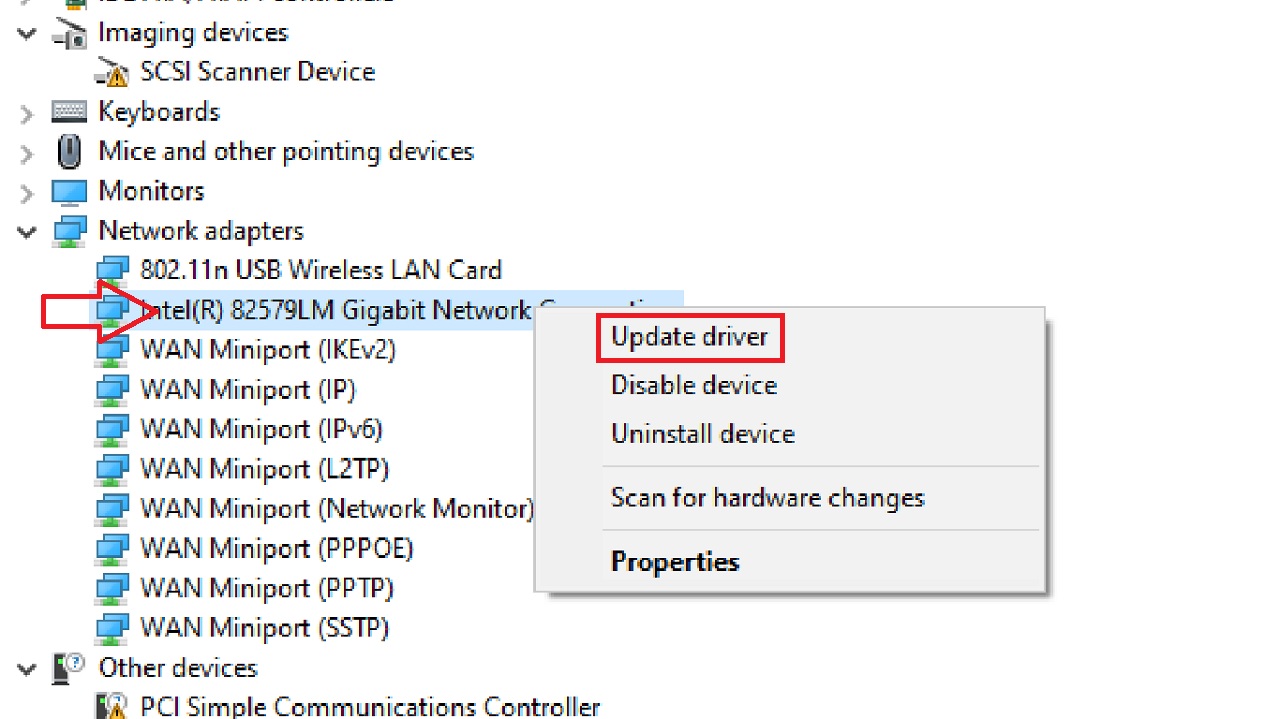
- Now, maximize the Device Manager window in the problematic device.
- Right-click on your network device.
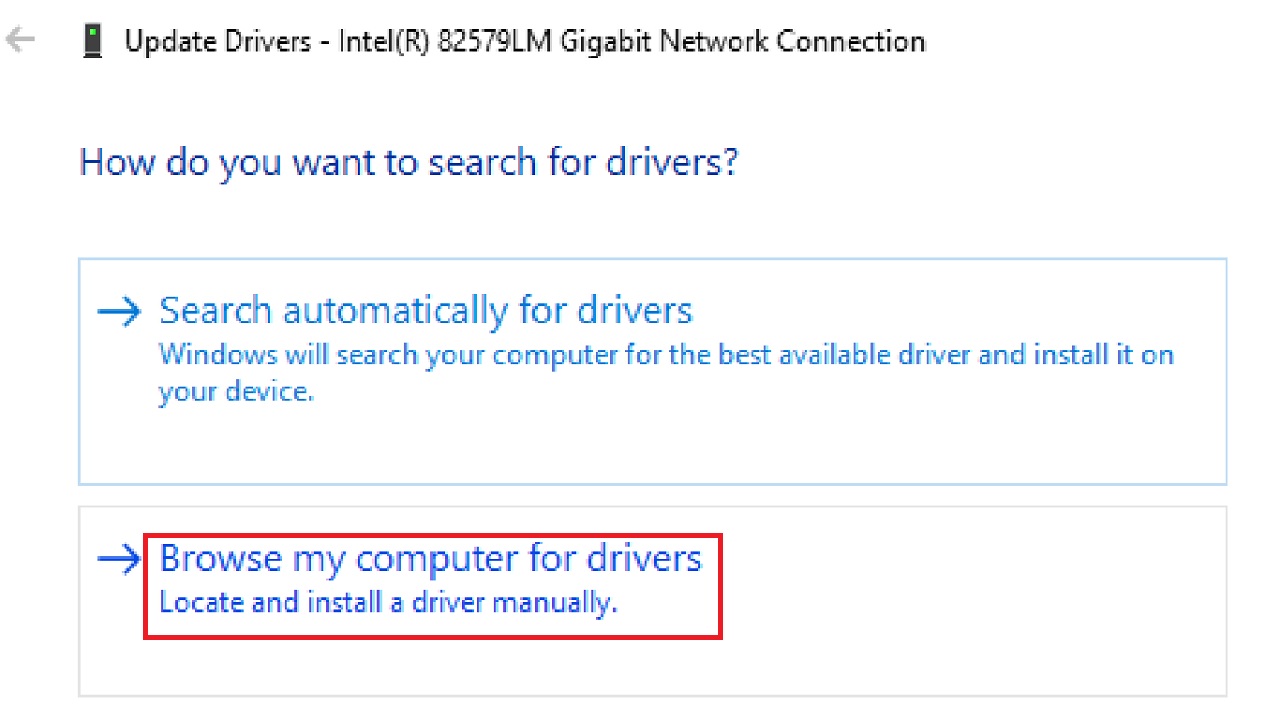
- Select Update driver from the dropdown options.
- Click Browse my computer for drivers in the following window.
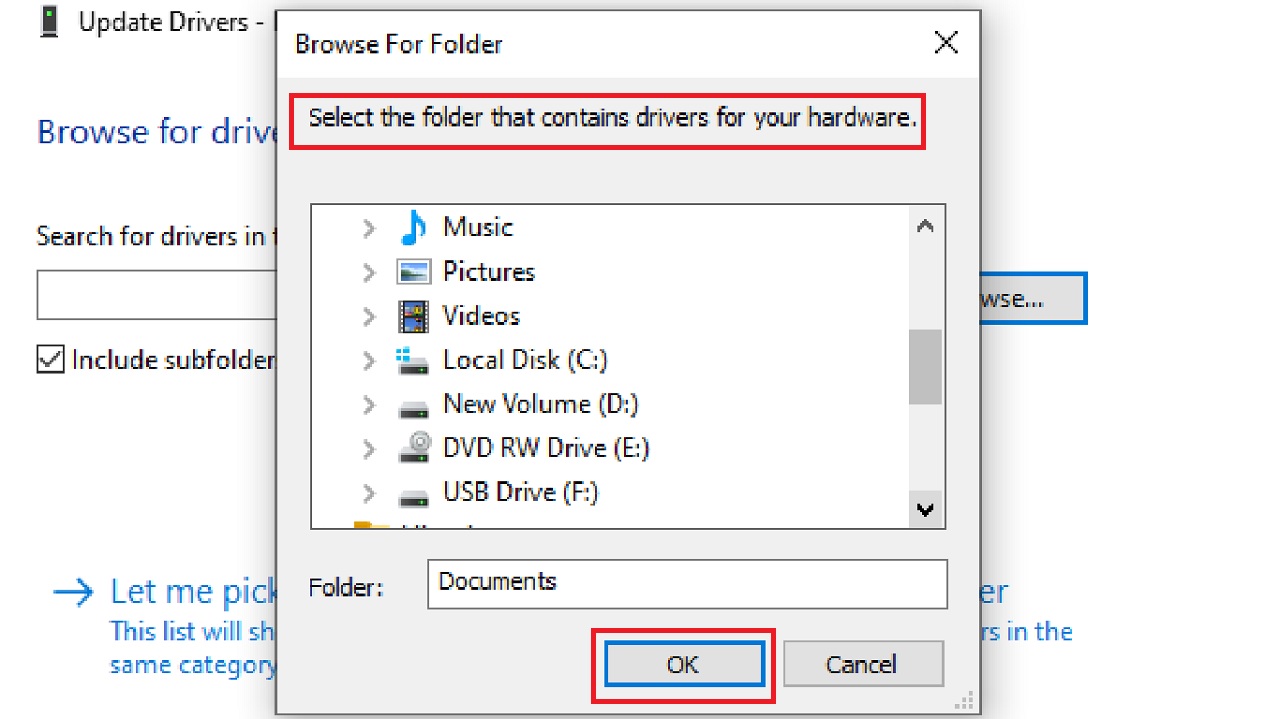
- Click Browse.

- Now, from the Browse For Folder window, Select the folder that contains drivers for your hardware.
- Click on the OK button to close this window.
- Click on the Next button in the previous window.
- Follow the additional on-screen instructions, if any.
Once the updating process is complete, restart your computer and check whether the issue is solved.
If that does not work, simply install the generic driver for your network device by following these steps:
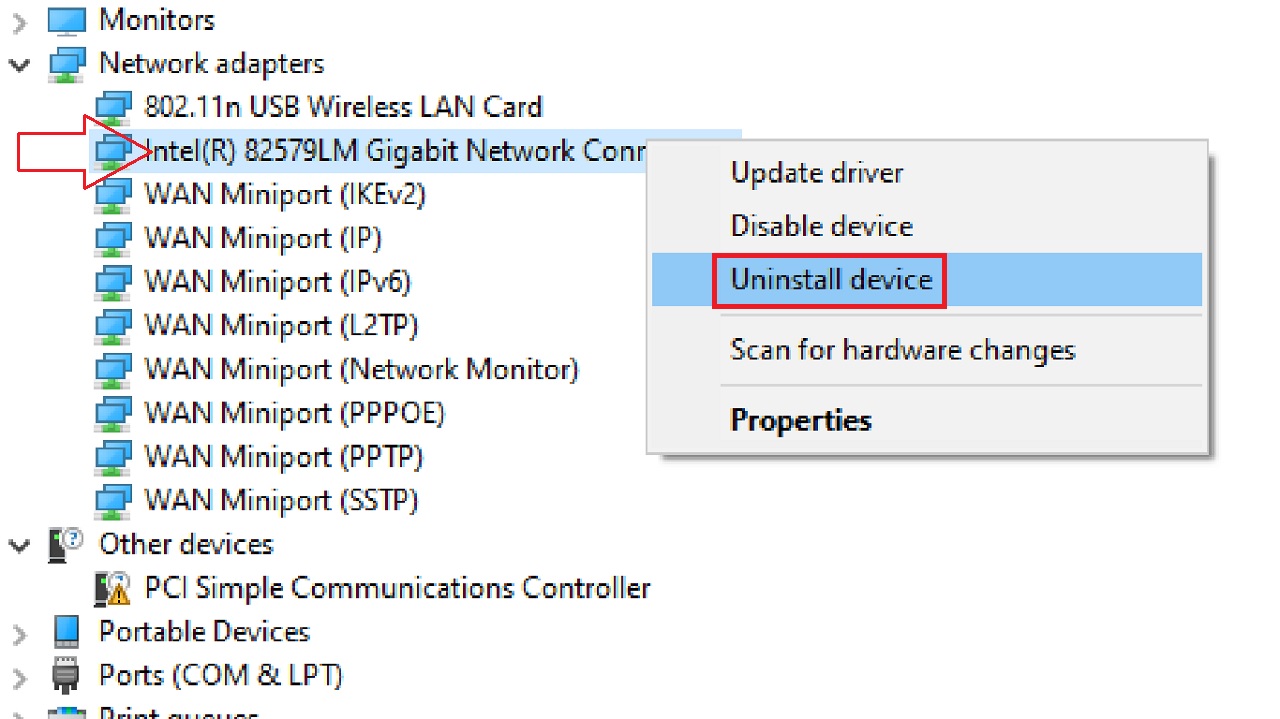
- Follow the same process in the Device Manager window to right-click on the network device.
- Select Uninstall device.
Wait for the driver to uninstall. Then restart your computer when the process is complete. When the system restarts, the generic drivers will be installed.
Since these generic drivers are mostly compatible with the network drivers, this might resolve the issue.
Method 2: Upgrade Router Firmware and Configure Settings
Upgrading the firmware of your router can potentially resolve the issue if it is causing the error.
STEPS TO FOLLOW:
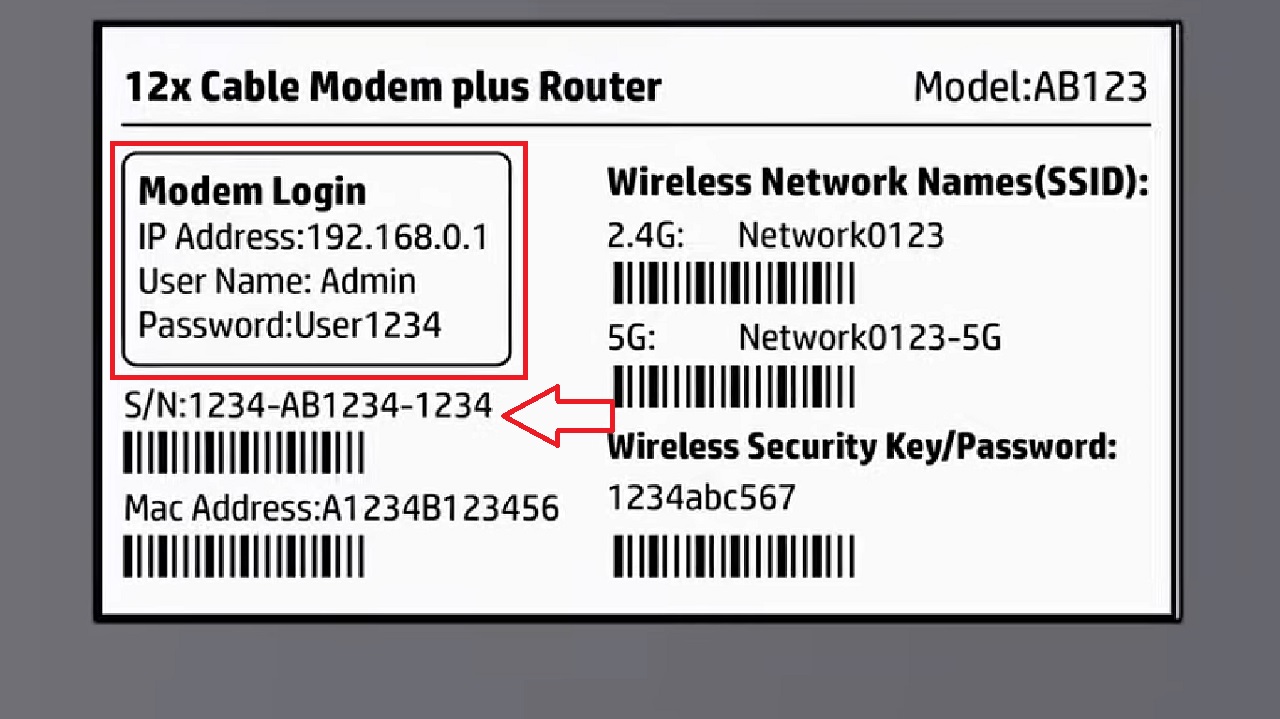
- Look at the label at the back of your router to check and note down all details regarding accessing your router’s admin webpage.
- Open a web browser on a PC with an internet connection and which is connected to the same network as the router.
- Go to the manufacturer’s website. It is TP-Link in this demonstration.
- Select router Type and type in your Model Number.
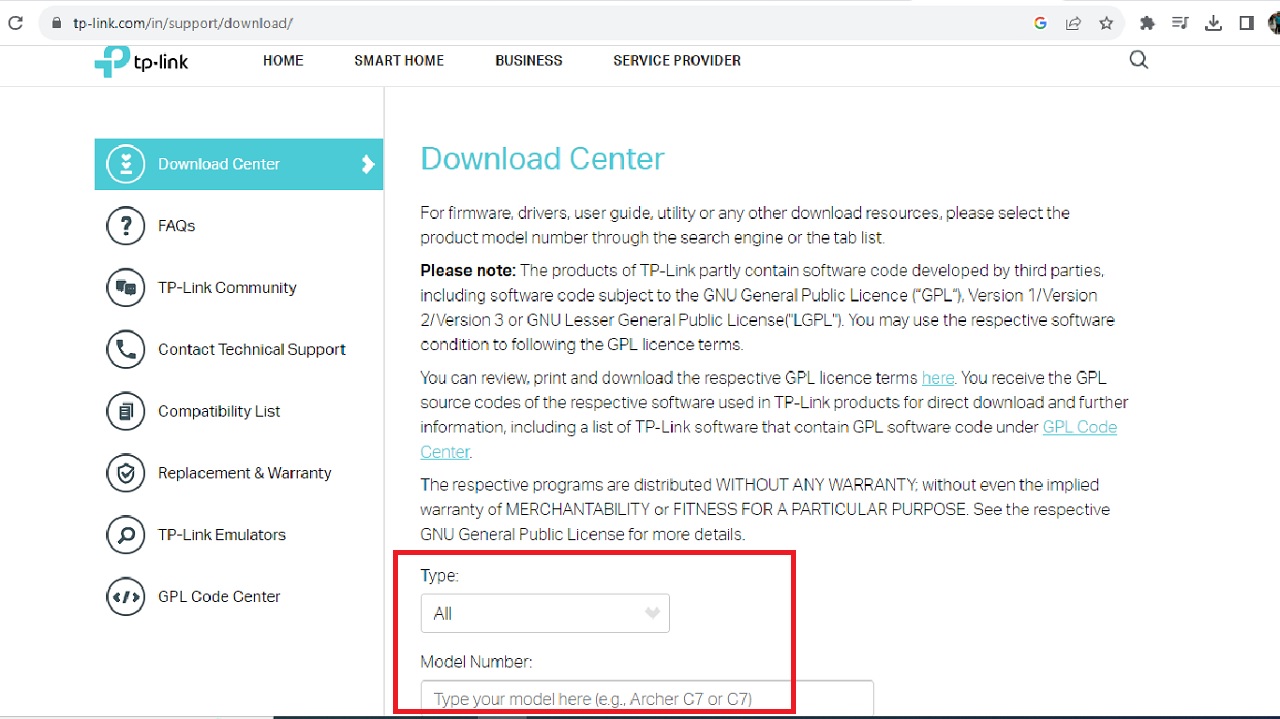
- Look for the Firmware Upgrade section on the web page of the router.
(This may vary depending on the brand and model of the router).
- Download and install the latest firmware version for your router.
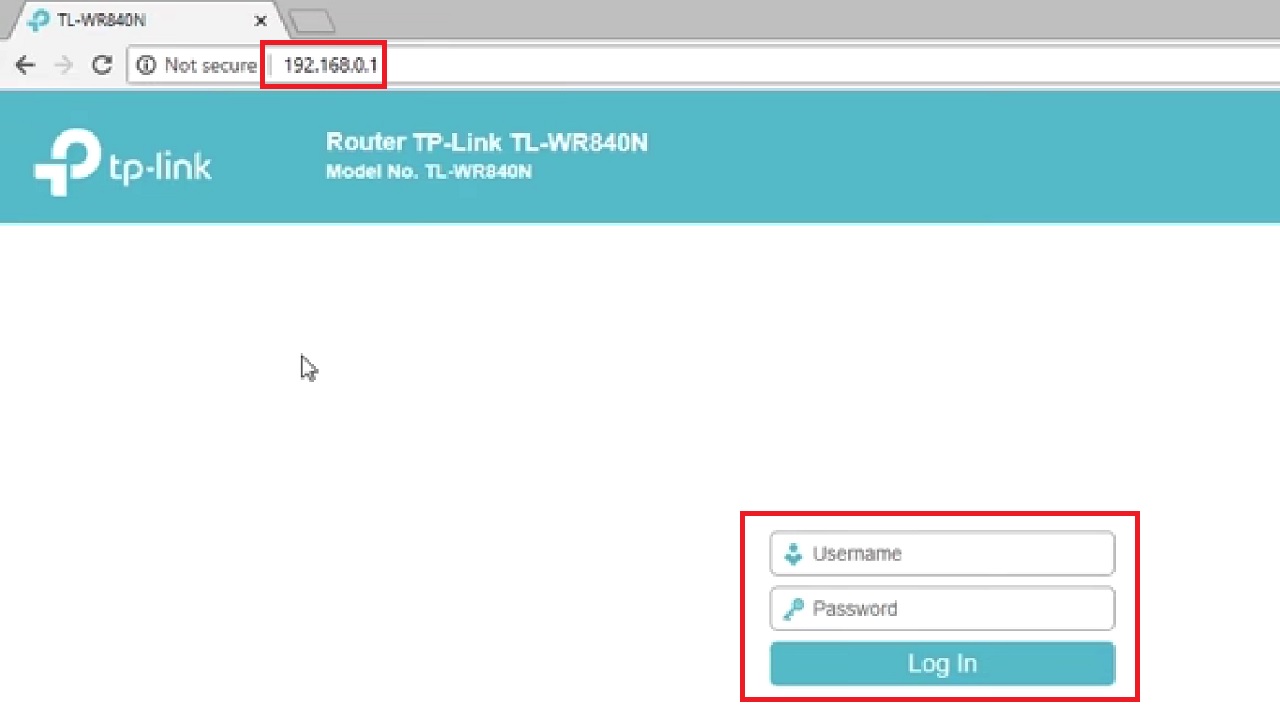
- Now, enter the IP address of the router in the address bar of the browser and hit Enter.
(The default IP address is usually 192.168.1.1 or 192.168.0.1. Check yours from the router manual).
- Log In by entering the username and password mentioned in the label, if you have not changed it in the interim.
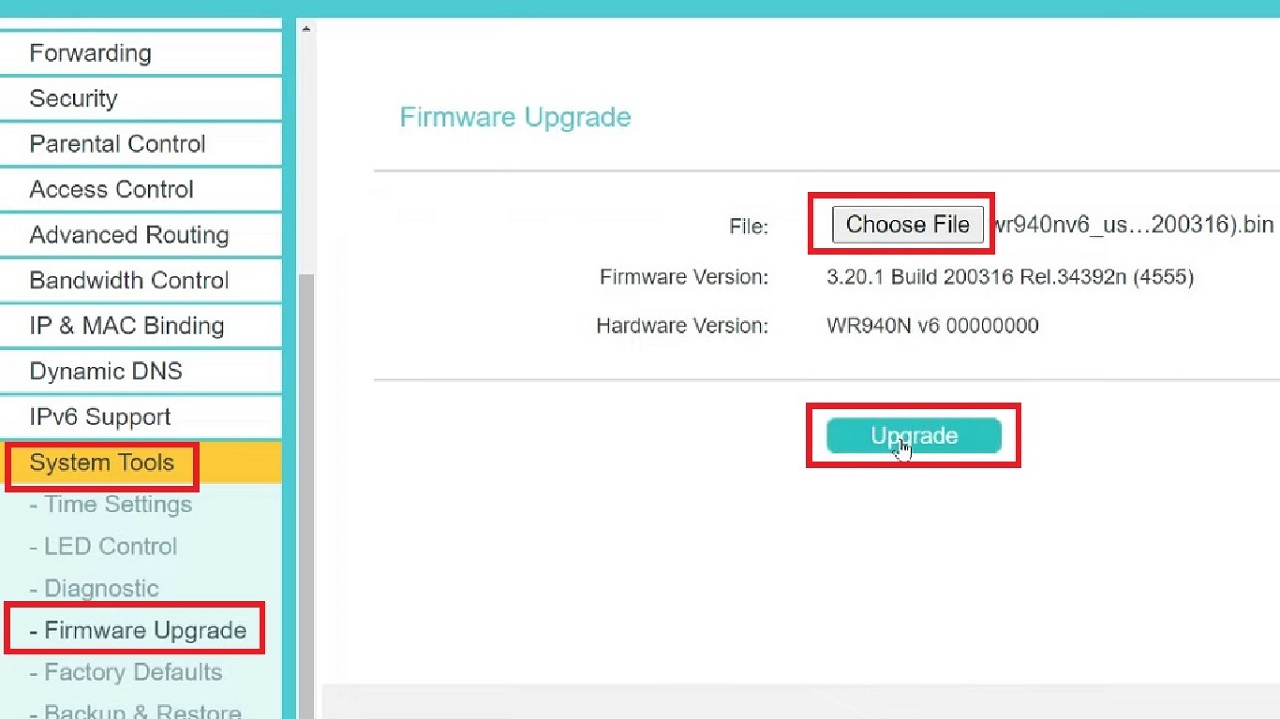
- Go to System Tools > Firmware Upgrade.
- Click on Choose File on the right.
- Select the downloaded file from your hard drive.
- Click on the Upgrade button.
- Click on the OK button in the confirmation window.
This will initiate the updating process, which will take some time. When it is complete, the router may restart automatically.
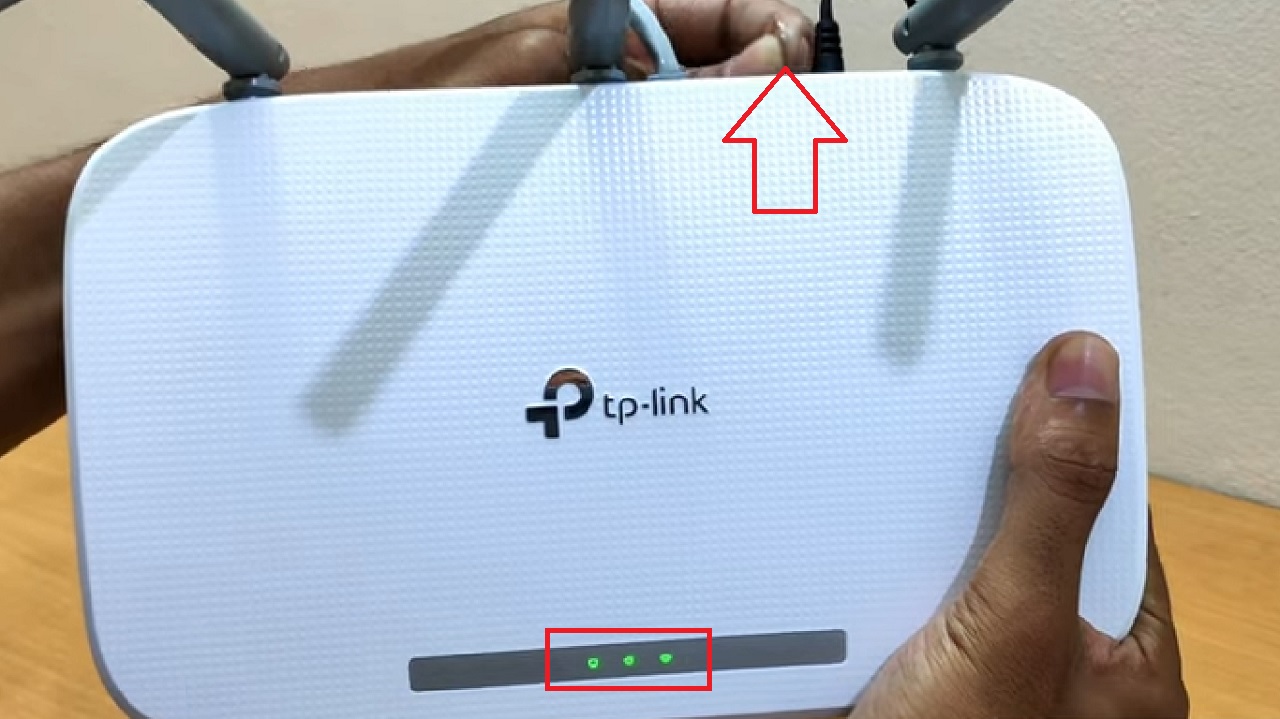
- Now, reset the router after the system restarts by performing a factory reset by pressing Reset at the back of the router with a paperclip or any sharp object.
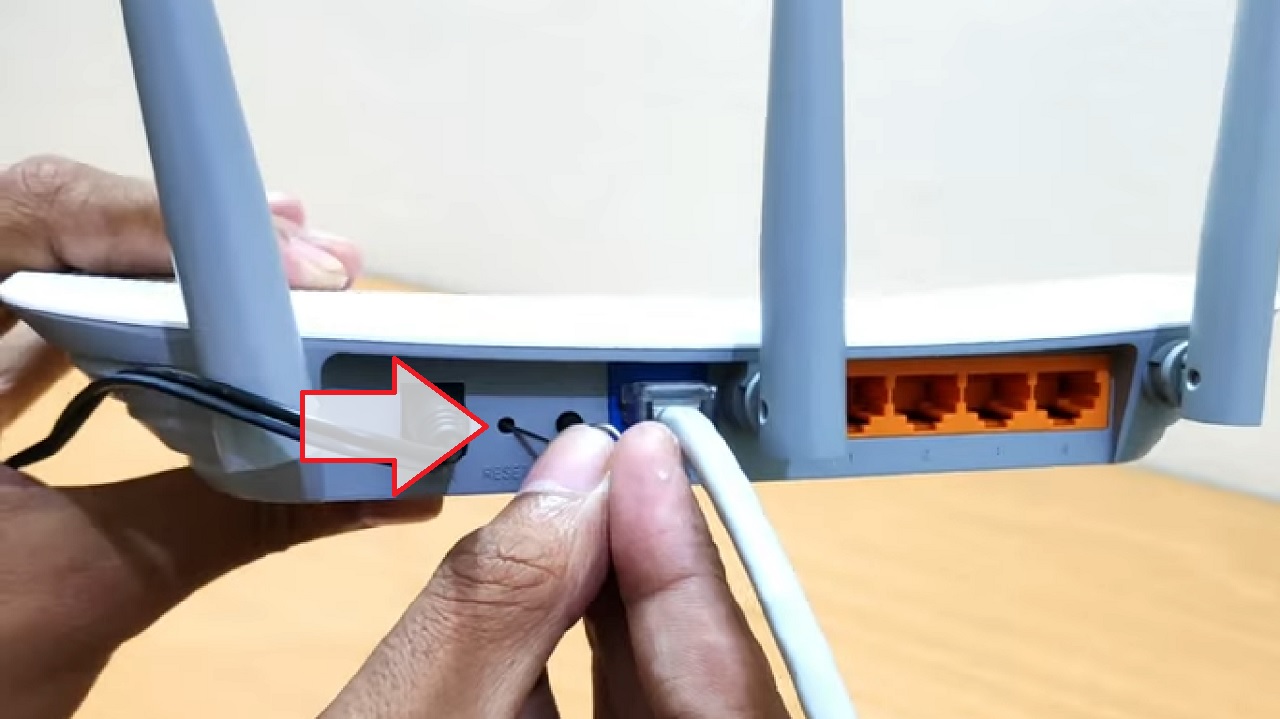
- Press and hold till the lights are on.
Now, follow these steps to configure the router settings.
Note: A TP-Link router is used for demonstration purposes. The interface may vary according to the router model but the basic process is the same.
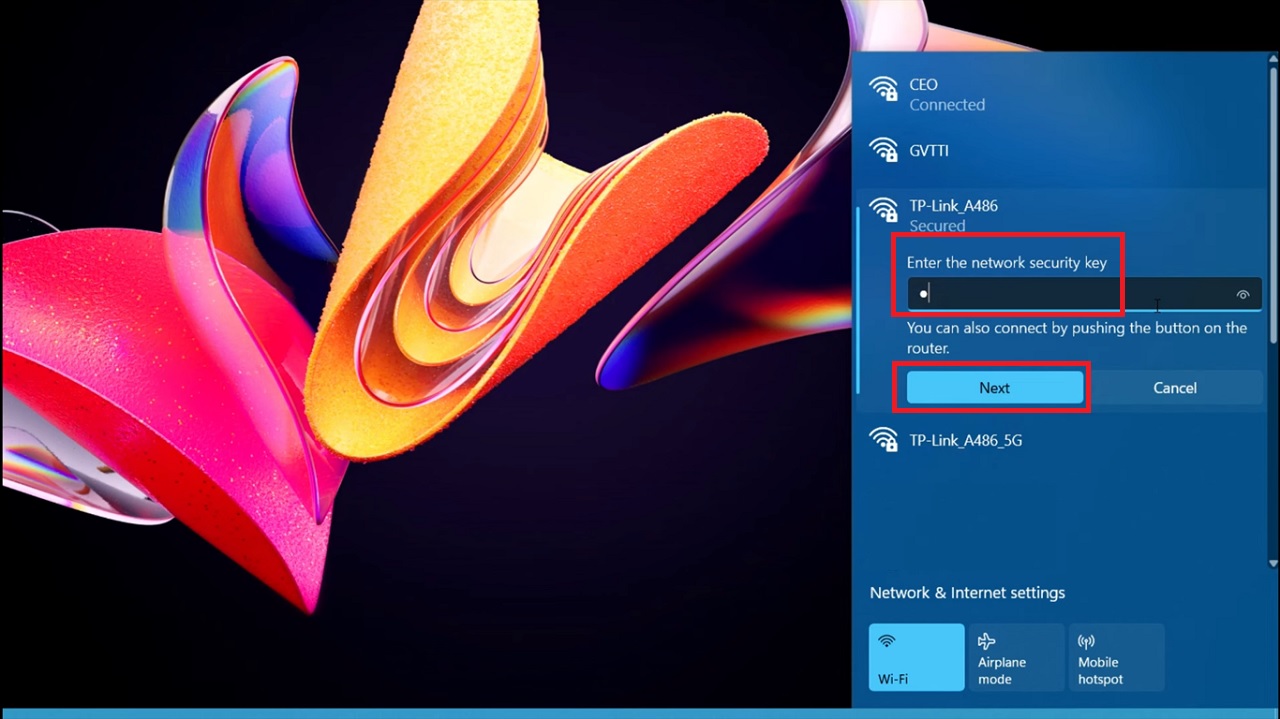
- Connect your computer to the TP-Link router by entering the network security key and clicking on the Next button.
- Open a web browser.
- Type tplinkwifi.net in the address field.
- Then press Enter.
Now, on the TP-Link router’s web management page, you will have to create an administrator password.
- First, type in the new login password.
- Then confirm the password.
- Now click on the Let’s Get Started button.

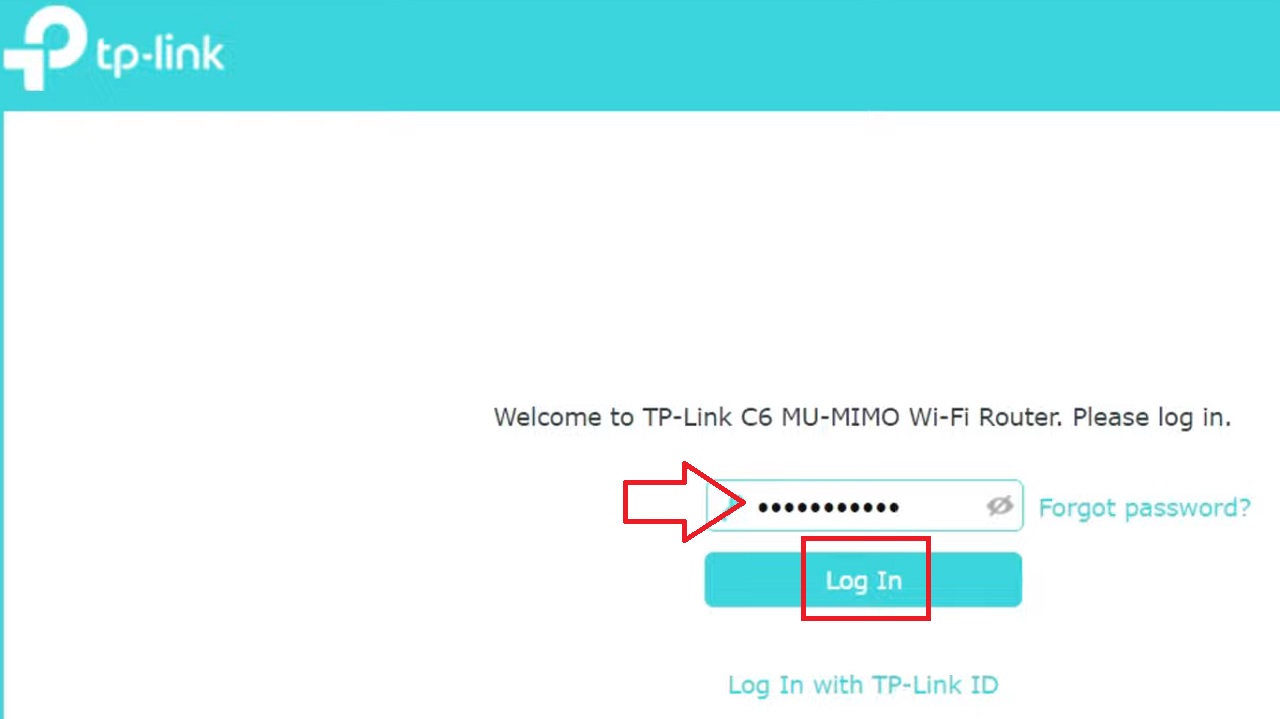
Then, you will need to log in to the admin page to run the Quick Setup to configure your internet connection and wireless settings manually.
- Type the password.
- Click on the Log In button.
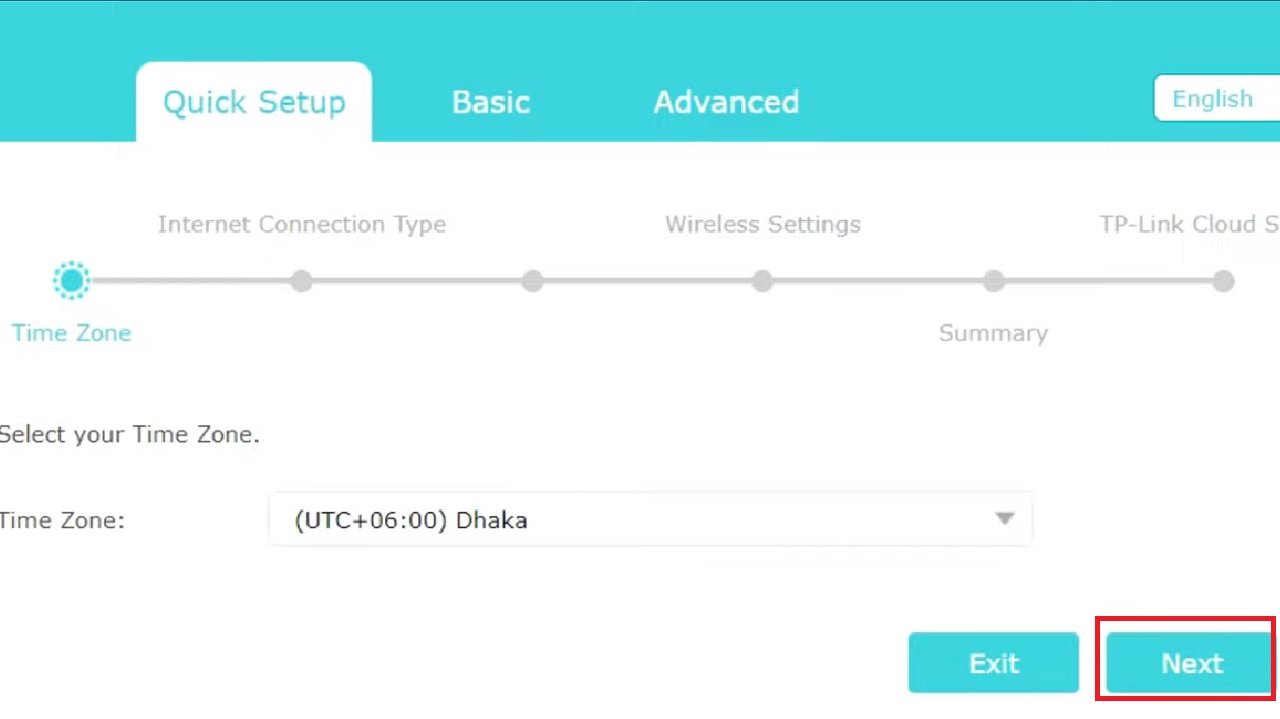
- Select your local Time Zone from the dropdown list that opens after clicking on the arrow in the box.
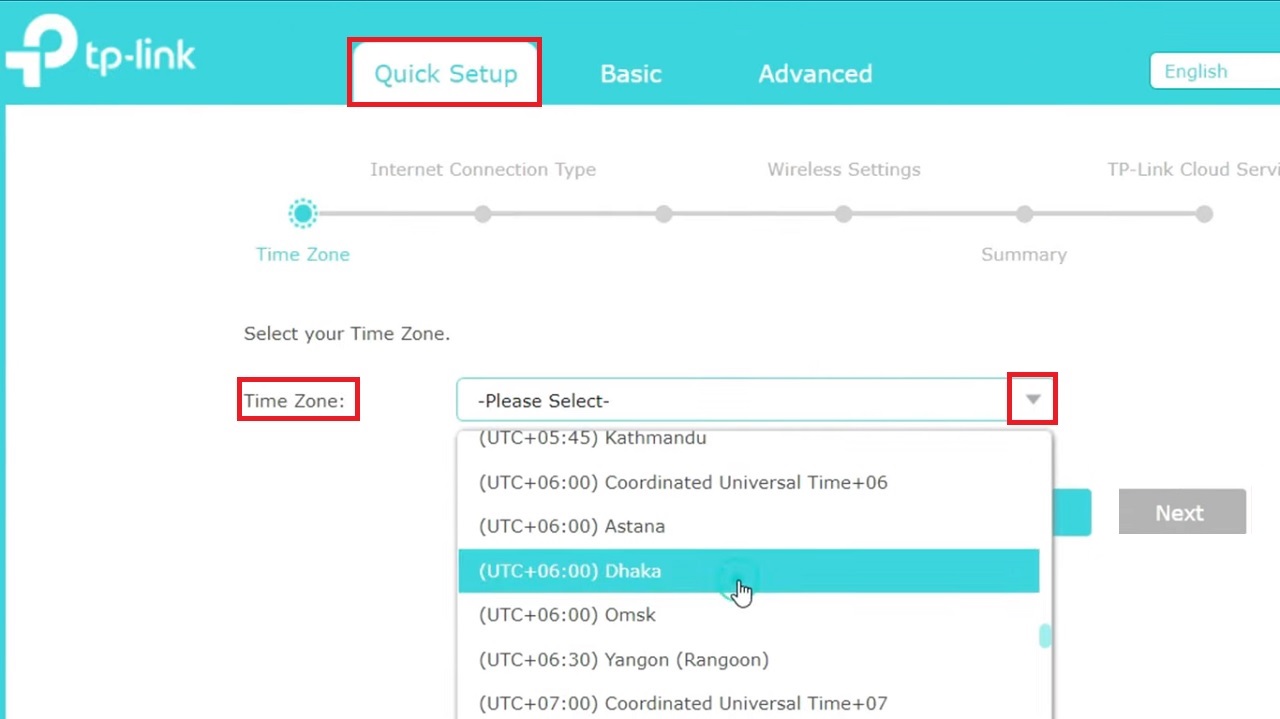
- Then click the Next button to continue.
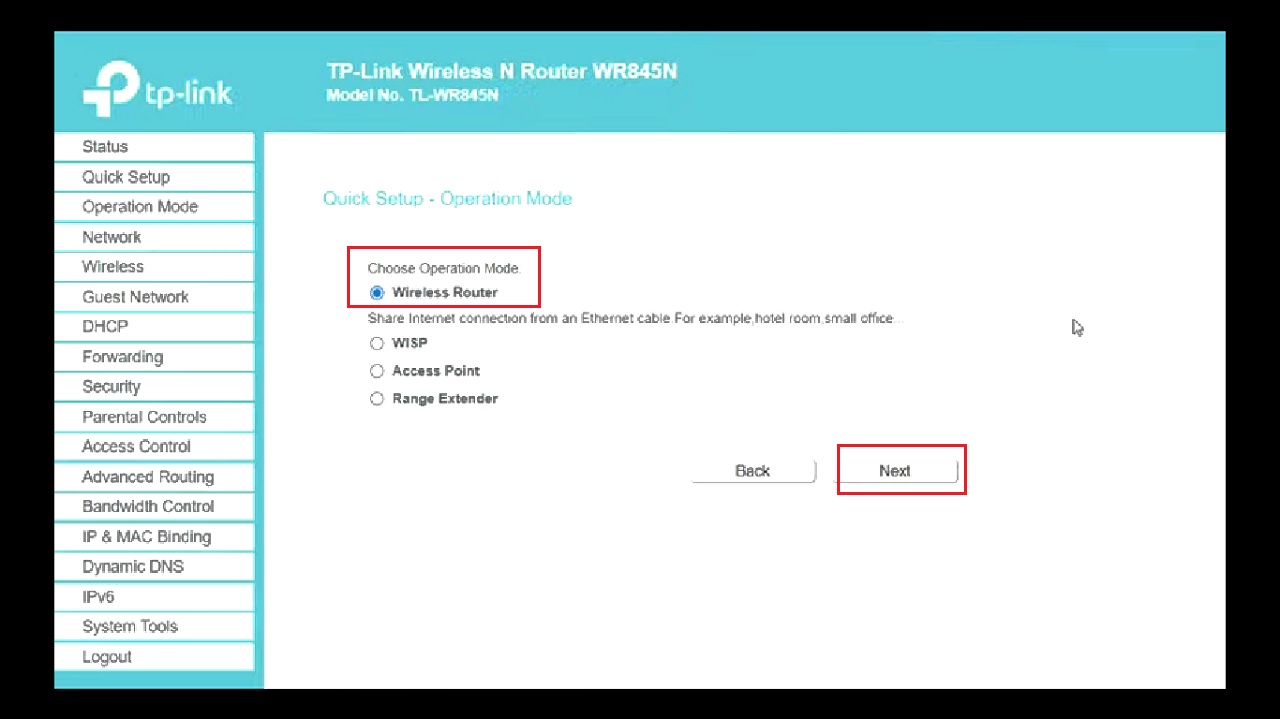
- Choose Operation Mode as Wireless Router, if and when it appears.
- Then click on the Next button to continue.
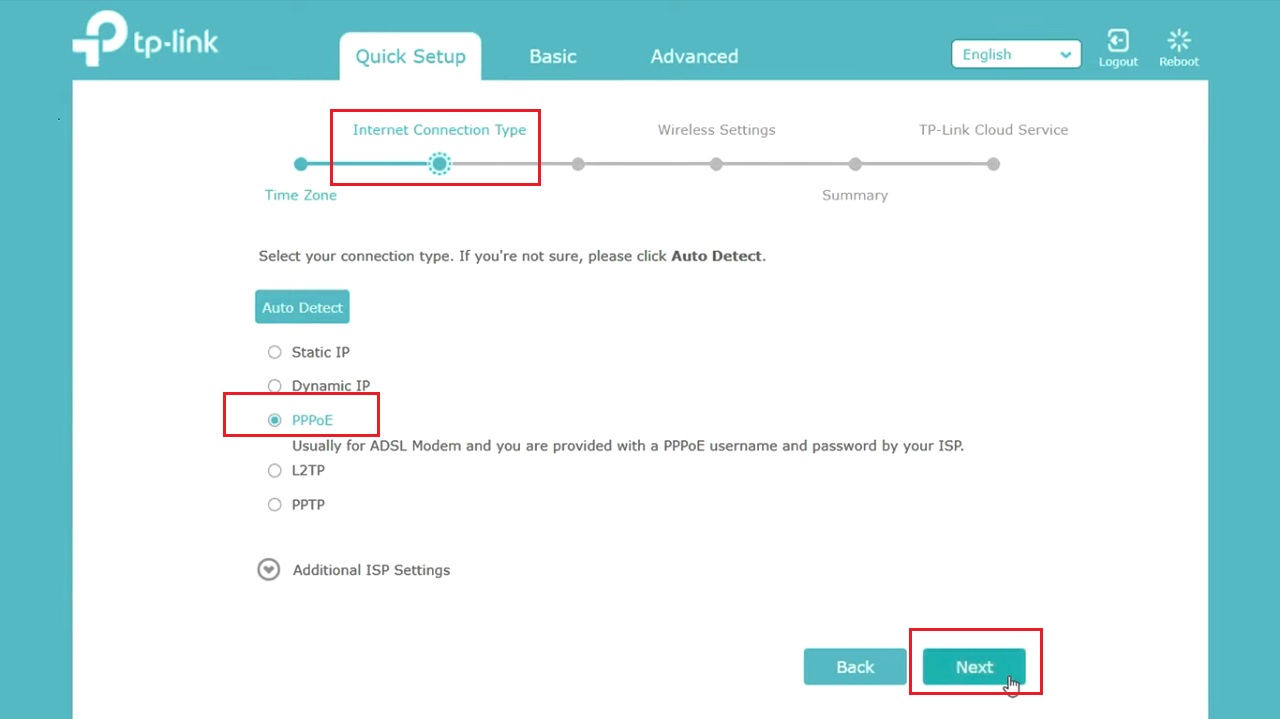
- Select the Internet Connection Type from the list in the next window. It is best to choose Dynamic IP, but for demonstration purposes, PPPoE is selected here.
(You can ask your Internet Service Provider about your internet connection and the mandatory details).
- Then click the Next button to continue.
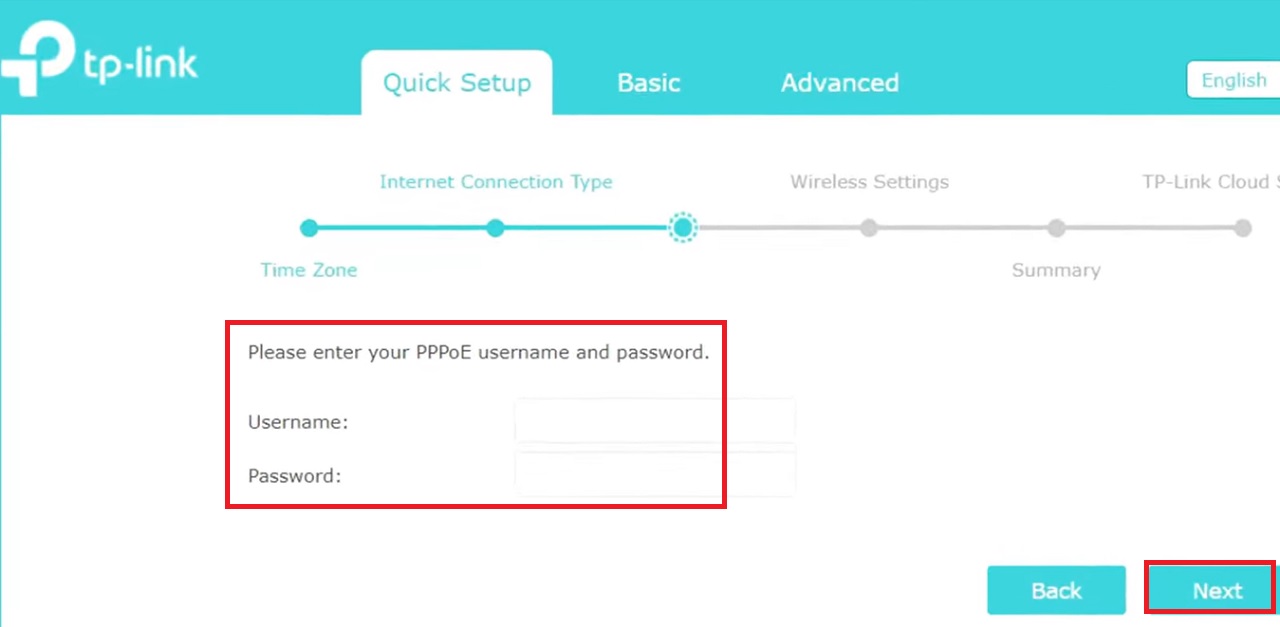
- Enter your PPPoE Username and Password and confirm the password provided by your Internet Service Provider.
- Click the Next button to continue.
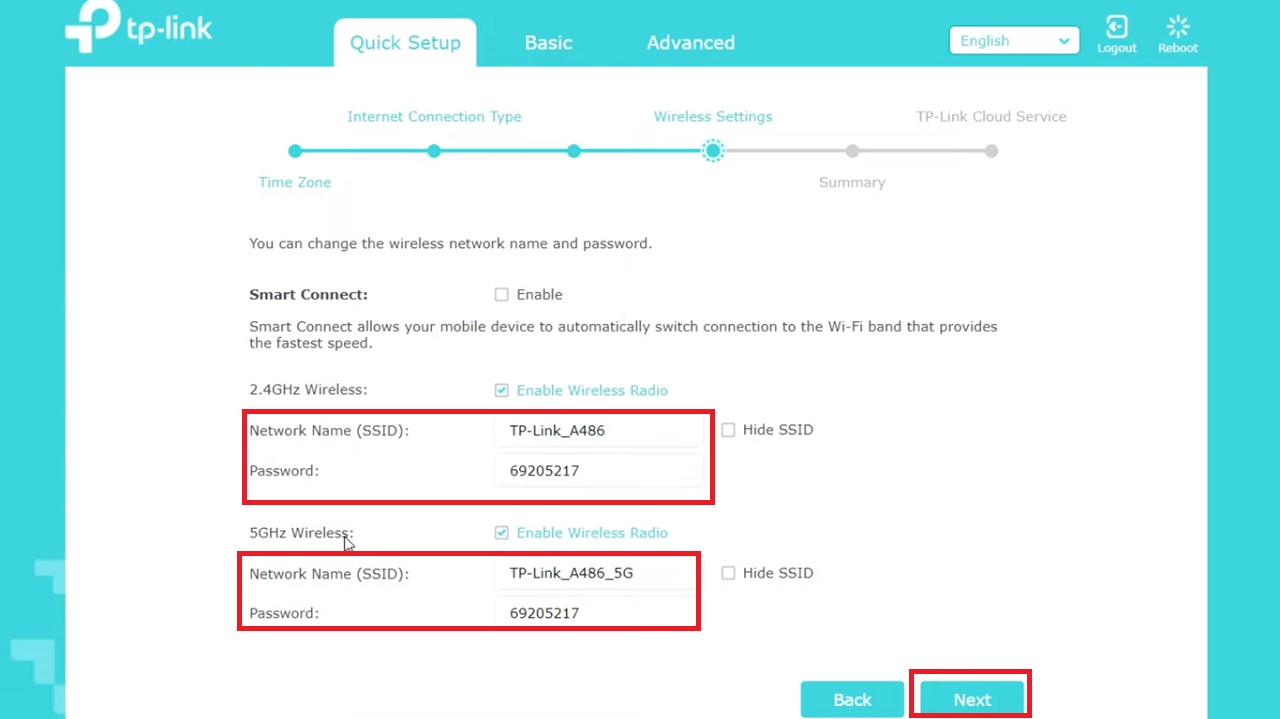
- Confirm or change the Network Name (SSID) and the password in the relevant fields, for both 2.4 GHz and 5 GHz bands, if you are using a dual-band TP-Link router.
- Click on the Next button to continue.
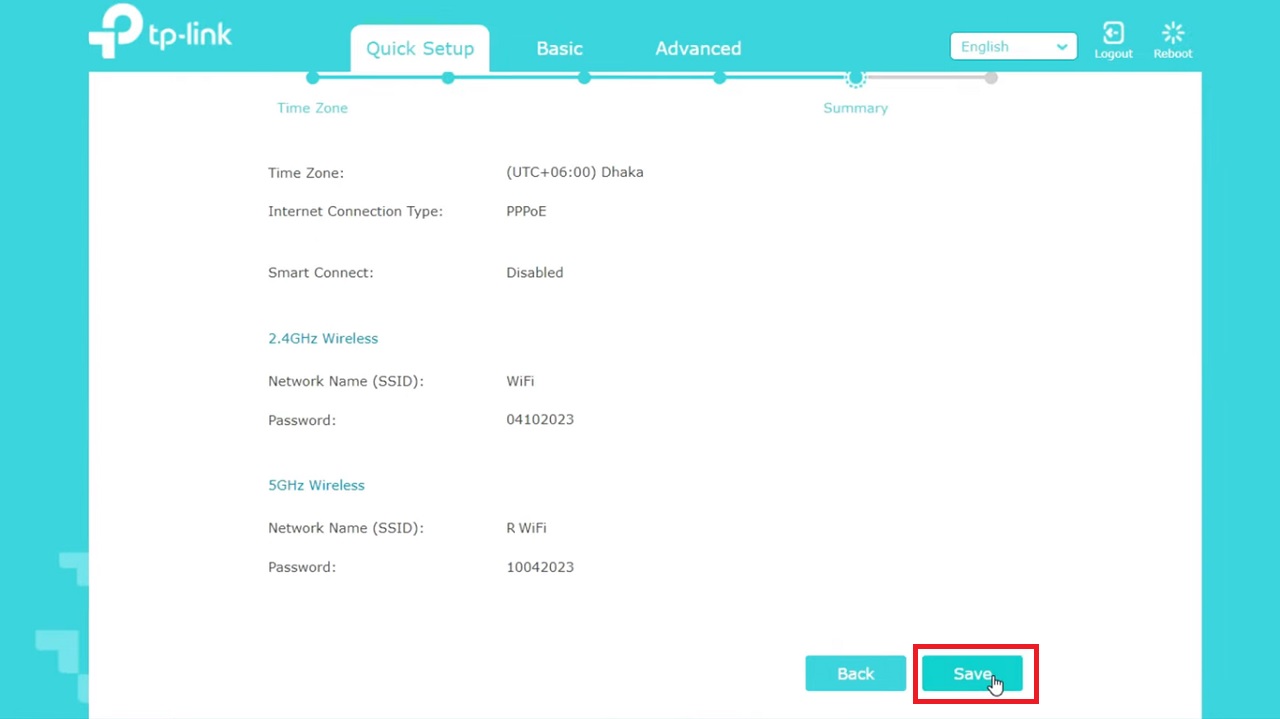
- Finally confirm all the parameters set.
- Click Back if you want to change any settings or on the Save button to save and apply the changes.
The TP-Link router setup is complete. You may restart the system and after it restarts, check whether the issue is resolved or not.
If none of the above methods can resolve your issue then there might be some other severe problems elsewhere.
You are advised to seek the professional assistance of a qualified technician in that case.
Conclusion
In conclusion, fixing the issues with the Wi-Fi router port is easy and will improve the performance of your network significantly.
Make sure you follow one or a combination of the troubleshooting steps, if necessary, outlined in this guide, to identify the root cause of Wi-Fi port malfunction and resolve the issue.