
Self-Monitoring Analysis and Reporting Technology or SMART hard disk error 301 is something users do not expect to encounter.
However, at times you may experience this unique error when you turn your PC on, which indicates the failure of the Hard Disk Drive or the Solid-State Drive installed on your PC.
There are some fixes to this specific issue before you go for the inevitable – replacing your hard drive. Continue reading this article to learn all about those solutions.
In This Article
KEY TAKEAWAYS
- SMART hard disk error 301 can occur due to physical damage, hardware or software issues. It can be averted with proper maintenance and cooling.
- Performing a hard boot on your system is one quick and easy way to fix the SMART hard disk error 301.
- You can also fix this particular issue by running the Check Disk command in the Command Prompt to detect and fix any errors in it.
- Repairing your PC from the boot menu using the Command Prompt is also another way to rectify this problem.
- Changing the boot priority order often can help in fixing the problem and help your PC to function normally again.
What are the Reasons for a SMART Hard Disk Error 301 in Windows?
Hard disk error 301 usually occurs when there is a severe corruption in the drive, HDD or SSD, or the device encounters physical damage.
In addition, there are some other significant reasons for this error to happen. These are:
- Failed SMART hard disk check
- Broken IDE or SATA controller chip on your motherboard
- Malware or virus attack on the drive
- Outdated or improperly configured BIOS
- Sudden shutdown of the PC
- Issues or errors in the directory
- Insufficient cooling
- The boot order priority may need to be changed
Typically, the SMART hard disk error 301 indicates your hard drive is pretty bad and almost unusable.
How to Fix SMART Hard Disk Error 301?
In most cases, you will need to replace your hard drive with a new one if you get the SMART hard disk error 301.
However, in some instances you can resolve the issue by simply restarting your PC, by performing a hard boot, or by running the CHKDSK command in the Command prompt.
Sometimes, if the ventilation and airflow is insufficient in your system, the hard drive will overheat and cause this issue. To resolve it, make sure the vents are clean and the coolants are working properly.
Also, clean all other internal parts of your PC regularly. This will prevent heat being absorbed by the dust and dirt accumulated in it. It will raise the temperature of the hard drive and cause such issues.
As for the advanced solutions for SMART hard disk error 301, you can try changing the boot priority order from the BIOS settings.
Apart from that, you may also check the hard disk drive for existing errors from its Properties as well as from BIOS and repair your computer from the boot menu by using the Command Prompt.
Method 1: Perform a Hard Reboot
Rebooting the system resolves a lot of issues and helps in dealing with bugs and errors. Therefore, in this case performing a hard reboot should be your first quick and easy solution to try and fix the SMART hard disk error 301.
STEPS TO FOLLOW:
- Shut down your computer system.
- Disconnect the power cord.
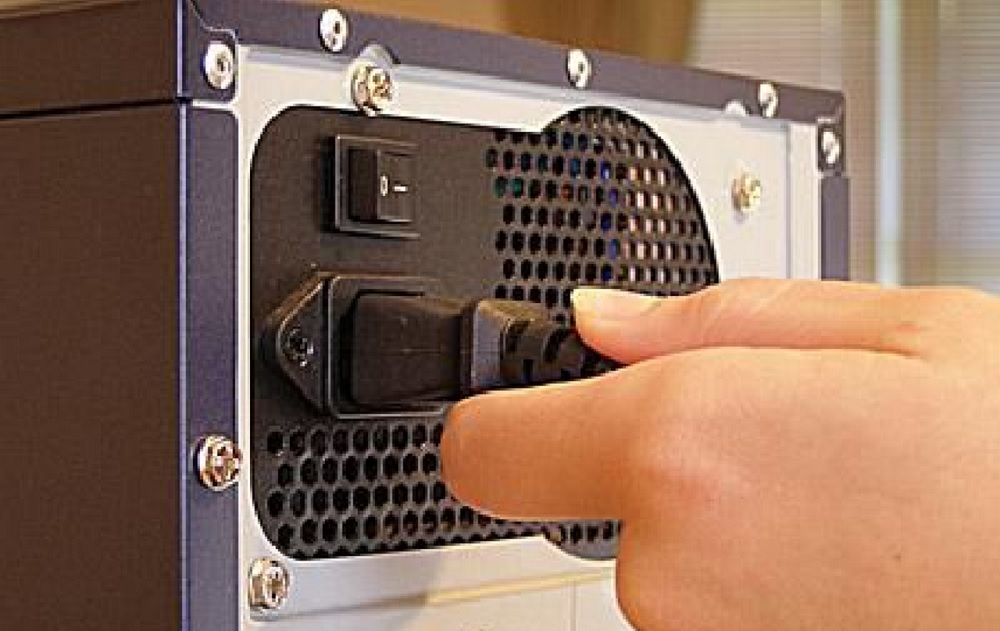
- Now, press and hold the power button for 15 to 20 seconds.
- Repeat this process once more after some time.
- Connect the power plug.
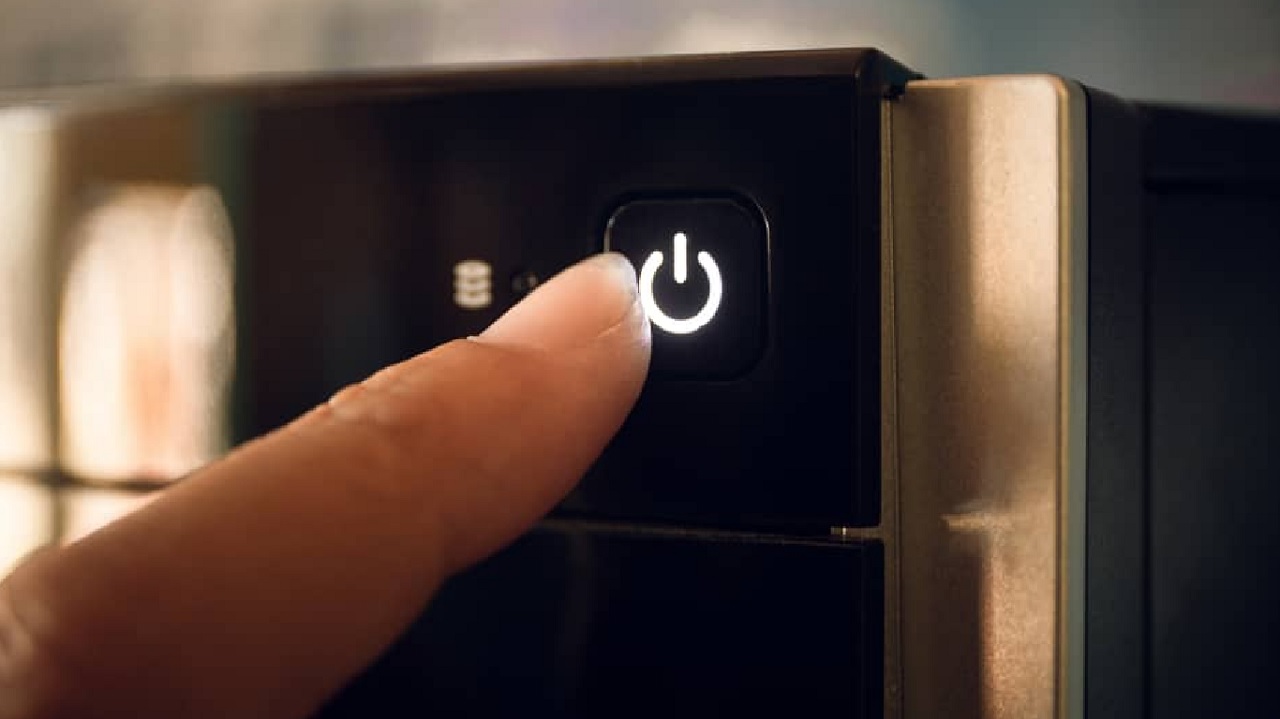
- Turn on your system.
Method 2: Run the Check Disk command in the Command Prompt
If the above method failed to restore normalcy, you should try fixing the issue by running the Check Disk command in the Command Prompt.
This will help in resolving any issues in the directory that is causing such error. It may also remove the bad sectors on the drive causing the same issue.
STEPS TO FOLLOW:
- Press the Windows and R keys together on your keyboard. This will open the Run box.
- Type cmd and press Enter.
- In the Command Prompt window, type in the command chkdsk C: /f/r/x and hit the Enter key.
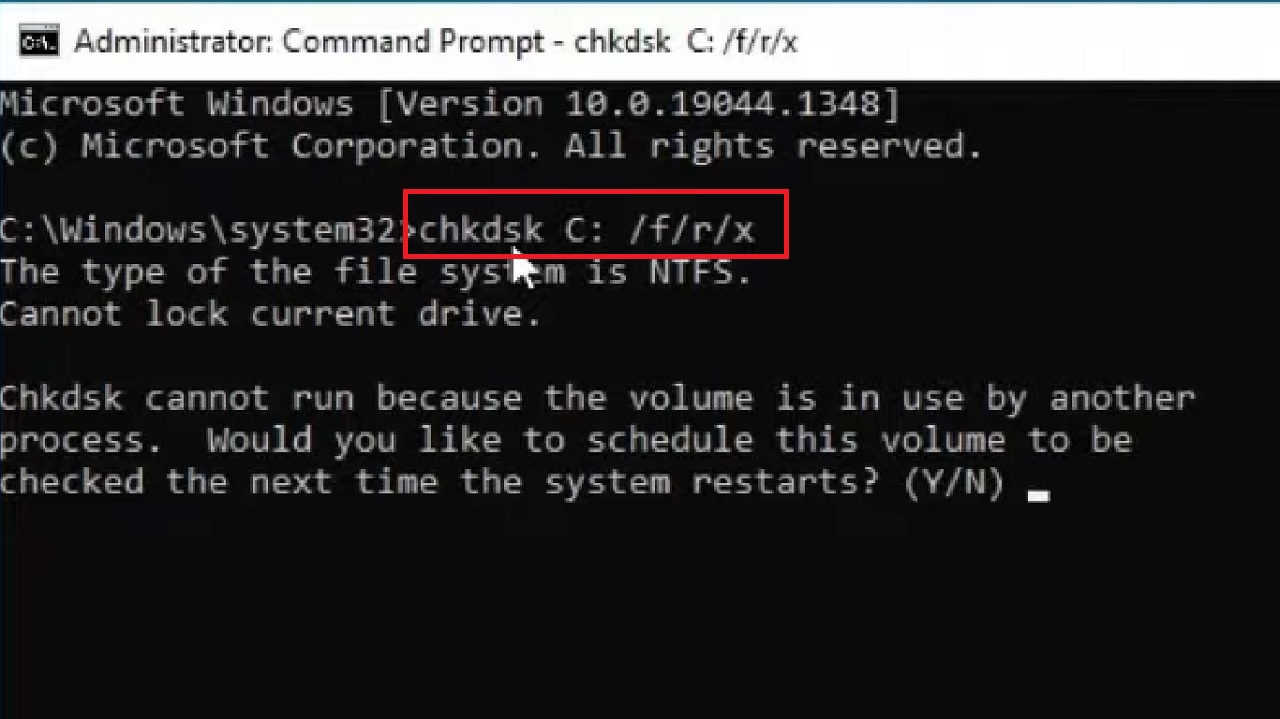
Once the command is executed fully, type exit to close the Command Prompt. Now restart your computer and check whether the issue is resolved or not.
Method 3: Change the Boot Priority Order from BIOS
Changing the order of booting can also resolve the SMART hard disk error 301. You can do it from BIOS or the Basic Input Output System settings.
STEPS TO FOLLOW:
- Shut down your PC.
- Turn it on again but keep pressing the BIOS key.
(Usually, the F1, F2, F10, F12, Del, or Esc keys are the common BIOS keys. It can be different for different PC models. Refer to the manual to know the specific key).
It will open the BIOS screen.
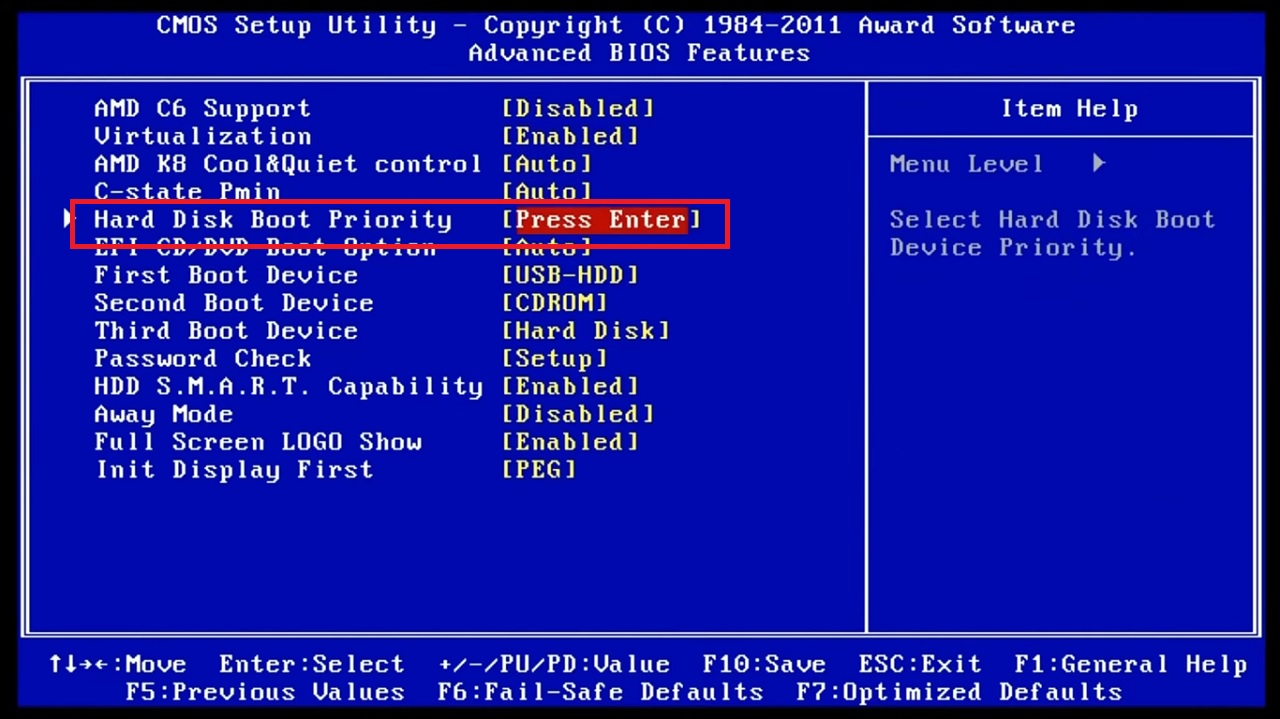
- Use the Left/right arrow keys on your keyboard to go to the Advanced BIOS Feature tab.
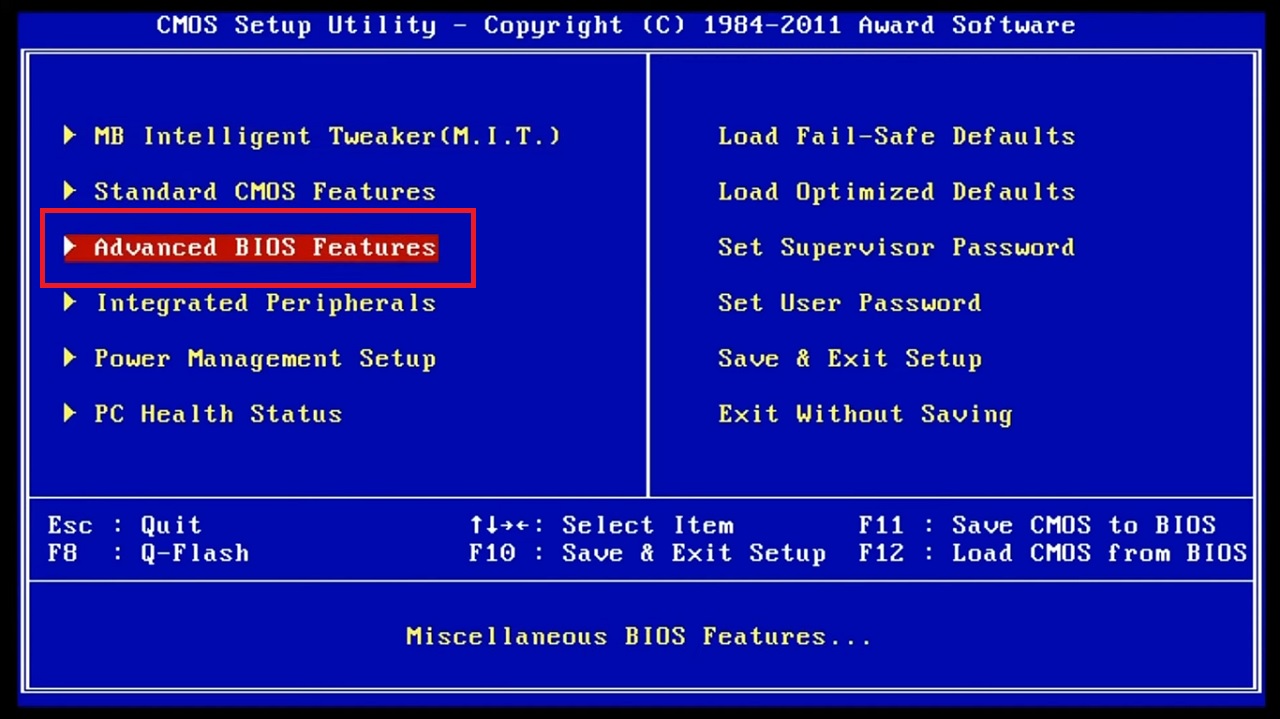
- Now, use the Up/down arrow keys to select the boot device. (First Boot Device [USB-HDD] in this case).
![First Boot Device [USB-HDD]](https://ecomputertips.com/wp-content/uploads/2023/07/word-image-40797-5.jpeg)
- Select the Hard Disk Boot Priority tab.
- Press Enter.
- Select the specific drive from the next window. (Samsung SSD 860 EVO25, for example).
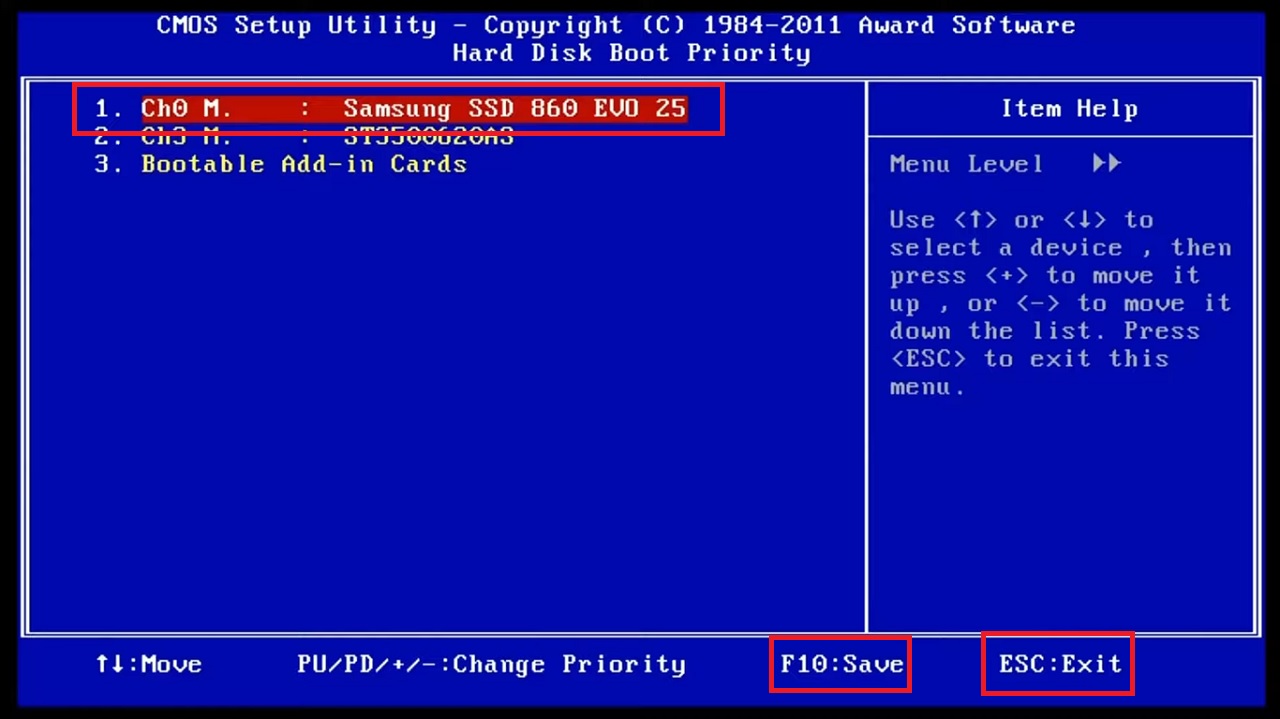
- Press the F10 key to Save the changes.
- Press the ESC key to exit BIOS.
The issue should be resolved now.
Method 4: Repair Your PC from Boot Menu Using the Command Prompt
You can also use the boot menu to run a command and repair your computer, which may fix the problem in the process.
STEPS TO FOLLOW:
- Go to the Boot menu of your computer as before and choose the booting device.
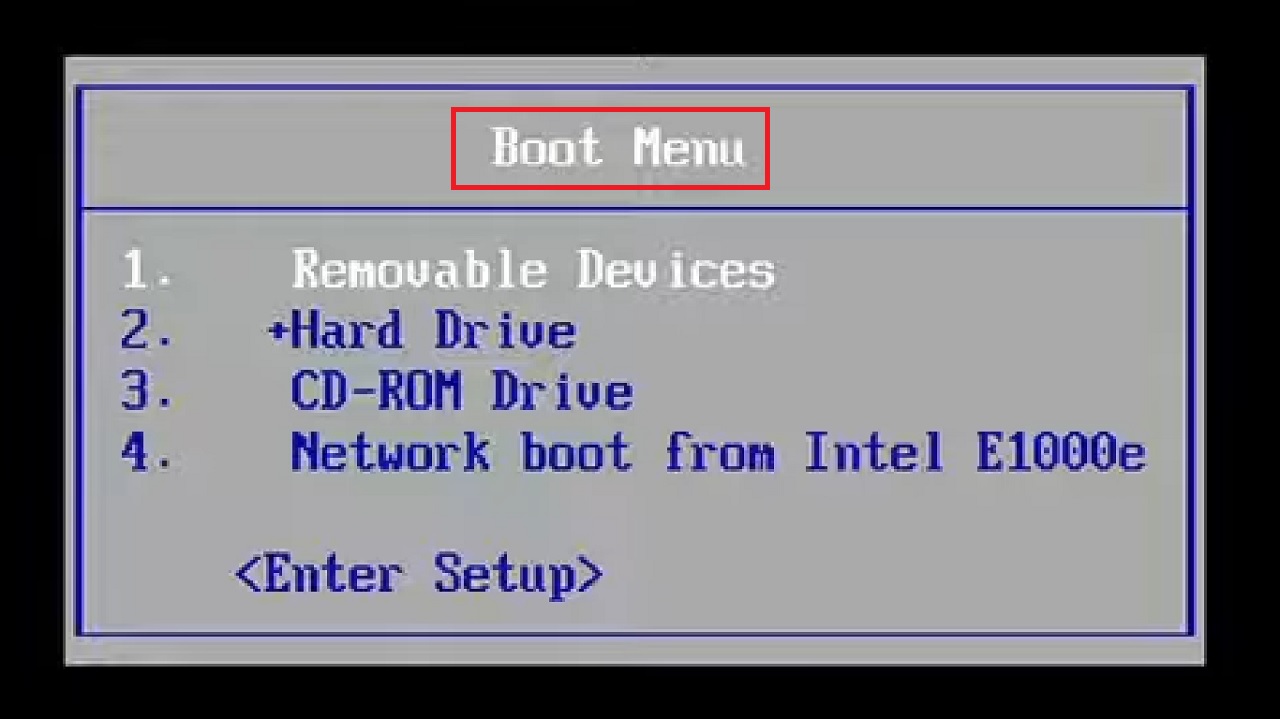
- Wait for the system to boot up and then select Next from the following window.
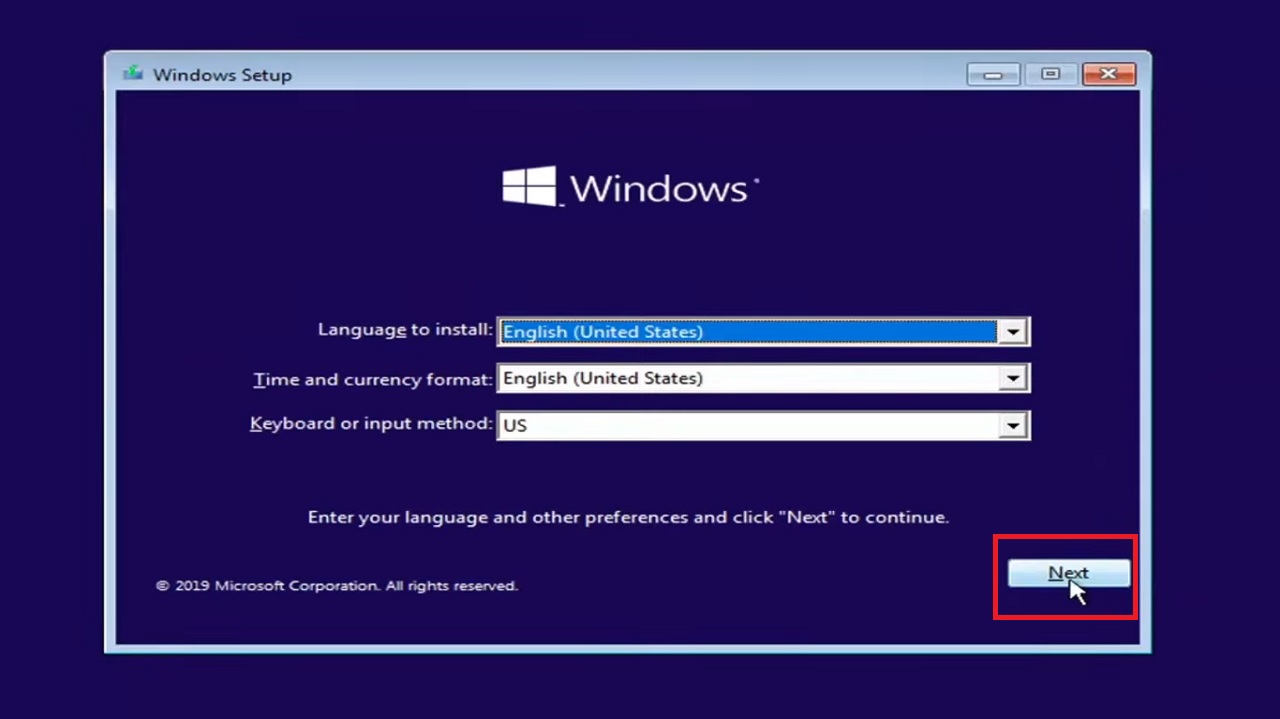
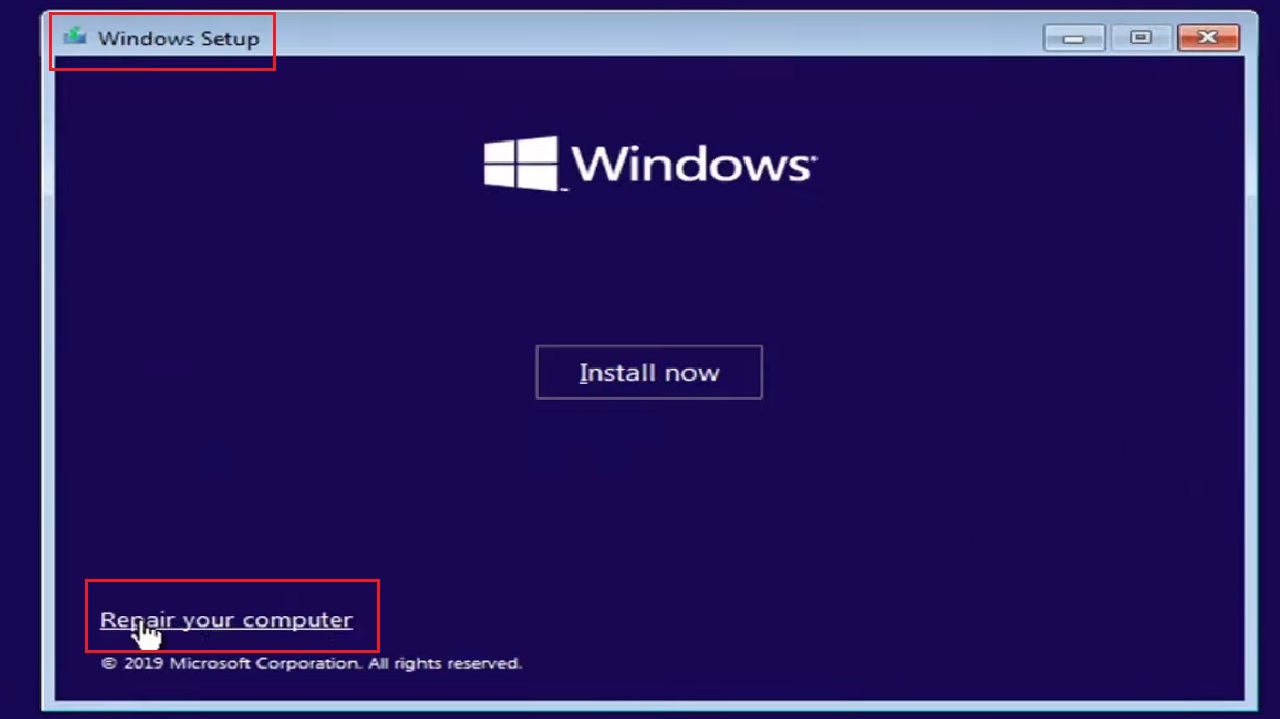
- Select Repair your computer at the bottom of the Windows setup screen.
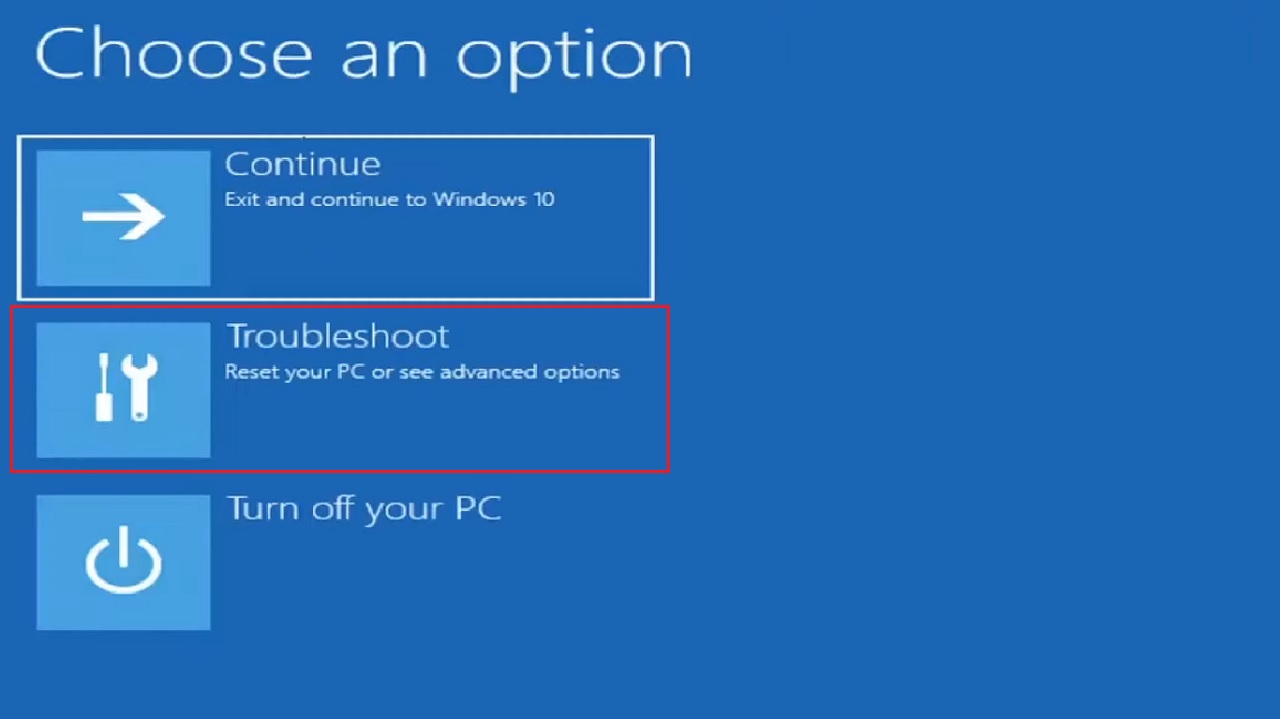
- Select Troubleshoot.
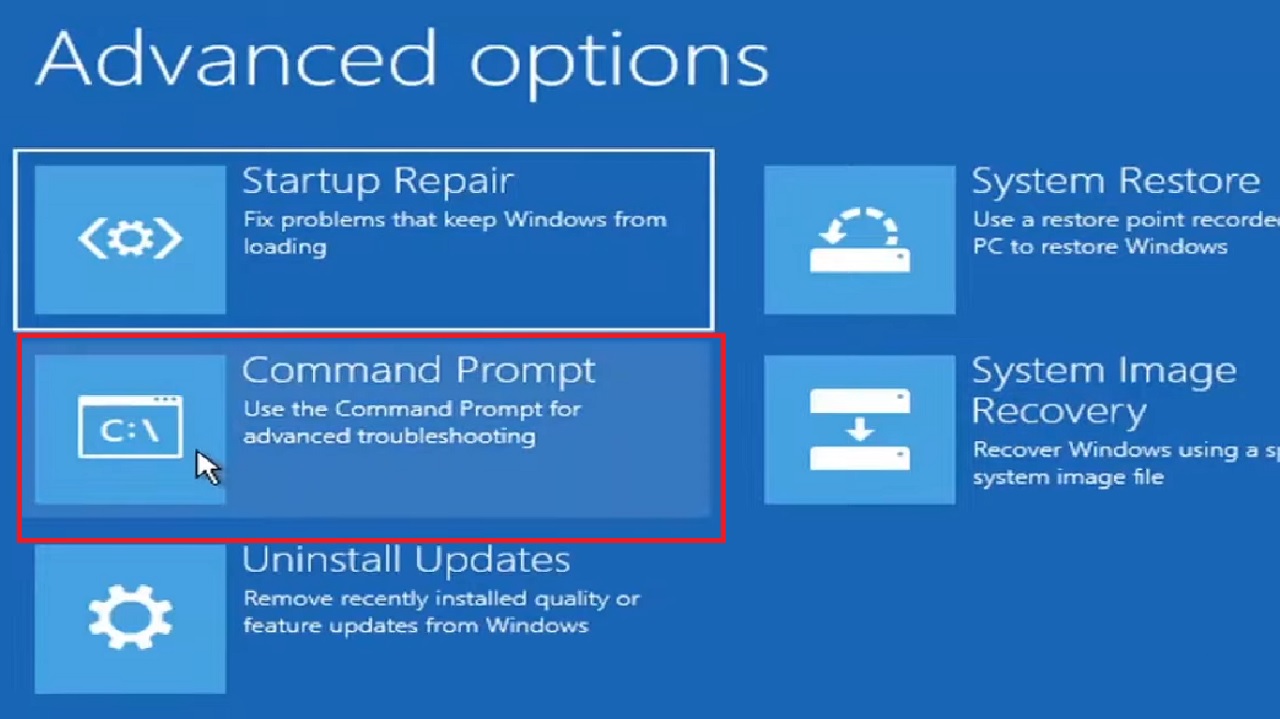
- Select Command Prompt.
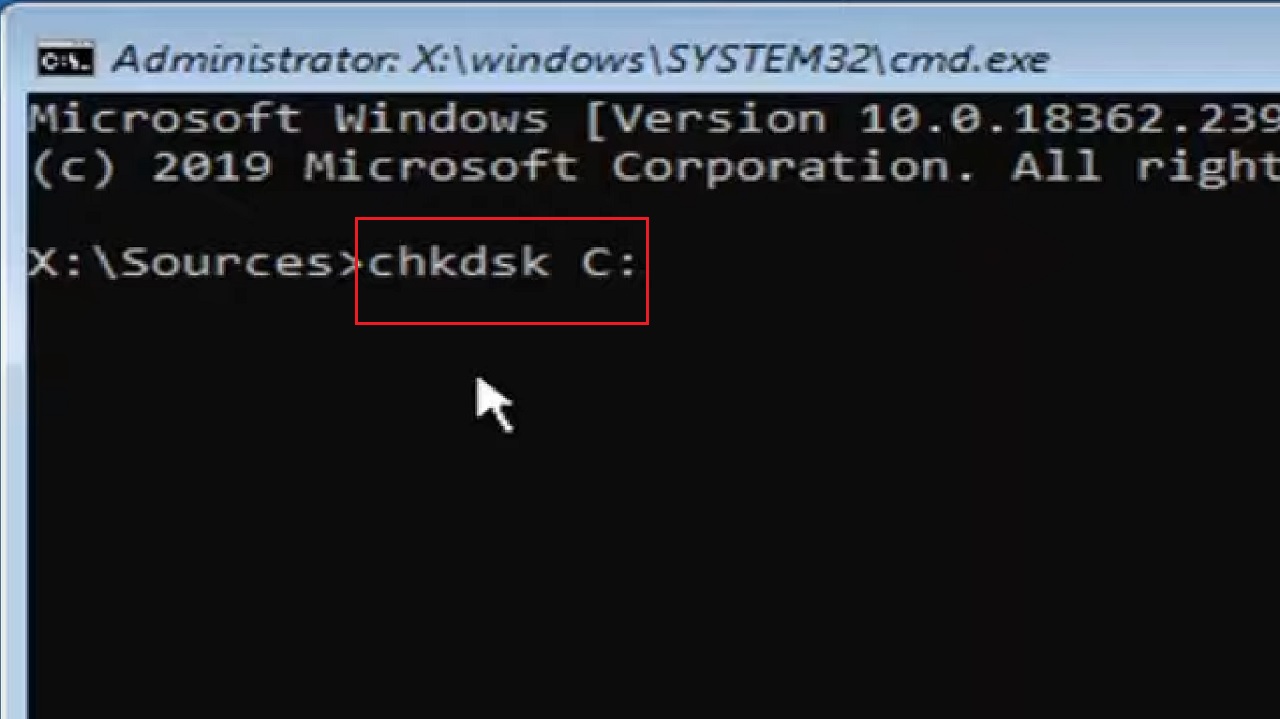
- Type in chkdsk C: (Usually, it is the C drive that has the Windows operating system. Yours may be different. So, replace the drive letter accordingly).
- Hit the Enter key on your keyboard.
- Let the process be complete, and then type C: and hit Enter.
- Then type in sfc /scannow and hit Enter.
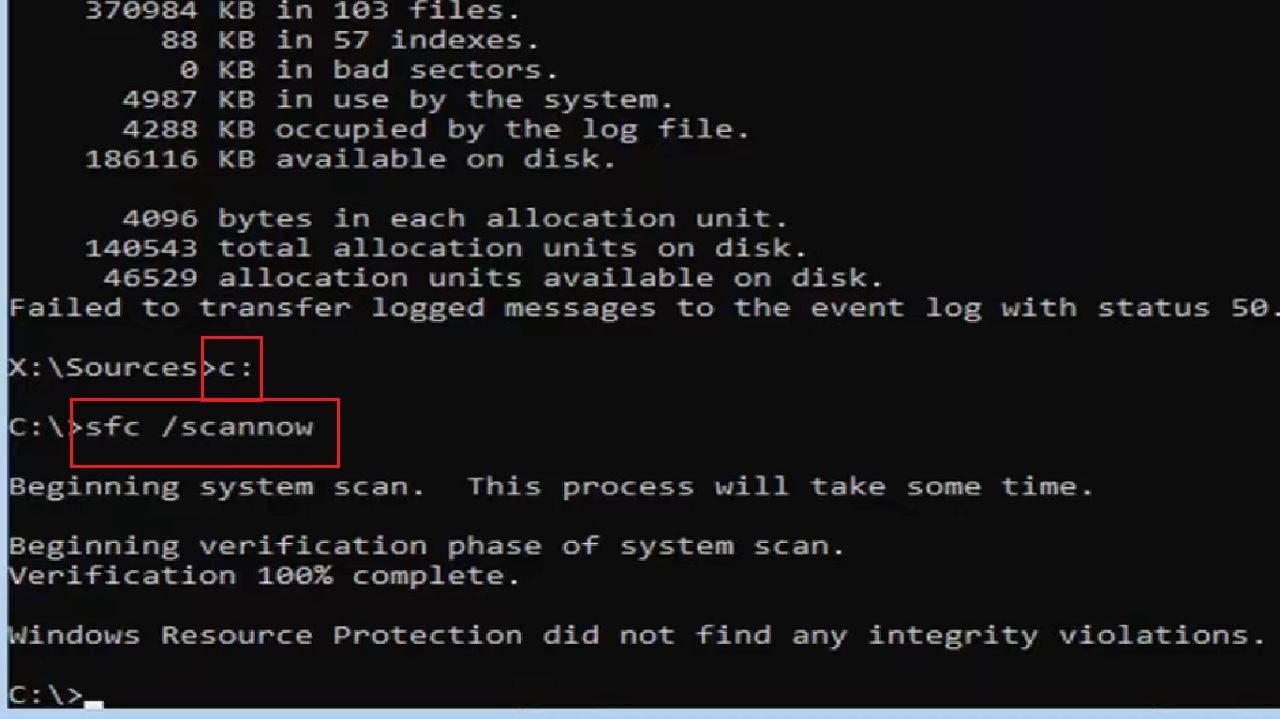
This will start the system scan and take some time.
- Type exit and hit Enter to close the Command Prompt.
- Click on Continue to start using Windows.
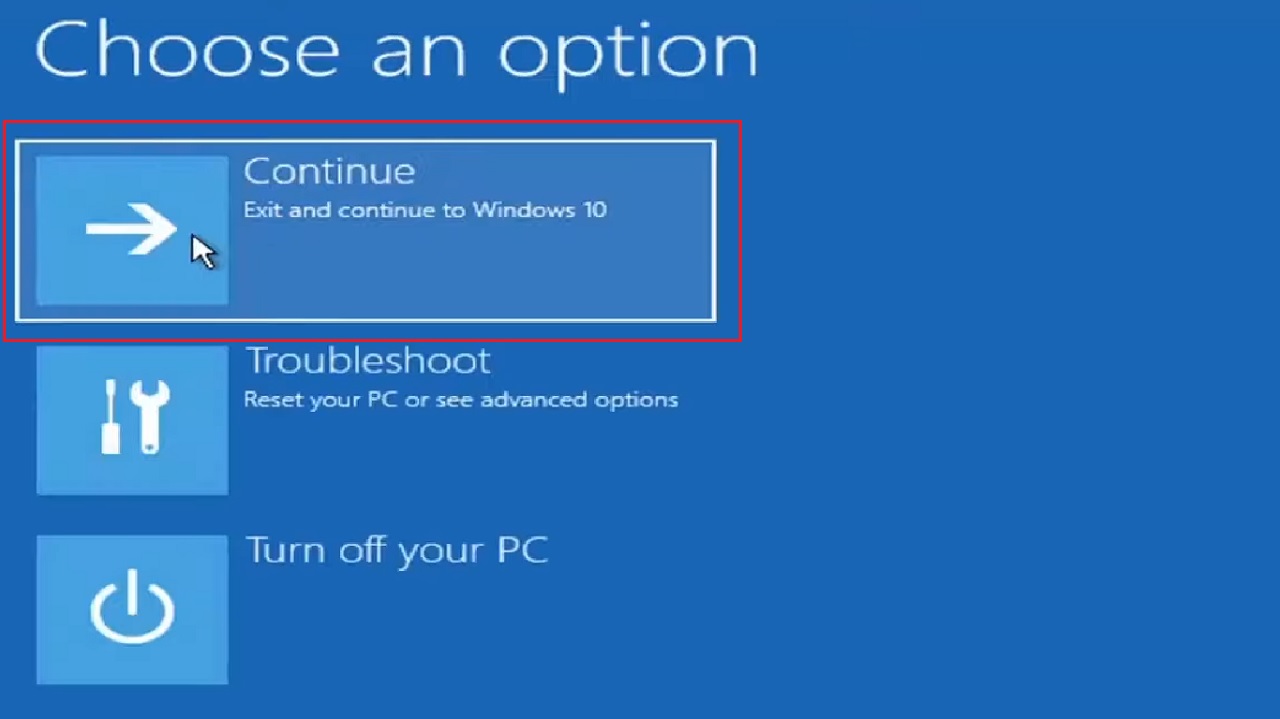
This will resolve the SMART hard disk error 301.
Method 5: Check the Hard Disk and Fix Errors
And finally, like in most issues, you can check the hard disk for any existing errors that may be causing this issue and fix them to rectify the SMART hard disk error 301.
STEPS TO FOLLOW:
- Go to This PC.
- Select the affected hard drive. (Once again, it is usually Drive C).
- Right-click on it.
- Select Properties from the drop-down options to continue.
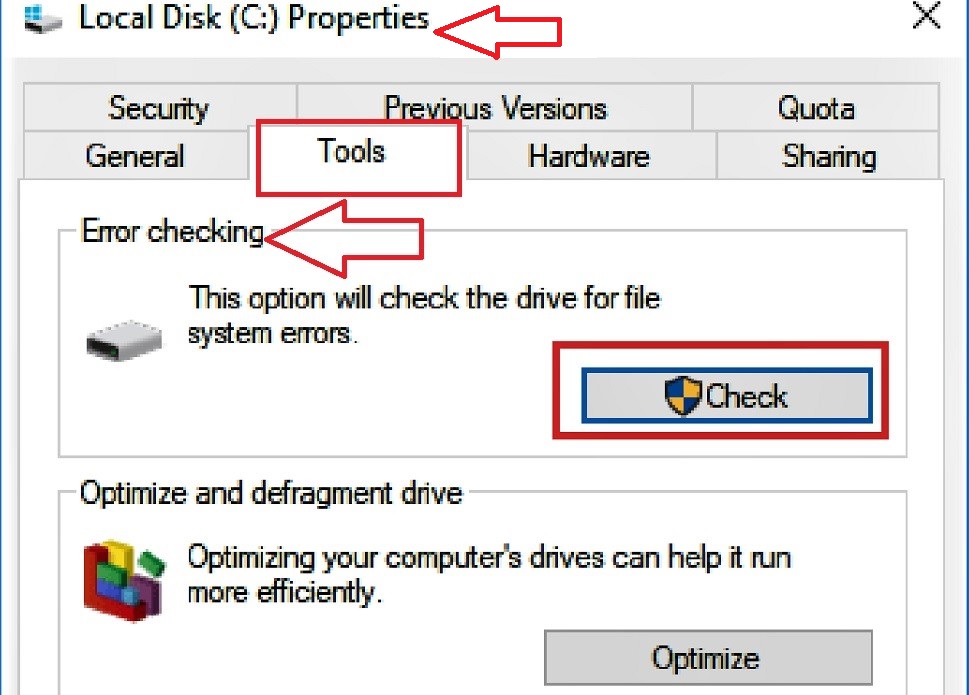
- Go to the Tools tab in the Local Disk (C:) Properties window.
- Click on the Check button under the Error checking section.
After the process is complete, if the hard drive has any errors, the system will ask you to check the disk.
On the other hand, if there are no errors found, you will see the following Error Checking (Local Disk (C:)) window saying that You don’t need to scan this drive:
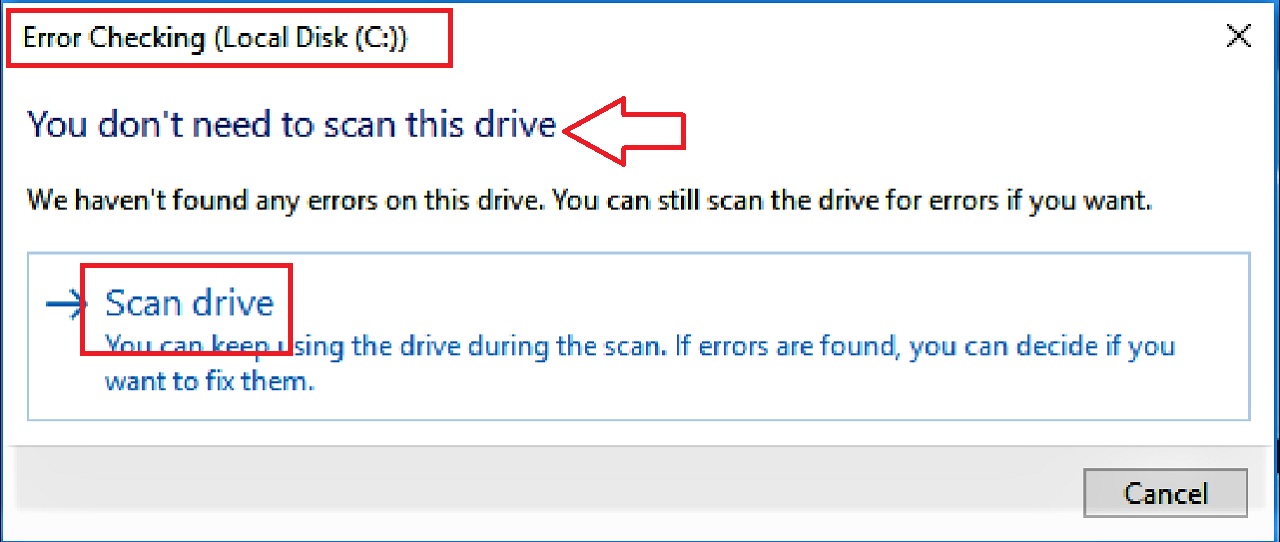
However, there is no harm if you still scan the hard drive. In that case, click on the Scan drive option, shown in the above image.
It will take some time and when this scanning process is complete, you will need to reboot the computer system in order to fix the errors in it, if any. If there aren’t any errors, you can close the window.
Finally, restart your computer. After it restarts go to the File Explorer to find out whether or not the SMART hard disk error 301 has been resolved.
Alternatively, besides the Windows utility, you can also check the hard drive from the BIOS and fix the error.
- Go to BIOS.
- Use the arrow keys on your keyboard to go to the ‘Diagnostics’ tab. The layout may differ depending on your system and its configuration.
- Select the ‘Primary Hard Drive Self Test’ option.
- Press Enter.
This will start checking the hard disk for errors. If there are any errors found, it will fix them as well. This will eventually fix the SMART hard disk error 301.
Conclusion
The hard drive in your PC is its heart and if it fails it will affect the entire workflow.
The SMART hard drive error 301 will let you know that the drive is not working properly.
But you do not have to worry because now you know the way to resolve the issue effectively.