
If you’ve ever experienced the frustrating problem of your PC not shutting down due to the Task Host window, you’re not alone. This issue can be caused by a variety of factors, including failed updates, unsaved data, and conflicting third-party services.
Fortunately, there are several ways to fix the issue and get your computer to shut down properly. In this article, we’ll explore the various reasons why the Task Host window may be preventing your PC from shutting down and provide step-by-step instructions for fixing the problem.
Whether you’re a beginner or an experienced user, you’ll find helpful tips and tricks to overcome this annoying hurdle.
KEY TAKEAWAYS
- The first thing that you need to check is that no app, program, or installation with unsaved data are running in the background.
- Sometimes, uninstalling any recent updates made to Windows and reinstalling them may also fix the issue related to the Task Host window.
- Completing all pending, and even the failed updates, manually or otherwise, is also a way to fix the issue and help the PC shutdown.
In This Article
Why the Task Host Window Prevents Shutdown?
One of the most common reasons for the Task Host window to prevent shutting down your PC is some sort of problem with the automatic update feature of Windows. Any corrupted, failed or pending updates may also result in such an issue.
Well, there are also a few other primary reasons for your computer failing to shut down due to the Task Host window. These are:
- There may be some critical program, app, or any other editing software such as Notepad running in the background and creating this issue.
- You may be installing a program and there may be some data unsaved that is stopping the system from shutting down.
- A few specific system settings, such as the Fast Startup, power management and others may also contribute to the issue.
- If you have any third-party services that may be conflicting with Microsoft update, it may also create the problem.
- Sometimes, such an issue may also be caused by an activated third-party antivirus software program.
How to Fix Task Host Window Preventing Shutdown?
One common way to resolve the Task Host window preventing shutdown issues is to disable the Fast Startup feature. You may also try making changes in the Registry to solve this problem.
Apart from that, updating Windows, cleaning viruses and malware, removing all third-party services that may be conflicting with Microsoft updates, and a lot more methods can be followed to put things back on the right track.
Method 1: Change the Value Data of Start
The Task Host window may interfere with the background tasks and prevent the PC from shutting down. In such a situation, changing the Value Data will resolve the issue.
STEPS TO FIX:
- Go to the Search box.
- Type Run in the box.
(Alternatively, you can Press the Windows and R keys together).

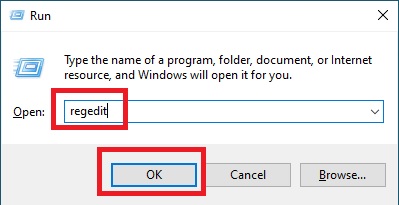
- Type in regedit in the box.
- Press Enter or click on the OK button.
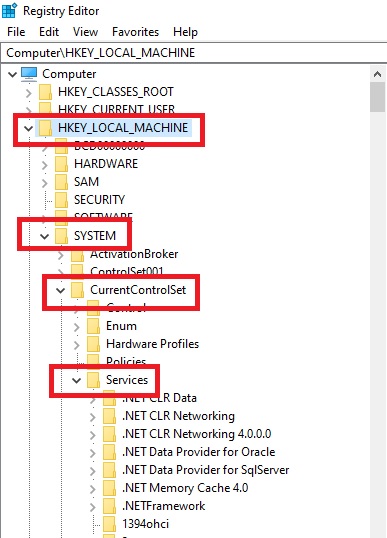
- Go to HKEY_LOCAL_MACHINE folder and click on the arrow next to it.
- Go to the SYSTEM folder and click on the arrow next to it.
- Do the same for CurrentControlSet and Services folders.
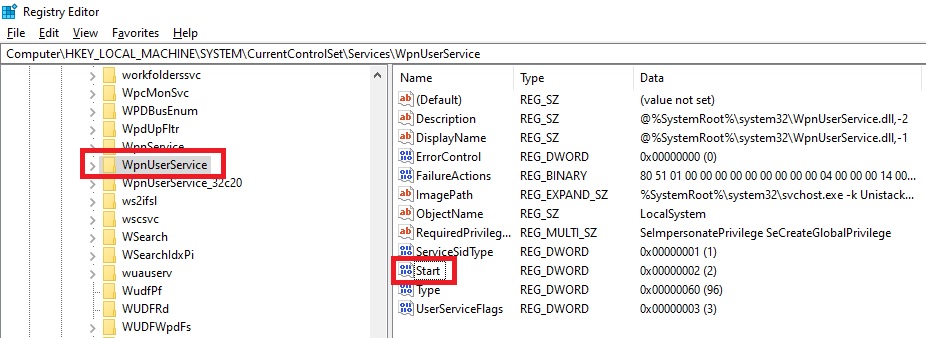
- Now, select WpnUserService and click on it. (You may write wpn on your keyboard to jump to it).
- Double-click on Start in the window on the right side.
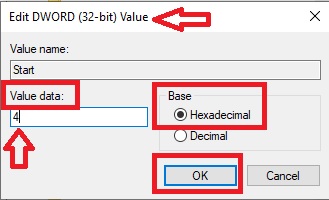
- When the Edit DWORD (32-bit) Value window opens, see that the circle next to Hexadecimal Base is checked, and set the value to 4 in the Value data box.
- Finally, click on the OK button and close the window.
Now, restart the PC.
Method 2: Disable Fast Startup and Change Value Data of Service Timeout
Sometimes, there may be some issues in the system control that may interfere with the service timeout function, especially when you are working on an Excel file and give a shutdown command to the operating system.
In such a situation, making changes in this specific control of the system after disabling the fast startup feature will also resolve the issue.
STEPS TO FIX:
- First, check the system for viruses and corrupted files by running an antivirus program and remove and repair them.
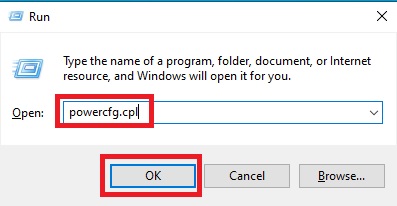
- Now, press the Windows and R key together to go to the Run box and type powercfg.cpl in it.
- Press Enter or click on the OK button.
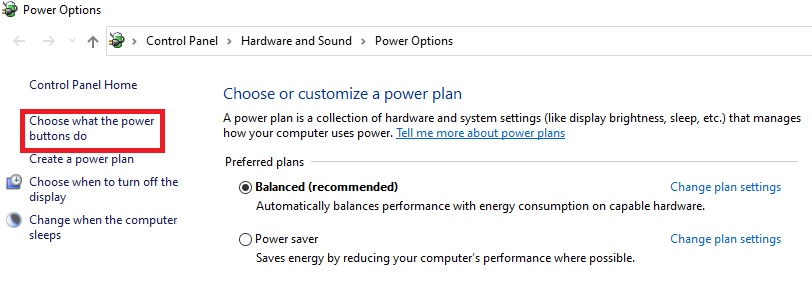
- Click on the ‘Choose what power button does’ option on the left side of the Power Options window.
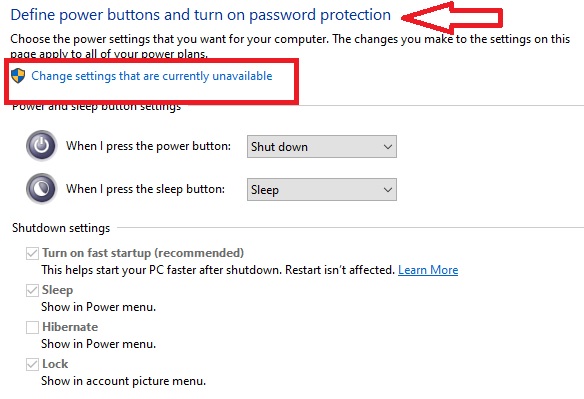
- Click on ‘Change settings that are currently unavailable’ under ‘Define power button and turn on password protection’.
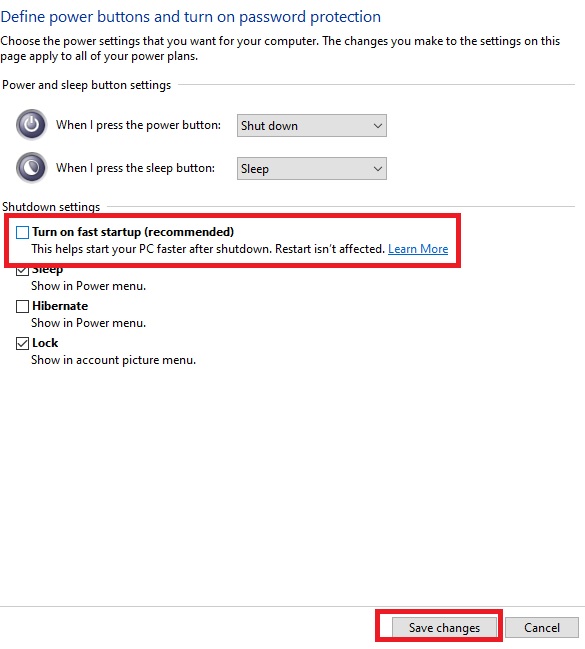
- Click on the square box next to ‘Turn on fast startup (recommended)’ to uncheck and disable it.
- Click on the ‘Save changes’ button.
- Now, go to HKEY_LOCAL_MACHINE, SYSTEM, and CurrentControlSet folder and click on the arrow next to it just like you did above.
- Now, click on the arrow next to the Control folder.
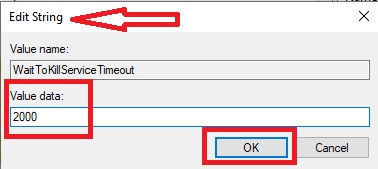
- Double-click on the WaitToKillServiceTimeout.
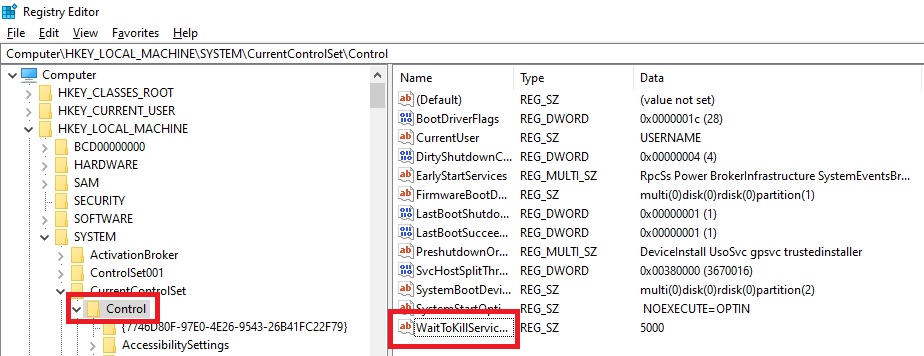
- In the Edit String window set the value to 2000 in the box under Value data.
- Click on the OK button.
- Now, go back to the main Registry Editor window and click on the arrow next to HKEY_CURRENT_USER folder.
- Click on the arrow next to the Control Panel folder and then the one beside the Desktop folder.
- Right-click on a blank space on the window on the right side and click on New.
- Select String Value from the drop-down window, to get a New Value # 1.
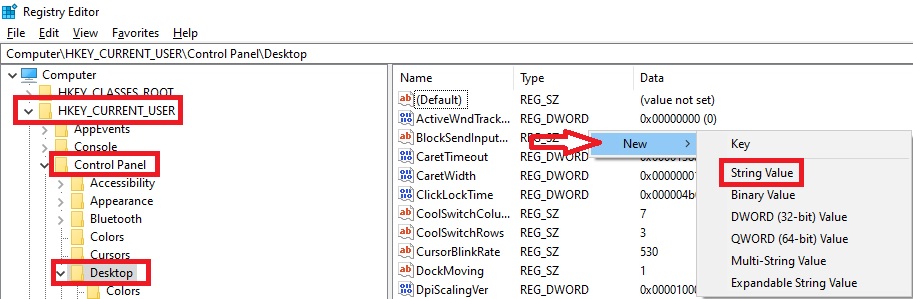
- Right-click on it and rename it as WaitToKillServiceTimeout.
- Double-click on it to open the Edit String window and change the Data value to 2000 once again like before.
- Close all the windows.
Now, restart your computer.
Method 3: Change the Sign-In Option
The sign-in options may also cause problems at times and prevent shutting down of the PC by the Task Host Window.
So, making small changes in it may resolve the issue easily as well.
STEPS TO FIX:
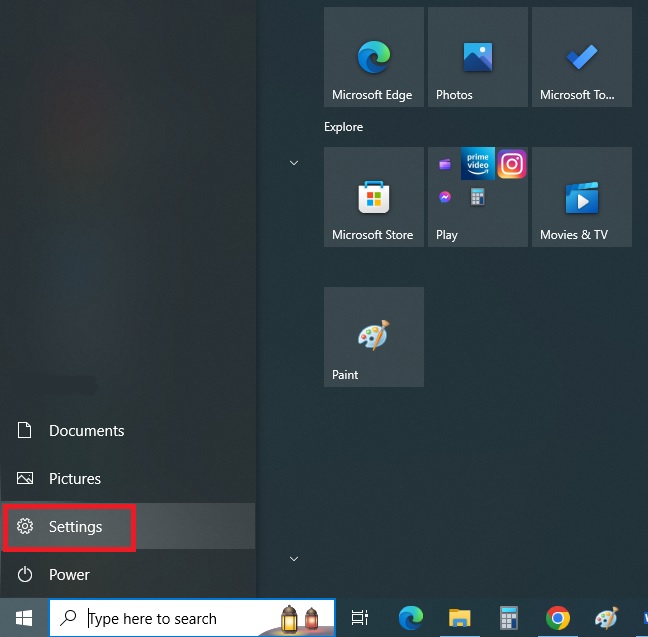
- Click on the Start menu.
- Select Settings or the gear icon from the window.
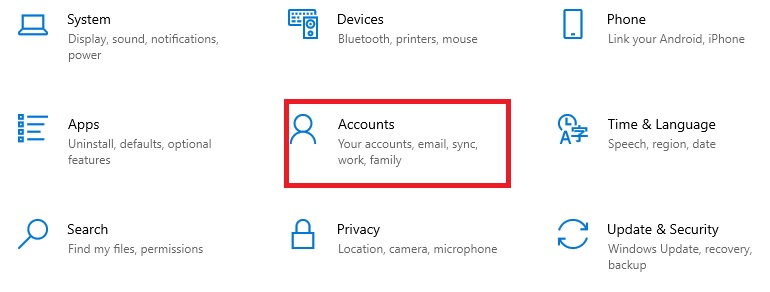
- Choose Accounts from the Settings window.
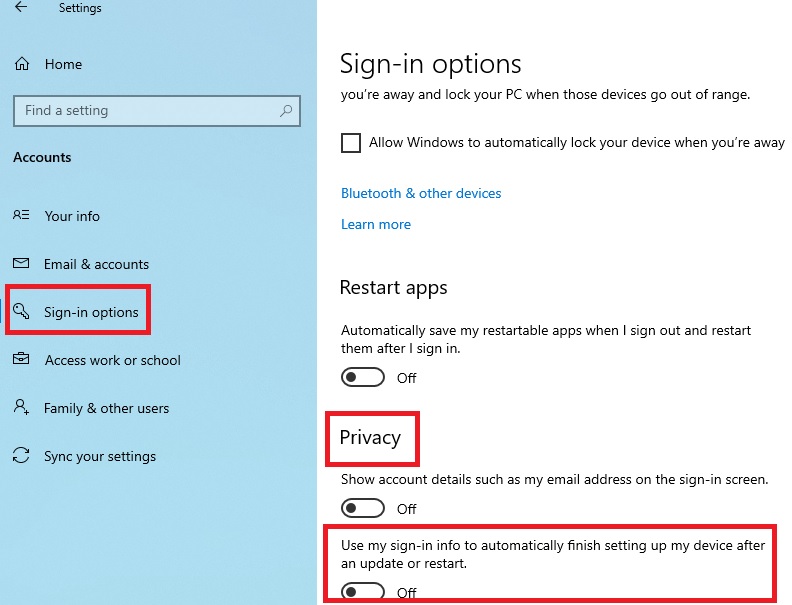
- Select Sign-in options from the left side of the new window.
- Scroll down to the Privacy section.
- Toggle the slide switch under ‘Use my sign-in info to automatically finish setting up my device and reopen my apps after an update or restart’ to Off.
Finally, close the windows and restart your system.
Method 4: Running Windows Update Troubleshooter
Even if the operating system is updated, there may be some internal issues in Windows that may prevent shutting down of the PC by the Task Host window.
Therefore, running the Windows update troubleshooter is a good way to resolve the issue.
STEPS TO FIX:
- Go to the Settings window as before.
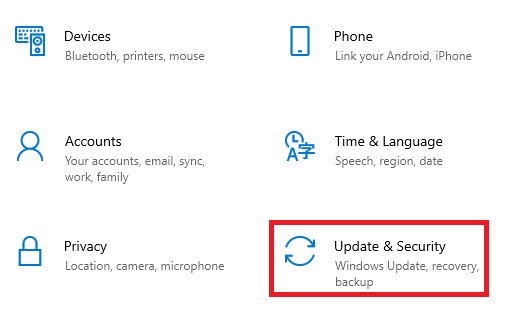
- Choose Update & Security from the window.
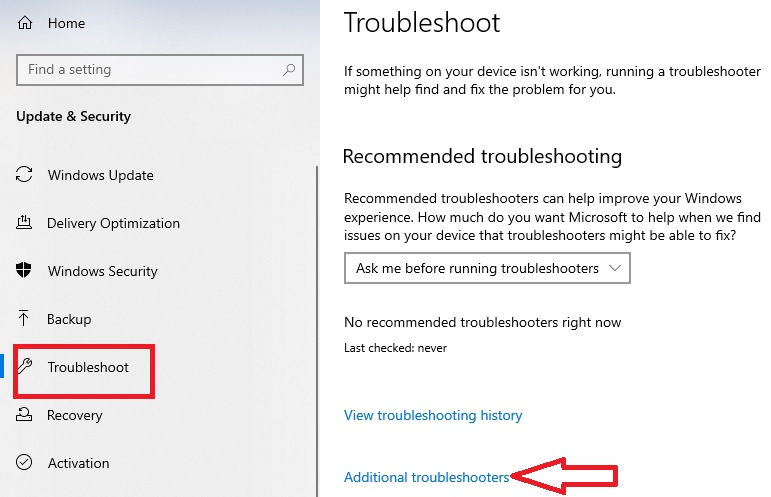
- Click on Troubleshoot on the left side of the window.
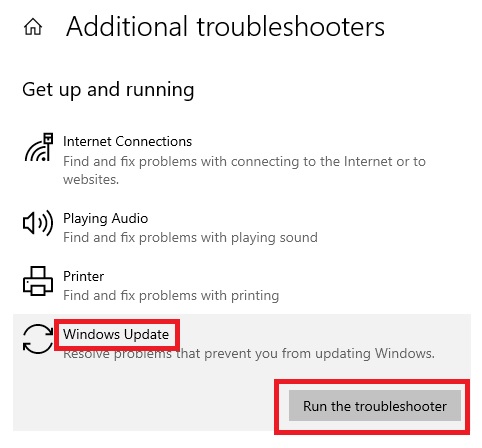
- Click on Additional troubleshooters on the right side.
- Go to Windows Update, click on it and click on Run the troubleshooter there.
- When done, in the same Additional troubleshooters window, scroll down to the Power section, click on it, and then click on the Run the troubleshooter button.
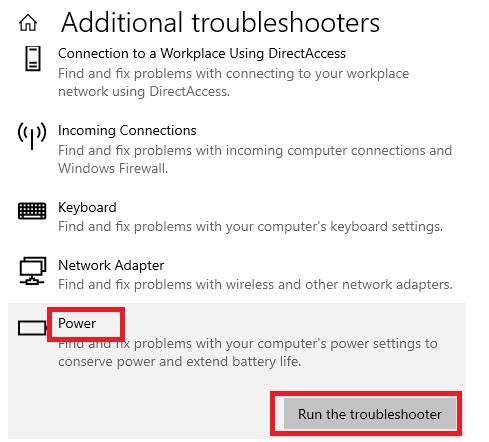
Close the window and reboot your system.
Method 5: Clean the Registry
There may be some issues in the Registry itself that may also cause this issue. You must, therefore, clean the registry by using CCleaner. If you have it installed in your system, run it, but if you do not, download and install it and then run it.
STEPS TO FIX:
- Open the CCleaner tool.
- Click on Registry on the left pane.
- Click on the ‘Scan for Issues’ button at the bottom.
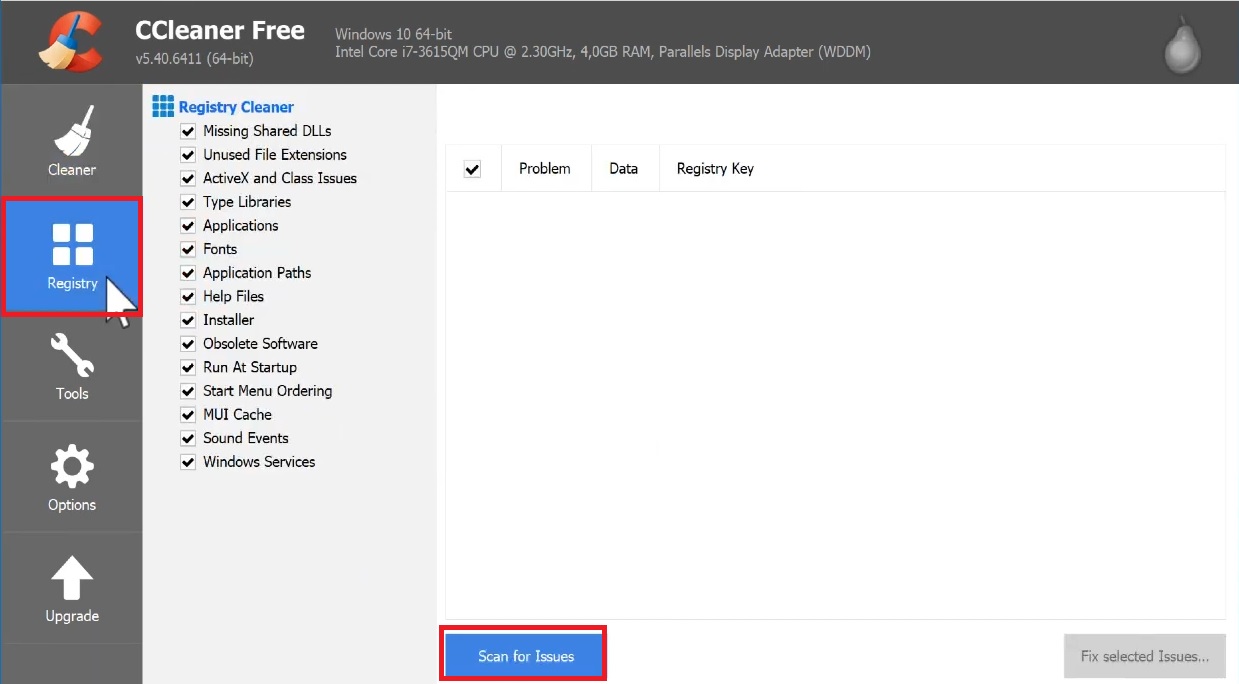
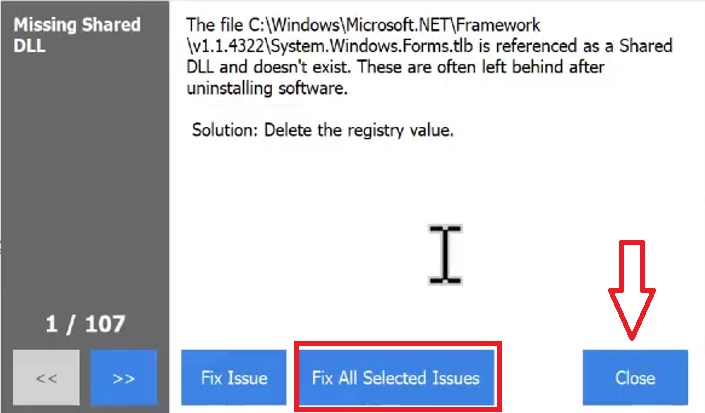
It will take some time to complete the scanning process. When done, click on the Fix selected Issues button on the extreme right side.

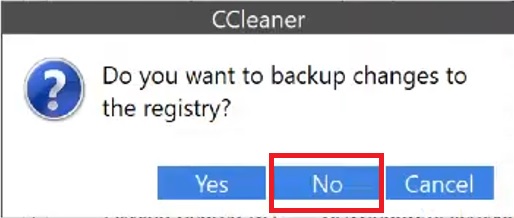
- Next, you may click on No in the window asking ‘Do you want to backup changes to the registry?’
- Click on the ‘Fix All Selected Issues’ button in the next window that pops up.
- And finally, click on the Close button and exit.
Now, restart your system.
Method 6: Update Windows
If the above steps do not resolve the issue, then the operating system itself may be outdated and create such a Task Host window preventing shutdown error. Needless to say, you will need to update it.
STEPS TO FIX:
- Go to Settings as before.
- Select Update & Security from the window.
- If it says your system is not up to date, then click on the Check for updates button.
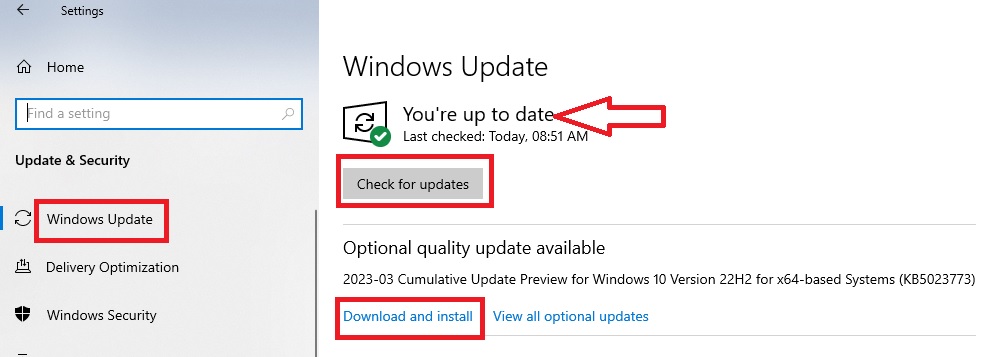
When it is done, it will inform you about the available updates. Update your Windows. You may also install the optional updates if you wish.
Method 7: Scan and Remove Viruses from Windows Security
There may be some virus existing in your PC and affecting Windows security to result in the Task Host window preventing shutdown.
Scanning for viruses and removing them, if any, will prove to be a smart move and an easy solution.
STEPS TO FIX:
- Go to Settings and choose Update & Security as before.
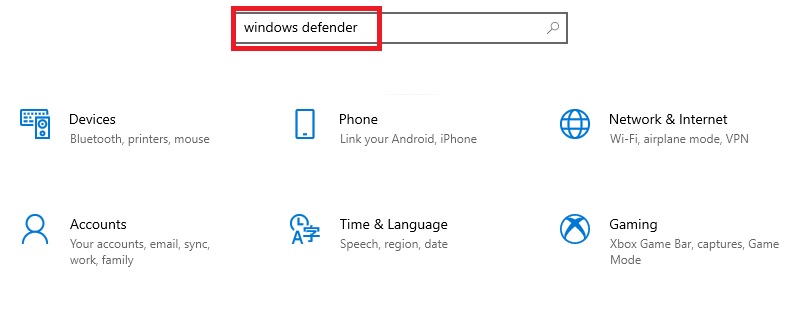
- Choose Windows Defender. If you cannot find this option, type it in the ‘Find a setting’ box.
- Press Enter.
- Select Windows Security settings on the left side of the window and click on it.
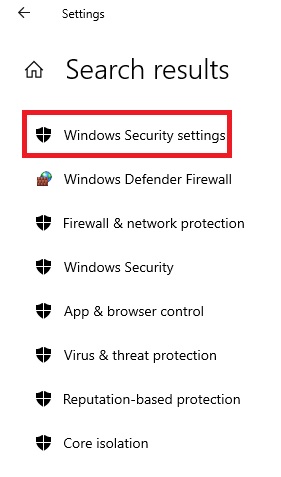
- Click on Virus and threat protection on the right side of the window.

If everything is fine then it will say that no action is needed.
If it is not, then you will have to click on the Advanced Scan option, select Windows Defender Offline Scan option and finally click on the ‘Scan now’ button.
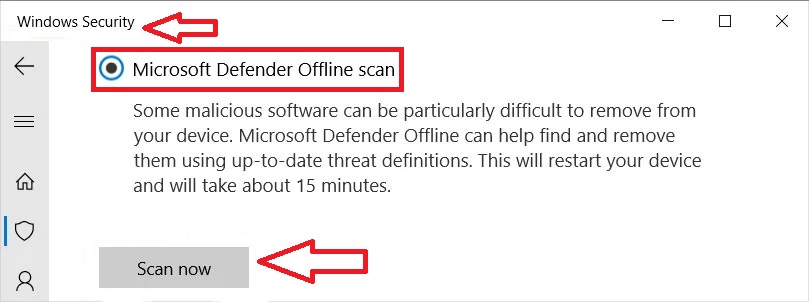
This will let the tool scan for the viruses and malware and remove them.
Method 8: Customize the Power Plan
The power settings of the PC may also cause such an issue sometimes. Therefore, changing the plan may help in most cases.
STEPS TO FIX:
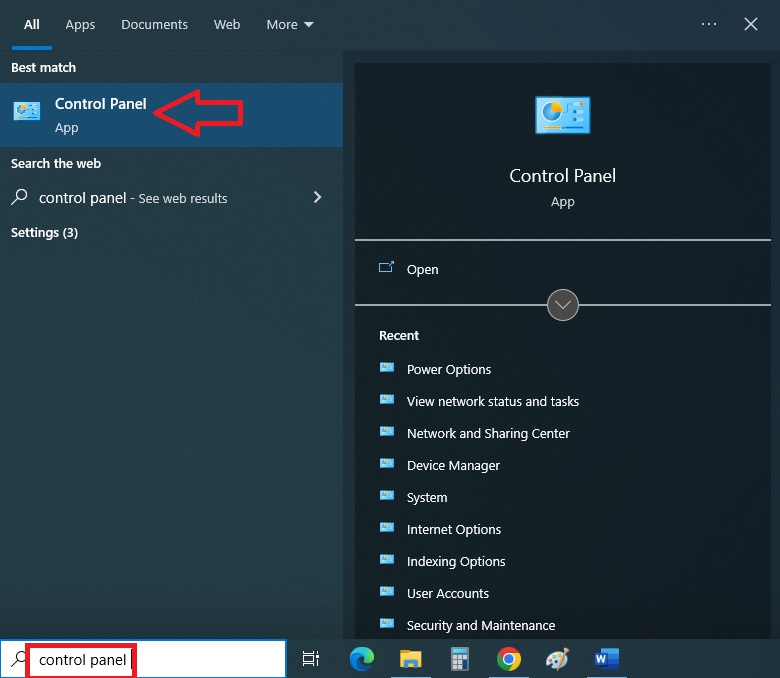
- Go to the Search box.
- Type control panel in the box.
- Press Enter.
- Click on Hardware and Sound.
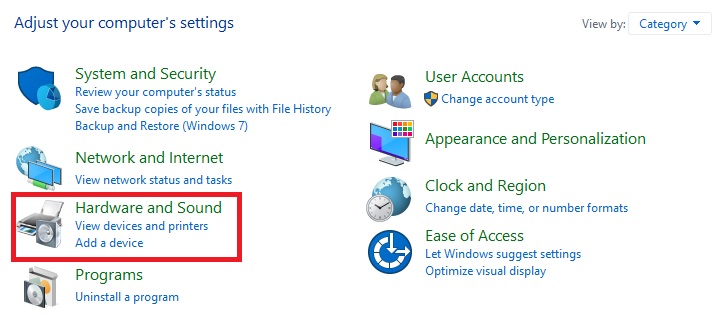
- Select Power Options in the new window.
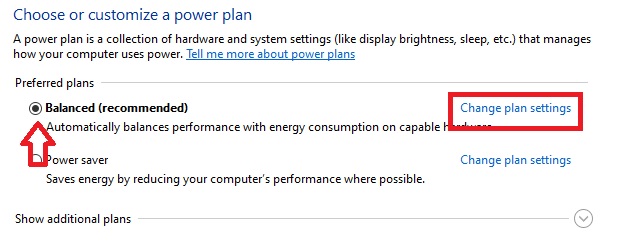
- Click on Choose a power plan.

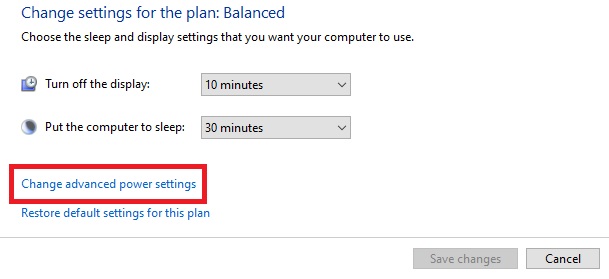
- In the new window, see that the small circle next to Balanced (recommended) is checked. Then click on Change plan settings beside it.
- In the new window, click on Change advanced power settings.
- Scroll down in the next Advanced settings window looking for PCI Express.
- Click on the small + sign next to it.
- Also click on the small + sign next to Link State Power Management.
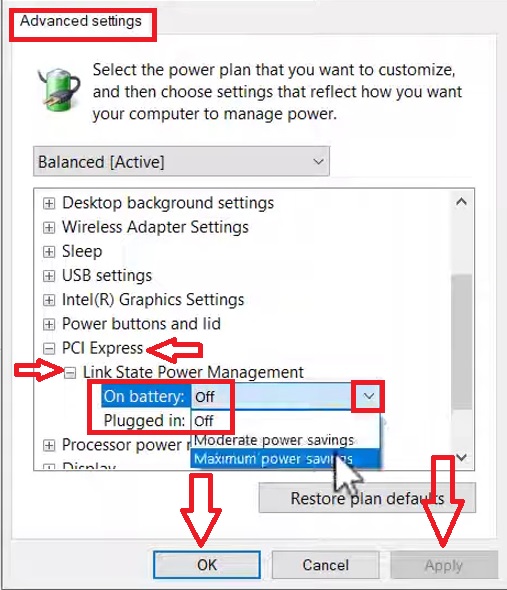
Make sure that both the ‘On battery’ and ‘Plugged in’ states are turned off. If they are not, change them to it by clicking on the small arrow key at the right side of the box and choosing the Off option from the drop-down menu, as indicated above.
Finally, click on the Apply button and then on the OK button.
Method 9: Updating Driver and Setting Power Management of System Devices
The system devices may also cause issues while shutting down. In that case, there may be a need to update the driver of the system devices as well as make some changes in the power management.
STEPS TO FIX:
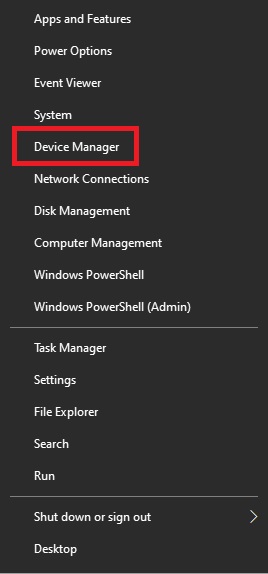
- Go to the Start menu.
- Right-click on it.
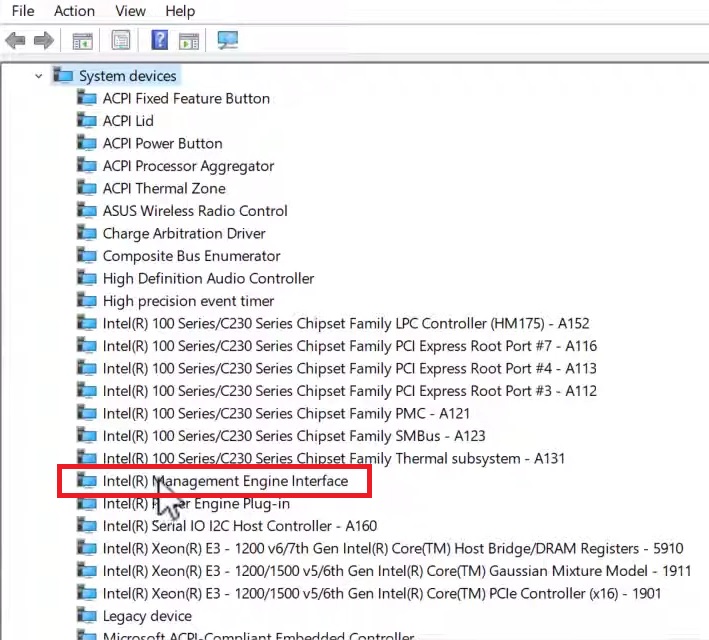
- Select Device Manager.
- From the Device Manager window, scroll down to select System devices.
- Double-click on it.
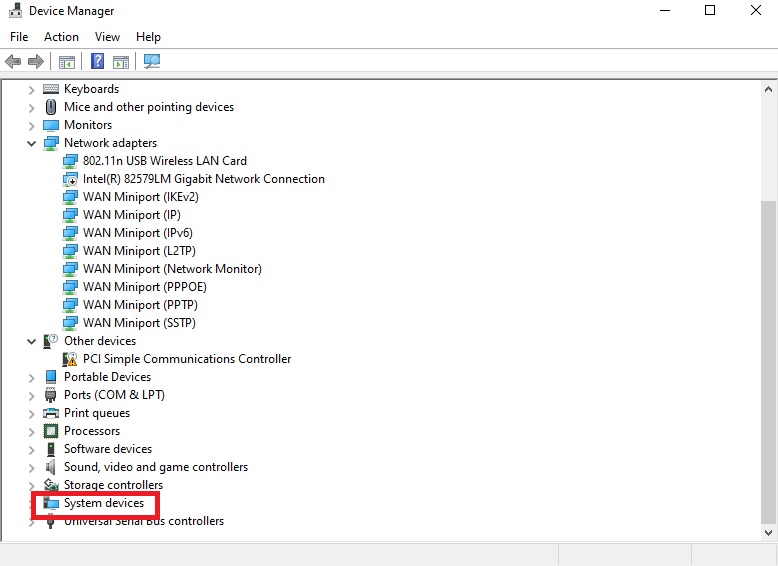
- Now, look for Intel (R) Management Engine Interface under the System devices.
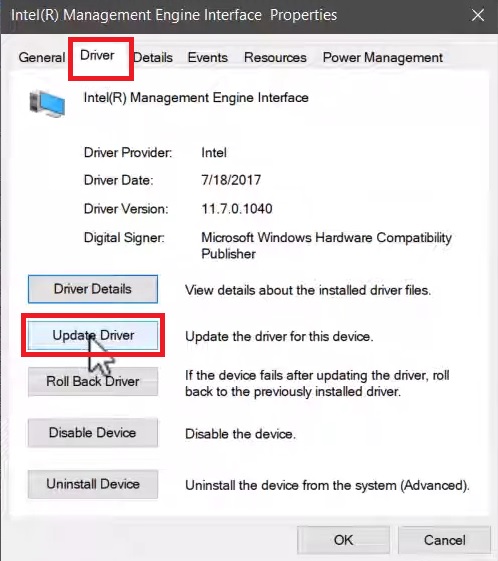
- Go to the Driver tab in the new window.
- Click on the Update driver option.
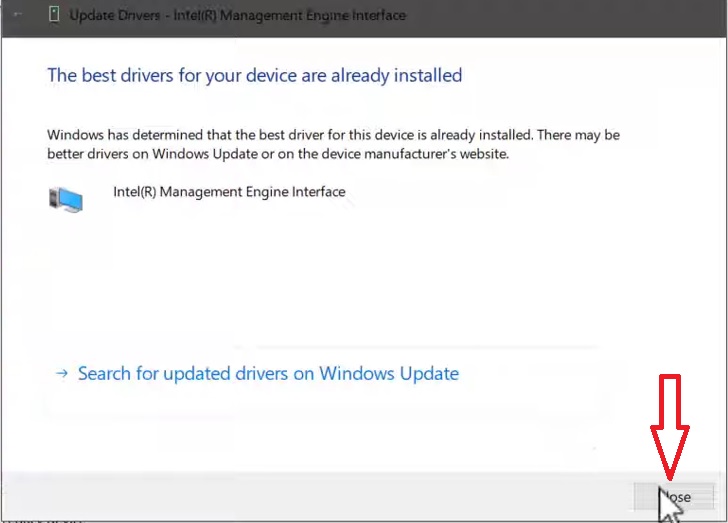
- Click on ‘Search automatically for updated driver software’ under ‘How do you want to search for drivers?’ from the new window.

- Click on the Close button when you see that ‘The best drivers for your device are already installed.’
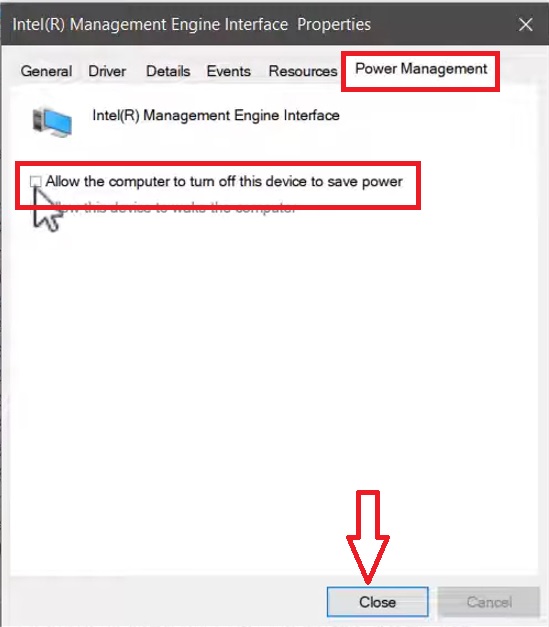
- Now, go to the Power Management tab in the Intel (R) Management Engine Interface Properties window.
- Uncheck the small square box next to ‘Allow the computer to turn off this device to save power’.
- Click on the Close button.
Close all the windows and restart your computer.
Method 10: Turning Third-Party Services Off
Sometimes, several components of Microsoft Update and any third-party services installed on your PC may conflict with each other and cause such an issue as well.
Therefore, disabling these services will help you to fix the issue.
STEPS TO FIX:
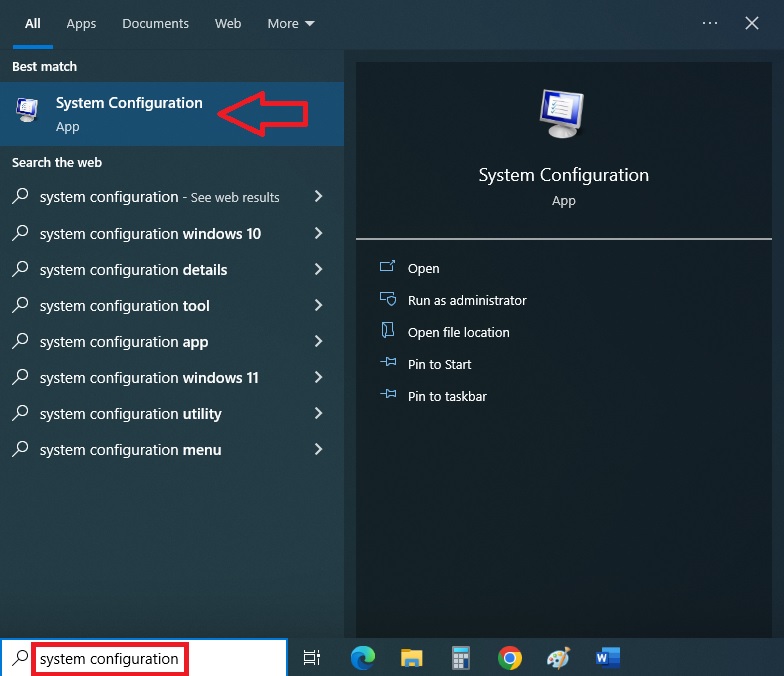
- Go to the Search box.
- Type system configuration in the box.
- Press Enter.
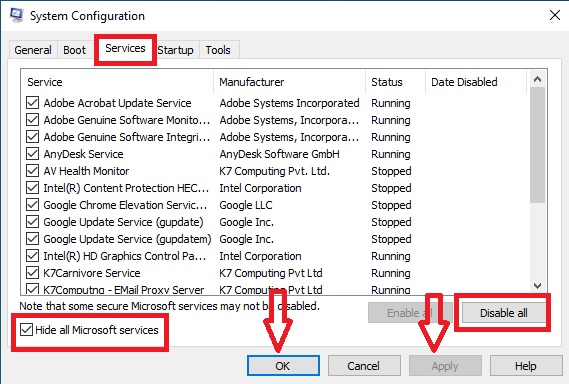
- Go to the Services tab.
- Click on the small square box next to ‘Hide all Microsoft services’ to check it.
- Then click on the Disable all button on the right.
- Click on the Apply button.
- Then click on the OK button.
Finally, click on the Restart button when the next window appears.
You may also run a clean boot for the same in the following way:
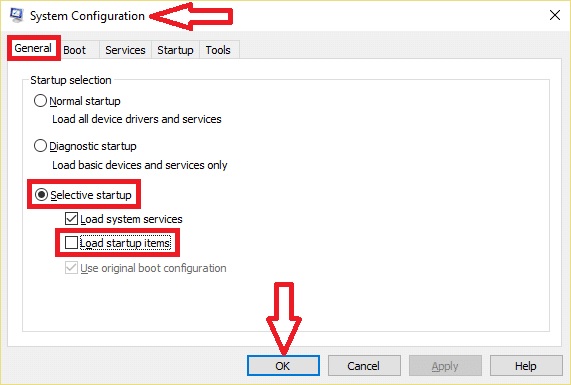
- Go back to the System Configuration window.
- Go to the General tab.
- Click on the circle next to Selective startup.
- Click on the Load startup item.
- Click on the OK button.
When the system is done booting, check whether or not the issue has been resolved in this way.
Method 11: Restarting the Microsoft Store Install Service
Sometimes there may be problems with the Microsoft Store Install Service which may erroneously consider the situations as an effect of a virus. In such a situation, restarting this service may bring things back to normal.
STEPS TO FIX:
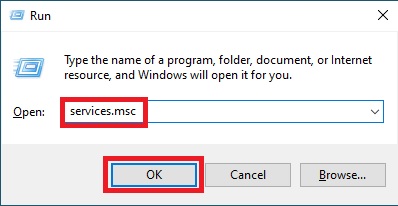
- Press the Windows + R keys on your keyboard together to open the Run box.
- Type services.msc in the text field of the box.
- Press Enter or click on the OK button.
- Look for the Microsoft Store Install Service in the Extended page of the Services (Local) window that pops up.
- Right-click on it.
- Click on the Restart button.
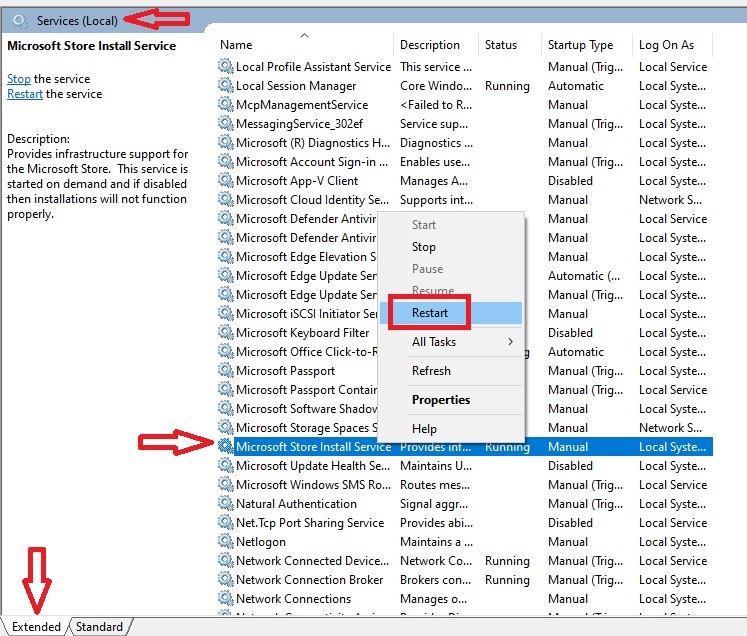
This will take a couple of minutes. Wait for the process to complete and service to start again.
Method 12: Disabling Startup Applications
A few startup applications may also cause this issue and therefore disabling them may keep your system up and running.
STEPS TO FIX:
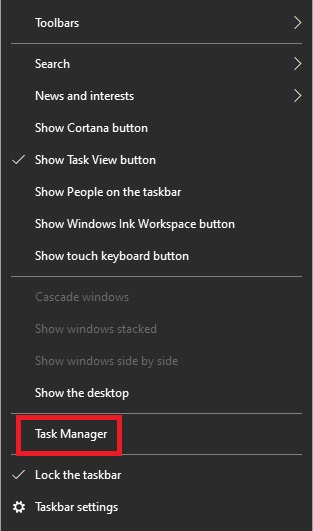
- Press the Control, Shift and Escape keys on your keyboard at the same time to open the Task Manager.
(Alternatively, you may right-click on a blank space on the Taskbar for the same).
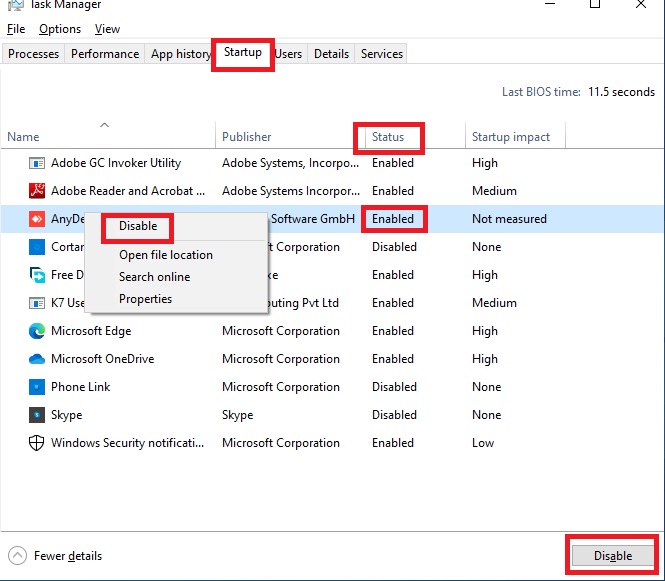
- Choose all the apps individually that are marked Enabled under the Status column.
- Right-click on it.
- Click on the Disable option at the top.
- Repeat it for all the apps.
When you have completed disabling each of them one by one, restart the system.
Method 13: Use the Command prompt to Run SFC and DISM Scans
Running SFC or System File Checker along with Deployment Image Servicing and Management or DISM scans in the Command Prompt may also allow you to identify the issue and fix it.
STEPS TO FIX:
First, open the Run box and then enter the command sfc /scannow. When the system is done scanning, reboot the system. Most of the time, it will resolve the issue.
If that does not, you may also try this command: sfc /scannow /offbootdir=c:\ /offwindir=c:\windows.
When you are done scanning your system, open the Command Prompt once again and type the following commands in the prompt, one at a time, and Press Enter after each:
- DISM /Online /Cleanup-Image /CheckHealth
- DISM /Online /Cleanup-Image /ScanHealth
- DISM /Online /Cleanup-Image /RestoreHealth
This should resolve the issue.
However, sometimes, the last command may not work depending on different factors. In that case, you should use the following commands:
- Dism /Image:C:\offline /Cleanup-Image /RestoreHealth /Source:c:\test\mount\windows
- Dism /Online /Cleanup-Image /RestoreHealth /Source:c:\test\mount\windows /LimitAccess
Here, the source C: should be replaced with the location source you are using such as a Windows installation or recovery disk.
When done, restart the system to save the changes. This will reset things to normal.
Method 14: Create a New User Account
If the problem persists, sometimes there may be issues in the user account itself. In such a situation, it is best to create a new account.
STEPS TO FIX:
- Go to the Accounts section from Settings as you did in Method 3.
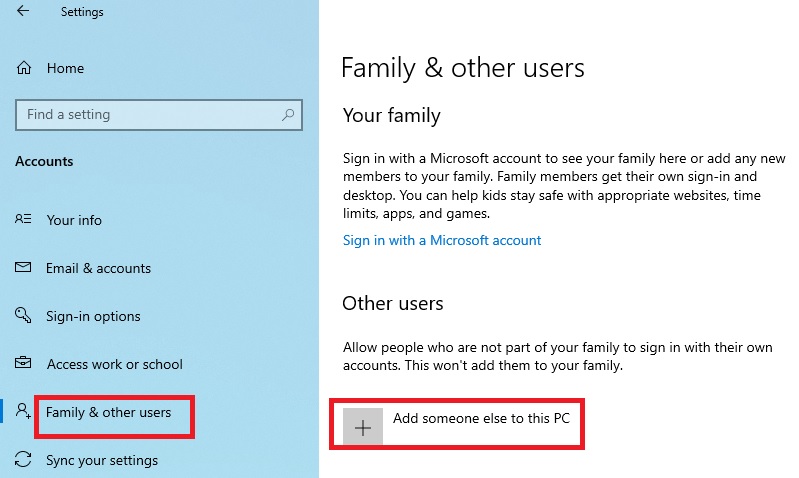
- Click on the Family & other people tab in the left panel.
- Click on the box next to ‘Add someone else to this PC’ under ‘Other users.’
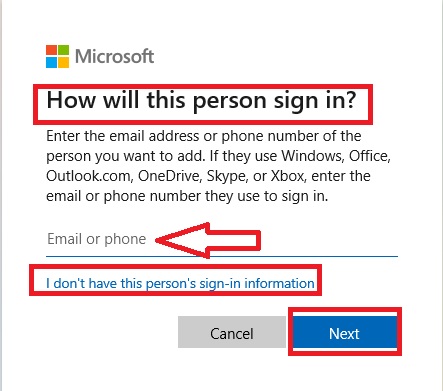
- Mention How will this person sign in? (Phone or email)
- Click on ‘I don’t have this person’s sign-in information.’
- Click on Next.
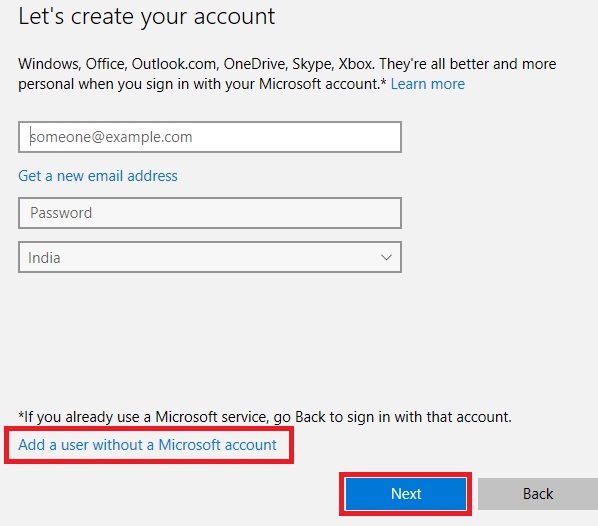
- Choose Add a user without a Microsoft account as well.
- Click on Next.
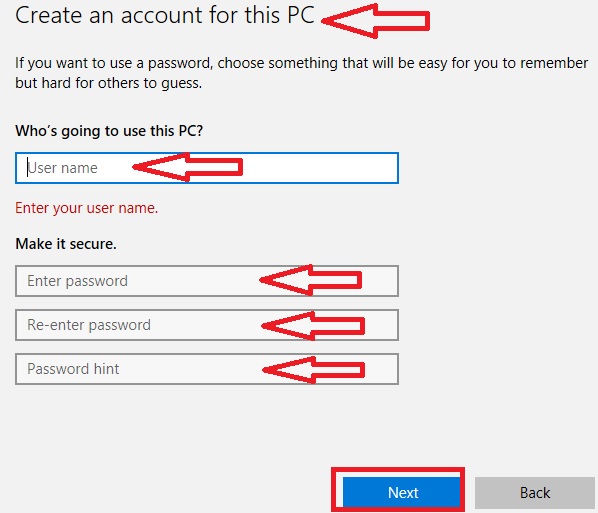
- Finally, type in the username to Create an account for this PC and the password along with a hint.
- Click on Next.
Now, you will have a new account altogether and with no more issues in shutting down the system.
Method 15: Delete the Software Distribution Folder
The software distribution folder may also corrupt the data needed by Windows to install updates, which eventually can cause the issue. Clear this folder to resolve the issue.
STEPS TO FIX:
- Go to the Command Prompt and type the command – net stop wuauserv. This will cease the Windows Update service.
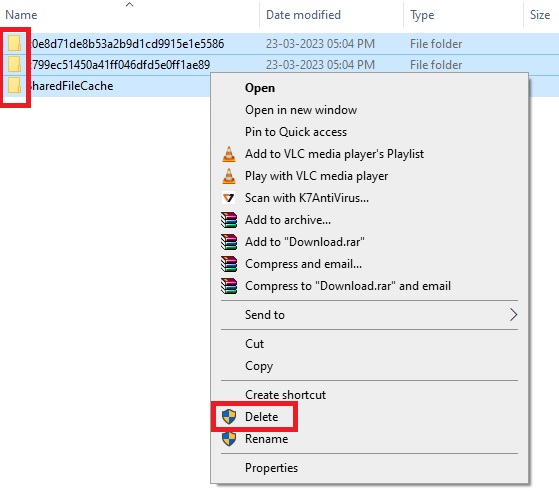
- Now, go to the Run box to open the directory by typing the command – C:\Windows\SoftwareDistribution\Download and clicking the OK button.
- Select all the files in here, right-click on them and click on Delete.
When you are done deleting the files, you will have to restart the Windows update service. Type in the command net start wuauserv in the Command Prompt and then run, download and install Windows Updates.
Finally, restart your computer system.
Conclusion
So, hopefully, coming to the end of this article, now you know that the Task Host may prevent your PC from shutting down, and that is quite normal for it to behave like that.
However, you can fix this issue very easily and quickly and shut down your computer safely in more than one way as described in this post.