
Are you facing Wi-Fi disruptions? It is due to Wi-Fi interference, which can be frustrating, primarily caused by overcrowded channels.
This guide explores the causes and practical solutions to resolve it efficiently.
In This Article
KEY TAKEAWAYS
- Use a Wi-Fi analyzer to identify interference sources.
- Optimize router Wi-Fi channels.
- Update router firmware.
- Place the router in an open location.
- Minimize electronic interference.
What are the Causes of Wi-Fi Interference?
The most significant cause of Wi-Fi interference is overcrowded Wi-Fi channels. There can be a number of networks nearby using the same Wi-Fi channel, which will result in such issues.
In addition, a few other reasons for this issue to happen are:
- Physical barriers such as large objects, walls, or floors
- Nearby electronic devices that use and emit Radio Frequency Interference (RFI).
- Neighboring Wi-Fi equipment and their networks
- Nearby household appliances such as cordless phones, microwave ovens, and others
- Outdated router firmware
- Improper router configuration
- Limited signal range of the router
Now knowing the reasons, explore the effective solutions to enhance your network connection and internet experience.
Ways to Fix Wi-Fi Interference
The most common fix to the Wi-Fi interference issue is to switch Wi-Fi channels from the commonly used one to a less-crowded frequency band.
However, there are also a few other solutions worth trying, such as:
- Updating the router firmware
- Reducing physical hindrances
- Relocating or repositioning the router
- Minimizing the sources of electronic interference
- Using a strong encryption and authentication protocol such as WPA2 or WPA3
- Changing the default SSID and password of the access points and devices
- Using MAC filtering or VLANs to check access to authorized users
- Disabling unnecessary features or services such as SSID broadcasting or WPS
While some of these solutions are pretty obvious and straightforward, a few others might need some expertise. Here are the steps detailed for you to help you in this regard.
Method 1: Change the Wi-Fi Channel and Channel Width
You may resolve Wi-Fi interference by changing the channel from a crowded to a less-crowded frequency band.
STEPS TO FOLLOW:
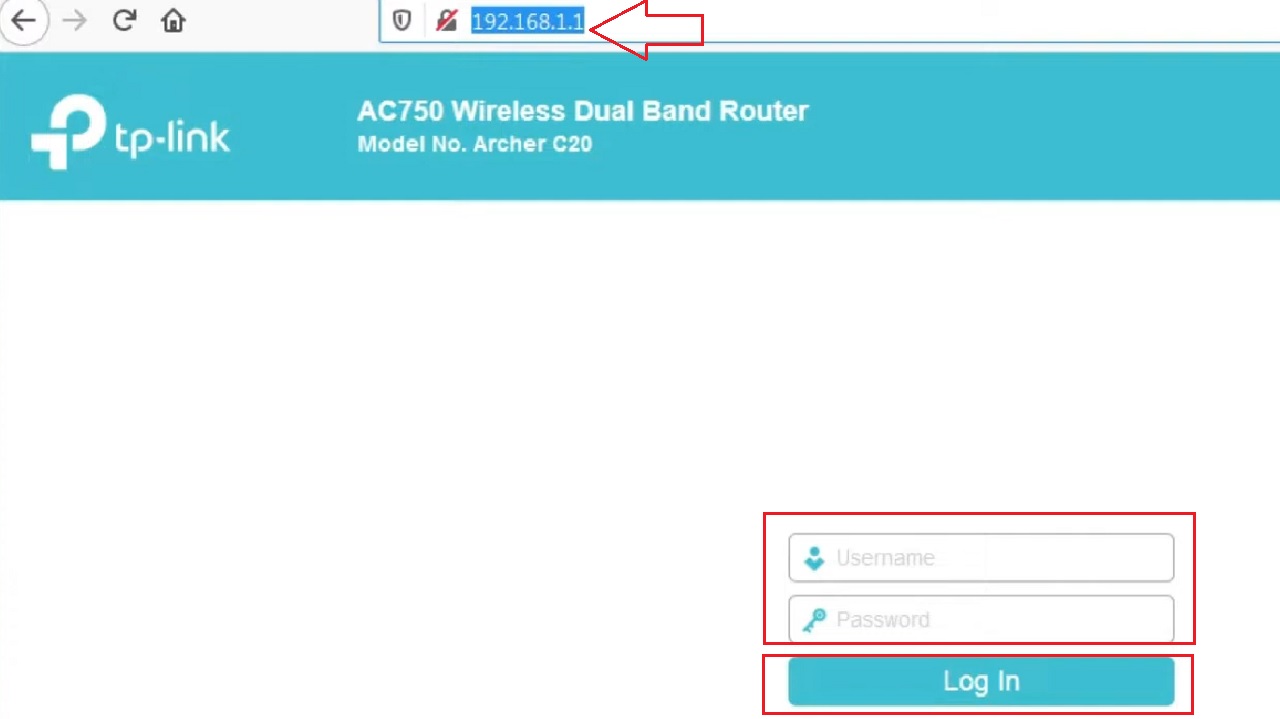
- Open a web browser.
- Type the IP address of your router in the address bar.
(It is usually printed on the label at the back of your router. If not, go to the search box > type cmd > hit Enter > look for the Default Gateway address).
- Enter the Username and Password to Log In to the admin panel.
- Click on the Wireless 2.4GHz option in the left pane.
- Click on the small arrow in the box next to Channel and select an option from the dropdown list.

- Select 20MHz or 40MHz in the same way to set the Channel Width below.
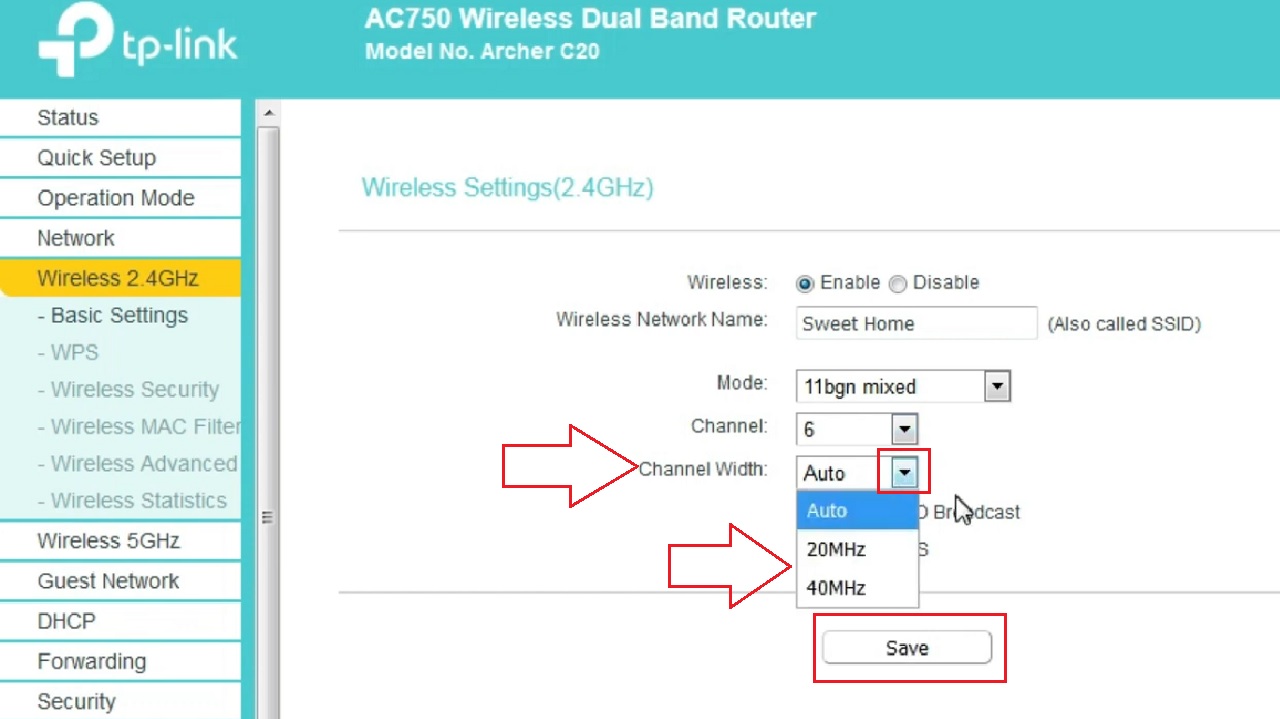
- Follow the same procedure to change the channel and channel width of the Wireless 5GHz frequency band.
- Click on the Save button.
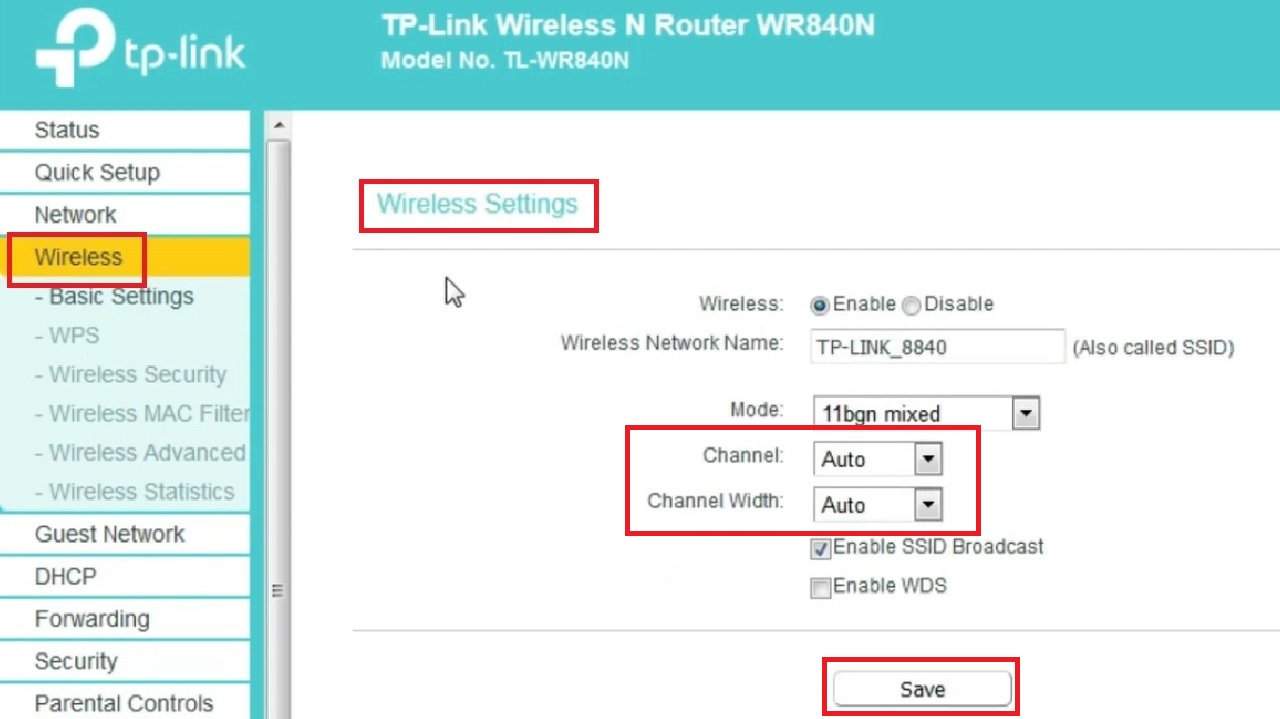
If your router has only one, you will have to go to the Wireless. Under Wireless Settings, make the necessary changes in the Channel and Channel Width boxes in the same way as above, and click on the Save button to exit.
Now, check whether the issue is resolved. If it fails to do so, move to the next method.
Method 2: Change the Wireless Frequency Band
Sometimes, changing the wireless frequency band from 2.4 GHz to 5 GHz may resolve the issue because it is less crowded and offers more available channels despite its shorter range.
STEPS TO FOLLOW:
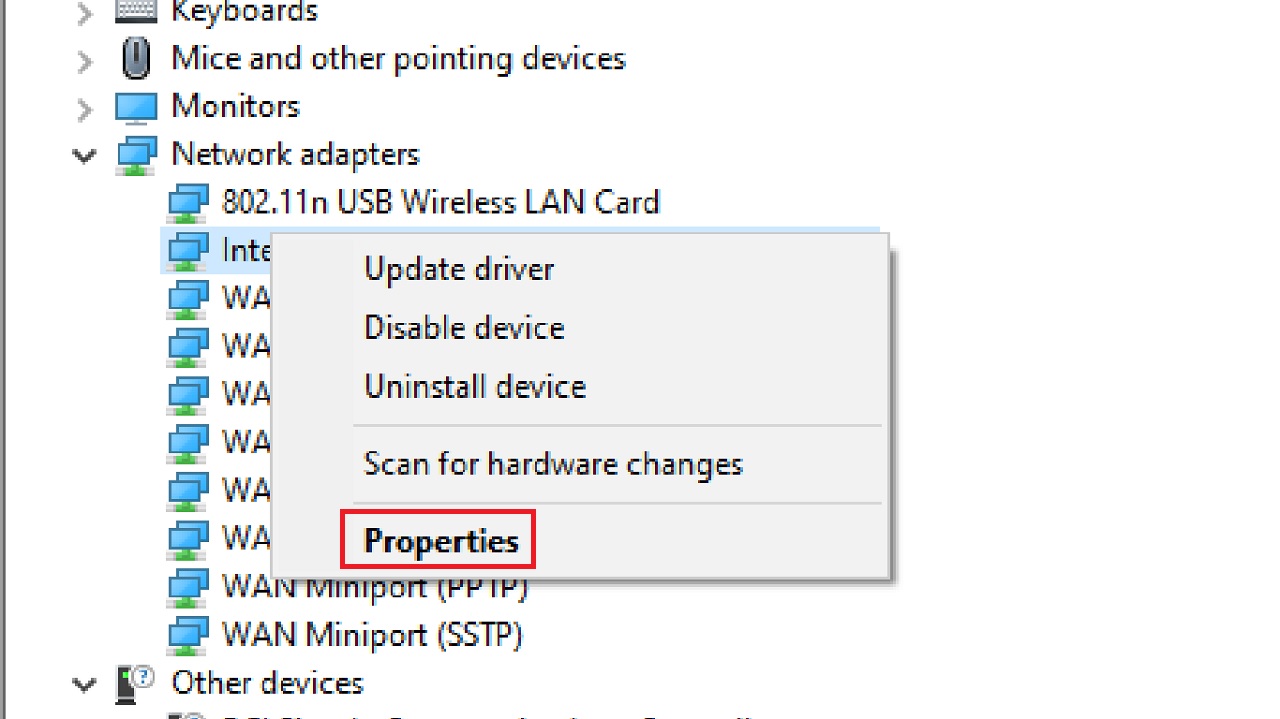
- Right-click on the Start Menu.
- Choose Device Manager from the options.
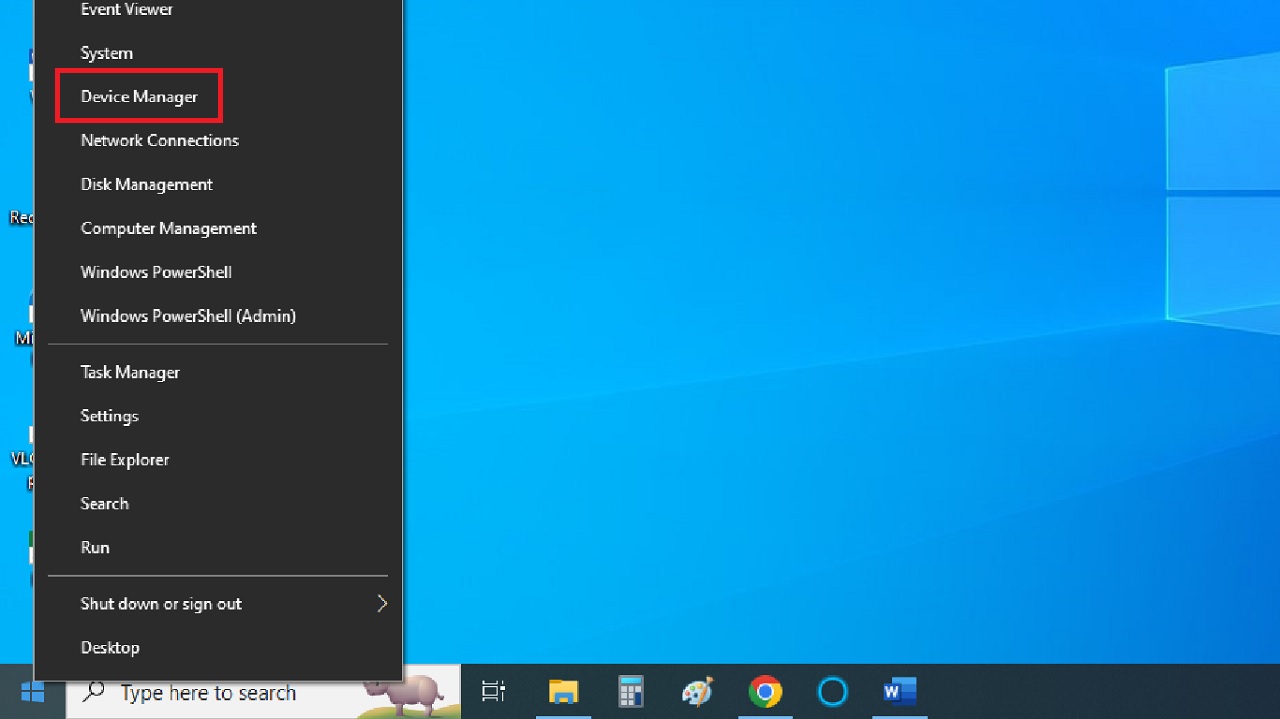
- Expand Network adapters by clicking on the small arrow beside it.
- Locate your network adapter mentioning Wireless AC.
- Right-click on it.
- Select Properties.
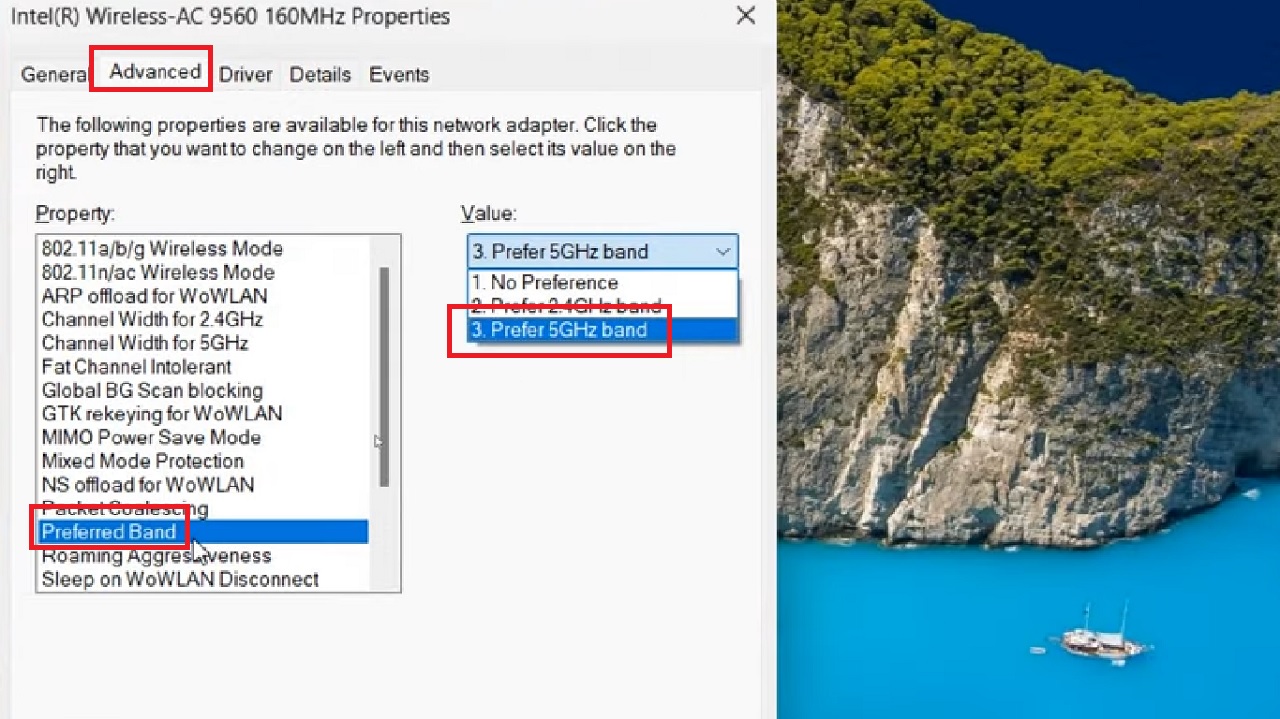
- Go to the Advanced tab.
- Look for the Preferred Band in the list of options.
- Go to the Value box and click on the dropdown arrow.
- Select Prefer 5 GHz band from the dropdown options.
- Next, you may also change the Channel Width for 5GHz and 2.4GHz to Auto, Fat Channel Intolerant to Enabled, and Roaming Aggressiveness to Lowest in the same way.
- Finally, click on the OK button.
Now, restart the computer and reconnect to the internet. Check whether or not the issue is resolved. If it persists, move to the next solution.
Method 3: Use a Wi-Fi Analyzer Windows Application
Though it is not a solution to resolve the issue directly, using a Wi-Fi analyzer will help you find the potential sources of interference. It will scan the wireless environment, and identify the channels and nearby networks.
This will, in turn, help you make informed decisions while selecting channels or placing your router to minimize interference and optimize your Wi-Fi network.
STEPS TO FOLLOW:
- Click on the link https://matthafner.com/wifi-analyzer to download and install the app.
- Open the app and scan for existing Wi-Fi networks.
- Find the channels that are least congested.
- Go to Config to switch to the least congested channel.
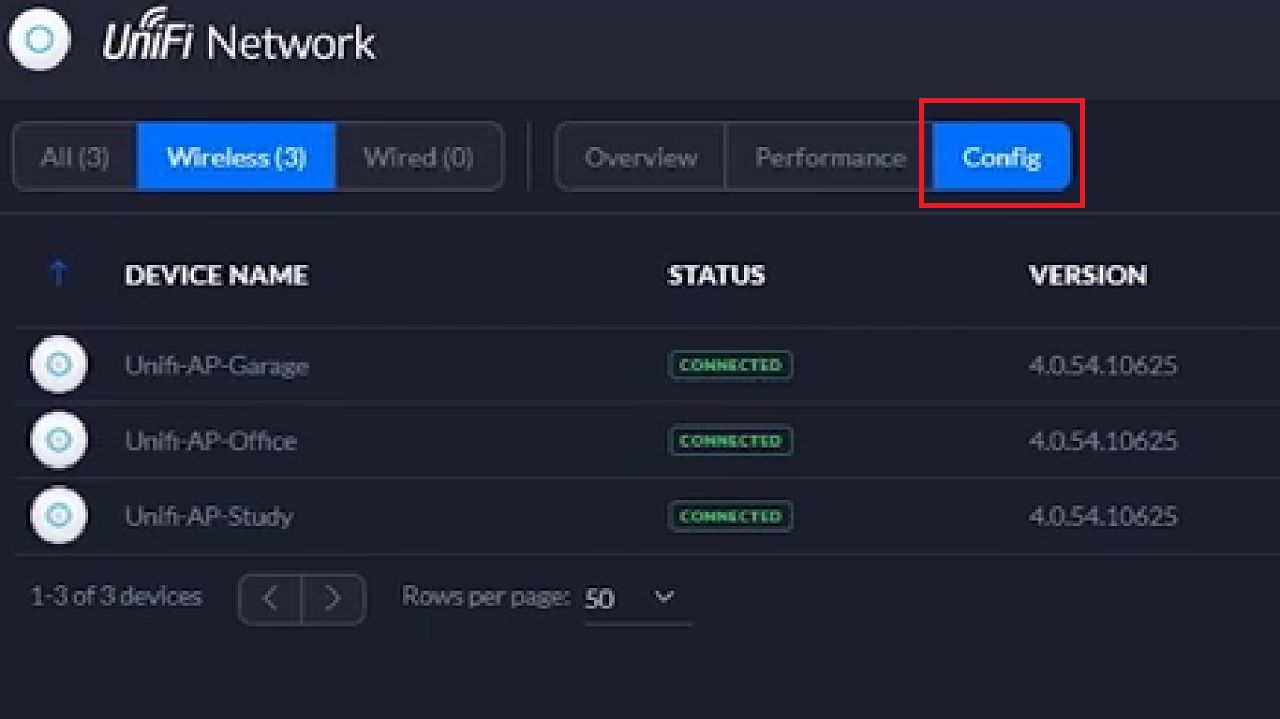
- Make the changes in the Channel from the interface.
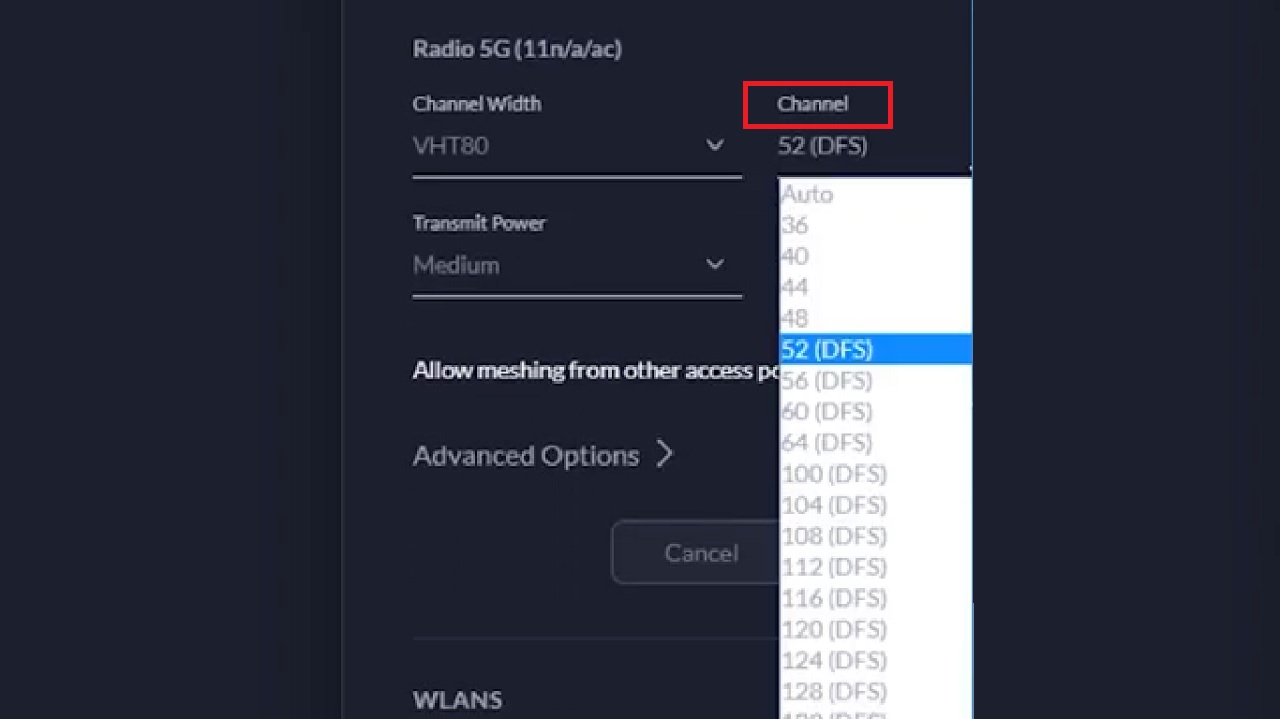
Alternatively, you can log in to your router’s settings through a web browser, access the Wi-Fi channel settings, and configure it as before.
Method 4: Update Router Firmware
Outdated firmware of the router may also cause this issue, which can be resolved by updating it, especially if it is related to incompatibility in the firmware.
Note: For demonstration purposes, a TP-Link router is used in this case.
STEPS TO FOLLOW:
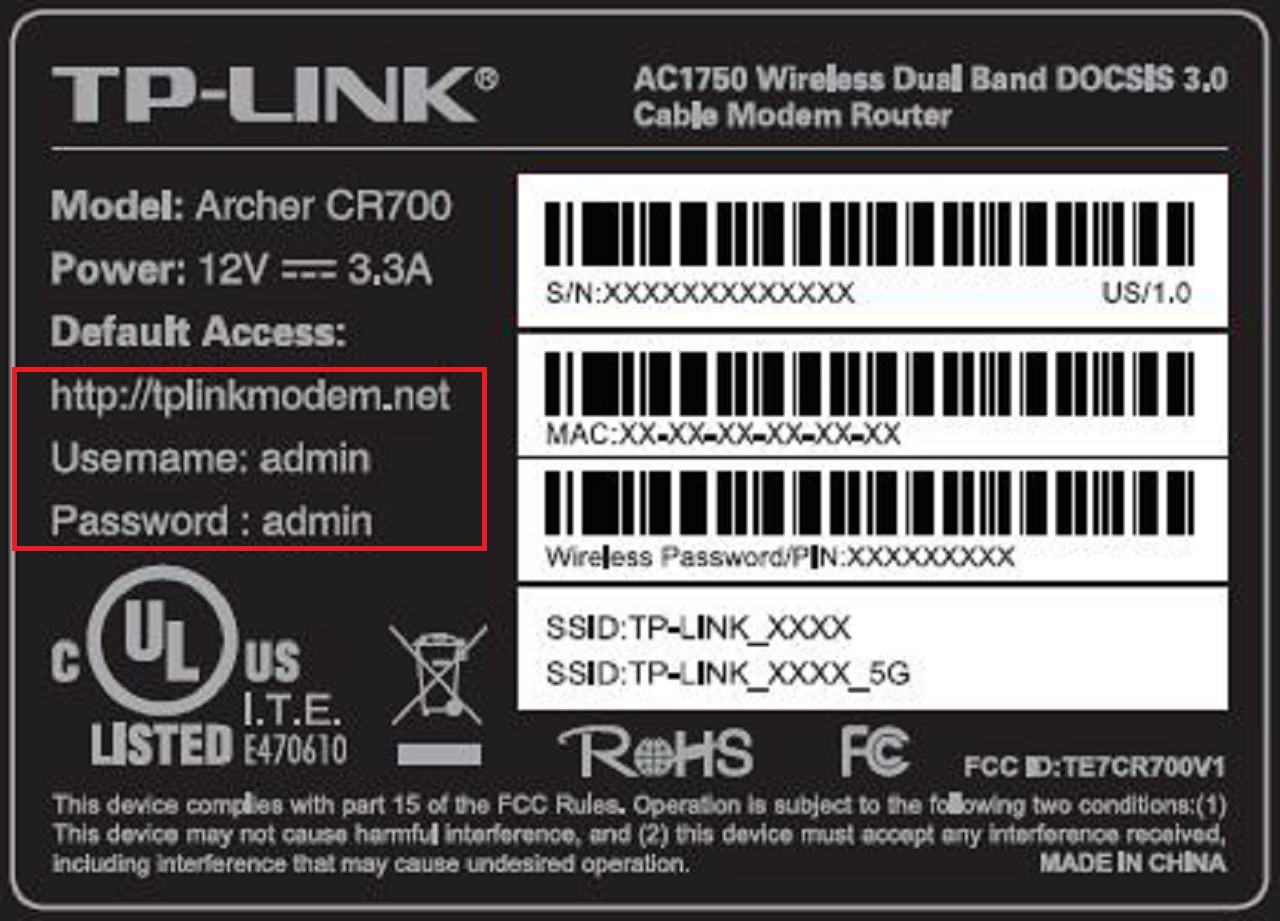
- Find the access details of your router on the label at the back.
- Open your web browser.
- Go to the manufacturer’s website.
- Go to the Firmware Upgrade or any similar section on the web page.
- Download and install the latest firmware version.
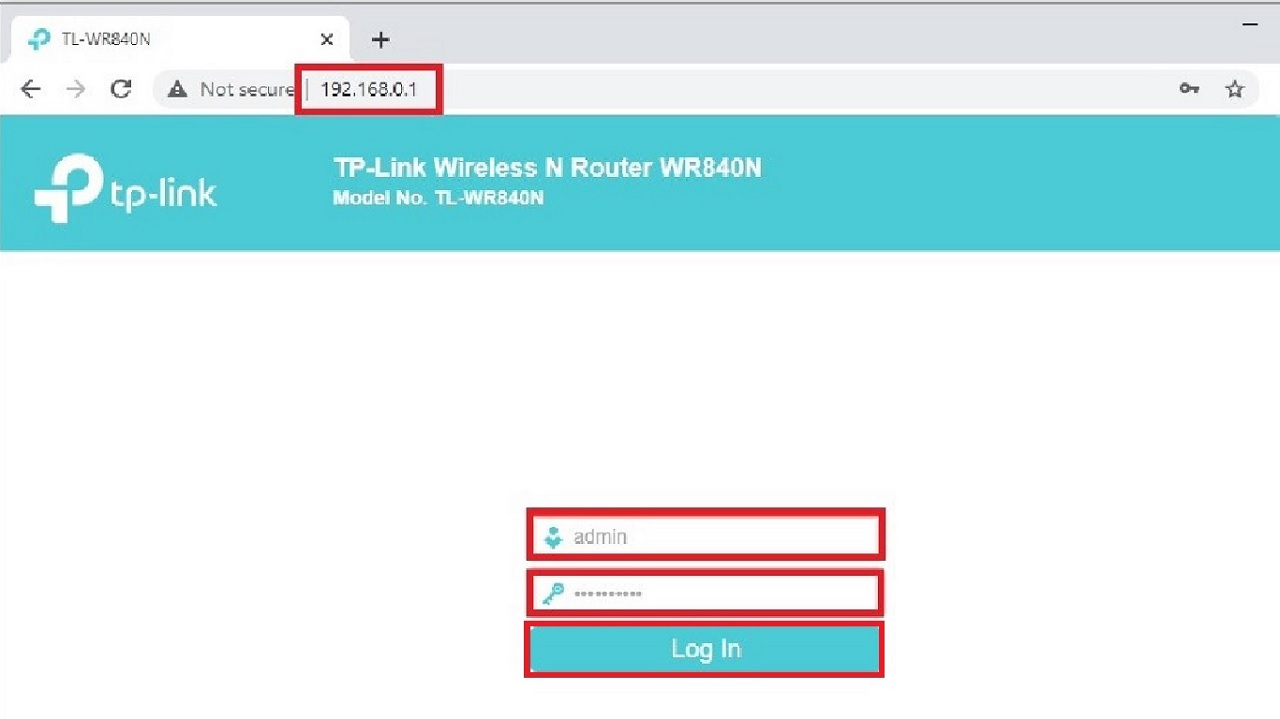
- Now, enter the IP address of the router in the address bar of the browser.
- Hit Enter.
- Log In by entering the username and password, which is usually ‘admin’ for both if you have not changed it.
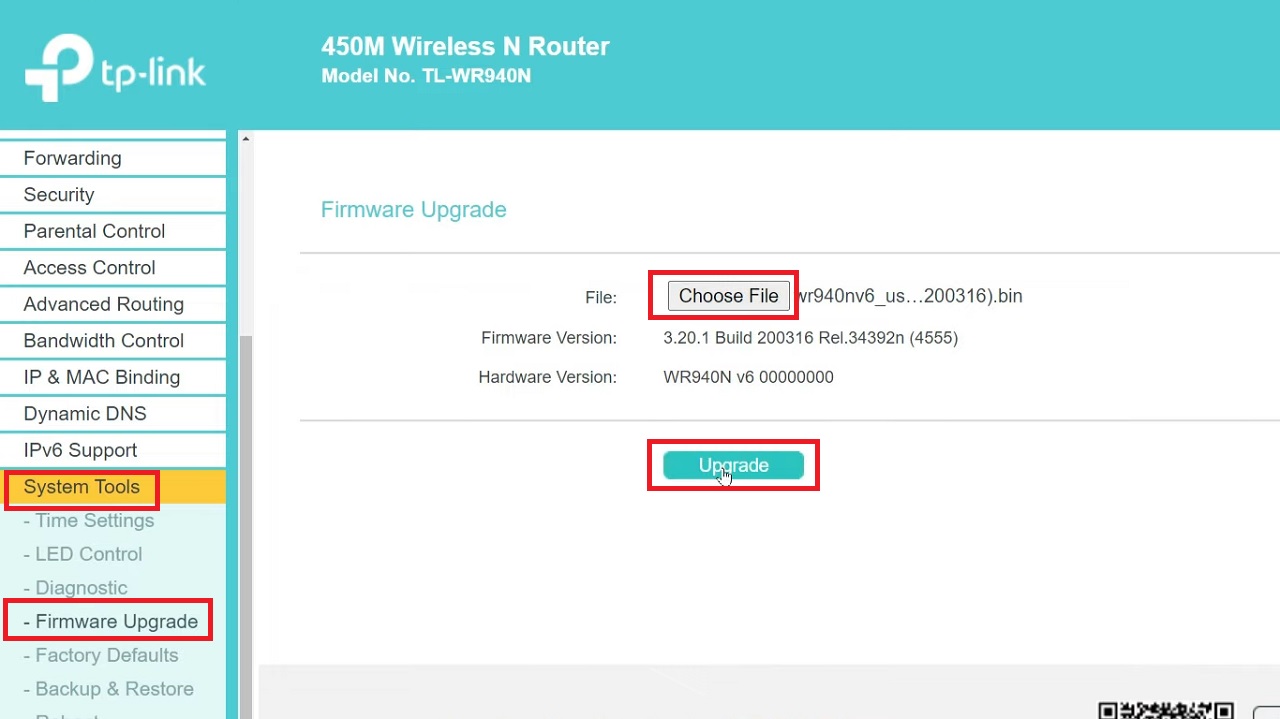
- Click on System Tools on the left side of the admin panel.
- Click on Firmware Upgrade.
- Click on Choose File on the right side of the window.
- Select the downloaded file from your hard drive.
- Click on the Upgrade button.
- Click on the OK button in the following window, when it appears to confirm your action.
Wait for the update process to complete. When it is, the system will restart automatically. Finally, after the system restarts, you may need to reconfigure the router.
Conclusion
With these solutions, you can ensure seamless connectivity by minimizing Wi-Fi interference, leading to a more reliable network and uninterrupted online experiences.
Use one or a combination of these solutions for a more reliable, smoother, faster, and interference-free Wi-Fi network connectivity.