
Wi-Fi Bridge Mode involves configuring two devices, with one acting as a bridge between separate networks.
This setup enhances the coverage of your network, especially in areas with weaker signal strength.
This comprehensive guide will lead you through the simple process; providing crucial insights into its significance.
In This Article
KEY TAKEAWAYS
- Start by logging in to the web interface of your router and accessing the settings to make the necessary changes.
- Go to the Bridge Mode or AP Mode option and proceed to configure your router accordingly, ensuring you provide all the necessary details.
- Use an Ethernet cable to establish a physical connection between the primary and secondary routers.
- Make necessary adjustments in the network settings of both devices to create a seamless bridge between them.
What is Wi-Fi Bridge Mode and Why Do You Need It?
Wi-Fi Bridge Mode is a specific configuration where two devices are connected, with one acting as a bridge between separate networks.
A Bridge Mode can serve various purposes, such as:
Network extension: You can expand Wi-Fi coverage to improve connectivity in areas with weak signal strength.
Simplified networking: It streamlines the process of connecting multiple access points or routers, creating an integrated network.
Seamless roaming: It will ensure uninterrupted connectivity as devices move between access points.
Enhanced security and performance: You can isolate specific networks or devices to enhance security and overall network performance.
Compatibility: It facilitates the compatibility of different devices and router types on the network, enabling them to work harmoniously together.
Ways to Set Up Wi-Fi Bridge Mode
To set up a Wi-Fi Bridge Mode you will have to access the router interface through a web browser for the necessary configurations.
Additionally, you will have to follow these steps:
- Finding and accessing the Bridge Mode or AP Mode option and activating it by furnishing the necessary details
- Connecting the primary and secondary routers via an Ethernet cable
- Modifying the network settings on both routers for seamless connectivity
Here are the steps explained to you in detail.
Method: Find the Details of the First and Configure the Second Router
To create the Bridge Mode, you will need to configure the second router based on the details of the first.
Note: In this demonstration, a TP-Link router is bridged with a Linksys router, both supporting Bridge Mode. You can also use two routers of the same brand.
Layouts and interfaces may vary from one router model to another but the fundamental process is the same. So, refer to your router manual.
STEPS TO FOLLOW:
- Go to the search box next to the Start menu.
- Type in cmd.
- Click on Run as administrator.
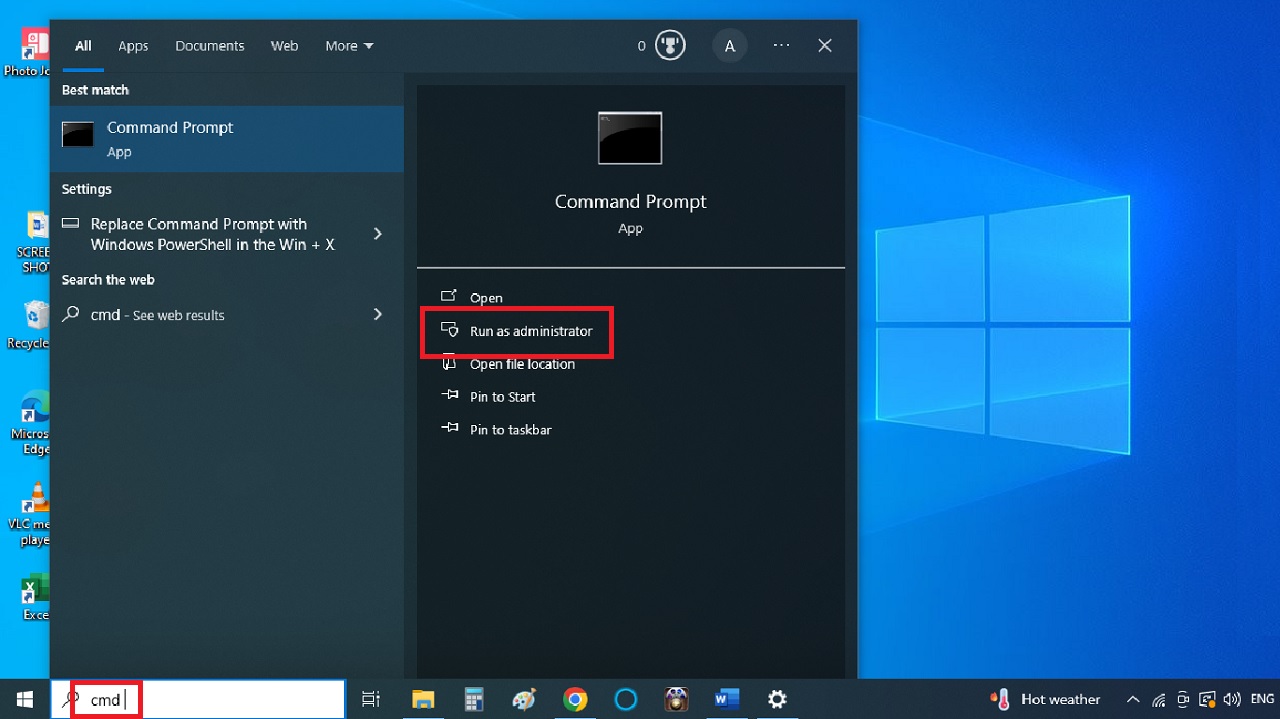
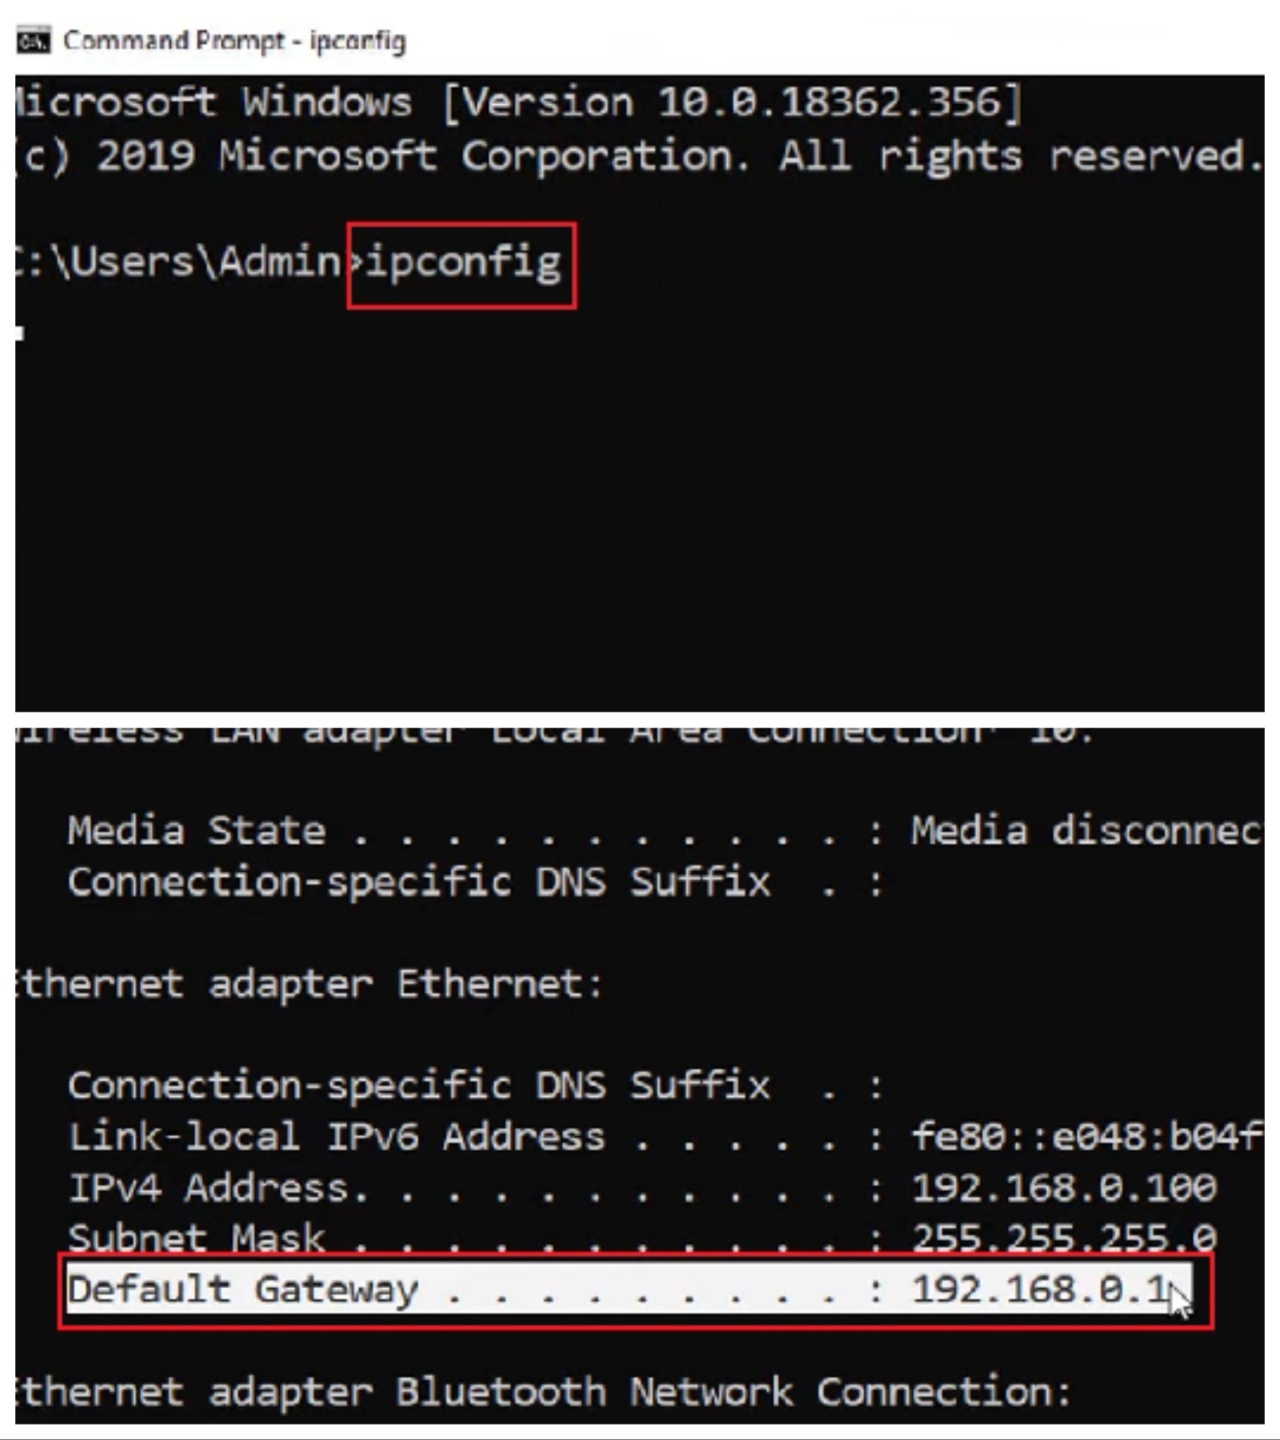
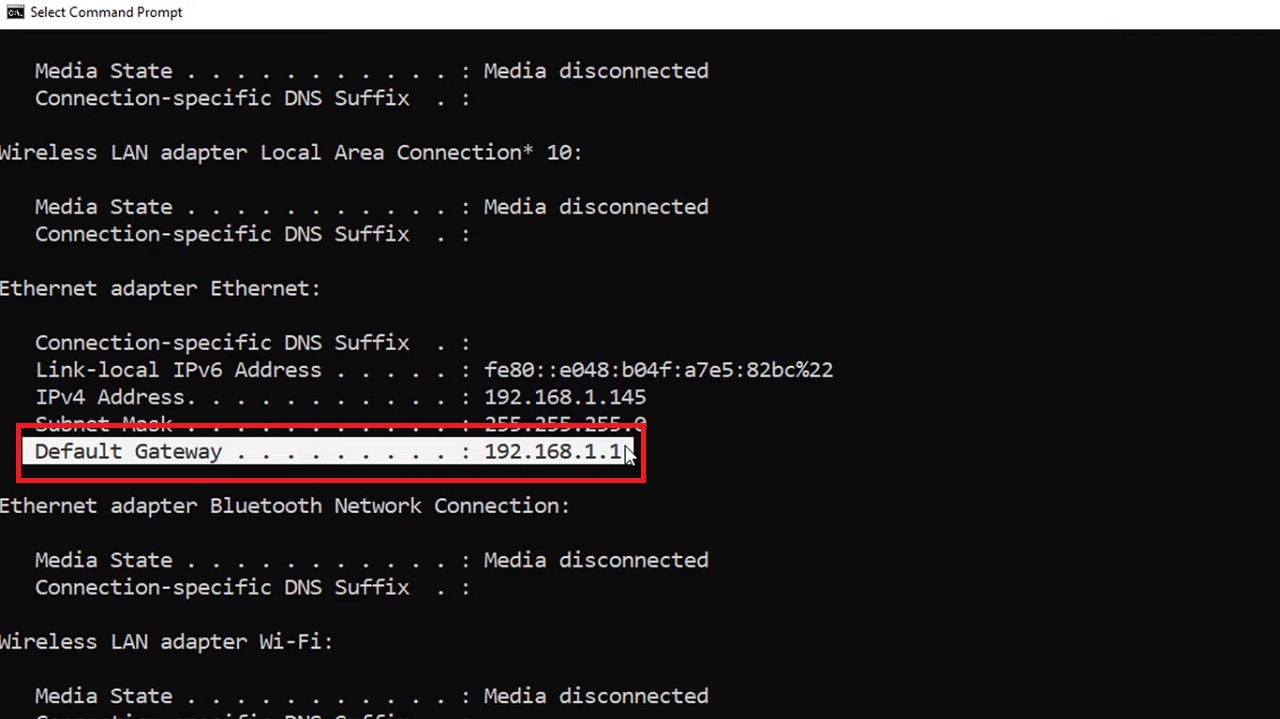
- In the Command Prompt window, type in the command ipconfig and hit the Enter key.
- The Default Gateway 192.168.0.1 is the IP address of the TP-Link router.
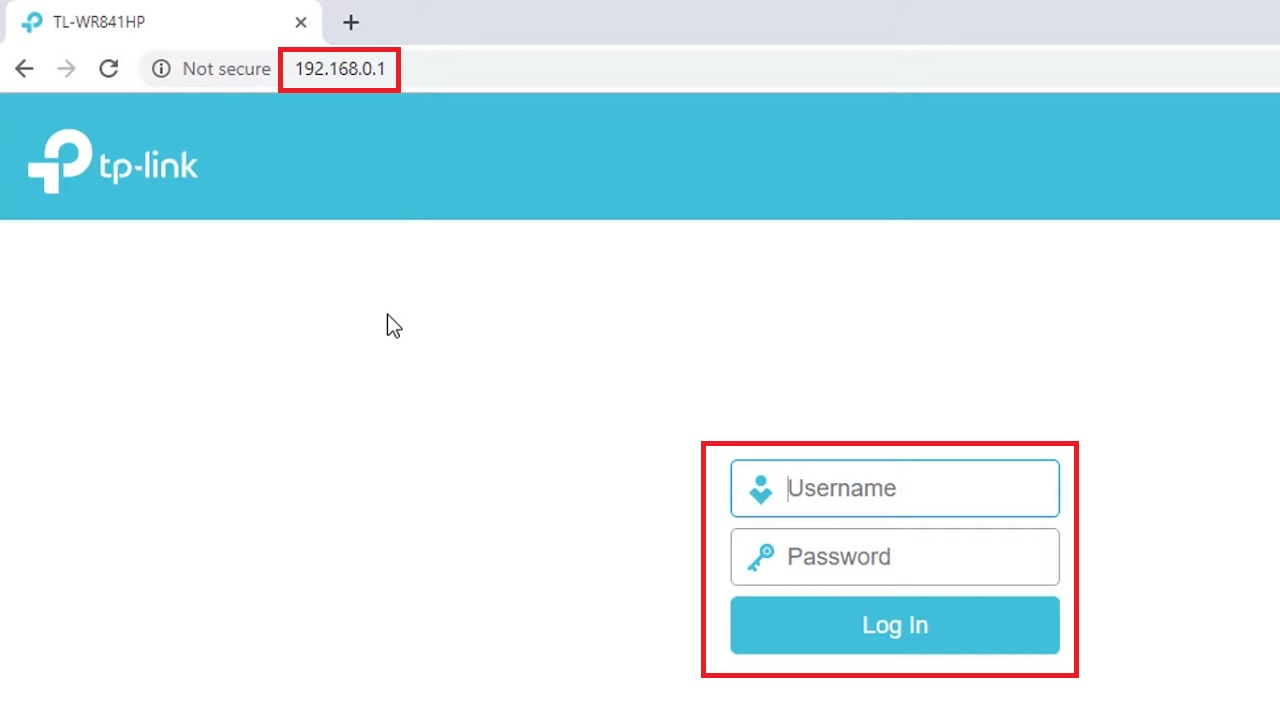
- Now, open up a web browser.
- Enter the IP address 192.168.0.1 and hit Enter.
- Type in the Username and Password, which is usually ‘admin’ for both if you have not changed before, to log into the web interface.
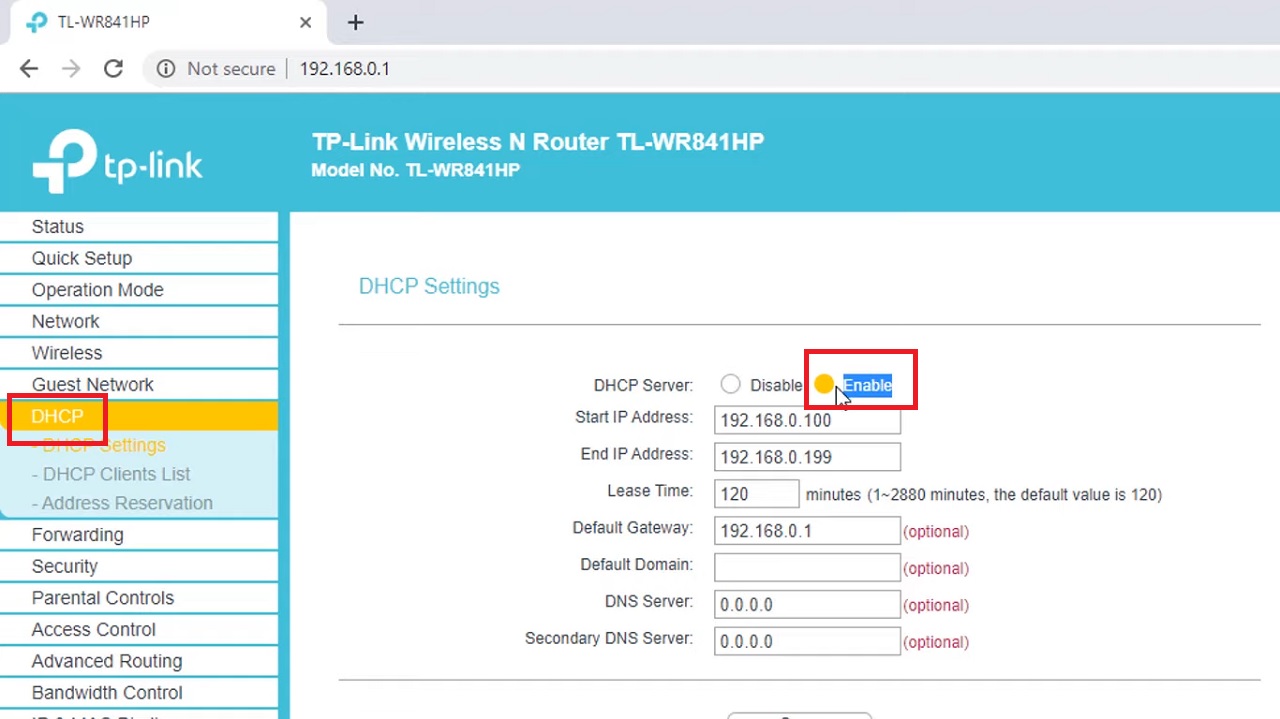
- Go to DHCP on the left pane on the following window.
- Click on the small circular button next to Enable.
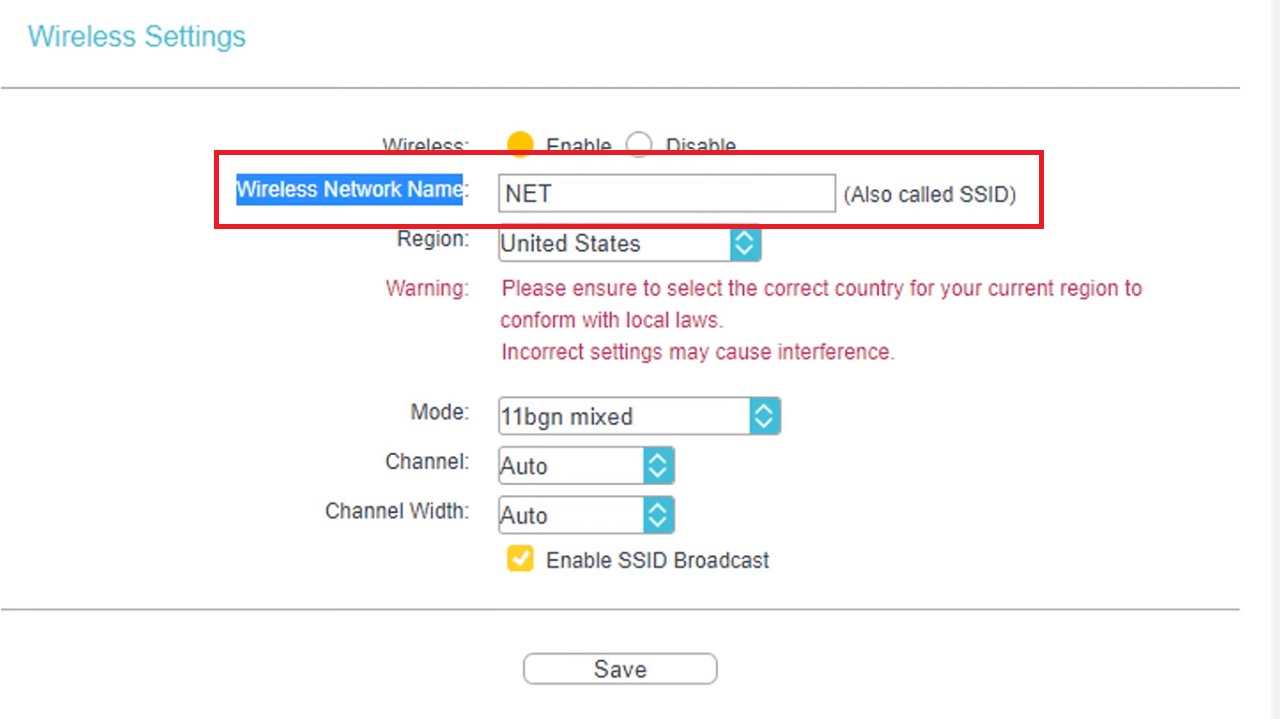
- Now go to Wireless on the left pane.
- Check the Wireless Network Name, NET in this case, which is also called SSID.
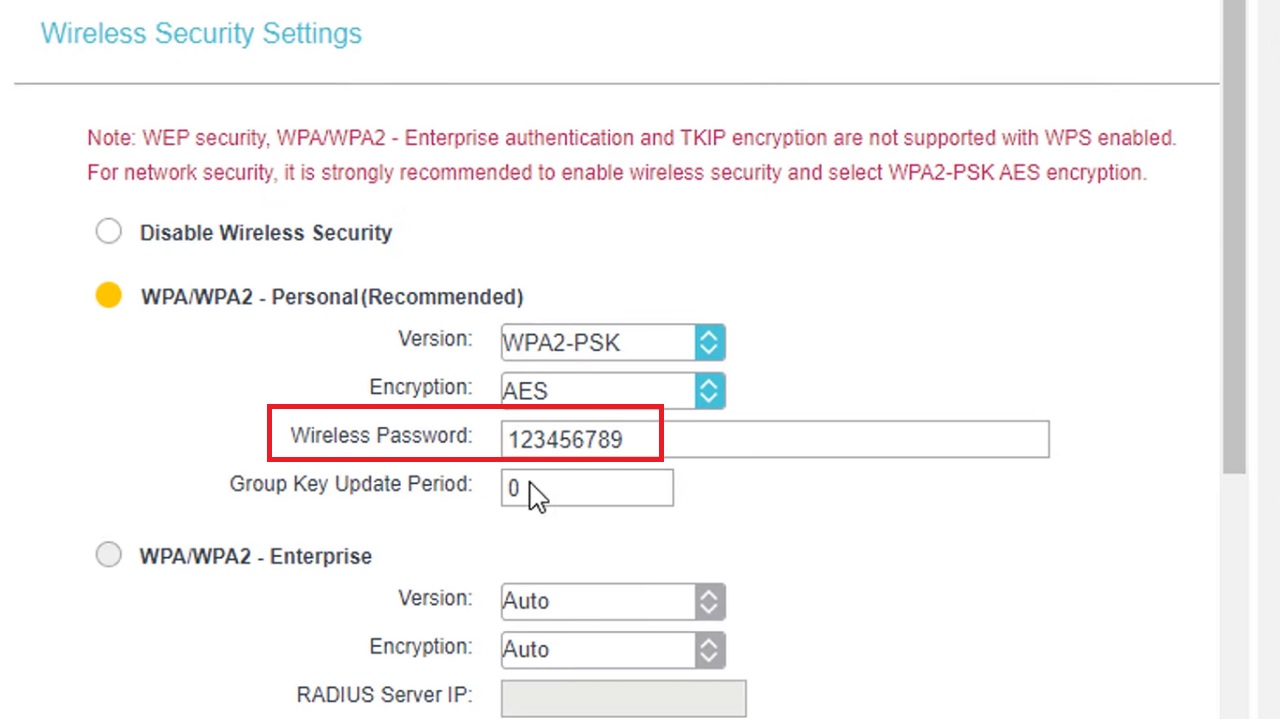
- Select Wireless Security under Wireless in the left pane.
- Check and note down the Wireless Password, which is 123456789 in this case.
Close all windows and disconnect the TP-Link router from the computer.
Now you will have to set up the Linksys router to create a Bridge Mode.
- Connect the router to the computer.
- Open the Command Prompt and find the IP address as before by typing the ipconfig command.
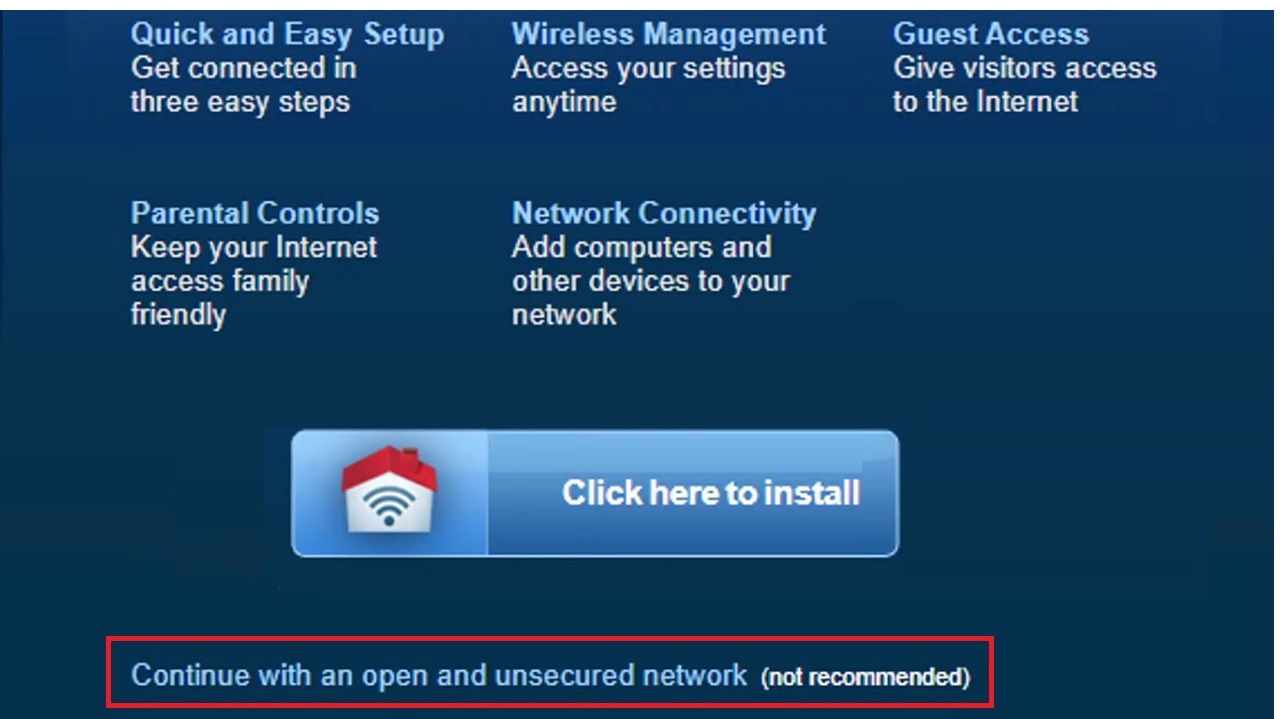
- Again, open the web browser > Type the IP address 192.168.1.1.
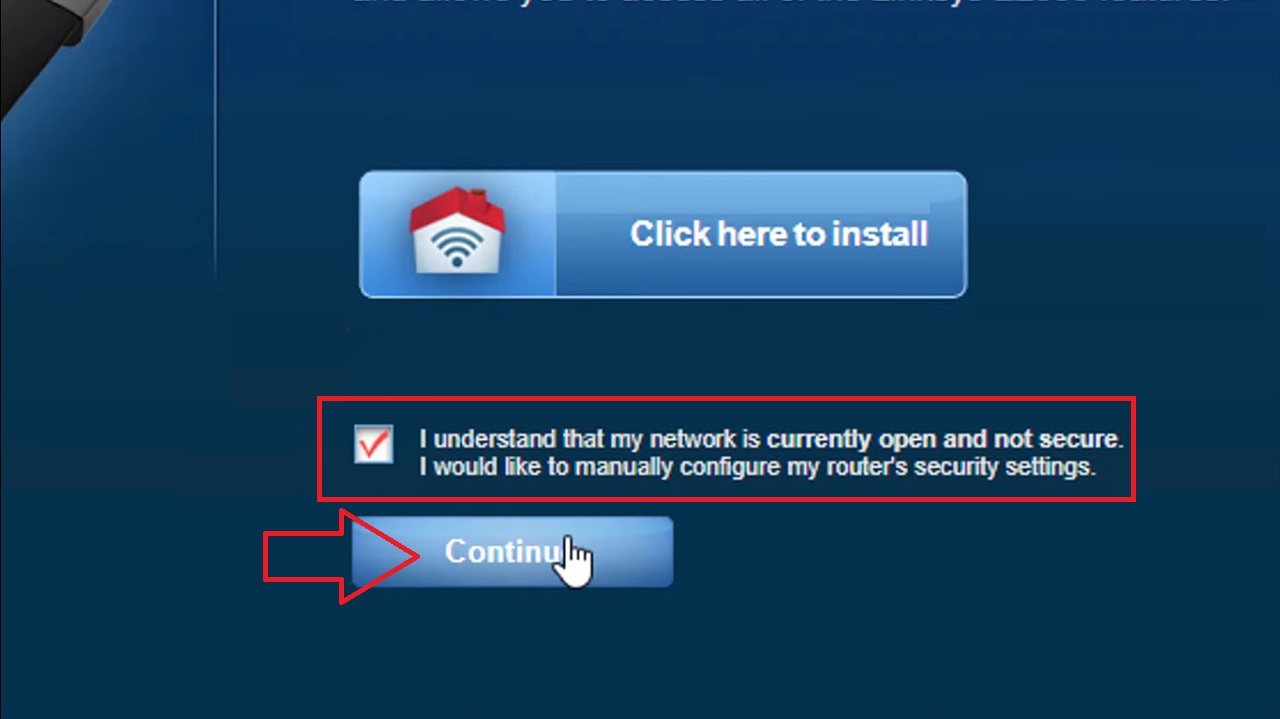
- Click on the Continue with an open and unsecured network (not recommended).
- Check the small box next to ‘I understand that my network is currently open and not secure. I would like to manually configure my router’s security settings.’
- Click on the Continue button.
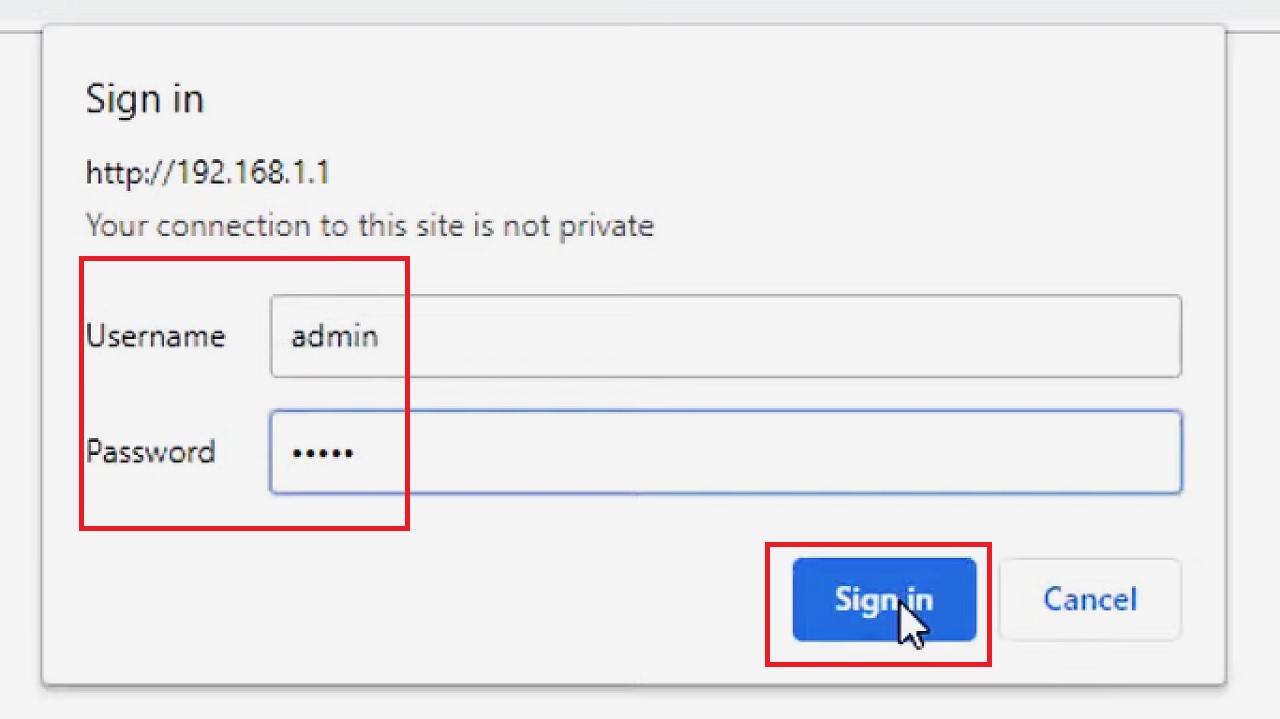
- Type in the Username and Password, which is usually ‘admin’ for both in this case as well, and click on Sign in to open the admin page of the Linksys router.
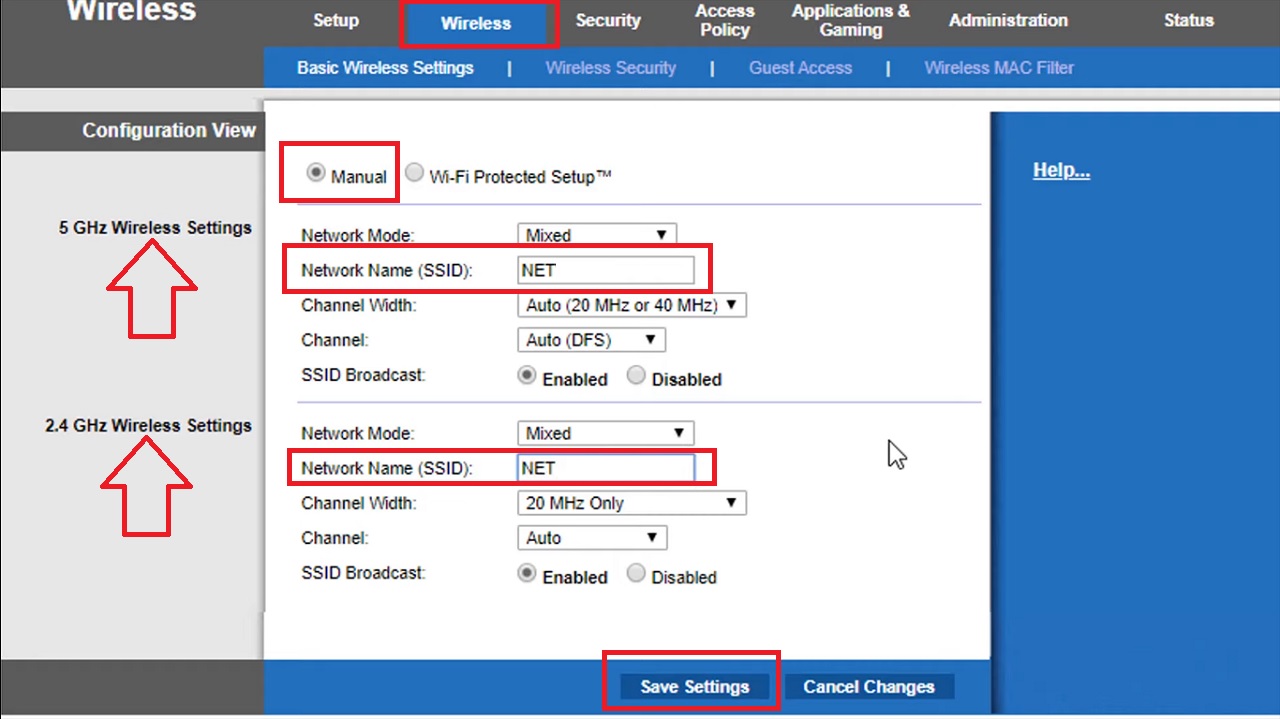
- On the following page, go to the Wireless tab.
- Click on the small circular button next to Manual.
- Change the SSID name of the router, which should be the same as the first router, for both frequencies.
- Click on the Save Settings button.
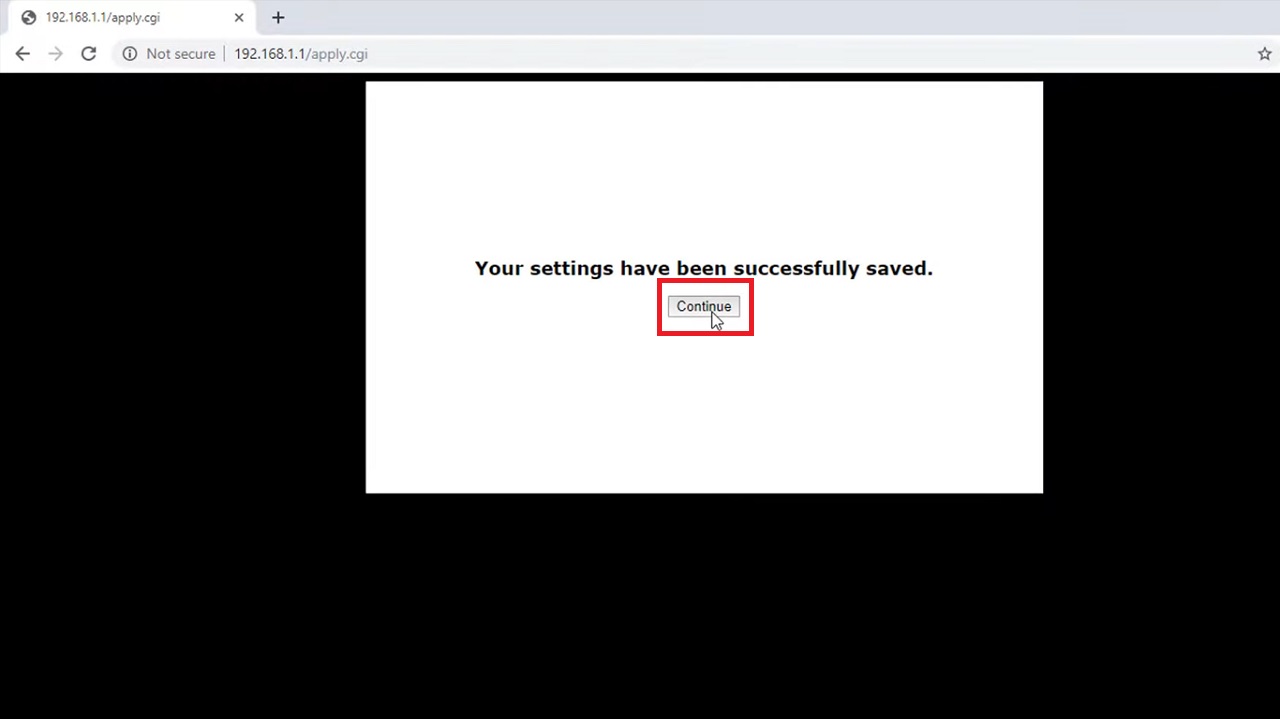
- Click on Continue in the following window which says ‘Your settings have been successfully saved.’
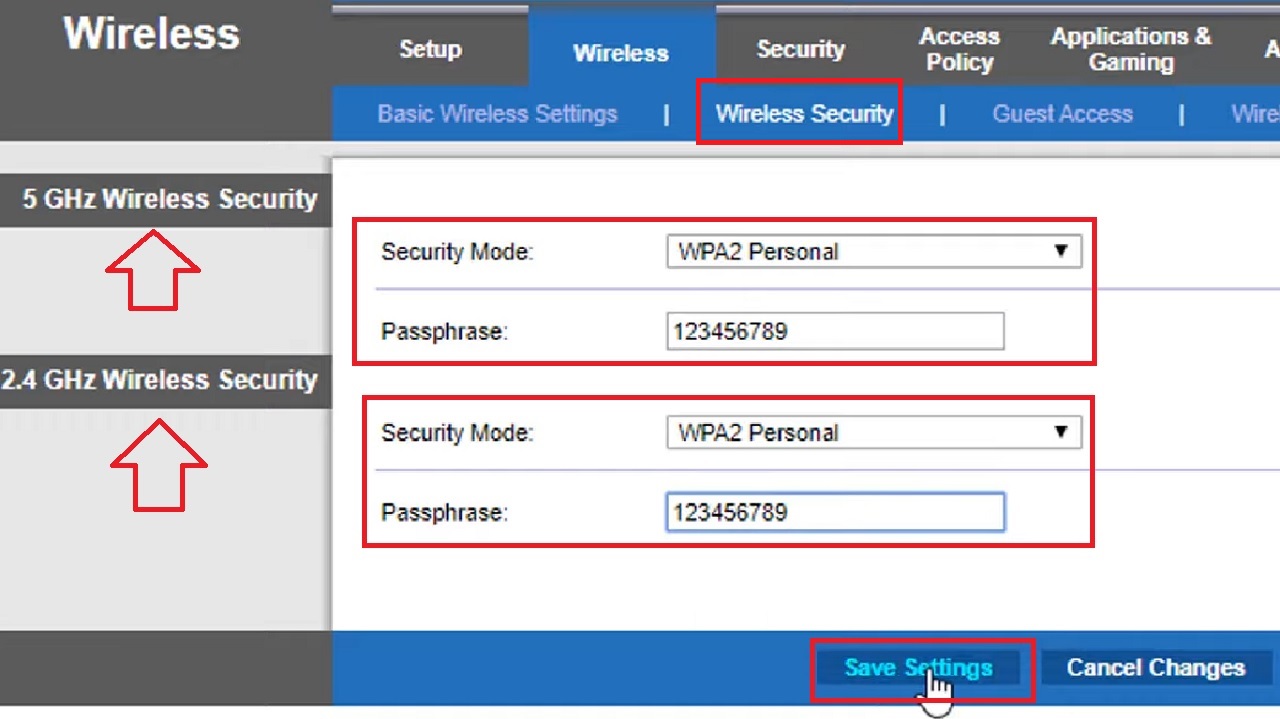
- Now, go to the Wireless Security tab.
- Click on the boxes beside both frequencies and set the Security Mode to WPA2 Personal for both.
- Also, type in the same password as the first router in both boxes next to the Passphrase.
- Click on the Save Settings button.
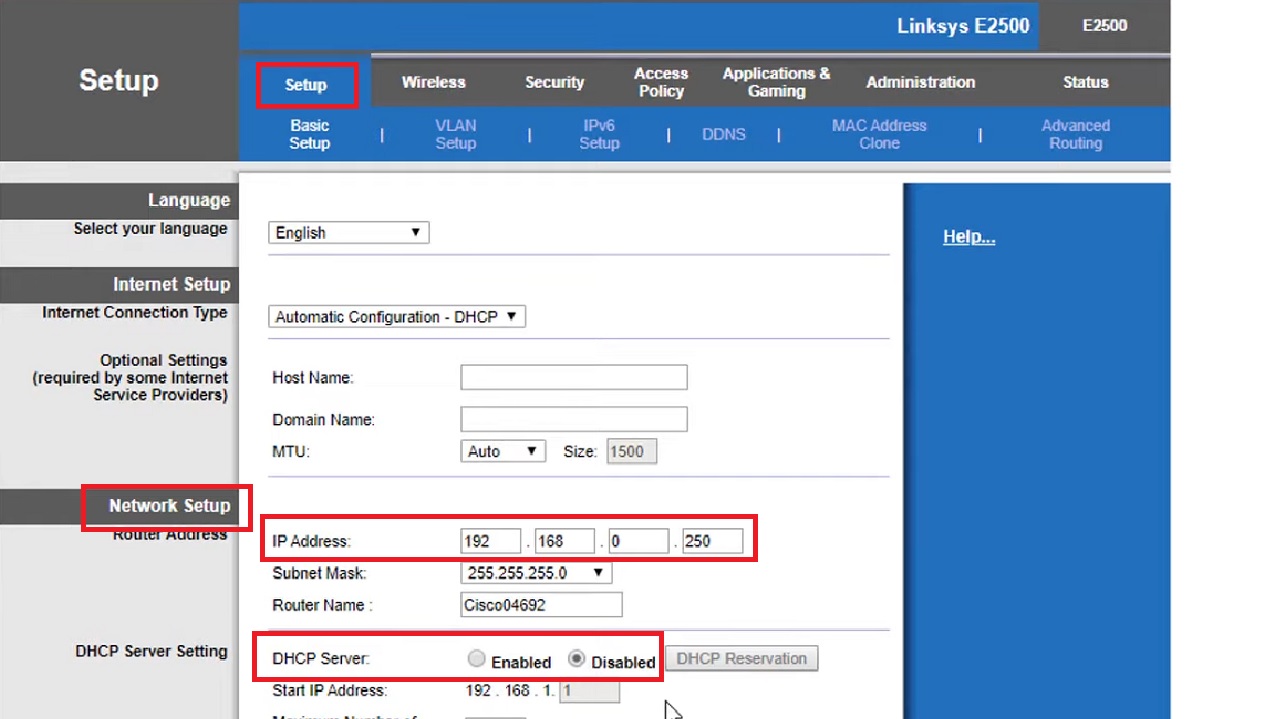
Now, you will have to assign a new IP address to the Linksys router.
- Go to the Setup tab.
- Under Network Setup, change the IP address to a different one than the first router to prevent IP address conflicts. For example, change it to 192.168.0.250.
- Also, click on the small radio button next to Disable to deactivate DHCP since it is enabled in the first router.
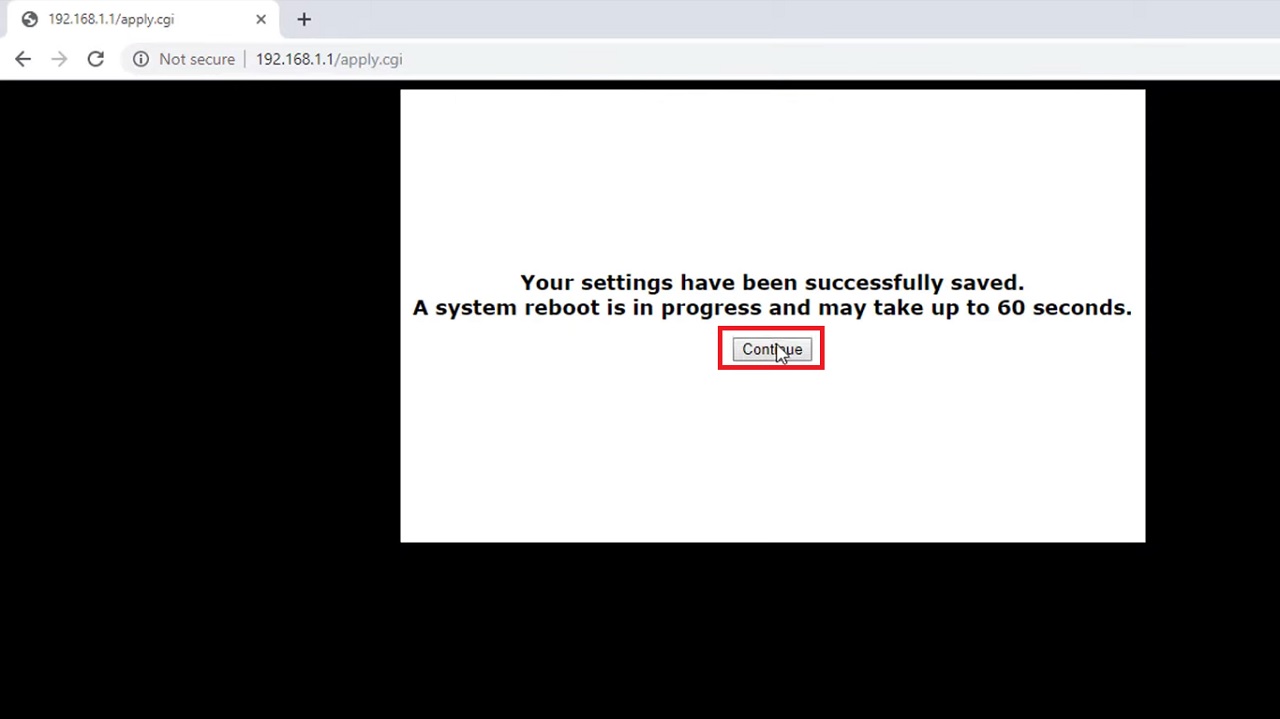
- Click on the Continue button in the following window to allow the system to reboot after 60 seconds.
Now, you need to connect the two routers properly.
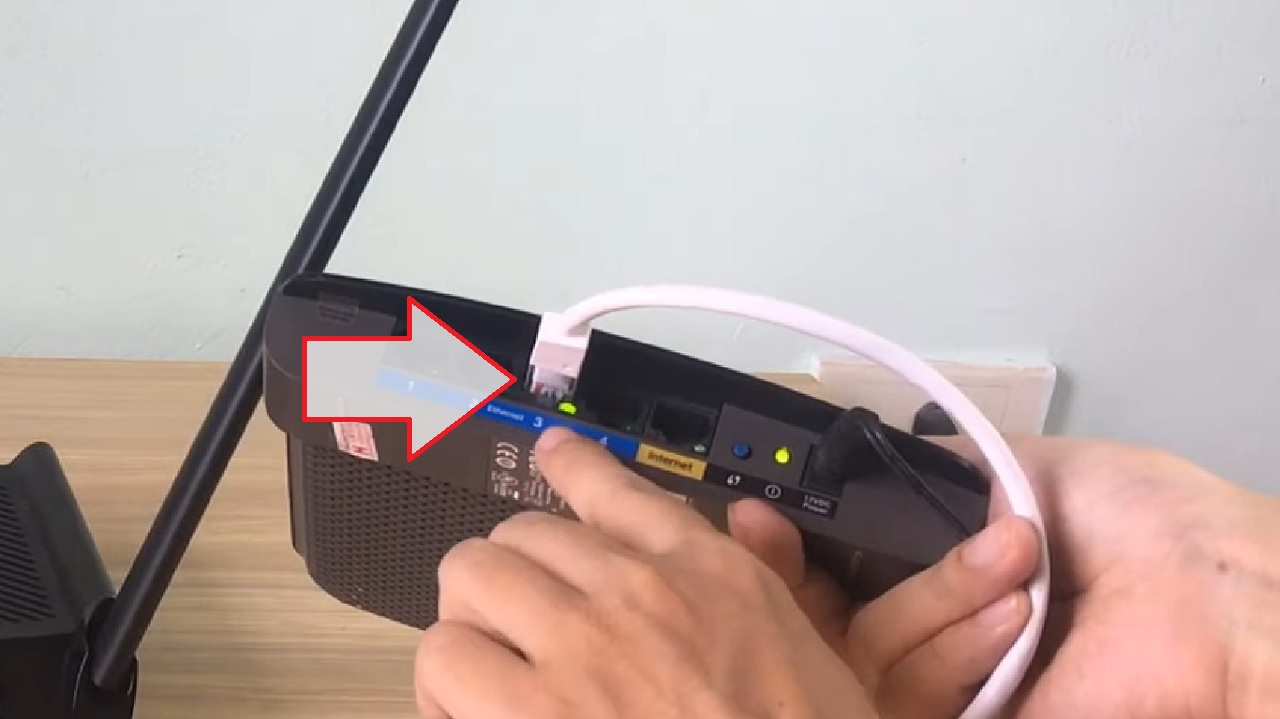
- Connect one end of the Ethernet cable to the LAN port of the first router.
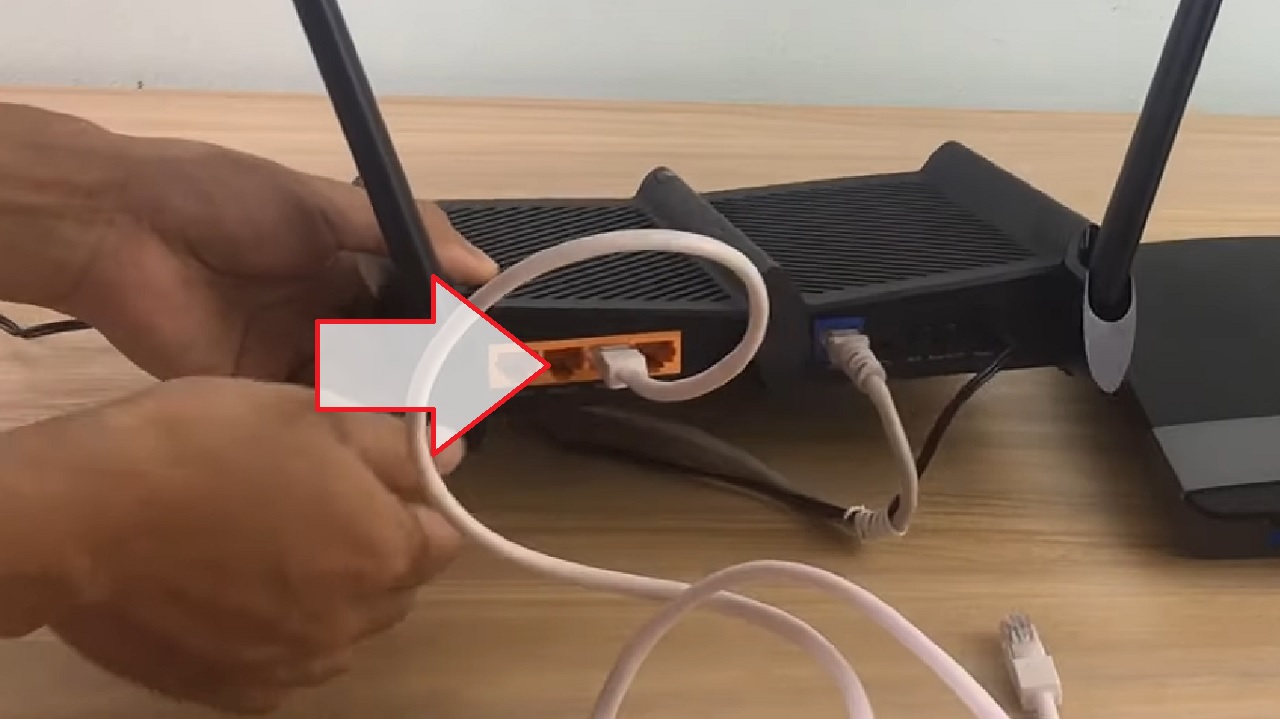
- Connect the other end of the cable to the LAN port of the second router. Make sure that you do not connect the ends to the WAN ports of the two routers as they look pretty much the same.
Now the bridge is set up successfully with both having the same SSID and password, as shown in the image below:

The second router will not function like a router anymore but act as a bridge to the first router, which is now in charge of both of them.
- Finally, connect other computers and devices by clicking on the Wi-Fi icon on the taskbar, typing the password, and clicking on the Next Button.

(The devices can be connected wirelessly or by using Ethernet cables to the LAN ports on the router).
Conclusion
To sum up: setting up Wi-Fi Bridge Mode is a useful way to extend the range of the network and improve connectivity.
When you follow the steps mentioned above, you can successfully configure and use Bridge Mode for seamless networking without pointless complications.