
You may sometimes experience an issue such as the Hosted Network is connected but there is no internet access.
In such situations, you will not be able to use the internet properly and you will not be able to create a hotspot on your PC.
This issue is quite normal and is not all that serious. It can be fixed by some easy methods.
If you are unaware of these methods but want to know about them you are at the right place. This article will inform you about its reasons, fixes and the steps to follow to rectify the problem.
In This Article
KEY TAKEAWAYS
- Simply restarting the Hosted Network feature may fix the issue most of the time.
- Running the troubleshooter to fix any internal hardware issues unknown to you may also help in fixing the error.
- Enabling file sharing for different bit-encryptions might also resolve the issues with connectivity due to the Hosted Network feature.
- Another simple and quick fix to the issue is to change the network connection from the Control Panel.
Why is Hosted Network Connected but No Internet Access?
If your system does not support the Hosted Network, you will face the issue of the Hosted Network connected but no internet access.
However, this issue does not occur only if the Hosted Network feature is not supported by your PC. It may also happen when:
- The Wi-Fi card is not working properly
- The Wi-Fi device is faulty
- Other hardware issues
- The drivers is outdated or corrupt
Regardless of the reason, here are a few remedies that might help in fixing the issue.
How to Fix Hosted Network Connected but No Internet Access Error?
The Hosted Network connected but no internet access error can be resolved easily by restarting the Hosted Network feature on your PC.
If there are any issues with the hardware that is causing the issue, you can try identifying and fixing them easily by running the hardware troubleshooter from the Control Panel.
Sometimes, minor changes in sharing settings from the Control Panel may resolve the issue. Go to the Control Panel > Network and Internet > Network and Sharing Center > Advanced sharing settings > Enable file sharing for 40 and 56-bit encryption. If any item is requested, you may also turn it on.
If that does not resolve the issue then you can try the following solutions:
- Change the network connection
- Install the latest driver of the Network Interface Card (NIC) installed on your PC
Here are the steps to follow for each.
Method 1: Change Network Connections from the Control Panel
More often than not, the issue of the Hosted Network connected but no internet access can be resolved by simply changing the network connections from the Control Panel.
STEPS TO FOLLOW:
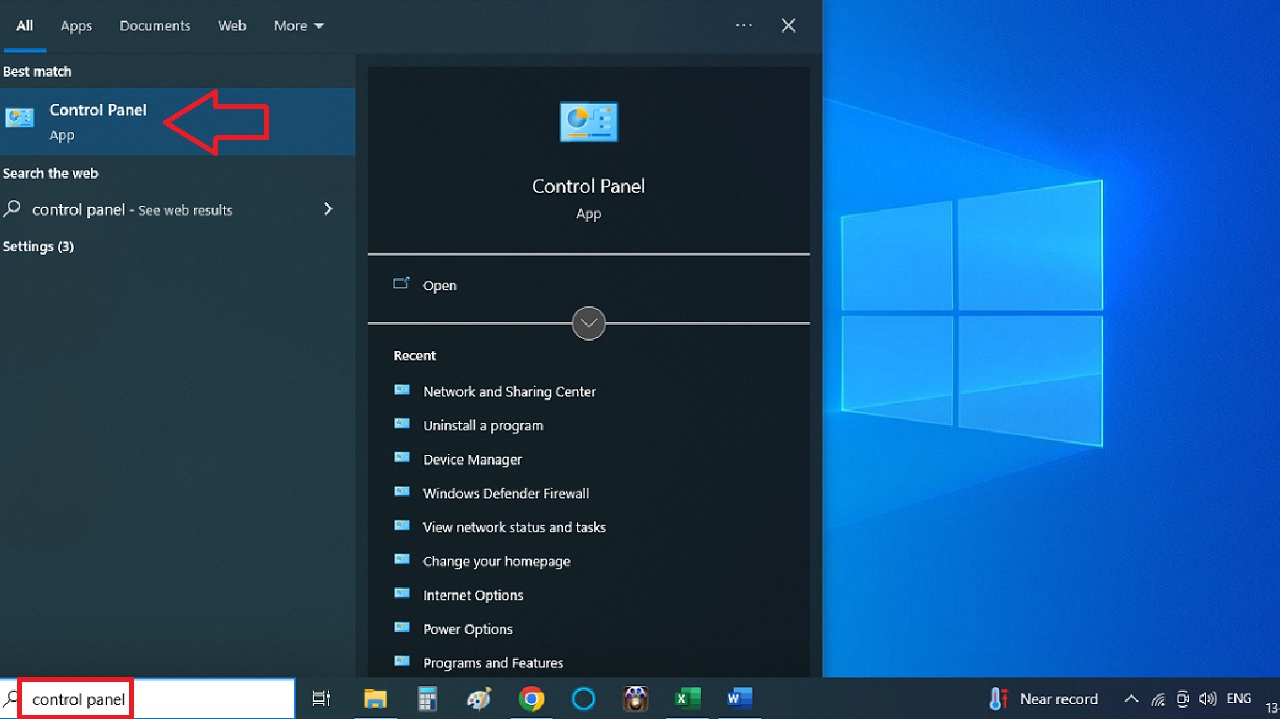
- Go to the search box next to the Start Menu.
- Type control panel and hit the Enter key on your keyboard.
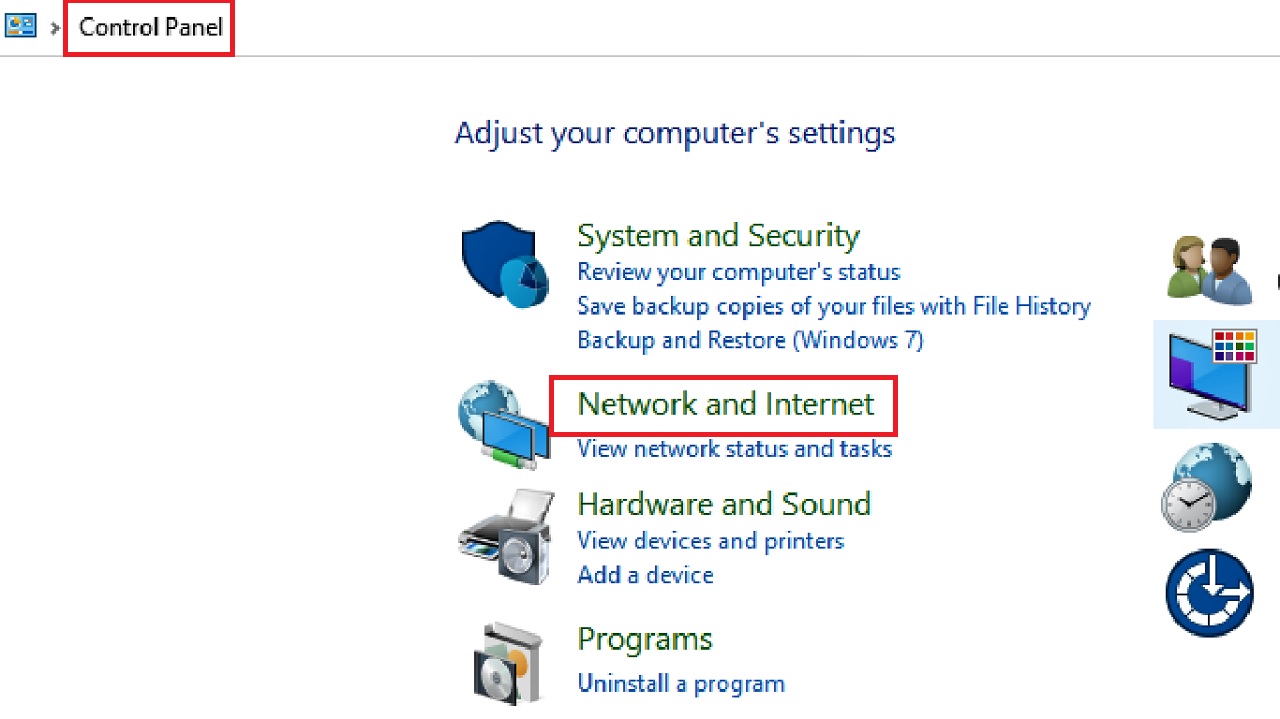
- Select Network and Internet from the Control Panel window from the Category view.
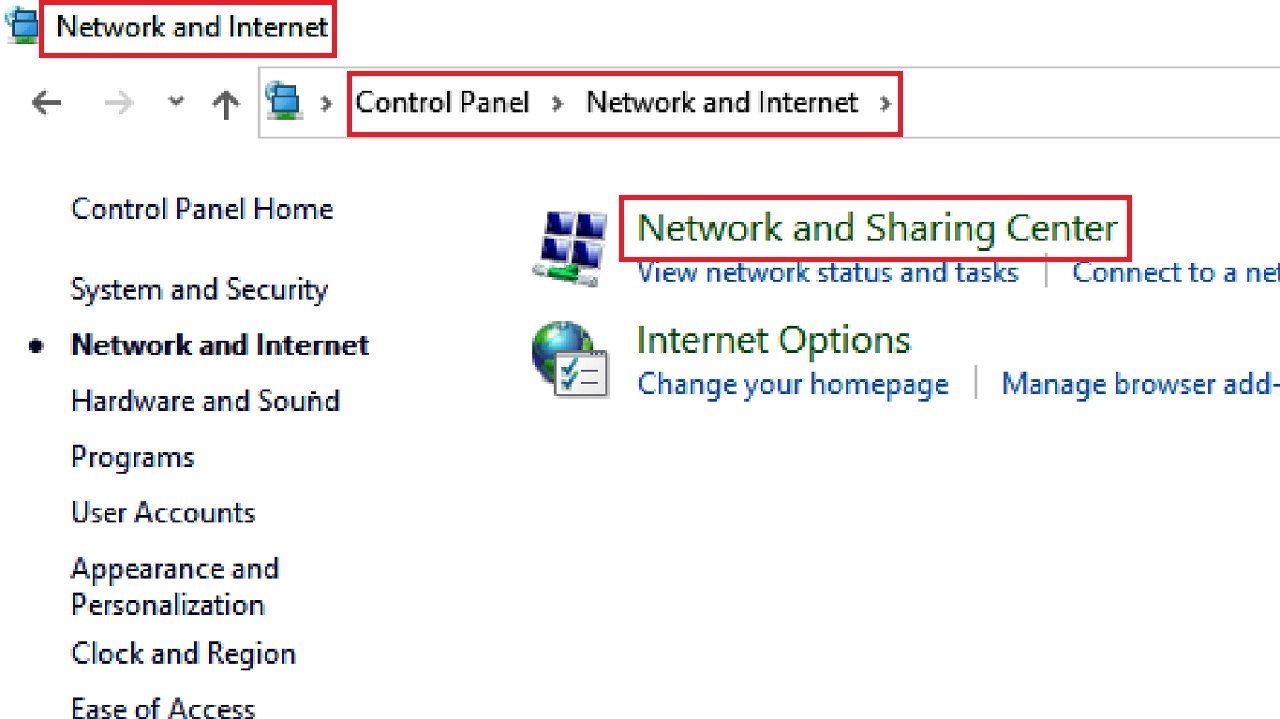
- Click on the Network and Sharing Center option in the following window.
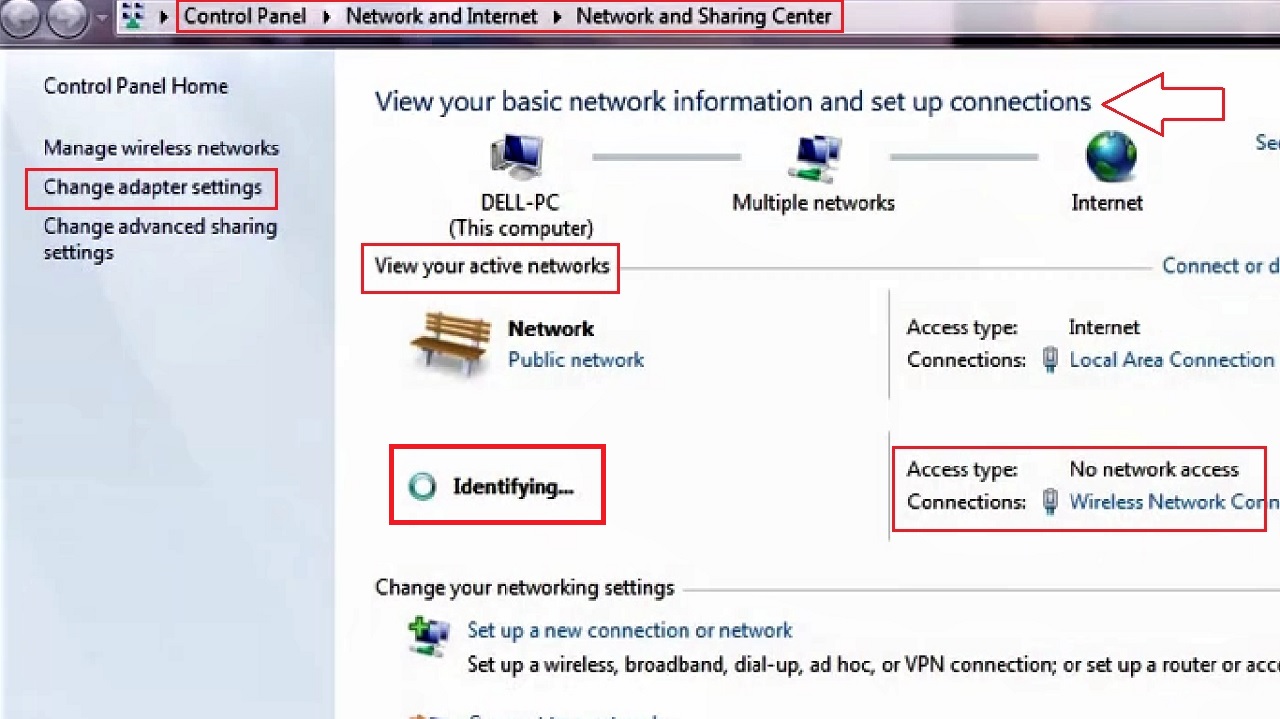
- In the following window where you can View your basic network information and set up connections, check the Access type whether it shows No network access and ‘Identifying.’
- In that case, click on the Change adapter settings option on the left panel of the window.
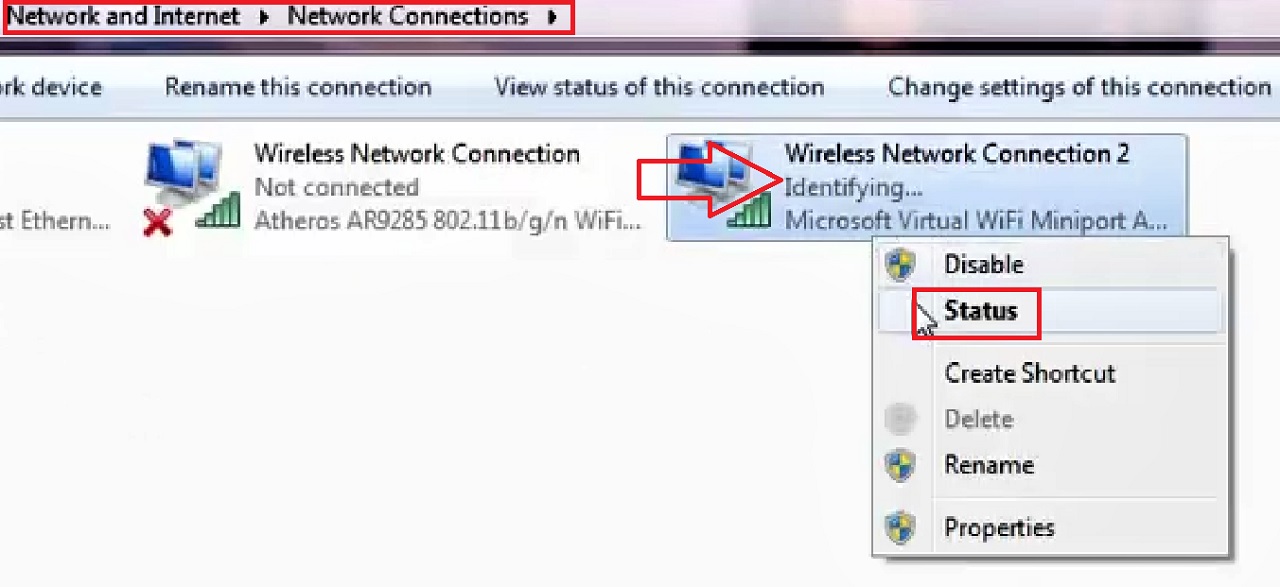
- Right-click on the other network connection showing Identifying in the Network Connections window that appears. (Wireless Network Connection 2 in this case).
- Select Status from the drop-down context menu.
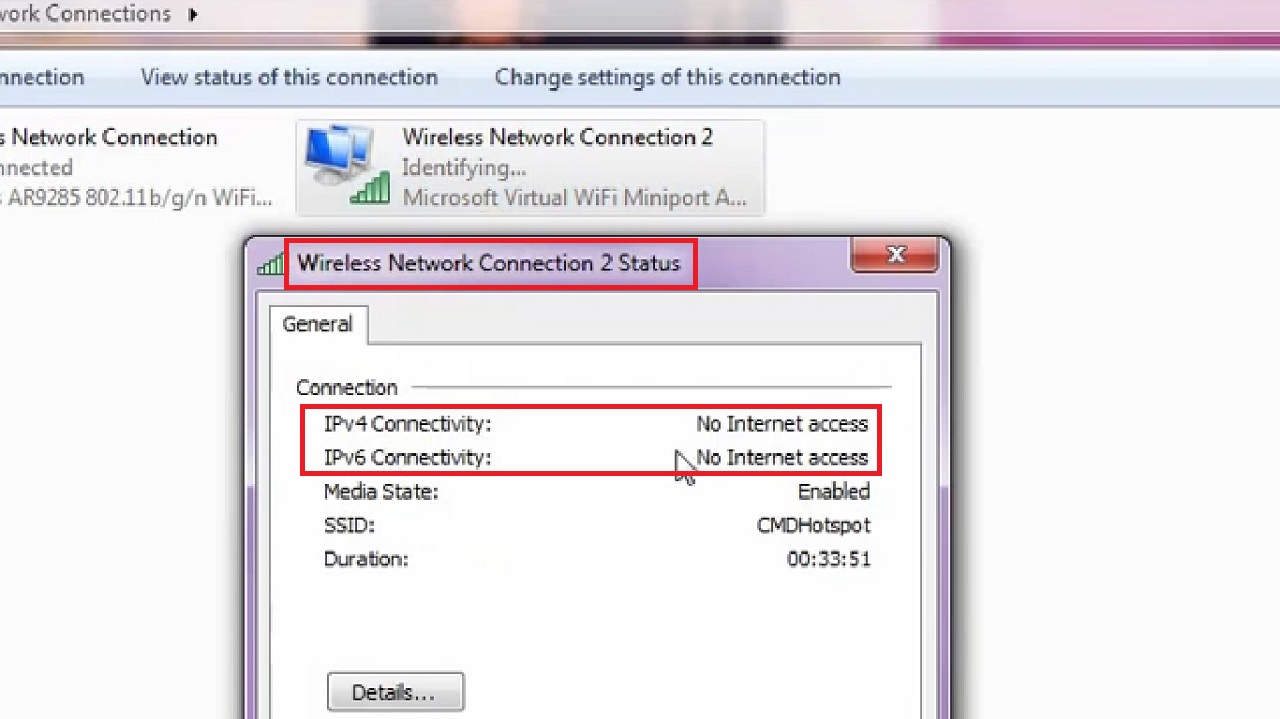
- Now, check the status of both IPv4 and IPv6 Connectivity in the following Wireless Network Connection 2 Status window under Connection. Note, both show No Internet access.
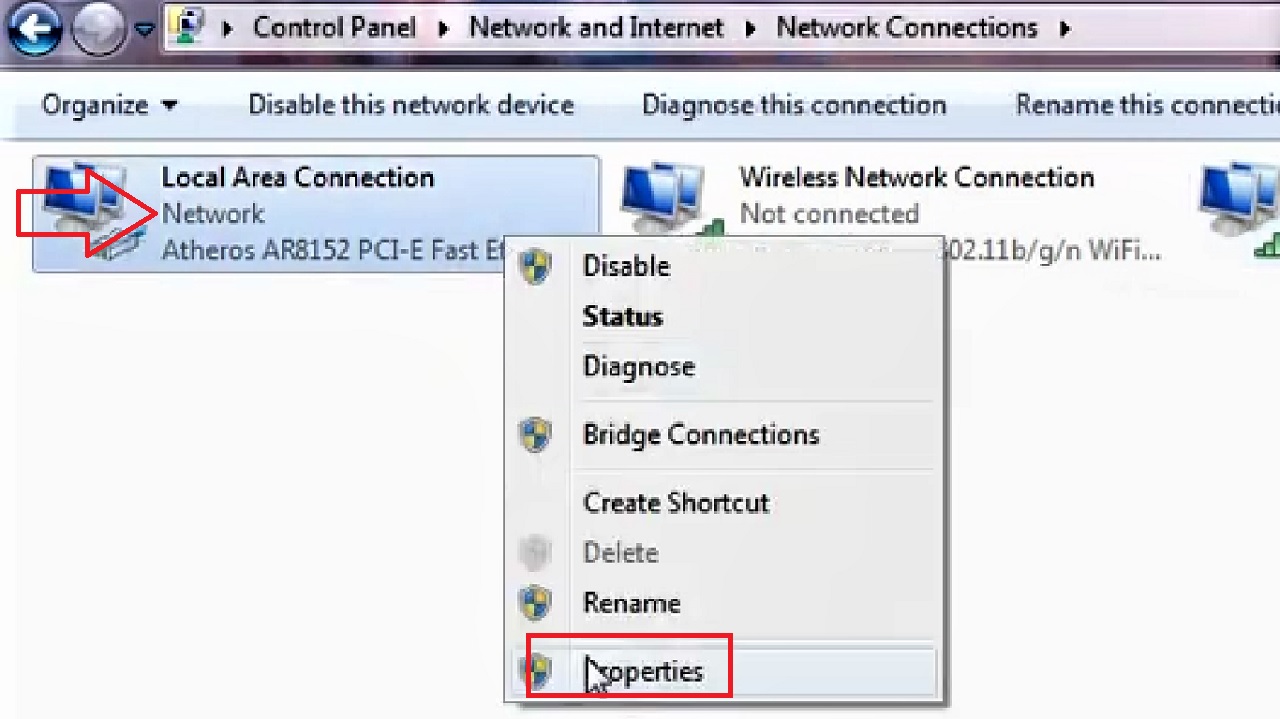
- Now, right-click on the Local Area Connection network.
- Choose Properties from the drop-down context menu.
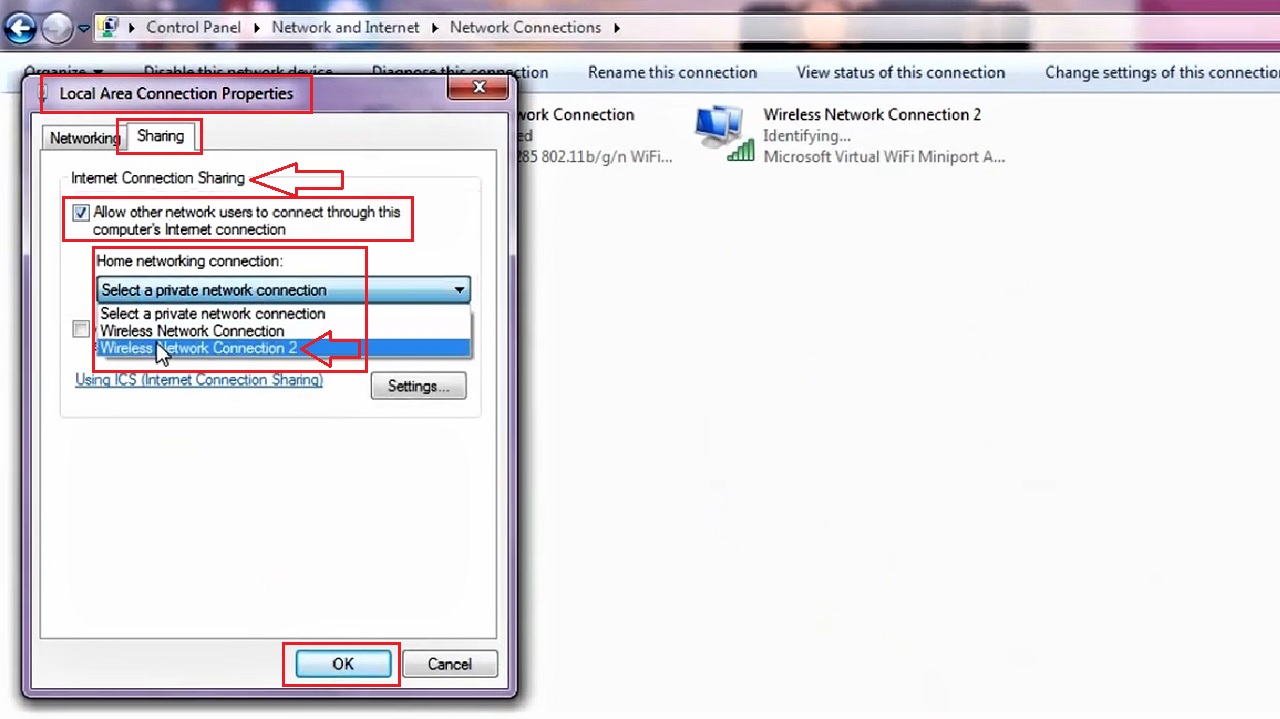
- Go to the Sharing tab in the following Local Area Connection Properties window.
- Check the small square box next to Allow other network users to connect through this computer’s Internet connection.
- Click on the box under Home networking connection.
- Select Wireless Network Connection 2 from the list of options that appears in the drop-down context menu.
- Then click on the OK button to save the change and close the window.
- Now, open the Status window of the Wireless Network Connection 2.
It will open a window which will look like the image below:
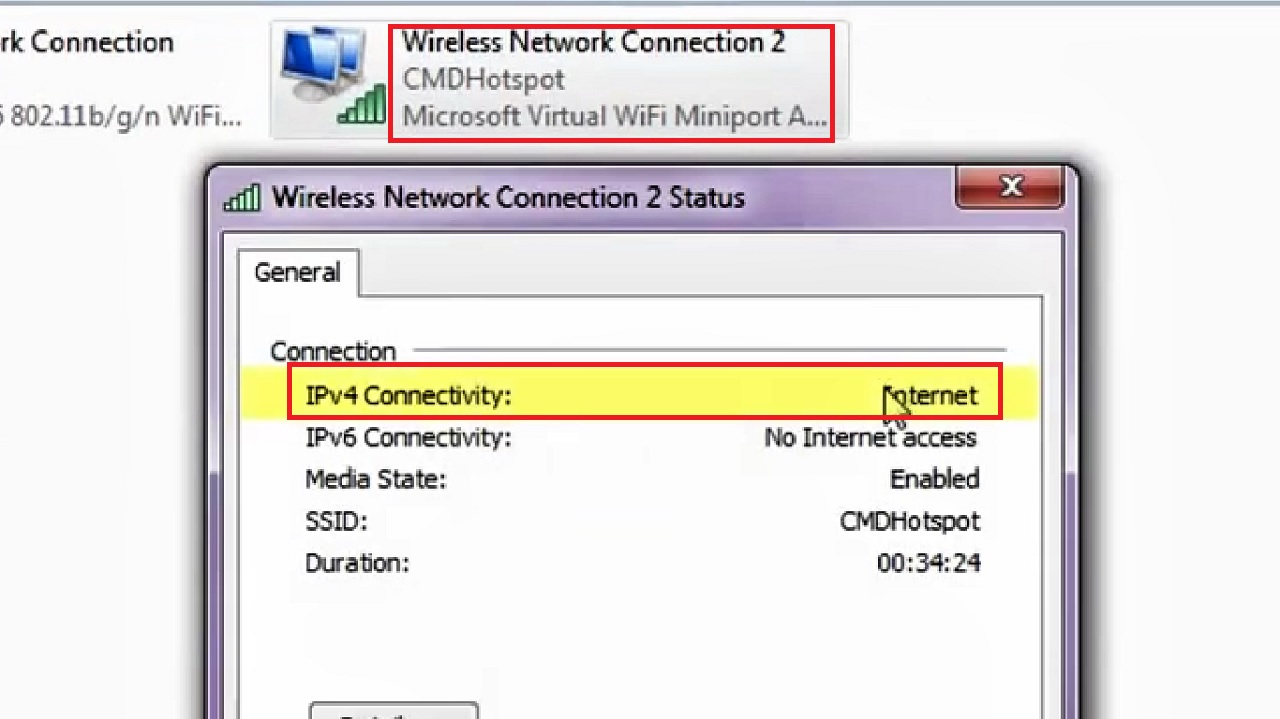
Note that the IPv4 Connectivity is now enabled, which is marked by a red box highlighted in yellow in the image.
Also, see that the connection is no more ‘Identifying’ and the Microsoft Virtual WiFi Miniport Adapter is being used.
Finally, check the Network and Sharing Center window and you will see that the connection that was shown as ‘Identifying’ before is now enabled, as shown in the image below:

Restart your system and use your network and internet as before.
If this does not resolve the problem, you may try the next method.
Method 2: Install the 8.1 Version Driver of the Network Interface Card
Irrespective of the operating system and the Network Interface Card installed on your PC, you might fix the issue of Hosted Network Connected but no internet access by installing the 8.1 version driver of the NIC.
Note: This method is quite long and comprises different stages. Follow each step precisely for successful rectification of the issue.
Also note that using a driver not compatible with the operating system may cause some issues.
STEPS TO FOLLOW:
- Press the Windows and R keys together on your keyboard.
- Type cmd.exe in the Run dialog box that opens up.
- Press CTRL + SHIFT + ENTER keys on your keyboard together to open the elevated Command Prompt window.
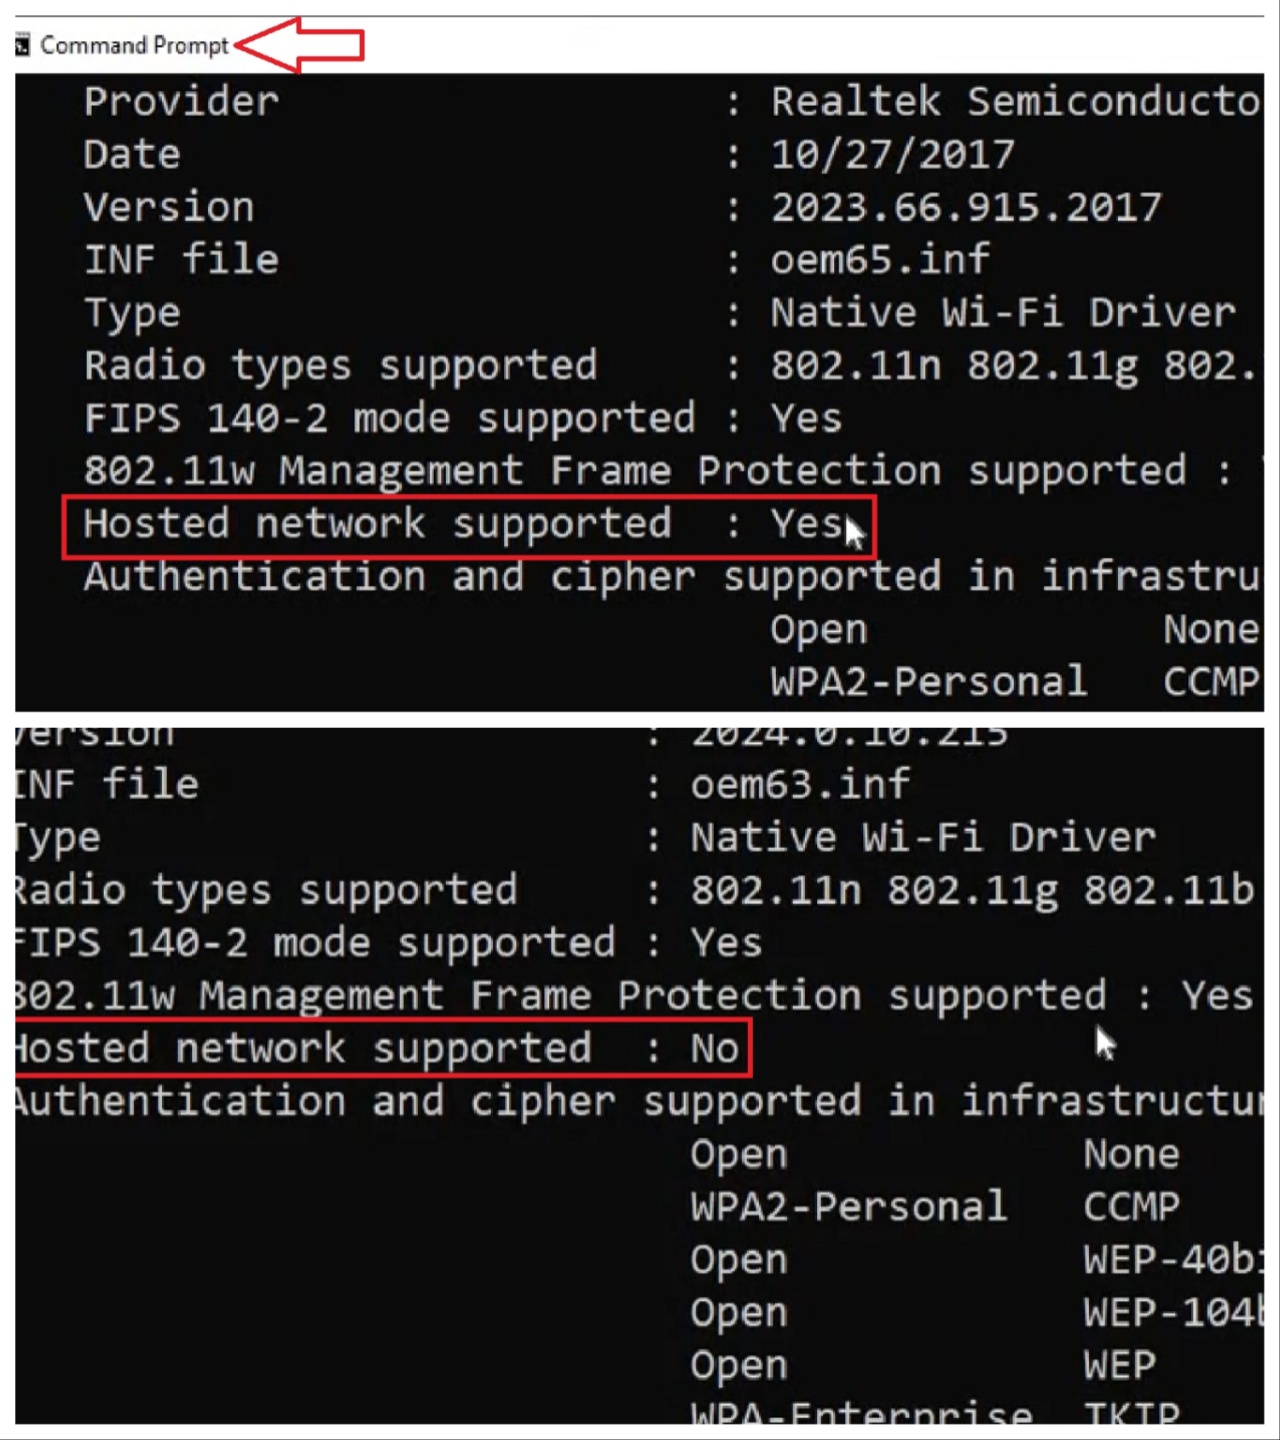
- Check whether or not your PC supports Hosted Network by typing the command netsh wlan show drivers in the Command Prompt and hitting the Enter button on your keyboard.
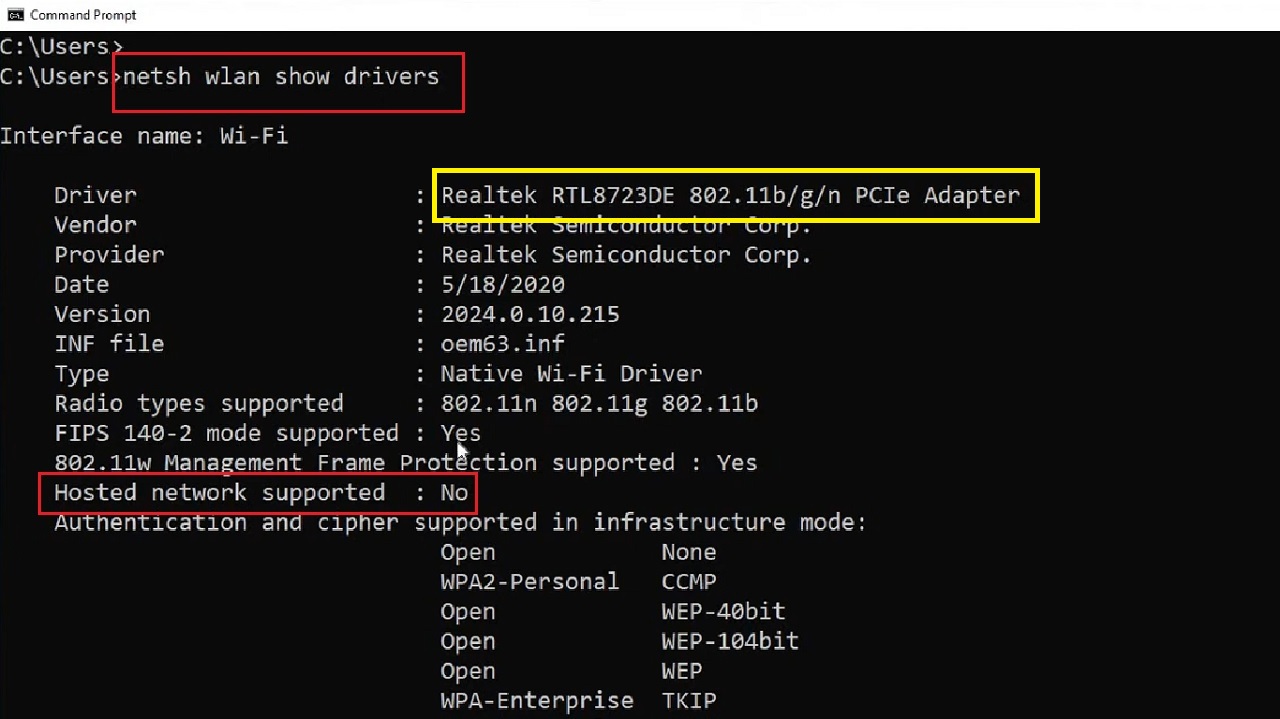
If it shows No, as it is in this case, you will need to enable it by following these steps:
- Note the model of your network adapter, marked by a yellow box in the image above.
- Open Google Chrome.
- Type in the model number (RTL8723 in this case) in the address bar and hit Enter.
- Select the result with the same model number and click open the webpage. Make sure its version is 8.1 and it supports your operating system bit (64 bit, in this case).
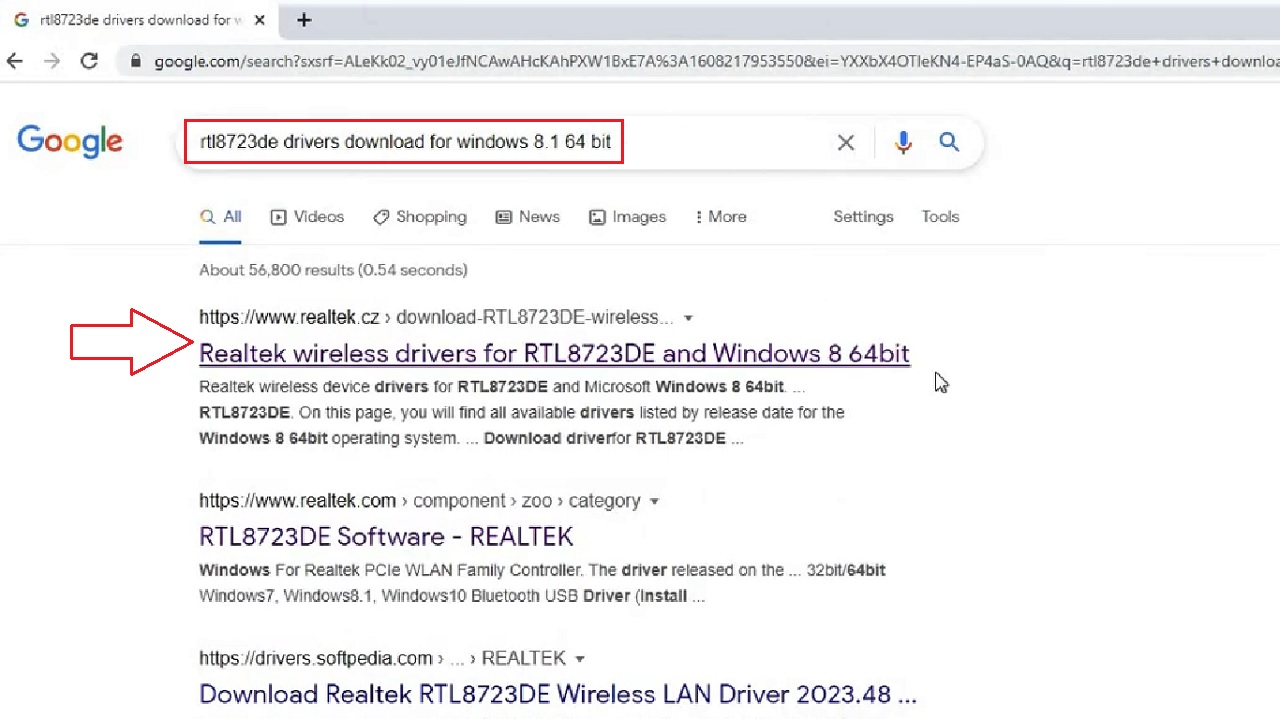
Remember, the suffix letters (DE, in this case) do not matter. Just ensure the model number is the same.
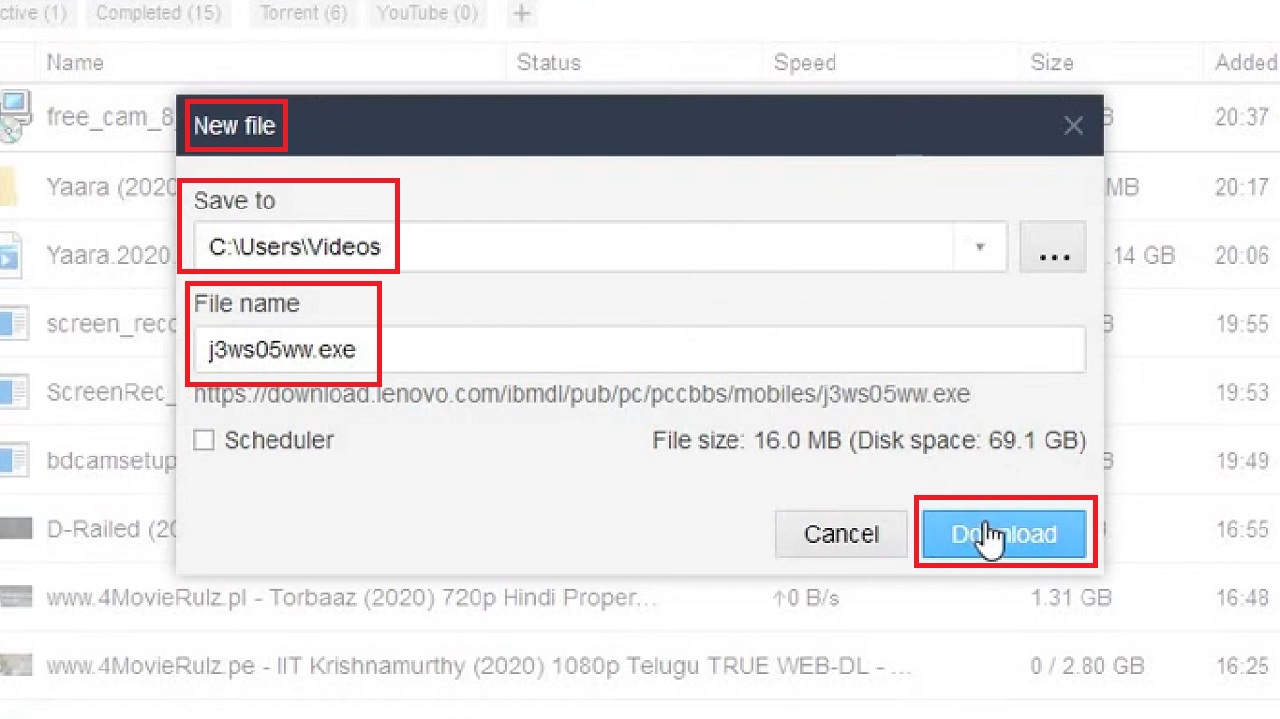
- Look for the Download button at the side and click on it to start downloading.
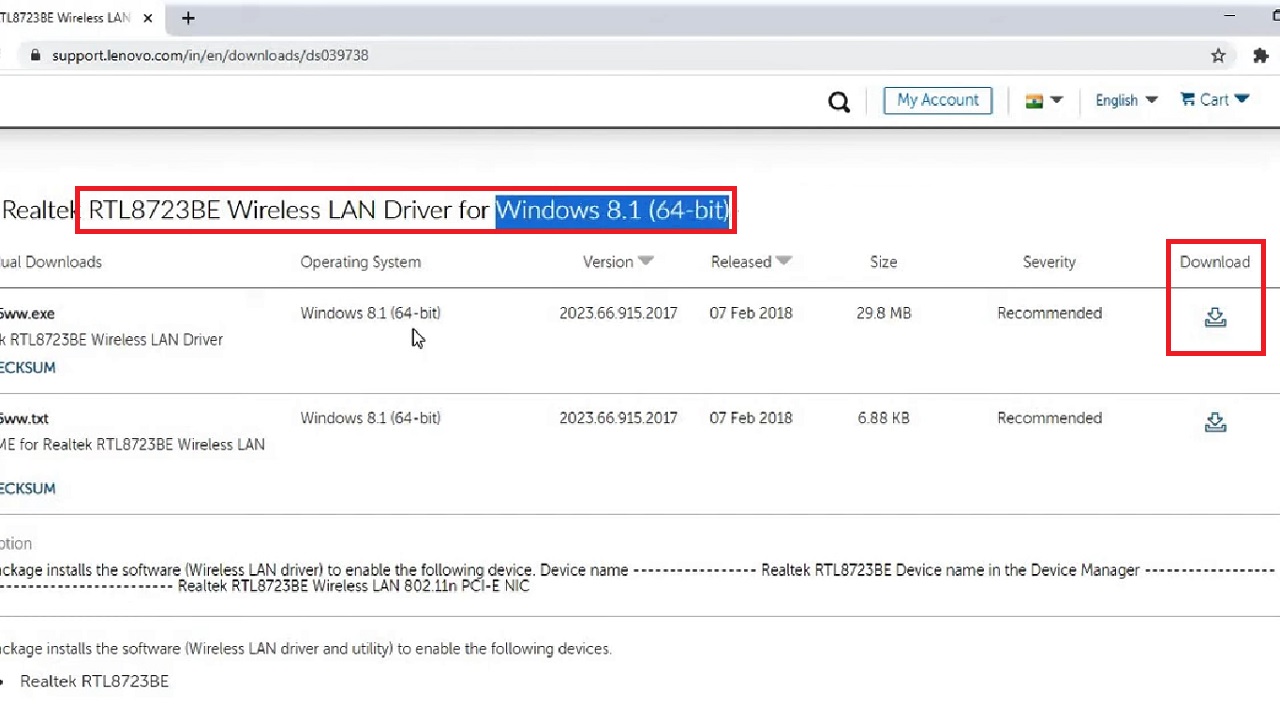
- Click on the Download button again in the New File window. Check where the file is saved and the file name.
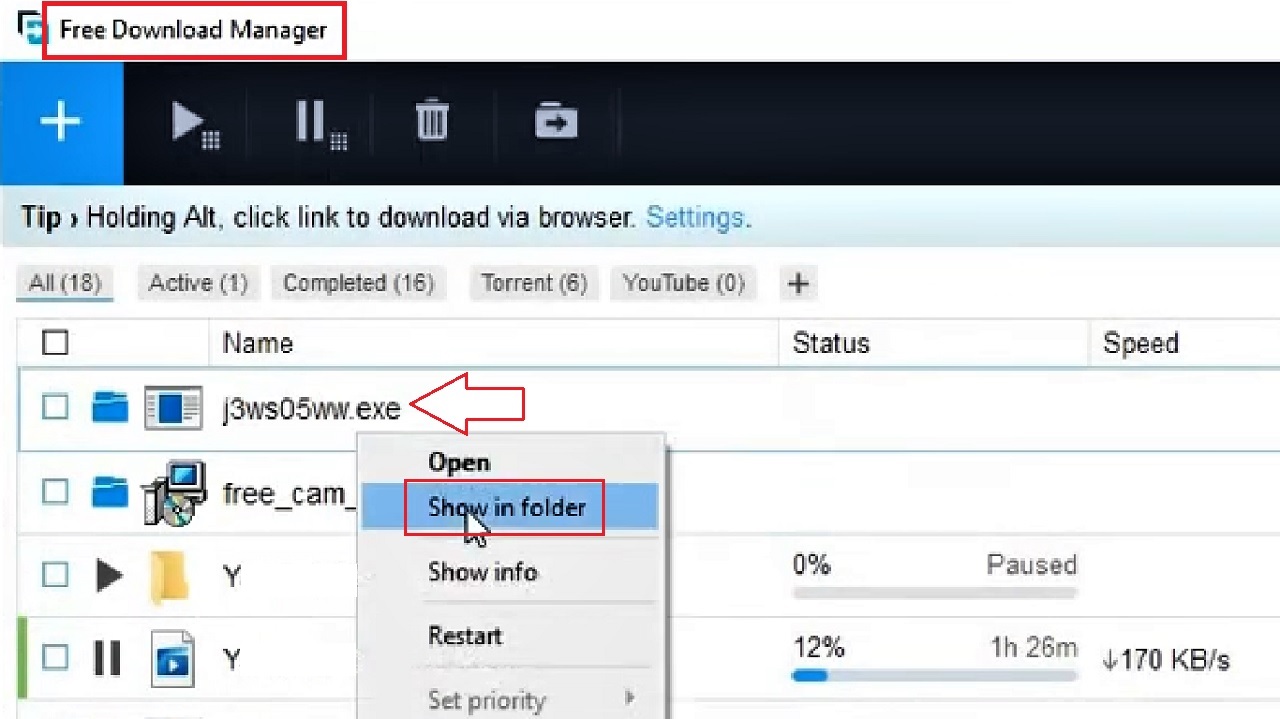
- When the downloading process is complete and you can see it in the Free Download Manager window, right-click on the file icon and click on Show in folder from the options in the drop-down menu.
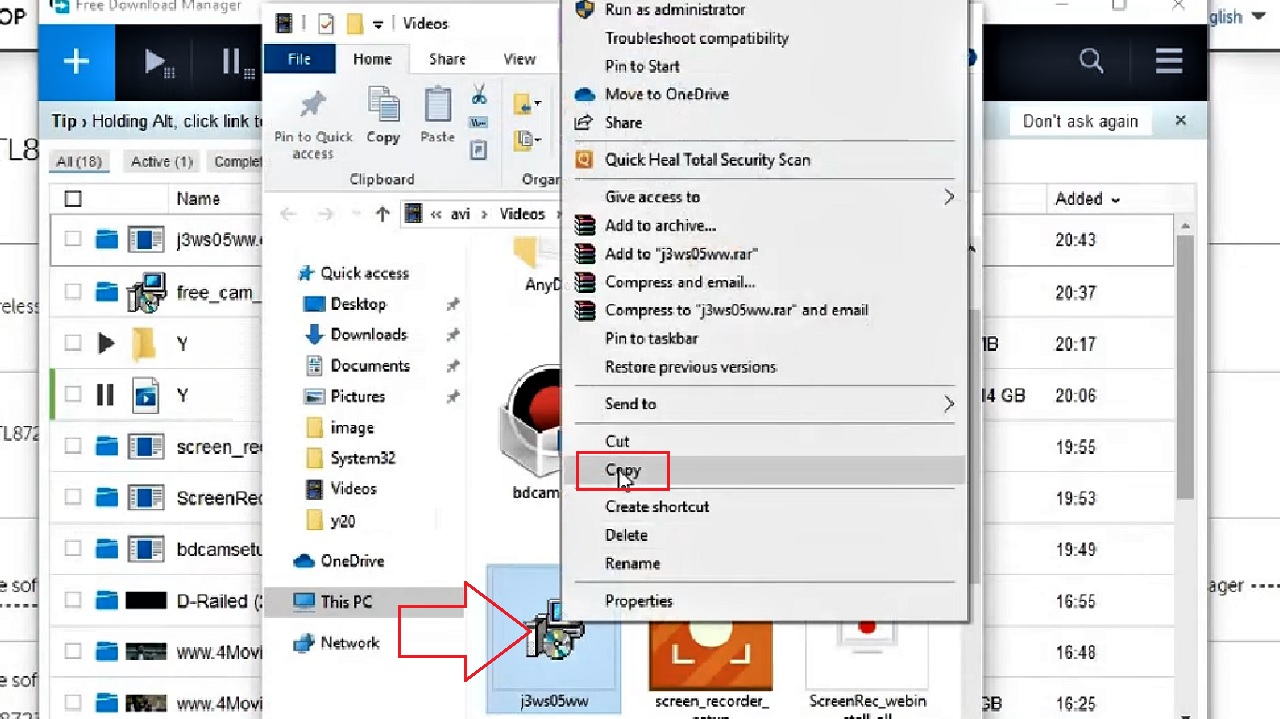
- In the following folder window that opens up, right-click again on the file and click on Copy from the options in the drop-down menu.
- Close all open windows.
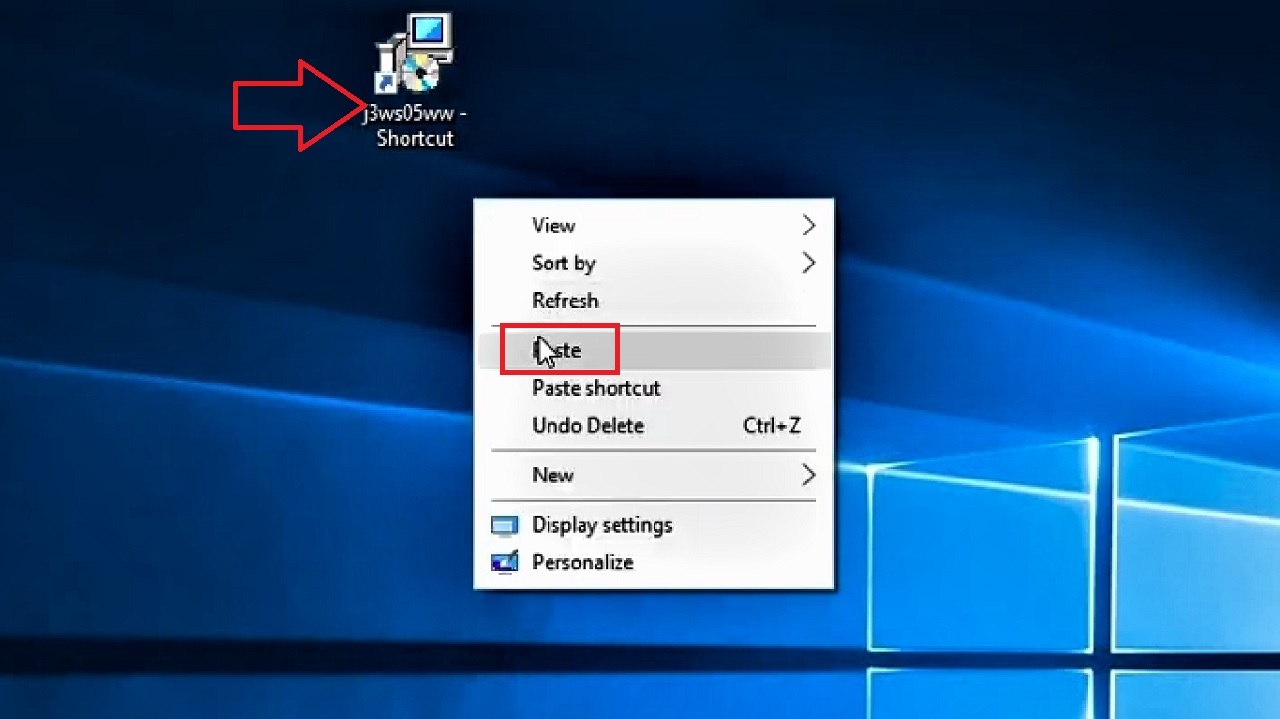
- Right-click on a blank space on your desktop and click on Paste Shortcut option from the drop-down context menu.
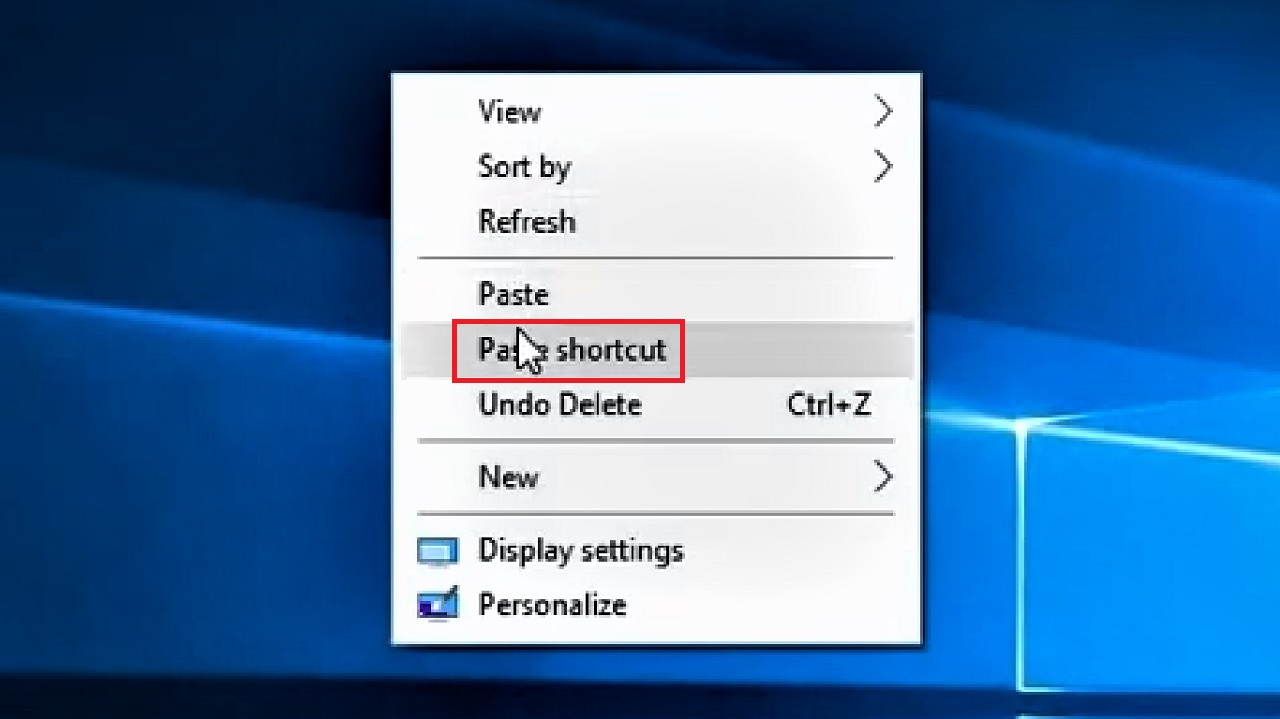
- This will create a shortcut of the downloaded file on the desktop.
- Then, right-click on the newly created shortcut of the file and this time choose the Paste option from the drop-down context menu.
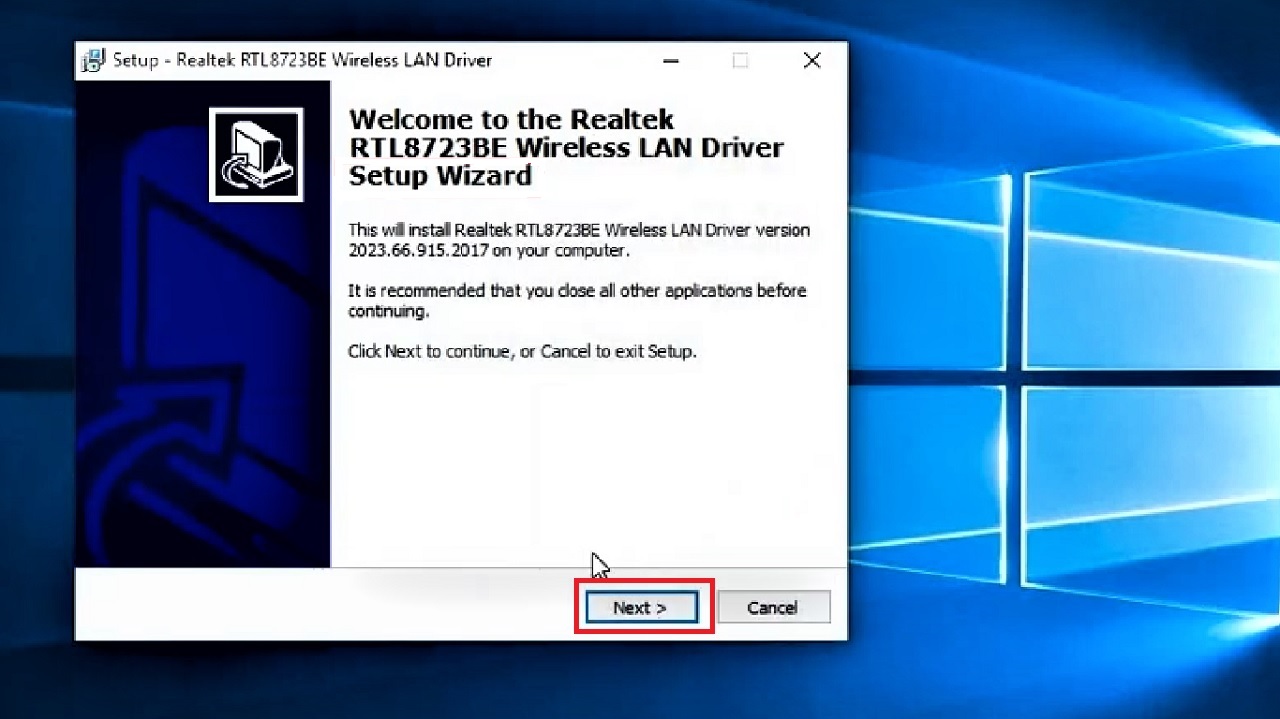
- Right-click on it and choose Run as administrator from the options in the drop-down context menu.

- Click on the Next button in the Setup Wizard window.
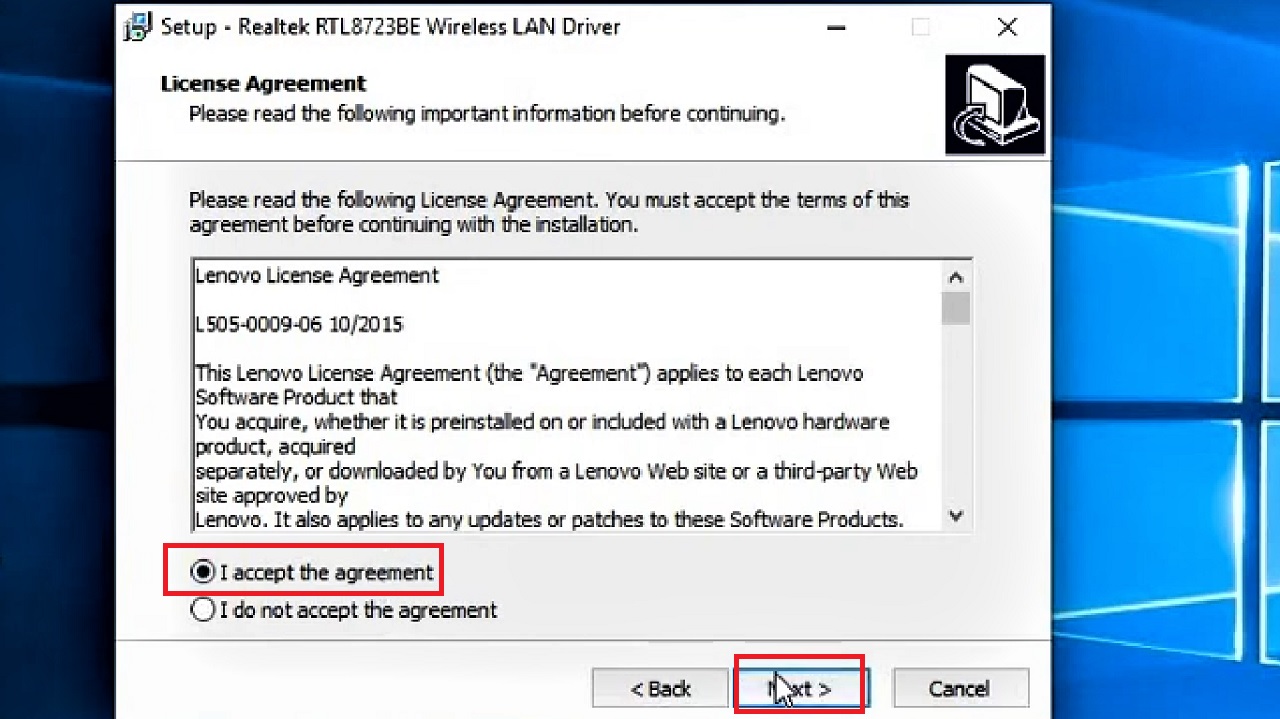
- Click on the small circle next to ‘I accept the agreement.’
- Click on the Next button.
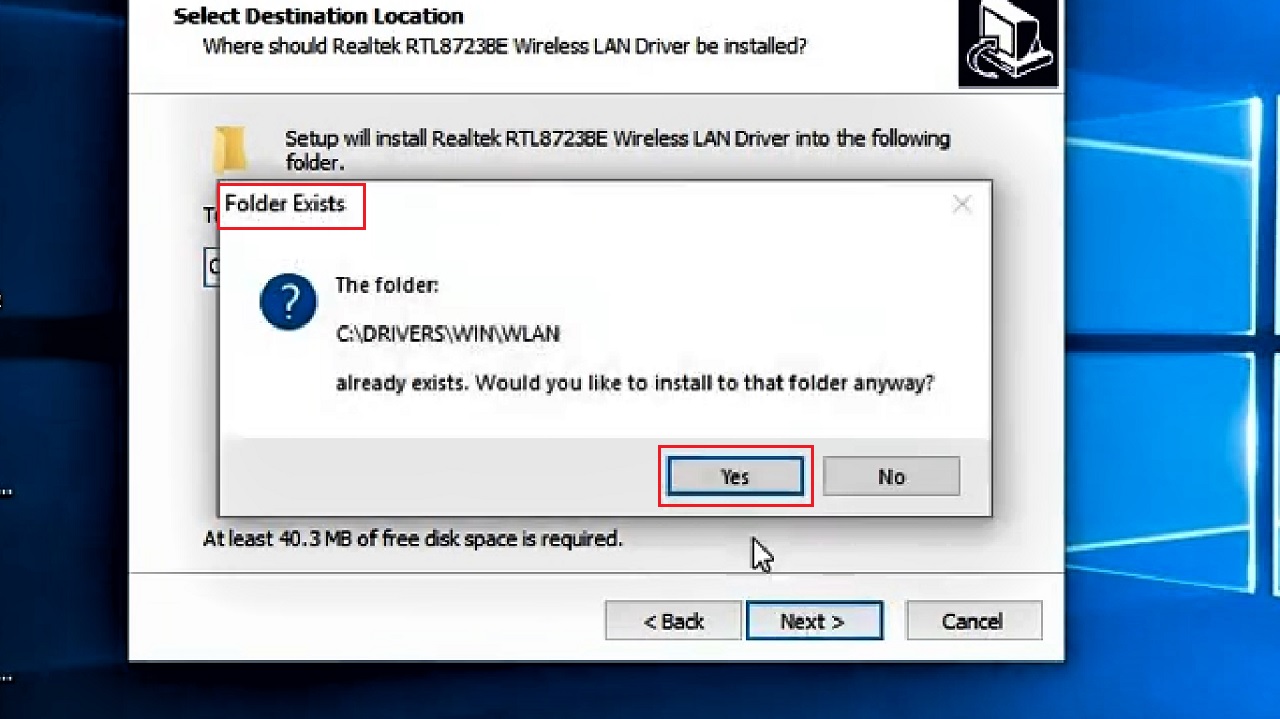
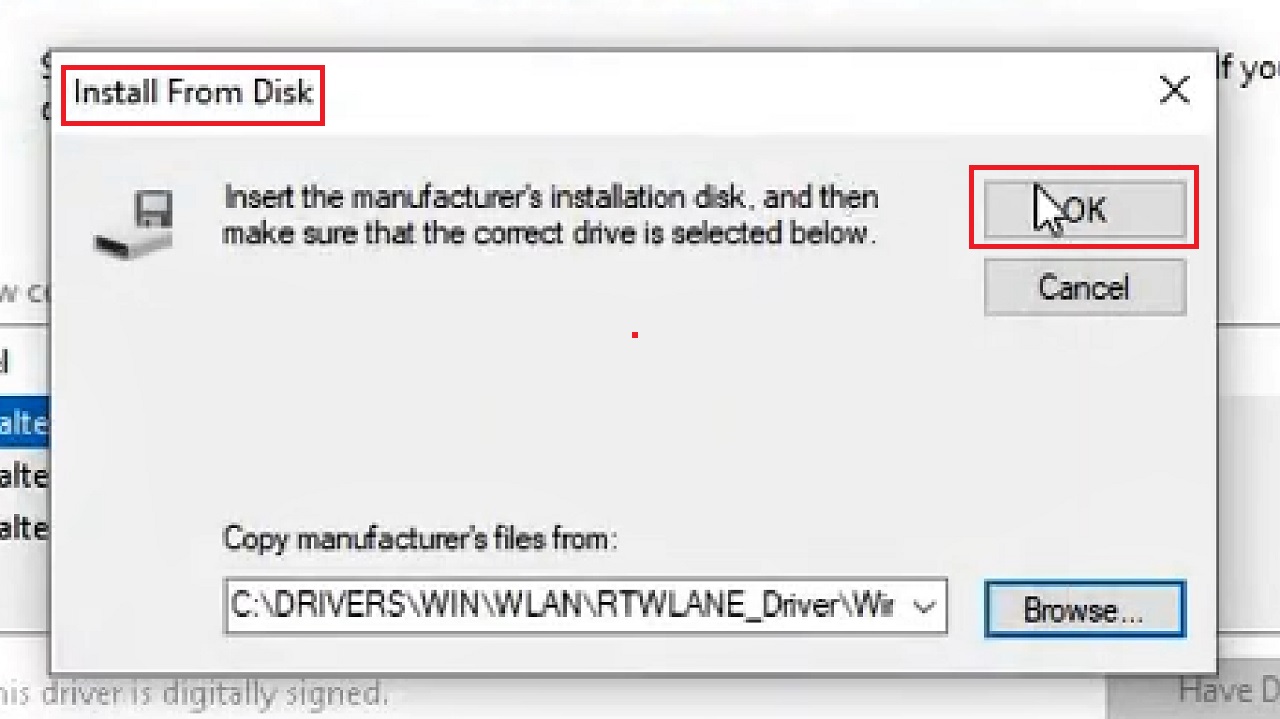
- Check the location of the folder in which Setup will install the file. (In this case, it is in C:\DRIVERS\WIN\WLAN).

You can change the location if you do not want the default location by clicking on the Browse button, shown by the red arrow in the above image, and clicking on a folder of your choice.
- Click on the Next button below.
- Click on the Yes button in the following Folder Exists window to continue.
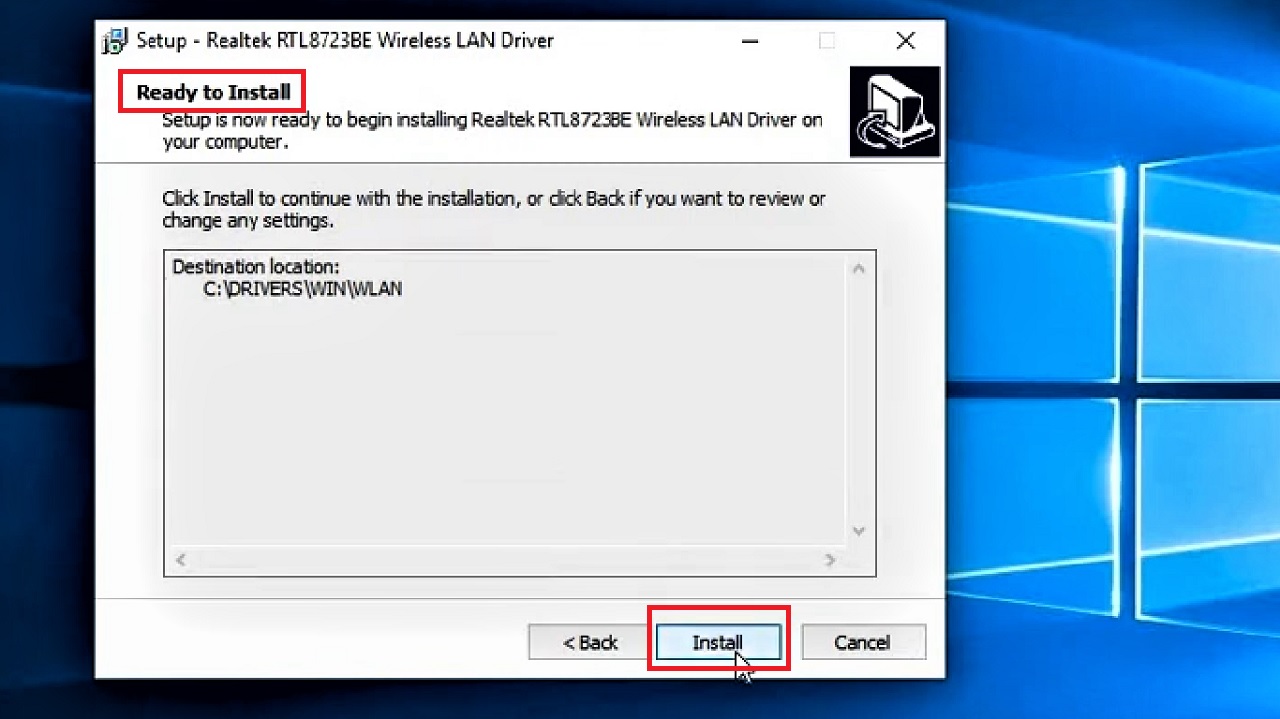
- Click on the Install button in the following window that says it is Ready to Install.
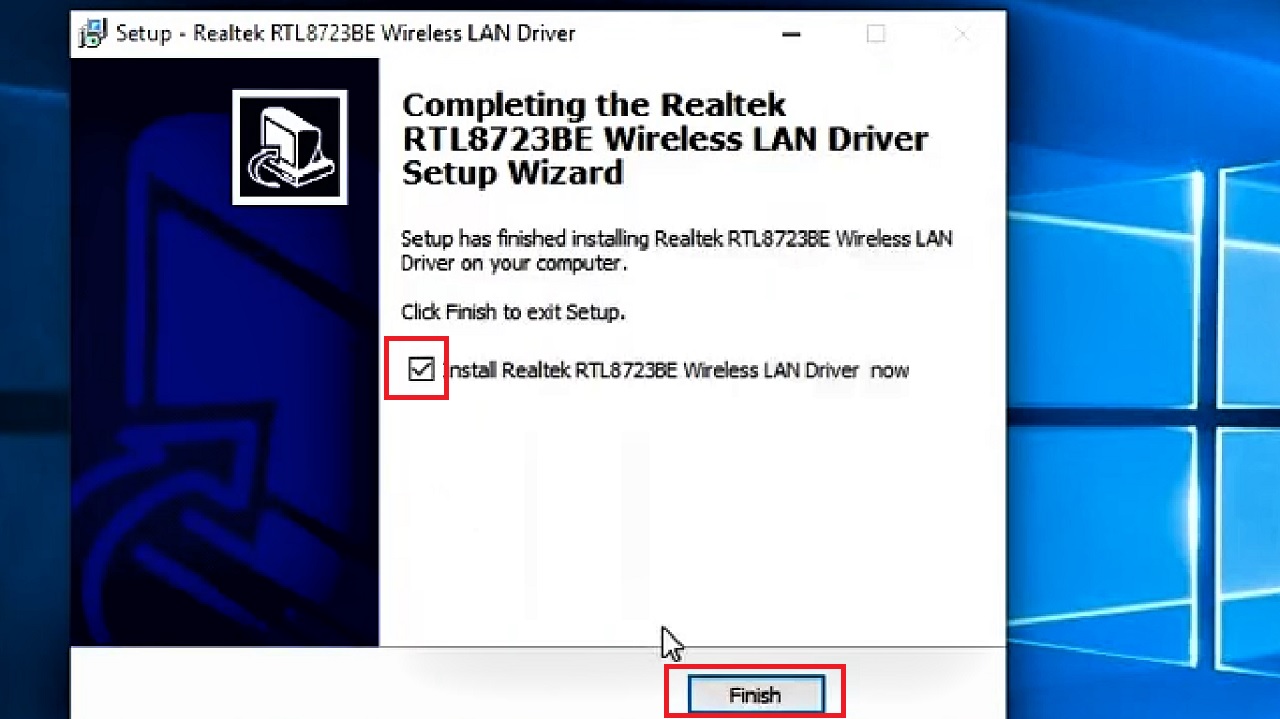
- Finally, click on the Finish button in the setup wizard to complete the process, making sure that the small square box next to Install Realtek RTL8723BE Wireless Driver now is ticked.
- At this time, you may see an error message that says ‘Sorry! We do not support this operating system!!’
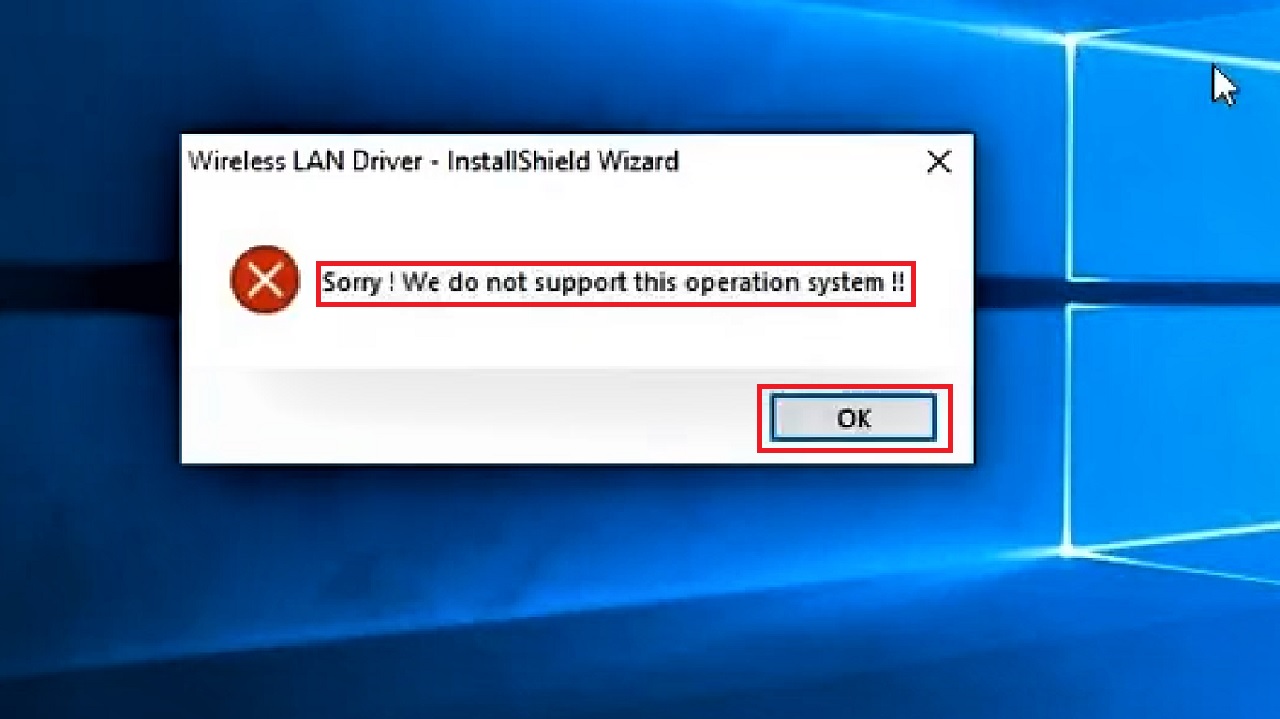
This is a normal error because you are trying to install an 8.1 driver in a Windows 10 system.
- Simply click on the OK button.
The driver is already extracted in Drive C: and therefore, you can work on it from there as follows:
- Open Windows Explorer.
- Go to This PC.
- Click on Local Disk (C:).
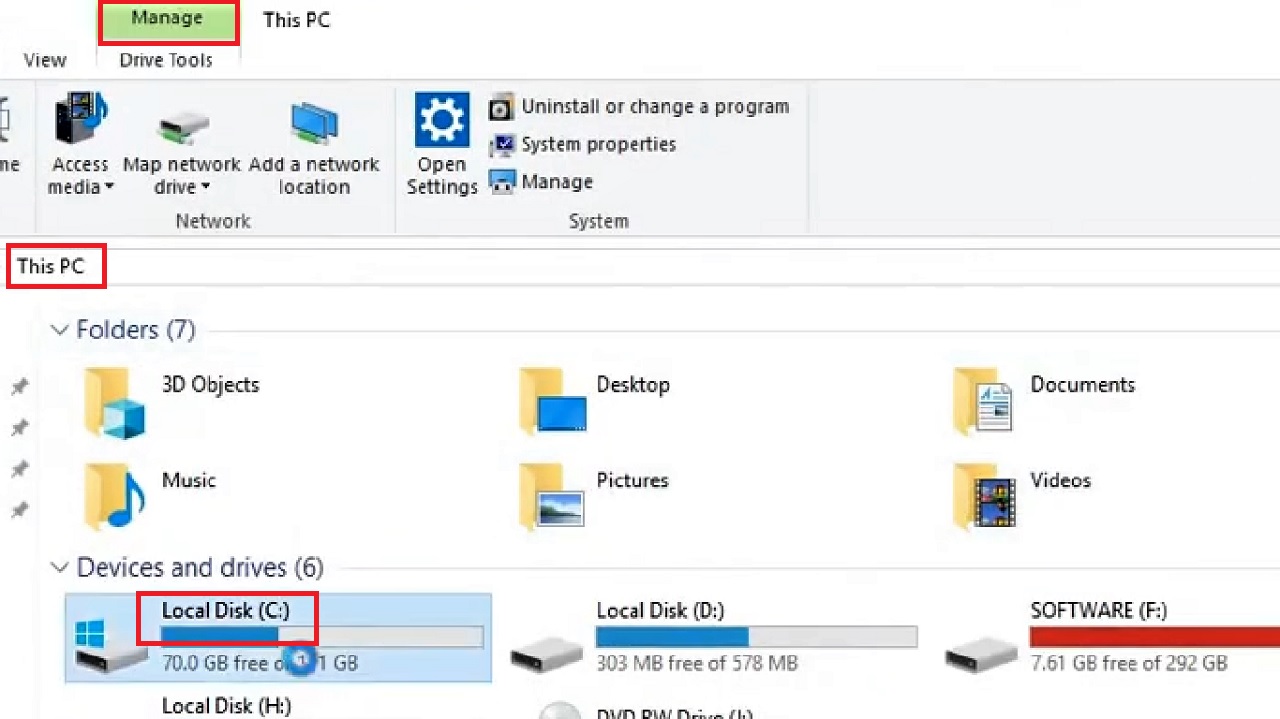
In the Manage window, you will need to go to the location or the folder in which the downloaded file is installed.
As for the locations noted above in this demonstration, the respective folders to click and open in the exact order are:
- DRIVERS
- WIN
- WLAN
- RTWLANE_Driver
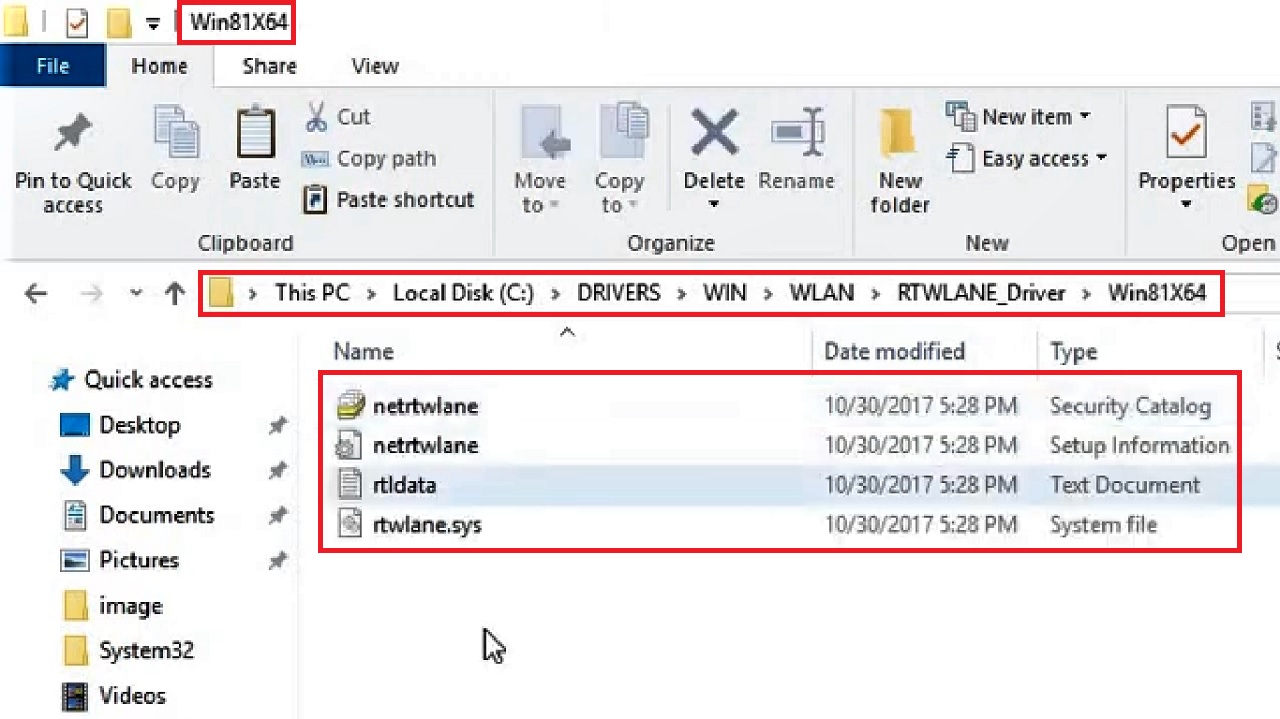
- Win81x64
You will find every file necessary for running the driver is downloaded in the Win81x64 folder, as shown in the image below:
Now, the next part is to update the network adapter driver. For that, you will need to follow these steps:
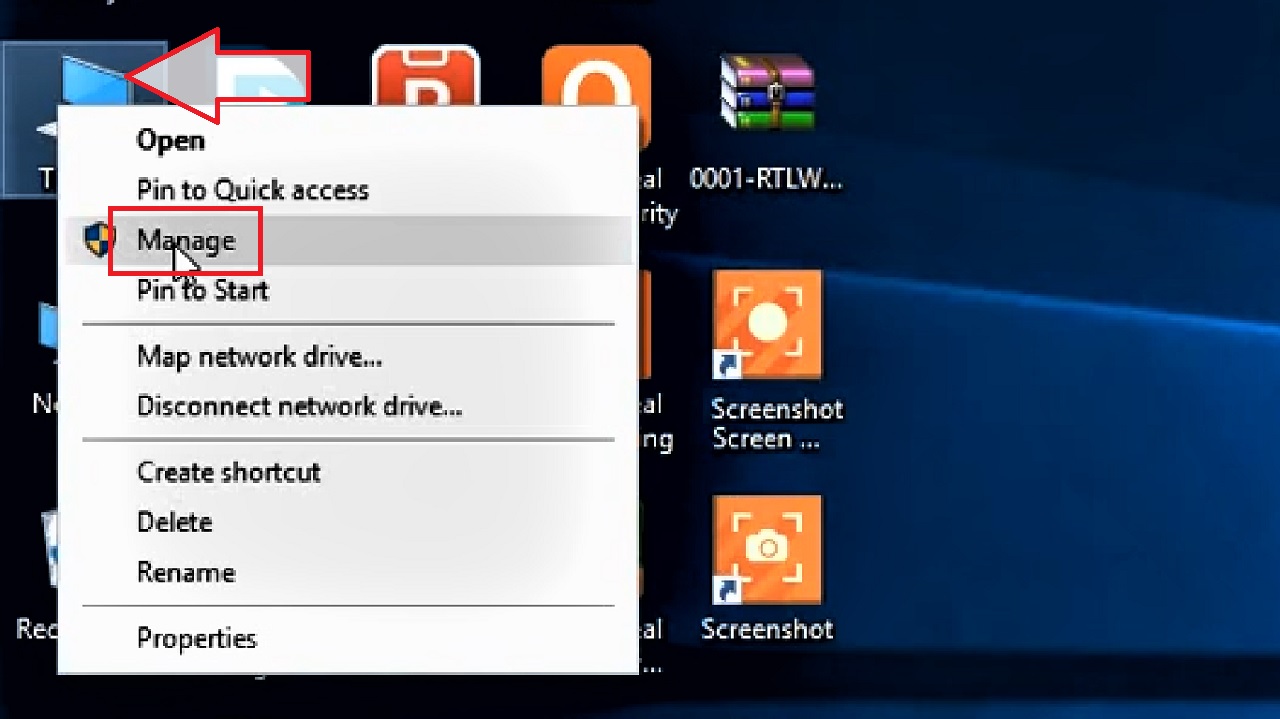
- Click on the This PC icon on your desktop.
- Right-click on it.
- Select Manage option from the drop-down context menu.
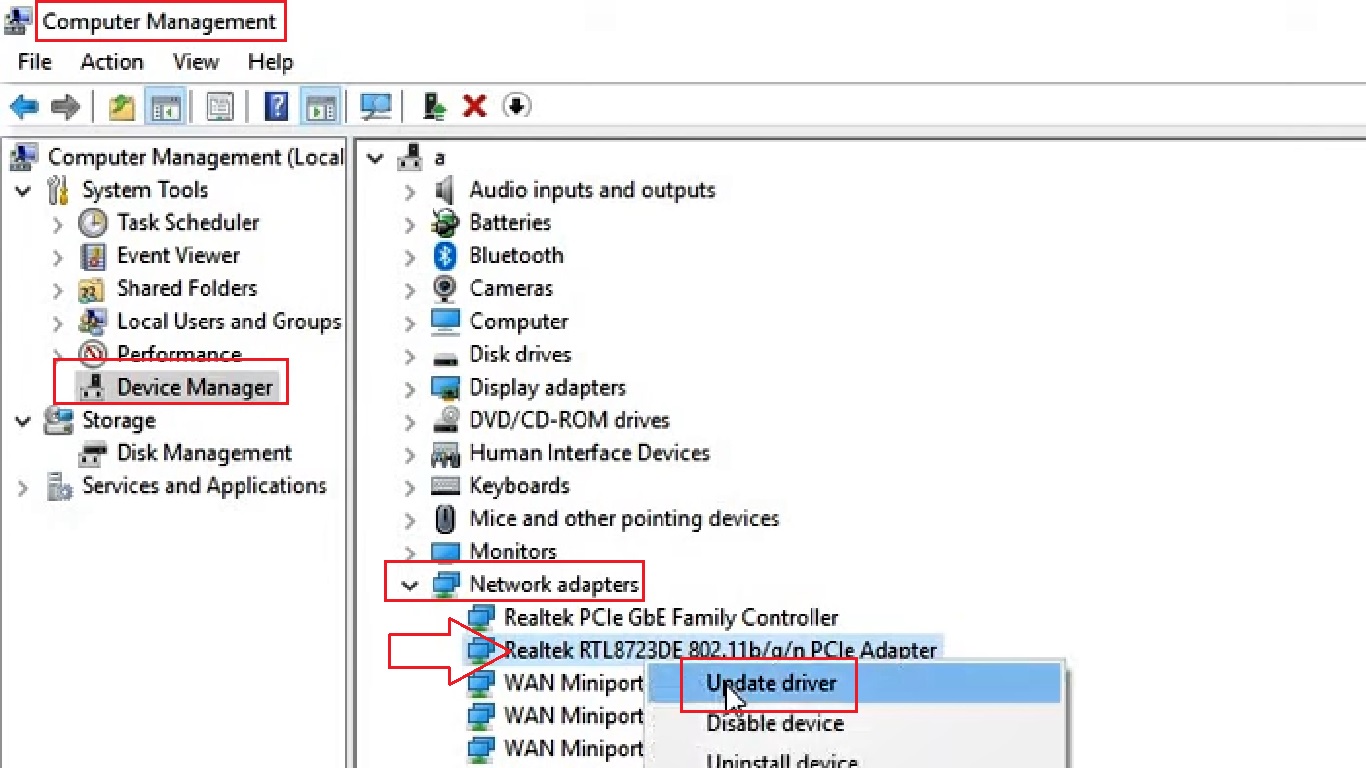
- This will open the Computer Management window. Select Device Manager from the left pane of this window.
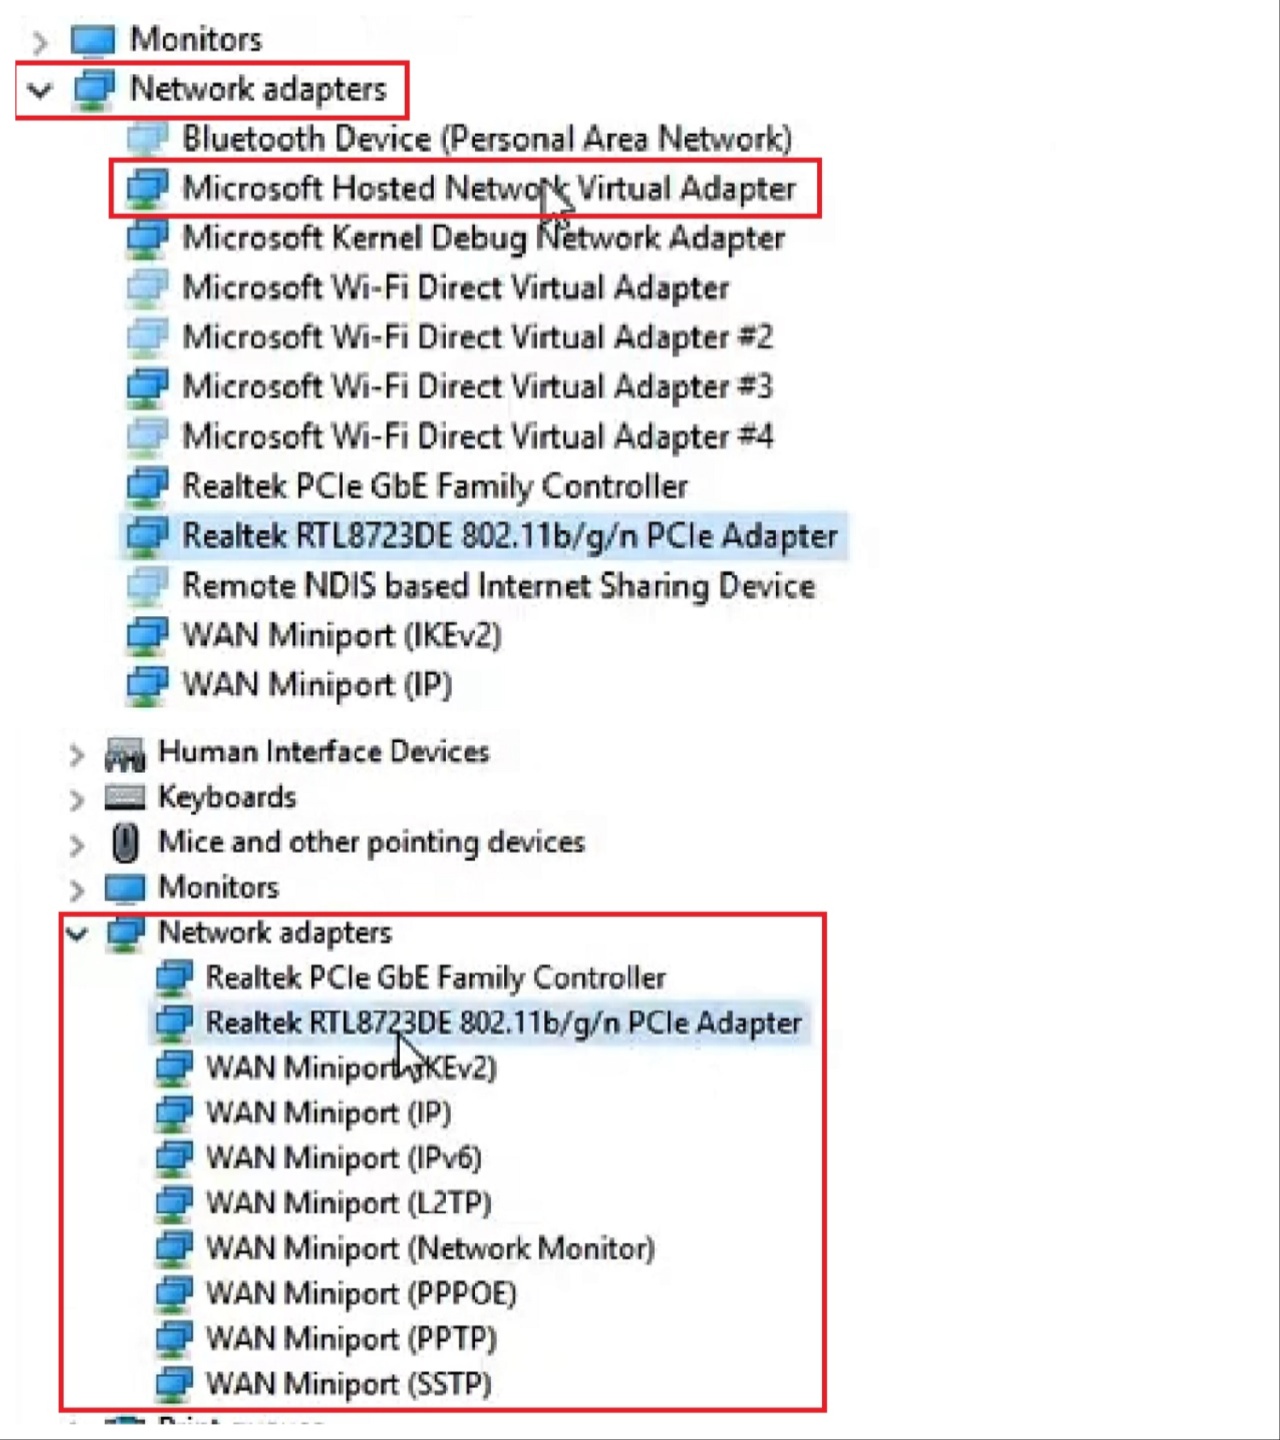
- In the Device Manager, click on the small arrow next to Network adapters to expand it.
- Select your network adapter, which is Realtek RTL8723DE.
- Right-click on it.
- Select Update driver from the options that appear.
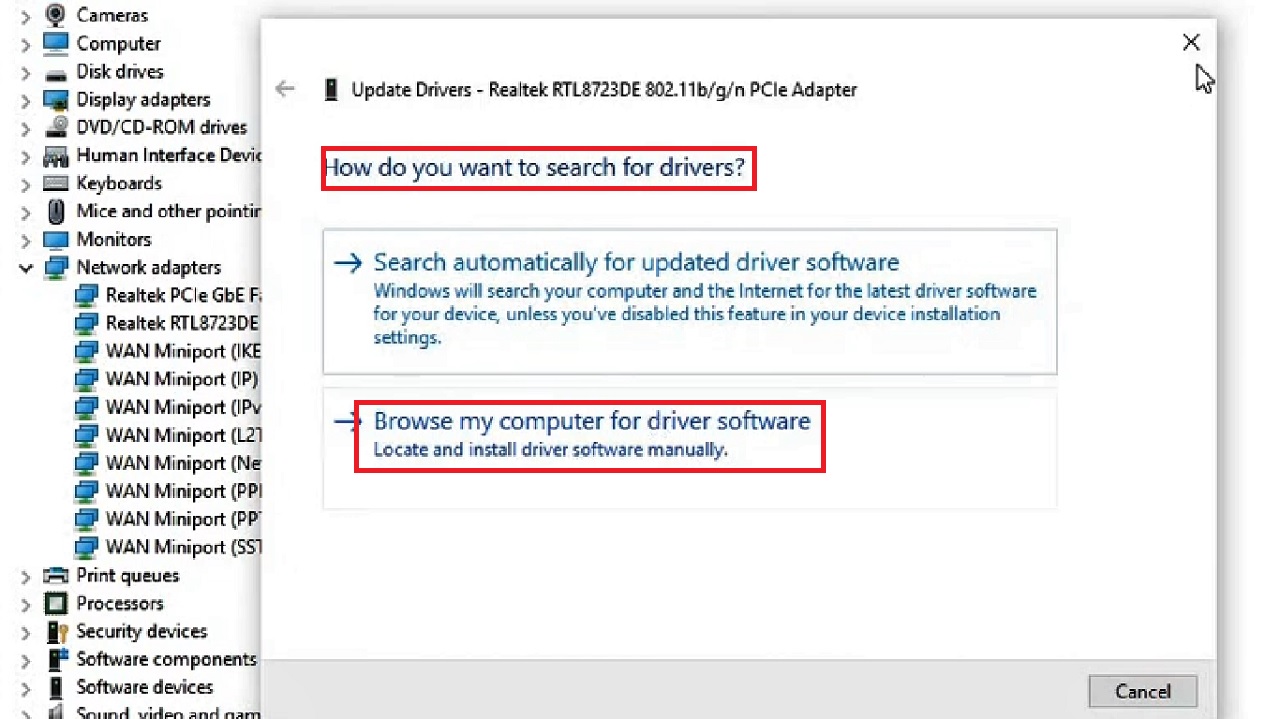
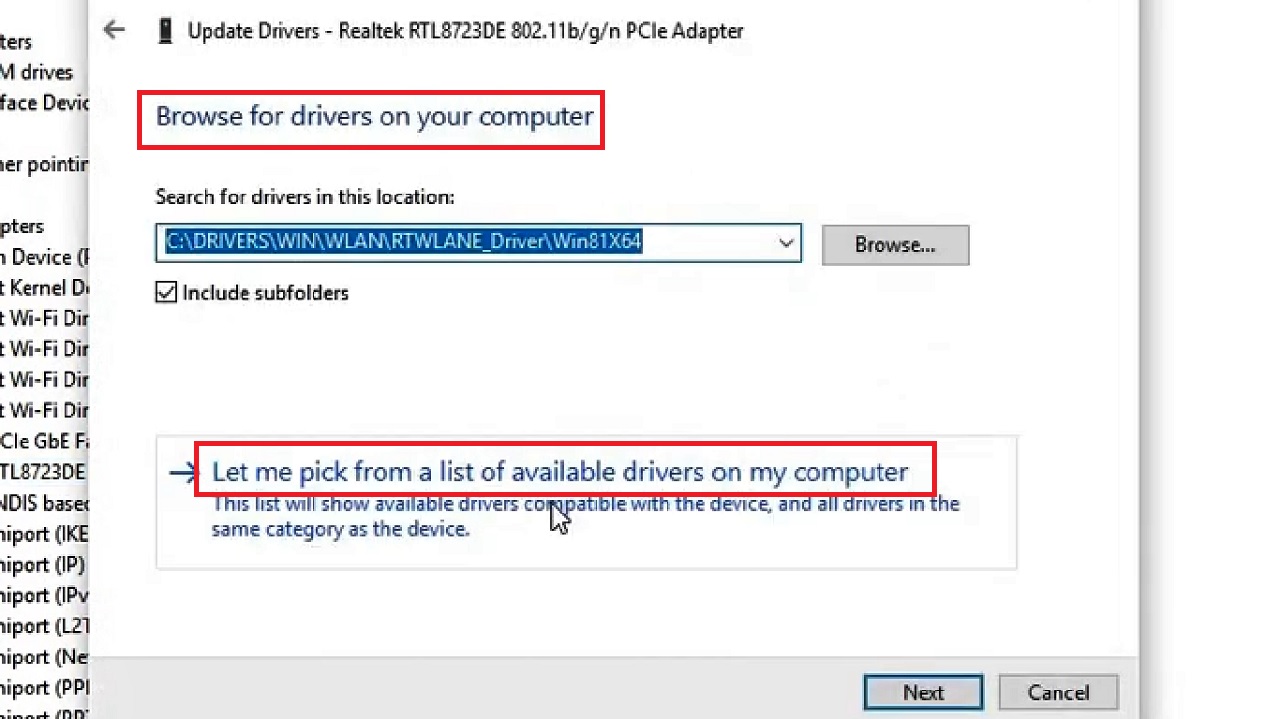
- In the following window, click on Browse my computer for driver software when you are asked How do you want to search for drivers?
- Then click on Let me pick from a list of available drivers on my computer in the following window that allows you to Browse for drivers on your computer.
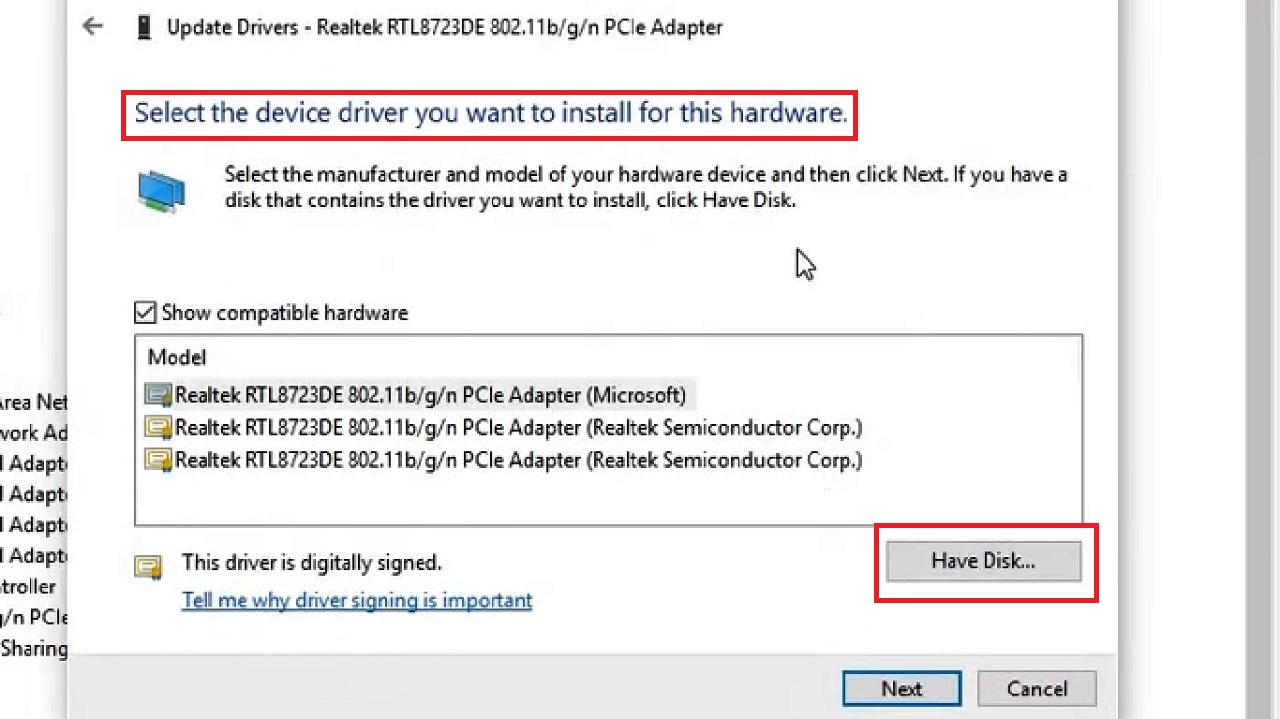
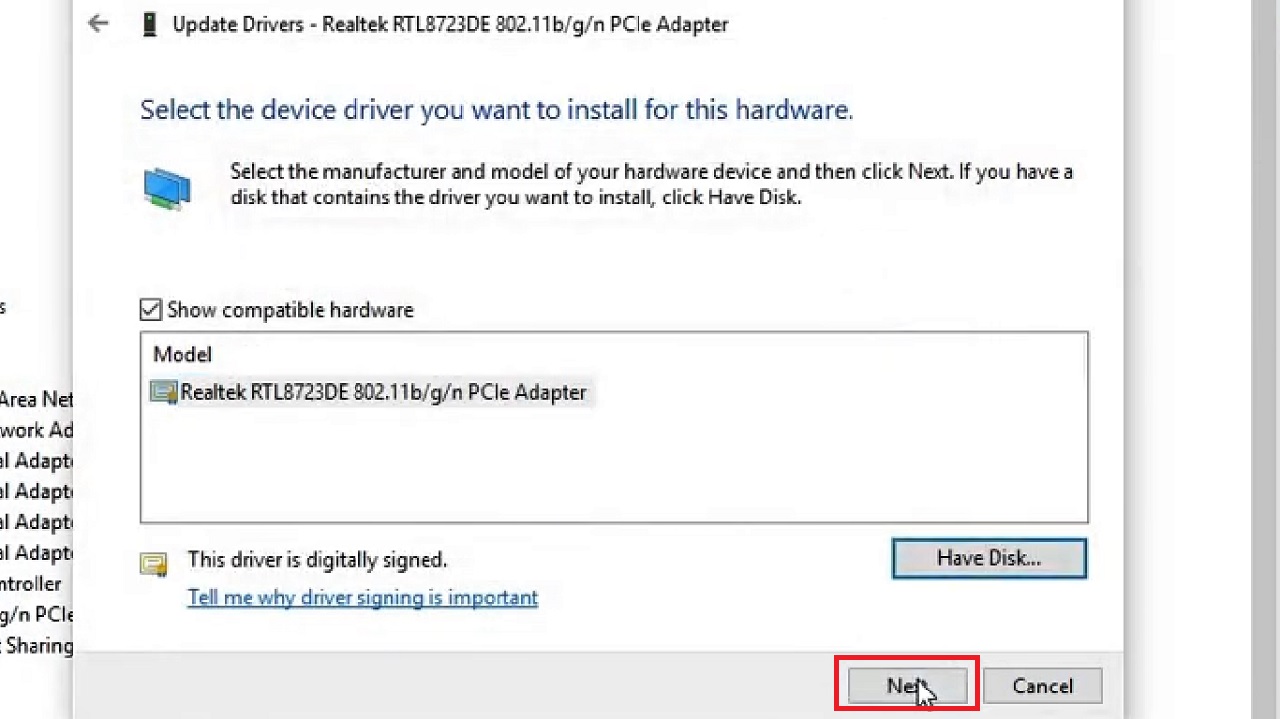
- Click on the Have a disk button in the following window which lets you Select the device driver you want to install for this hardware.
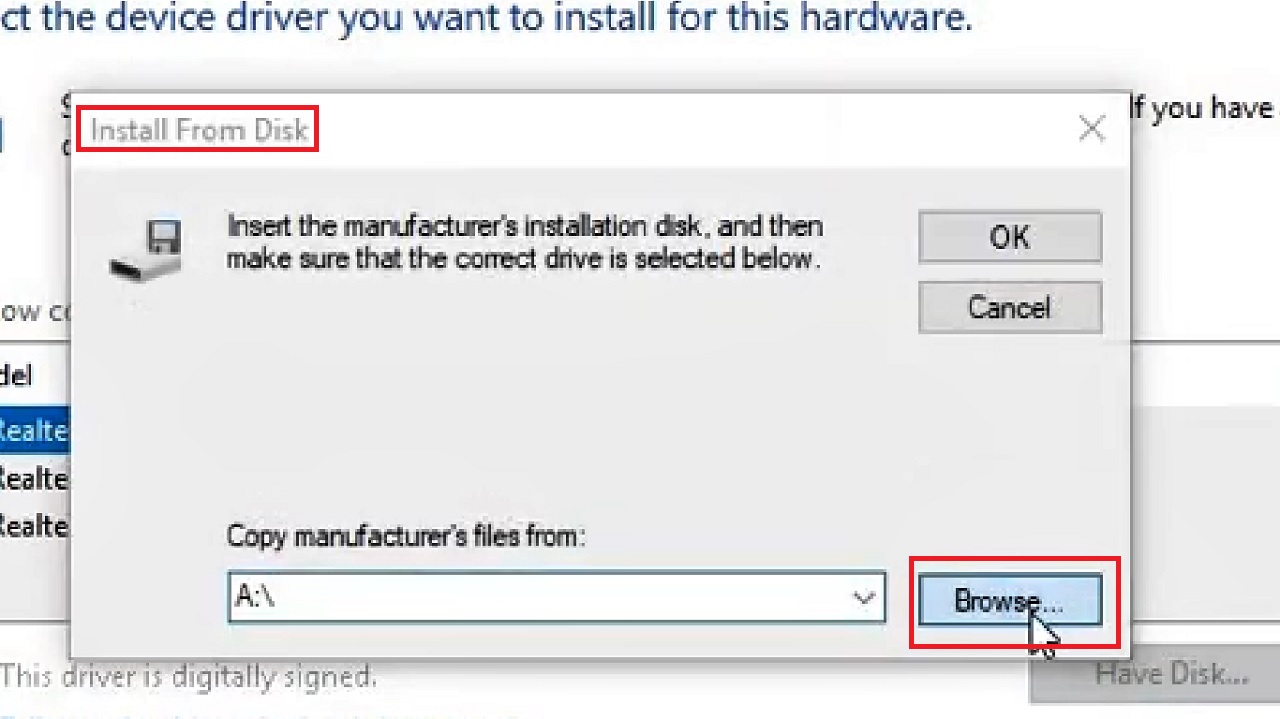
- Then, click on the Browse button in the Install From Disk window that follows.
- Now, in the next Locate File window, click on This PC on the left.
- Then, in the box under Name, continue clicking the folders that appear until you locate the netrtwlane file inside the Win81x64 folder.
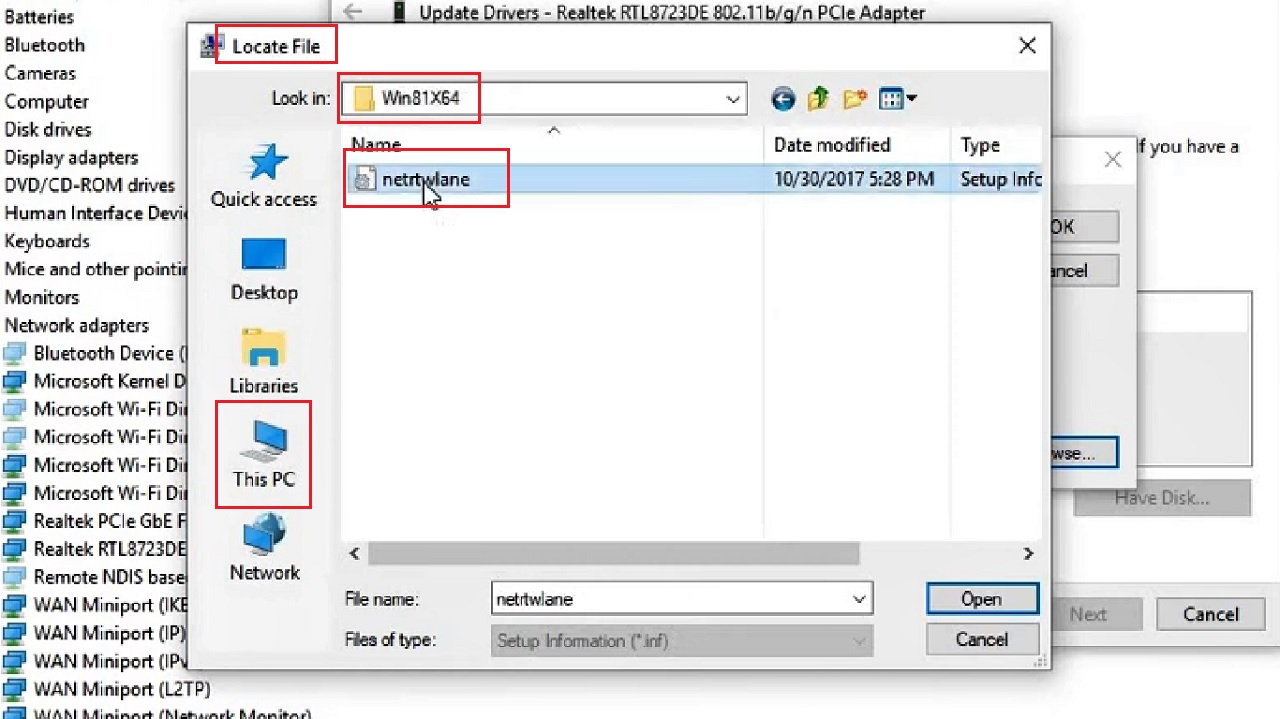
Alternatively, for quick search, you can type Win81x64 in the box next to Look in and locate the same file.
- Now, click on the OK button in the following Install From Disk window.
- Click on the Next button in the following window.
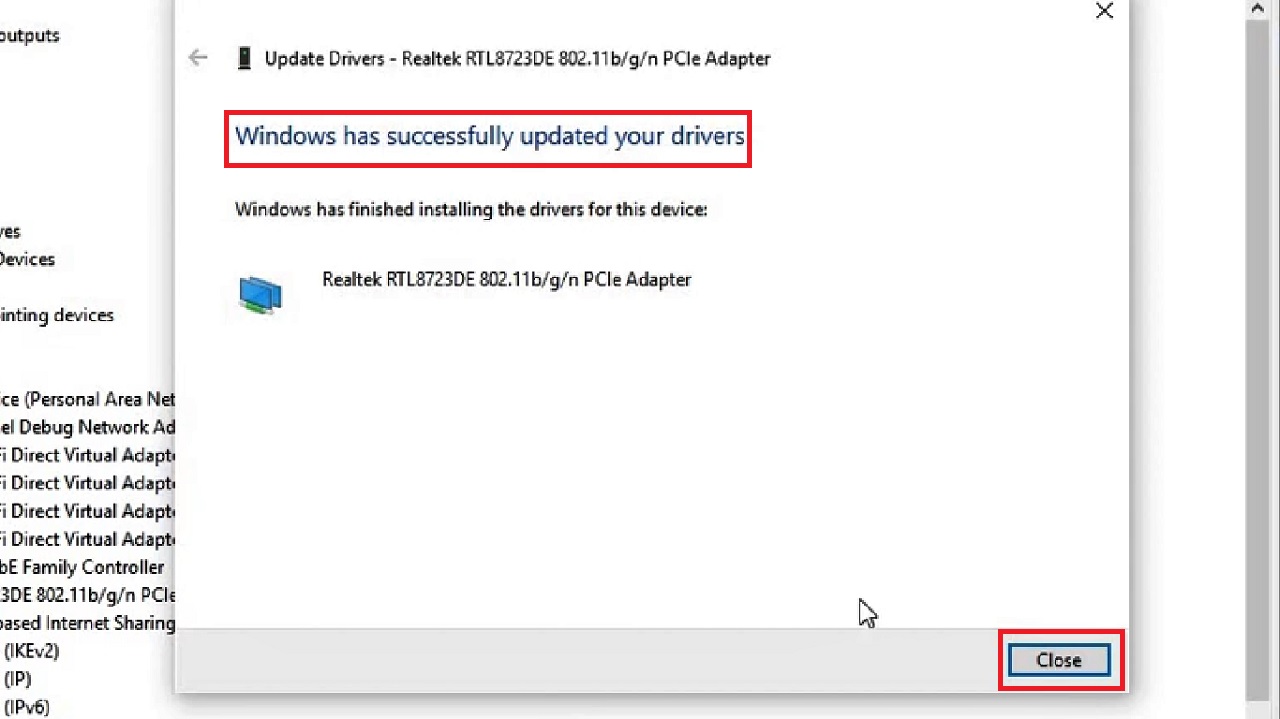
- This will start updating the driver and will take some time. When you see a window suggesting that Windows has successfully updated your drivers, click on the Close button below to complete the process.
You can now see the Microsoft Hosted Network Virtual Adapter in the Device Manager, which was invisible before under the Network adapters, as shown in the image below:
Additionally, you can also see that the Hosted network supported in the Command Prompt is saying Yes, which was showing No before, as shown in the image below:
Now, finally, you will be able to work freely since the Hosted Network will connect and allow internet access as well.
Note: The names of the files and folders used here are just for demonstration purposes and may vary in your case.
Conclusion
So, that is all you have to do to rectify the error of Hosted Network connected but no internet access.
Though there aren’t many ways to fix the error, these could be quite effective and worth trying for a quick resolution.