
When you add another computer system to a network, sometimes it may not show up in the workgroup or when you browse Network in the File Explorer. This is mainly an issue related to the configuration of the whole network.
However, there is nothing to worry, because you are at the right place to know some easy fixes to it.
KEY TAKEAWAYS
- Checking the cables for loose connections or removing them all and re-fixing may sometimes resolve the issue.
- More often than not, simply restarting the system or using the Windows troubleshooter may detect the PC in the network.
- Making some changes in the Network and Internet settings in Status and then rebooting the computer system may also fix the problem.
- Performing DNS flush and network reset may make the system detectable as checking the necessary services and Network Discovery would.
- The Fast Startup feature may often cause problems in the normal operations of a PC. Disabling this feature may solve your problem often.
In This Article
Why is the PC Not Showing in the Network?
The main reason behind a computer being invisible in a network is wrong configuration of the whole network in the first place.
However, there are a number of other reasons for a PC not to show up in a network. Some of them are as follows:
- Incorrect Windows updates
- Adapter issues
- Outdated network driver
- Wrong settings of Server Message Block (SMB)
- Disabled printer or file sharing feature
- Loose cable connections
- Issues in the DNS or Domain Name System cache
- Improper network reset or local network setting
- The necessary services may not be running
- The Network Discovery may not be turned on
- Incorrect workgroup environment setting
Most of these factors causing the issue will be removed in a few simple steps, as explained hereunder.
How to Fix PC Not Showing in Network?
In order to make your computer visible in a network, there are lots of easy solutions to avail, right from simply restarting your computer to turning on the Network Discovery, and from reinstalling the network adapter to enabling the SMB protocol.
As you continue reading, you will come to know which solution will work in your case. Ideally, it will largely depend on the specific cause of the issue. However, here are all of the possible fixes to the PC not showing up in a network issue.
Method 1: Tweaking Network Discovery
Often, a PC may not show a network because it cannot be discovered by the system in the first place. In such a situation, making changes in the Network and Sharing Center may resolve the issue.
This is one important method that involves different steps in different parts.
STEPS TO FIX:
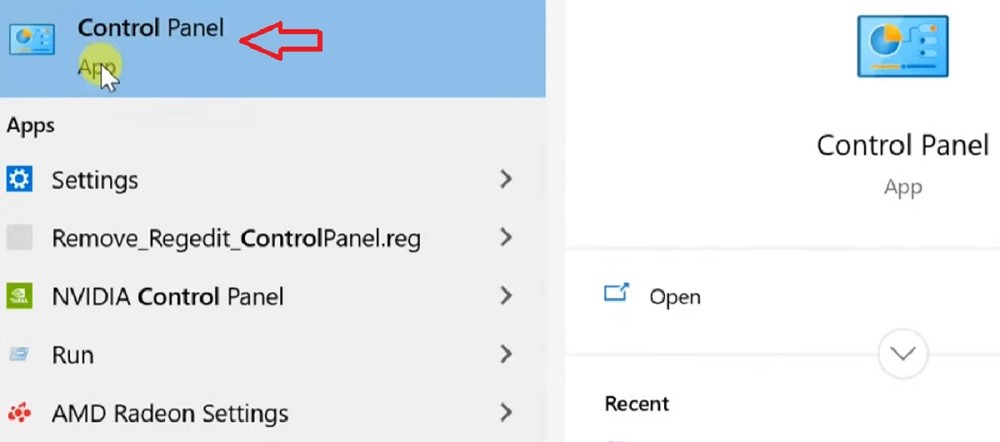
- First, go to the Control Panel app.
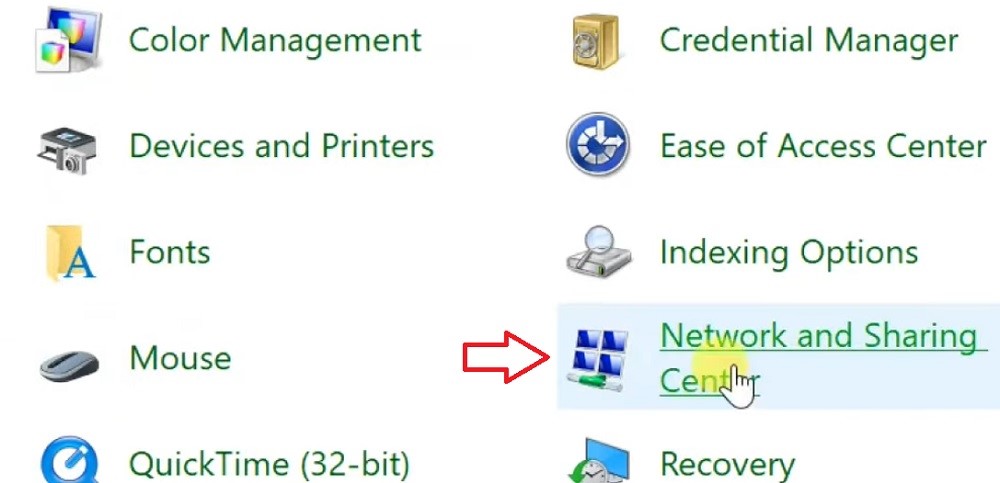
- Select the Network and Sharing Center option.
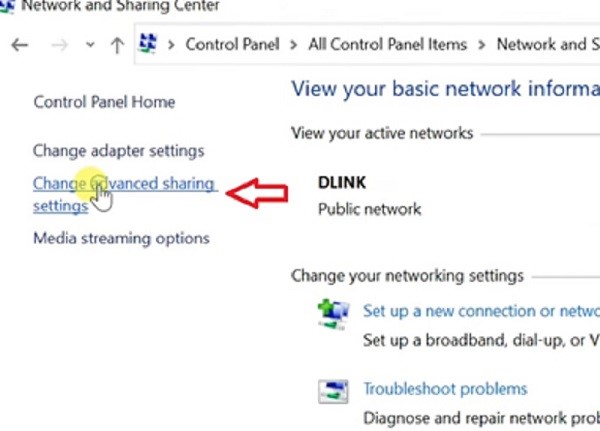
- Click on the Advanced sharing settings button.
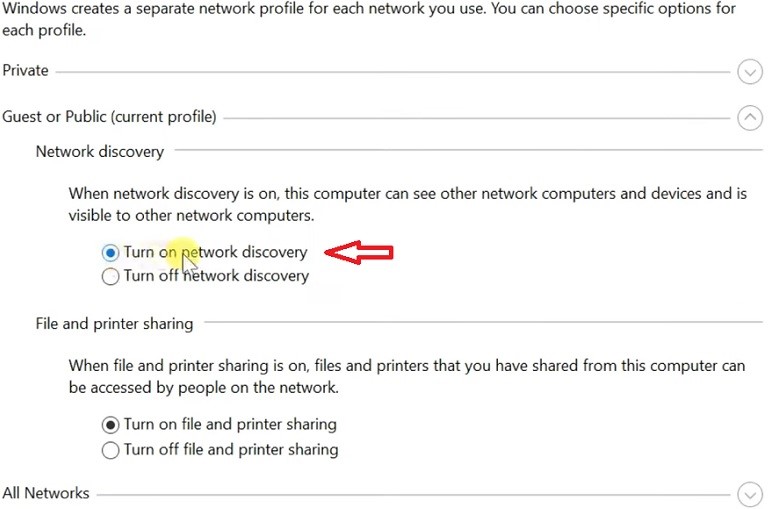
- Look in the current Guest or public network profile section.
- Check Turn on network discovery.
- Check Turn on automatic setup of network connected devices in the Private section as well.
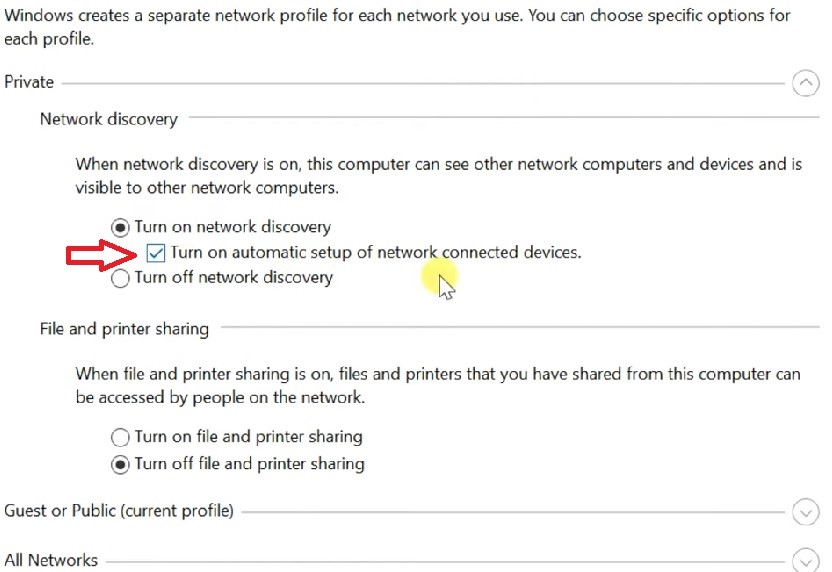
- Now, go to the All Networks section.
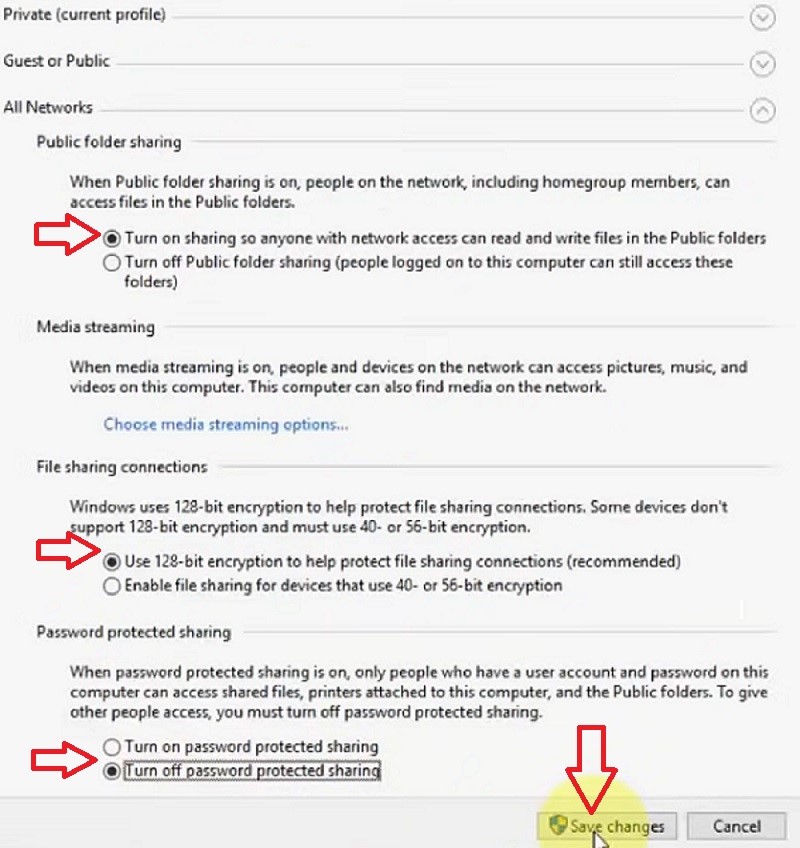
- Check Turn on sharing so anyone with network access can read and write the file in the Public folders.
- Next, check on Use 128-bit encryption to help protect file sharing connections (recommended).
- Finally, check on the box beside Turn off password protected sharing.
- Click on Save changes.
- Close the window.
Method 2: Tweaking Services
A few specific services may not be set properly, such as the discovery of the provider host, which may prevent the computer from detecting the network.
Therefore, making some changes in the settings will fix the problem. Remember, this method also involves different tweaks, which you need to make in different service areas.
STEPS TO FIX:
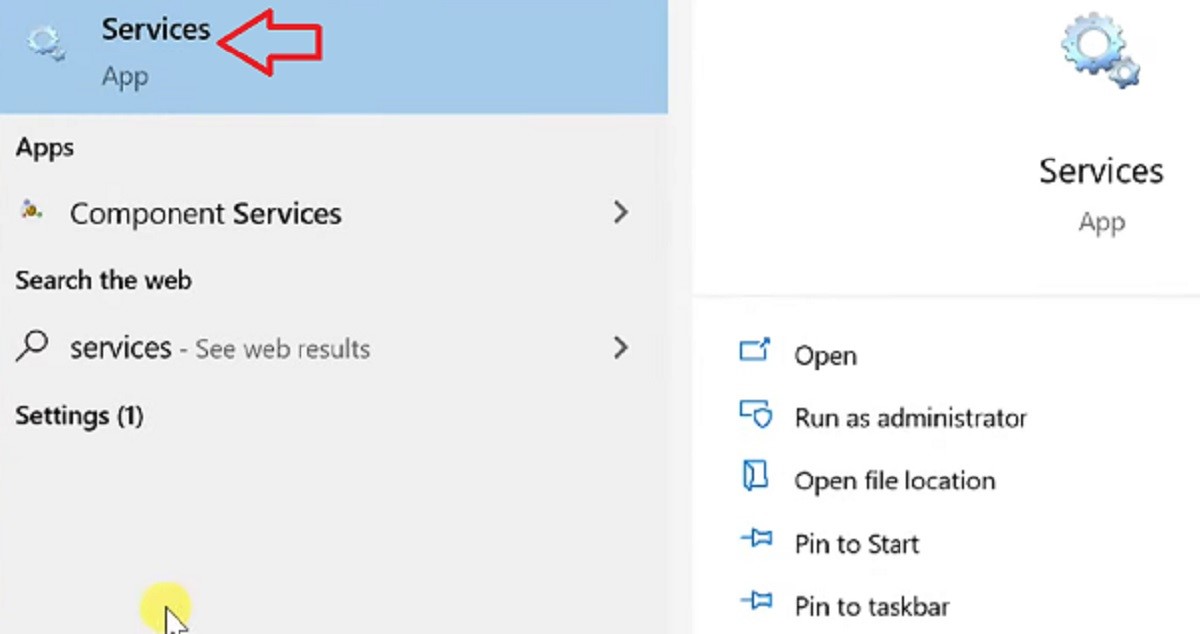
- Go to the Search bar
- Type ‘services’
- Click Enter
The next steps to follow are:
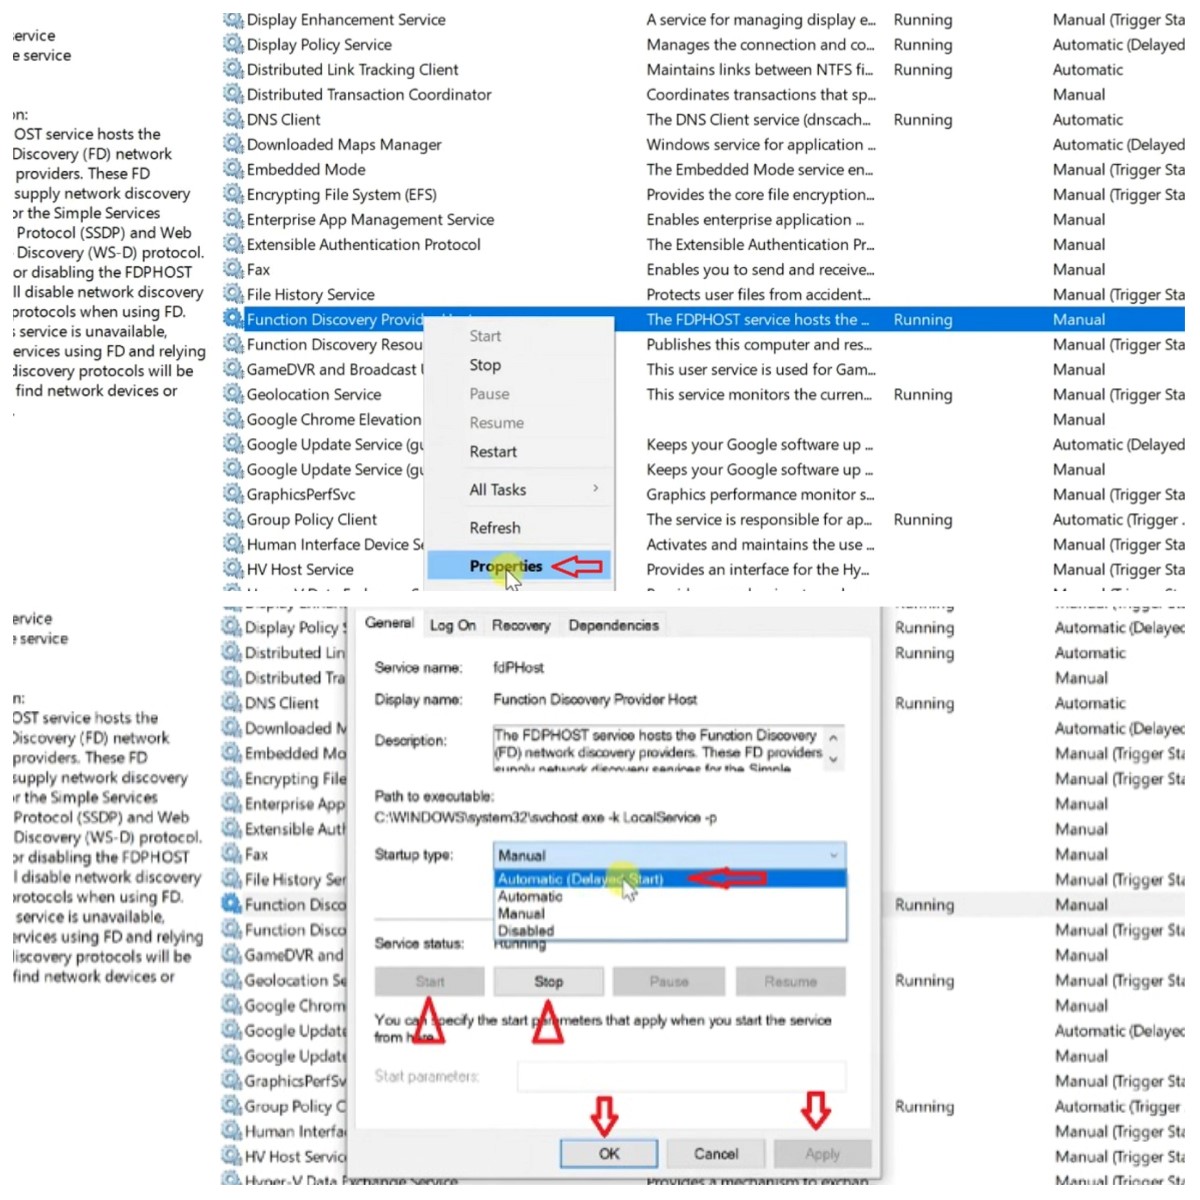
- Look for Function Discovery Provider Host
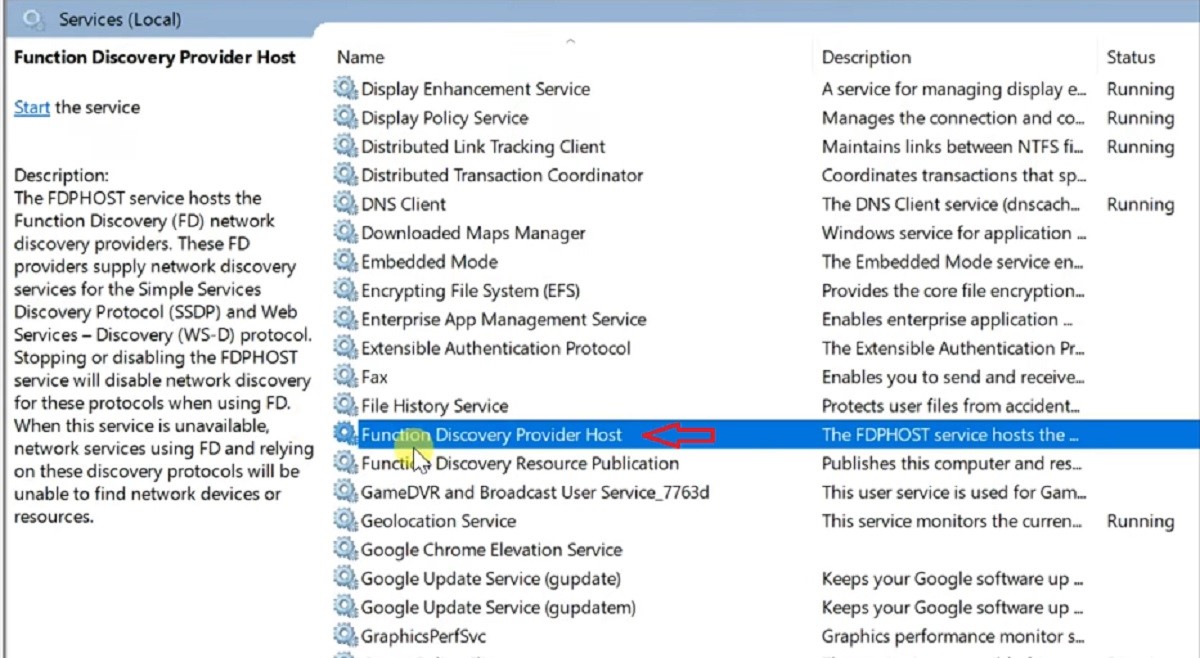
- Click on it
- Click on the Start button

However, on the next restart, you may face the same problem again. In that case, you should follow these steps:
- Right-click on Function Discovery Provider Host
- Select Properties
- Change the default Startup type from Manual to Automatic Delayed Start
- Click on Stop
- Click on Start
- Click on Apply and then on Okay
You should follow the same process under the Services category for a few other things, such as:
- The UPnP Device Host Properties
- SSDP Discovery
- Function Discovery Resources Publication
- Server
- Print Spooler, if you want to share the printer
- Workstation
- DNS Client
- Firewall, if you have it installed
Regardless of how long the process takes, it will undoubtedly resolve the problem. However, all these should be done on every computer connected to the network. Missing out on any one may make your PC invisible.
Method 3: Tweaking SMB 1.0
If the above solutions do not fix the issue, there may be issues with the SMB. This is located in Programs and Features in the Control Panel of your computer.
Therefore, checking it and making the necessary adjustments is a good way to resolve the issue.
STEPS TO FIX:
- Open the Control Panel as in Method 1.
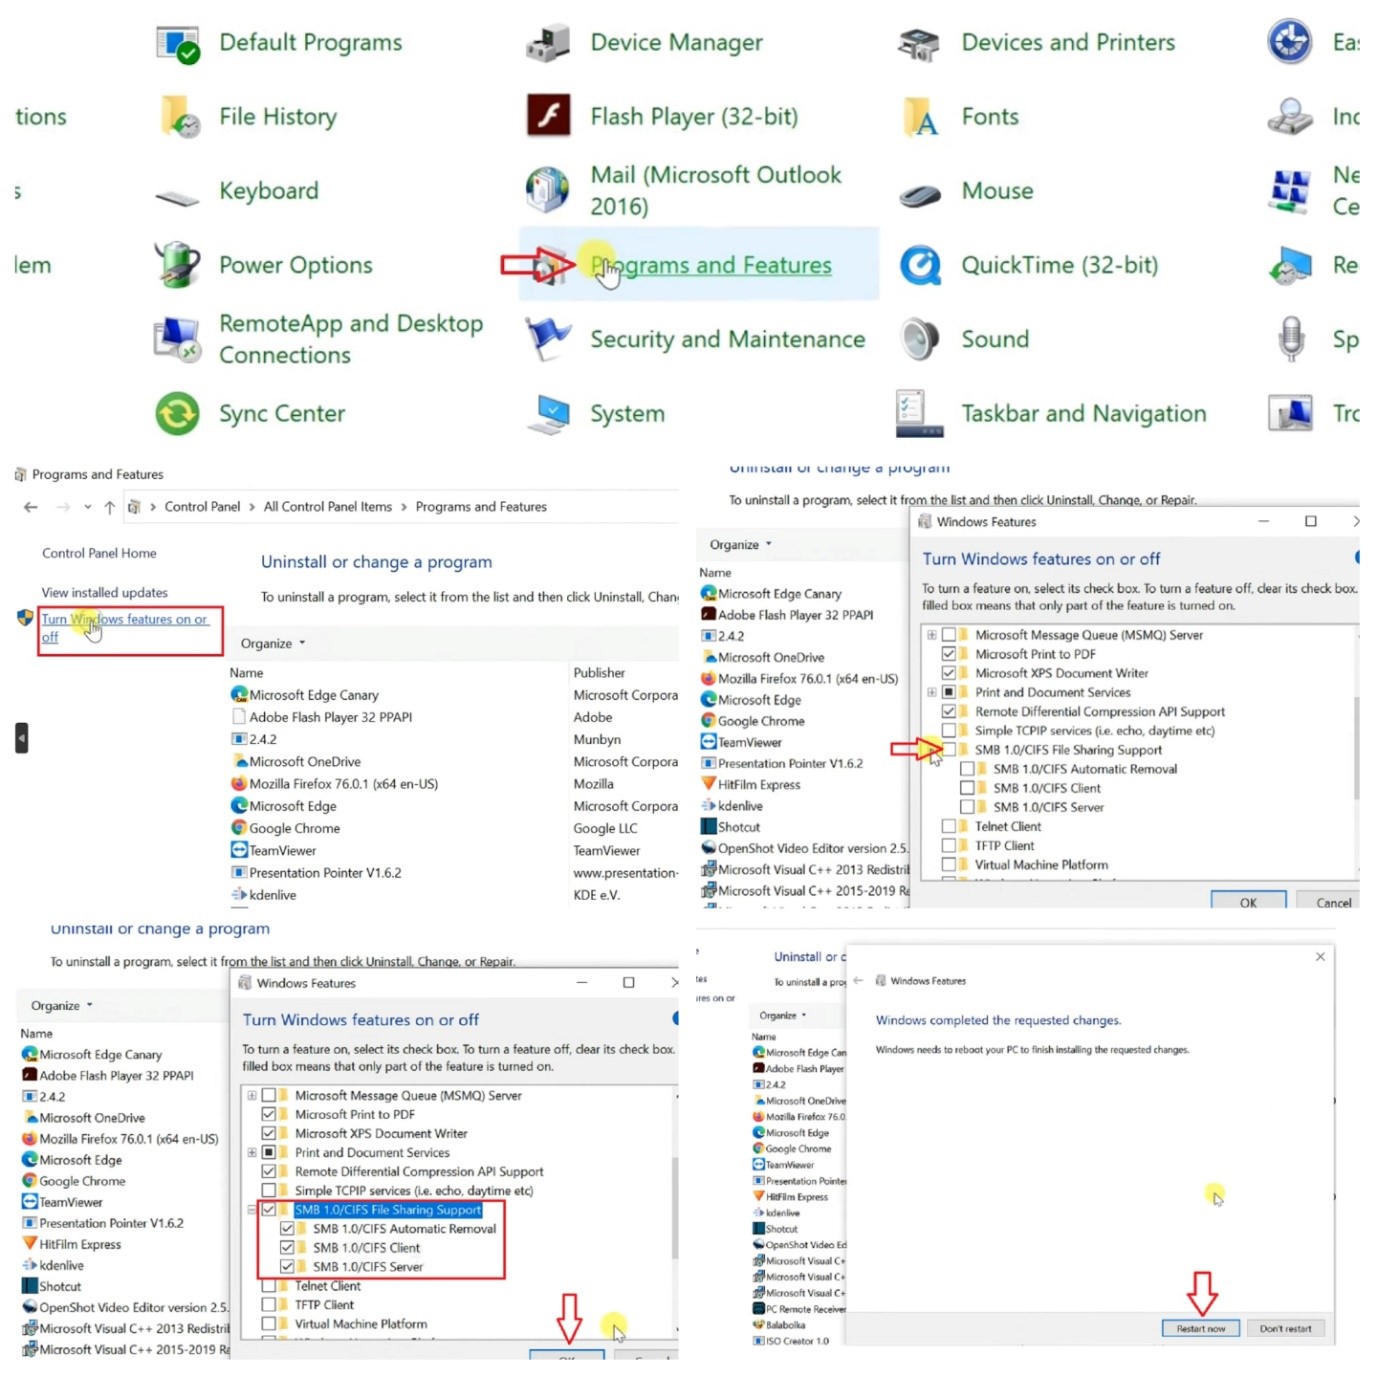
- Click on Programs and Features.
- Click on Turn Windows features on or off on the left side of the panel.
- Find SMB 1.0/ CIFS File Sharing Support from the window when it appears.
- Check on the square box.
- Click Ok and wait until the changes are applied.
- Click on the Restart now button.
Method 4: Turning on File Sharing
There may also be some issues in the file sharing ability of the computer system due to improper settings in network connection.
So, make the changes in the network status to enable the PC to detect the network.
STEPS TO FIX:
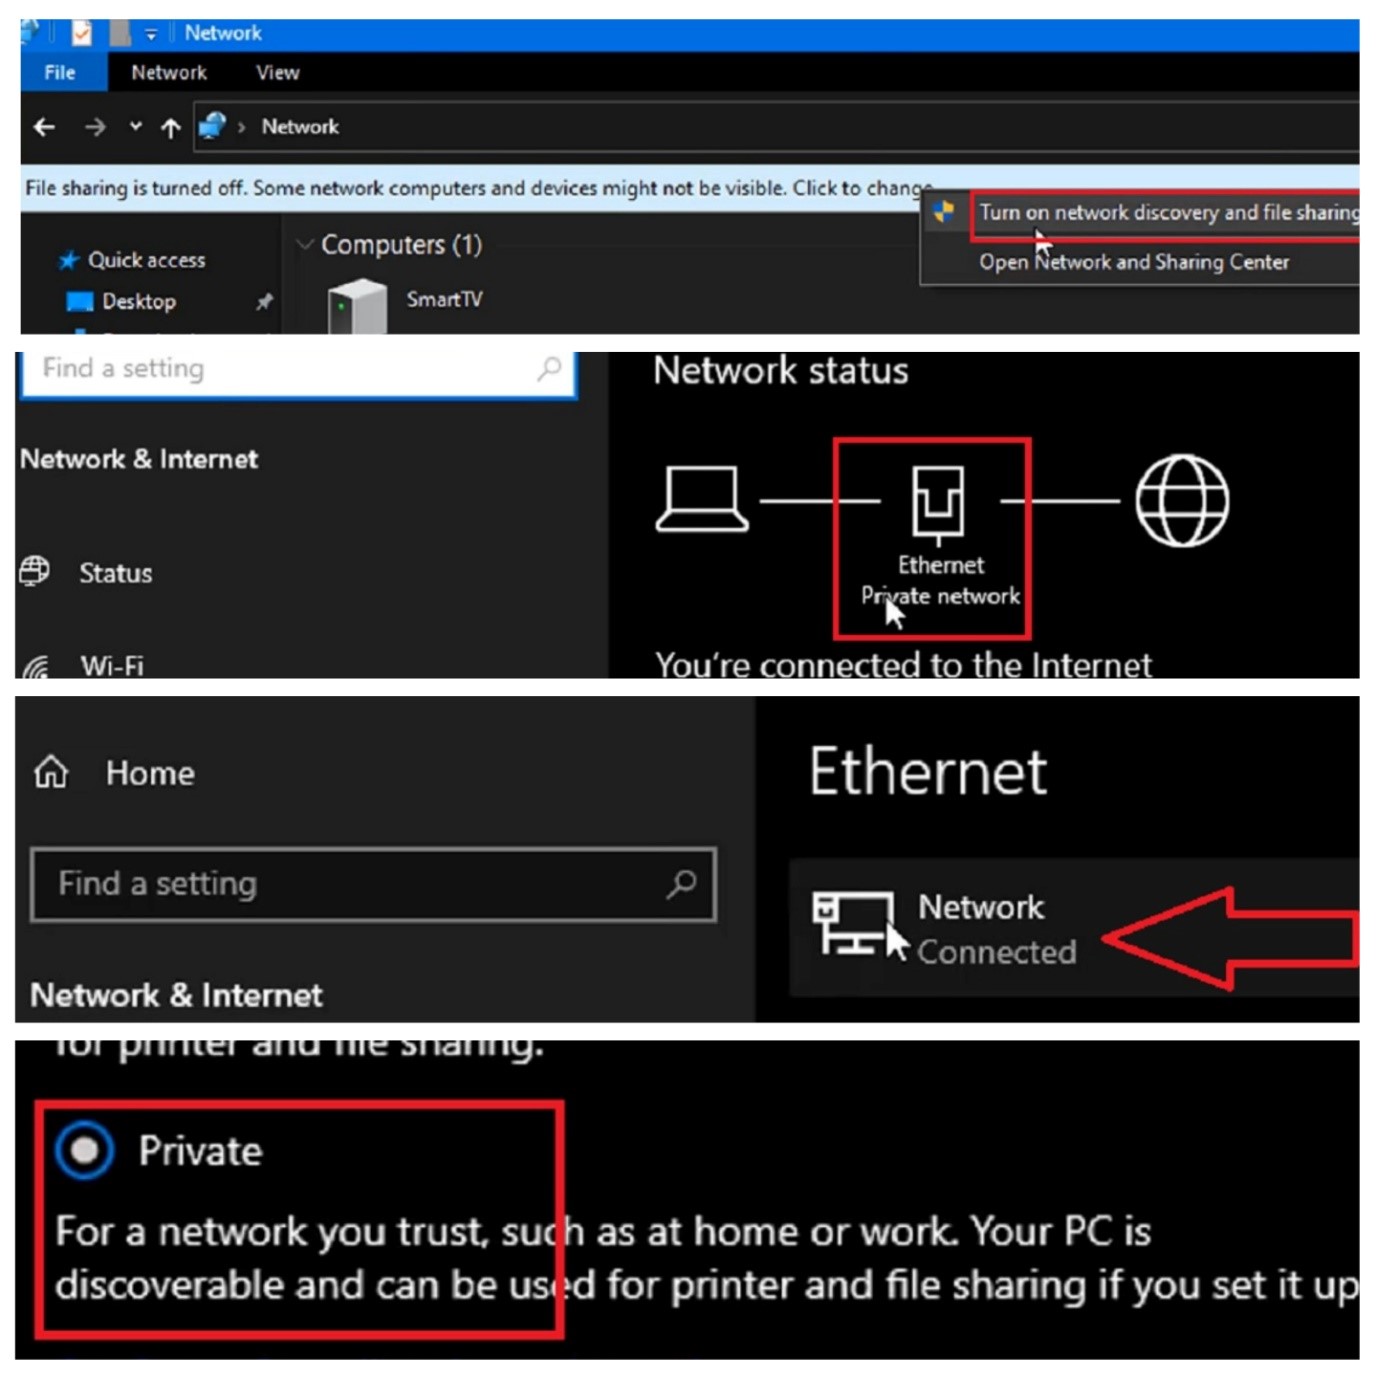
- Go to the bottom right-hand corner
- Click on the Internet icon or the Globe sign
- Open the Network and Internet settings
- Click Ethernet Connect icon
It should be set to private by default and has to be on every device.
There are a few other simple fixes to the issue as well, apart from the other major and essential ones.
Method 5: Reset Network from Command Prompt
The network protocols play a significant role in the process, and therefore, in Windows, resetting all network protocols to their default settings may also fix the issue. You will need to use the Command Prompt for that.
STEPS TO FIX:
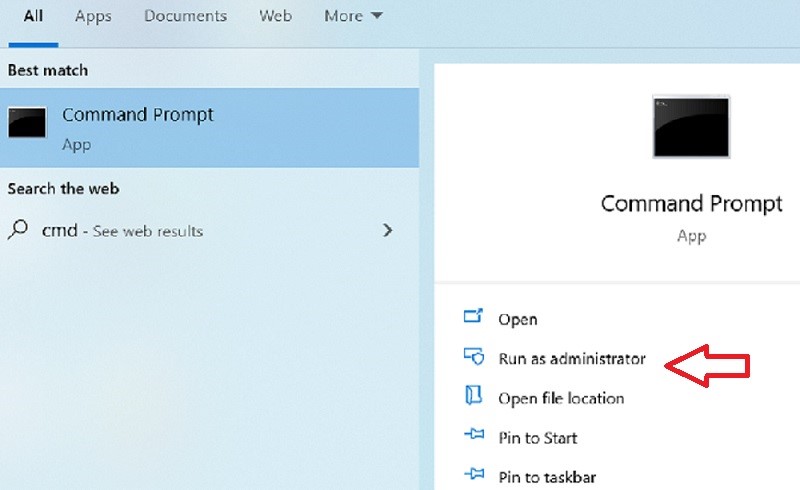
- Go to Search bar
- Type ‘cmd’
- Press Enter
- Select Run as administrator
Once the prompt opens, you must type each of the following commands and press the Enter key every time:
- netsh int ip reset
- netsh winsock reset
- netsh advfirewall reset
Finally, exit from the Command Prompt and check whether the issue is resolved.
Alternatively, you can reset the network from the Network reset window to fix the issue. This will find the default network settings and reinstall the network adapters as well.
To launch the network reset, follow these steps:
- Go to the Network and Internet section from settings or by clicking on the internet logo on the bottom right-hand corner
- Go to Status
- Click on the Network reset button.
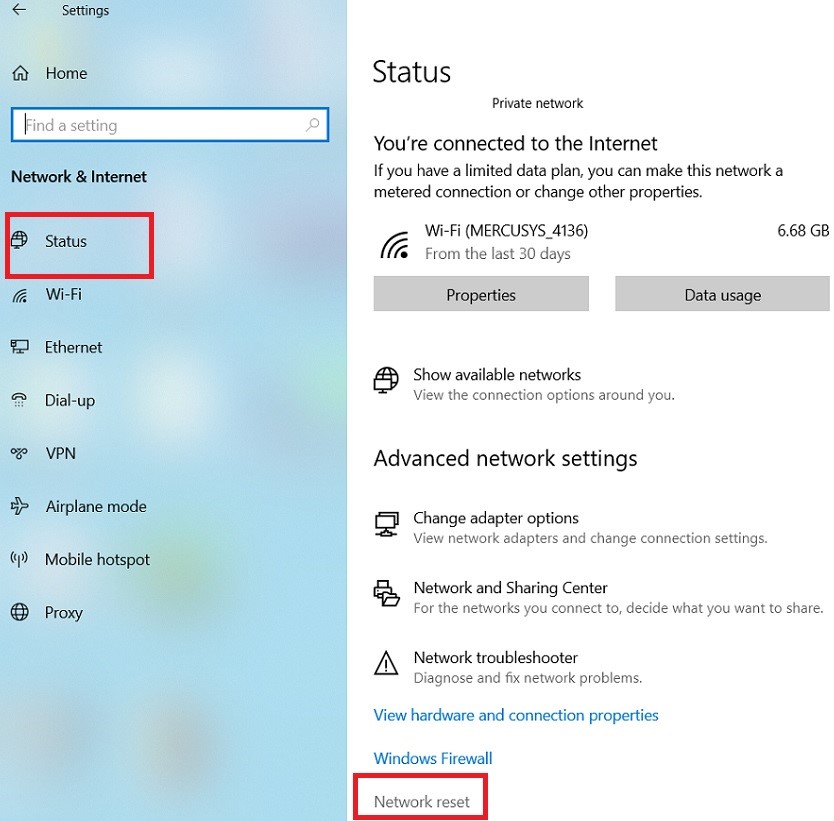
- Click on the Reset now button on the next window
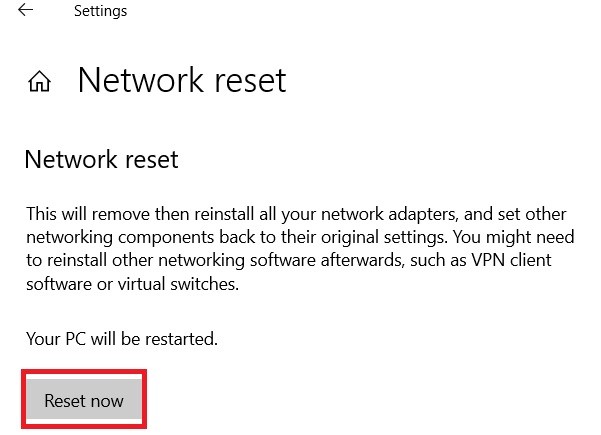
- Click on Yes, when asked for confirmation
Once done, you must reboot the computer system.
Method 6: Using the Workgroup Wizard
In order to add your computer to a workgroup in a business network, the system may not detect the network if it is not linked properly.
Using the workgroup wizard to establish a proper connection is therefore, elementary.
STEPS TO FIX:
- Go to the Control Panel just as before
- Click on System and Security
- Select System
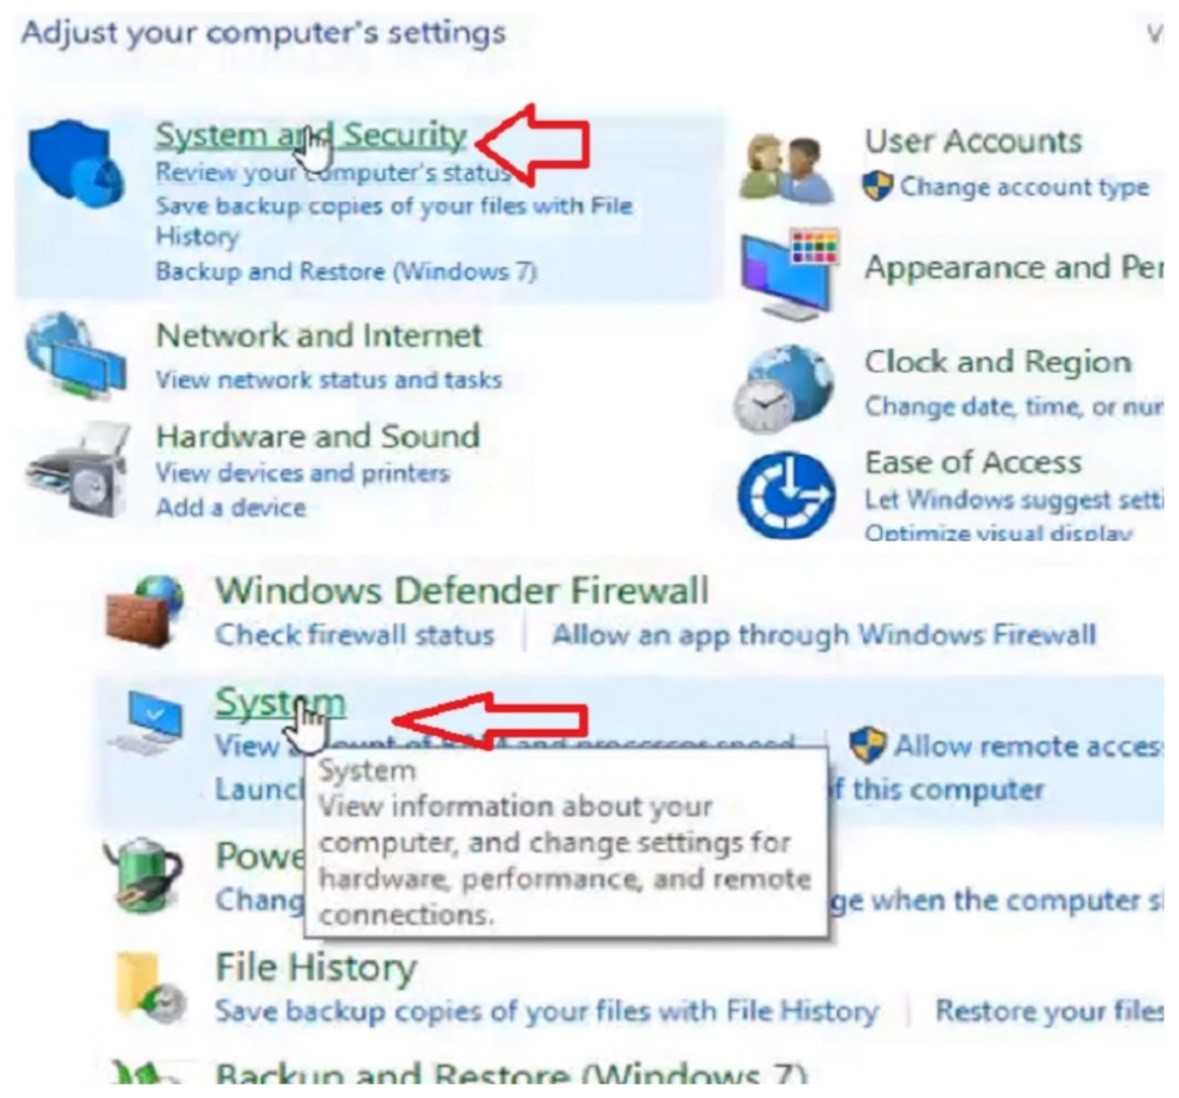
- Focus on the Workgroup
- Click on the Change Settings button on the right-hand side
- Click on Change under Network ID
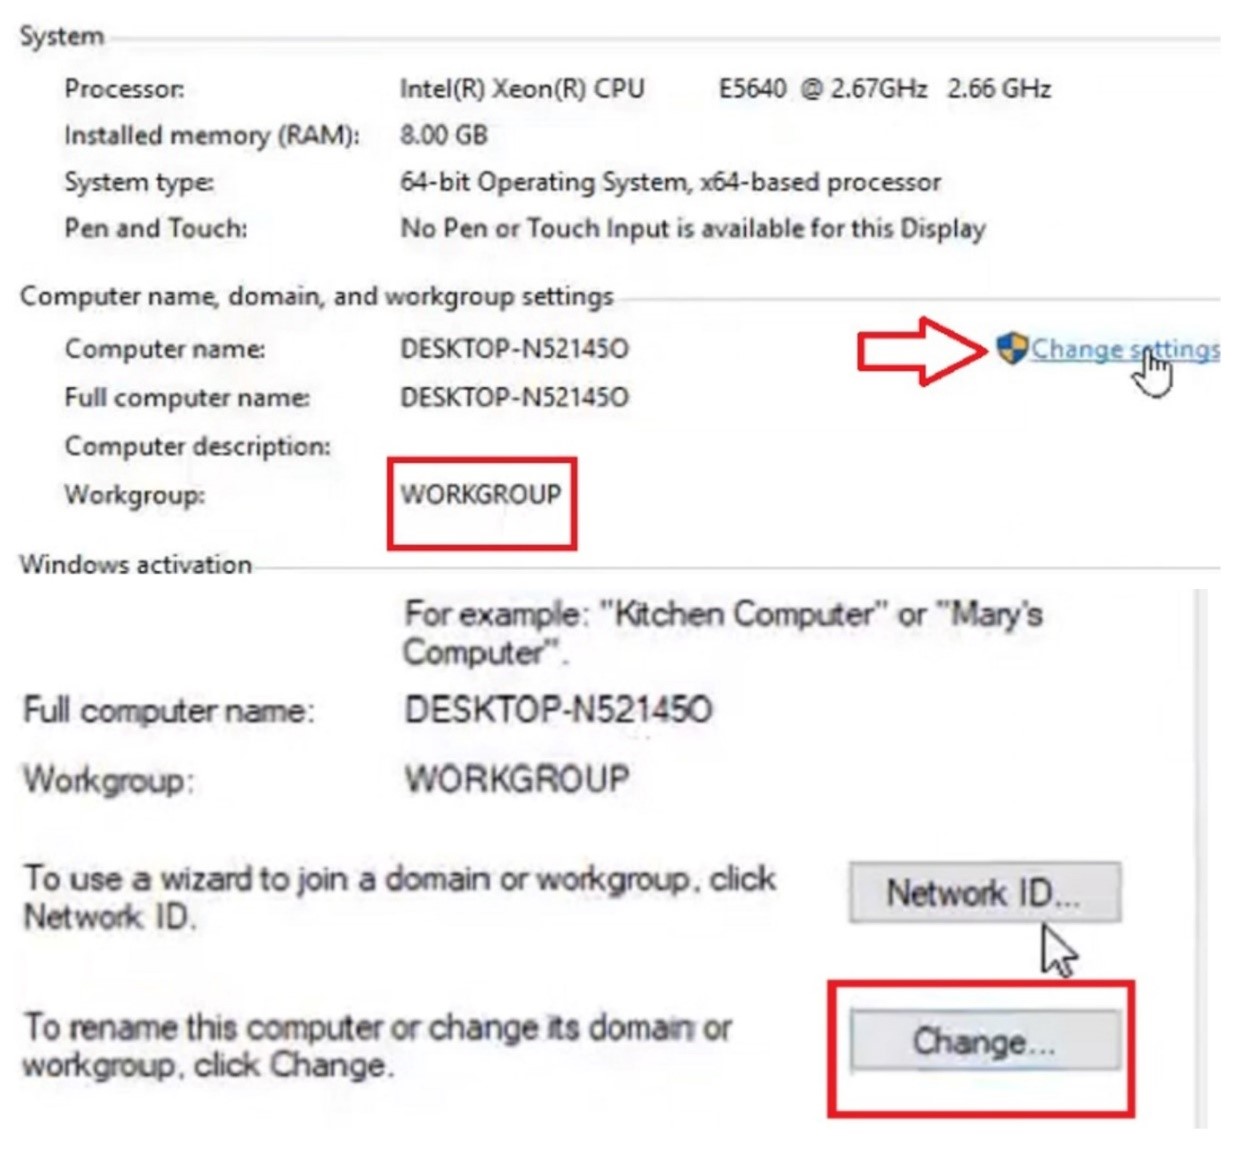
- See your computer name
- Look below at the Workgroup field
- Enter the name of the workgroup of the connected computer systems
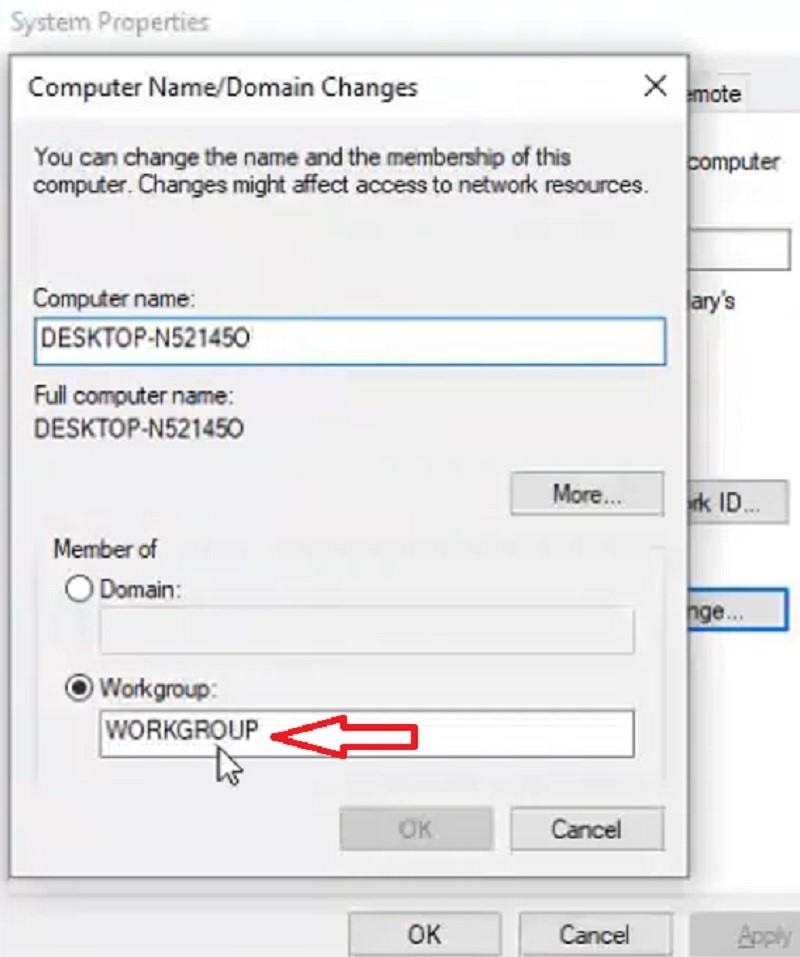
- Click on the OK button
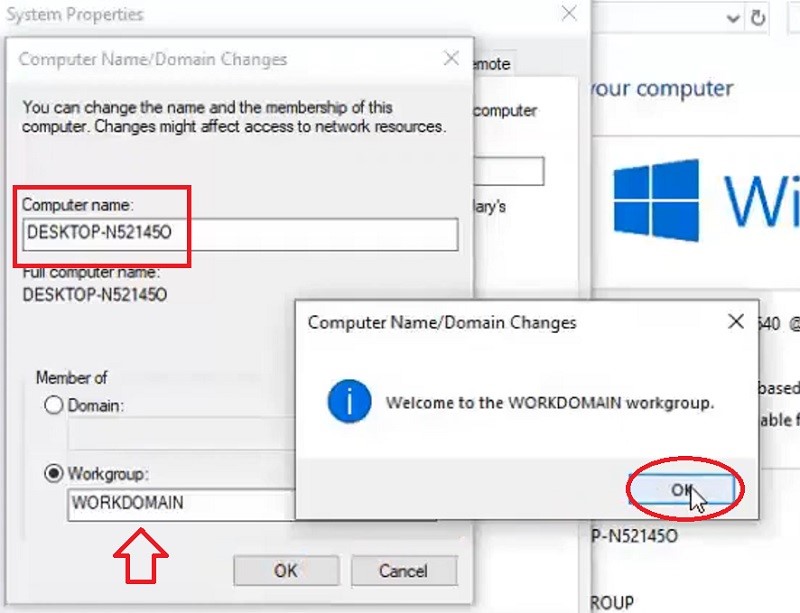
Restart the computer system to finish the process.
Method 7: Reinstalling Network Adapter from the Device Manager
The network adapter is often a cause of this issue. Resetting the network adapter card will revert the system back to its default settings.
However, in order to go ahead with this method, you will need to reinstall the network adapter.
STEPS TO FIX:
- Open Run by pressing the Windows and R keys together on your keyboard
- Type devmgmt.msc
- Press Enter to open the Device Manager
- Find Network adapters
- Find the adapter in your system
- Right-click on it
- Select Uninstall device
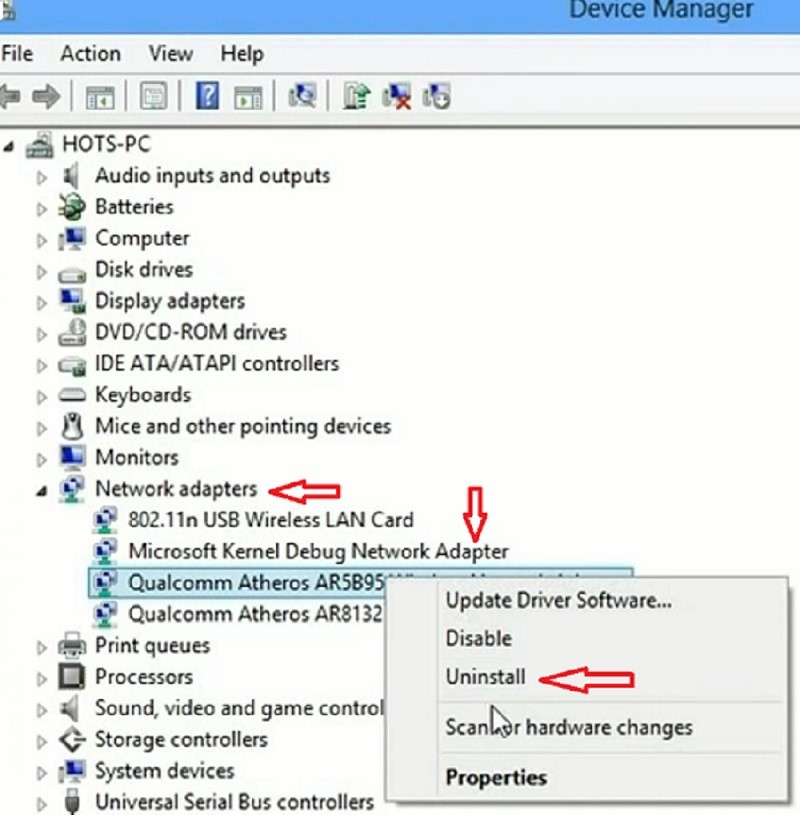
Finally, restart the computer system.
Method 8: Restart the PC
Sometimes, simply restarting the PC may resolve this issue because it will remove the apps that are causing temporary problems like not showing up in a network.
STEPS TO FIX:
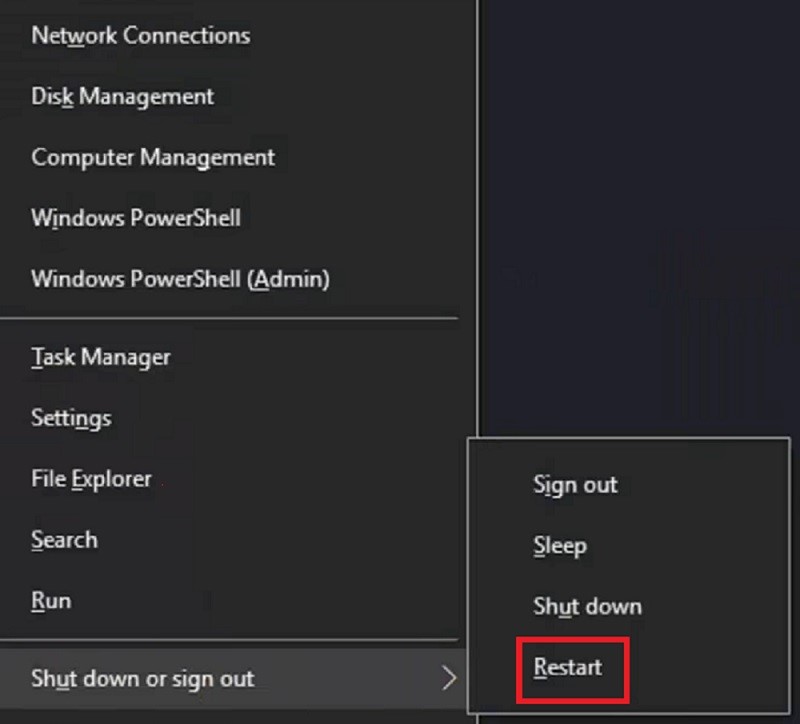
- Go to Start or Windows logo
- Click on the Power button
- Click on Restart
Method 9: Updating Windows
Sometimes bugs in the operating system may also cause several issues such as the PC not showing up in the network. Fresh updates will detect, fix and remove the bugs or issues that were in the earlier version.
Therefore, check for updates on a regular basis and run them.
STEPS TO FIX:
- Go to the Start menu.
- Click on the gear icon to open the Settings app.
(Alternatively, you can press the Windows and I keys together on your keyboard)
- Click on Update and Security.
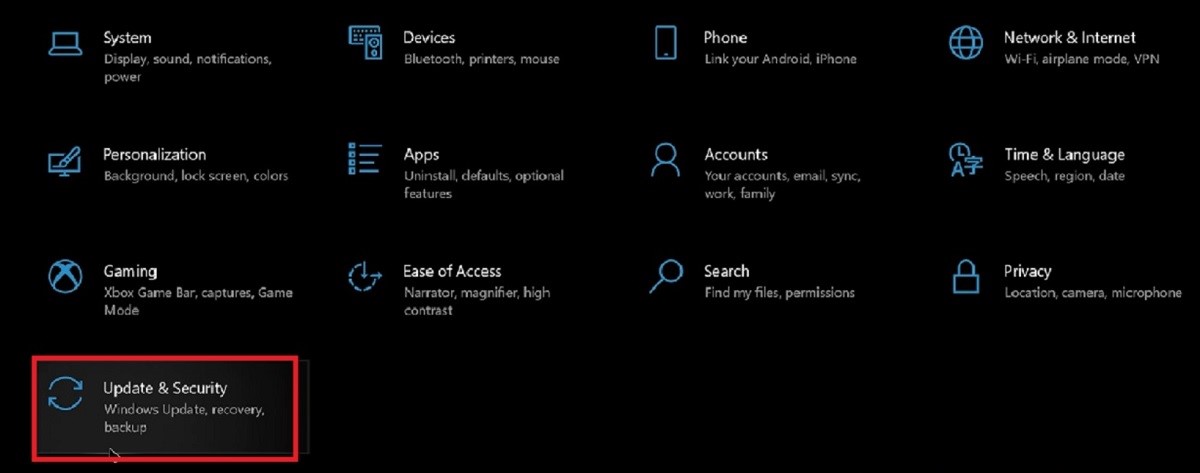
- Click on Windows Update on the left panel.
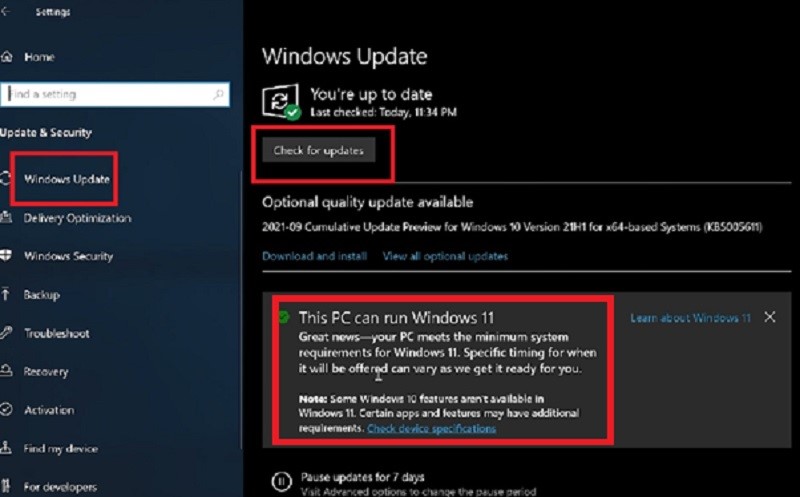
- Click on Check for updates.
If updates are available, there will be a link. Click on it to download and install the latest updates and restart the PC.
Method 10: Use the IP Address
Sometimes, you may not get access to a specific network if your PC is not detected by its unique IP Address. Therefore, make sure that you have entered the right IP address of your system.
STEPS TO FIX:
First, you will need to make sure that you know the exact IP address of your system. If you do not know the IP Address of your computer, use the Command Prompt and enter the command – ipconfig/all. Your system address will be either the IPv4 or the IPv6 address.
Now, go to the File Explorer and type the IP Address in the address bar after two backward slashes. For example: \\192.165.1.13
You will now be able to see your PC on the network.
This, however, is just a temporary fix that will allow you to get the job in hand done and then look for the other permanent fixes.
Method 11: Local Network Configuration Tweaks
The local network configuration may be proper, which, in some cases, may prevent the PC from detecting the network. So, reset it to fix the issue.
You may use the ping command in PowerShell to check whether or not this setting is in the right order.
STEPS TO FIX:
The initial steps to follow for it are opening the PowerShell terminal and using the ping command with the host name, say ping www.google.com, or the IP Address, say ping 192.165.1.13.
If it responds to the command, consider the configuration to be correct. If not, then something is wrong. In that case, follow the below steps:
- Open Settings
- Go to Network and Internet
- Go to Advanced network settings
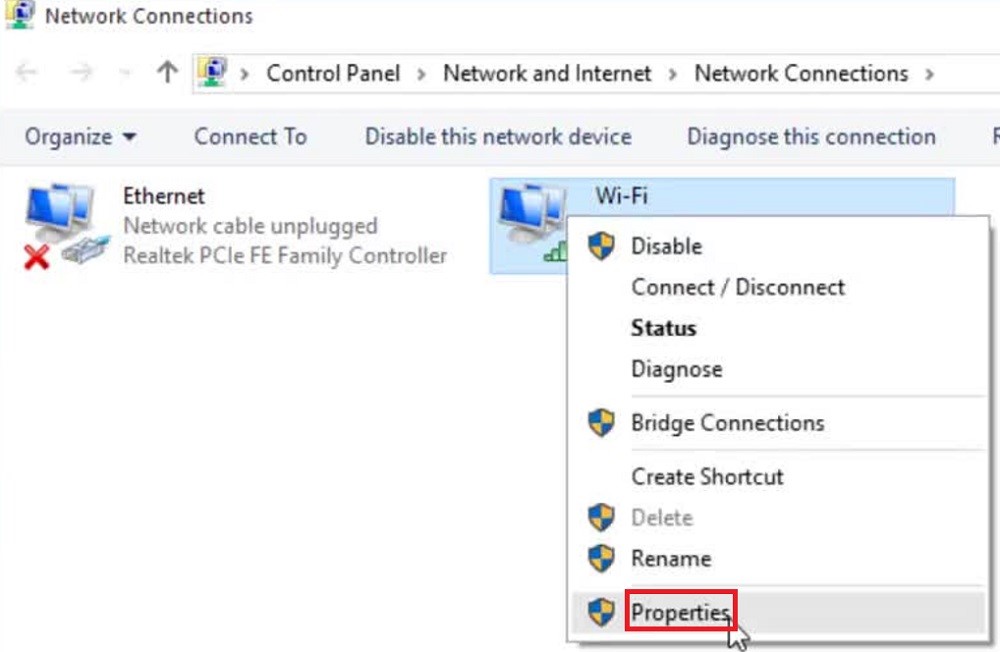
- Click on Change adapter options under it
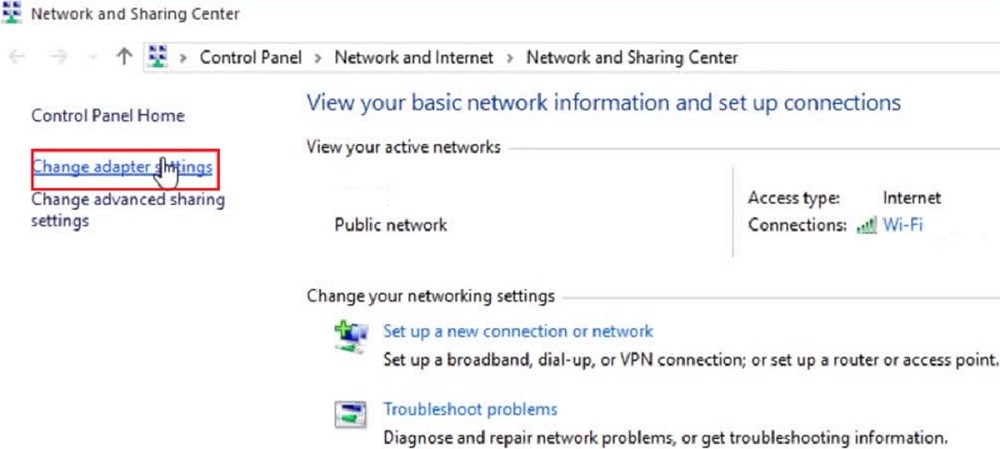
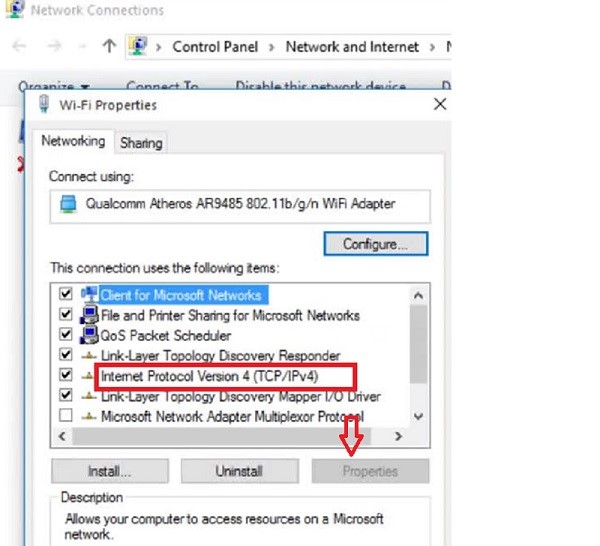
- Right-click on the connected network, say Wi-Fi
- Select Properties
- Double-click on Internet Protocol Version 4, if you are using it
- Click on the Properties button
- Select ‘Obtain an IP address automatically’
- Select ‘Obtain DNS server address automatically’
- Click on the OK button
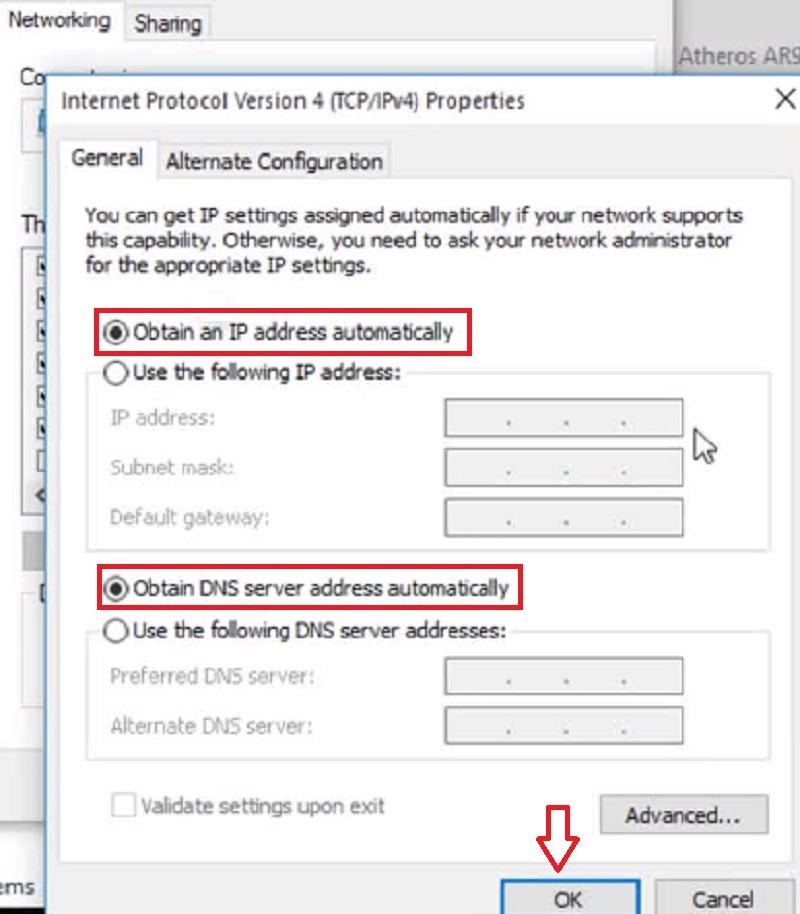
- Save the changes
- Close the window
- Restart your computer
Method 12: Use Network Adapter Troubleshooter
Once again, the network adapter may cause this issue due to improper settings even after apprising the drivers. Therefore, setting it right is required.
You may use the Windows troubleshooter to fix it for you.
STEPS TO FIX:
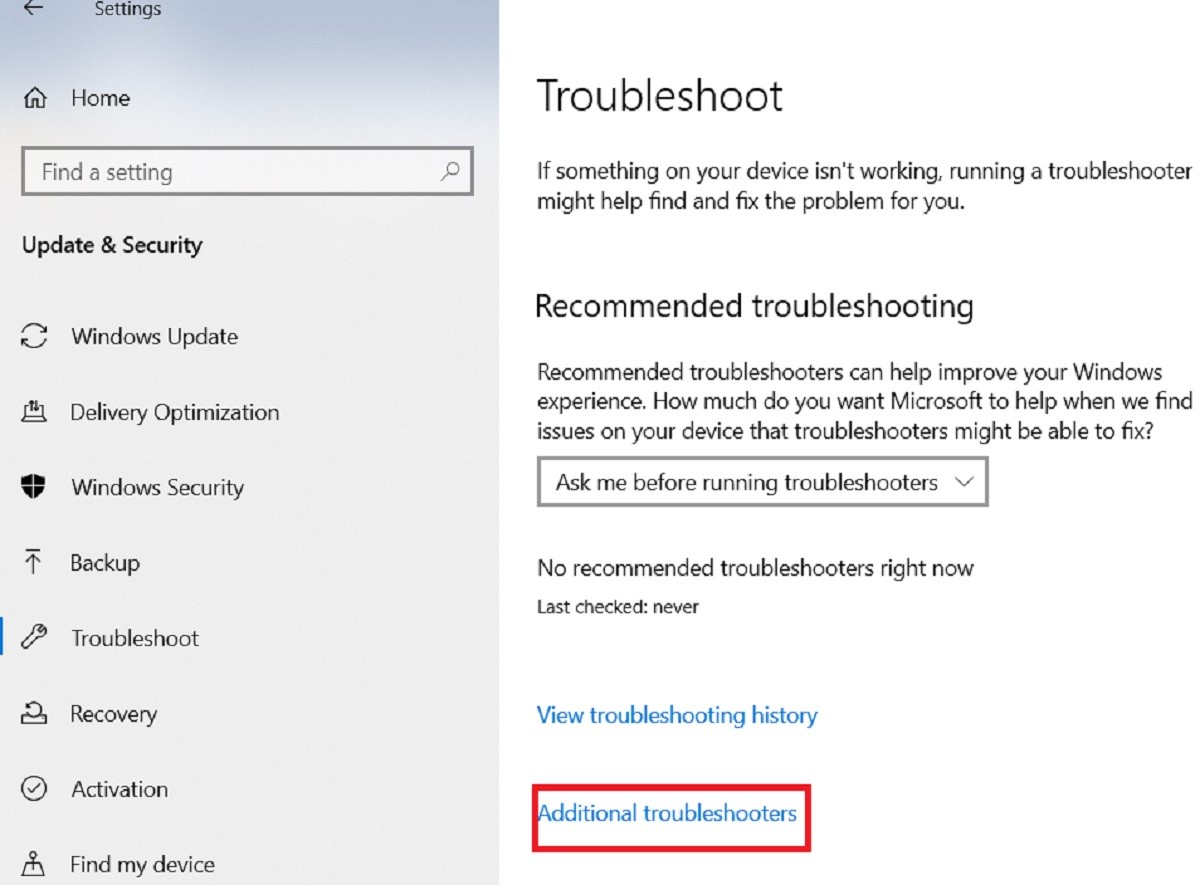
- Open Settings
- Go to Update and Security, as already mentioned above
- Select Troubleshoot
- Click on Additional Troubleshooters
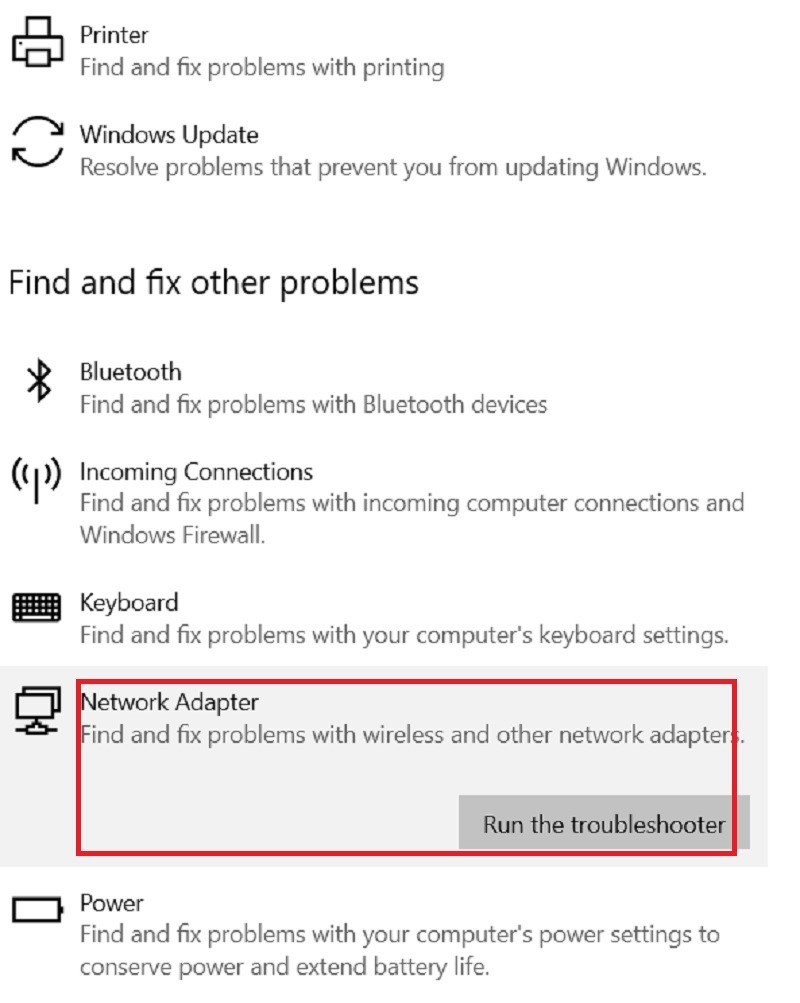
- Look for the Network Adapter
- Select it
- Click on the Run the troubleshooter button
Wait until the changes are applied and check whether or not your PC is now detected in the network.
Conclusion
So, coming to the end of this article, you now do not have to wonder why your PC is not showing up in the network, because you know the reasons as well as the easy fixes to the network discovery issue.
If simple fixes like restarting and troubleshooting do not help, there are lots of others to fall back and count on.