
Like many other issues with the network of a PC, Wificx.sys Blue Screen of Death is also a common error that will cause system shutdown.
It can cause a lot of convenience when your PC won’t work or shuts down just when you need it the most.
If it happens frequently and persistently, you will need to rectify the issue as soon as possible.
There are several ways to resolve the Wificx.sys Blue Screen of Death issue. If you do not know about them, here are the solutions you can try.
In This Article
KEY TAKEAWAYS
- If any errors in the system files are causing the Wificx.sys Blue Screen of Death issue on your PC, run a System File Checker scan to resolve it.
- Installing updated drivers for wireless and network adapters is another simple and quick fix to this specific issue.
- Uninstalling any recent updates to the Windows operating system may also rectify the problem quite easily and effectively.
- A complete network reset may also help rectify the problem most of the time by fixing the internal issues.
- Running a DISM command in the Command Prompt can also help in fixing the Wificx.sys Blue Screen of Death issue on a PC.
Why Does Wificx.sys Cause Blue Screen of Death?
Ideally, Wificx.sys helps to program network drivers. There may be issues with the Wificx.sys driver itself which may cause a Blue Screen crash.
The Wificx.sys Blue Screen of Death issue may also be a result of an error in the file system.
A few other reasons for this issue to occur are:
- Outdated wireless and network drivers
- Outdated Windows
- Recent Windows updates that may be incompatible
- Windows Defender Firewall conflicting
- Issues in the HID or Human Interface Device
- Corrupt or conflicting third-party antivirus program
- Malfunctioning memory, Hard Disk Drive or other hardware
- Overheating components
- Issues in the Random Access Memory (RAM)
- Issues in the HDD or SSD Read Only Memory (ROM)
- Outdated BIOS version
There are specific steps to follow to fix the Wificx.sys issue depending on the specific reason for this issue to occur. These solutions are explained in the section hereunder.
How to Fix Wificx.sys Blue Screen of Death?
You may run a System File Checker scan on your computer to fix the issue of Wificx.sys Blue Screen of Death.
In addition, you may also try these simple yet effective solutions:
Uninstall any conflicting Windows updates made recently: Go to the Start Menu > Settings > Windows Update > Update history > Uninstall updates.
Updating network adapter drivers: Right-click on the Start Menu > Choose Device Manager from the options > Expand Network adapters > Right-click on the network adapter > Select Update driver > Select Browse my computer for drivers > Click on Let me pick from a list of available drivers on my computer > Select model > Click Next.
Remove Vanguard app (If any): Press Windows and I keys to open Settings > Go to Apps > Installed Apps > Search for Vanguard > Click the three horizontal dots on the right > Select Uninstall from the pop-up window > Click on Uninstall for confirmation in the following window > Restart your PC when done.
Uninstall and reinstall network adapter: Right-click on the Start Menu > Choose Device Manager from the options > Expand Network adapters > Right-click on your network adapter > Select Uninstall device > Click on Uninstall in the next window > Go to the Action tab at the top > Click on Scan for hardware changes.
Disable third-party antivirus programs: Go to the Windows search box > Type add or remove programs > Hit Enter > Select your antivirus program > Uninstall.
A few other quick fixes that you can try before moving on to the relatively complex solutions are:
- Updating the wireless drivers
- Update Windows
- Restart your system
- Restart router
If the above issues do not resolve the Wificx.sys Blue Screen of Death issue, then you can try one or more of these relatively complex solutions.
Method 1: Run a System File Checker Scan
Scanning the system for any errors in the system files that may be causing the Wificx.sys Blue Screen of Death issue is an effective way to resolve the problem.
STEPS TO FOLLOW:
- Press the Windows and R keys on your keyboard together to open the Run dialog box.
- In the Run dialog box type cmd.exe.
- Press the CTRL + SHIFT + ENTER keys on your keyboard together.
- In the elevated Command Prompt, type in the command sfc /scannow and hit the Enter key.
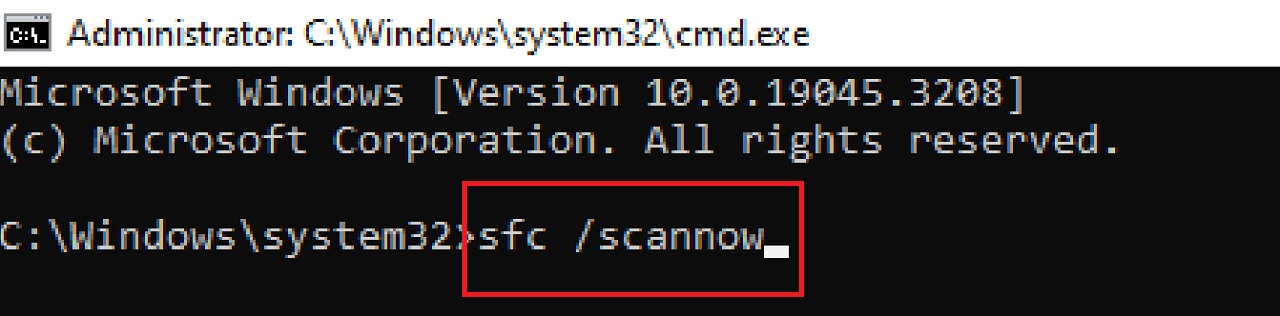
This will start the scanning process and will take some time. When the process is complete, restart your system and check whether or not the issue is resolved.
Method 2: Perform a Network Reset
Resetting the network as a whole may often resolve the internal errors and the issue in the process.
STEPS TO FOLLOW:
- Right-click on the Start Menu.
- Choose Settings from the options that appear.
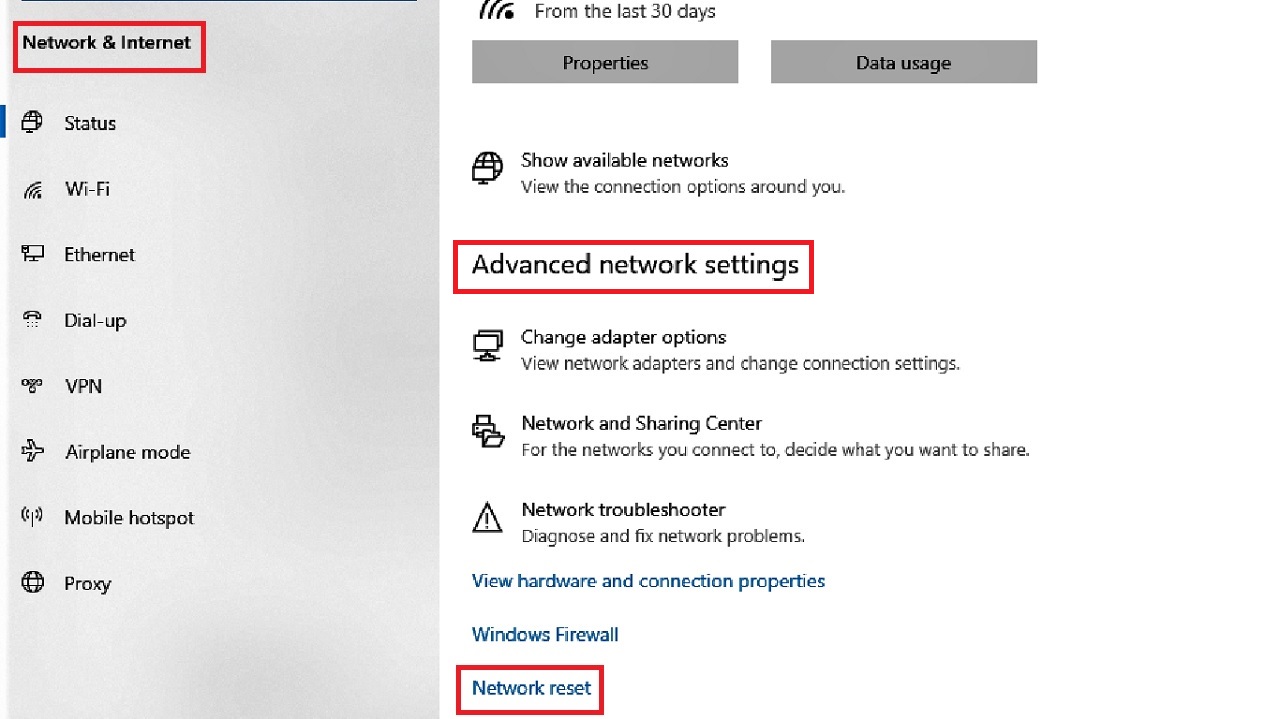
- Click on the Network & Internet tile.
- Look for Advanced network settings in the following window on the right side and click on it.
- Click on Network Reset.
- Click on the Reset now button in the following window.
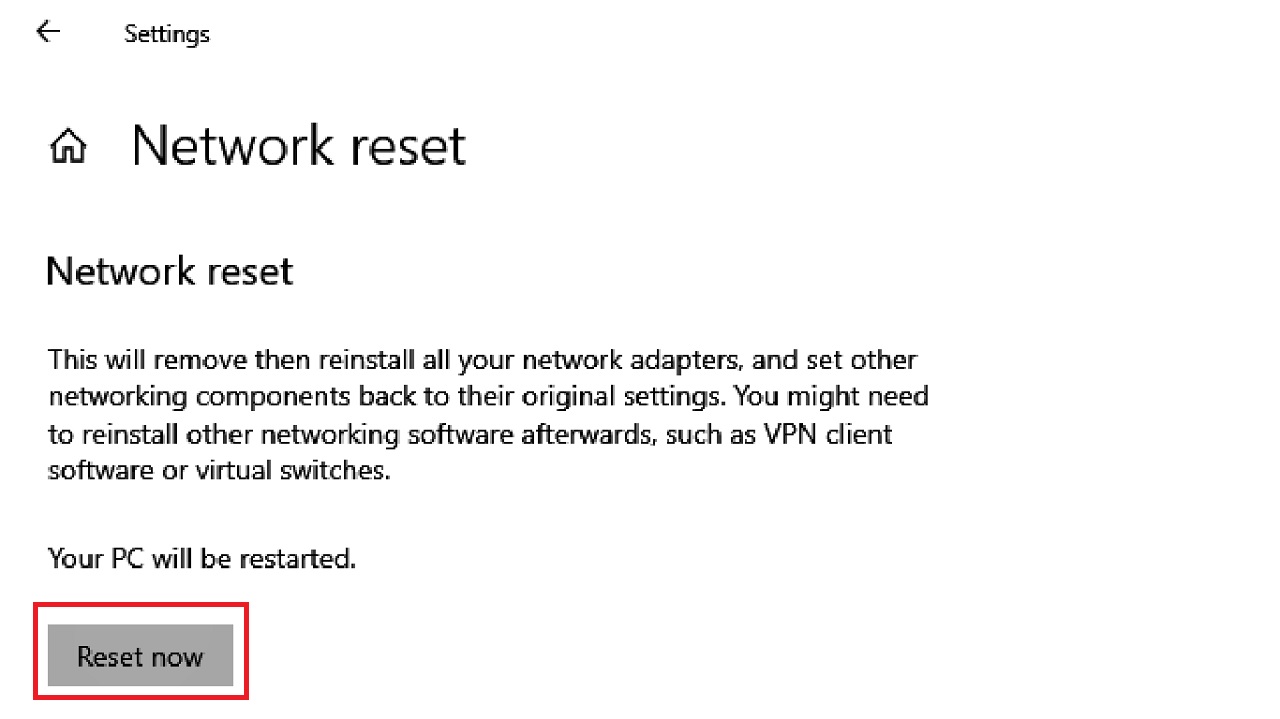
Now, restart your PC and check if the problem is fixed.
Method 3: Run a DISM Command in the Command Prompt
More often than not, running a Deployment Image Servicing and Management or DISM command in the Command Prompt may resolve the issue.
STEPS TO FOLLOW:
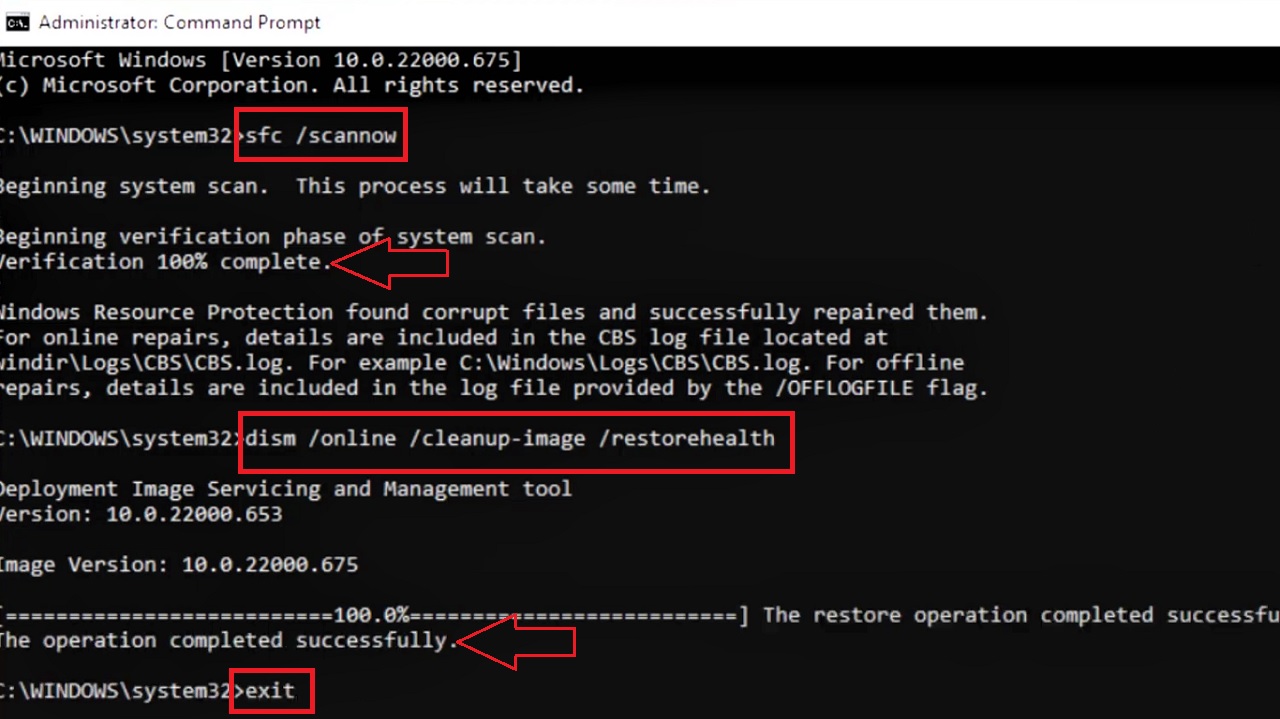
- Open the Command Prompt as an administrator and run the System File Checker scan as you did in Method 1.
- When the process is complete, run the DISM command dism /online /cleanup-image /restorehealth and press the Enter key on your keyboard.
- Wait for the process to complete and then type exit and hit Enter to exit and close the Command Prompt.
Finally, restart your PC and check whether or not the issue has been resolved.
Note: If you want a deeper scanning of your system and checking the health of your PC, you may additionally run the two dism /online /cleanup-image /checkhealth and dism /online /cleanup-image /scanhealth commands in between the SFC command and DISM restorehealth command.
Method 4: Turn off Windows Defender Firewall Temporarily
The Windows Defender Firewall protects your system from virus attacks but may also cause a few network issues such as Wificx.sys Blue Screen of Death. So, disabling it temporarily may help in rectifying the problem.
STEPS TO FOLLOW:
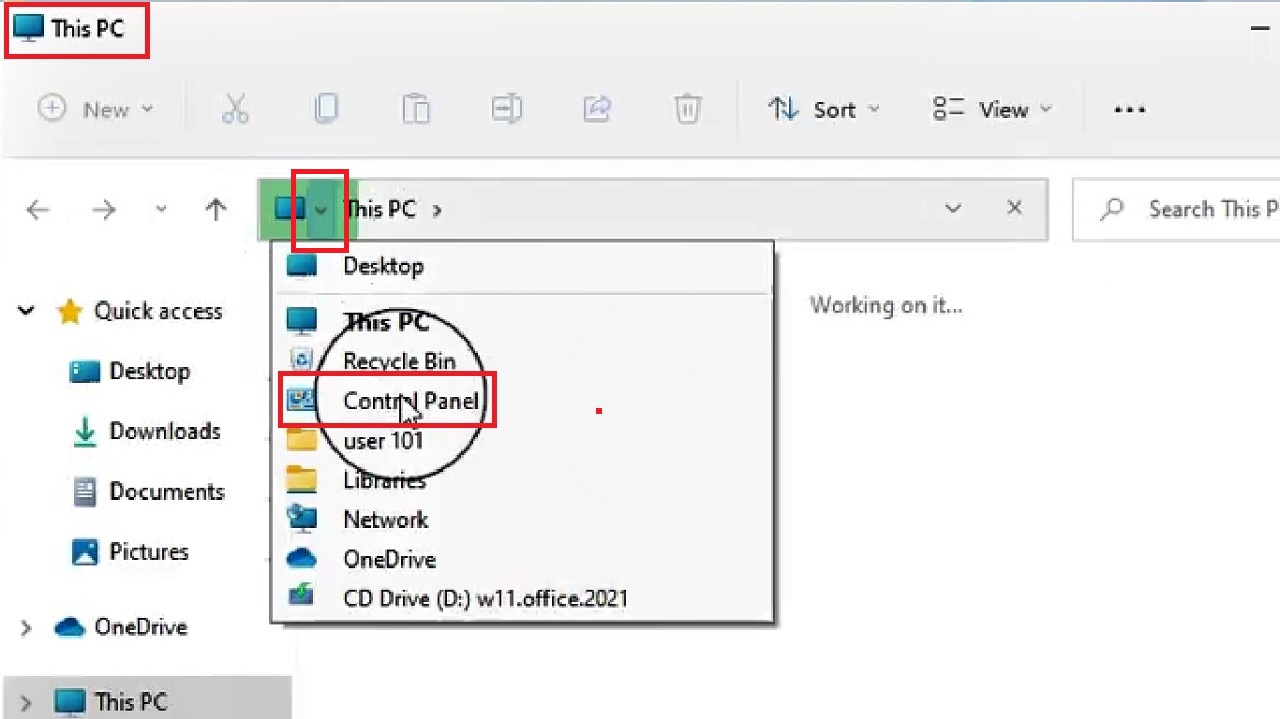
- Go to This PC on your desktop and click on it to open it.
- Click on the small arrow in between the monitor icon and This PC at the top.
- Select Control Panel from the drop-down options that appear.
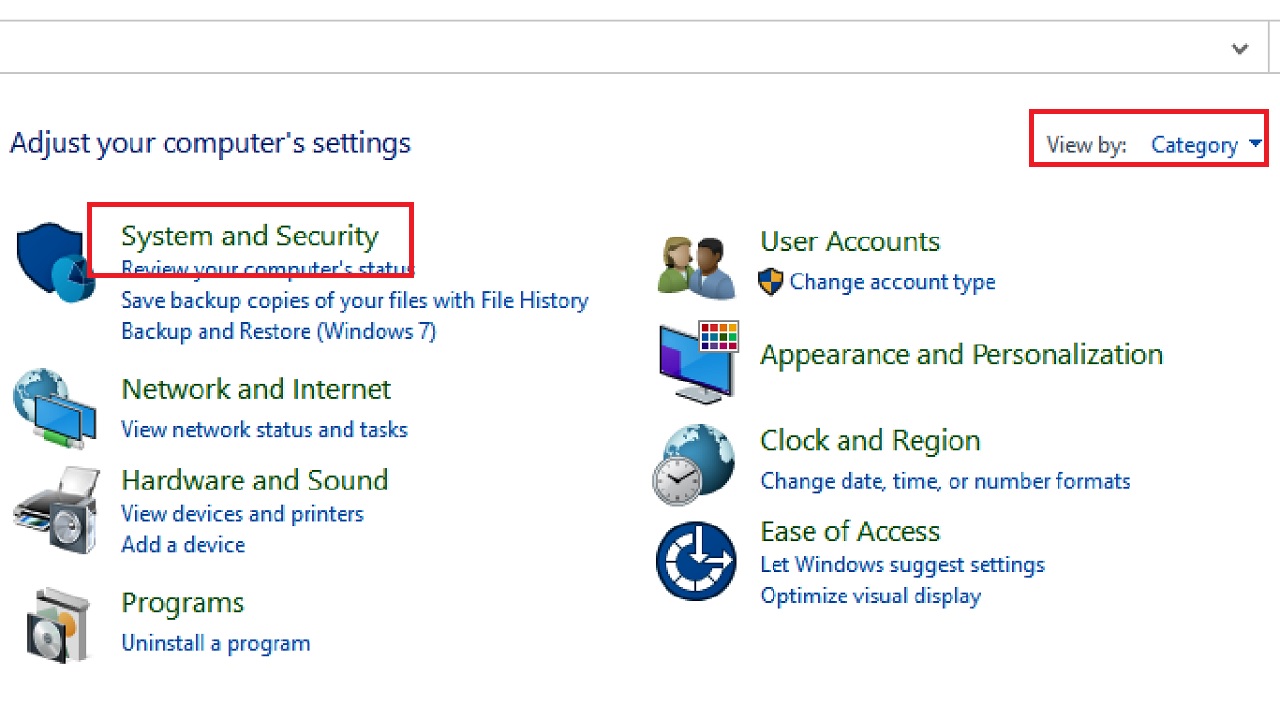
- Select Category in the View by box at the top-right corner.
- Go to System and Security in the Control Panel window.
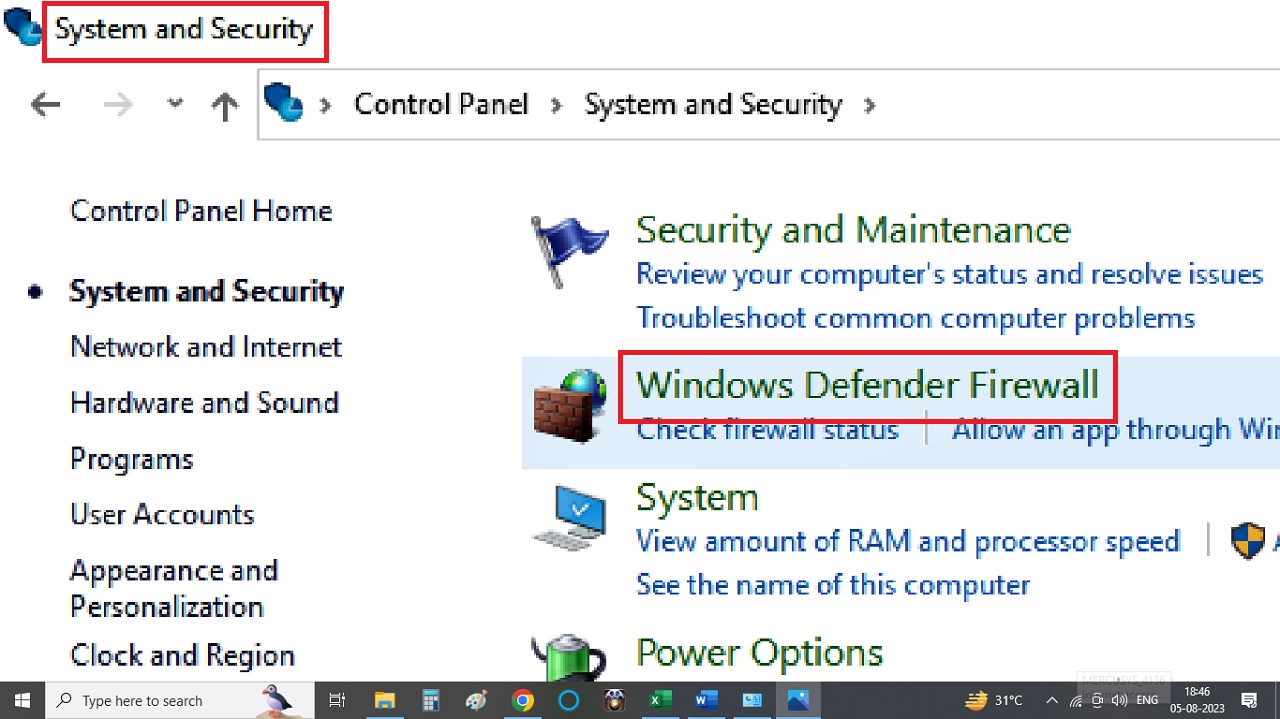
- Select Windows Defender Firewall from the following System and Security window.
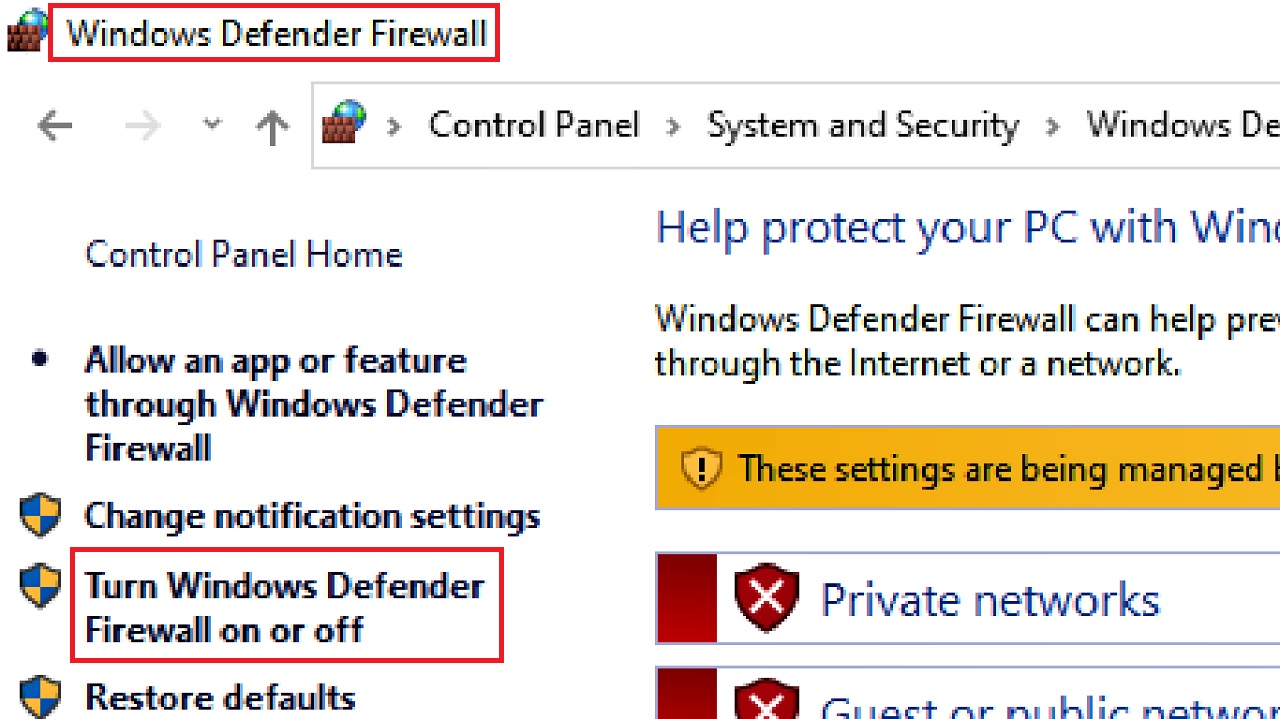
- Select Turn Windows Defender Firewall on or off from the left panel of the next Windows Defender Firewall window that appears.
- Click on the small radio button next to Turn off Windows Defender Firewall (not recommended) under Private network settings in the Customize Settings window that follows.
- Do the same for the Public network settings below it.
- Then click on the OK button below to save the changes. (Not shown in the image).

Finally, close all windows and check whether the issue is fixed or not.
Note: Disabling the Windows Defender Firewall in your system is usually not recommended, especially if you do not have any other third-party antivirus protection program or software running on your PC. This may cause virus or malware infection, especially when you access the internet.
Method 5: Remove Human Interface Device
Sometimes, a few specific types of Human Interface Devices such as sound, videos and game controllers can cause this specific Wificx.sys Blue Screen of Death issue. Removing them can fix the problem.
STEPS TO FOLLOW:
- Open Device Manager as before.
- Click on the small arrow next to Sound, video and game controllers to expand it.
- Select and right-click on one.
- Click on Uninstall device from the drop-down option.
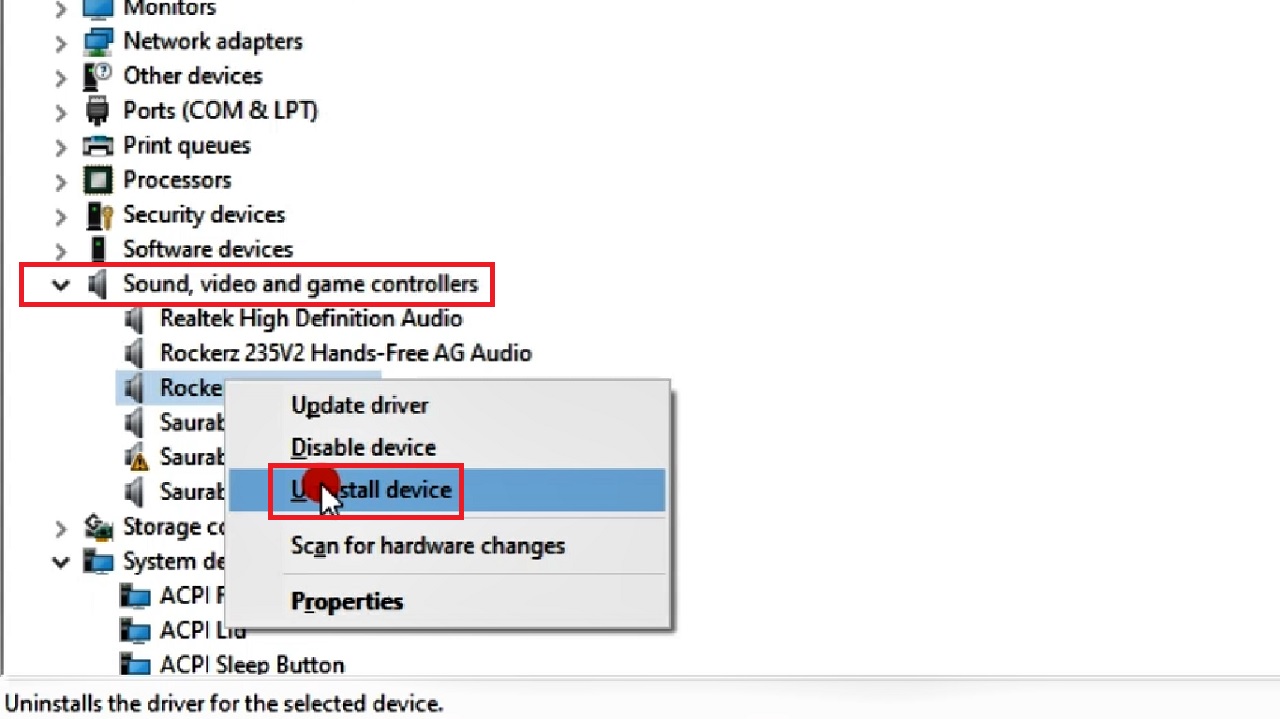
- Check whether the Blue Screen of Death error message is still appearing or not.
Repeat the process for each and check to find the faulty one and uninstall it.
Method 6: Run a Verifier for Non-Microsoft Drivers
The non-Microsoft drivers may also cause this error. You will need to run a verifier to check them and remove the one that is causing the error.
STEPS TO FOLLOW:
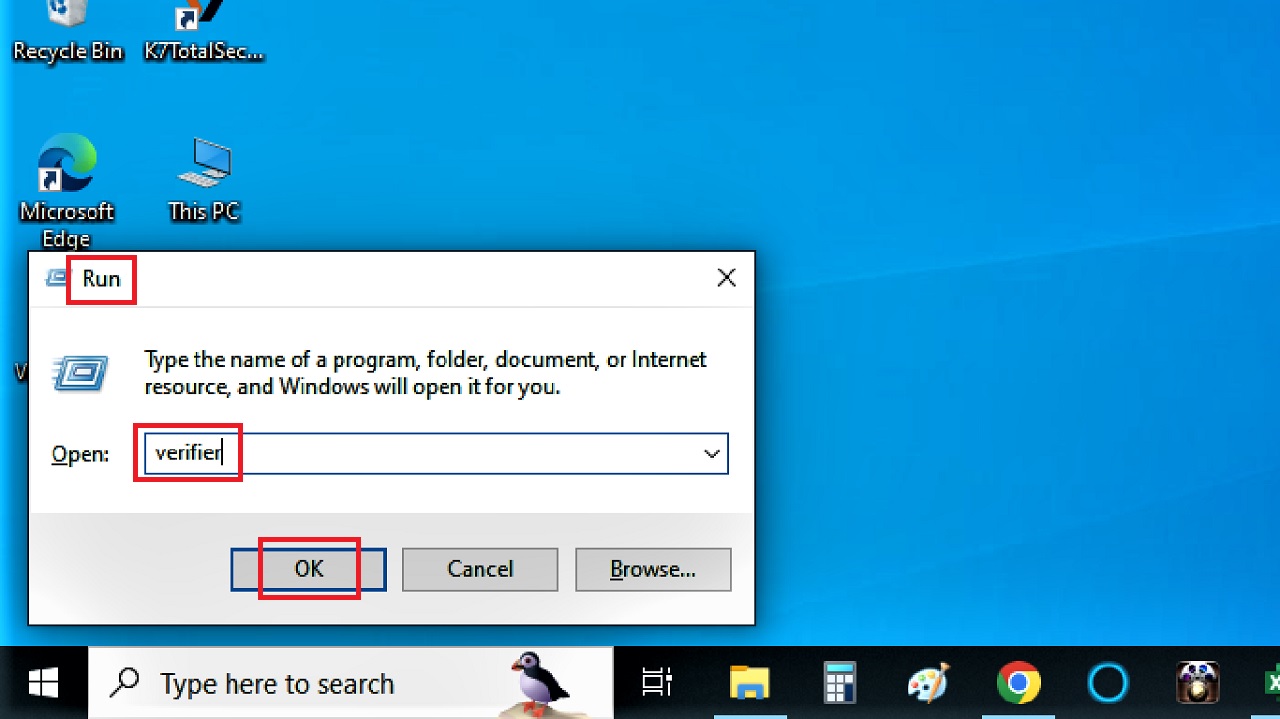
- Open the Run dialog box as before.
- Type verifier in the box and press the OK button or hit the Enter key on your keyboard.
- Click on the Yes button when the User Account Control window appears.
- In the Driver Verifier Manager window that appears, click on the small circular button next to Create custom settings (for code developers).
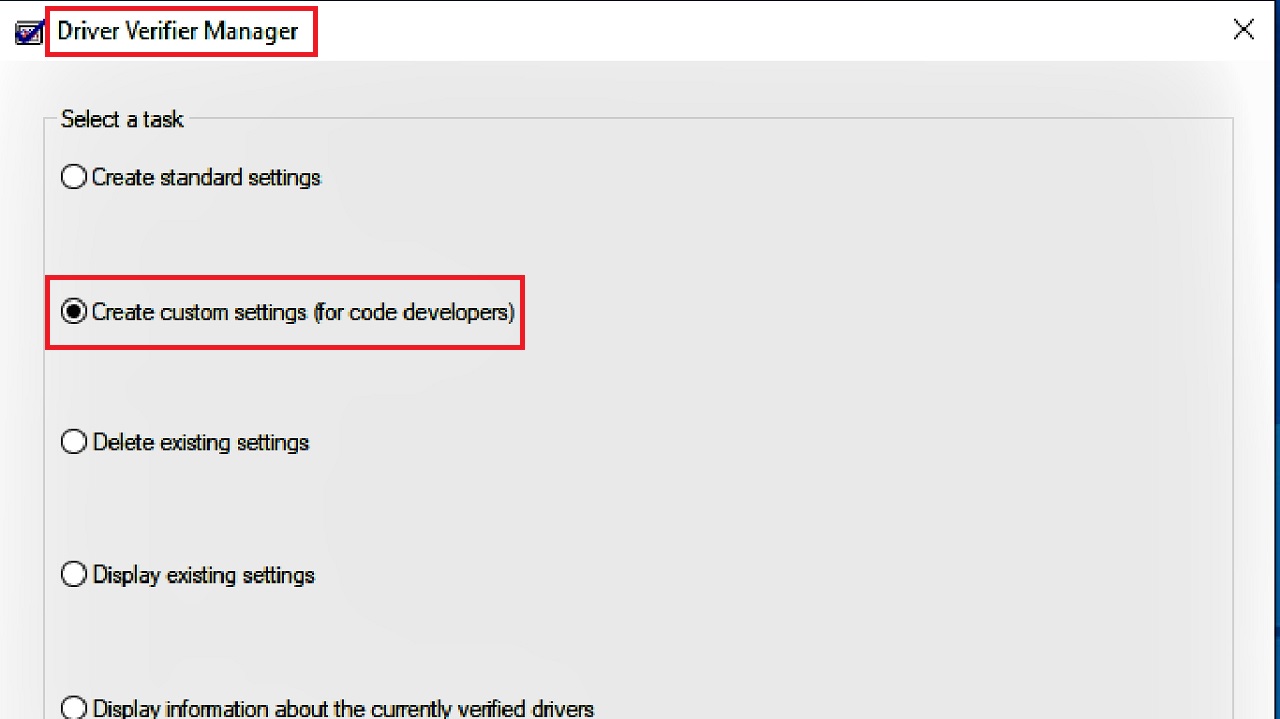
- Click on the Next button below. (Not shown in the Image).
- In the following window, click on all the square boxes except the one next to Randomized low resources simulation.
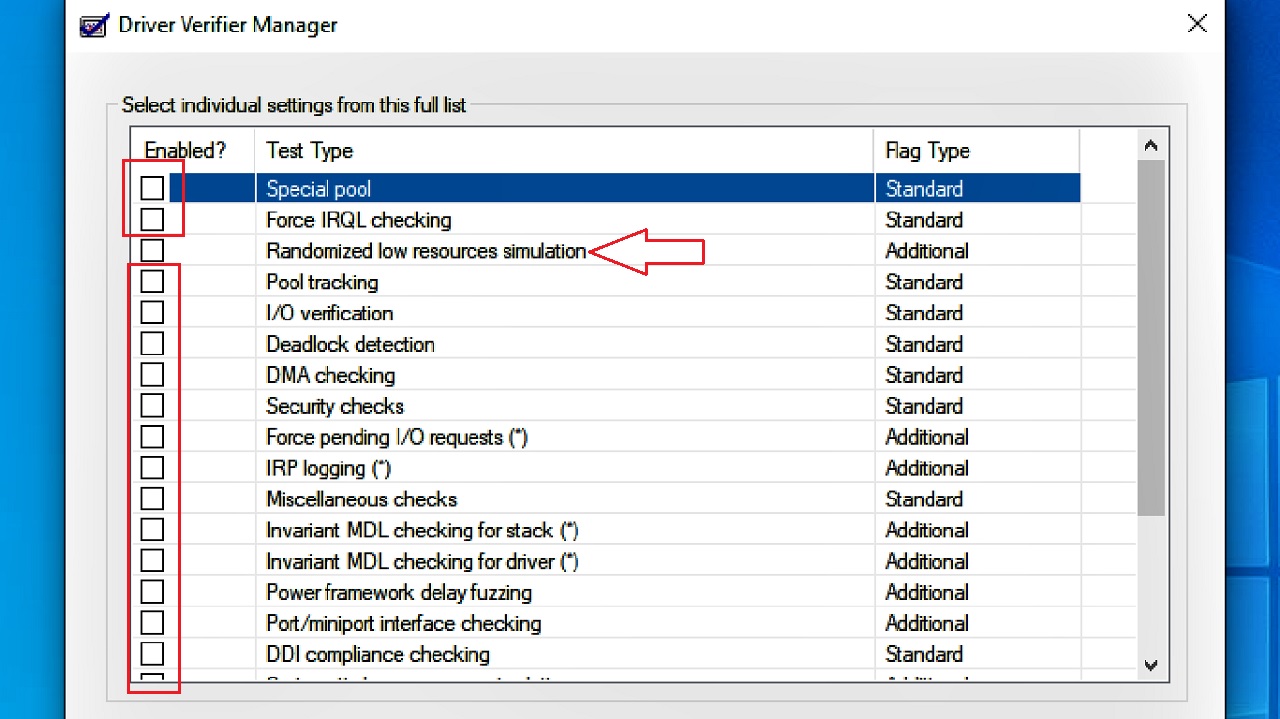
- Click on the Next button. (Once again, not shown in the image).
- Now, click on the small radio button next to Select driver names from a list and then click on the next button below, which is not shown.
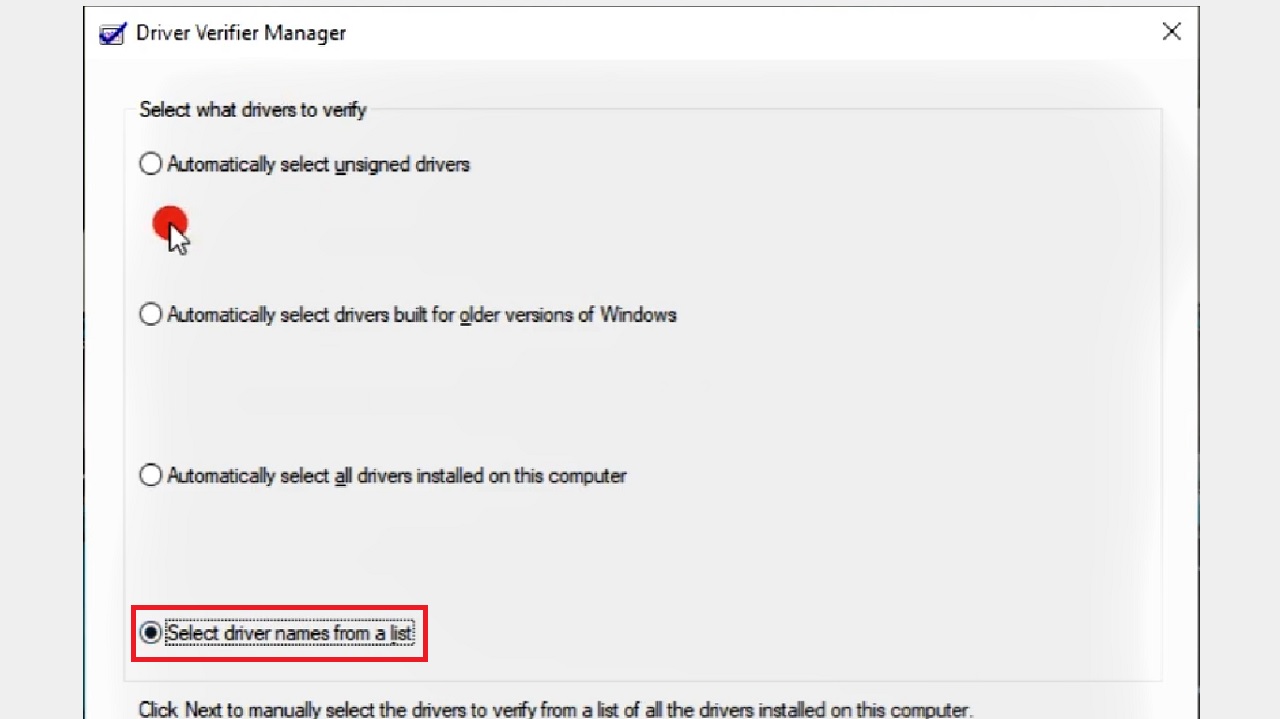
This will load all necessary information of the drivers installed on your PC. It will contain all Microsoft and non-Microsoft drivers.
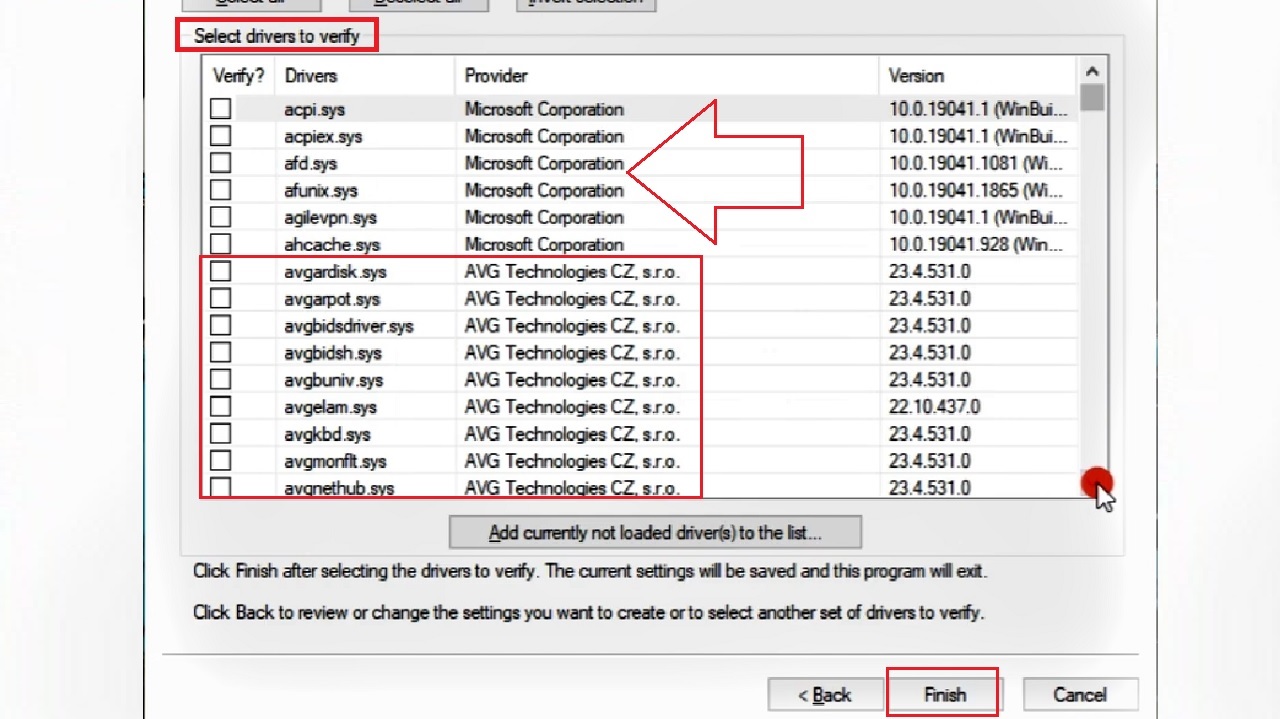
- From the following window, check the square boxes next to all third-party or non-Microsoft drivers only in the list in the box under Select drivers to verify. Leave the Microsoft drivers, as indicated by the red arrow in the image below, unchecked.
- Click on the Finish button below.
When you do so, your device will restart and it will scan for any errors in it and fix them as well.
If this does not resolve the issue, you will then have to disable the antivirus software programs from your computer system.
If you do not know the method then go to the How to Fix Wificx.sys Blue Screen of Death section above, before Method 1.
Method 7: Update the Basic Input Output System
Sometimes, if the Basic Input Output System (BIOS) of your PC is outdated, it may cause this issue. Updating your BIOS to the latest version is therefore an obvious solution.
STEPS TO FOLLOW:
- Open the Command prompt as before and run it with administrative privileges.
- Type in the command wmic bios get smbiosbiosversion and hit the Enter key to execute it.
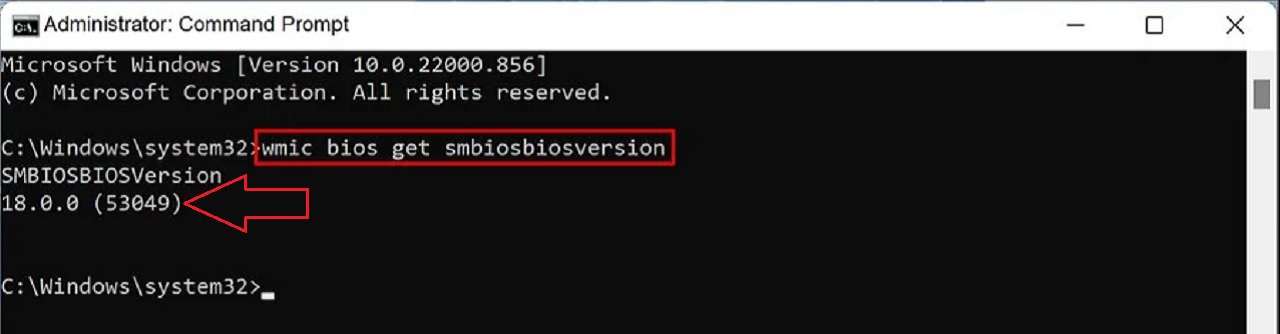
- Note down the version of your BIOS from the result, 18.0.0 (53049) in this case.
- Visit the website of the manufacturer of your device.
- Go to the download section.
- Enter the details of your device.
- Look for recent updates.
- Download if there are any updates available.
It will take some time. When the downloading of the file is complete, follow the on-screen instructions in the readme.txt file to extract the file.
This will update your BIOS. Now check whether the Wificx.sys BSOD issue is fixed or not. If the problem still persists, try the next method.
Method 8: Check and Replace Faulty Memory
There may be some hardware issues for which this error may occur. You should therefore diagnose the issues with the RAM and ROM installed on your PC, and replace them if necessary.
STEPS TO FOLLOW:
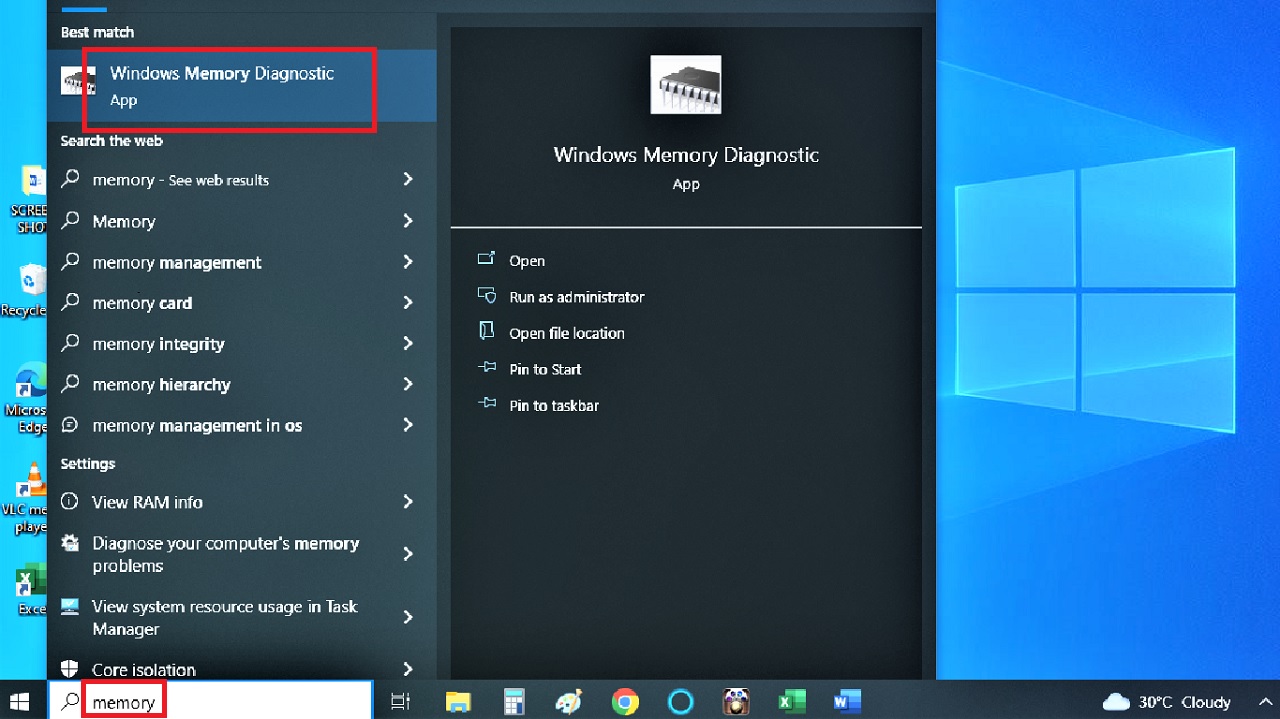
- To diagnose the RAM, press the Windows and S keys on your keyboard together to open the Windows search box.
- Type memory in the box and click on the best result, Windows Memory Diagnostic.
- In the Windows Memory Diagnostic window, click on Restart now and check for problems (recommended).
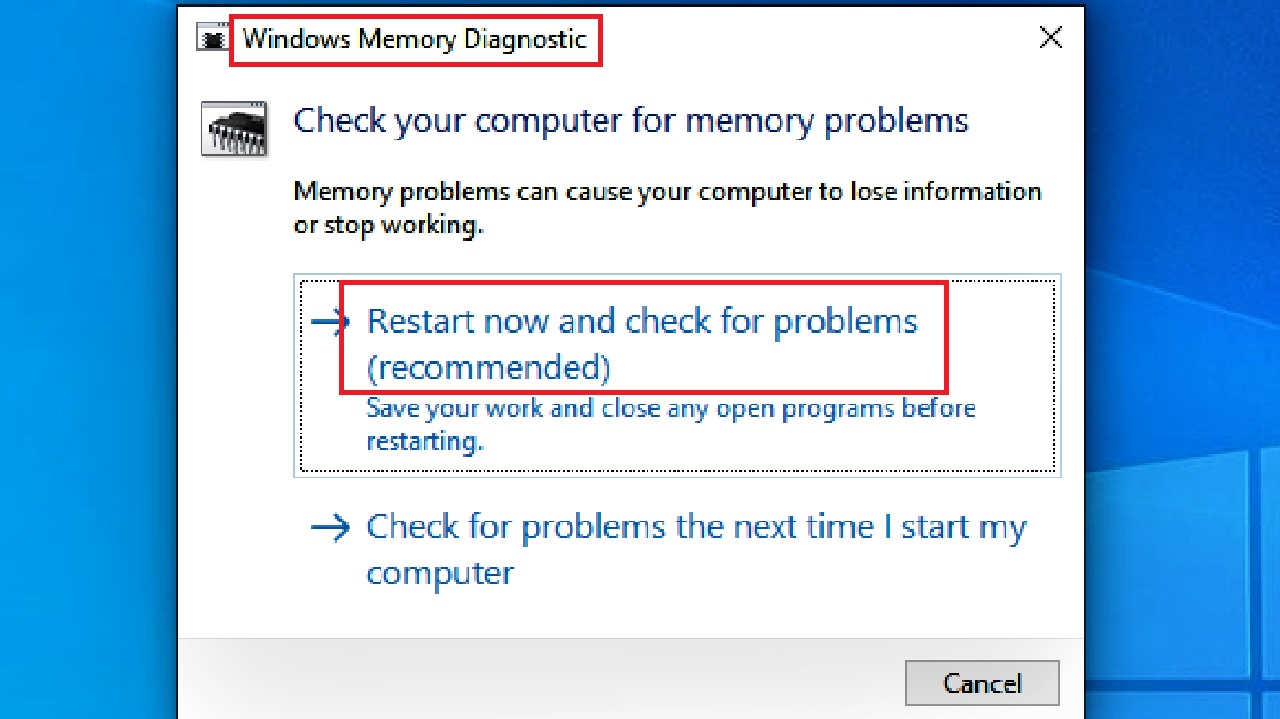
This will start scanning the RAM and will take some time. Wait for it to complete, and when it is done scanning, reboot Windows.
The system will display the scanning report suggesting whether or not you need to replace the RAM or not. Do as suggested.
Now, to inspect the issues in the ROM in the HDD or SSD, follow these steps:
- Right-click on the Start Menu.
- Select Windows PowerShell (Admin) from the list of options that appears.
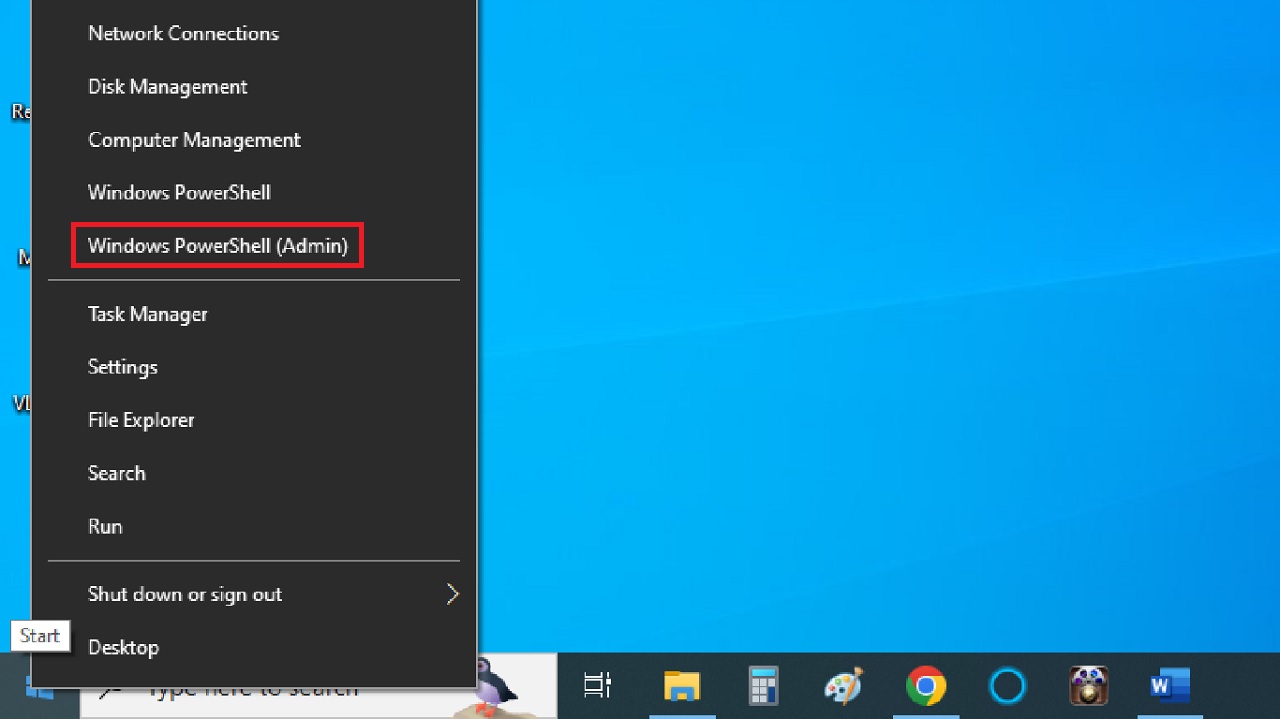
- Click on the Yes button in the User Account Control window to proceed.
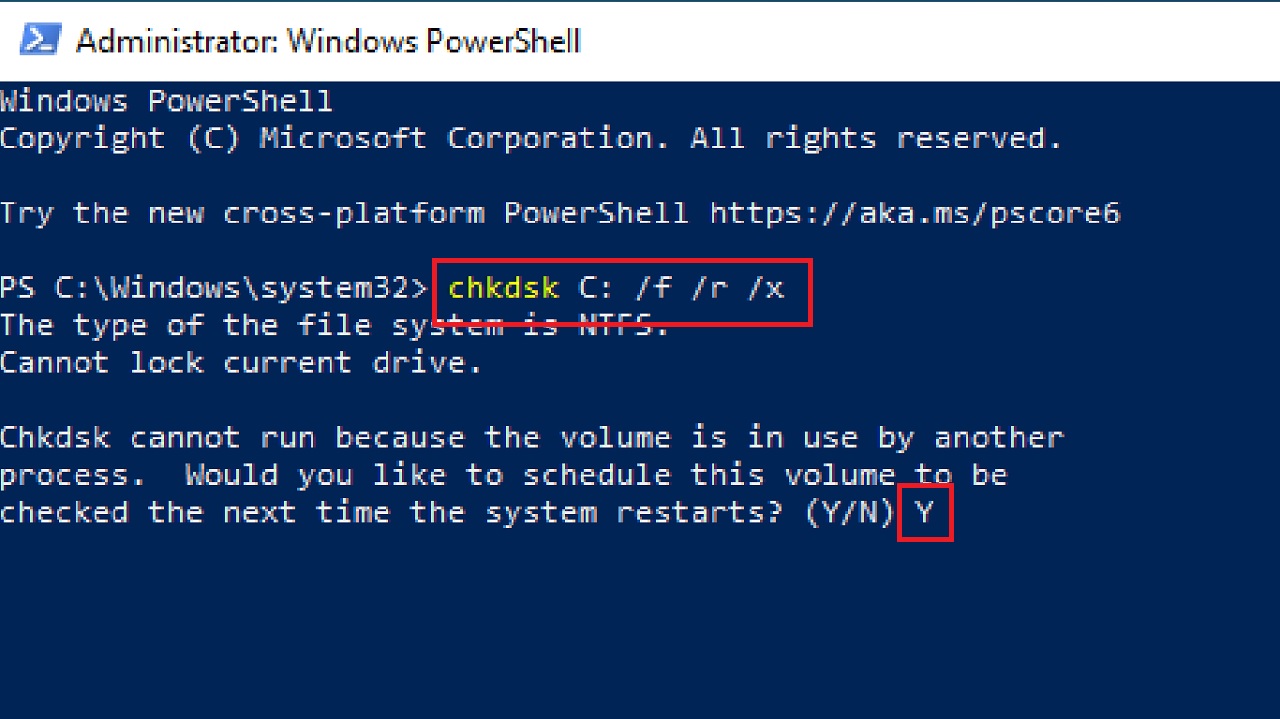
- In the PowerShell window, type the command chkdsk C: /f /r /x and hit the Enter key on your keyboard.
However, the Drive C will be in use already and therefore the system cannot run the Check Disk command automatically.
Therefore, it will ask you, “Would you like to schedule this volume to be checked the next time the system restarts?” (Y/N).
- Type Y and hit the Enter key.
Now, restart your computer system. When it does, the Check Disk command will take over automatically to initiate the scanning process on the Hard Disk Drive or the Solid-State Drive installed on your PC.
This might take some time. Wait for the scanning process to complete, and check the report displayed when it is done. Replace your HDD or SSD if suggested.
This will resolve the Wificx.sys BSOD error on your PC.
Conclusion
So, these are the common solutions to resolve the Wificx.sys Blue Screen of Death issue and save your system from frequent shutdowns.
It is always best to try with the quick and easy fixes first and then go for the more complicated ones.