
Adjusting the Maximum Transmission Unit (MTU) settings, or size to be more precise, in Windows can significantly enhance the network speed and performance as well as the efficiency of moving data packets. This size will also help reduce latency.
However, most users are ignorant about this feature and possibility. If you are one of them, you’re in the right place.
This guide outlines the simple steps to change the MTU size in Windows.
In This Article
KEY TAKEAWAYS
- You may configure the router to change the MTU size for every device connected to a network, by accessing its web portal.
- It is also quite easy to adjust the MTU size in Windows by running a specific network shell command in the Command Prompt as an administrator.
- Almost in the same way as using the Command Prompt, you can use the PowerShell to modify the MTU size of your network adapter as well.
- The registry editor can also be used to modify the MTU size by setting the DWORD value of the registry key of the network adapter as desired.
Why Change MTU Size in Windows?
Changing the Maximum Transmission Unit size in Windows will help in meeting the requirements of custom network configurations by the network administrators and advanced users.
Apart from that, there are several other reasons for which a user may want to change the MTU size. These are:
- Ensuring a closer and better match with the characteristics of the network
- Reducing fragmentation of data
- Reducing the number of smaller data packets processed and transmitted
- Improving output by maximizing the packet size
- Ensuring the packet size suits the capacity of the network
- Meeting the set standards and requirements of specific networks or services
- Ensuring compatibility with network service providers
- Reducing overhead due to over-fragmentation of data packets
- Meeting the tunnelling protocols and additional encapsulation headers of the Virtual Private Networks (VPNs)
- Enjoying the benefits of Voice over Internet Protocol (VoIP) and other real-time applications due to smoother data flow and lower latency
- Resolving connectivity issues due to failure of Path MTU Discovery (PMTUD)
- Ensuring compatibility after network upgrade or changing to new ISP or network infrastructure
- Resolving compatibility issues due to unsupported jumbo frames
- Reducing signal degradation and potential interference
- Meeting the recommendations of the cloud service providers and data centers to ensure best performance
- Enjoying better online streaming and gaming experience
- Helping in identifying and rectifying performance issues with better network monitoring and troubleshooting
Well, the needs are many and so it is better to know the quick ways to change the MTU size in windows mentioned in the following section.
How to Change MTU Size in Windows?
One way to change the MTU size in Windows quickly is by running the netsh or Network Shell command in the Command Prompt.
You may also follow a few other relatively simple steps to change the MTU settings and size, such as:
- Changing the configuration of the router from the web-based interface
- Changing the Jumbo Packet value from the network adapter properties
- Changing the value from the Windows Registry
- Using Windows PowerShell to change the value
You may also use a reliable third-party software or tool with a user-friendly interface to adjust MTU size.
Few Important Notes:
Please keep in mind that if you change the MTU settings or size in a wrong way it might possibly interrupt the network connection. Therefore, you are advised to follow extreme caution while you proceed with the following methods.
Changing the MTU size will also affect other services and applications being unable to communicate with the other devices connected to the network if they are not configured to use modified MTU settings.
Also, it is most prudent to keep a note of your current settings. This will allow you to get things back to where it was in case you face any issue in the interim.
And, if you are uncertain and do not know what you are doing, better drop the idea or consult with your service provider or network administrator before you make any changes.
Some Additional Tips:
Before you move to the steps mentioned below, it is important to know a few important things.
- You must know the maximum MTU size of your computer so that you do not exceed it. Run the command netsh interface ipv4 show subinterfaces in the Command Prompt as an administrator to know the maximum size.
- Make sure that your computer is installed with the latest Windows updates because older versions might not support changing the MTU to larger values.
- Also make sure that your network adapter is updated with the latest drivers for the same reason.
- And finally, make sure that your computer is connected to the internet via Wi-Fi or an Ethernet cable.
Method 1: Change Jumbo Packet in the Network Adapter Properties
You can change the value of the Jumbo Packet to change the MTU size in the network adapter properties by accessing it through the Control Panel.
STEPS TO FOLLOW:
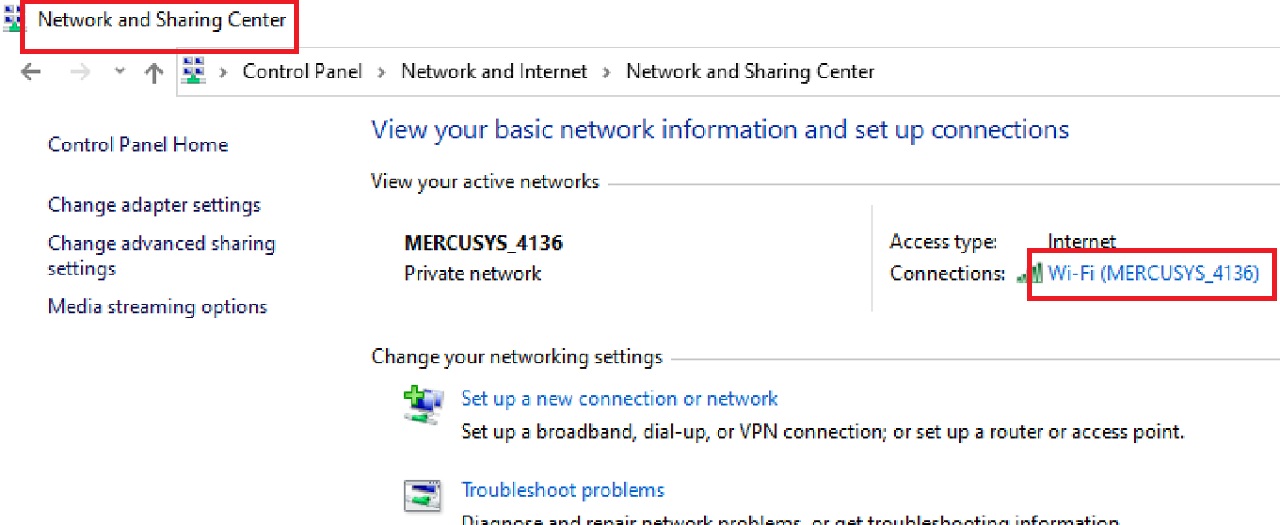
Press the Windows key > Type control panel in the search bar > Hit Enter > Select Network and Internet in the Control Panel window > Select and click on Network and Sharing Center.
- In the Network and Sharing Center window, double-click on your Wi-Fi adapter.
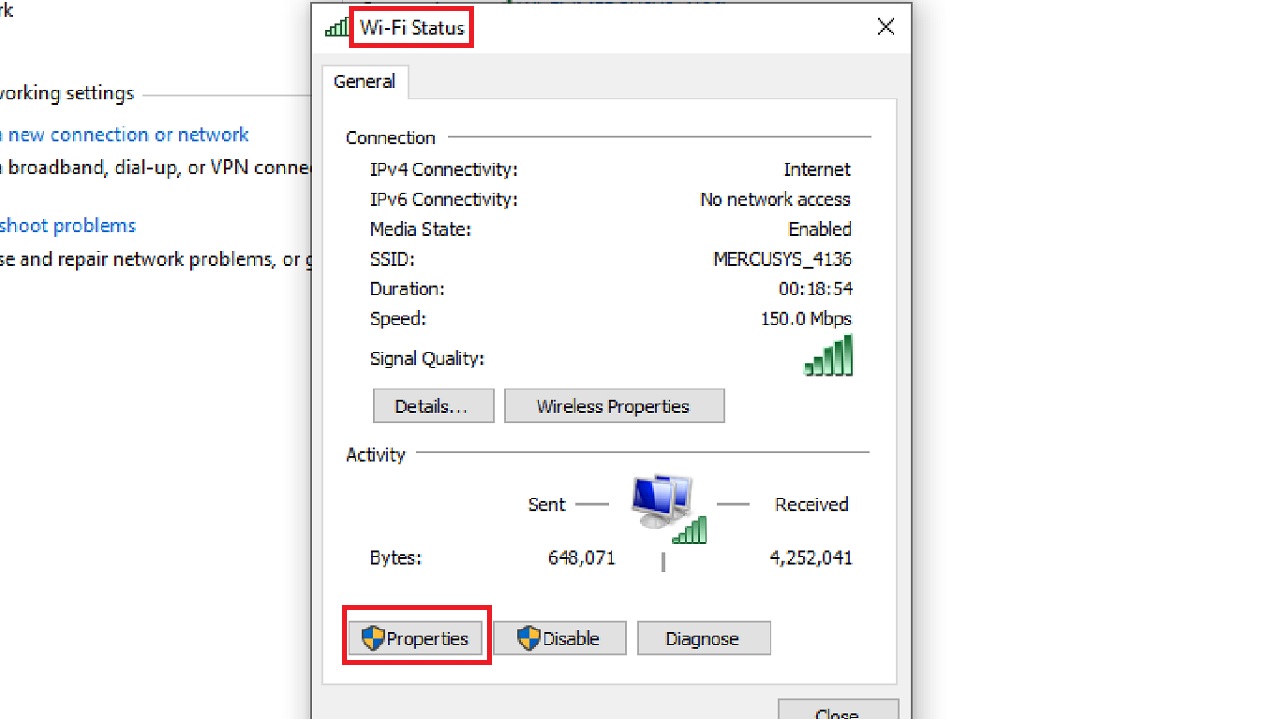
- Select Properties from the following Wi-Fi Status window.
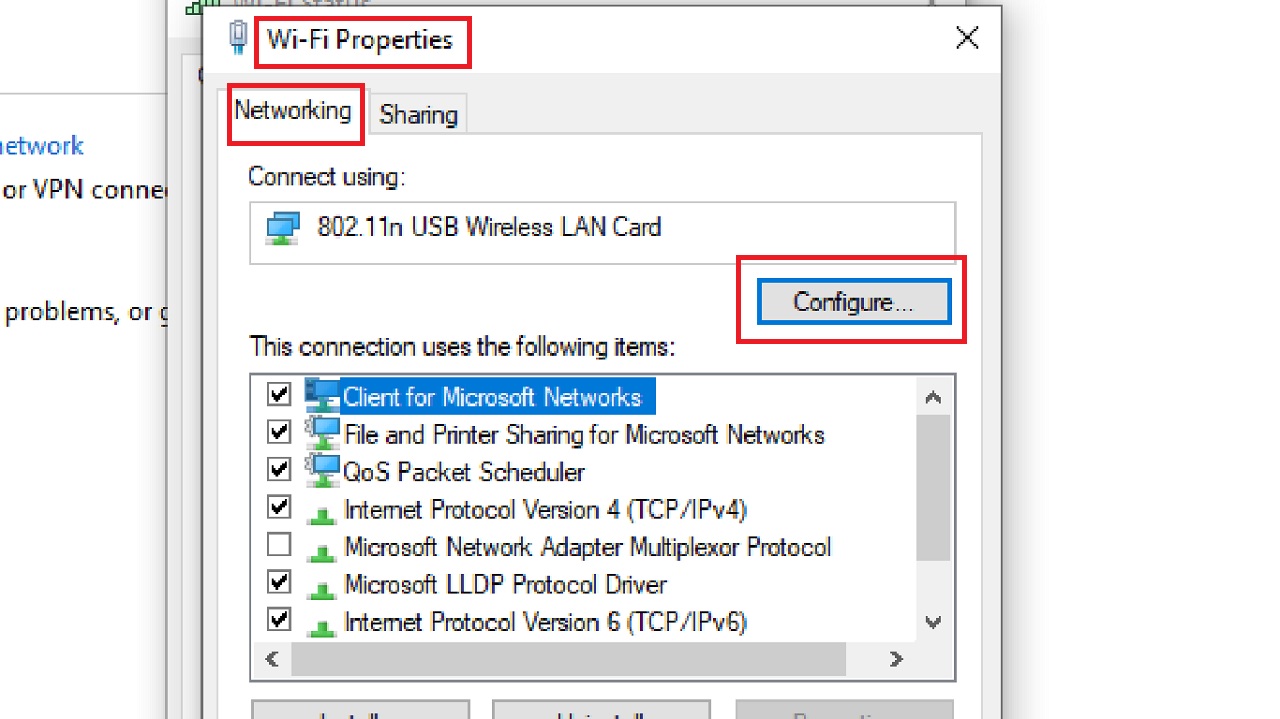
- Hit the Configure button in the next Wi-Fi Property window under the Networking tab.
- Go to the Advanced tab in the following window.
- Look for Jumbo Packet from the list in the box under Property.
- Go to the box under the Value option on the right.
- Click on the arrow.
- Select a value option from the drop-down menu.
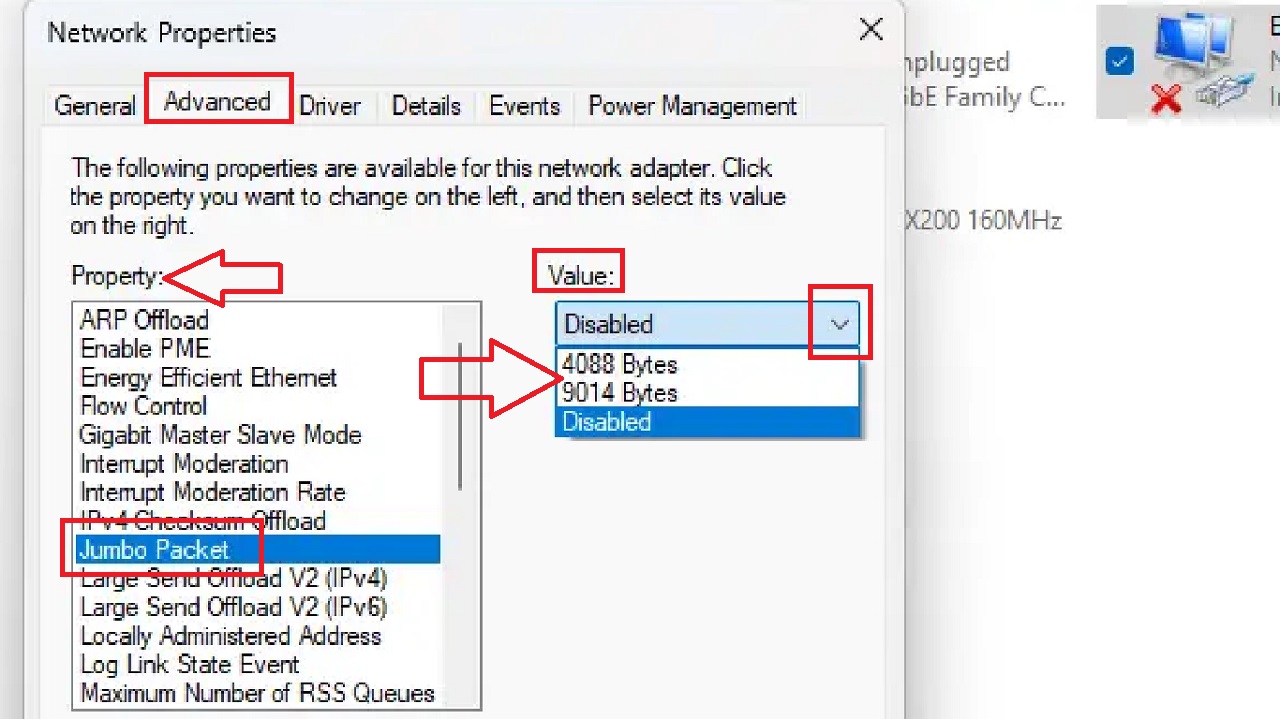
Finally, click on the OK button to save the change and close all windows.
Note: The Jumbo Packet size must match the MTU size. So, make sure you choose a proper value that is supported by your network.
Method 2: Run Network Shell Command in the Command Prompt
Running a specific network shell command in the Command Prompt will allow changing the MTU size pretty easily and quickly.
STEPS TO FOLLOW:
- Go to the search box next to the Start Menu.
- Type cmd.
- Right click on the best match.
- Choose Run as administrator and click on it.
- Click on the Yes button on the User Account Control window when it appears next.
- In the Command Prompt window, type in the command netsh interface show interface and hit the Enter button on your keyboard.
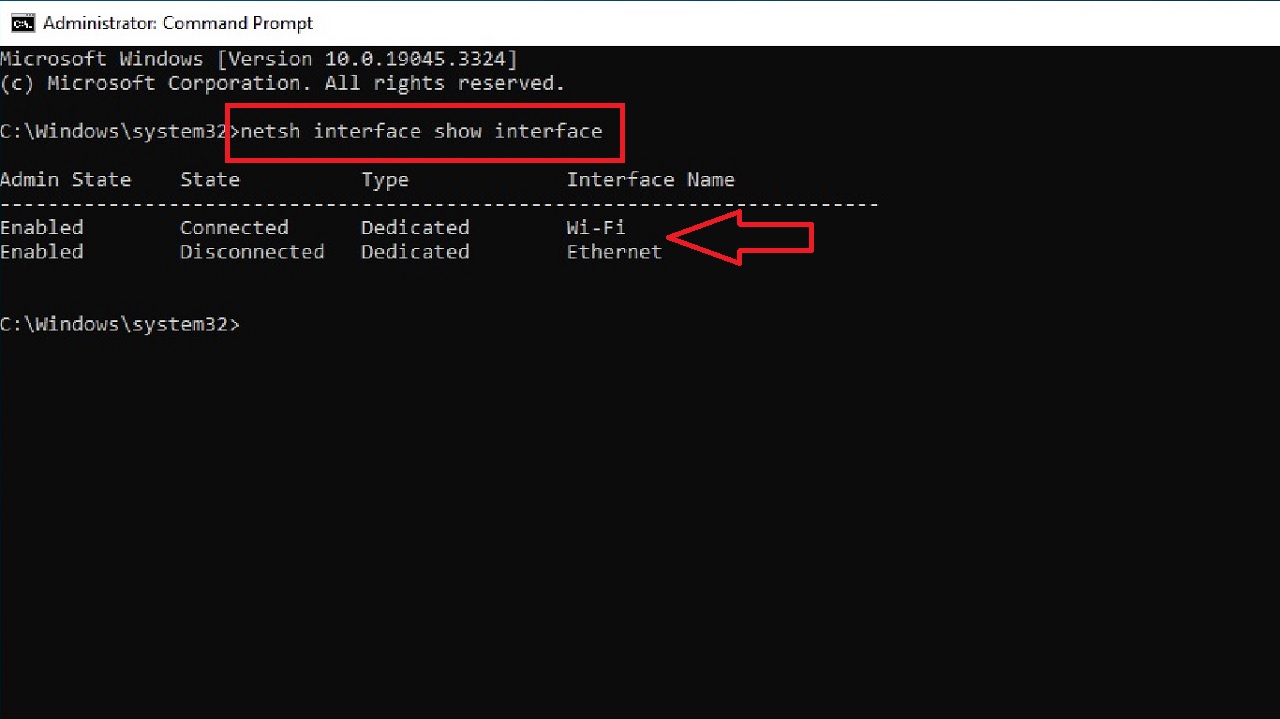
Note the network interface name you want to modify the MTU size of. It may be different from the network name used in this demonstration.
For clarity, let’s assume the network interface name is InterfaceName, and the desired MTU value is XXXX.
- Now, in the Command Prompt window, type the command netsh interface ipv4 set subinterface “InterfaceName” mtu=XXXX store=persistent and hit Enter.
Here, replace “InterfaceName” with your network interface name and XXXX with the MTU value you want to set.
- Type exit to close the Command Prompt window.
Reboot the system and you are done changing the MTU size.
Alternatively, you can change the MTU size from the Windows PowerShell as well by running it as an administrator, in the following way:
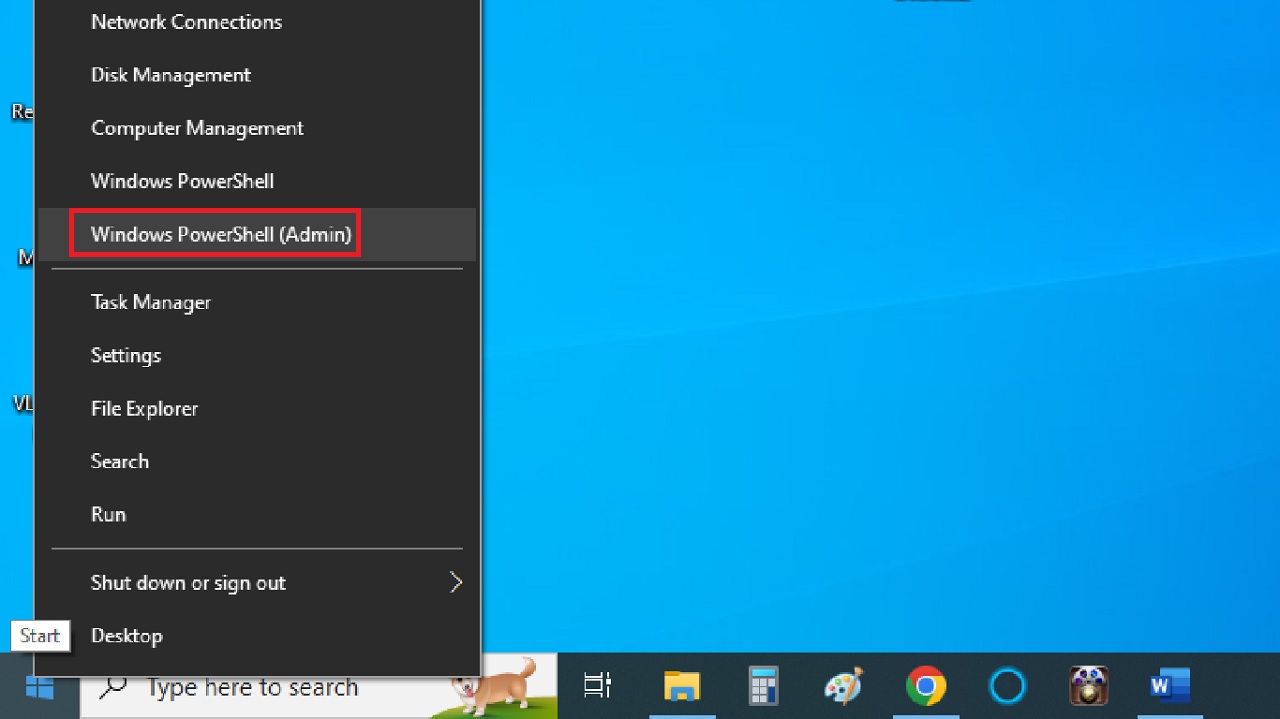
- Right-click on the Start Menu.
- Select Windows PowerShell (Admin) from the options.
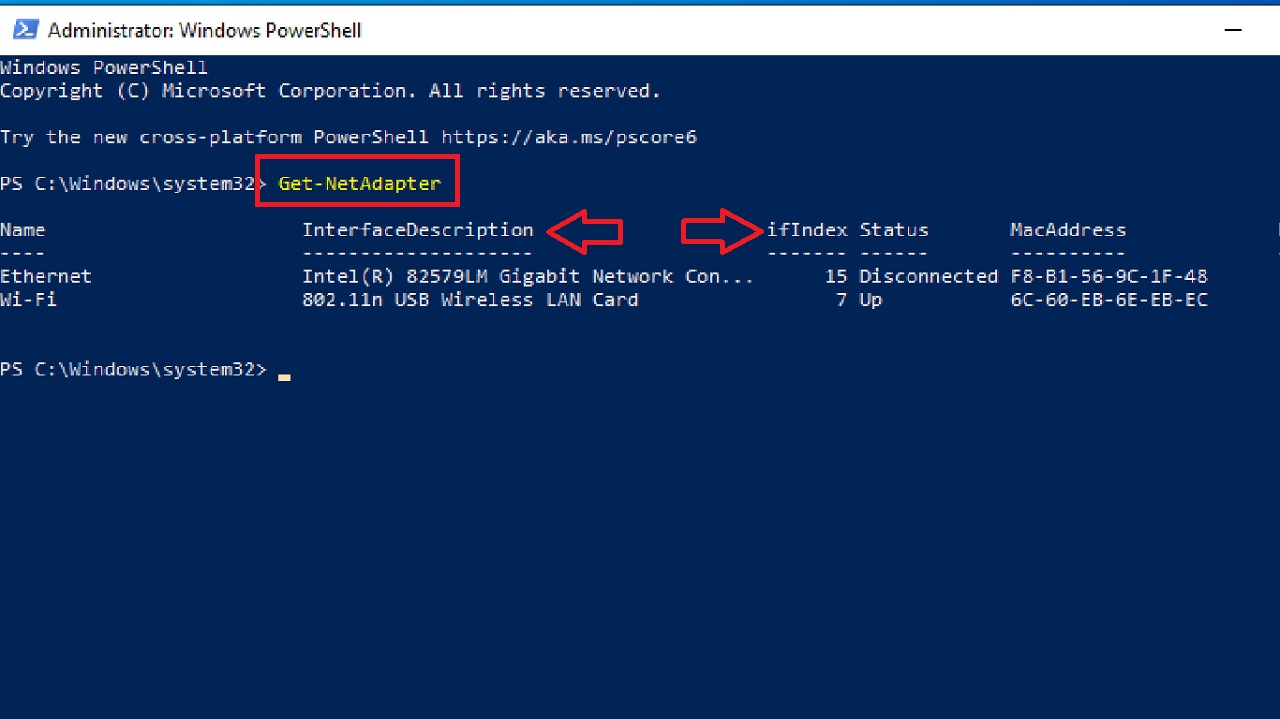
In the PowerShell window, run the command, Get-NetAdapter and hit Enter to identify and note the InterfaceDescription and ifIndex columns of the network adapter you want to modify.
Then, type in the command Set-NetAdapterAdvancedProperty -Name “AdapterName” -RegistryKeyword “*Ndi-params\Tcpip\*Tcp1323Opts” -RegistryValue “1” to enable TCP Chimney Offload.
Replace the “AdapterName” part of the command with the actual name of your network adapter.
Method 3: Change the Registry Key from the Registry Editor
You may change the value of the registry key of your network adapter to change the size of it.
Note: It is always better to create a backup of the Registry before you make any changes into it.
STEPS TO FOLLOW:
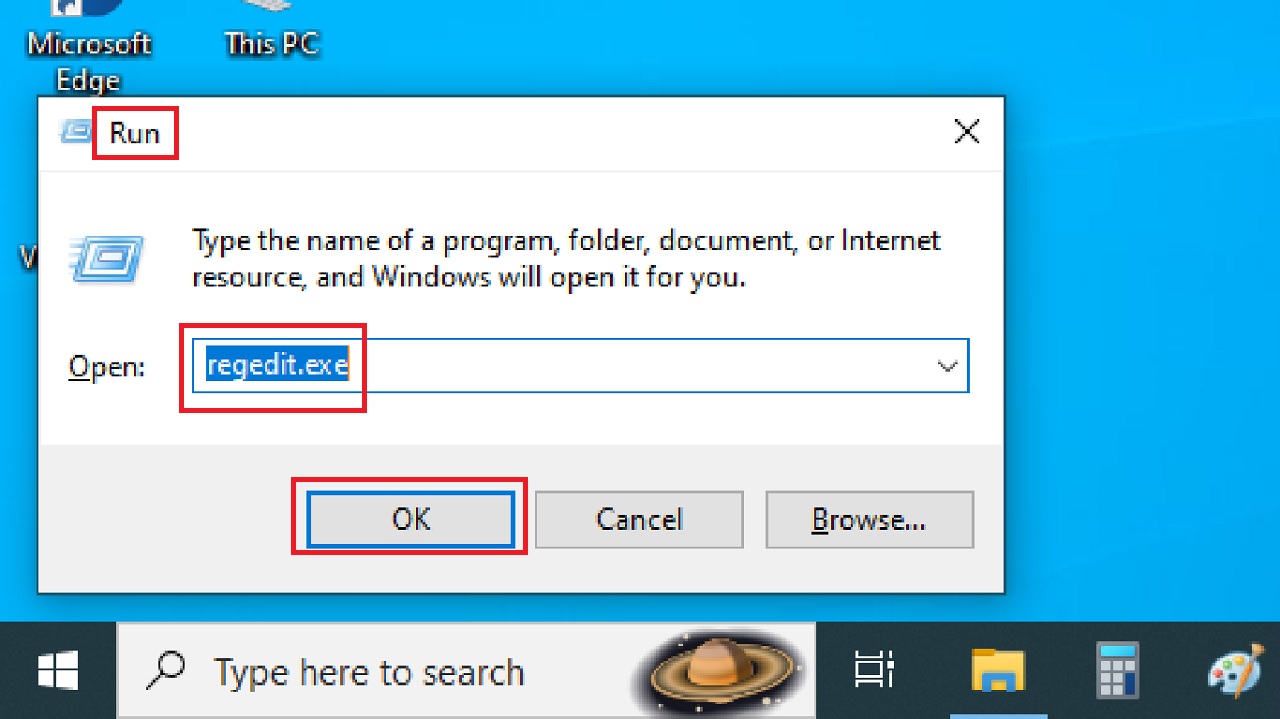
- Press the Windows and R keys together to open the Run dialog box > Type regedit.exe > Hit Enter.
In the Windows Registry window, click on the small arrow next to each of these following folders on the left pane to expand them in the exact order mentioned below:
- HKEY_LOCAL_MACHINE
- SYSTEM
- CurrentControlSet
- Services
- Tcpip
- Parameters
- Interfaces
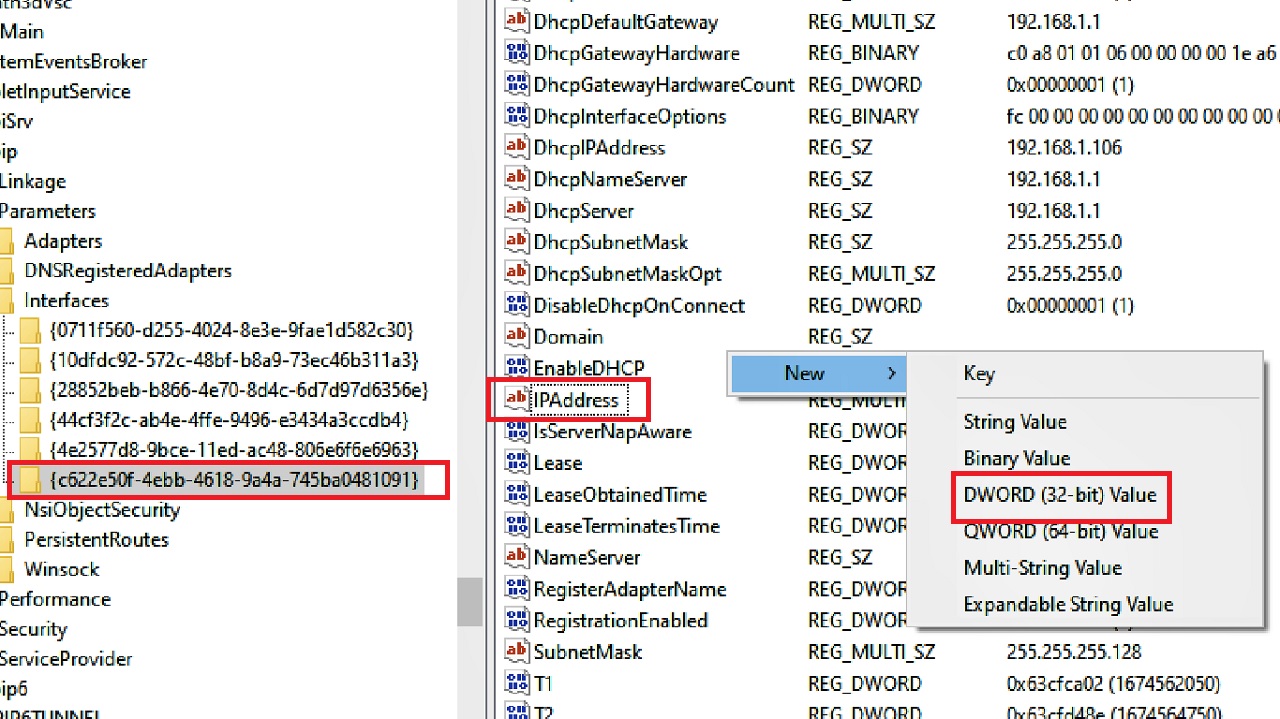
Once you reach here, find the subkey under it corresponding to the network adapter you want to modify. If you are not sure, click on each subkey and look for the IPAddress value.
- Once you have found the subkey, right-click on a blank space on the right side of the window of the subkey it is in.
- Click New.
- Select the DWORD (32-bit) Value from the dropdown options to create a new value.
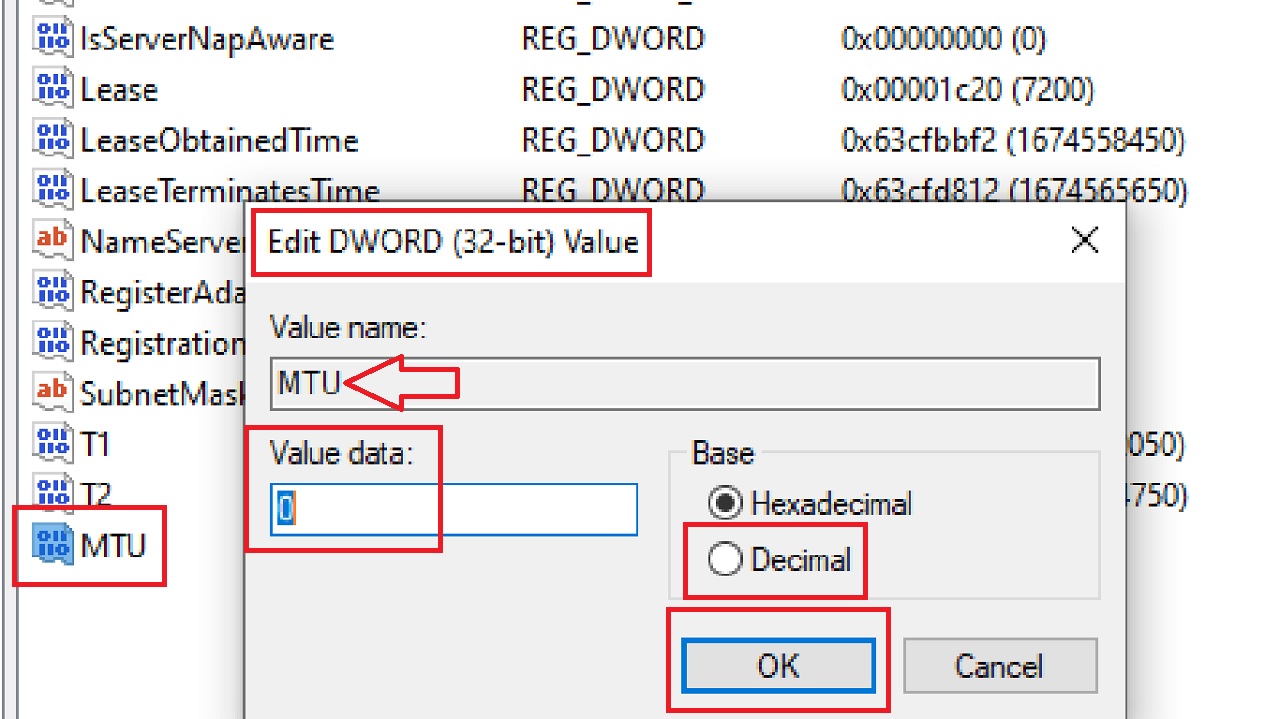
- A new key will be created. Now, name it MTU if it is not there already.
- Double-click on it to open the Edit DWORD (32-bit) Value window.
- Click on the small radio button next to Decimal.
- Set the value in the box under Value data to the desired MTU size.
- Click on the OK button to save the change.
Close all windows and you are done.
Method 4: Change the Router Configuration
You can even change the MTU size by changing the router configuration from the web-based interface for a better performance.
STEPS TO FOLLOW:
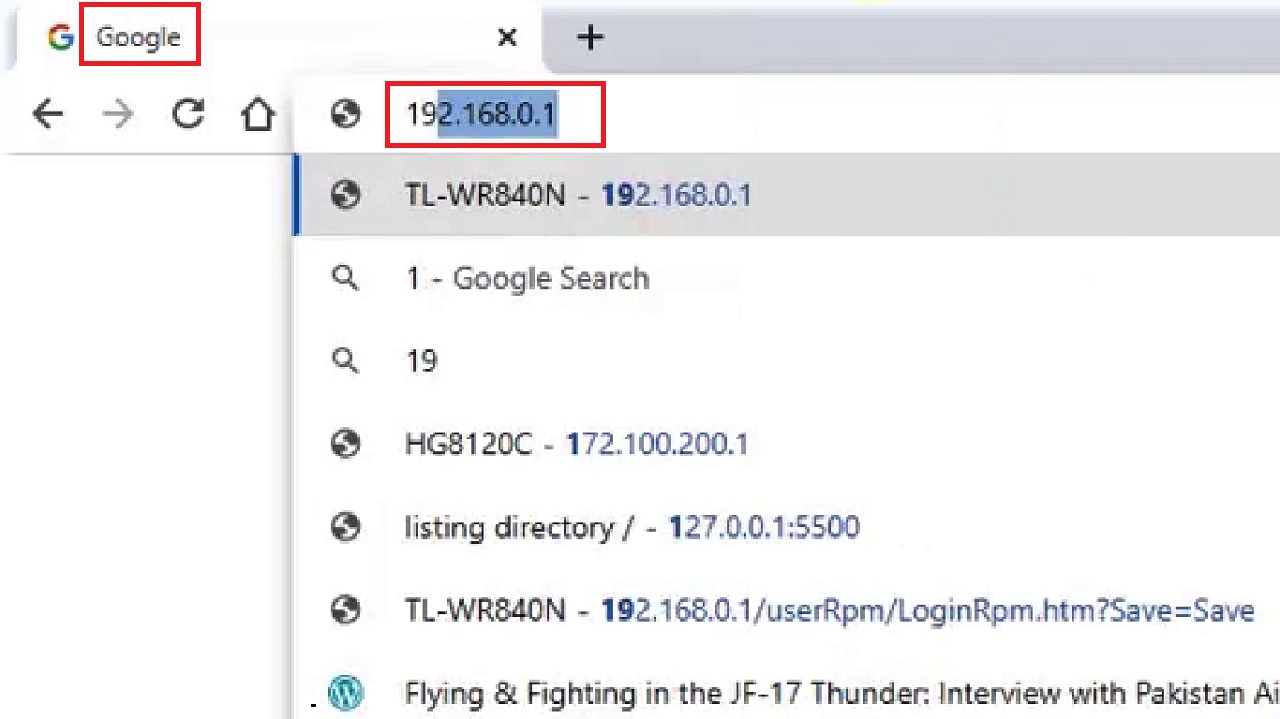
- Open a web browser.
- Type in the IP address of your router in the address bar.
You will find the IP address generally printed on the label at the back of the device and is usually 192.168.0.1, as it is in this case.
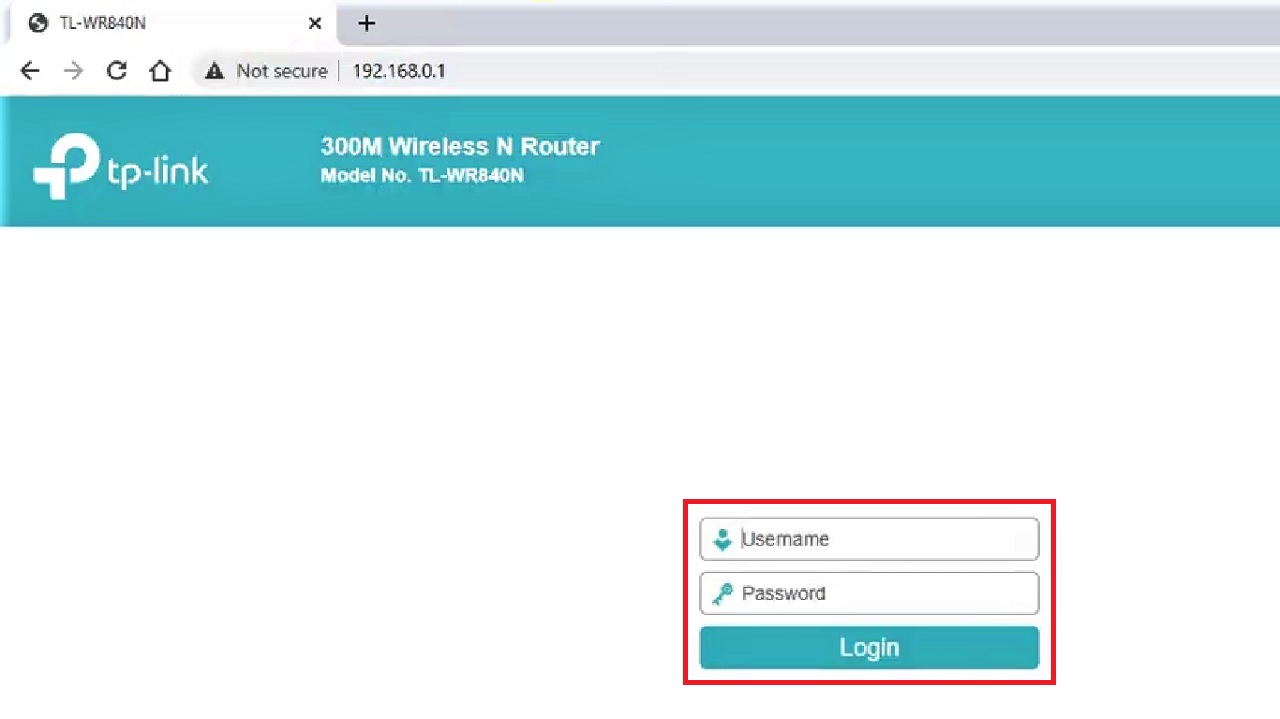
- It will open the web-based interface of the router. (It is a TP-Link router in this demonstration).
- Login by typing the username and password.
- Click on the Network option on the left.
- Select WAN from the drop-down options.
(Check your interface as its location may vary.)
- Go to the box next to MTU Size (in bytes).
- Change the MTU value. (1371 for example).
- Click on the Save button to save the change.
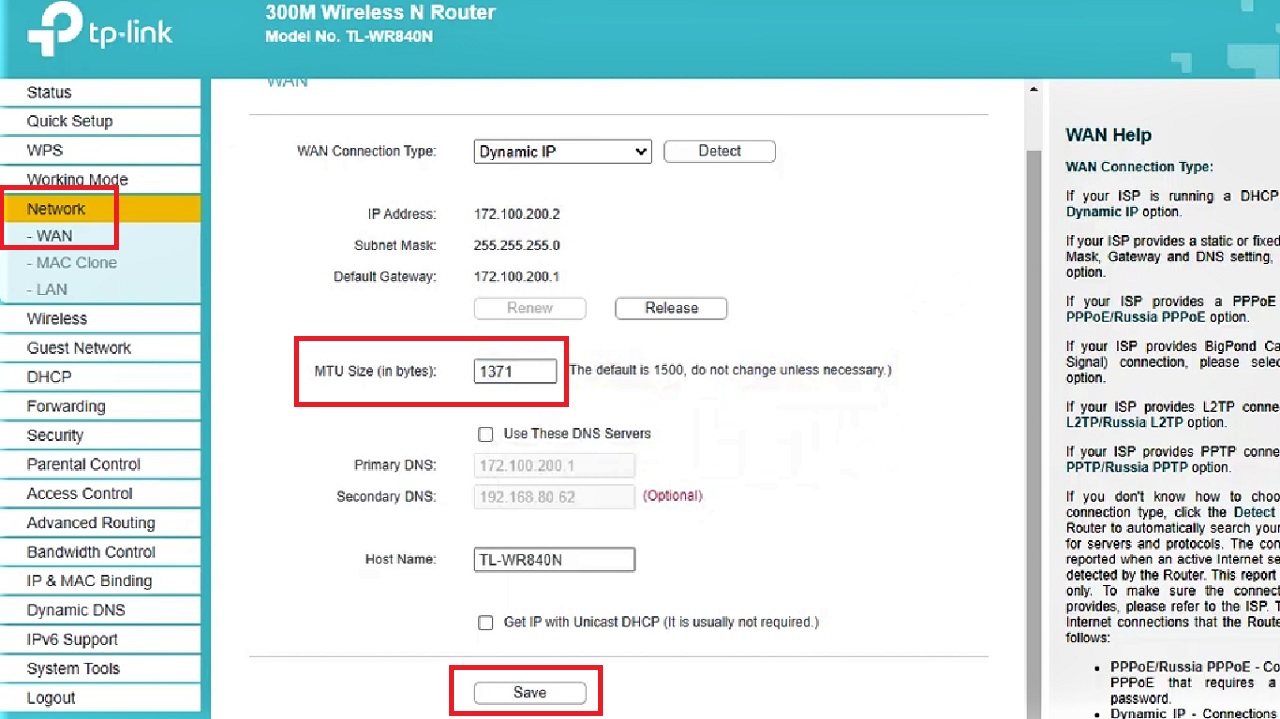
It will take some time to obtain the network parameters and change the MTU value. Once it is done changing, close the window.
Conclusion
Changing the MTU size in Windows can increase the performance, speed, efficiency, and compatibility of the network across different scenarios.
The ways mentioned in this article will make it easier for you. However, exercise extreme caution and considering the setup to avert interruptions in connectivity.