
Experiencing Dynamic Host Configuration Protocol (DHCP) issues can disrupt your network connectivity.
While not fatal, it is essential to identify and resolve the issue promptly.
Explore the common causes and methods to address the DHCP not working properly issue and ensure your network operates seamlessly.
In This Article
KEY TAKEAWAYS
- Start by inspecting the network cables for loose connections or damages and swap them if needed.
- Turn off and restart the router. This might remove the temporary glitches causing the issue.
- Check DHCP server configurations on your router and make sure it is enabled and has a fairly large IP address pool.
- Update or rollback the network drivers, as the case may be, to resolve incompatibility issues.
- Finally, check with your ISP for any service issues, or outages or seek technical support.
Why is DHCP Not Working Properly?
Dynamic Host Configuration Protocol or DHCP usually does not function properly when the router has a problem in fetching an IP address from the ISP or Internet Service Provider (ISP).
This is mainly a result of misconfigured DHCP server settings on the router or network equipment.
A few other strong reasons that may cause this issue are:
- Technical glitches
- Hardware issues with PC, router, or modem
- Network configuration problems
- ISP service outages
- Loose connections
- Damaged or faulty network cables
- Conflicts with duplicate IP addresses assigned to devices
- Outdated router firmware
- Software bugs
- Overly aggressive firewall or security software
- Too many devices connected to the network causing delays due to network overload
- Expired DHCP lease
- Issues with DNS server settings
- VLAN configuration or network segment isolation causing restrictions
- Incorrect configuration of DHCP relay agents
- Faulty network adapters
- Firewall rules blocking DHCP traffic and IP address assignment
- Misconfigured load balancing in multiple DHCP servers
- Manual Static IP address assignments on devices conflicting with DHCP
- Expired or inadequate IP address pool
- Clock or time synchronization issues between the DHCP server and devices
So, there are different reasons for the DHCP not working properly and so are the solutions to fix it.
Ways to Fix DHCP Not Working Properly
The first and most common solution to the DHCP not functioning properly is to run the network troubleshooter to detect any issues in the network or your system and fix them automatically.
A few other ways to try and resolve the issue are:
- Checking and adjusting DHCP server settings on your network equipment or router
- Restarting the router or DHCP server
- Updating or rolling back network drivers
- Checking the cables for any physical damages and replacing them if needed
- Ensuring there are no loose connections or ports
- Managing assignments to resolve IP address conflicts
- Rectifying misconfigurations in device network settings
- Updating router firmware to remove bugs and internal issues
- Adjusting security software settings to allow DHCP traffic
- Monitoring and balancing network load properly to prevent DHCP delays
- Renewing expired DHCP leases on devices
- Checking and adjusting the settings of network segment isolation
- Configuring DHCP relay agents correctly
- Checking for hardware issues in the devices and replacing faulty components
- Reviewing and adjusting firewall rules to allow DHCP traffic
- Reexamining Static IP assignments to eliminate conflicts
- Expanding inadequate or exhausted IP address pool
- Ensuring accurate DHCP lease management with precise time synchronization
Note: The solution to choose to fix DHCP not working properly and its effectiveness will however depend on the network conditions and specific symptoms. So, follow the next method if the previous method does not resolve the problem.
Method 1: Run Network Troubleshooter
Running the network troubleshooter can solve a lot of network related issues by detecting them quickly and fixing the issue, including DHCP not working properly.
STEPS TO FOLLOW:
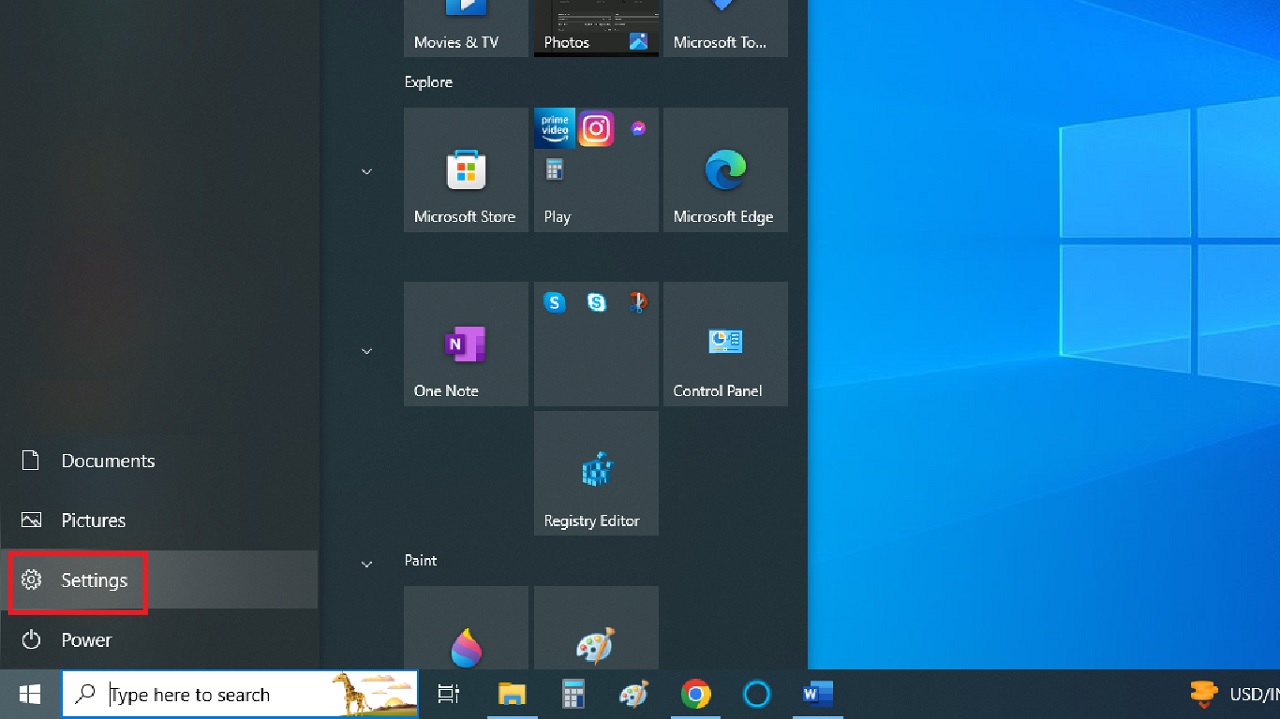
- Click on the Start Menu.
- Open Settings.
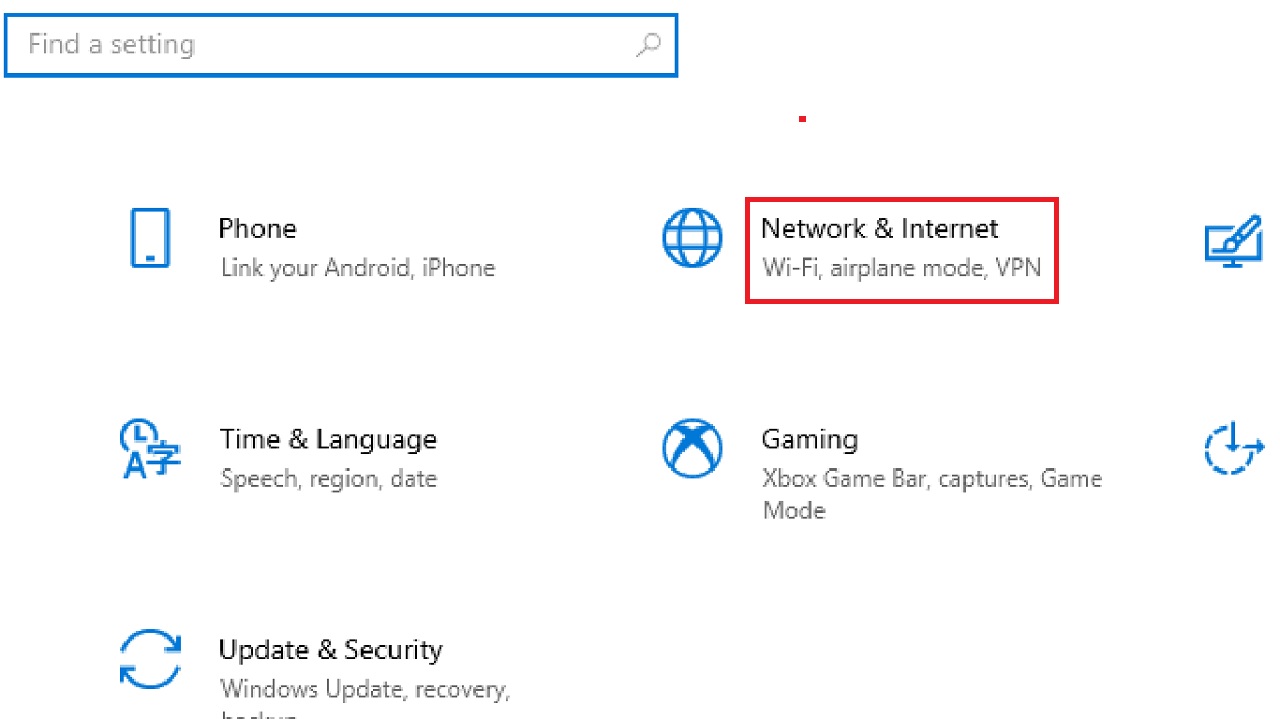
- Navigate to Network & Internet.
- Select Status from the left panel, if it is not selected already.
- Scroll down to find the Network troubleshooter on the right side of the window.
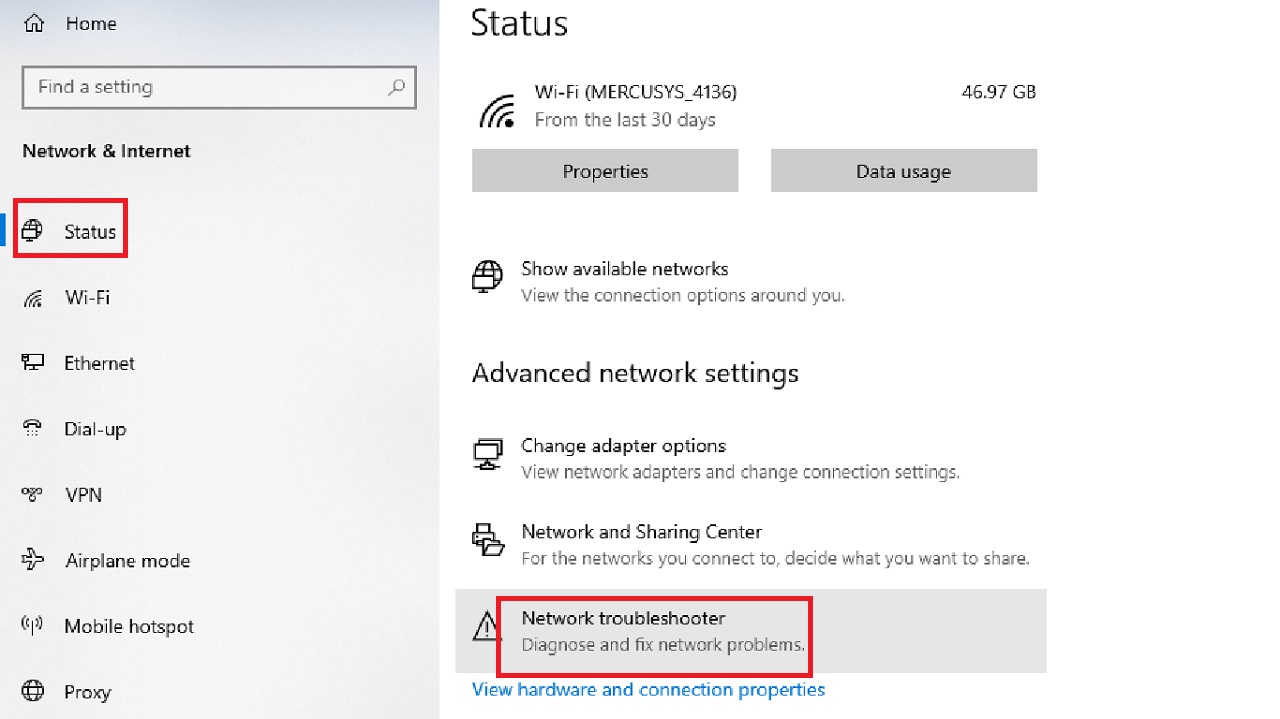
- Click on it.
- Follow the on-screen instructions.
Method 2: Clone Your MAC Address
Cloning your MAC address can also resolve DHCP not working and other issues if it is specifically related to the identification of the device connected to your network.
STEPS TO FOLLOW:
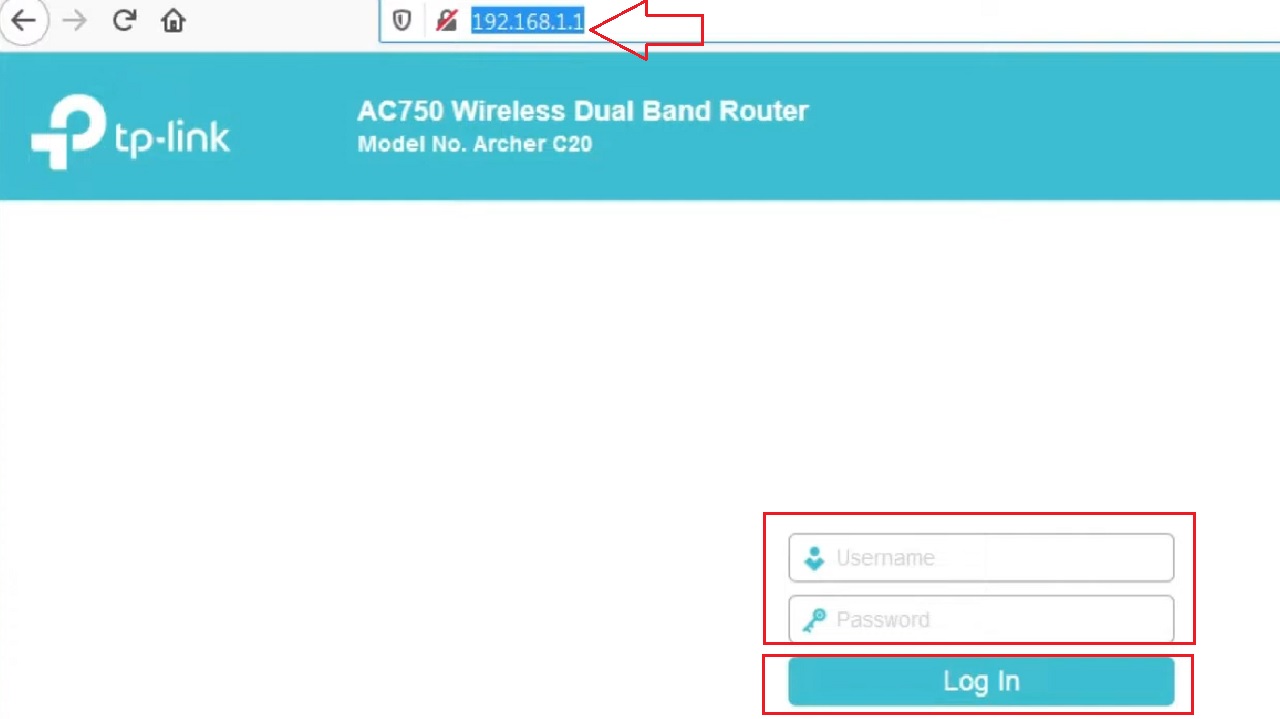
- Open your web browser.
- Type in the IP address in the address bar to access your router’s web interface.
- Log In to your router using the admin credentials.
- Select Network in the left pane of the following window.
- Click on the MAC Clone option from the expanded options.
- Click on the Clone MAC Address button.
- Click on the Save button.
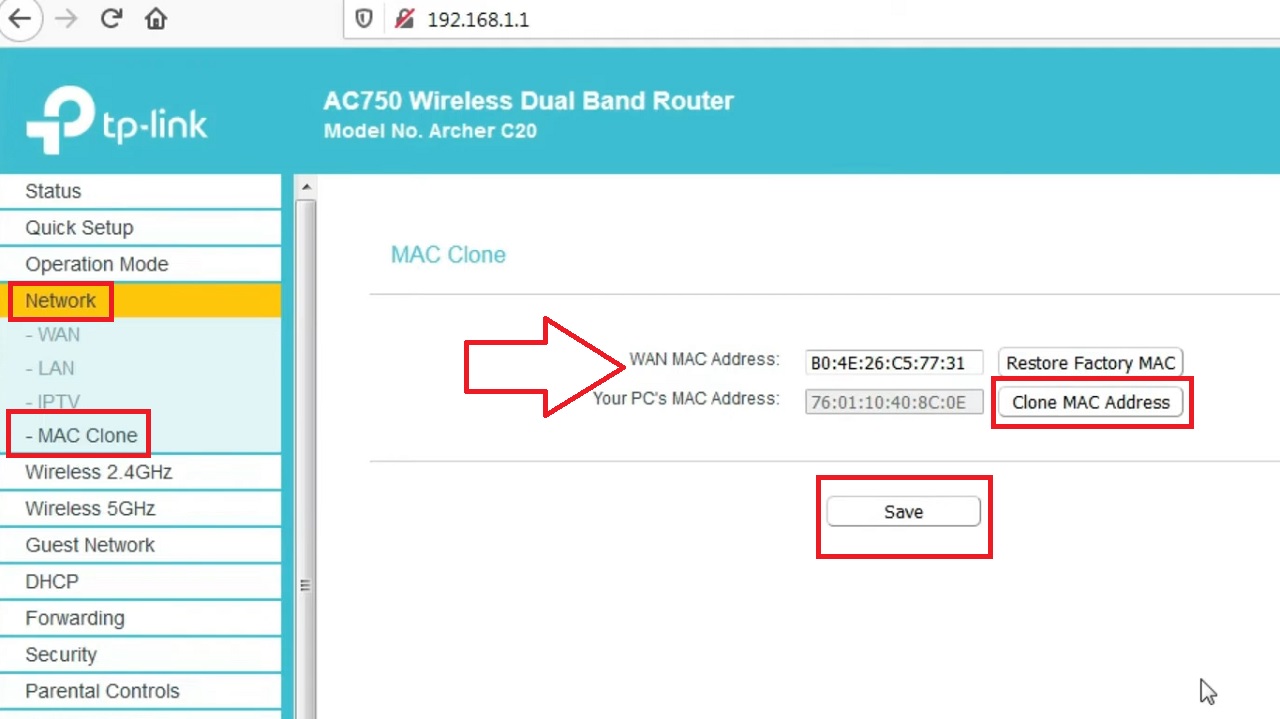
This will show the same address for both the WAN MAC Address and Your PC’s MAC Address, which are showing differently in the image.
- Restart your router for the changes in the MAC address to take effect.
Method 3: Update Your Network Driver
Issues related to compatibility that may result in problems like DHCP not working properly may also be resolved sometimes by updating your network driver.
STEPS TO FOLLOW:
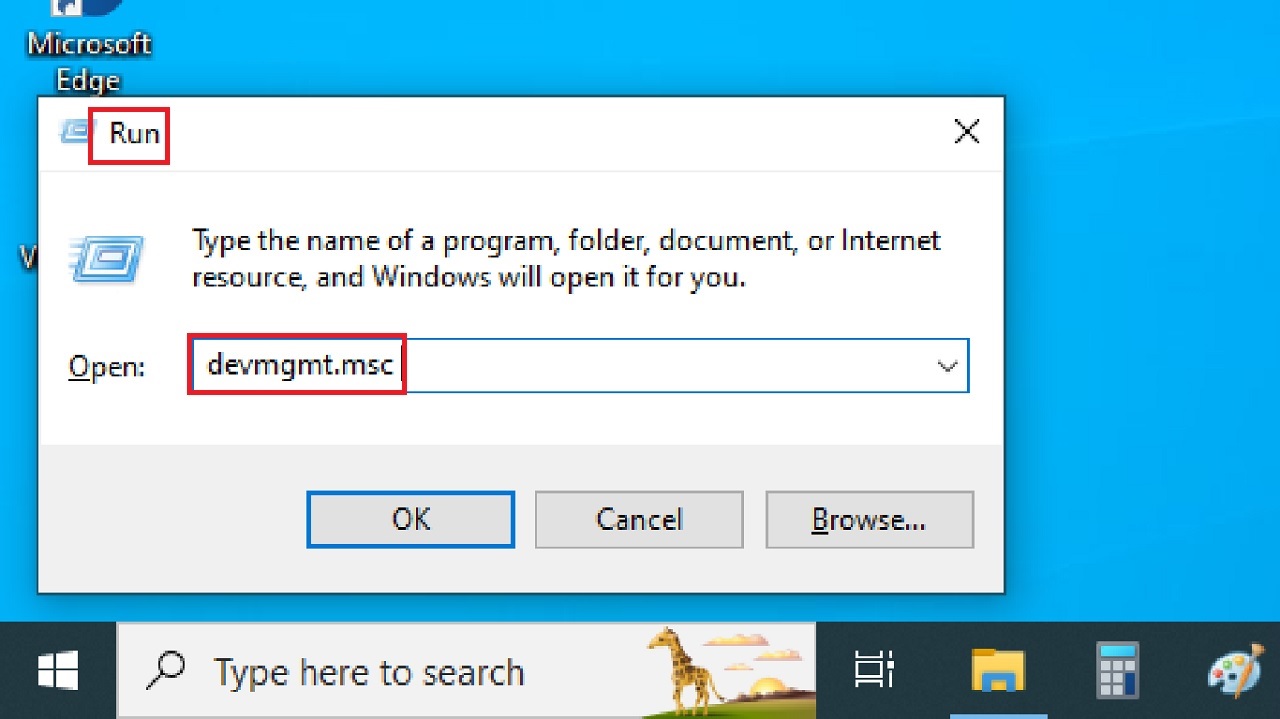
- Press the Windows and R keys together on your keyboard to open the Run dialog box.
- Type devmgmt.msc and hit the Enter button.
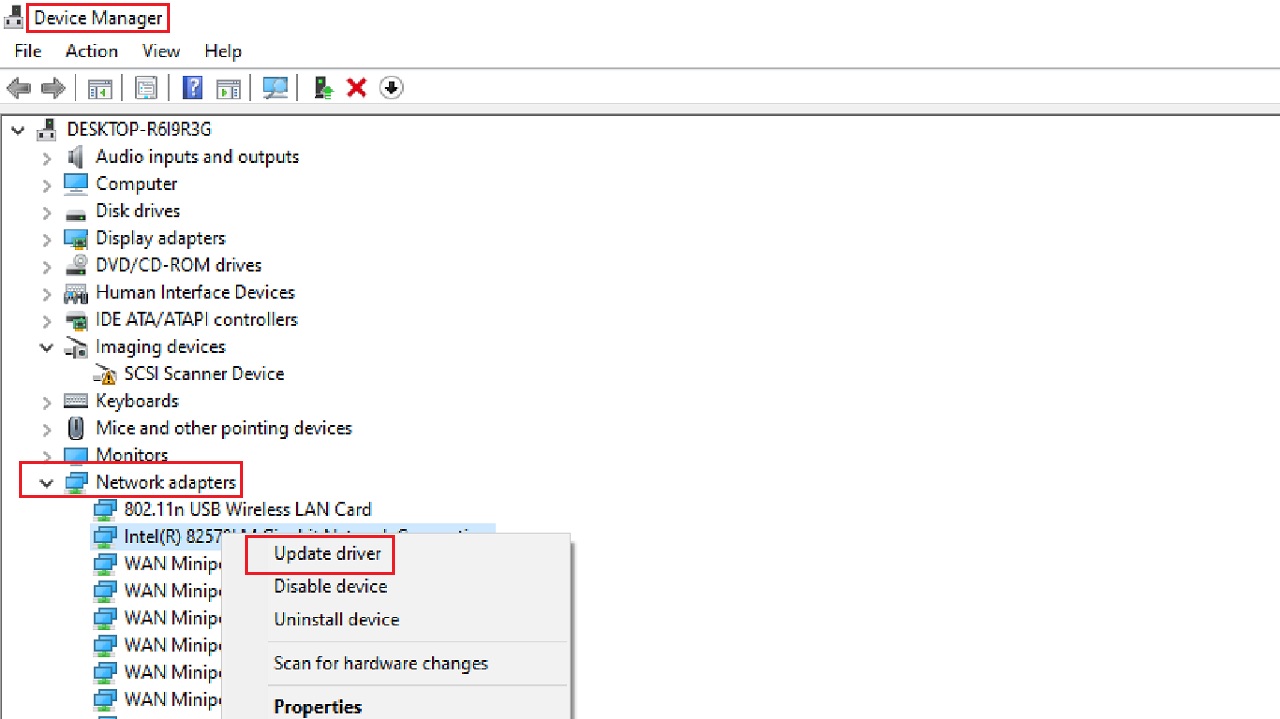
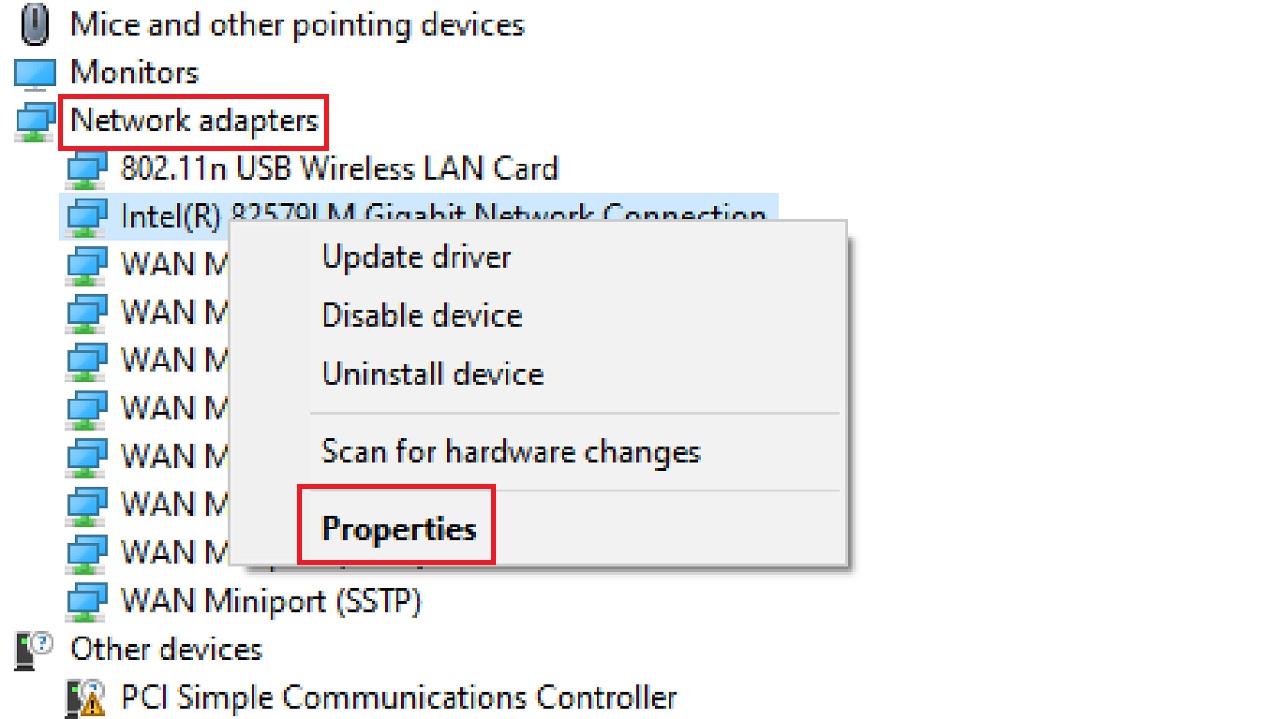
- In the Device Manager window, click the arrow and expand the Network adapters section.
- Right-click on your network adapter.
- Select the Update driver option from the dropdown list.
- Select Search automatically for drivers in the following window.
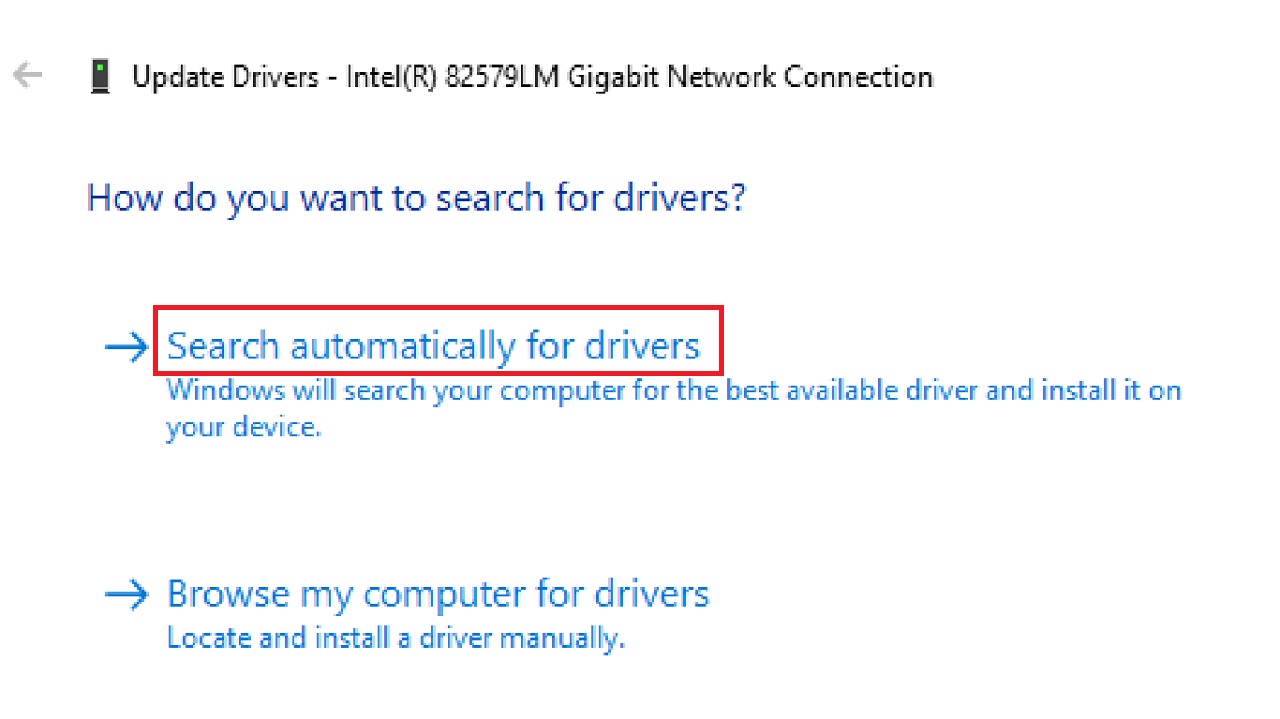
- Follow the on-screen prompts to complete the network driver update process.
- Restart your computer when and if you are prompted to do so.
Method 4: Rollback Network Driver
If updating your network driver does not help resolve the issue, rolling it back might.
STEPS TO FOLLOW:
- Right-click on the Start button and select Device Manager from the option.
- Select and right-click your network adapter as before.
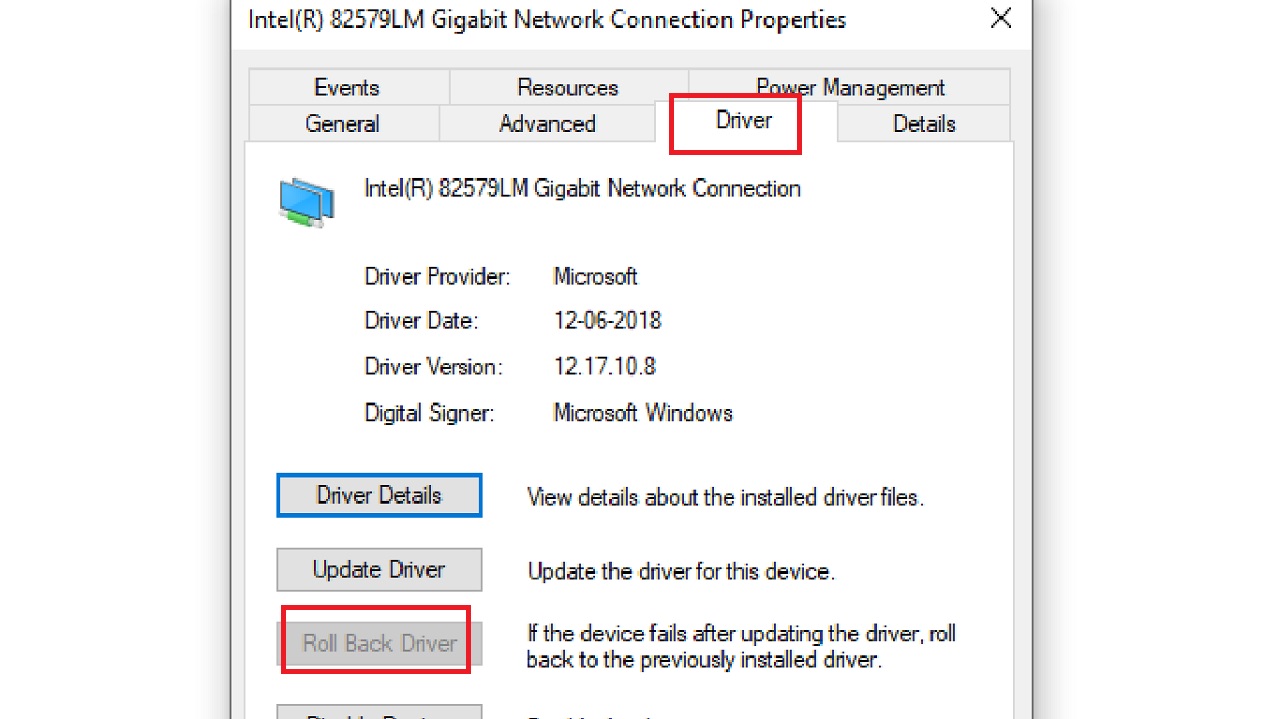
- This time, click on Properties from the dropdown menu.
- Go to the Driver tab in the following window.
- Click on Roll Back Driver, if the option is available or not grayed out.
- Follow the on-screen instructions to complete the rollback process.
- Restart your computer when and if prompted.
Method 5: Disable Internet Protocol Version 6
Disabling Internet Protocol Version 6 (TCP/IPv6) may resolve the issue if it is causing conflicts.
STEPS TO FOLLOW:
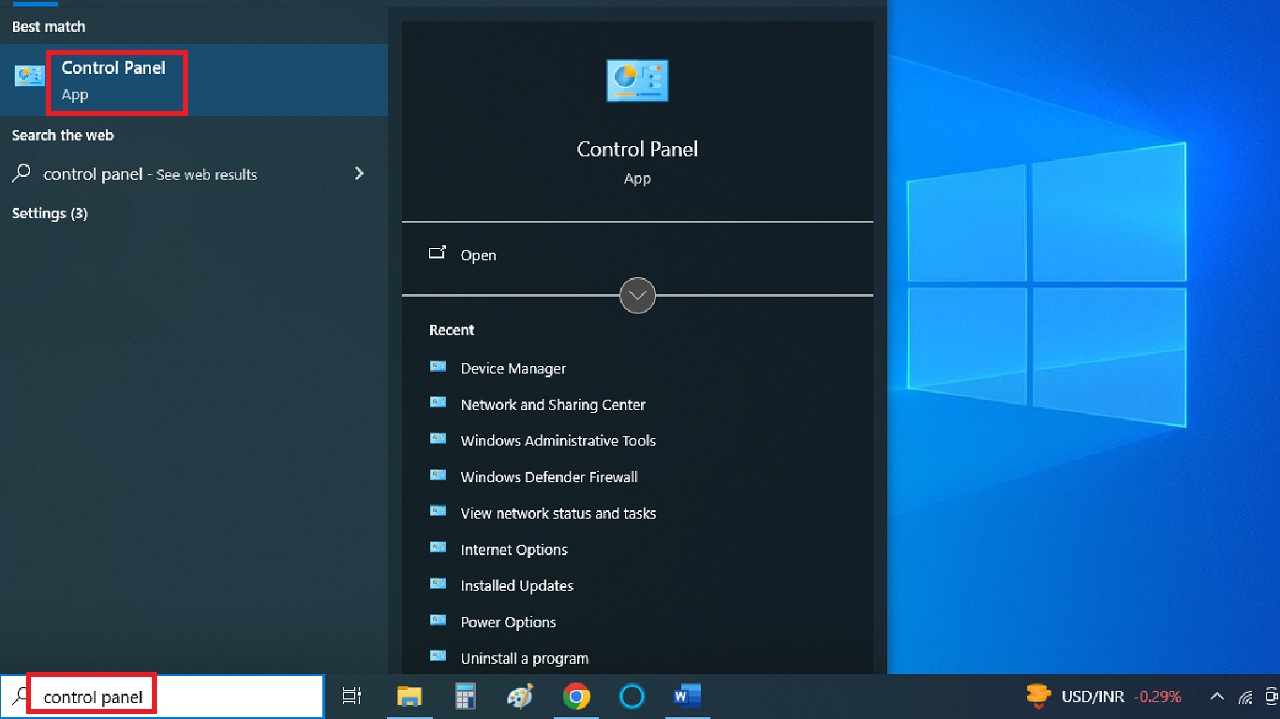
- Go to the search box.
- Type control panel and hit Enter.
- Select Network and Internet in the Control Panel.
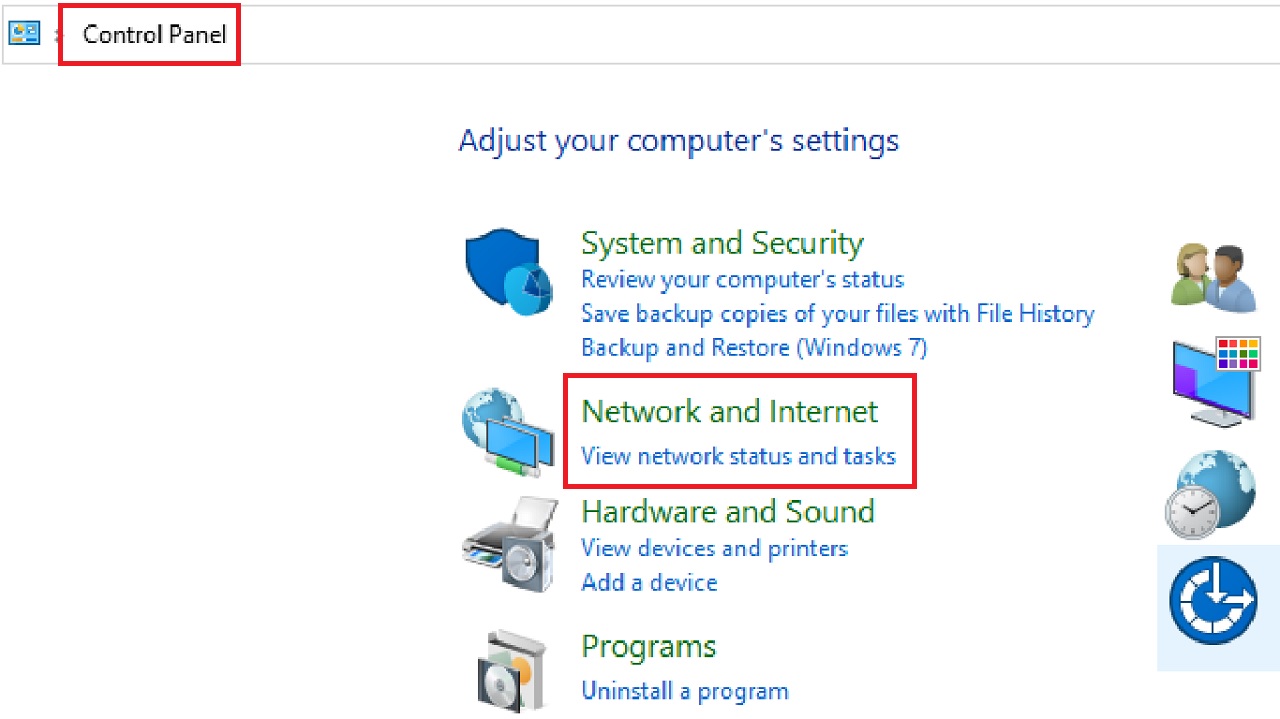
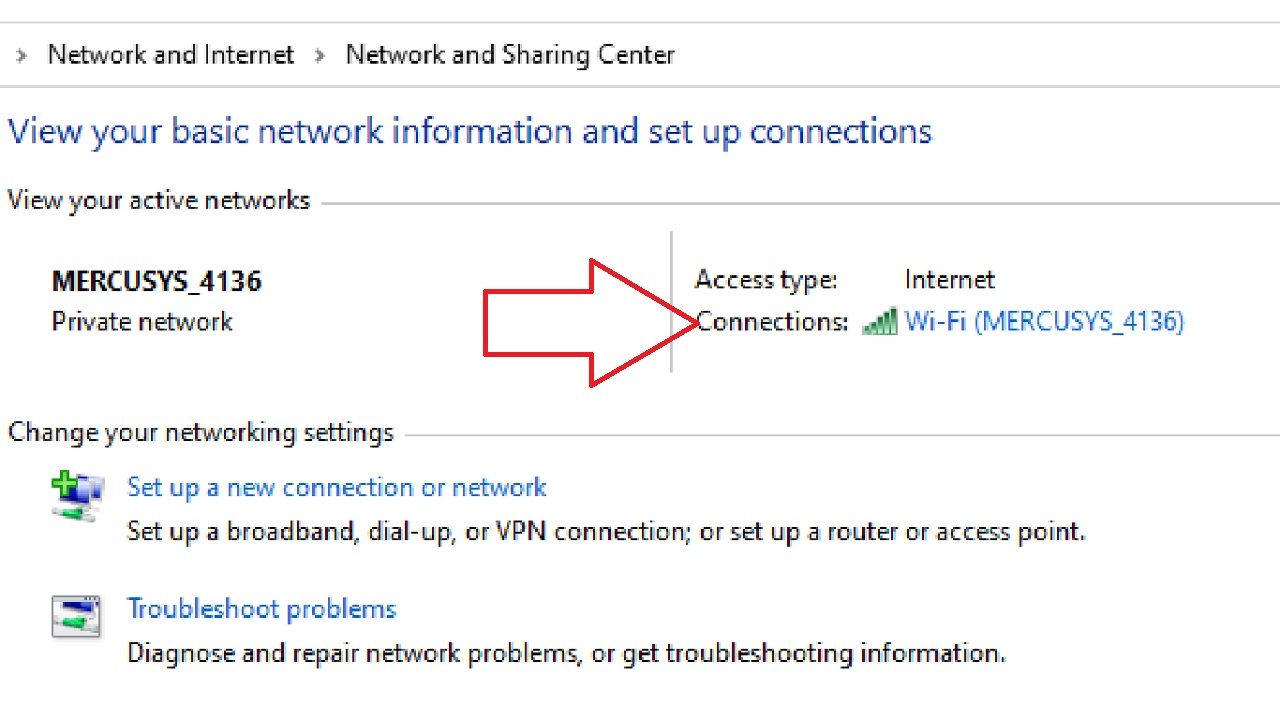
- Go to Network and Sharing Center in the Network and Internet window.

- Click on your active network connection, Wi-Fi (MERCUSYS_4136) next to Connections in this case.
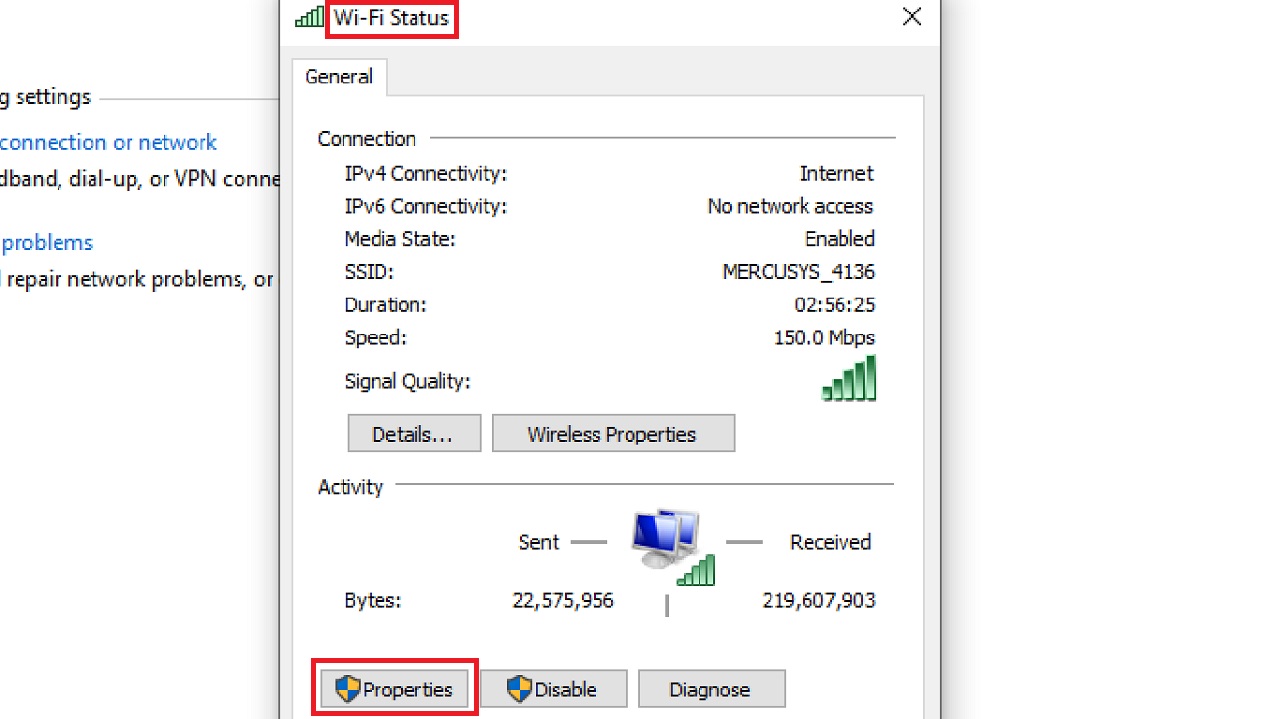
- Click on Properties in the Wi-Fi Status window.
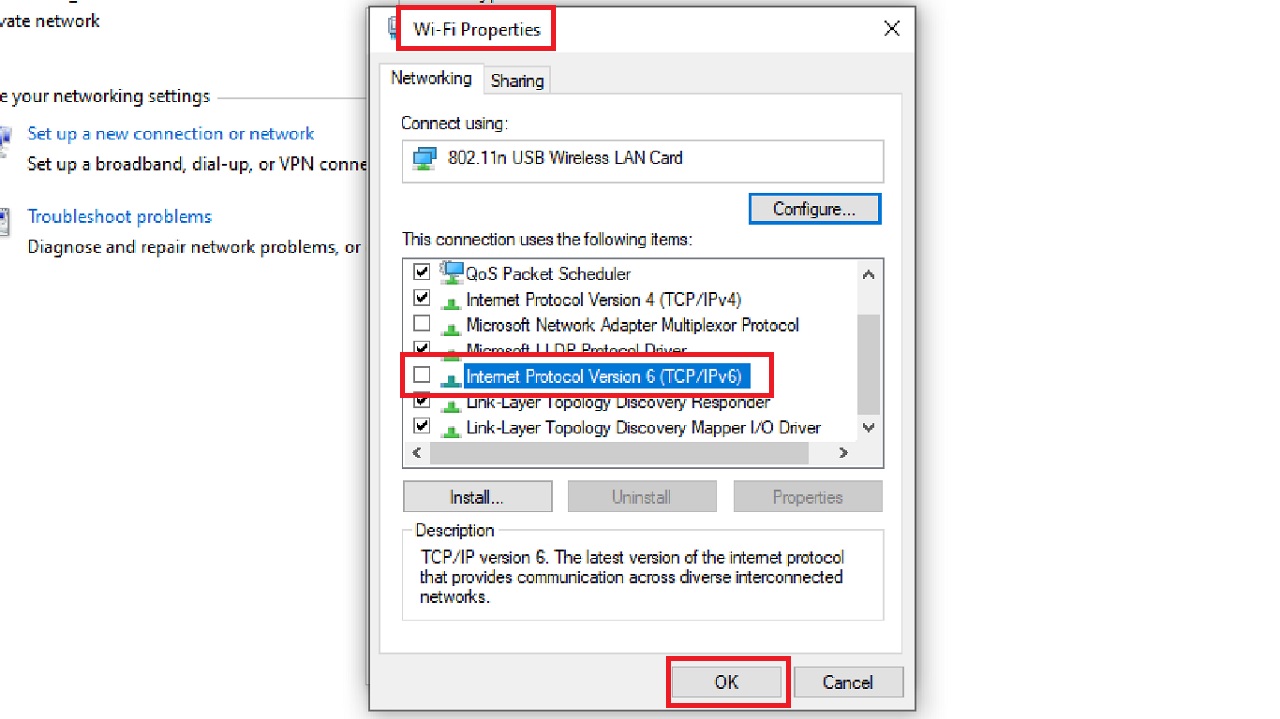
- Uncheck the Internet Protocol Version 6 (TCP/IPv6) option from the list in the Wi-Fi Properties window.
- Click the OK button to save the changes.
Method 6: Restart DHCP Client Service
Restarting the DHCP Client Service can resolve the issue by refreshing the DHCP configurations.
STEPS TO FOLLOW:
- Open the Run dialog box as before.
- Type services.msc and press Enter.
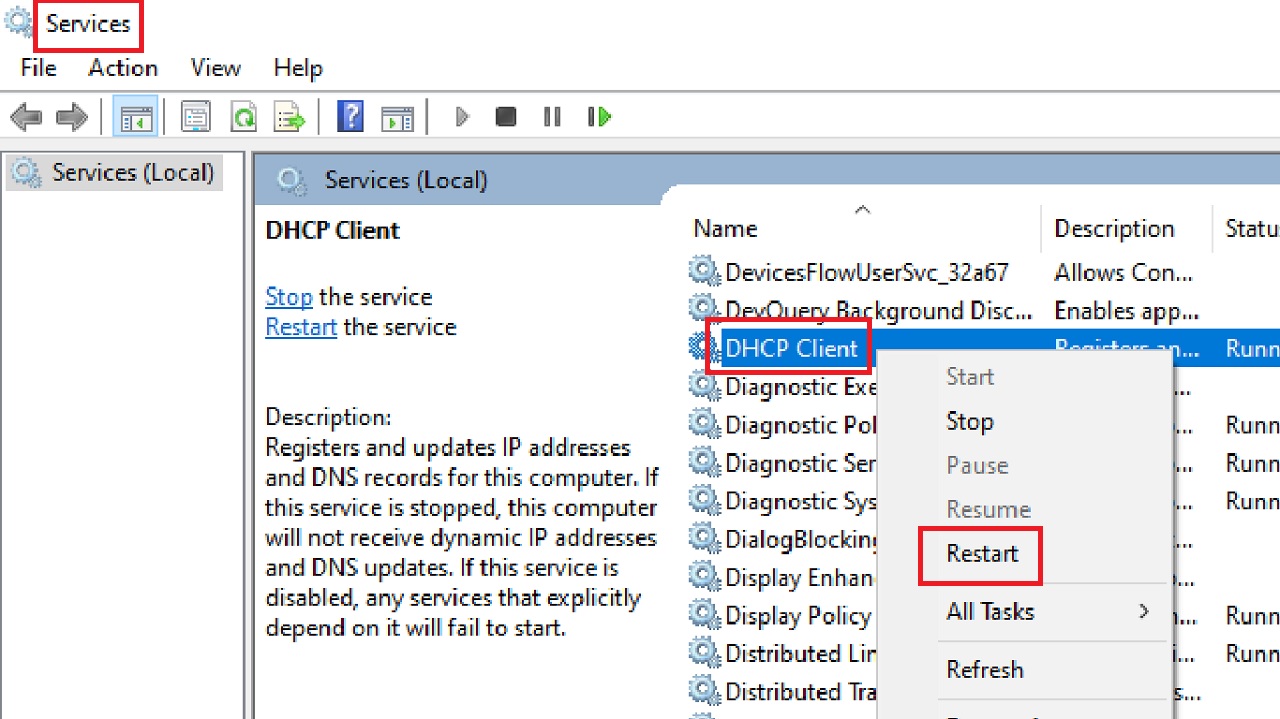
- In the Services window, scroll down and look for DHCP Client in the list.
- Right-click on it.
- Select Restart.
Method 7: Change DHCP Query Frequency
Sometimes, adjusting the DHCP query frequency can address this issue by optimizing the frequency of IP address requests by the device from the DHCP server.
Note: Exercise caution while making changes in the Windows Registry, and make sure to take a proper backup before performing the following steps, as any errors may render your system inoperable.
STEPS TO FOLLOW:
- Open Run.
- Type regedit and hit Enter.
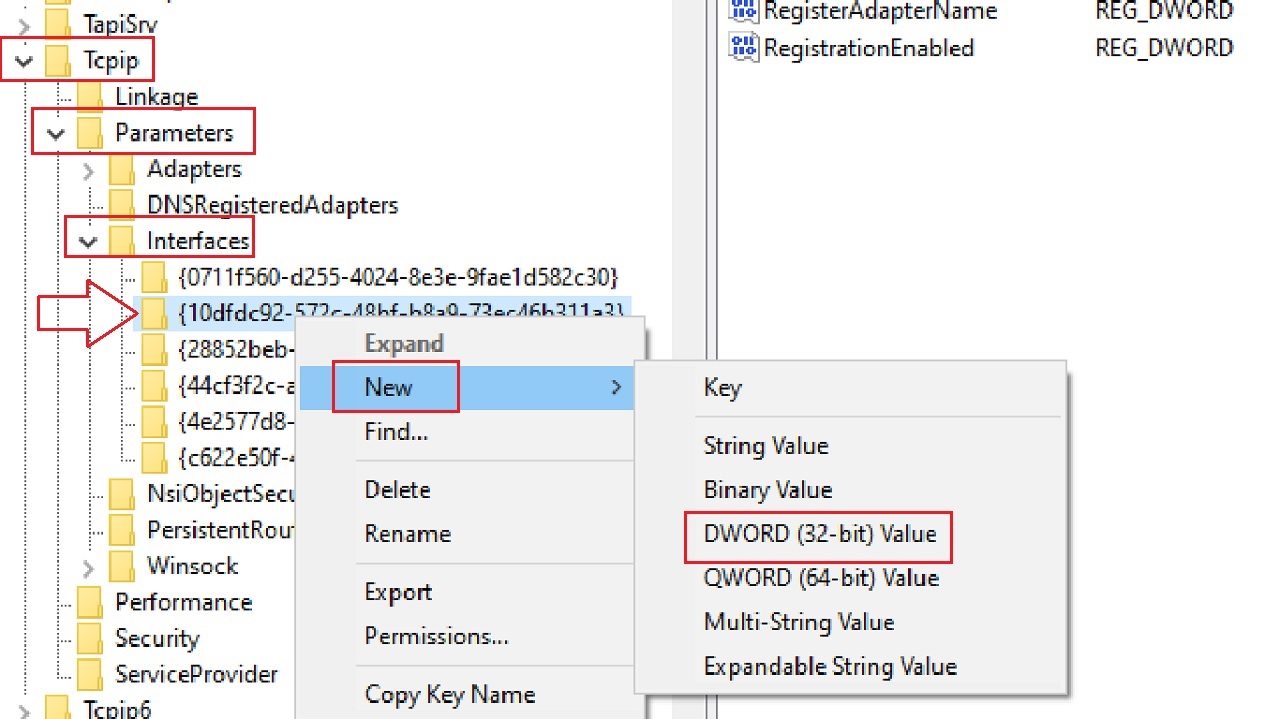
In the Windows Registry Editor, click on the following folders on the left pane in the exact order:
- HKEY_LOCAL_MACHINE
- SYSTEM
- CurrentControlSet
- Services
- Tcpip
- Parameters
- Interfaces
Now, there may be multiple subkeys under it. Look for the interface key of your network adapter.
- Right-click on it.
- Select New.
- Choose DWORD (32-bit) Value from the dropdown option.
- Name the new value as DhcpConnEnableBcastFlagToggle.
- Double-click on the new value.
- Set the Value data to 1 to enable the DHCP broadcast flag.
- Close the Registry Editor.
- Restart your computer for the changes to take effect.
Method 8: Update Router Firmware
Updating the firmware of the router will remove the bugs in it and improve compatibility, potentially resolving the DHCP not working properly issue.
STEPS TO FOLLOW:
- Open the web browser.
- Visit the manufacturer’s website.
- Look for firmware downloads.
- Download the latest firmware version compatible with your router.
- Save the extracted file on your hard drive.
- Access your router’s web interface as you did in Method 2.
- Go to the Advanced tab.
- Select System Tools from the left pane.
- Click on Firmware Upgrade.
- Go to the Local Upgrade on the right side of the window.
- Click on the Browse button in the router interface.
- Select the downloaded file saved on your hard drive from the following window.
- Click on Open.
- Finally, click on the Upgrade button.
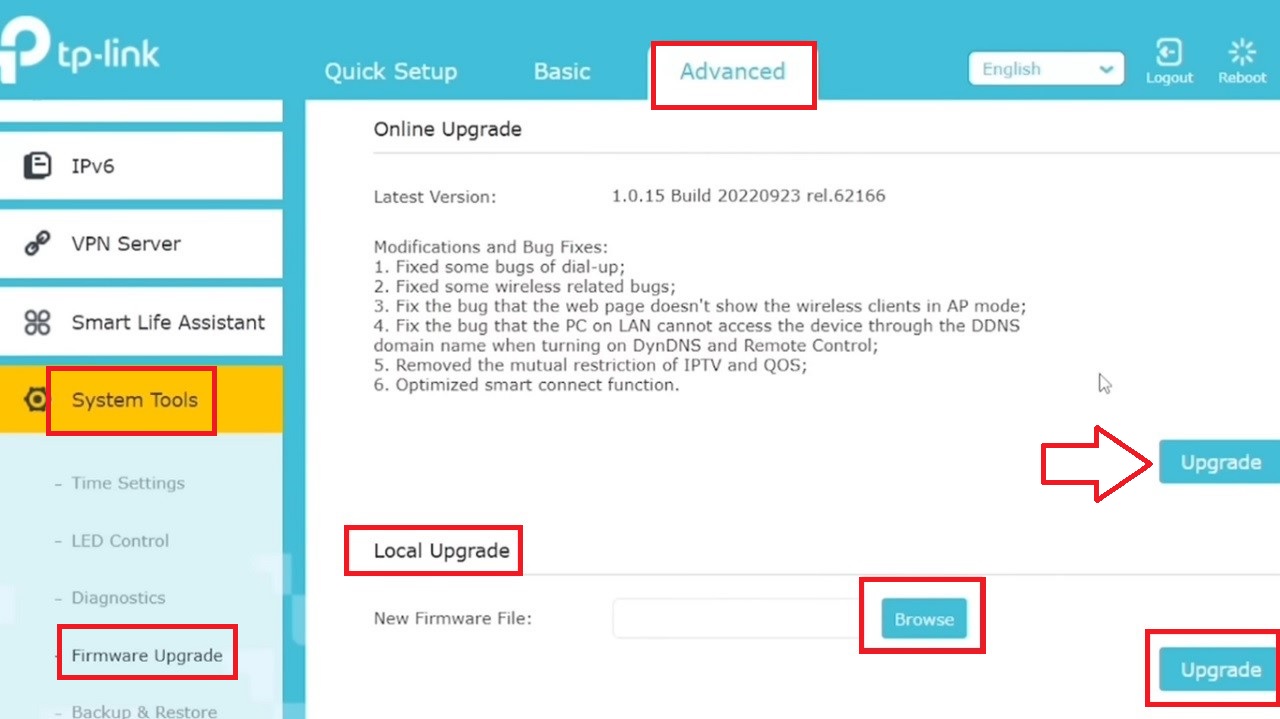
Alternatively, if you want a quick online upgrade, you can simply click on the Upgrade button, marked with a red arrow in the above image.
- Restart your router for changes to take effect.
If this does not resolve the issue, try the following method.
Method 9: Reconfigure DHCP Adapter Settings
Reconfiguring DHCP adapter settings will allow the device to obtain IP addresses automatically, which might help the DHCP work properly.
STEPS TO FOLLOW:
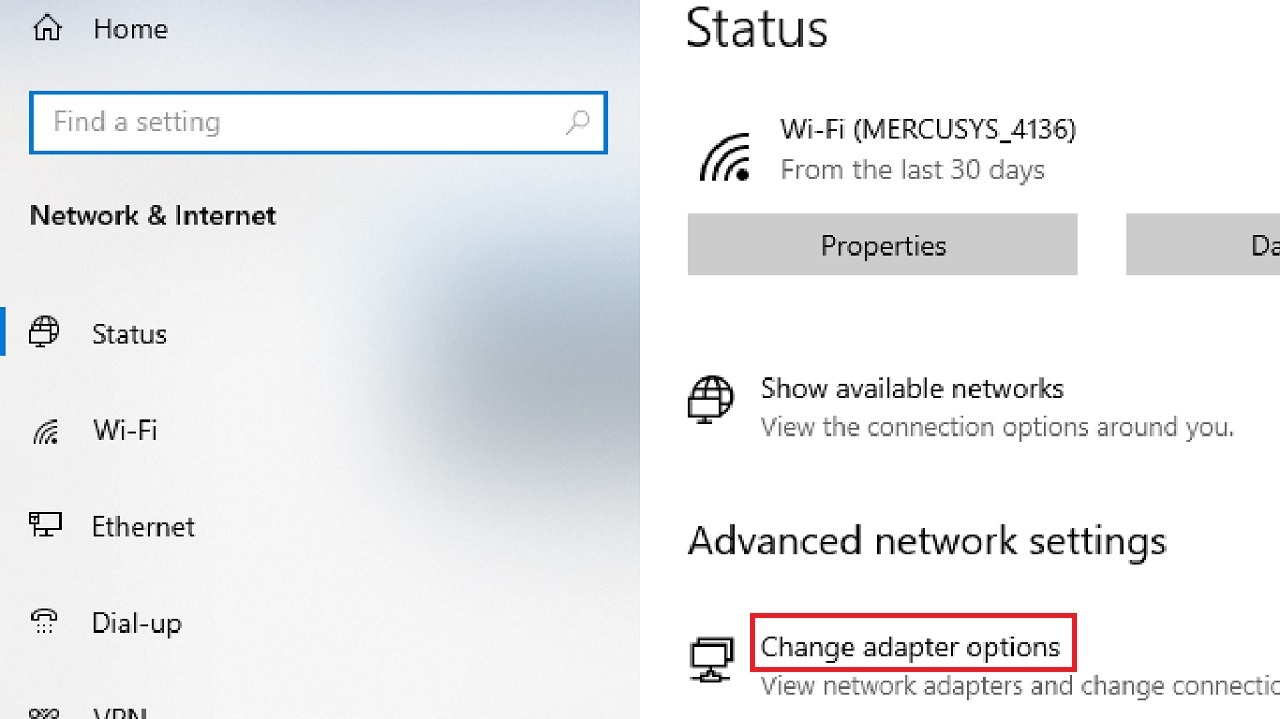
- Click on the Internet or Wi-Fi icon on the right-bottom corner of the taskbar.
- Click on Open Network & Internet settings.

- Click on Change adapter options.
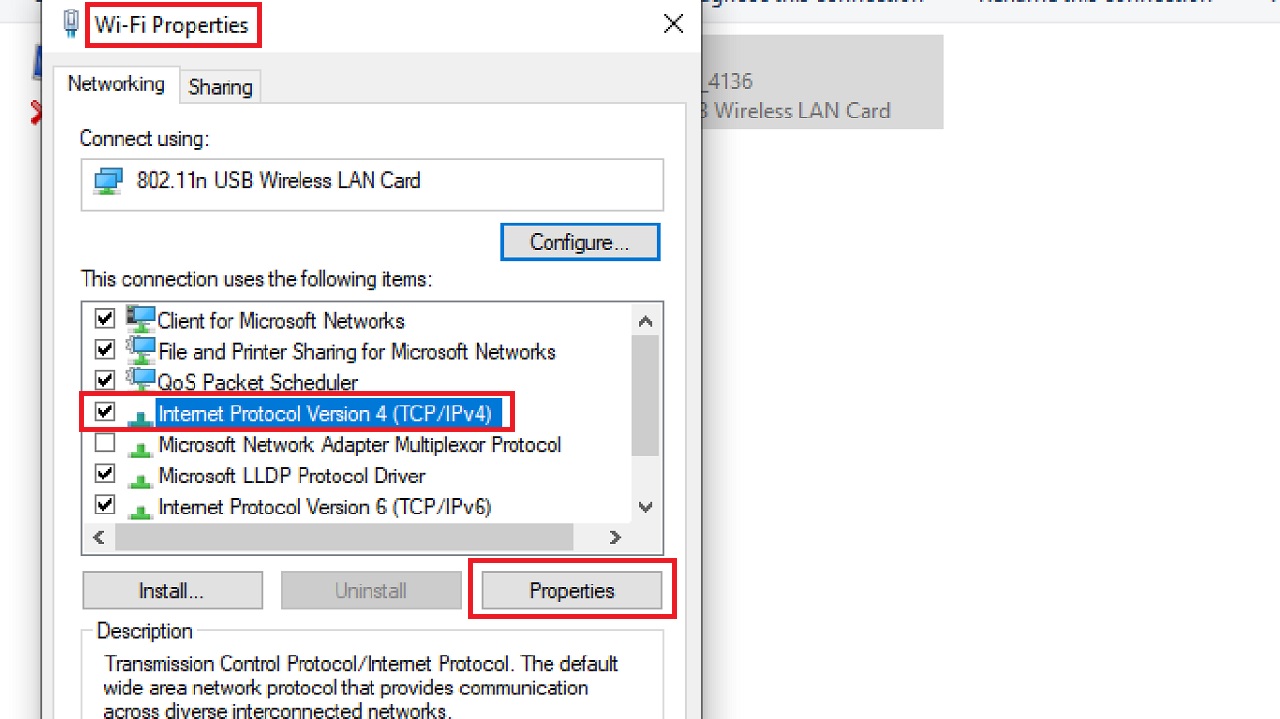
- Select and right-click the active network in the Network Connections window.
- Select Properties.

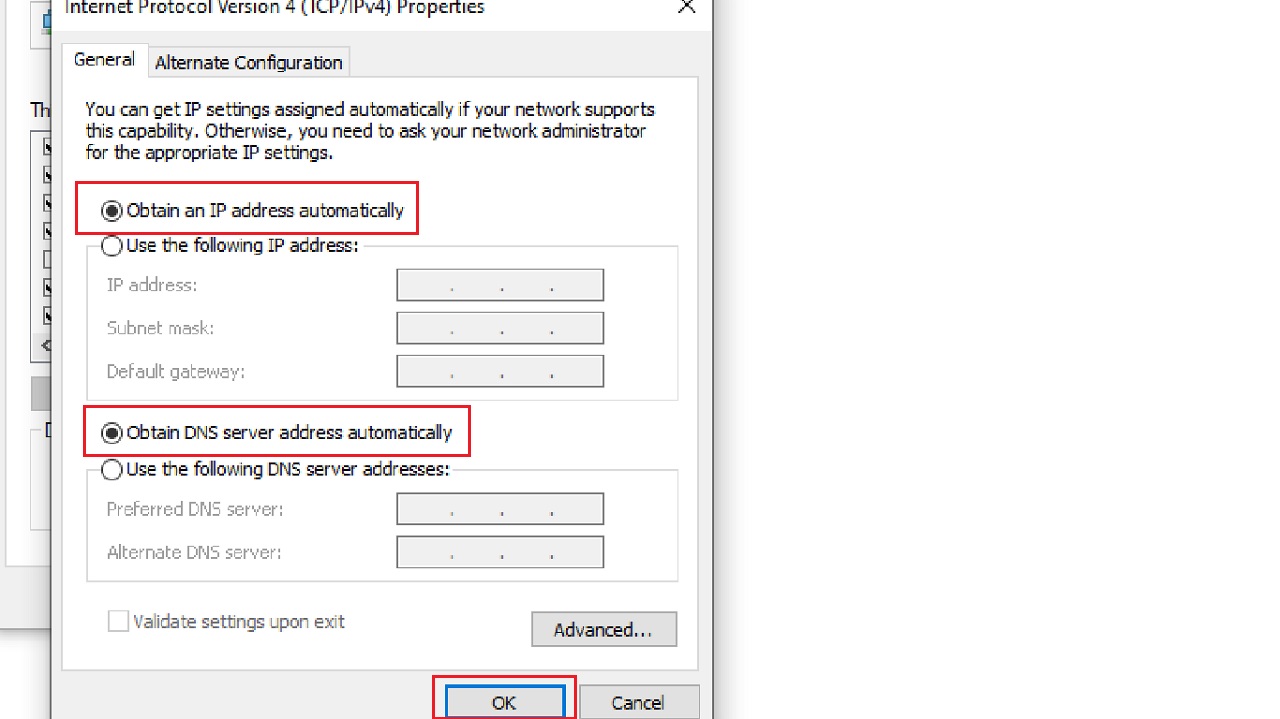
- Select Internet Protocol Version 4 (TCP/IPv4) from the list in the next Wi-Fi Properties window.
- Click on the Properties button.
- In the following window, click on both the small circular buttons next to the options Obtain an IP address automatically and Obtain DNS server address automatically.
- Click on the OK button to save your changes.
- Restart your device for the new settings to take effect.
Method 10: Reset Your Router
Resetting your router will clear the settings and might resolve the issue.
However, use this as your last resort as it will clear all saved settings, including your password and SSID. You will need to reconfigure them again from scratch.
STEPS TO FOLLOW:
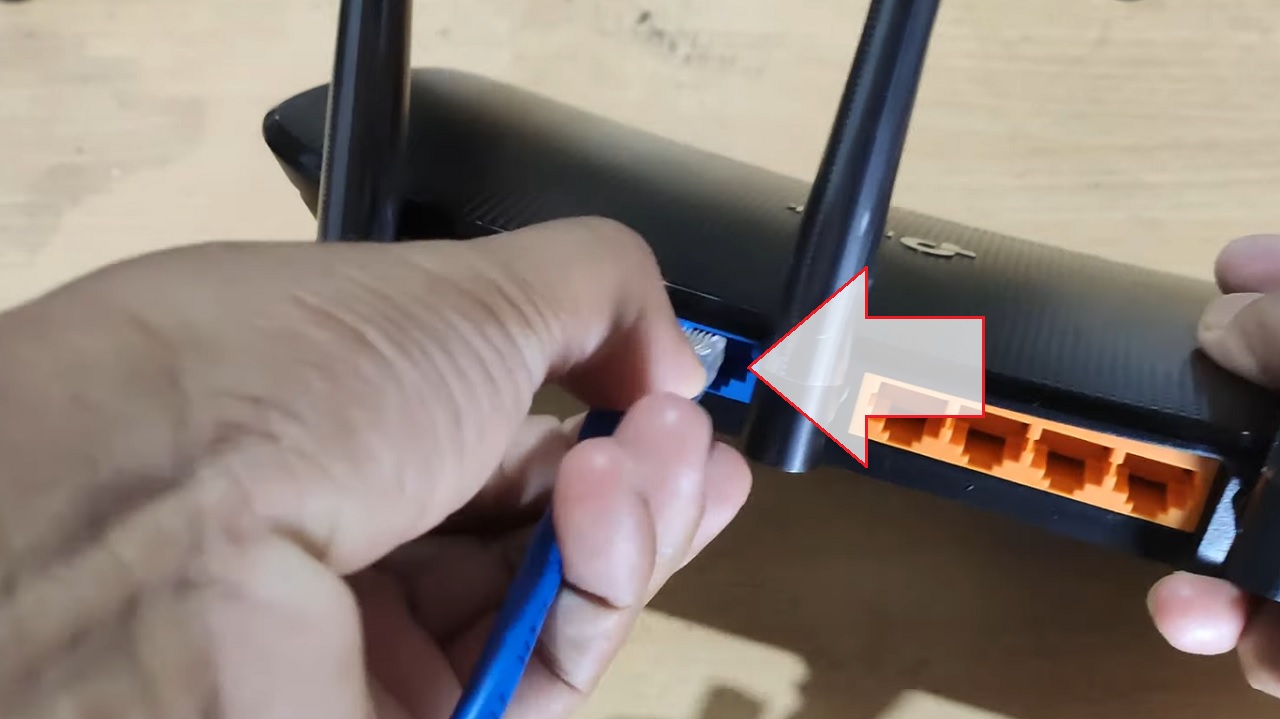
- Disconnect the internet cable from the router.
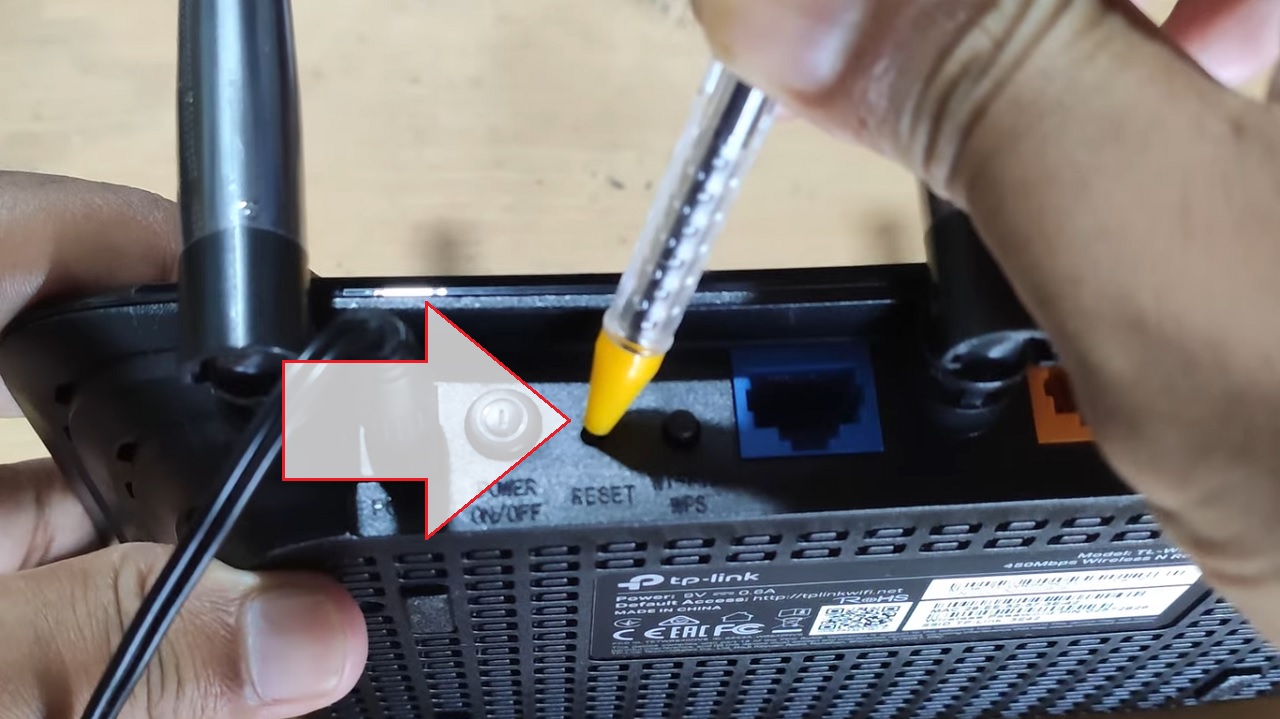
- Locate the Reset button at the back of your router.
- Use a pen or any pointed object to press and hold the Reset button for about 10 to 15 seconds.
- Wait for the router to reset fully and restart.
- Reconfigure your router settings.
Conclusion
In conclusion, there are lots of reasons and solutions for DHCP not working properly. Try one or a combination of them based on your needs.
If none of the methods work, you must reach out to your ISP. There may be some service issues or outages from their end.
You may also seek their assistance if needed.