
It may happen sometimes that Windows 10 will not save your Wi-Fi password and will ask for it every time you want to login.
Though the connection will work fine after you connect it, the issue will need you to type the password every time you log in.
This can be a bit inconvenient for you but there are some easy fixes to this issue, and here they are explained for you.
In This Article
KEY TAKEAWAYS
- An easy way to fix the issue of Windows 10 not saving Wi-Fi password is by switching security protocols and changing the SSID name.
- You may also fix the issue by resetting your router to factory settings or by flushing DNS after resetting the TCP/IP.
- Changing the manual setting of the Wired and WLAN AutoConfig services to Automatic can also resolve the issue most of the time.
- Often, as with several other networking issues, this particular problem can also be fixed by checking and setting the wireless properties.
- You may also try forgetting the network and then adding it again from the network properties to rectify this issue.
Why Won’t Windows Save a Wi-Fi Password?
Windows 10 may not save Wi-Fi passwords if it does not match with the saved passwords or the credentials.
This usually happens when the credentials stored are not updated, especially when you change your password.
The issue may also occur when there is an issue with:
- The connection
- The router settings
- Manual setting of wireless services
- System performance due to presence of malware and viruses
- Third-party software programs
- Outdated drivers and firmware
- System files
- Wired and wireless services
- Wireless or internet protocols
Are you facing the same issue due to any of these reasons? Here are the fixes you can try out to resolve it.
How to Fix Windows 10 Will Not Save Wi-Fi Password?
One of the easiest ways to resolve the issue of Windows 10 not saving the Wi-Fi password is by restarting the system and the router, resetting network settings, and even running a system file check and check disk utility in the Command Prompt to identify and fix internal errors.
There are also a few other proven solutions to this issue, such as:
Uninstall and reinstall the Wi-Fi adapter: Open Device Manager > Expand Network adapters > Choose your Wi-Fi adapter > Right-click on it > Select Uninstall > Reboot your PC > Reconnect and reboot again.
Download latest driver: If the above solution did not solve the issue, download the latest driver for your Wi-Fi adapter from the internet and reboot your PC.
Disable and enable the Wi-Fi adapter: Open Run by pressing the Windows and R keys together > Type ncpa.cpl > Click OK > Right-click on your Wi-Fi network adapter > Select Disable > Right-Click again > Choose Enable > Reconnect > Test > Reboot the system > Test again.
A few other quick and easy solutions you may try are:
- Switching security protocols
- Changing SSID name
- Removing third-party antivirus programs and tools
- Disabling secure boot in BIOS
- Updating Windows
- Resetting router to factory settings
Here are some of the proven methods to solve the issue of Windows 10 not saving your Wi-Fi password explained in detail.
Method 1: Reset Wired and WLAN AutoConfig to Automatic
A few specific types of services, such as Wired and WLAN AutoConfig are usually set to manual by default. Changing them to automatic will resolve the issue most of the time.
STEPS TO FOLLOW:
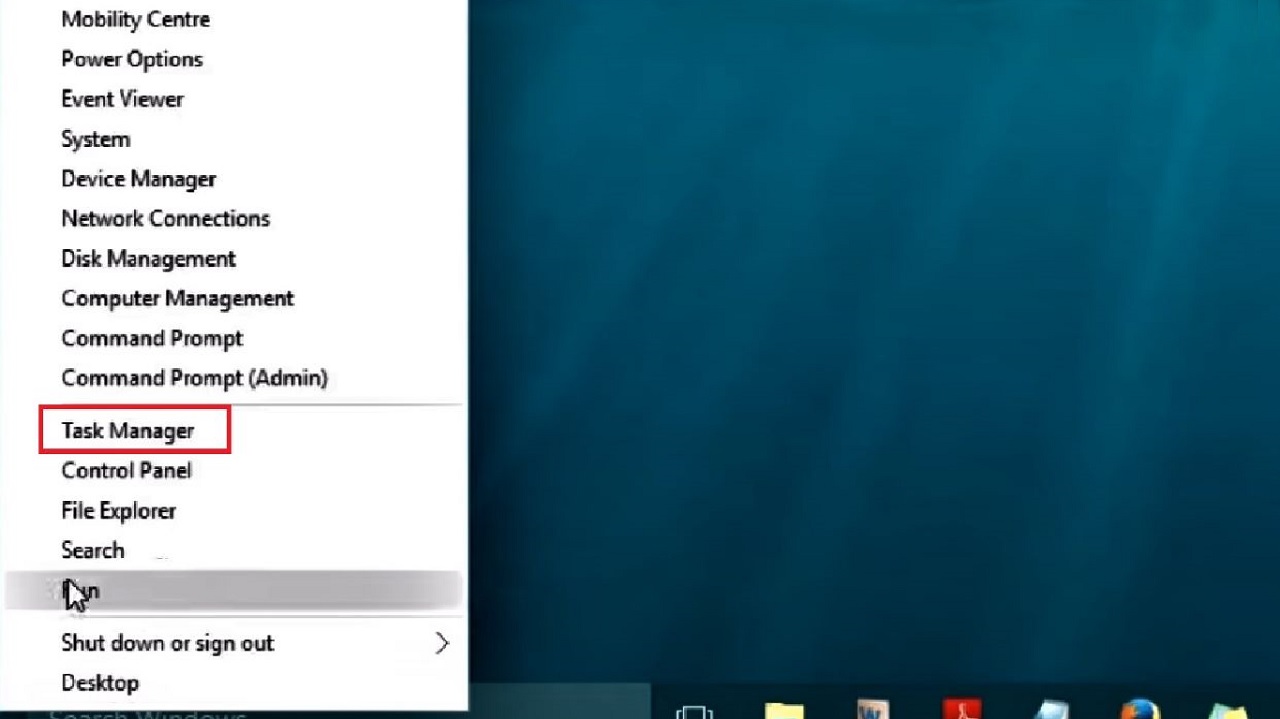
- Right-click on the Start Menu.
- Select Task Manager from the list of options.
- Go to the Services page in the Task Manager.
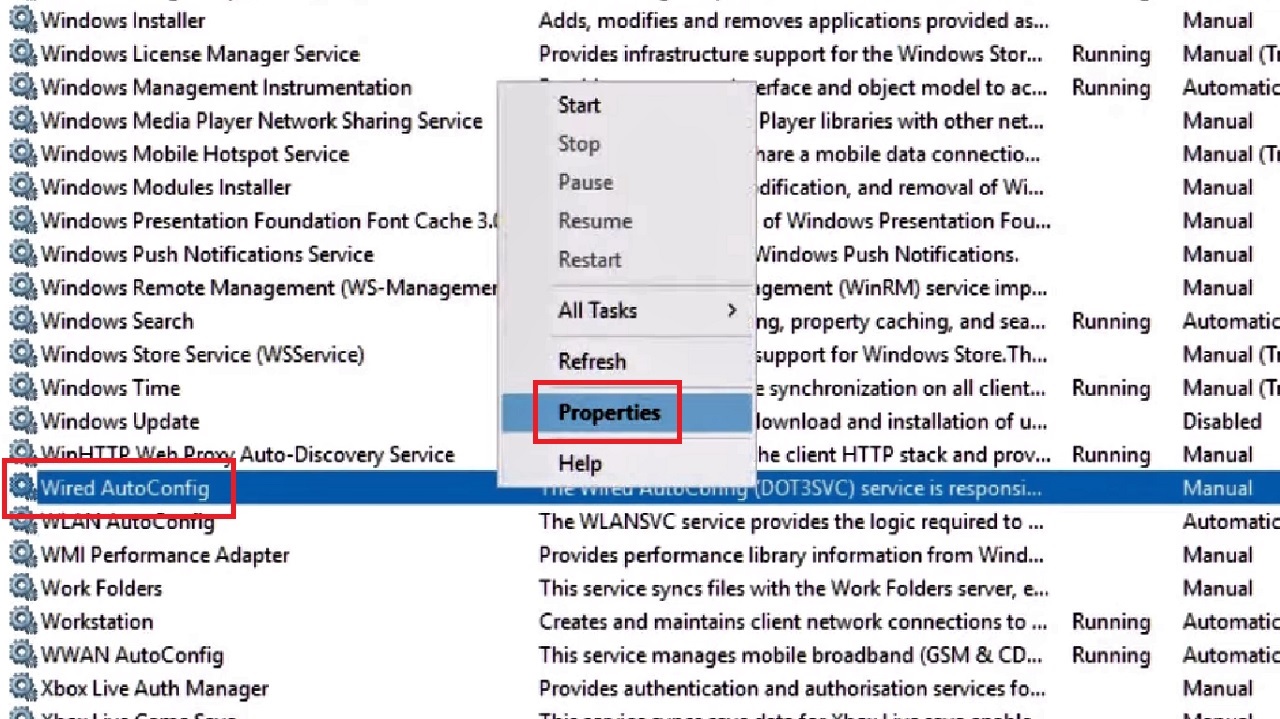
- Look for Wired AutoConfig.
- Right-click on it.
- Stop the service.
- Again right-click on it.
- Select Properties from the drop-down options.
- Click on the small arrow on the right side of the box next to the Startup type in the General tab in the Wired AutoConfig Properties (Local Computer) window that appears next.
- Set it to Automatic.
- Click on the Start button.
- Click on the Apply button and then on the OK button.
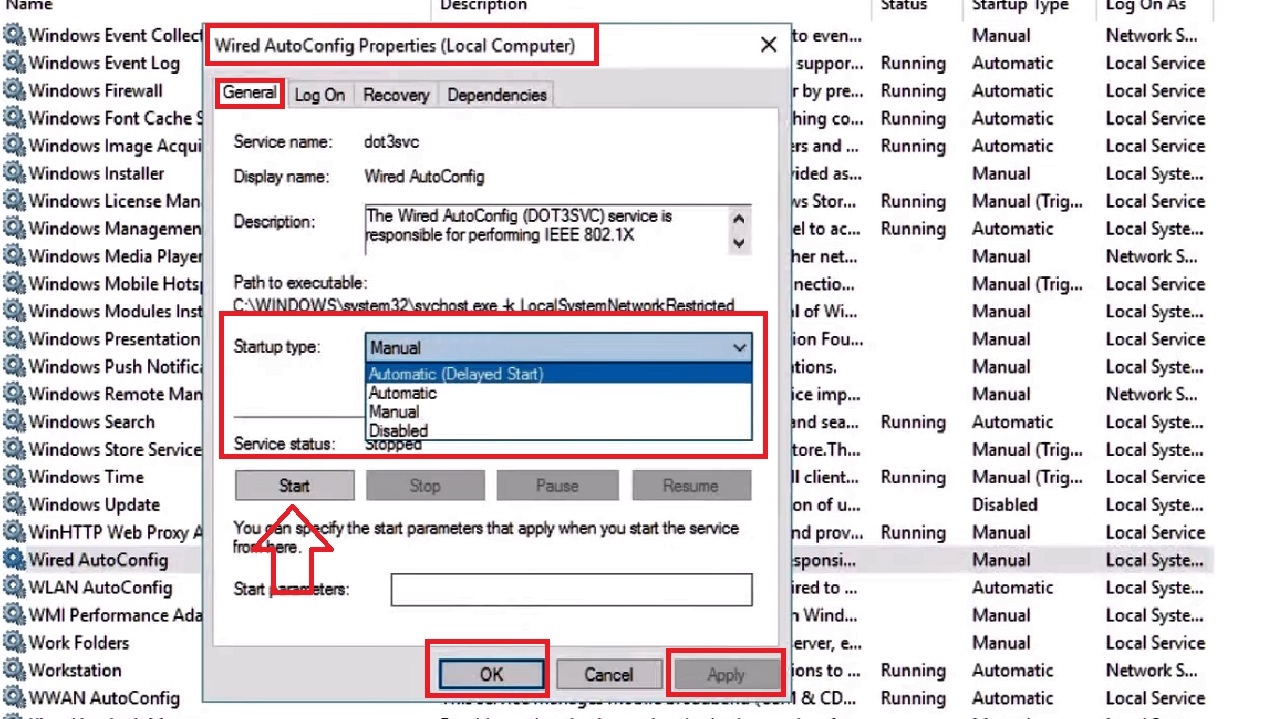
- As for the WLAN AutoConfig, follow the same process and change it to Automatic.
- Close the Task Manager.
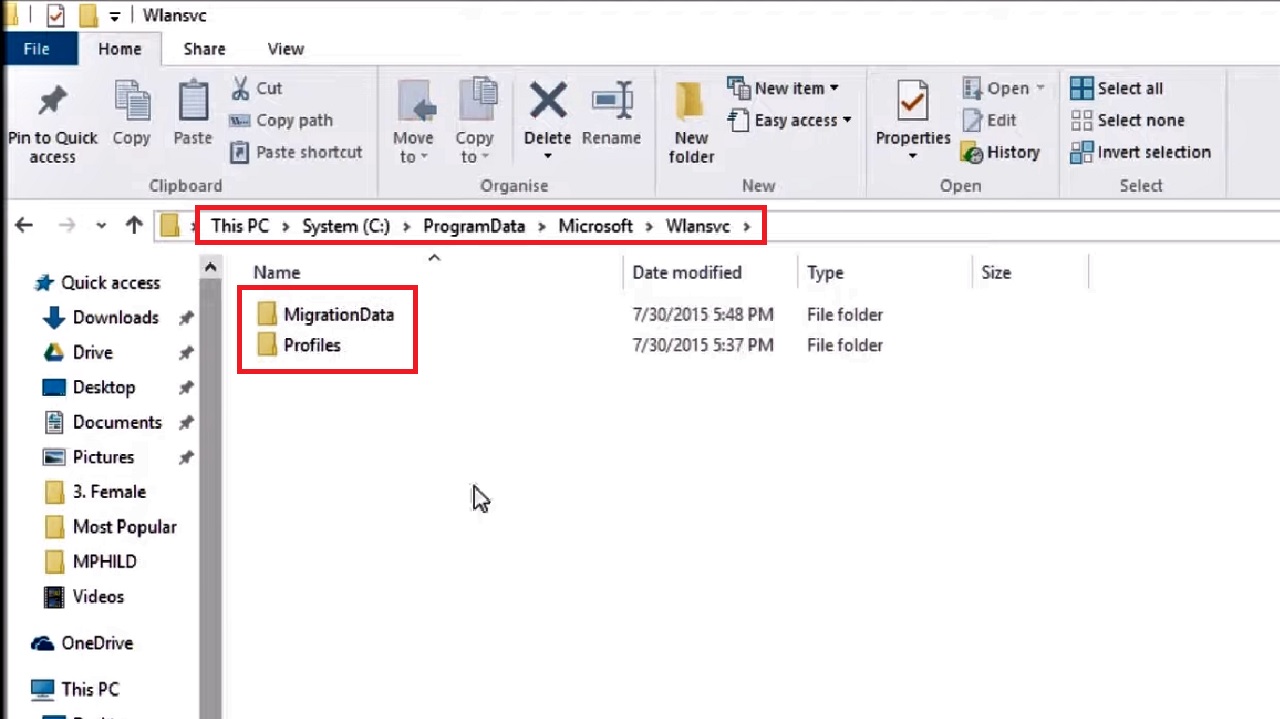
- Now, open This PC > System (C:) > ProgramData > Microsoft > Wlansvc.
- In the Wlansvc folder, you will find two other folders, namely Profiles and MigrationData.
- Click on the Profiles folder and then on the Interfaces folder.
- Select all and delete.
- In the confirmation window, you will need to provide administrator permission to delete this folder.
- Check the box next to Do this for all current items.
- Click on the Continue button.
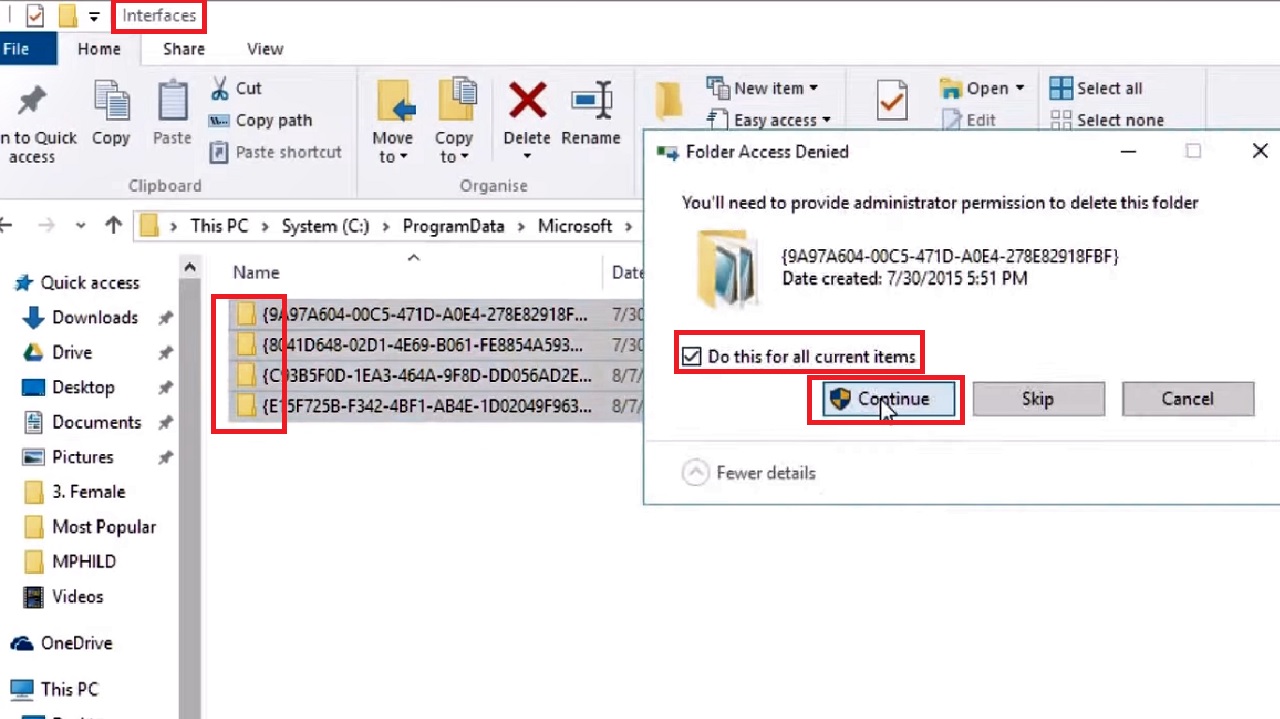
Follow the same process to delete the MigrationData folder.
The issue should be resolved. If it still persists, move on to the next solution.
Method 2: Perform a Network Forget
Forgetting the network and adding it again may also resolve the issue of Windows 10 not saving the Wi-Fi password at times.
STEPS TO FOLLOW:
- Click on the Start Menu.
- Go to Settings.
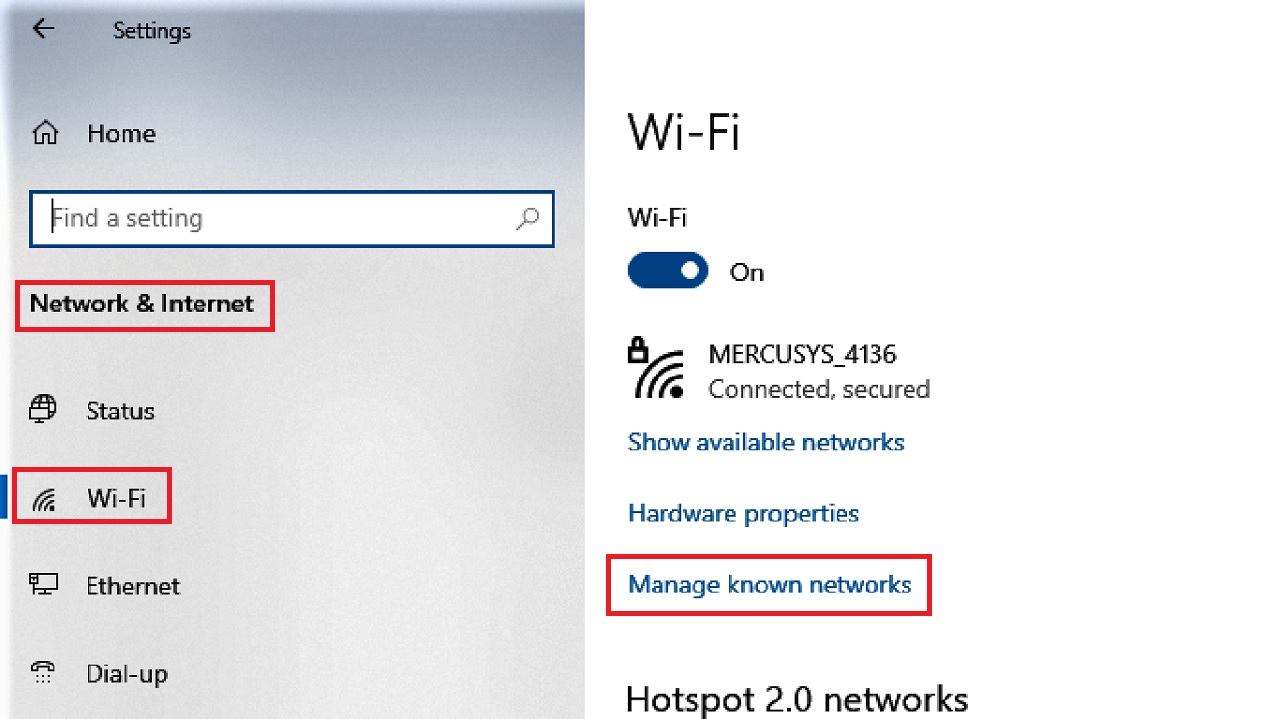
- Select Network & Internet.
- Choose Wi-Fi from the left pane of the following window.
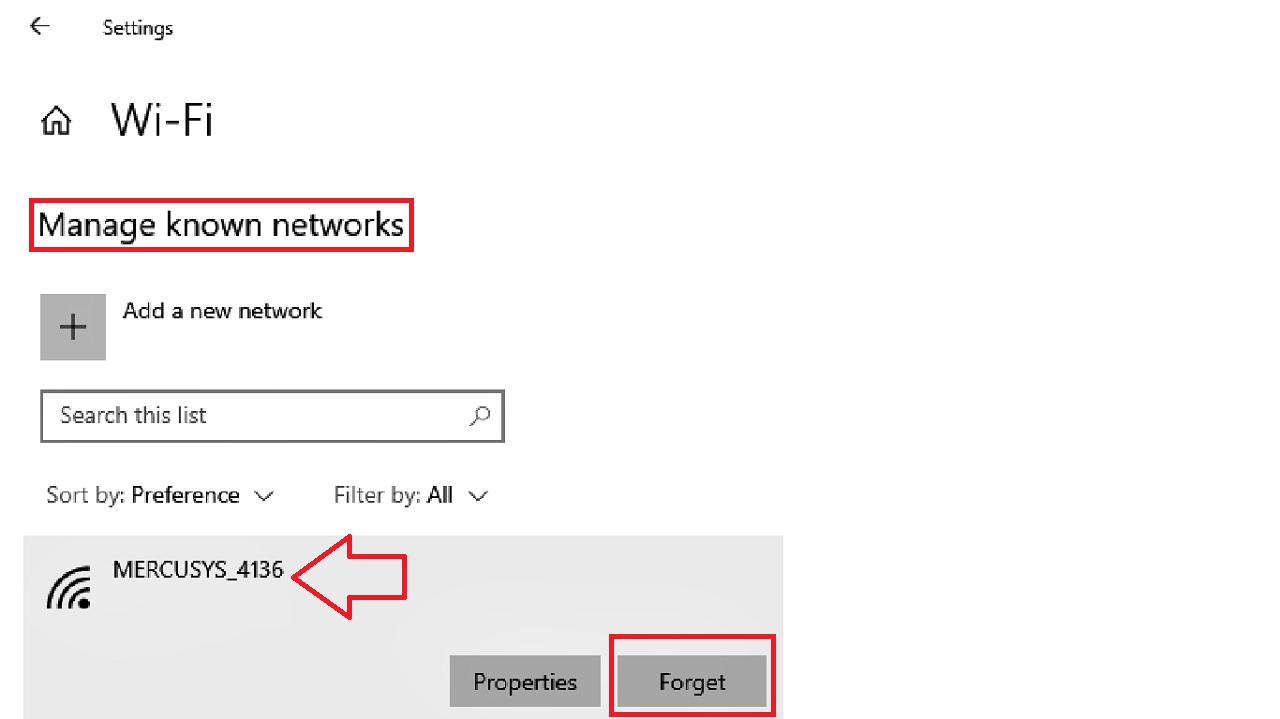
- Go to Manage known networks section.
- Click on your wireless network (MERCUSYS_4136 in this case).
- Click on Forget.
- Shutdown and restart your PC.
- Connect to your Wi-Fi network using the same password again.
- Reboot the system.
Test whether the issue is resolved or still persists. If it is not resolved, follow the next step.
Method 3: Check and Set Wireless Properties
Specific settings in the wireless properties may not allow Windows 10 to save the Wi-Fi password. You must check it and set it accordingly.
STEPS TO FOLLOW:
- Go to the search box next to the Start menu.
- Type control panel and hit the Enter button on your keyboard.
- View by Large icons.
- Click to open Network and Sharing Center.
- Click on your Wi-Fi connection.
- In the following Wi-Fi Status window, click on Wireless Properties.
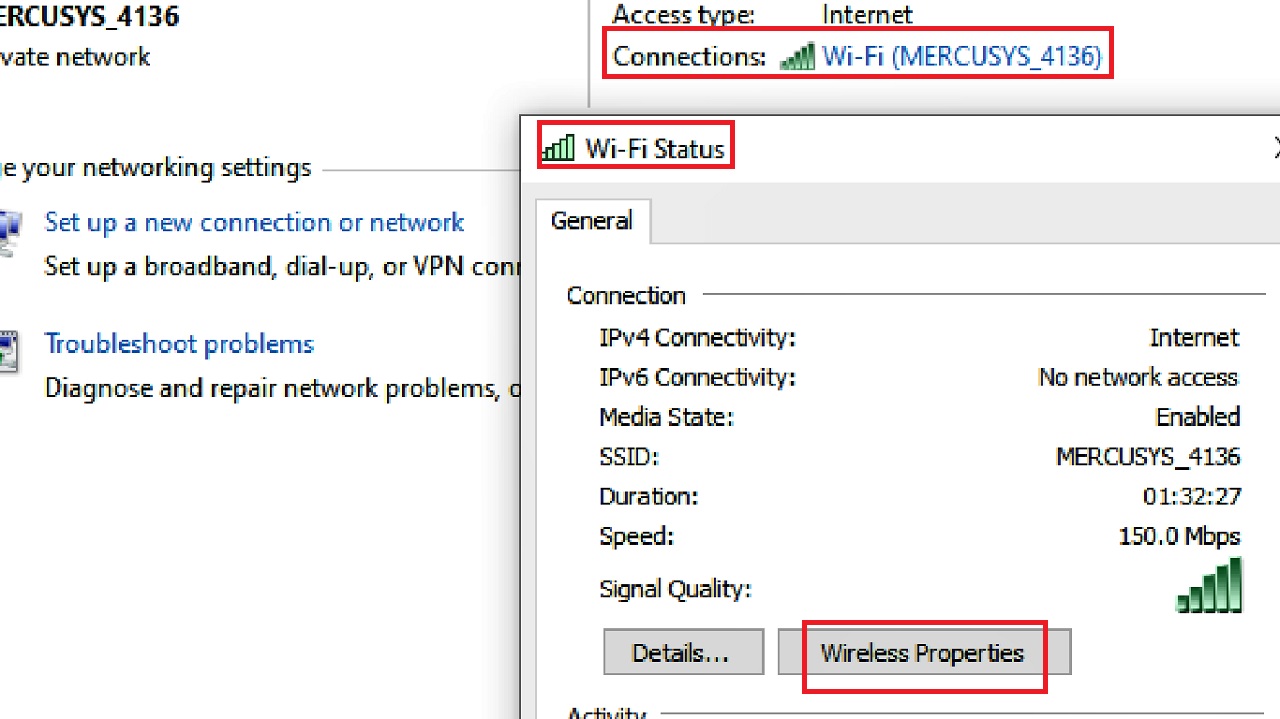
- Click on the small box next to Connect automatically when this network is in range or Start this connection automatically under the Connection tab.
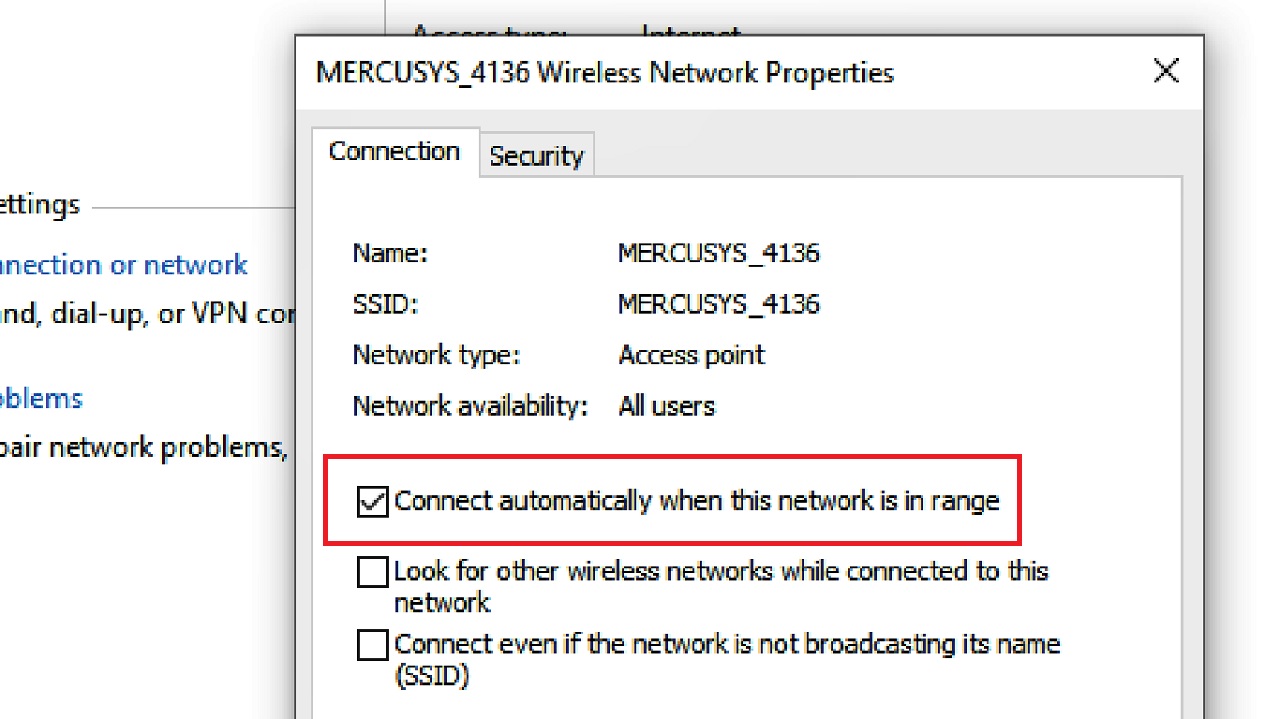
- Click on the OK button below (not shown in the image above) to save the changes.
Reboot the computer and check if it works. If it does not, follow the next method.
Method 4: Reset TCP/IP and Flush DNS
Often resetting the transmission and internet protocol and flushing the DNS may resolve the issue of Windows 10 not saving a Wi-Fi password.
STEPS TO FOLLOW:
Open the Command Prompt with admin rights by typing cmd in the search box, right-clicking on it and choosing run as administrator.
In the Command Prompt, type in the following commands hitting the Enter key on your keyboard every time to flush DNS:
- ipconfig /release
- ipconfig /flushdns
- ipconfig /renew
After that, to reset the TCP/IP, type in the following commands one after another in the same way hitting enter every time:
- ipconfig /flushdns
- nbtstat –r
- netsh int ip reset
- netsh winsock reset
Once all the commands are executed successfully, reboot your system to apply the changes and check whether the issue has been resolved or not.
Method 5: Disable Secure Boot
Though it does not have any direct influence, sometimes disabling secure boot may resolve the issue of Windows 10 not saving the Wi-Fi password.
STEPS TO FOLLOW:
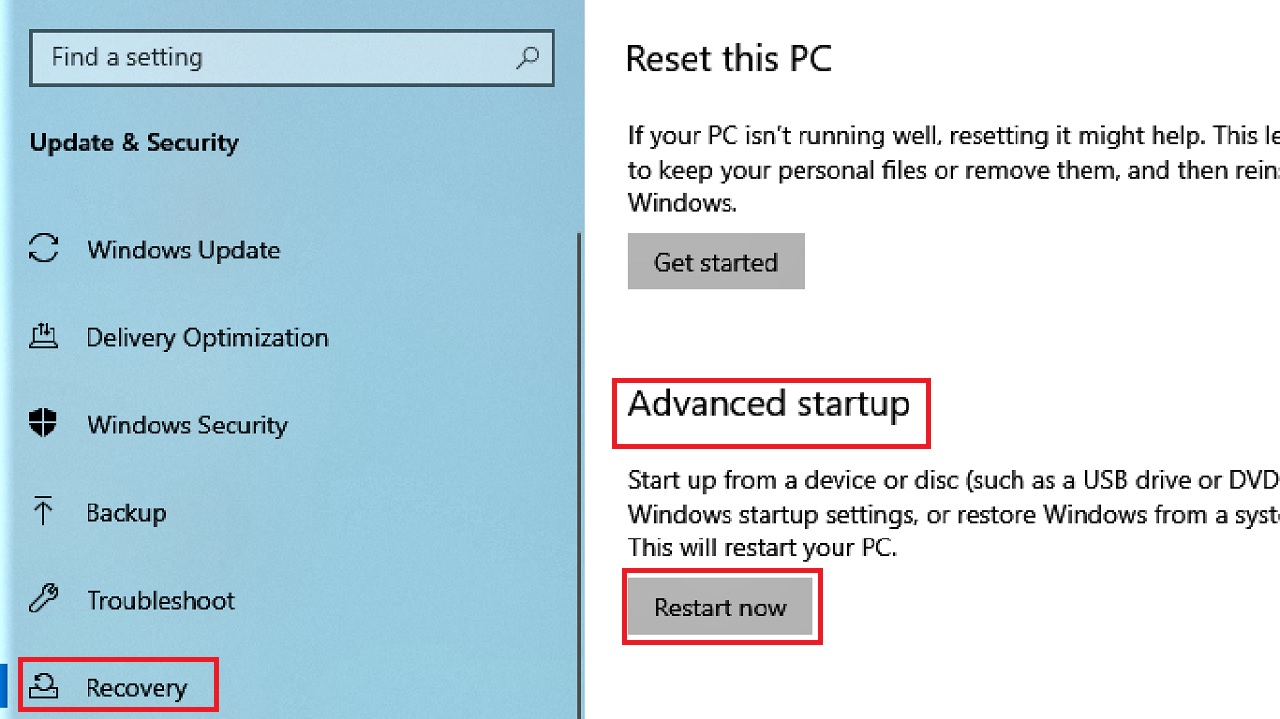
- Type recovery options in the Windows search box and hit Enter.
- In the Recovery page, go to the Advanced startup section on the right side.
- Click on the Restart now button.
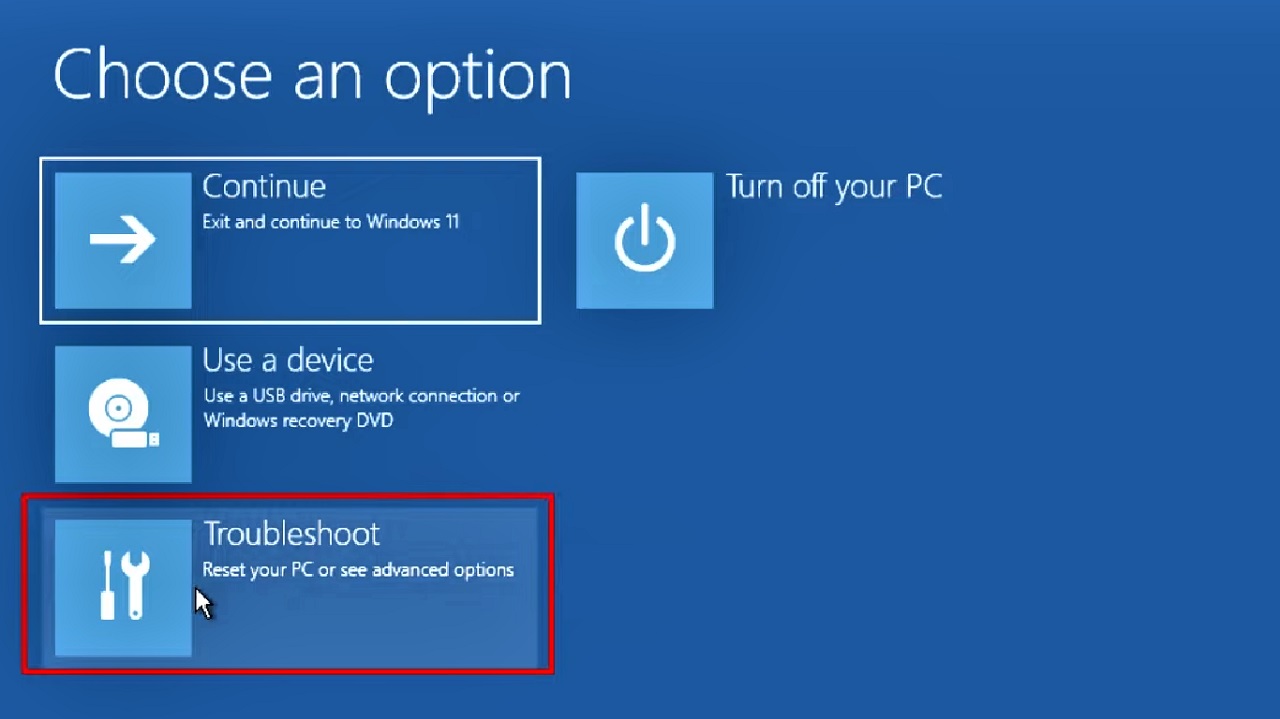
- When the system restarts, choose Troubleshoot.
- Select Advanced options in the next window.
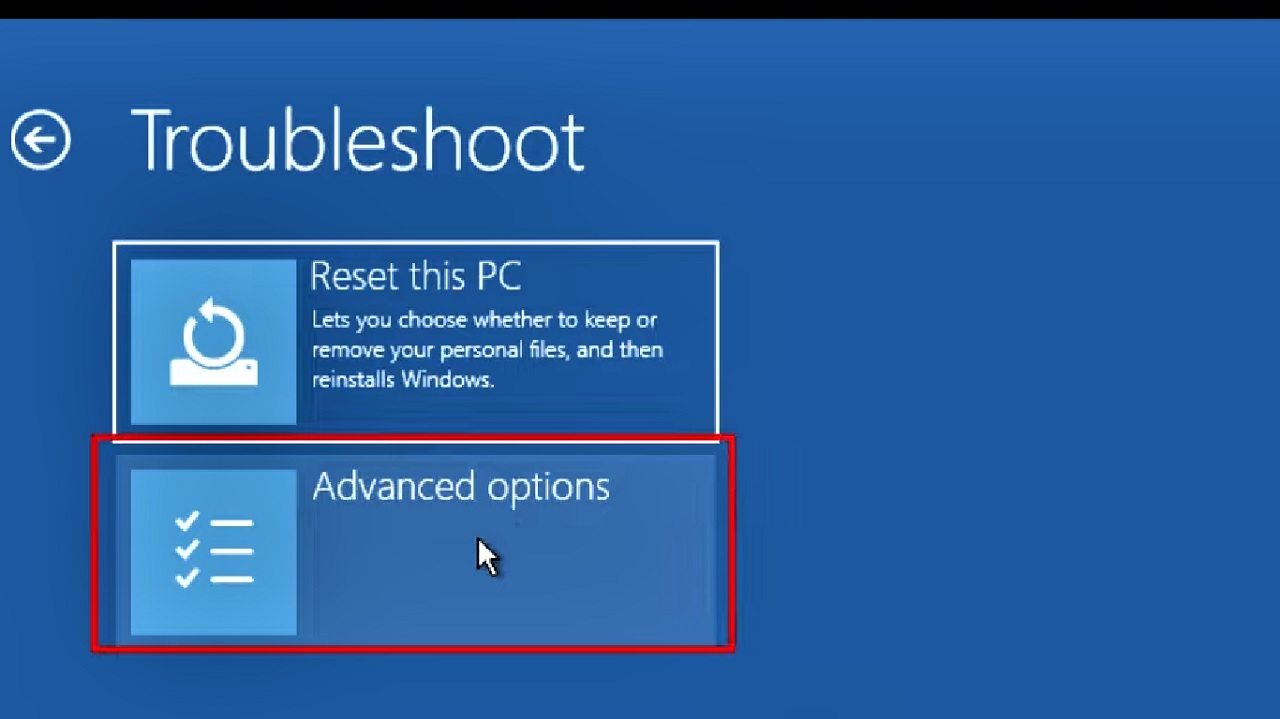
- Choose UEFI Firmware Settings in the following window.
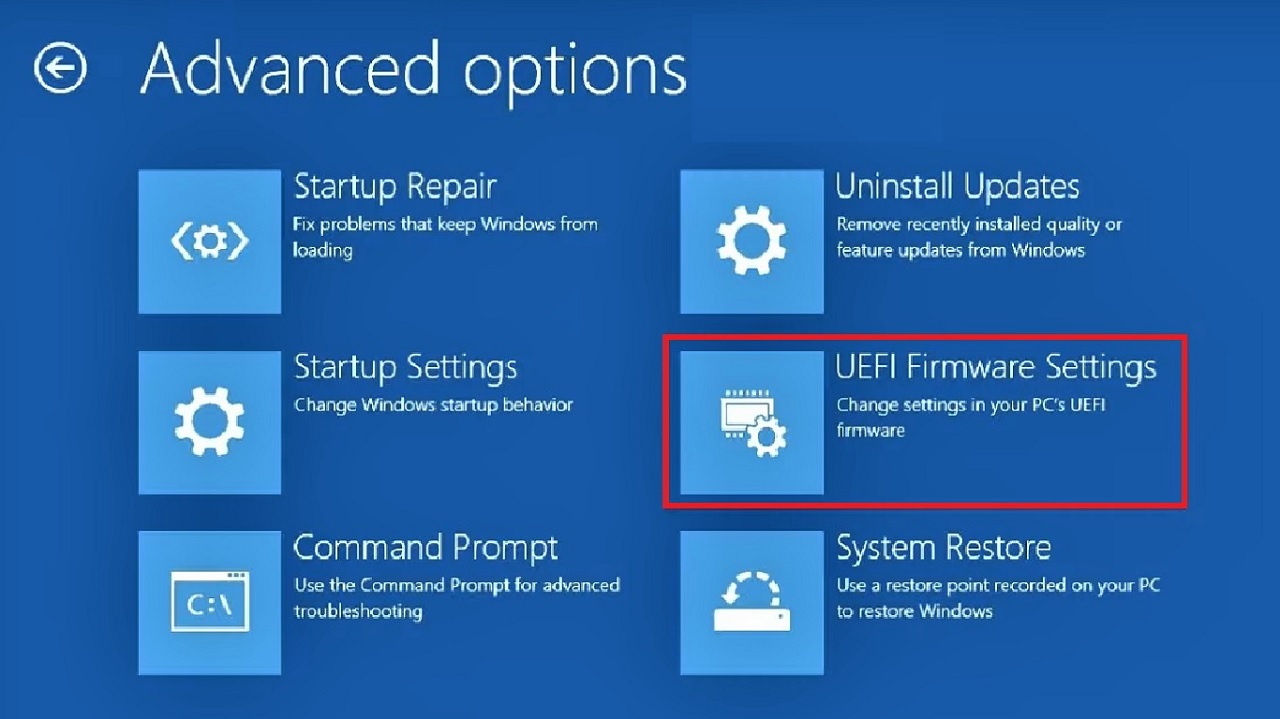
- Click on Restart.

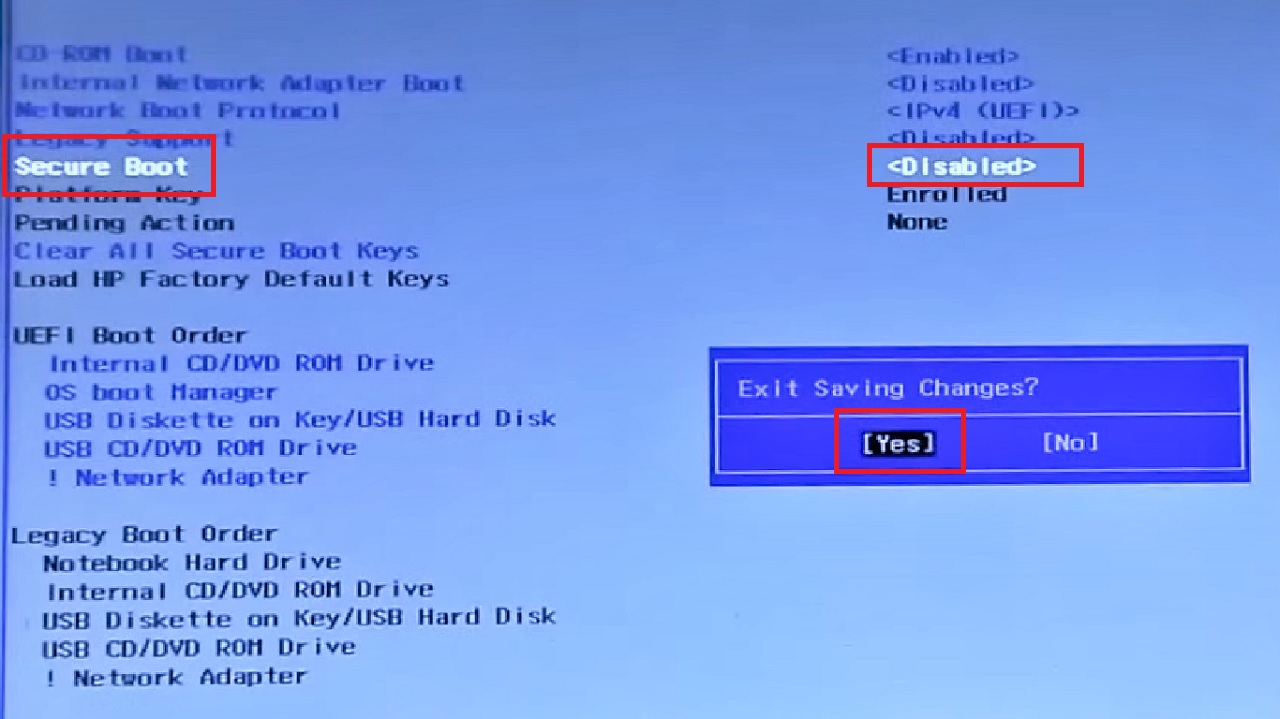
- Find Secure Boot.
- Disable it using the arrow keys on your keyboard.
- Click on the Yes button to exit saving changes.
Restart your PC and check whether the issue is resolved.
Method 6: Check the Credential Manager
You may delete and reestablish the Wi-Fi credentials stored in the Credential Manager to resolve the issue of Windows 10 not saving a Wi-Fi password, assuming that you have the required administrative permission.
STEPS TO FOLLOW:
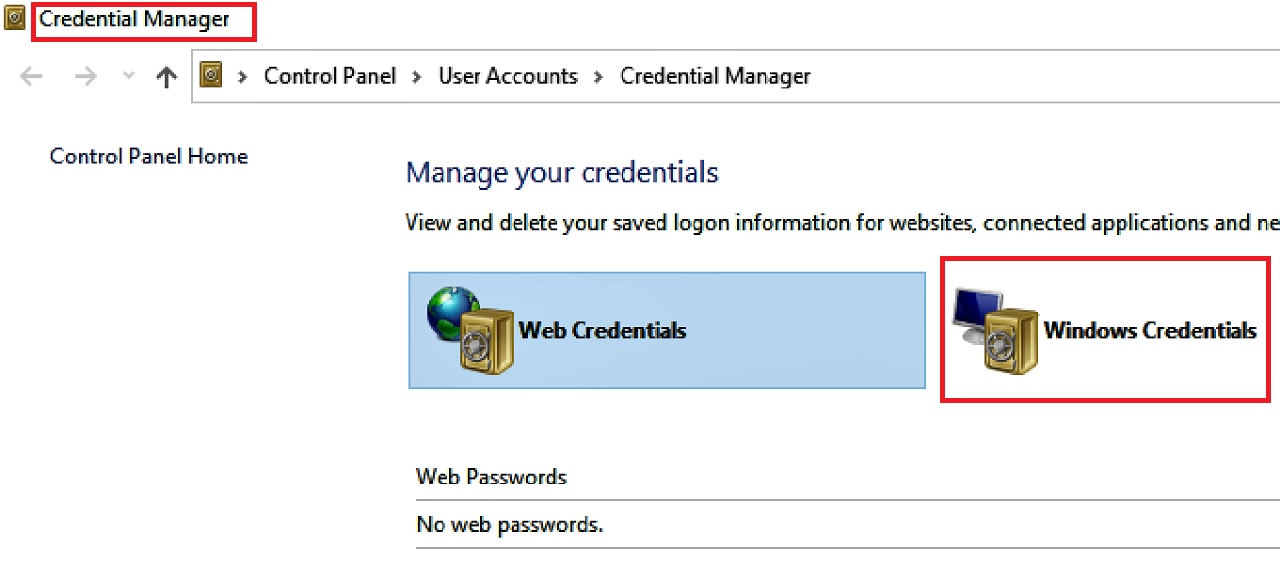
- Access the Credential Manager by typing in the Windows search bar and hitting Enter.
- Click on Windows Credentials in the Credential Manager window under Manage your credentials.
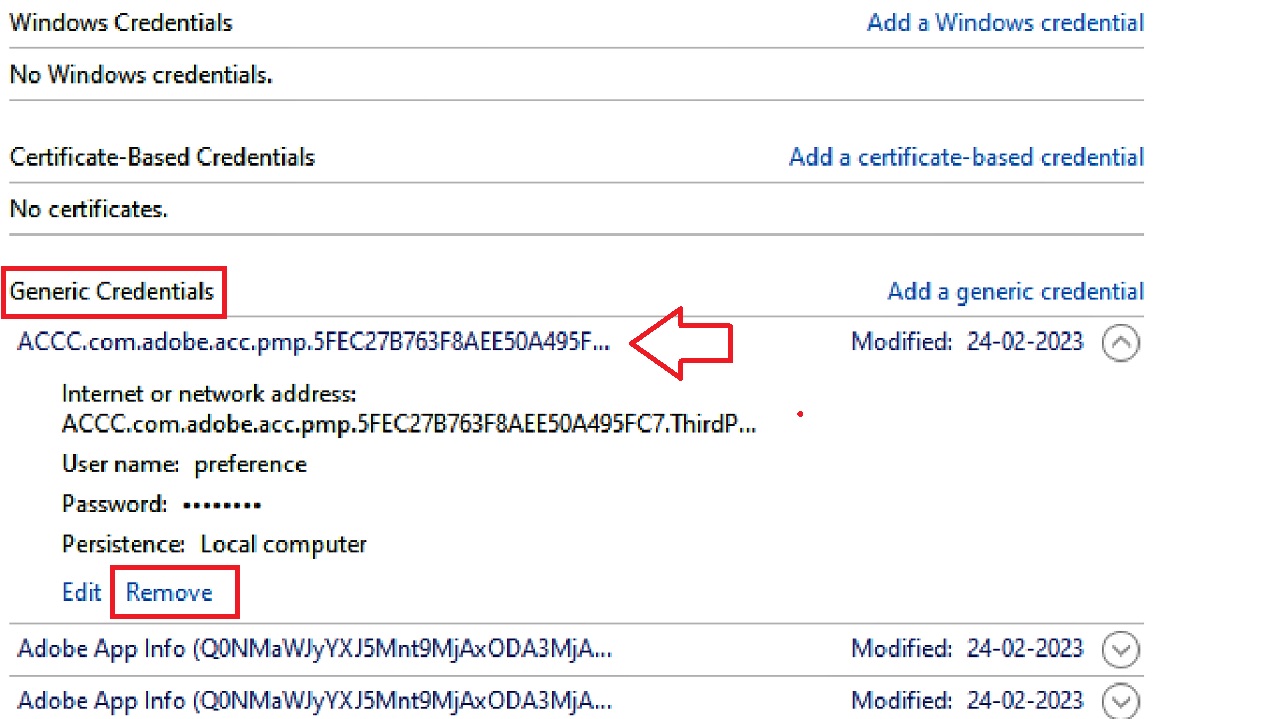
- From the list of credentials under Generic Credentials, select the one that is related to your Wi-Fi. (The first one in the list here is shown just as an example).
- Click on it to expand it.
- Click on Remove under it.
Now, restart your computer system. After the system restarts, configure your Wi-Fi connection again and then check whether or not the issue has been resolved.
Conclusion
Windows 10 not saving the Wi-Fi password may seem a trivial issue but can cause a significant amount of annoyance and inconvenience.
Luckily, through this article, now you know about a few viable solutions to fix the issue.