
When you experience the ‘DNS server not responding’ error on your Windows or Mac computer, you will not be able to browse the internet.
This can cause inconvenience and can be quite frustrating when you need to look up something online.
However, the good news is that this error can be rectified very easily, which is what this article is all about.
If you do not know about these solutions, read on to know more and implement one or a couple of them when you face this error on your PC.
Note: Different approaches for Mac computers for a few specific solutions are mentioned separately.
In This Article
KEY TAKEAWAYS
- When you experience the ‘DNS server not responding’ error, you may get it rectified by simply changing the DNS server manually.
- Reconfiguring the network connection and resetting the router manually may also help in rectifying the issue in some situations.
- If the driver of the network adapter is out of date, updating it with the latest version may also resolve the issue.
- In most cases, disabling the Internet Protocol Version 6 and all other additional connections may rectify the problem.
- Disabling the Peer to Peer feature may also resolve the issue and bring things back to normal.
Why is DNS Server Not Responding?
The most significant reason for experiencing the ‘DNS server not responding’ error is the issues in the DNS settings and issues in its address. It may also be a result of improper settings of your PC in the first place.
Other significant reasons for such an error to occur are:
- Faulty or outdated driver
- Conflicting antivirus programs or firewall settings
- Conflicting VPN or Virtual Private Network
- Outdated firmware of the router
- Improper network configuration
- Microsoft Virtual Wi-Fi Miniport Adapter
- Conflicting Peer-to-Peer feature
- Unreliable internet connection
- Multiple network connections
- Outdated browser
- Temporary server outage
- Phishing malware
- Inadequate cache memory
- Issues with the ISP
- Cyberattacks
- Third-party software programs and apps conflict
- Hardware malfunctions
- Unavailability of DNS provider
Despite the varied reasons for the ‘DNS server not responding’ error to occur, fortunately, the fixes to it are relatively simple.
How to Fix DNS Server Not Responding Error?
One of the easiest solutions to the ‘DNS server nor responding’ error is switching browsers or devices.
In other situations, you may try resolving it by changing the DNS servers or addresses, flushing the DNS cache or disabling a few specific network connections.
Some other easy fixes of this issue could be:
- Restarting the router
- Checking and fixing network issues by running internet connections troubleshooter
- Disabling third-party apps
- Updating the browser
- Resetting the router
- Disabling antivirus and firewall temporarily
- Updating the firmware of the router
Now, if these easy and quick solutions could not resolve the issue, here are a few advanced solutions to try.
Update Network Driver: Press Windows and X keys together > Select Device Manager from the options > Select and expand Network drivers > Select your network adapter > Right-click on it > Select Uninstall device from the options > Click on the square box next to Delete driver software for this device > Click on Uninstall > Restart your PC.
Reset Network Settings: Go to the Start Menu > Settings > Network and Internet > Status > Network reset > Restore Now > Restart your computer when prompted.
Run Internet Connections troubleshooter: Go to the Control Panel > Network and Internet > Network and Sharing Center > Troubleshoot problems > Additional troubleshooters > Internet Connections > Run the troubleshooter.
If these could not rectify the problem, try the following solutions.
Method 1: Change the DNS Server Manually
You may change the DNS server to Google DNS or OpenDNS manually and solve the issue.
Note: Changing the DNS server might slow down your internet speed depending on the location. You are therefore advised to check using different servers.
STEPS TO FOLLOW:
In Windows:
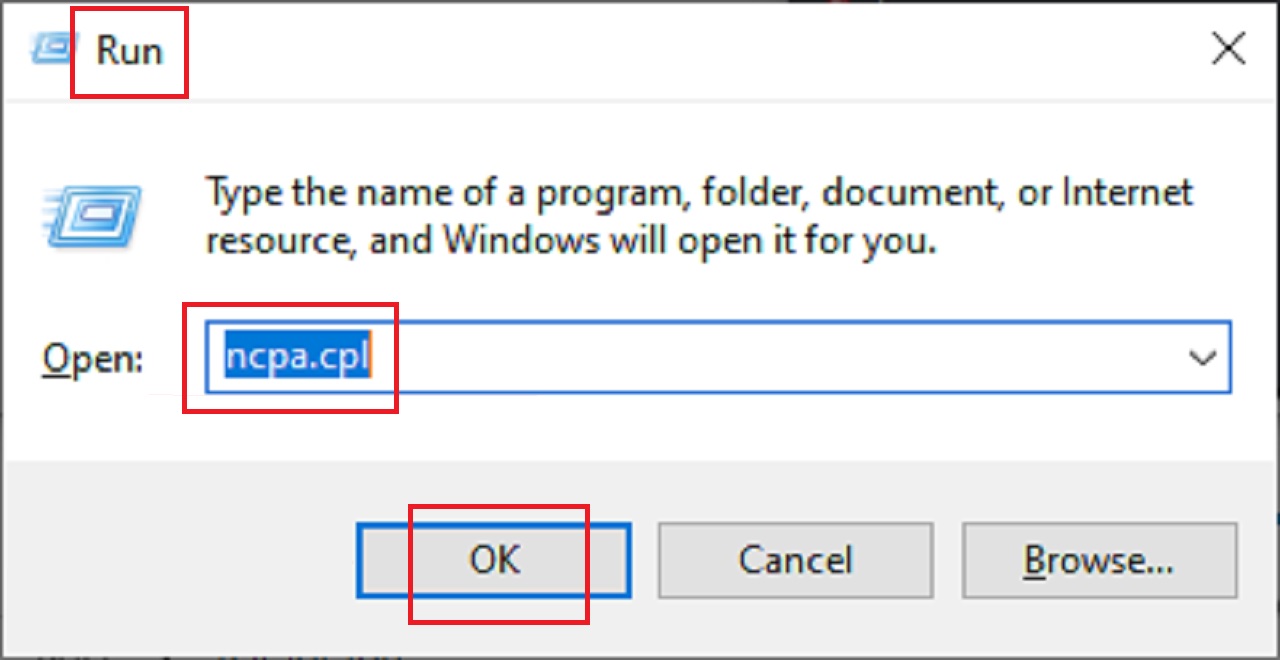
- Press the Windows and R keys together to open the Run dialog box.
- Type ncpa.cpl in the box.
- Click on the OK button.
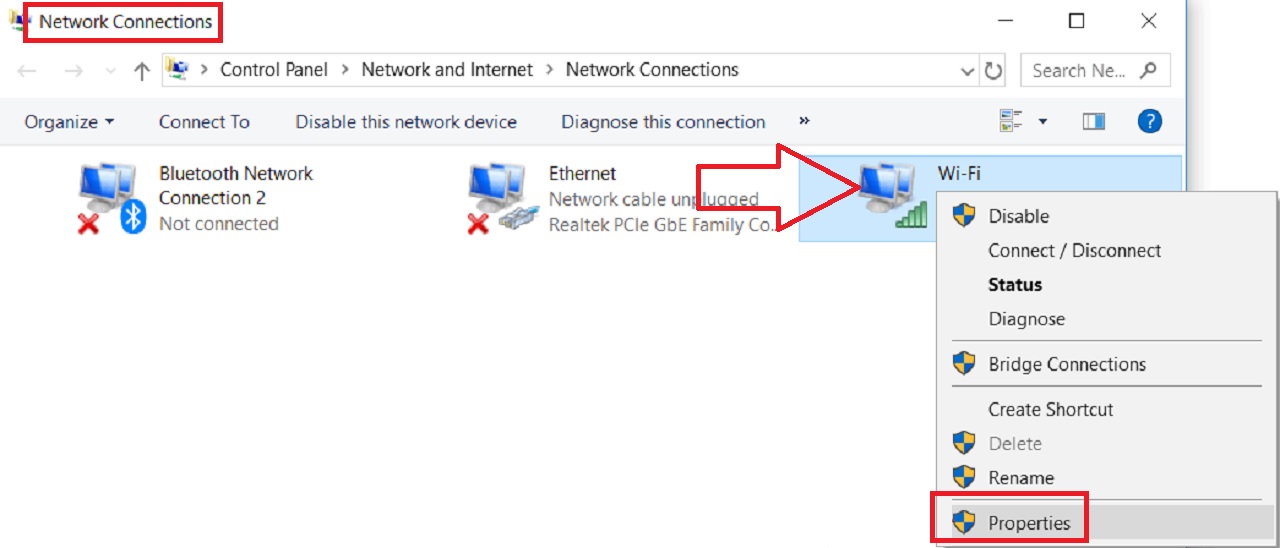
- Right-click on your active network in the Network Connections window.
- Choose Properties from the list of options.
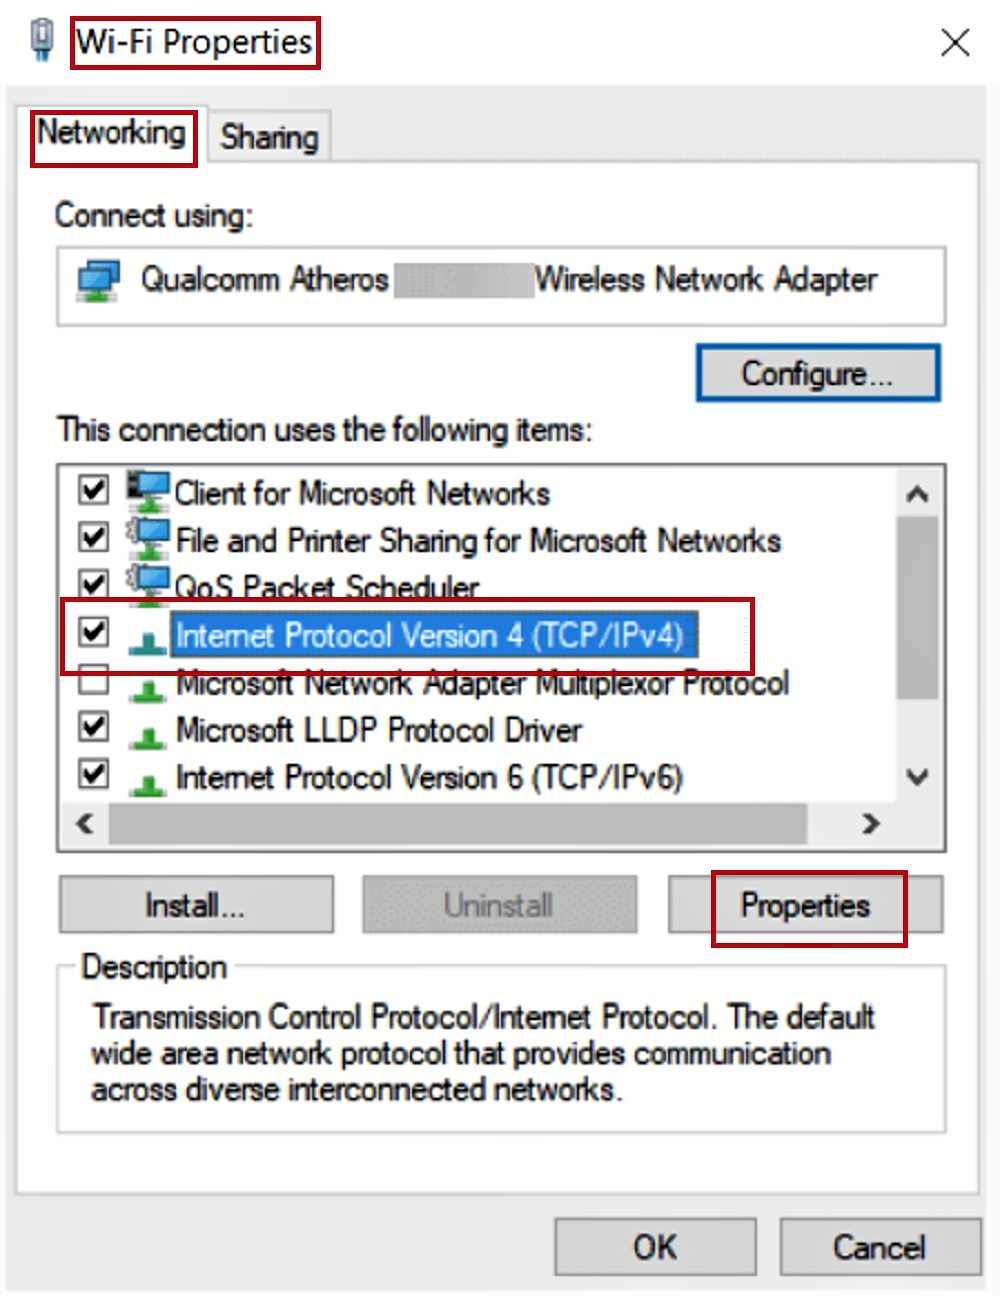
- In the Wi-Fi Properties window under the Networking tab, select Internet Protocol Version 4 (TCP/IPv4) from the list in the box under ‘This connection uses the following items.’
- Click on the Properties button.
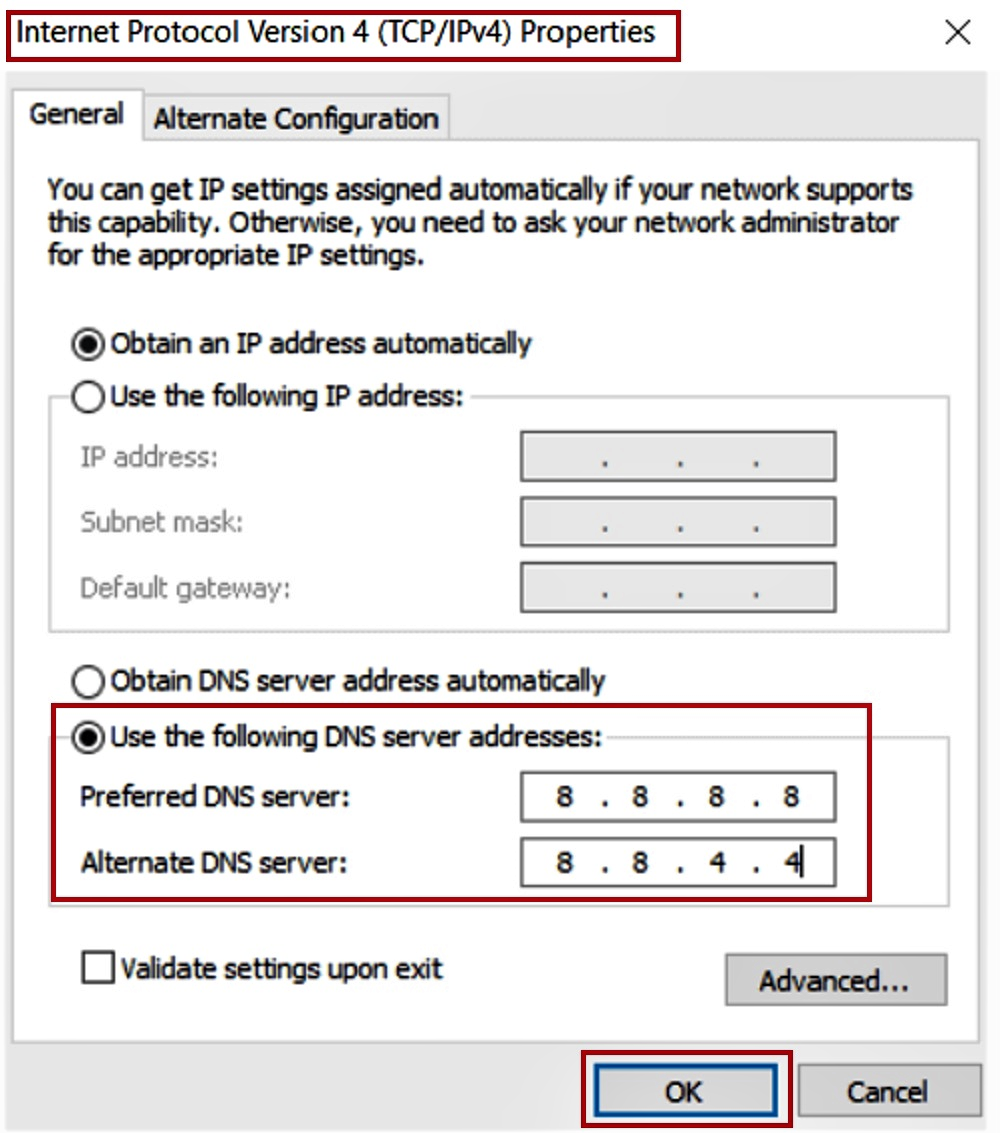
- In the following Internet Protocol Version 4 (TCP/IPv4) Properties window, click on the small circular button next to ‘Use the following DNS server addresses’ option.
- Set the Preferred DNS server to 8.8.8.8.
- Set the Alternate DNS server to 8.8.4.4.
- Click on the OK button to save the changes.
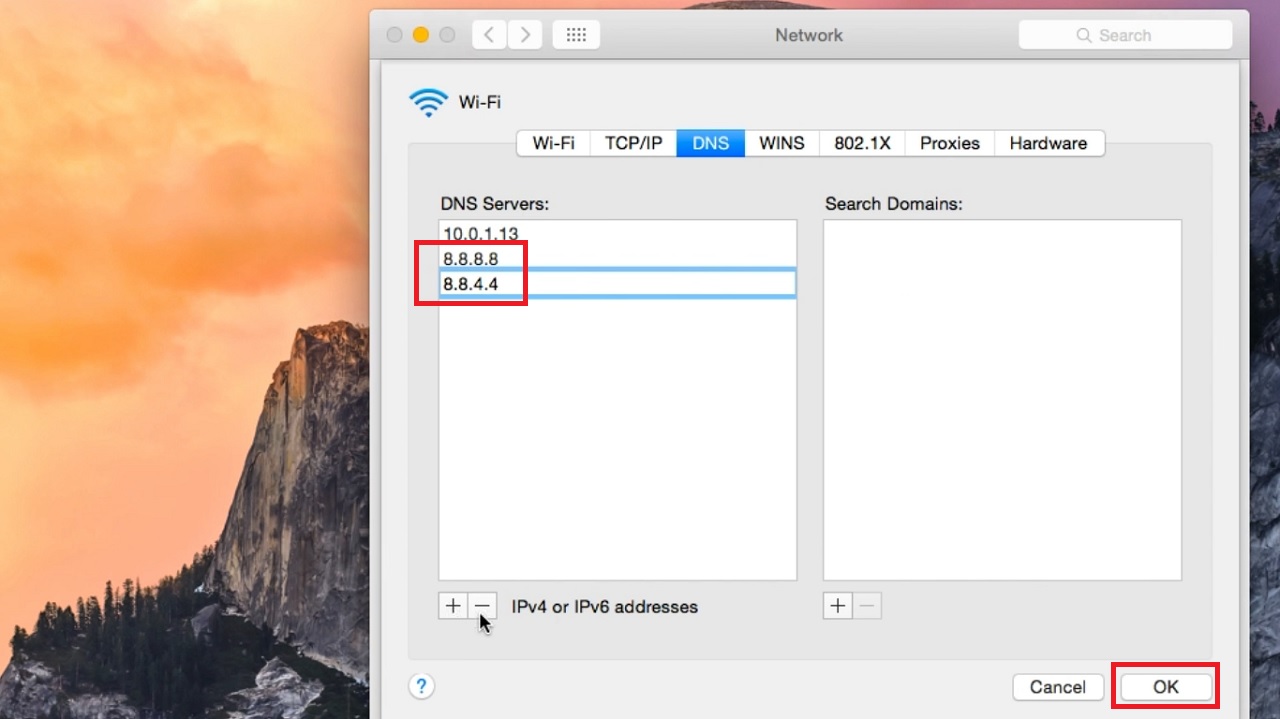
In Mac:
If you are using a Mac system, follow these steps:
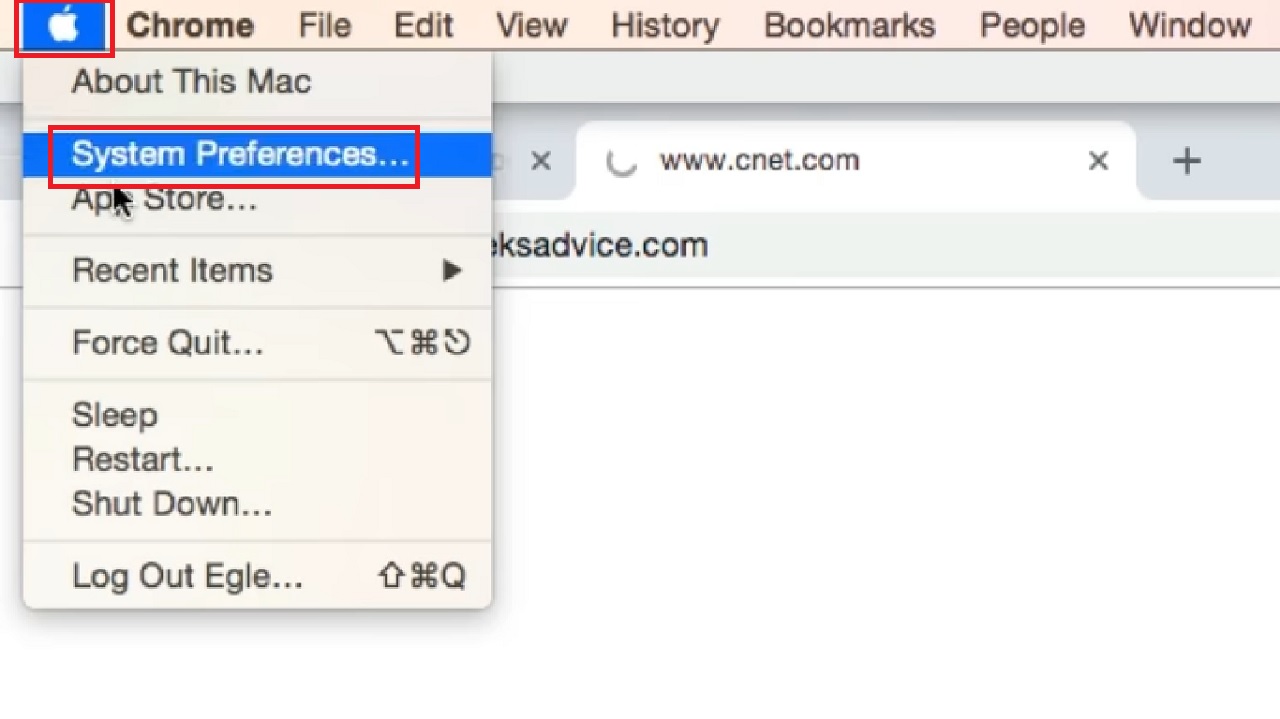
- Go to the Apple icon on the top-left corner of your screen.
- Click on System Preferences.
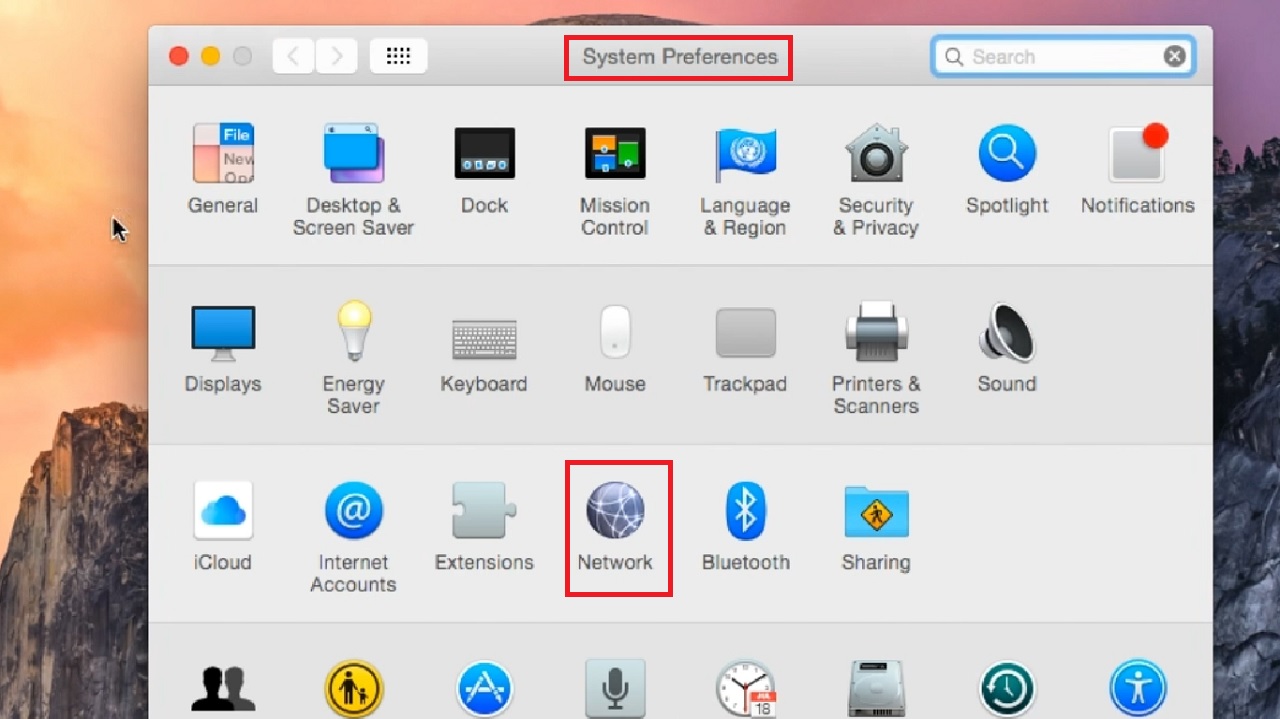
- Click on Network in the System Preferences window.
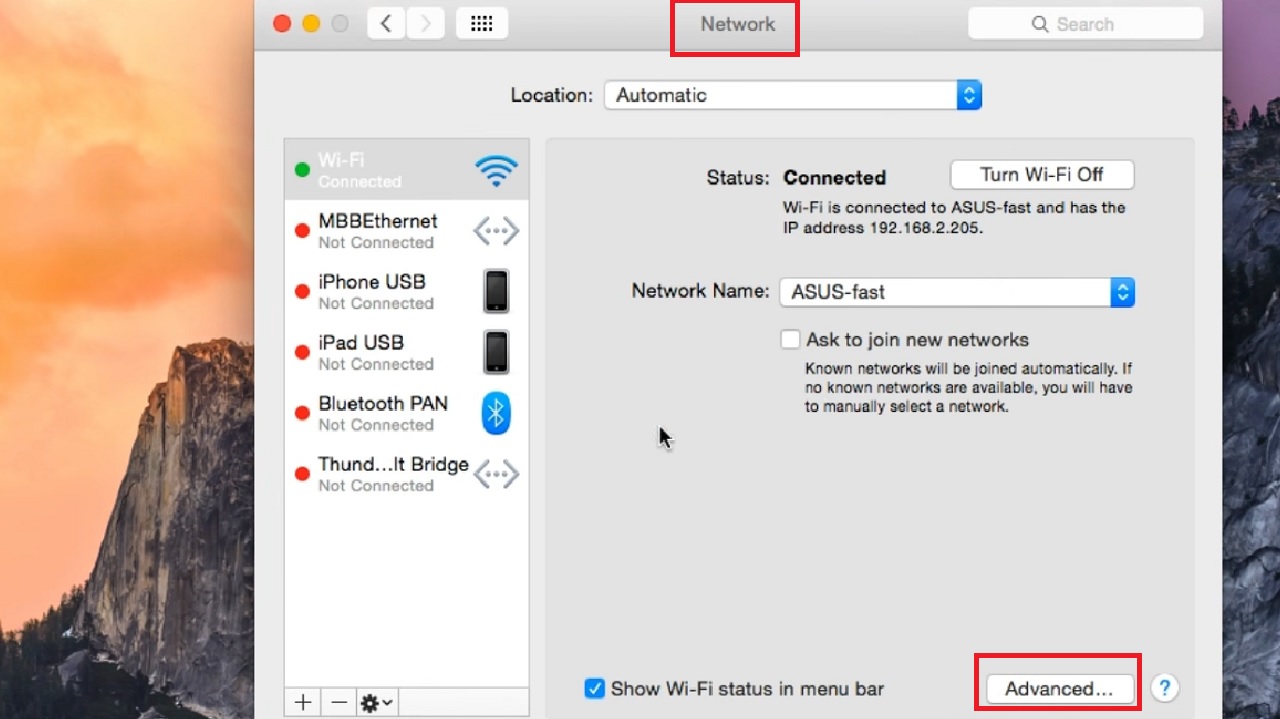
- Select your network connection.
- Select Advanced.
- Go to the DNS tab.
- Click on the Plus button next to IPv4 or IPv6 addresses below the DNS Servers box.
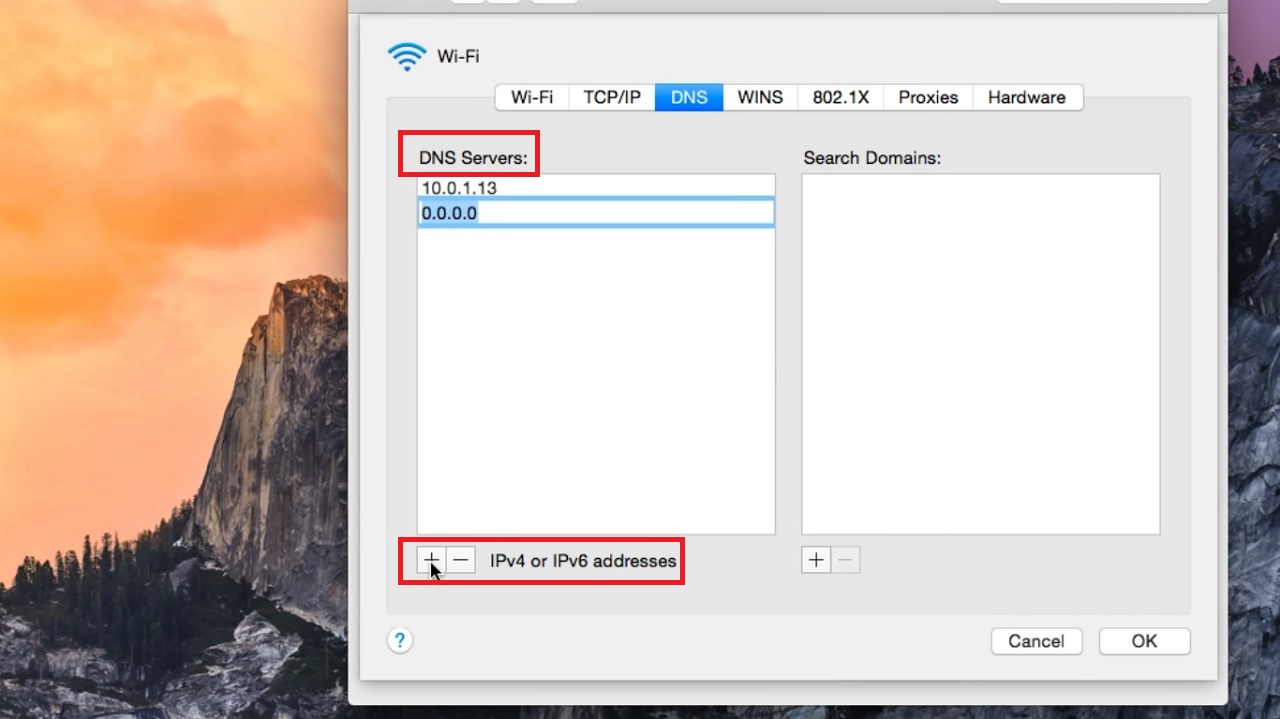
- Type the new DNS server addresses.
- Click on the OK button below.
- Click on Apply in the previous window.
When you are done, disconnect your internet connection and reconnect. The problem should be resolved now.
Method 2: Enter the MAC Address Manually
You may enter the MAC address of the network adapter, preferably after changing to Google DNS or OpenDNS. This might resolve the issue in a few situations.
STEPS TO FOLLOW:
- To find the MAC address, first go to the Start Menu.
- Type cmd.
- Click on Run as administrator to open the Command Prompt window.
- In the Command Prompt window, type ipconfig /all and hit Enter.
- Note the Physical Address. (Your address may be different from the address in the image).
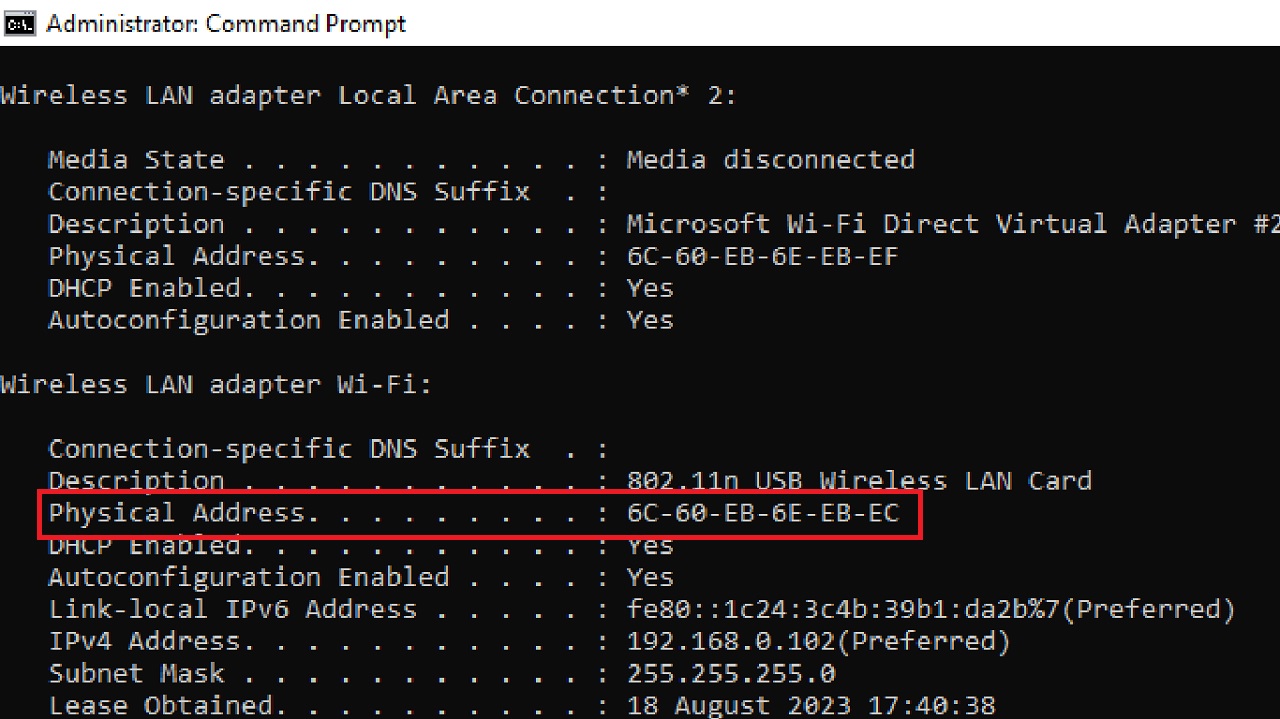
- Close the Command prompt window.
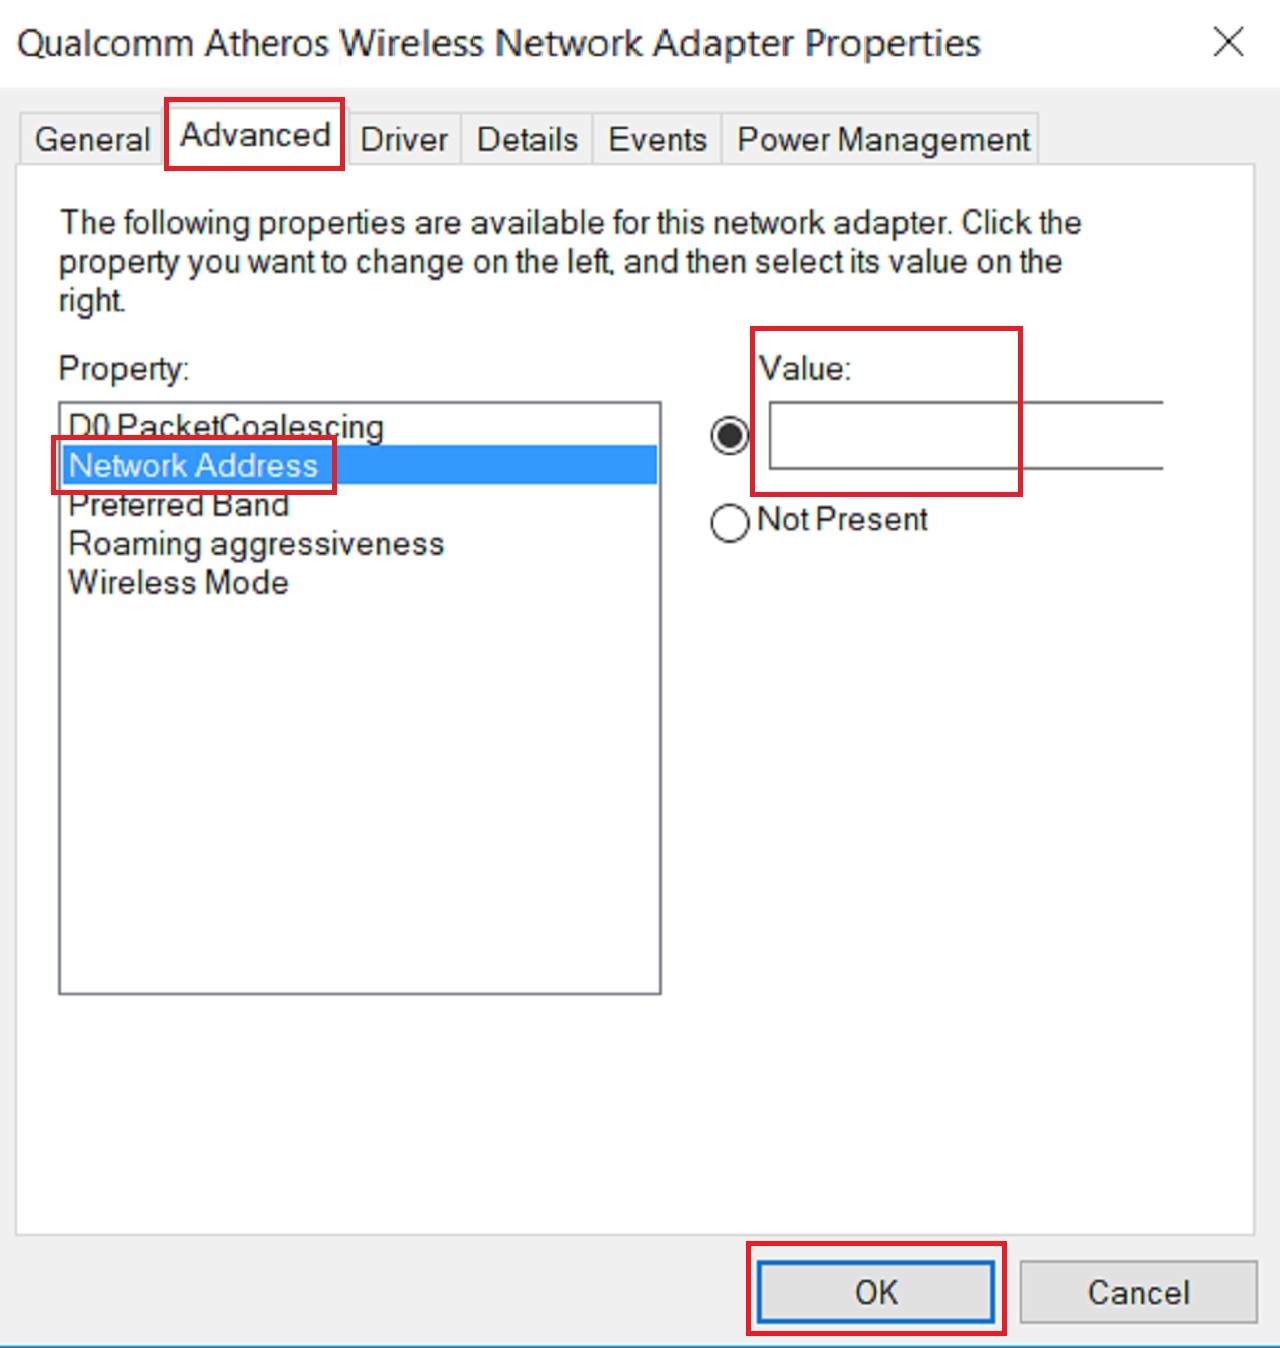
Now, to configure your network connection and change the MAC address, go to the Wi-Fi Properties as before.
- Click on the Configure button.

- In the following window, go to the Advanced tab.
- Select Network Address from the options in the box under Property.
- Go to the box under Value.
- Enter the physical address you noted from the Command Prompt, without any dashes in between.
- Click on the OK button to save the changes.
Check whether the issue is resolved or not. If it still persists, move to the next solution.
Method 3: Run Specific Commands to Clear DNS Cache and Reset IP
Clearing the DNS cache and resetting the IP by running a few specific netsh commands in the Command Prompt may resolve this issue.
STEPS TO FOLLOW:
In Windows:
- Open Command Prompt as administrator as before.
Type each of these commands one after the other and pressing Enter after each completes its execution:
- netsh int ip reset
- netsh winsock reset
- ipconfig /flushdns
- ipconfig /renew
When the process is complete, exit Command prompt and restart your PC to check whether or not the issue is resolved.
If the issue still persists, you can try running additional commands in the Command Prompt as follows:
- netsh winsock reset catalog
- netsh int ipv4 reset reset.log
- netsh int ipv6 reset reset.log
Now, try connecting again to your internet to see whether the issue is resolved, or else move to the next method.
In Mac:
If you are using a Mac computer, you will need to run different commands for different operating systems to flush DNS cache. So be cautious while performing this method.
- Press F4 to open the Terminal or type it in the search box of the Launchpad.
Run the command from the following list that applies to your operating system:
- On macOS Big Sur – sudo dscacheutil -flushcache; sudo killall -HUP mDNSResponder
- On macOS Catalina – sudo killall -HUP mDNSResponder
- On macOS Mojave – sudo killall -HUP mDNSResponder
- On macOS High Sierra – sudo killall -HUP mDNSResponder
- For macOS Sierra, X El Capitan, X Mavericks, X Lion, or X Mountain Lion – sudo killall -HUP mDNSResponder
- On macOS X Yosemite – sudo discoveryutil udnsflushcaches
- On macOS X Snow Leopard – sudo dscacheutil -flushcache
- On macOS X Leopard and other earlier versions of operating systems – sudo lookupd -flushcache
When the process is complete, the DNS configuration will be refreshed. Now, reconnect and check whether the issue is resolved.
Method 4: Disable Microsoft Virtual Wi-Fi Miniport Adapter
The issue of ‘DNS server not responding’ might be resolved by disabling the Microsoft Virtual Wi-Fi Miniport Adapter.
STEPS TO FOLLOW:
- Right-click on the Start Menu.
- Select Device Manager from the options.
- In the Device Manager window, go to View at the top.
- Select Show hidden devices.
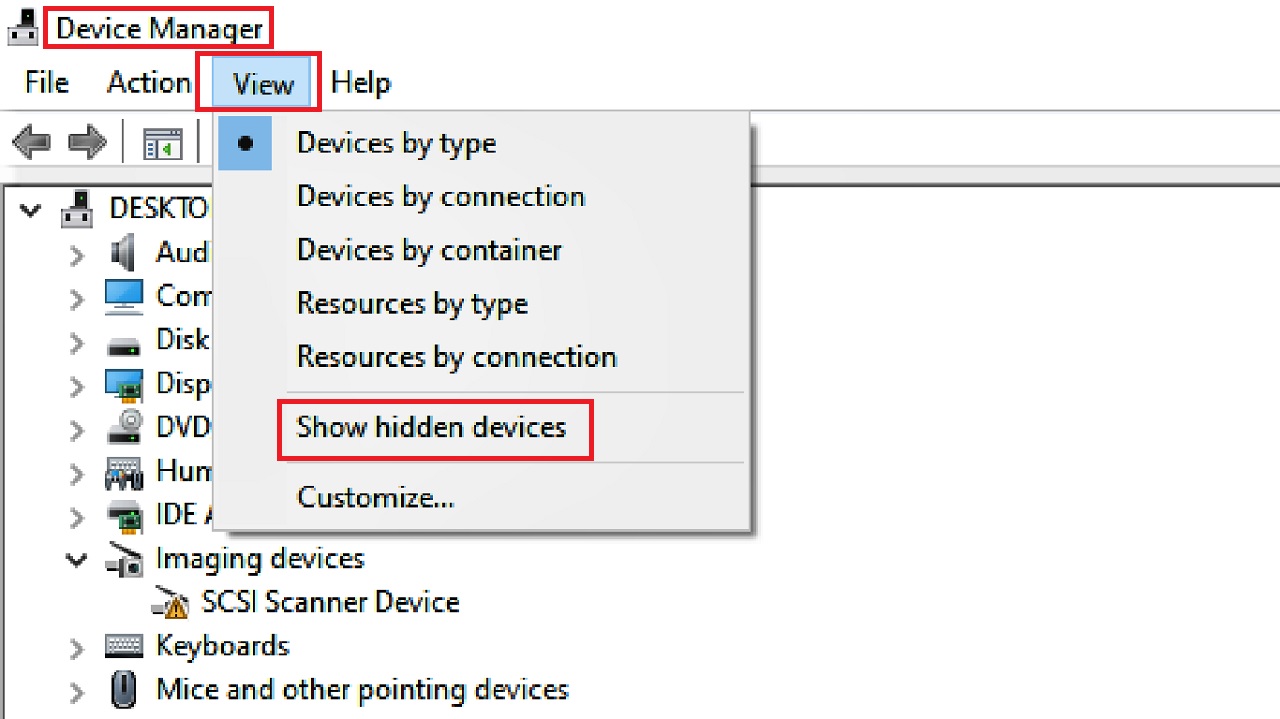
- Expand Network Adapters by clicking on the small arrow next to it.
- Look for Microsoft Virtual Wi-Fi Miniport Adapter.
- If you see it, right-click on it.
- Select Disable.
Do the same if you have multiple Virtual Miniport Adapters.
When you are done, close the Device Manager window, restart your PC, connect to the network again and check whether or not the issue is resolved.
If it still persists, move to the next method.
Method 5: Disable Internet Protocol Version 6
You may try to fix the issue by disabling the Internet Protocol Version 6 from your PC, if it is enabled. This will not affect the functionality of your PC negatively but might resolve the ‘DNS server not responding’ issue.
STEPS TO FOLLOW:
In Windows:
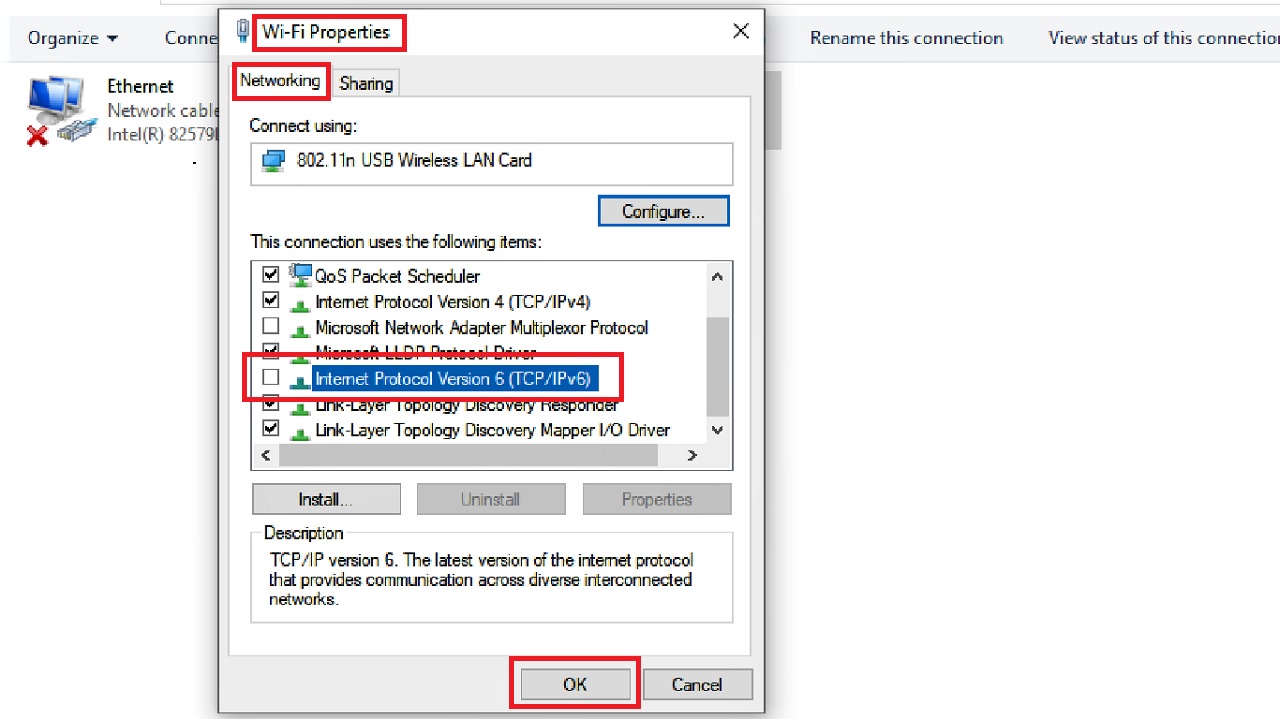
- Go to the Wi-Fi Properties window as you did in Method 1.
- Uncheck the small square box next to Internet Protocol Version 6 (IPv6) in the list under the Networking tab.
- Click on the OK button.
Check whether the problem is fixed or not.
In Mac:
If you are using a Mac system, these are the steps to follow:
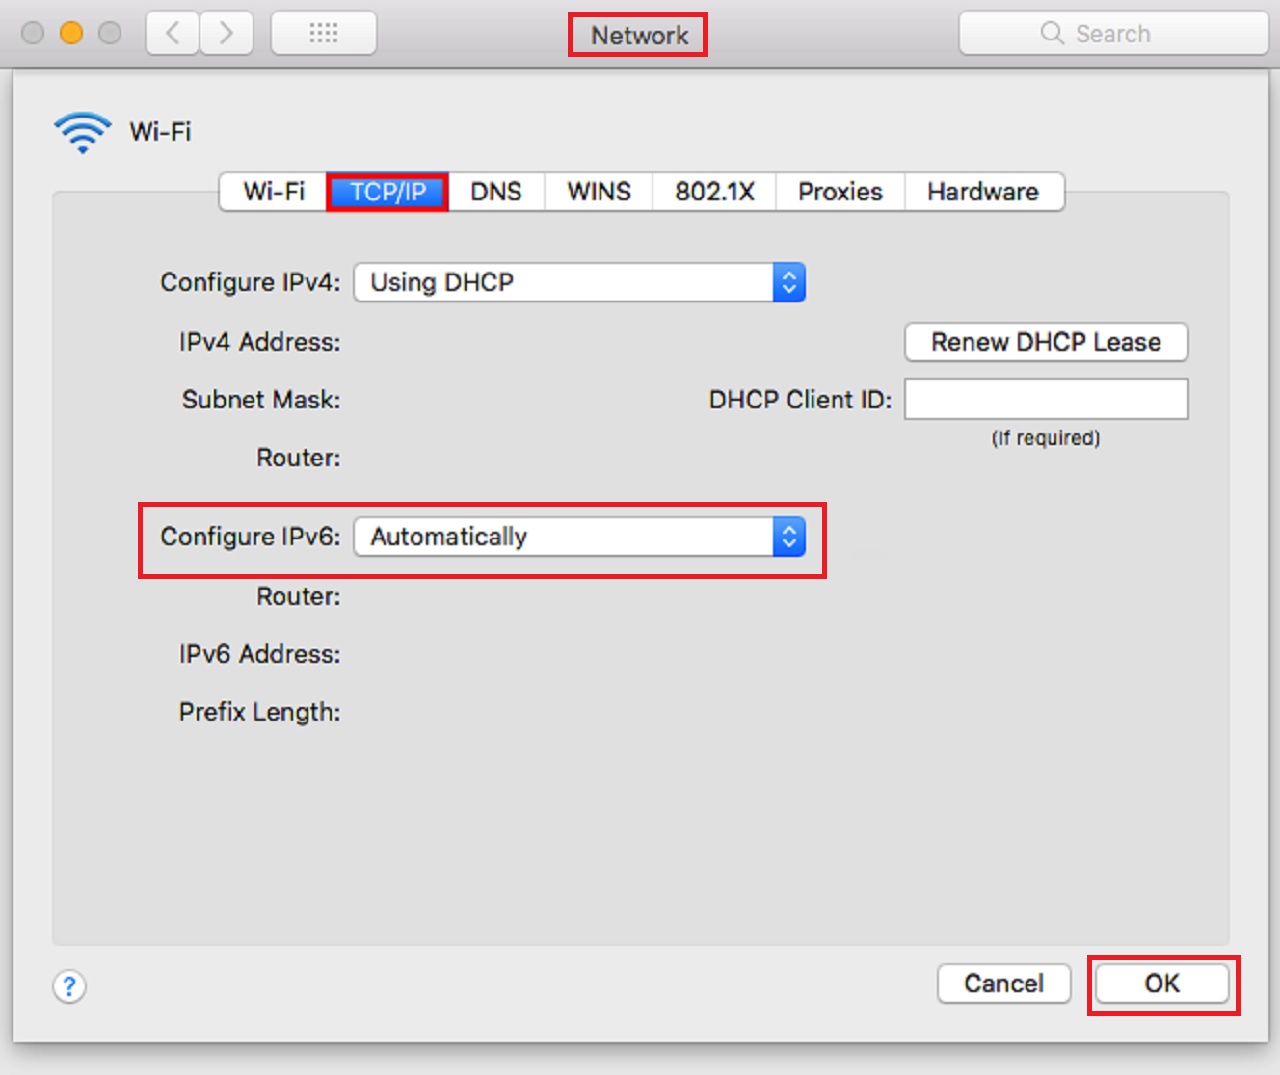
- Go to the Advanced window as you did in Method 1.
- Go to the TCP/IP tab.
- Click on the arrows in the Configure IPv6 box to open the drop-down menu.
- Set it to Off.
- Click on the OK button.
However, in some cases, the Off option may not be available. In that case, you will need to run a specific command in the Terminal app. The commands will vary on the type of connection.
- The command to run for disabling IPv6 on a wireless connection is – networksetup -setv6off Wi-Fi
- The command to run for disabling IPv6 on an Ethernet connection is – networksetup -setv6off Ethernet
- The command to run to deactivate IPv6 on an Ethernet and wireless connection together is – networksetup -setv6off Ethernet && networksetup -setv6off Wi-Fi
When the process is complete, restart your system and reconnect to the internet to check whether or not the DNS server not responding issue is resolved.
Method 6: Disable Additional Connections Other than Wi-Fi
If you have multiple network connections enabled on your system PC, it might cause the issue. So, disable them when you use the Wi-Fi connections to fix this issue.
STEPS TO FOLLOW:
In Windows:
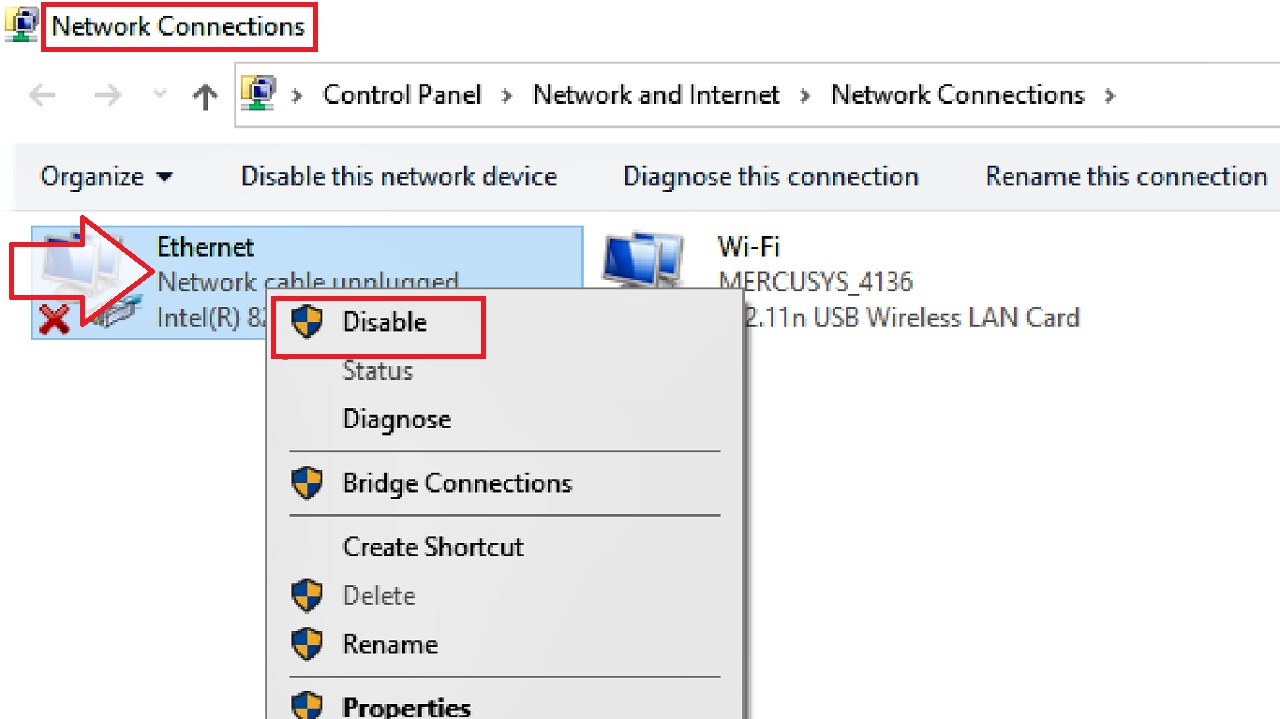
- Go to the Network Connections window as you did in Method 1.
- Right-click on the other connections you want to disable.
- Select the Disable option from the drop-down context menu.
In Mac:
If you are using a Mac computer, follow these steps:
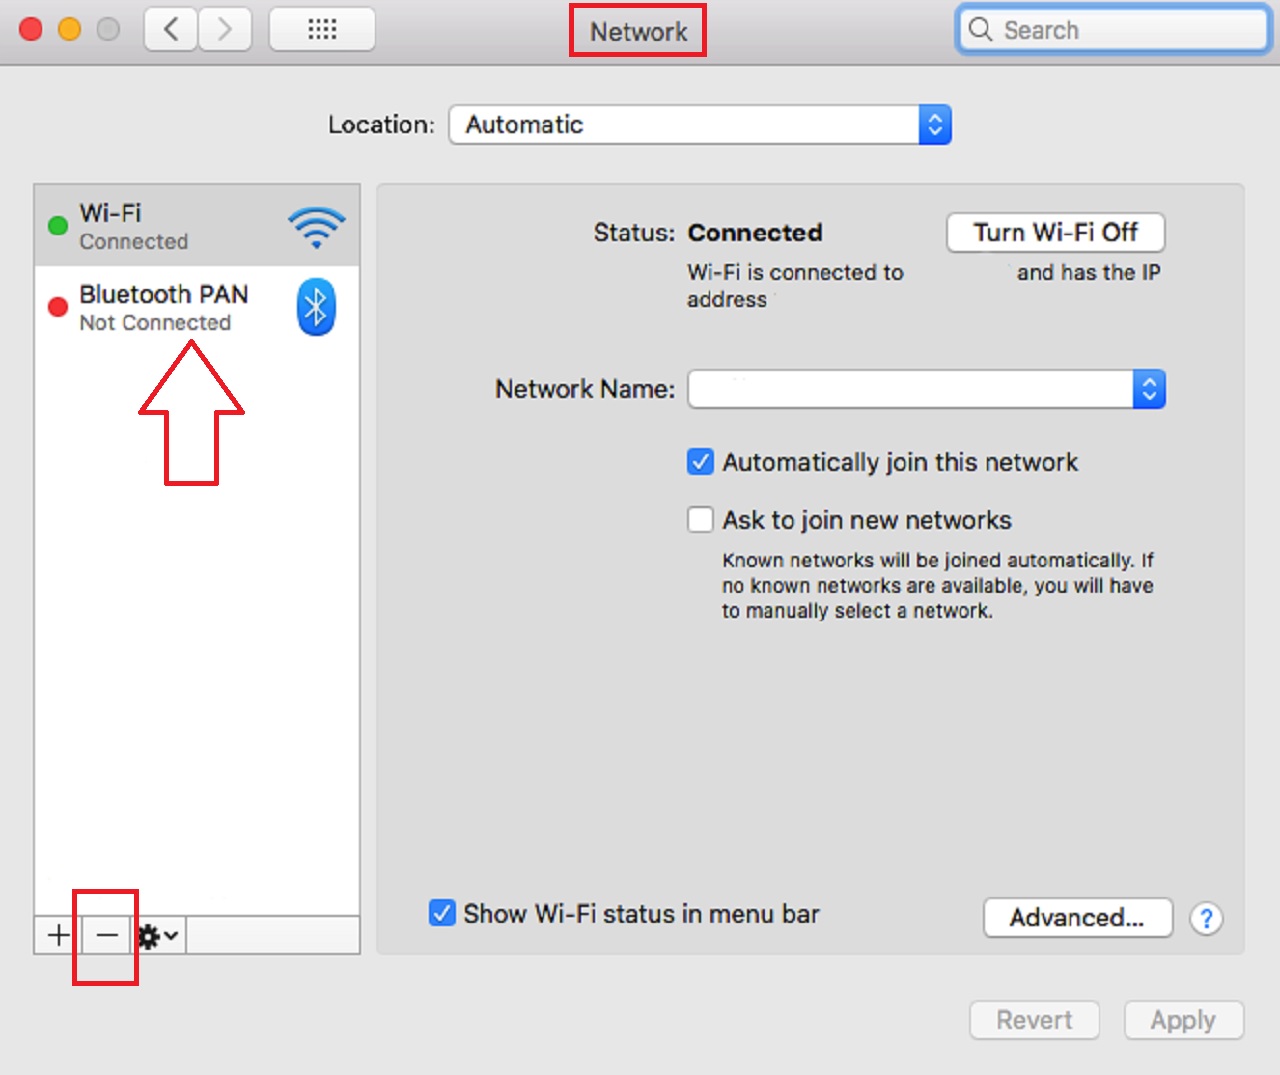
- Go to the Network window as you did in Method 1.
- Select each unused connection on the left side of the Network window.
- Click on the minus (–) button to disable it.
Connect again to see whether or not the error is resolved.
Method 7: Disable the Peer-to-Peer Feature
The peer-to-peer feature in Windows may cause this issue as well. Disabling it is one potential solution.
STEPS TO FOLLOW:
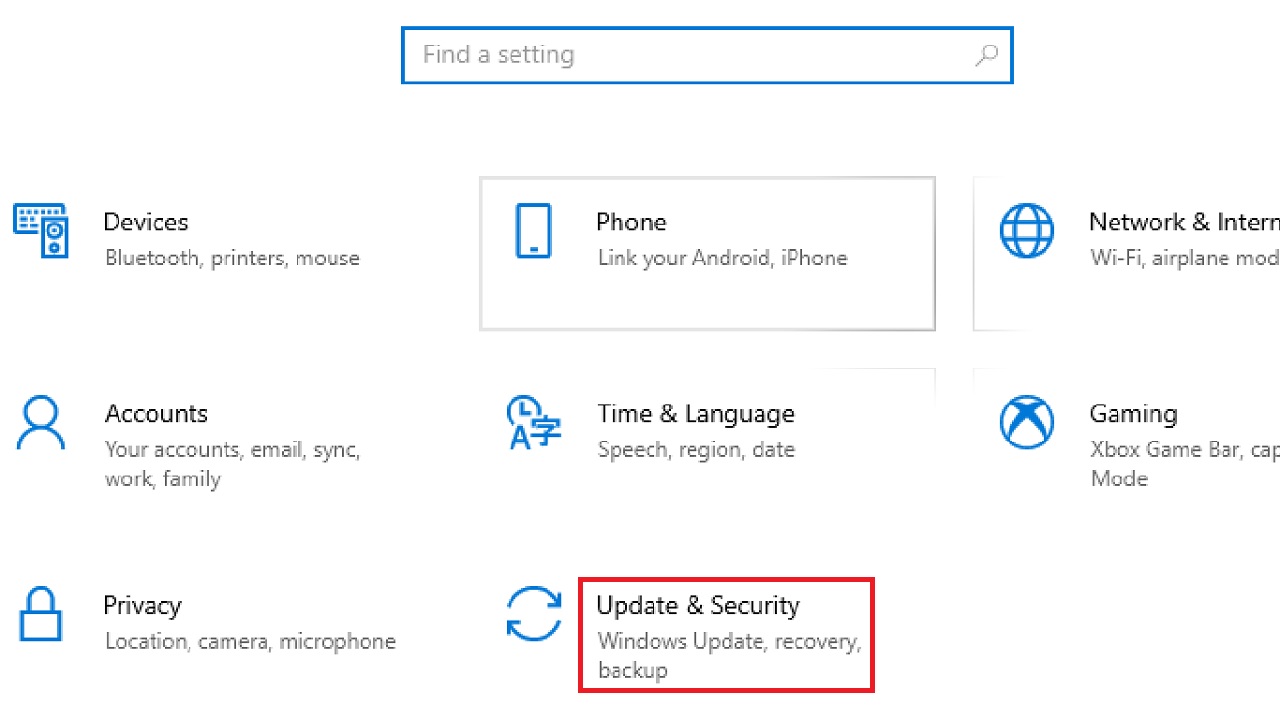
- Press the Windows and I keys on your keyboard together to open the Settings app.
- Go to Update & Security.
- With Windows Update selected on the left, click on Advanced options.
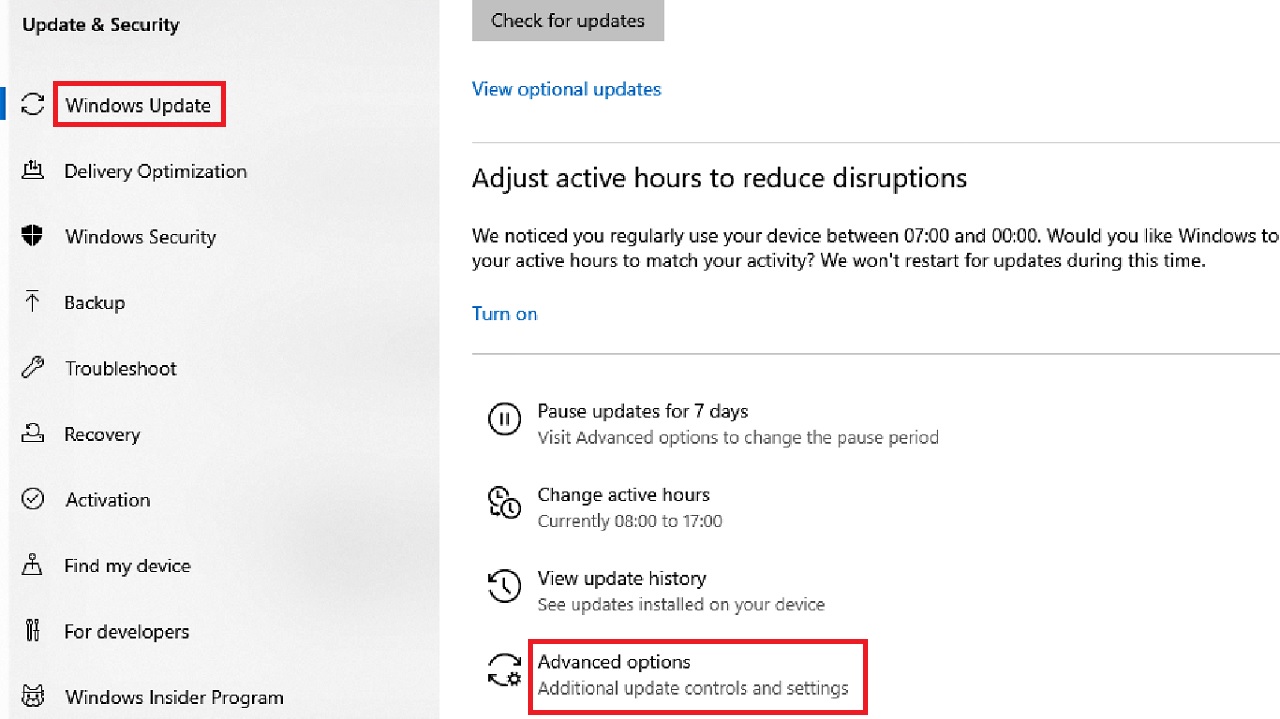
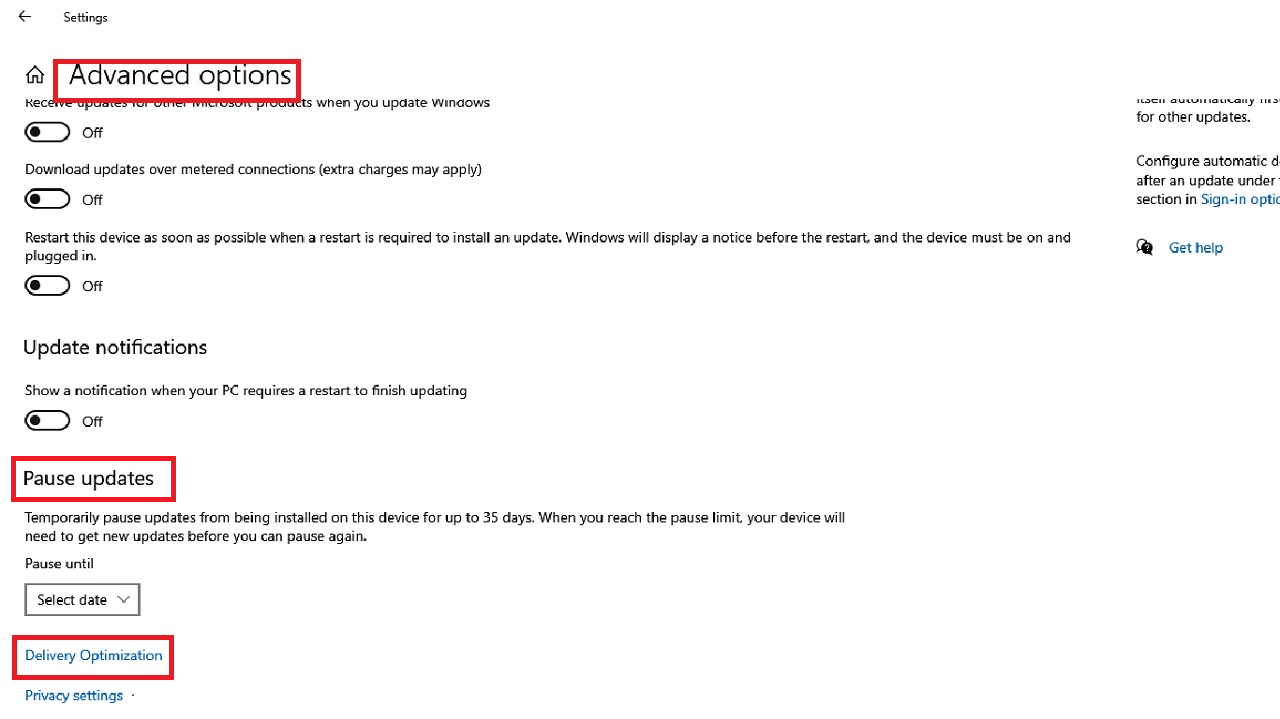
- Select the Delivery Optimization option in the following Advanced options window under Pause updates.
- Drag the sliding switch under ‘Allow downloads from other PCs’ in the Delivery Optimization page to the left to turn it off.
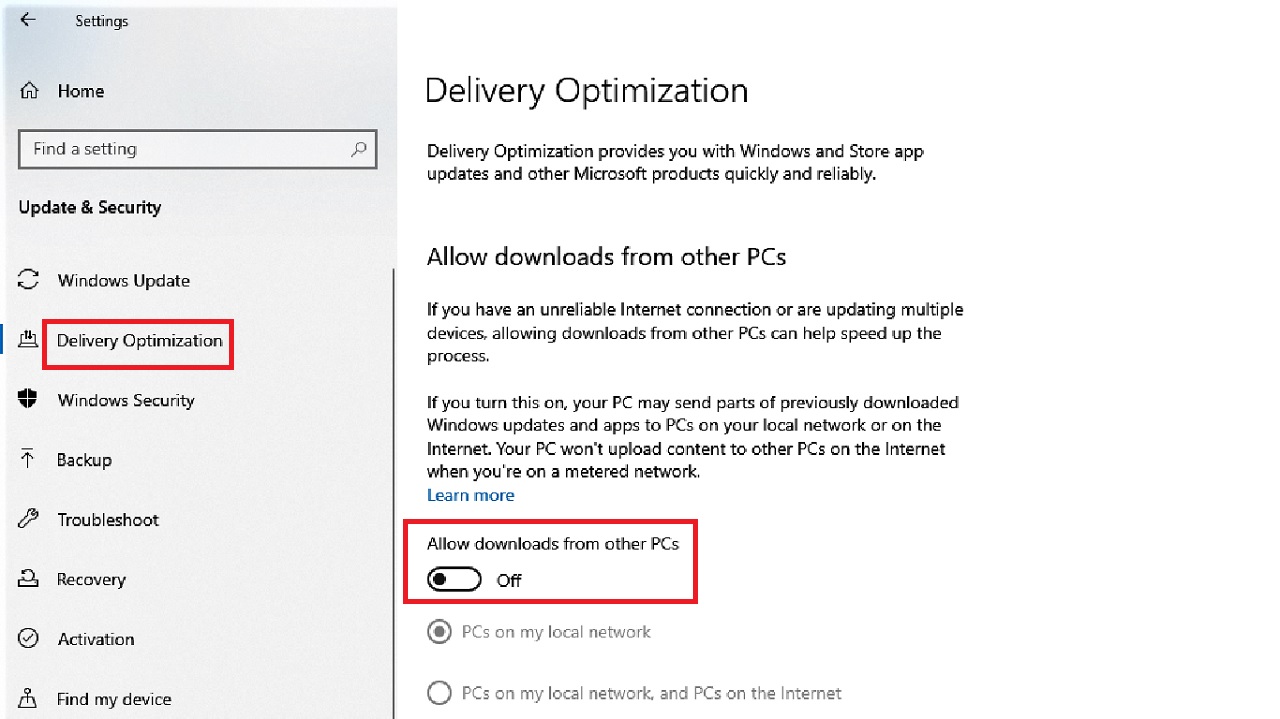
Now check if the ‘DNS server not responding issue’ is resolved.
Method 8: Remove Conflicting Third-Party Apps and Programs
Sometimes third-party software programs and applications such as VPN and antivirus may cause interference and result in this error.
Finding them first and removing them might solve the issue.
STEPS TO FOLLOW:
In Windows:
- Go to the Start Menu.
- Click on the Power button.
- Hold down the Shift key on your keyboard.
- Click Restart.
- Select Troubleshoot in the following Choose an option window.
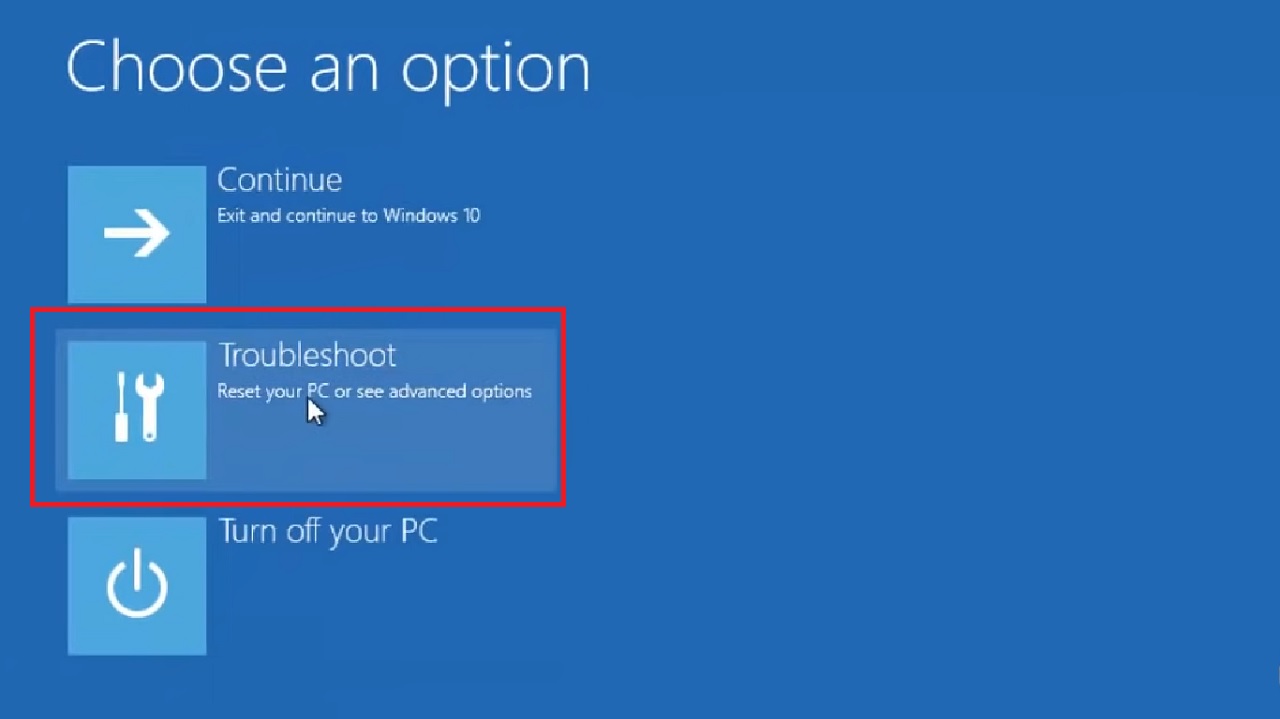
- Go to Advanced options in the next Troubleshoot window.
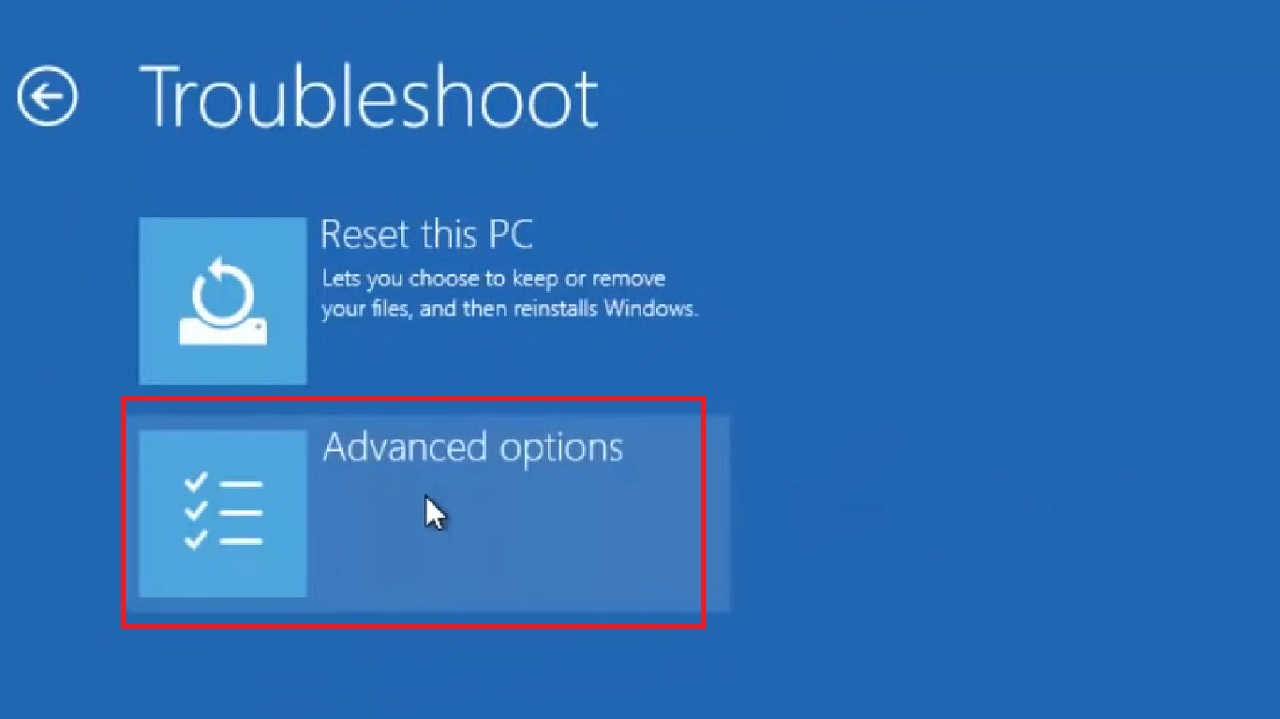
- Select Startup Settings in the Advanced options window that follows.
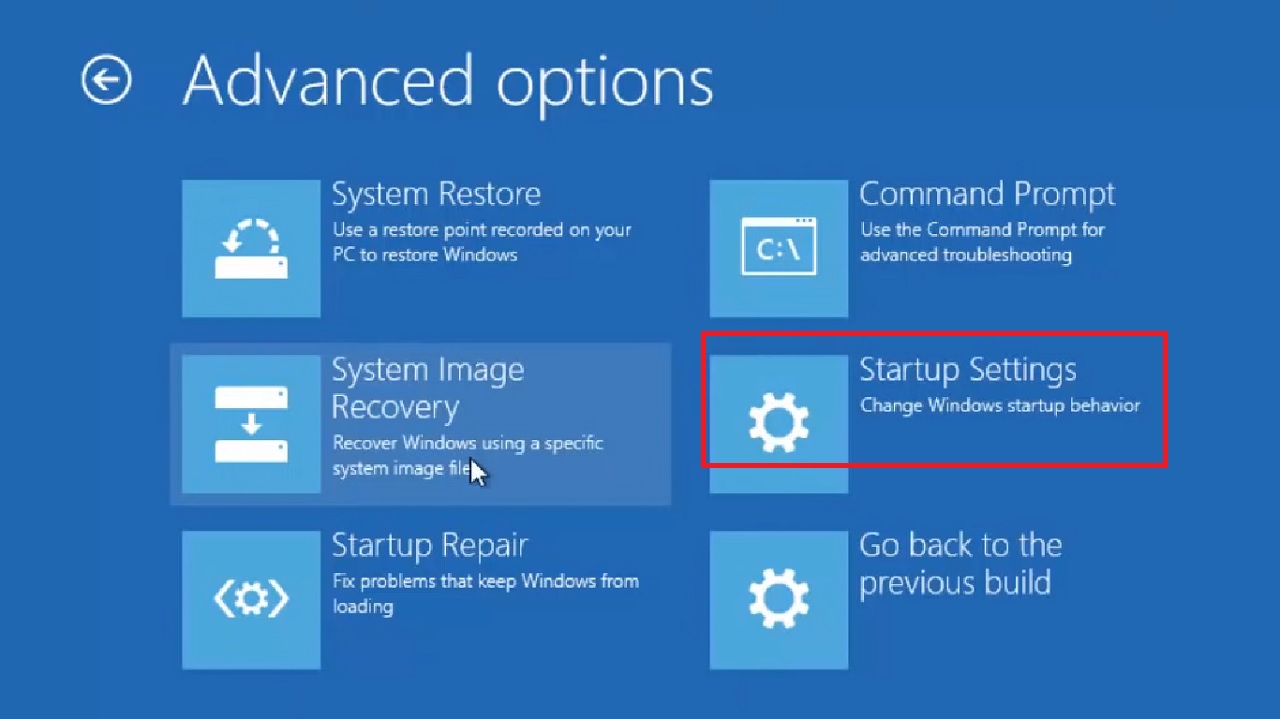
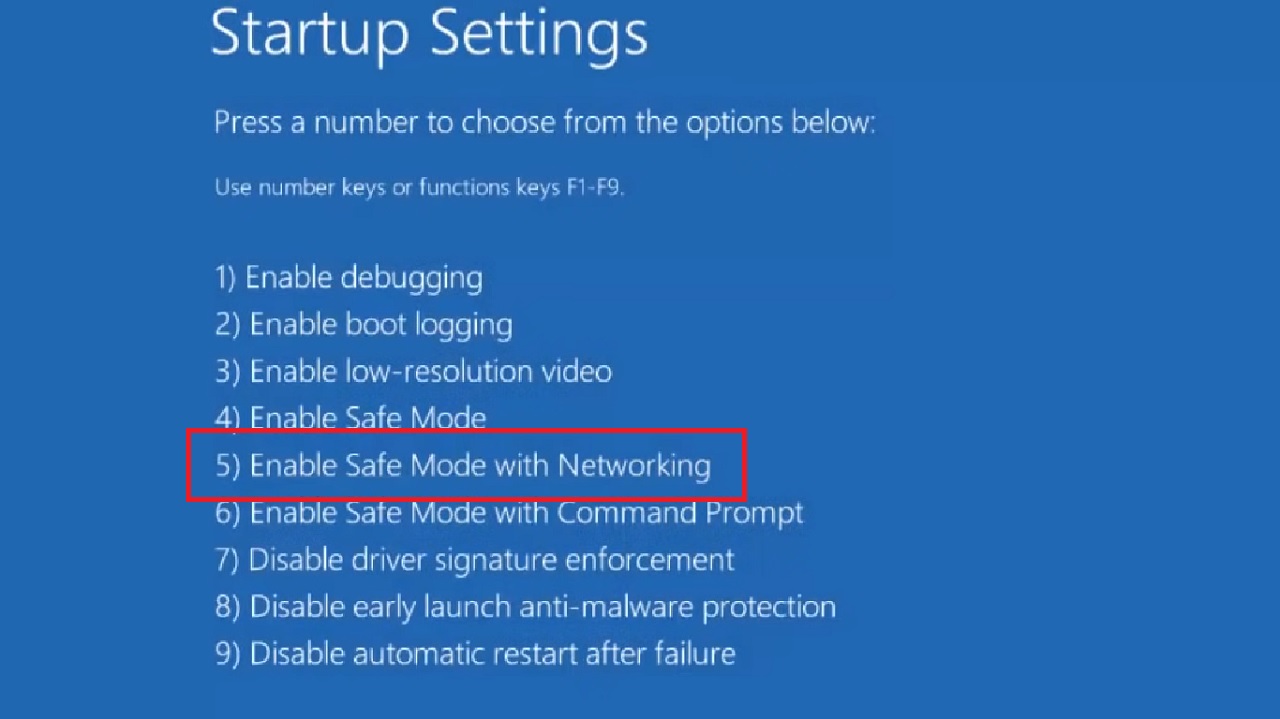
- In the next Startup Settings window, click on the Restart button.

- Now, select Enable Safe Mode with Networking from the list of options that appears after the PC restarts.
Now, check whether or not you can access the internet in the safe mode. If you can, there may be software or apps interfering in the normal operations.
Now remove these apps from the system to fix the issue.
- Go to the Start Menu.
- Select Settings.
- Click on Apps.
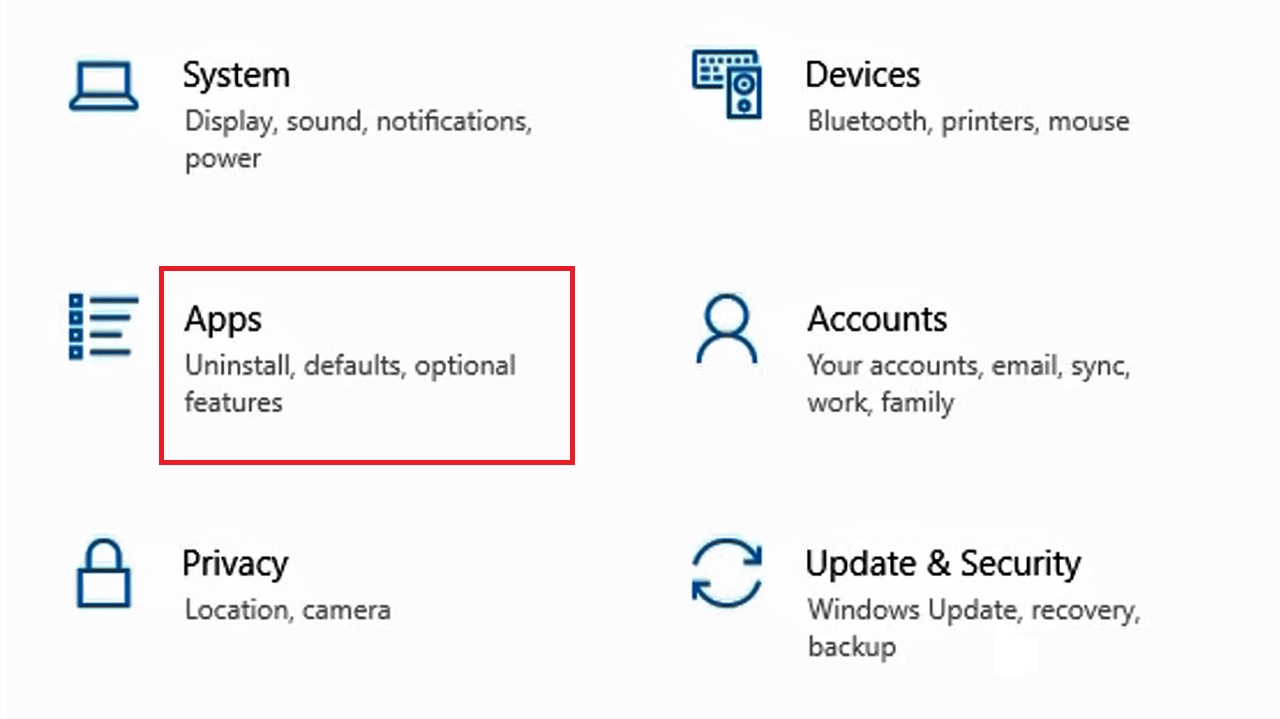
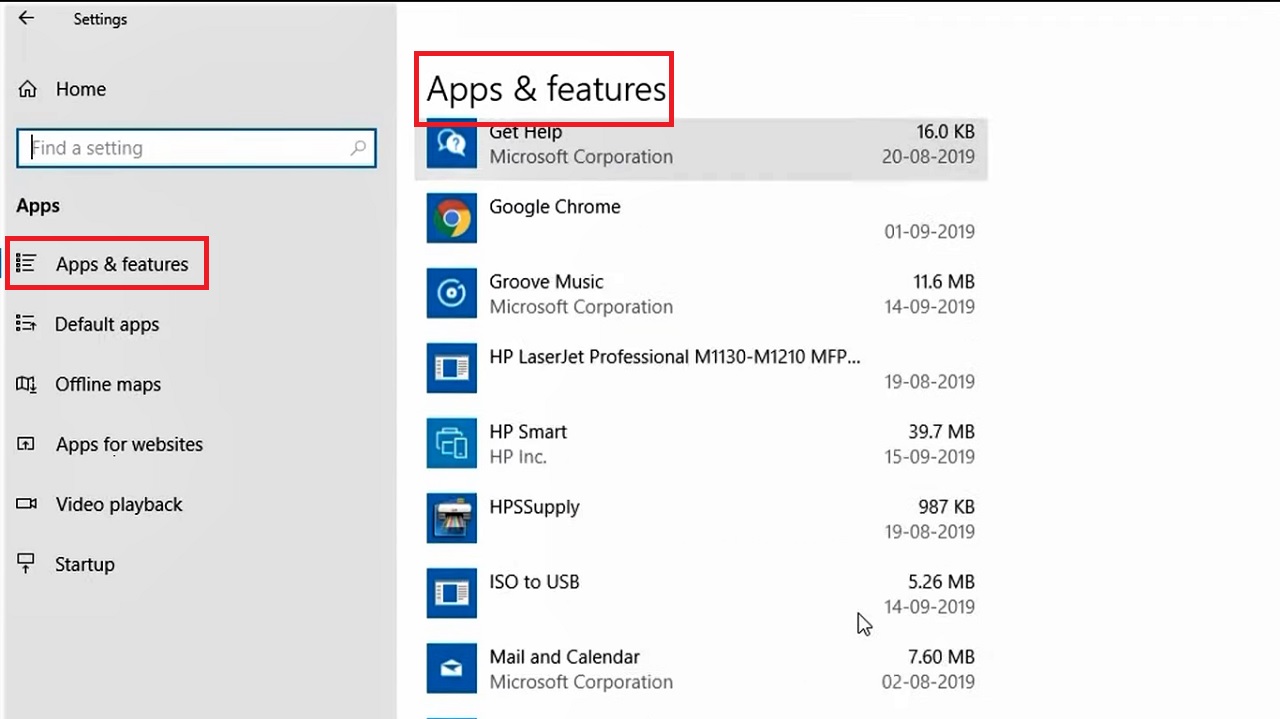
- Select Apps & features on the left panel of the following window.
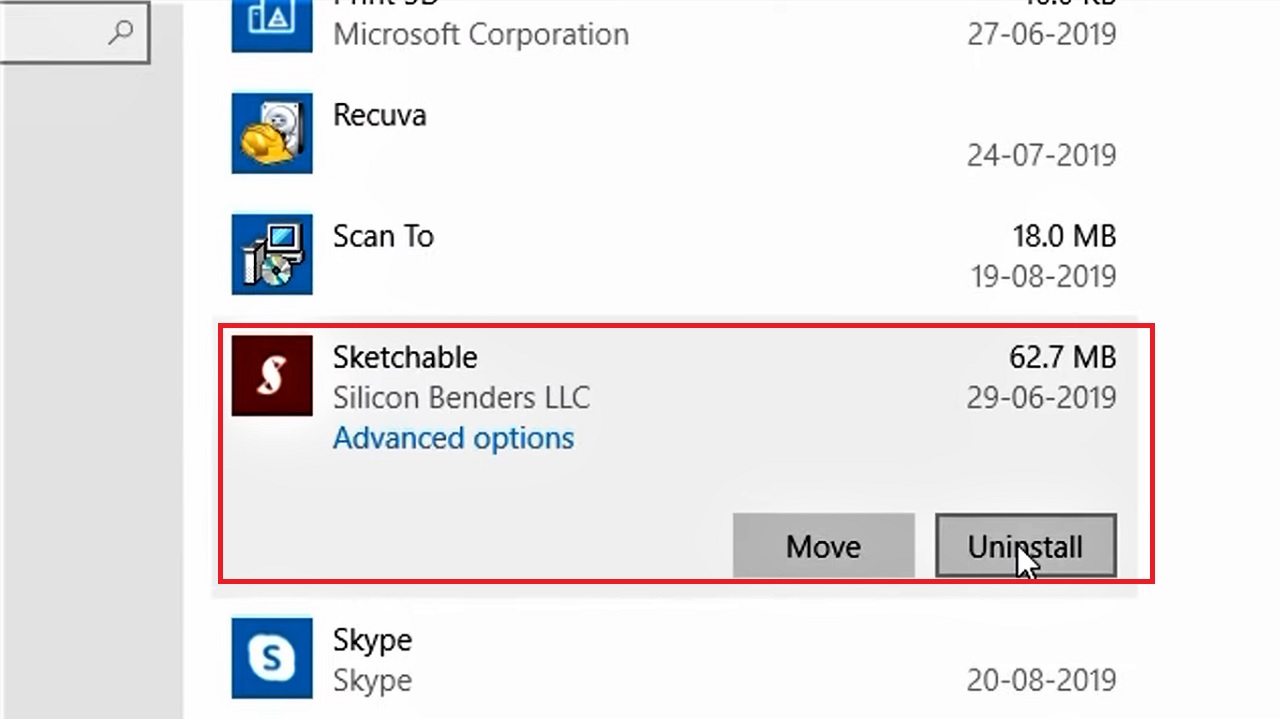
- Scroll up and down and select any app you want to remove from the list on the right side of the window.
- Right-click on it.
- Click on Uninstall.
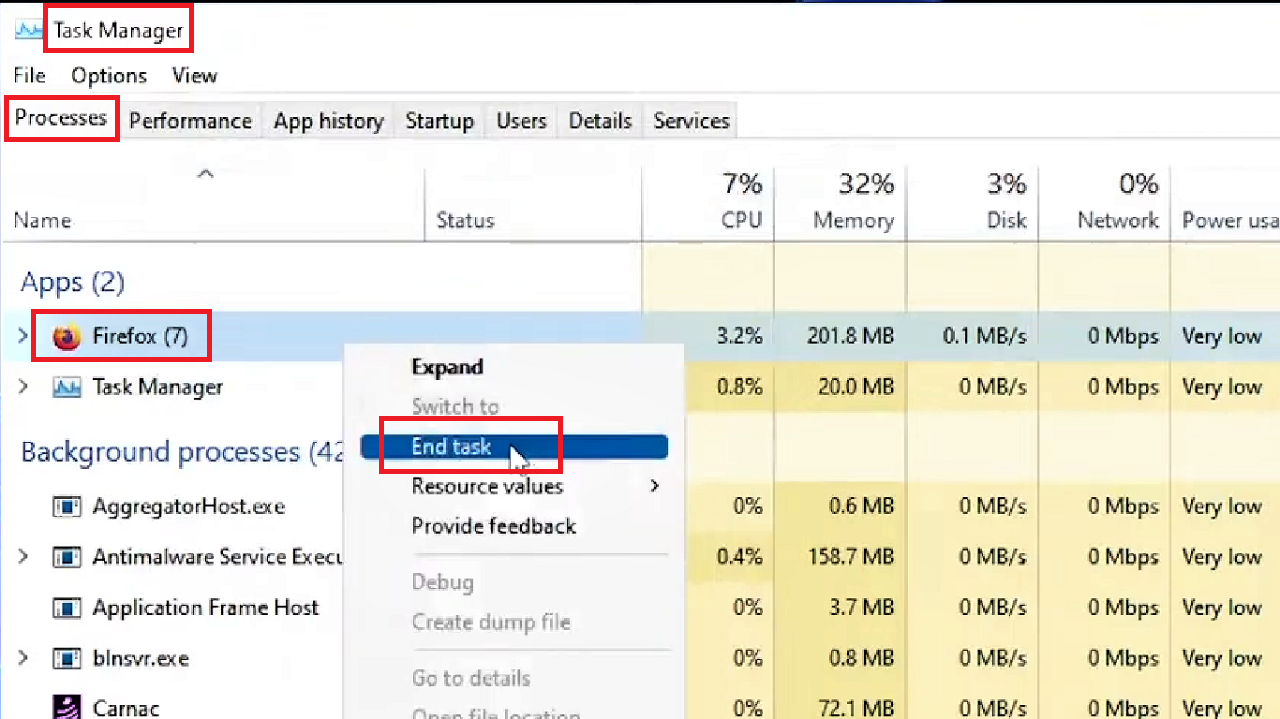
Alternatively, you can remove it from the Task Manager as well, if it is there running.
- Click on a blank space on the taskbar.
- Select Task Manager.
- Select the app or software program you want to remove under the Processes tab, Firefox, for example.
- Right-click on it.
- Select End task from the drop-down context menu.
Note: Either way it is a tedious and time-consuming process because you will need to know which particular app is causing the problem. For that, you will need to remove each, restart the system, and connect to the internet.
If your system connects, the app or software program is good to keep. You may reinstall it later. If it does not, leave it uninstalled.
In Mac:
If you are using a Mac computer, you can enter into safe mode in two different ways.
If you are using an Intel processor:
- Turn off the system.
- Turn it back on after about 10 seconds and press and hold down the SHIFT key immediately until you see the login window.
- Login to your system.
(You may be asked to login for a second time. Go ahead and do so).
If you are using an Apple Silicon M1 chip:
- Turn off the system.
- Turn it back on after about 10 seconds and press and hold down the Power button immediately until you see the ‘Loading startup options’ window.
- Select the Volume.
- Press and hold the SHIFT key now.
- Click Continue in Safe Mode.
- The system will restart.
- Login after it restarts.
You can remove the conflicting app or software program, if you know about it that is, in the following way:
- Click on Finder.
- Open Applications.
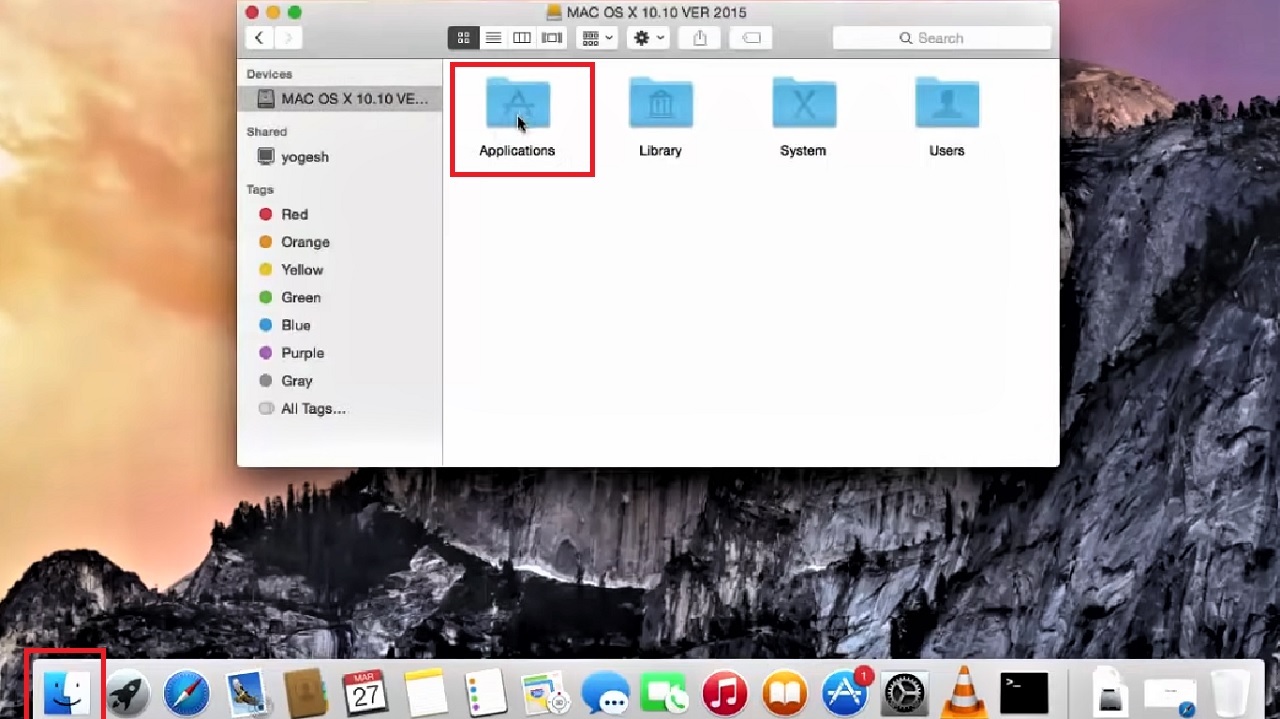
- Click on the program or app you want to uninstall. (VLC in this case).
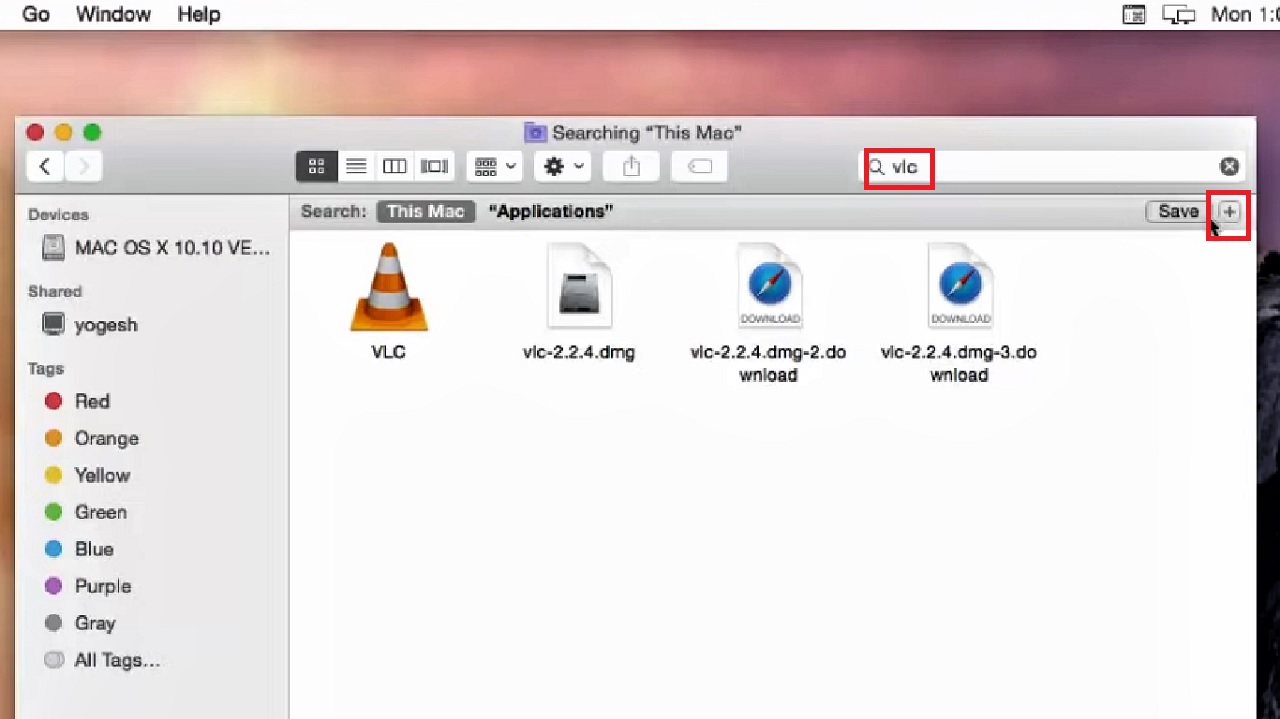
- Go to the search bar and type vlc.
- Click on the Plus button at the top-corner next to the Save button.
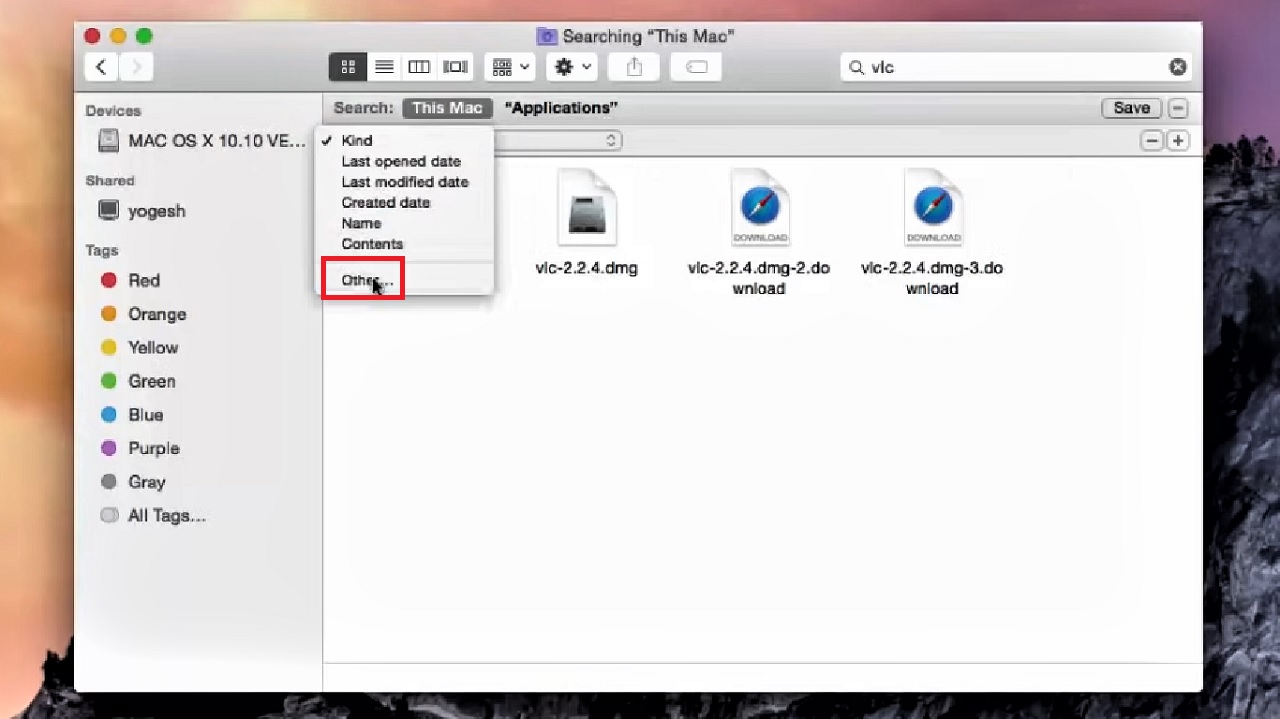
- Click on Kind on the left.
- Select Other from the drop-down options.
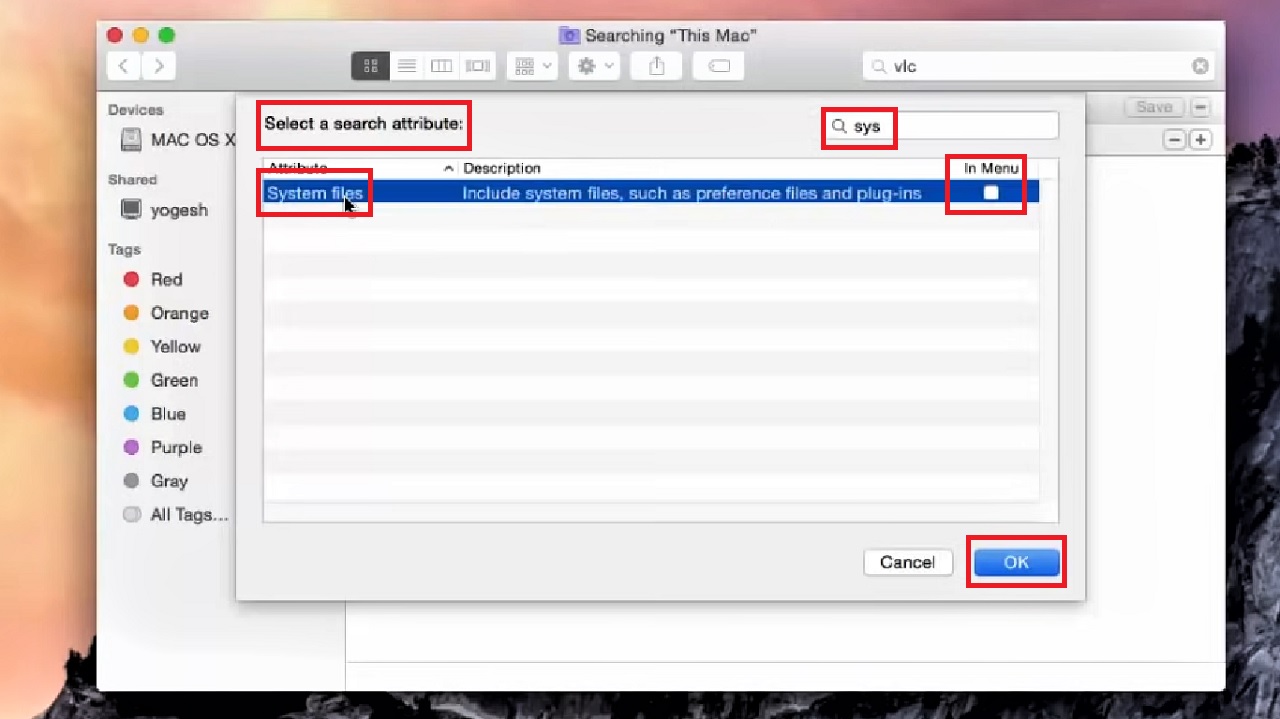
- Type system in full or part in the search bar in the following window to Select a search attribute.
- Check the small square under In Menu alongside System files.
- Click on the OK button below.
- Now, click on the arrow keys in the box written ‘aren’t included’ by default.
- Select are included.
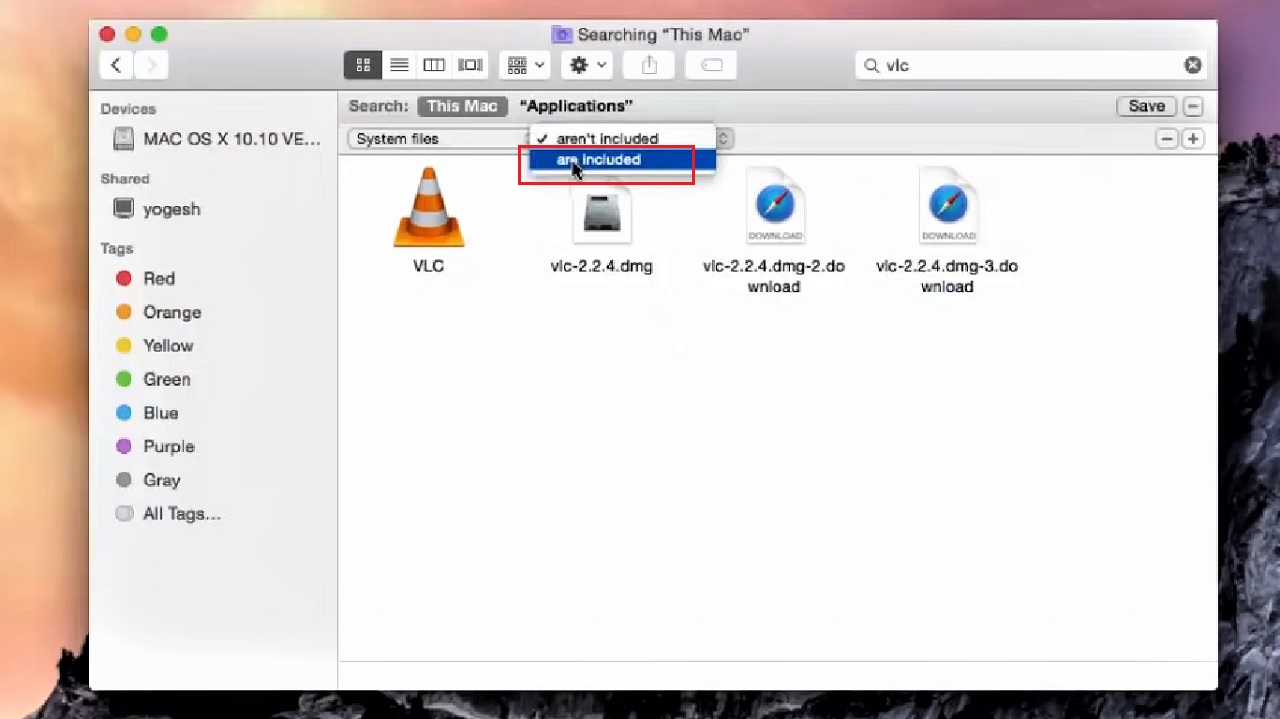
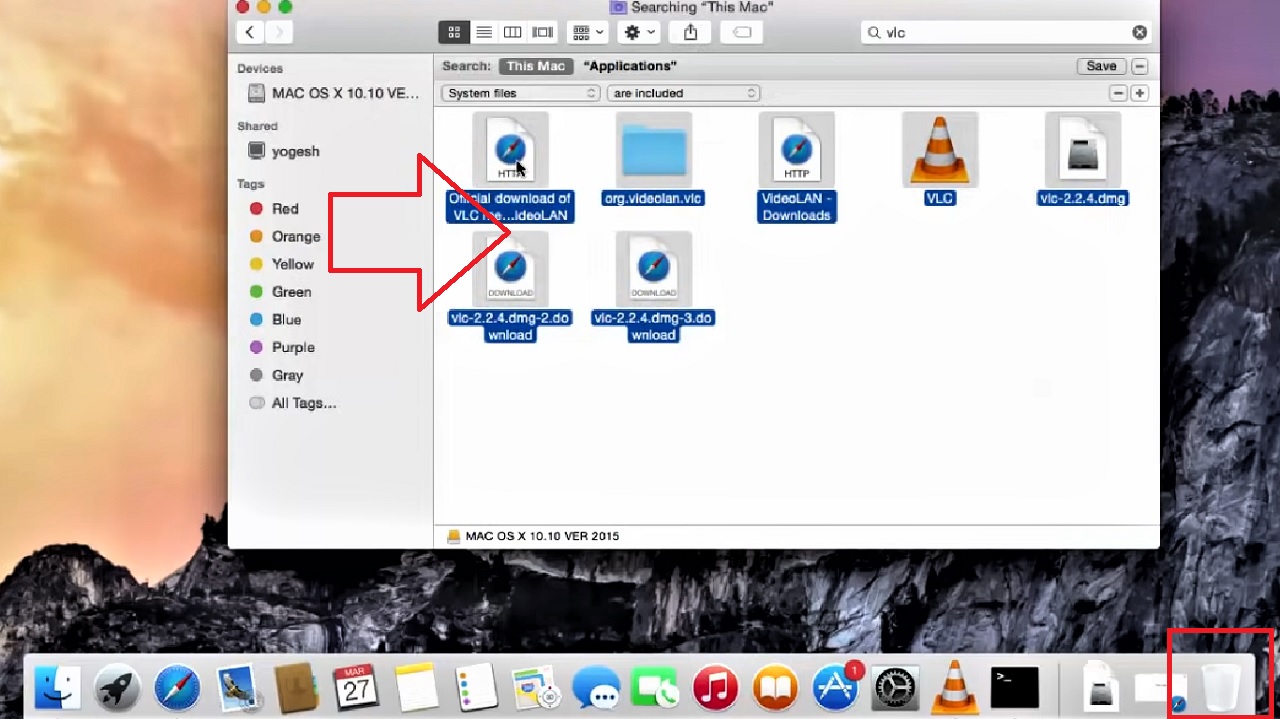
- This will show all the files related to VLC.
- Select all the files by pressing and holding the left key and dragging the mouse.
- Drag all these files to the Trash below.
- If the app is open, it will not be deleted and you will get a message as shown below, saying The item “VLC” can’t be moved to the Trash because it’s open.
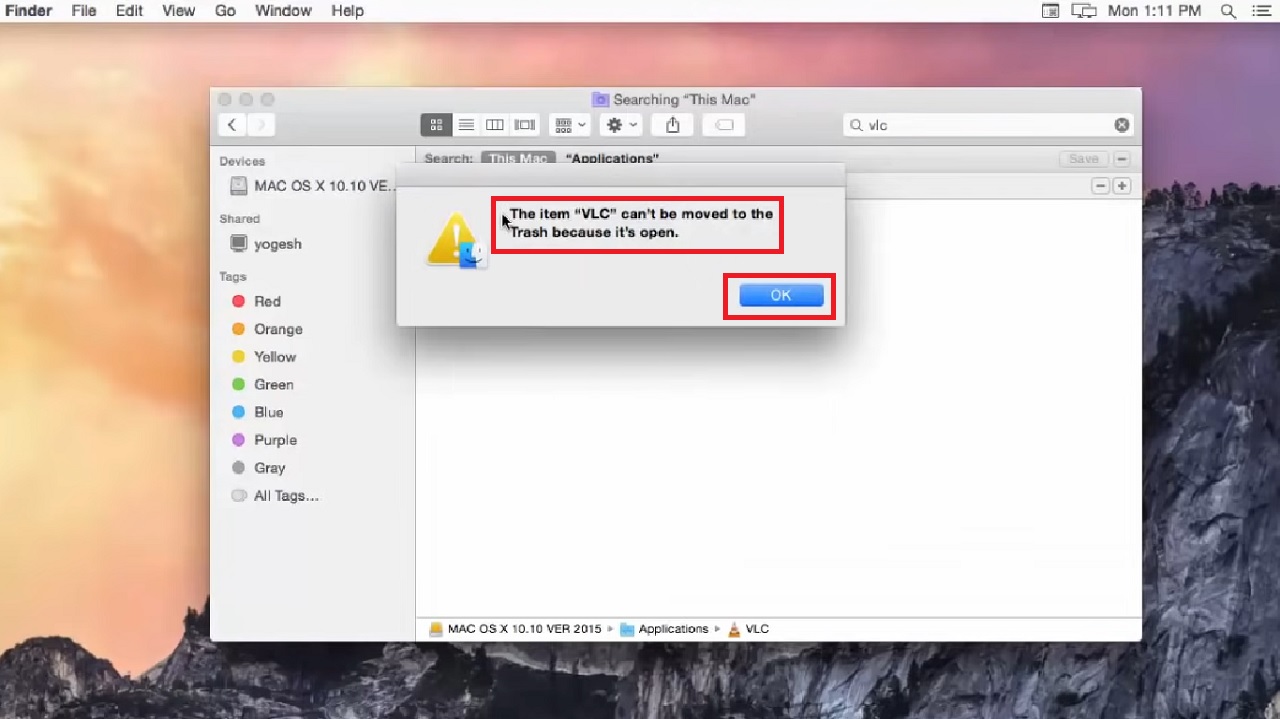
- Click on the OK button to close the window.
- Click on the App below.
- Select Quit.
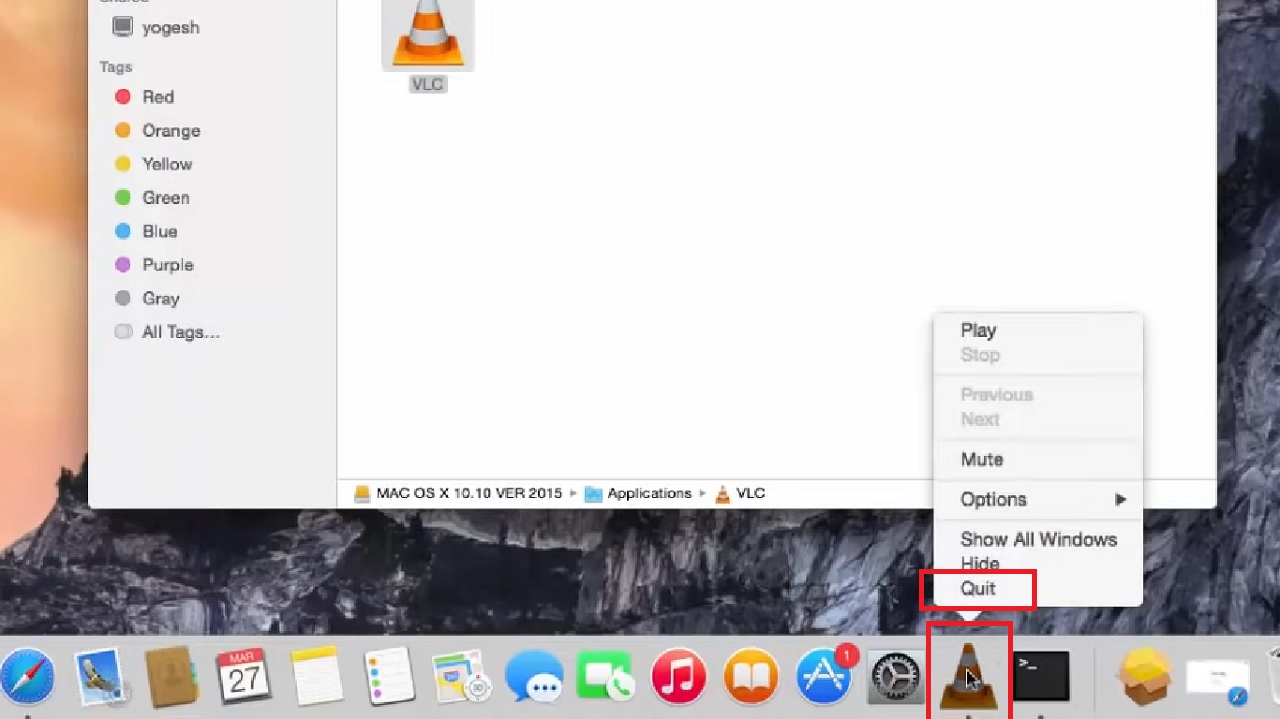
- Now, select any remaining files and drag them to the Trash, as you did before.
- Close the window.
Now check whether or not the issue is resolved.
Conclusion
So, as you can see, there are lots of ways in which you can rectify the ‘DNS server not responding’ error.
While some of the solutions are as easy as restarting your PC and router or changing the web browser, there are other relatively advanced solutions such as changing the DNS address that might also help.